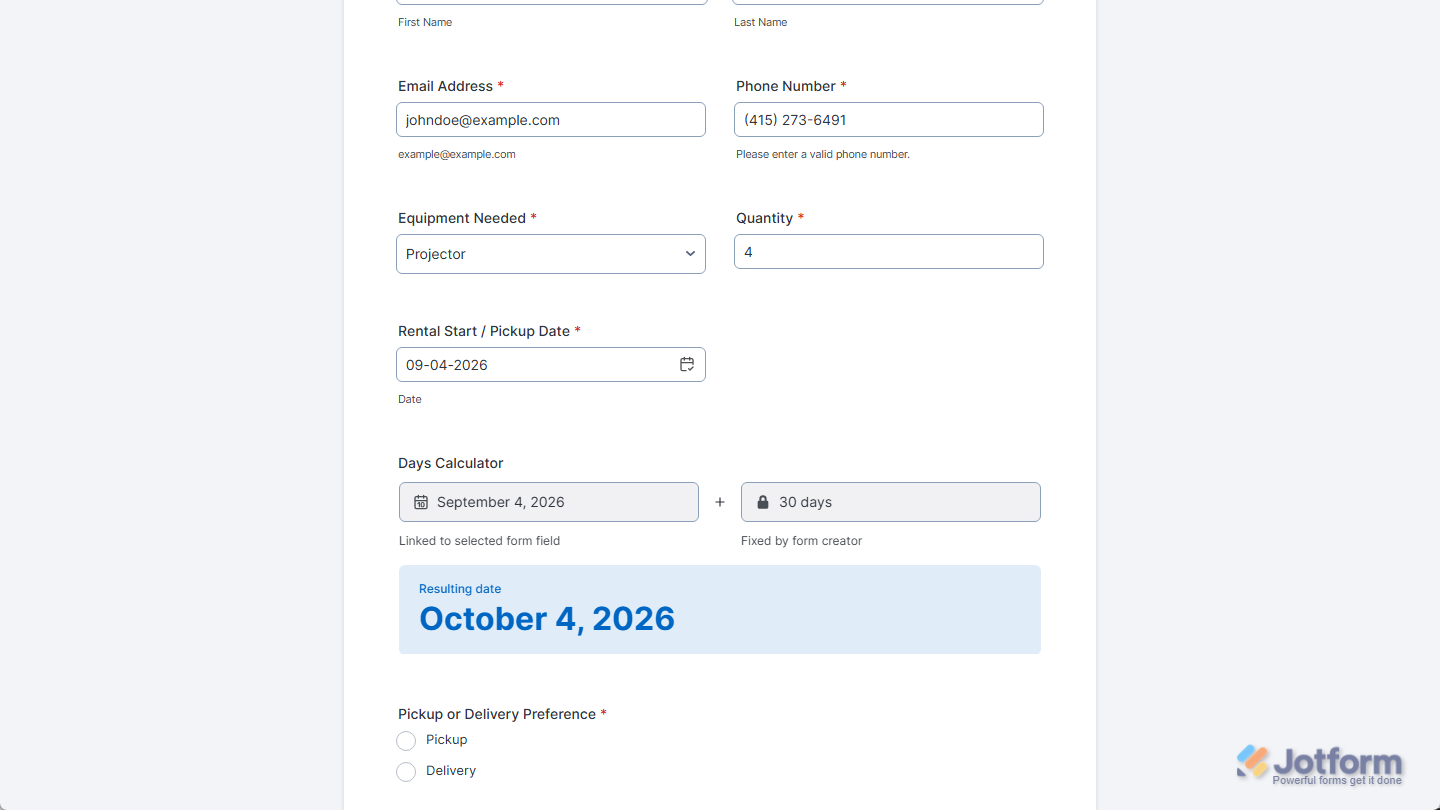
With Jotform’s Add Days Calculator widget, you can calculate a future or past date from a starting date and include the result with each form submission. It’s useful for bookings, rentals, school deadlines, project schedules, service requests, and other forms where dates need to be determined consistently. By handling the date calculation for you, the widget helps reduce manual counting and makes follow-up dates and deadlines easier to manage.
Here are a few ways to use it:
- Calculate appointment or follow-up dates for booking teams.
- Determine return or renewal dates for rental businesses.
- Track school deadlines from enrollment or event dates.
- Set task due dates for project coordinators.
- Estimate service delivery dates without manual counting.
Note
The Add Days Calculator widget is available on both Classic and Card Forms. Check out our guide on When to Use Card Forms to learn more.
Whether youʼre creating a new form or updating an existing one, you can add and configure the Add Days Calculator widget in just a few steps. Hereʼs how to set it up:
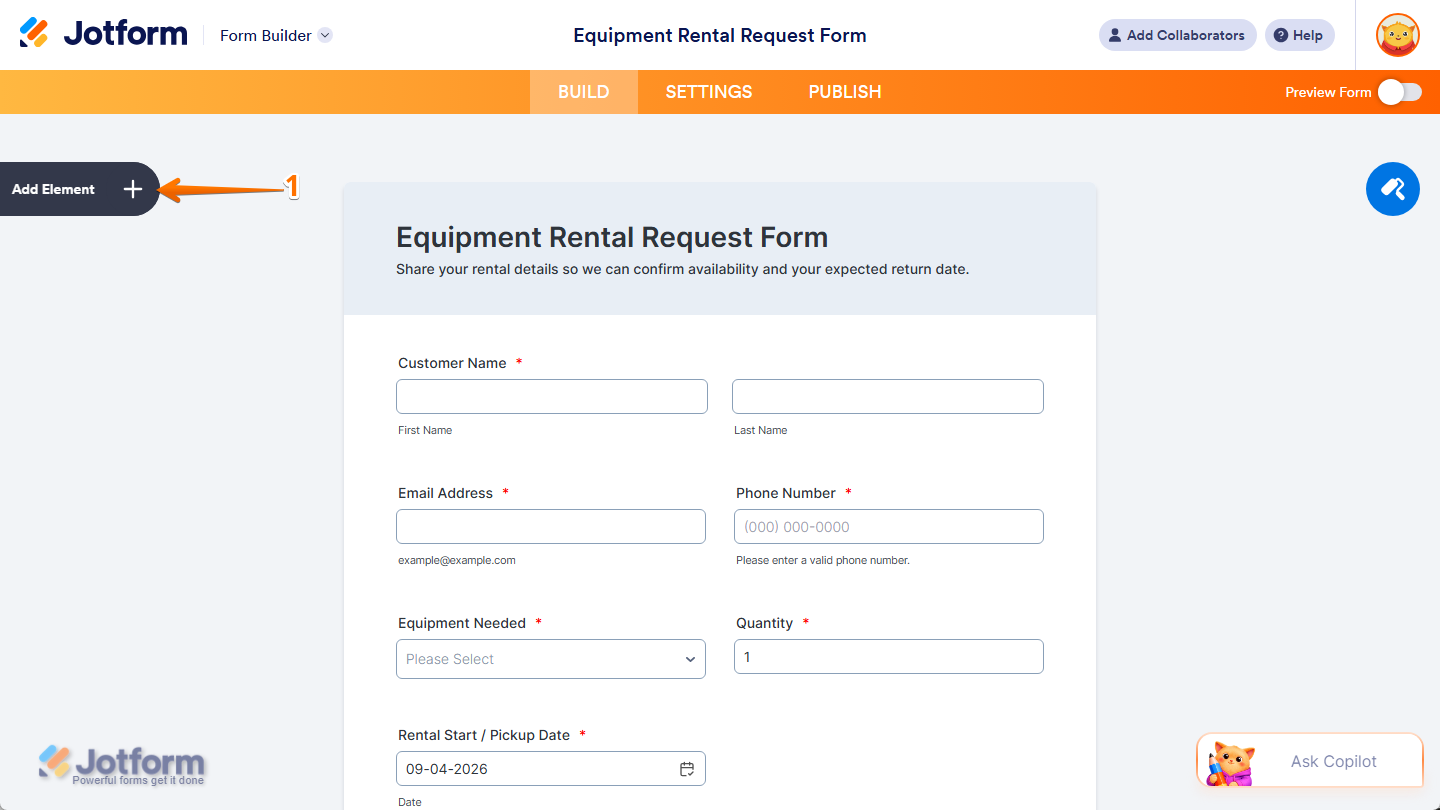
- In Form Builder, click on Add Element on the left side of the page.
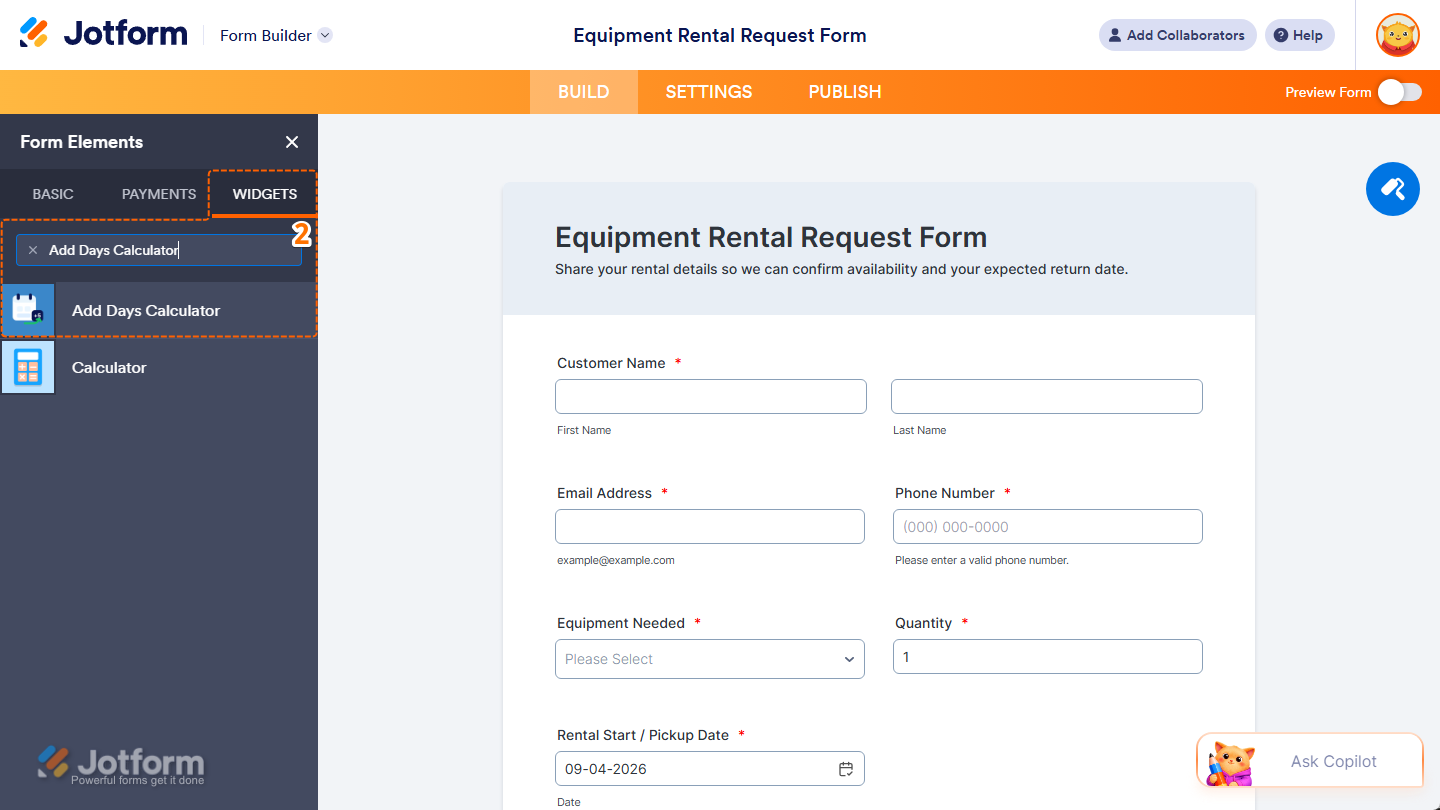
- Now, in the Form Elements menu, under the Widgets tab, search for Add Days Calculator and click on it. Or, drag and drop it to where you want it to appear on your form.
Note
You can only add one Add Days Calculator widget to your form.
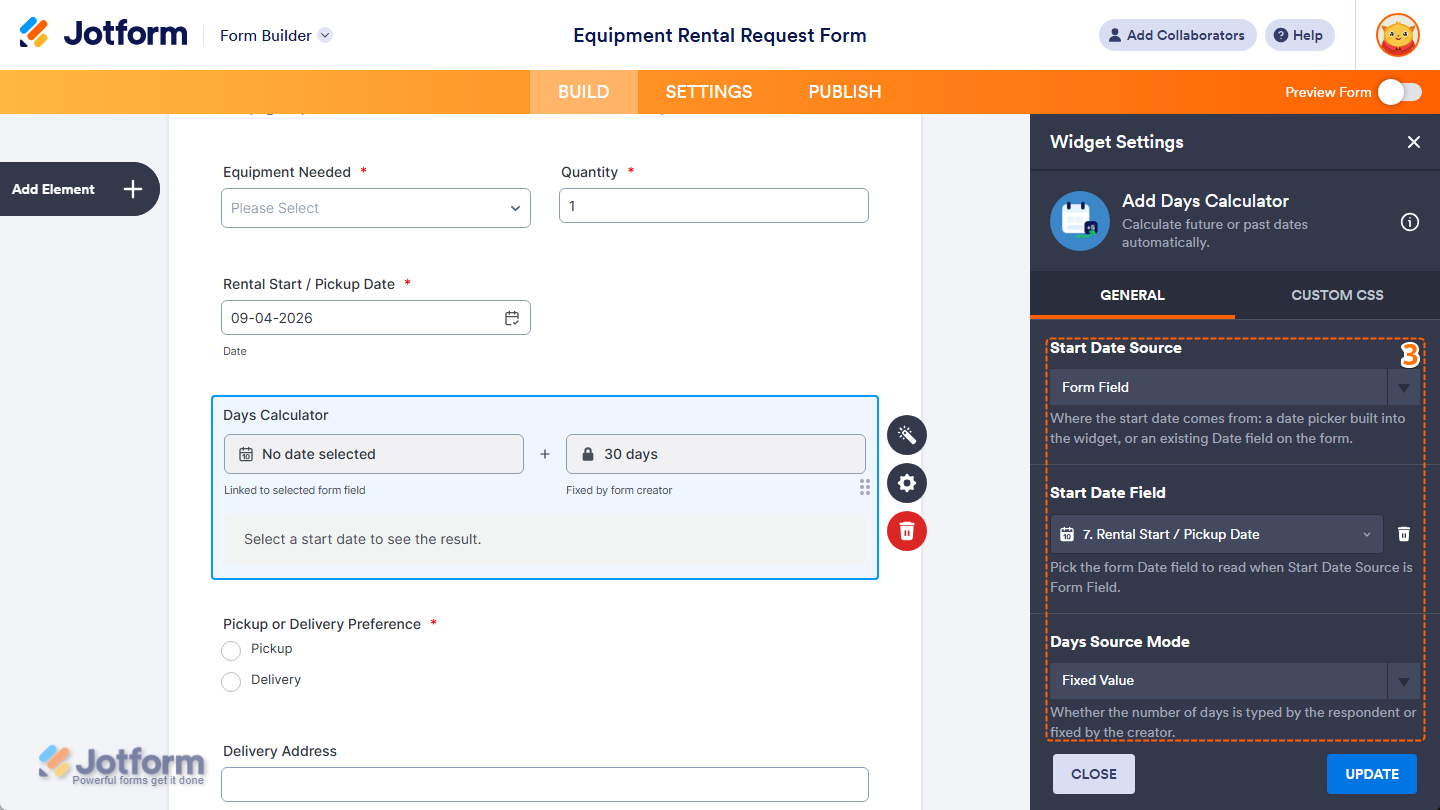
- Next, in the Widget Settings menu that opens on the right side of the page, you’ll see this list of settings you can configure:
- Start Date Source — Click on the Downward Arrow icon and in the Dropdown menu, select where you want the widget to get the start date.
- Start Date Field — Click on the Downward Arrow icon and in the Dropdown menu, select the form Date field you want to use as the start date.
- Days Source Mode — Click on the Downward Arrow icon and in the Dropdown menu, select whether respondents enter the number of days or you set a fixed number.
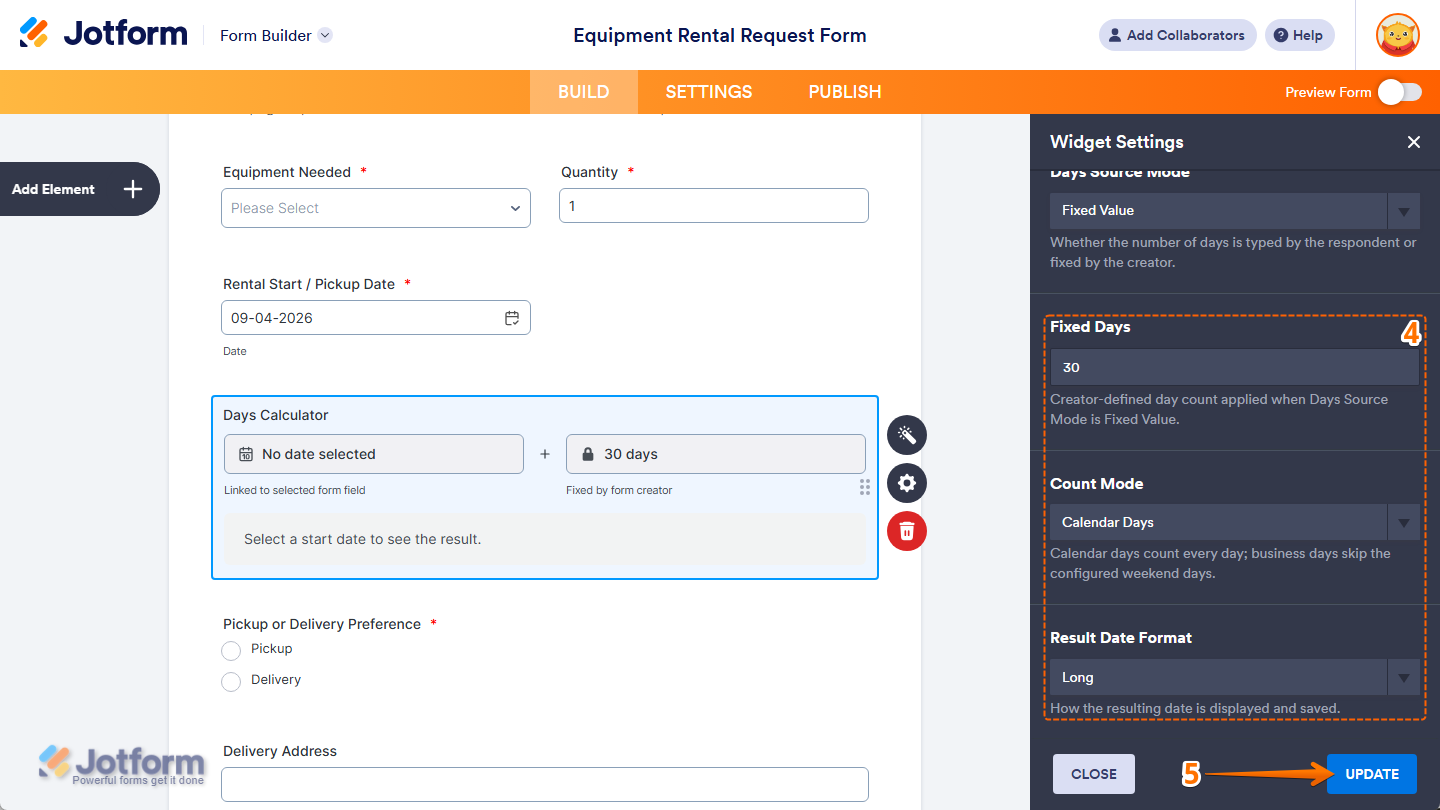
- Then, scroll down to the bottom and continue to set up these settings:
- Fixed Days — Enter the number of days you want to add to or subtract from the start date.
- Count Mode — Click on the Downward Arrow icon and in the Dropdown menu, select whether you want to count calendar days or business days.
- Result Date Format — Click on the Downward Arrow icon and in the Dropdown menu, select the format you want to use for the calculated date.
- Once everythingʼs set, click on Update.
That’s it! You’ve now successfully added and set up the Add Days Calculator widget on your form. Wondering how it looks in action? Check out this demo form.
Notes
- For advanced styling of the Add Days Calculator widget, you can add your own custom CSS code under the Custom CSS tab in the Widget Settings. Our guide on How to Inject CSS Codes to Widgets walks you through everything.
- You can also configure the widget properties, like alignment, labels, size, visibility, and more, to control how it looks and behaves on your form. Check out our guide on How to Access and Configure the Question Properties of a Widget to learn more.

Send Comment: