With Jotform, you can easily add a Star Rating element to your form to collect quick, visual feedback from respondents. The Star Rating element lets people rate experiences, products, or services using a familiar scale, making it easy for them to respond and for you to understand results at a glance. It’s a simple way to gather clear, measurable input without requiring long written answers, helping keep forms fast, engaging, and easy to complete.
Here are a few ways to use it:
- Collect customer satisfaction ratings after a purchase, service, or support interaction.
- Gather quick feedback on products, services, or specific parts of the user experience.
- Add rating questions to surveys and feedback forms for clear, easy-to-analyze responses.
- Use it in event, course, or training evaluations to measure attendee experience.
- Include it in employee feedback or performance review forms for quick scoring.
- Make longer forms feel easier by breaking down opinions into simple rating questions.
Note
The Star Rating element is available in both Classic and Card Forms. You can check out our guide on When to Use Card Forms to learn more.
Adding the Star Rating Element
Whether you’re creating a new form or updating an existing one, you can add the Star Rating element to your form in a few easy steps. Here’s how to do it:
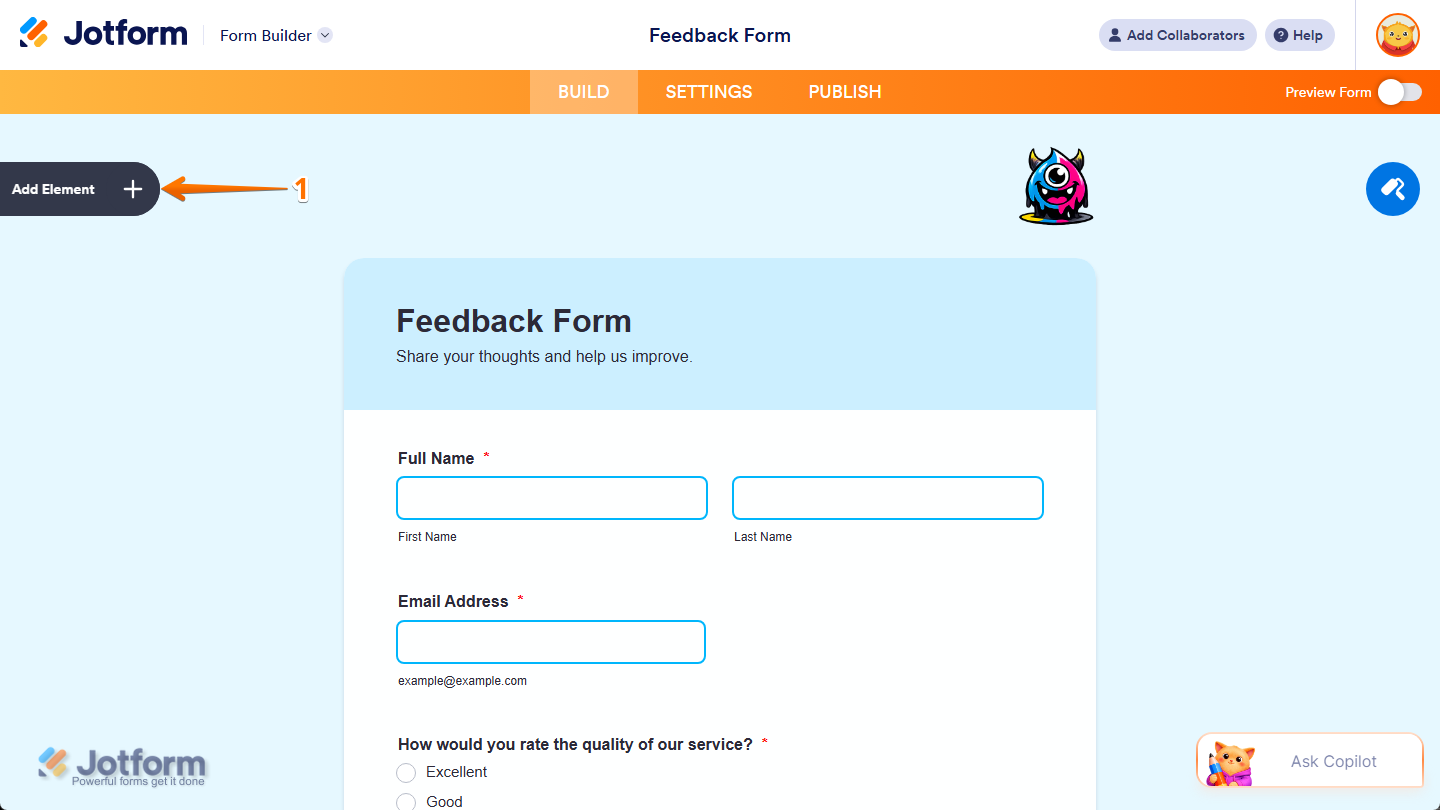
- In Form Builder, click on Add Element on the left side of the page.
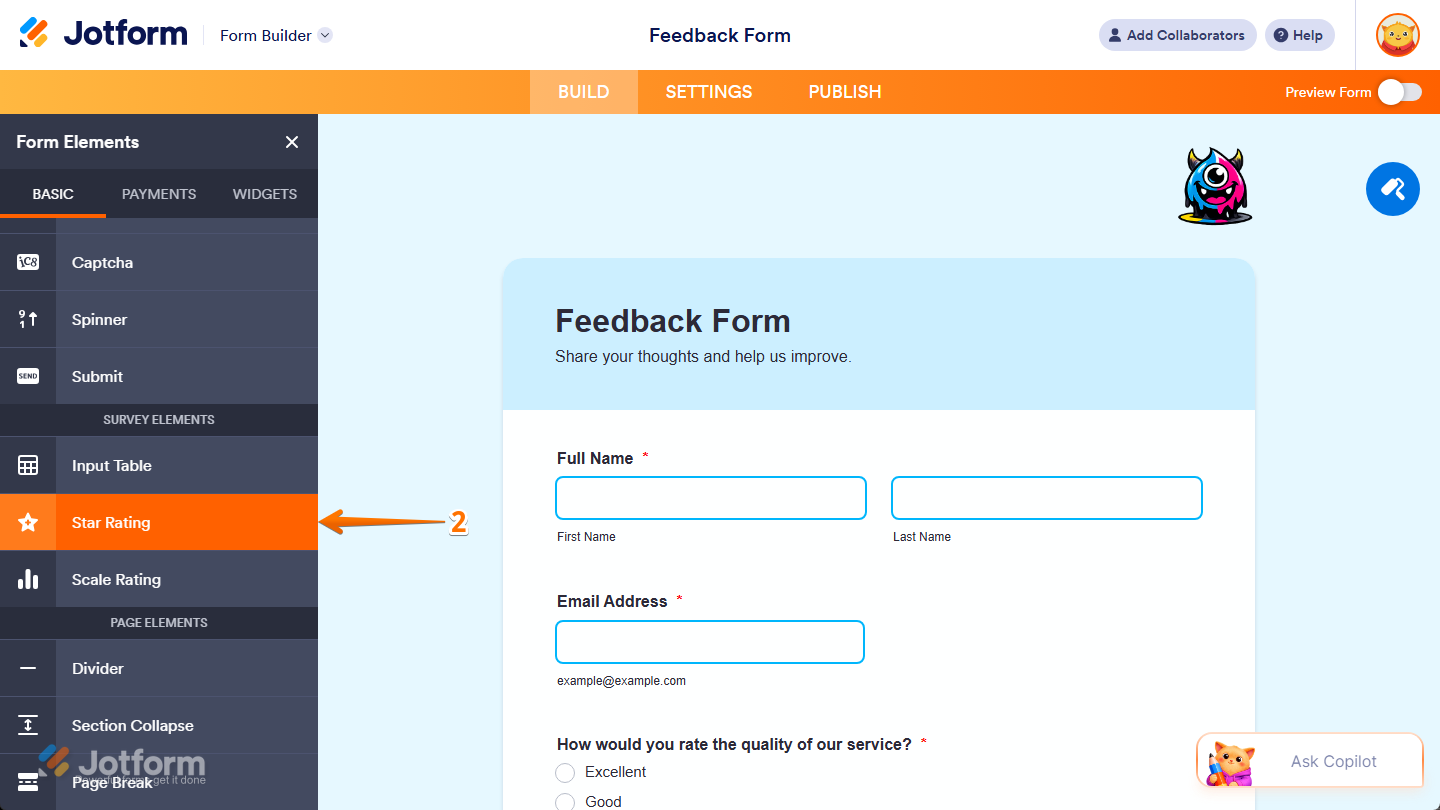
- Then, in the Form Elements menu, under the Basic tab, scroll down and then click on Star Rating. Or, just drag and then drop it to where you want it to be on your form.
Once you’ve added the Star Rating element to your form, you can adjust how it appears and works through the following tabs:
Configuring General Tab Properties
After adding the Star Rating element to your form, you can configure its basic properties to control how it looks and behaves on your form. Follow these quick steps to get started:
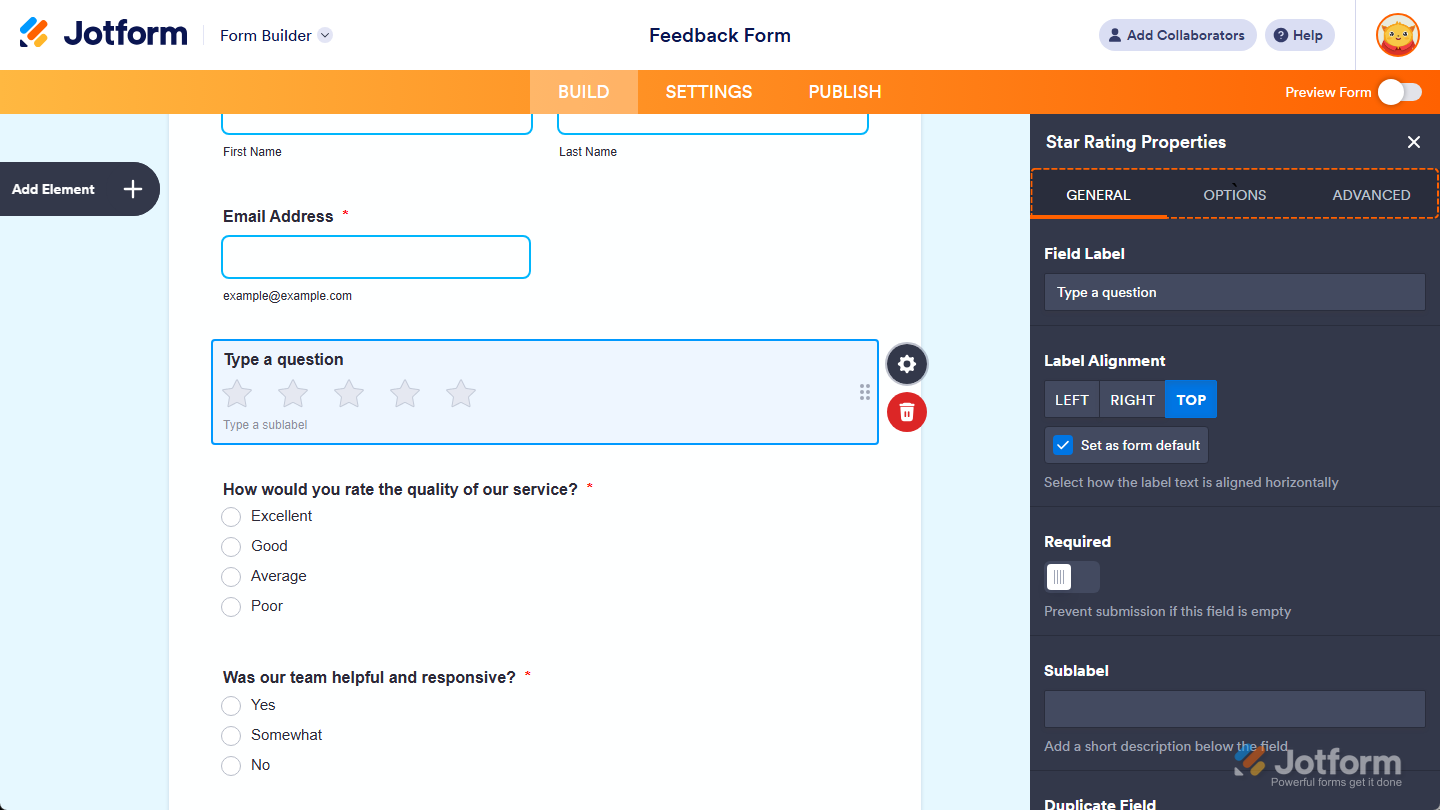
- In Form Builder, while your Star Rating element is selected on your form, click on the Gear icon on the right side of it.
- Then, in the Star Rating Properties menu that opens on the right side of the page, under the General tab, you’ll see a list of properties you can configure:
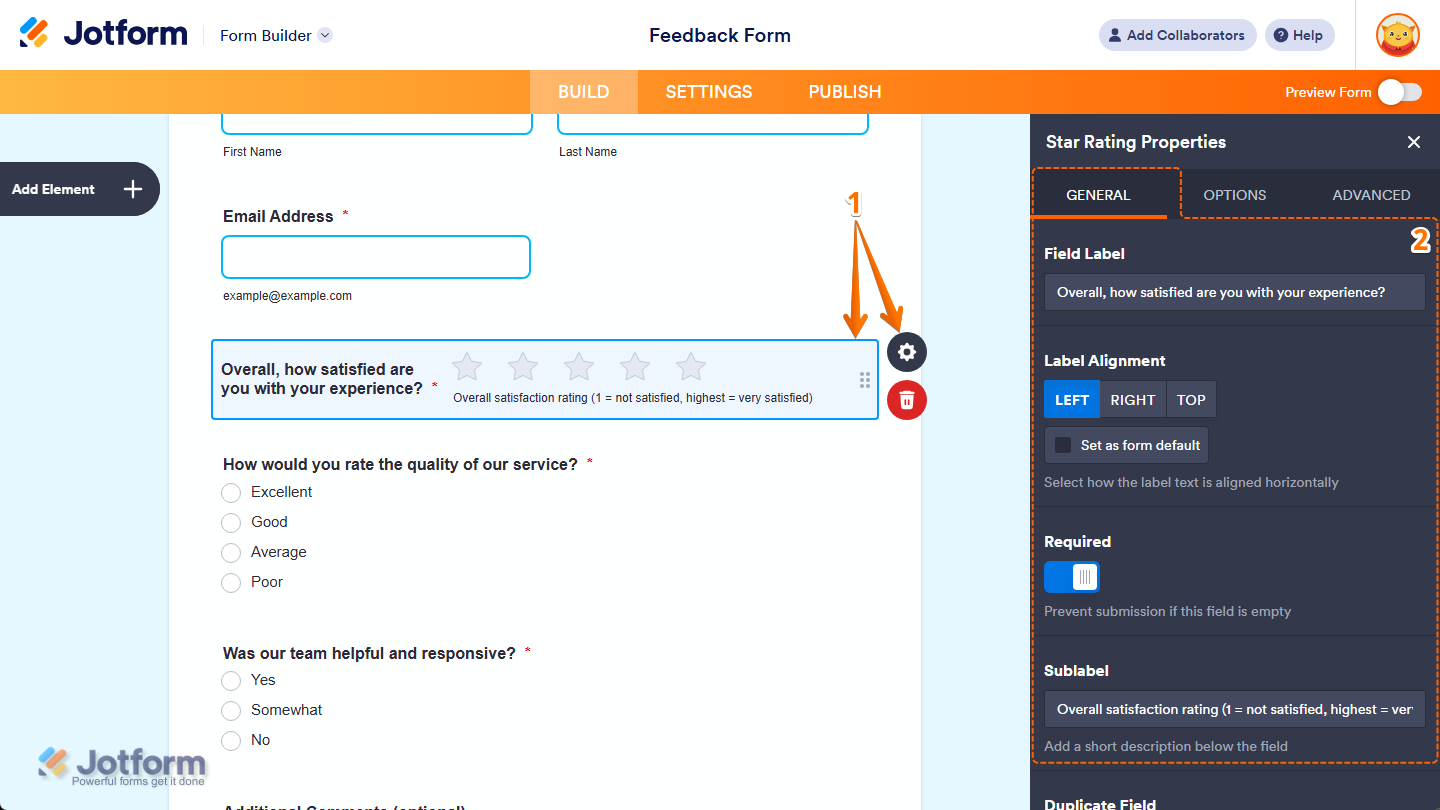
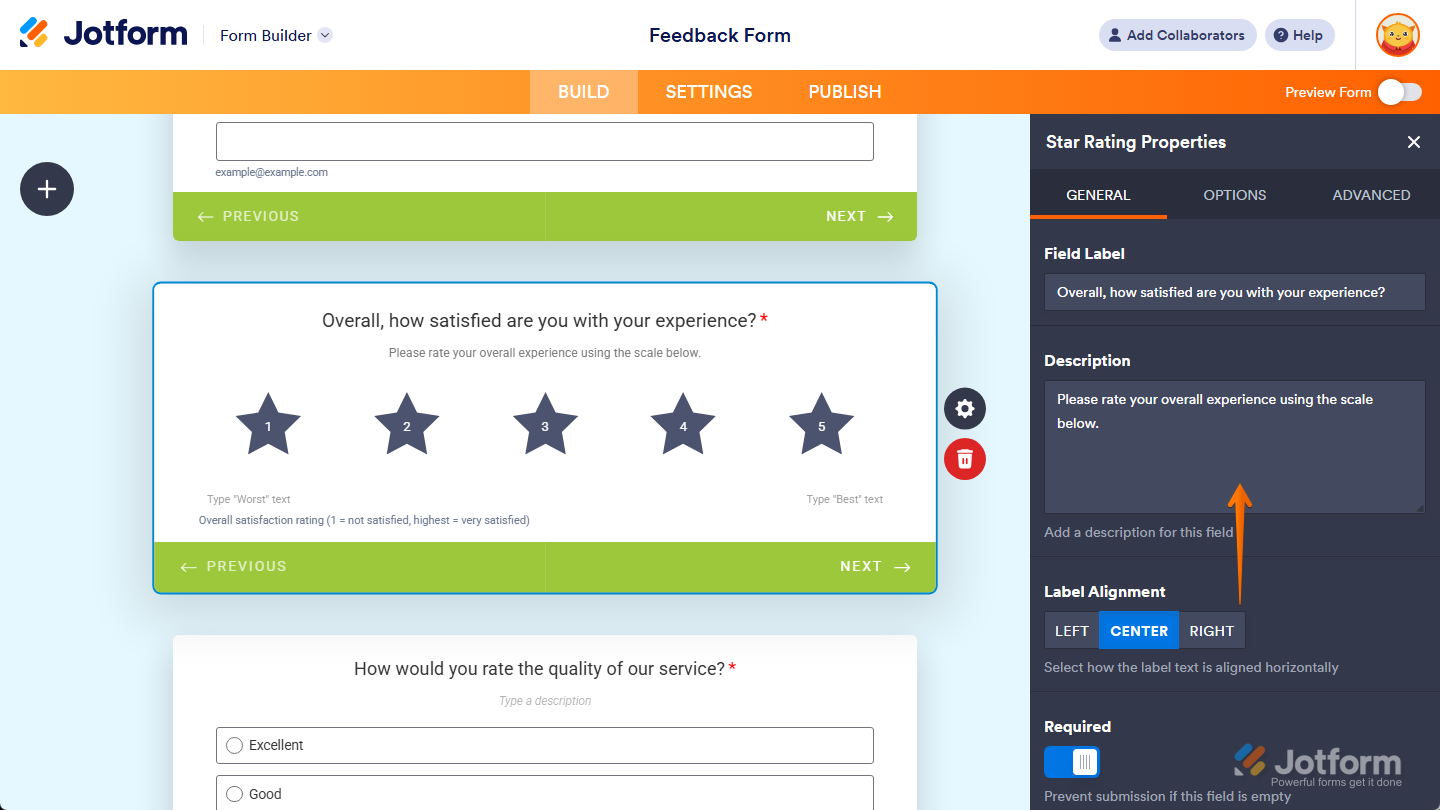
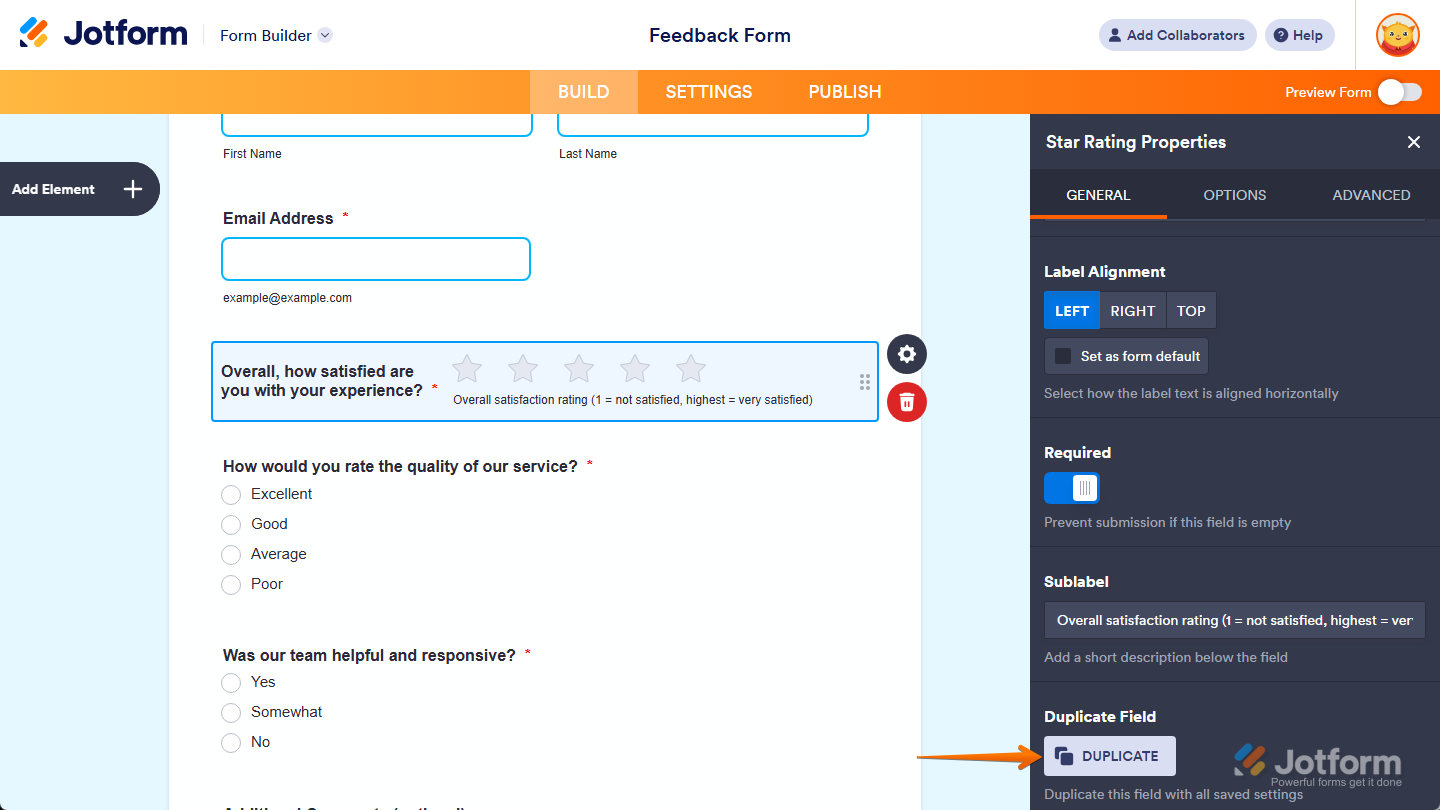
- Field Label — Delete the default text and enter a label in the input box if you want to customize your Star Rating field’s question.
- Label Alignment — Keep this set to Center to position your Star Rating field’s label in the middle of its width, or select Left or Right to position it on either side.
- Set as Form Default — Keep the check in the box next to this option, or remove it if you want other fields to retain their current label alignment when you change your Star Rating field’s label alignment. You’ll only find this option in Classic Forms.
- Required — Toggle this on if you want respondents to complete your Star Rating field before they can submit the form.
- Sublabel — Enter a sublabel in the input box if you want to add additional context or instructions below your Star Rating field.
In Card Forms, you can enter text in the Description property to add context or instructions that appear below your Star Rating field label.
That’s it. You’ve configured the General tab properties of the Star Rating element on your form. If you want to create a copy of it with the same setup, you can click on the Duplicate button at the bottom of this tab.
Setting Up Options Tab Properties
After adding the Star Rating element to your form, you can tweak its properties to set how the rating scale displays and functions for respondents. Here’s how to set it up:
- In Form Builder, while your Star Rating element is selected on your form, click on the Gear icon on the right side of it.
- Then, in the Star Rating Properties menu that opens on the right side of the page, under the Options tab, you’ll see this list of properties you can set up:
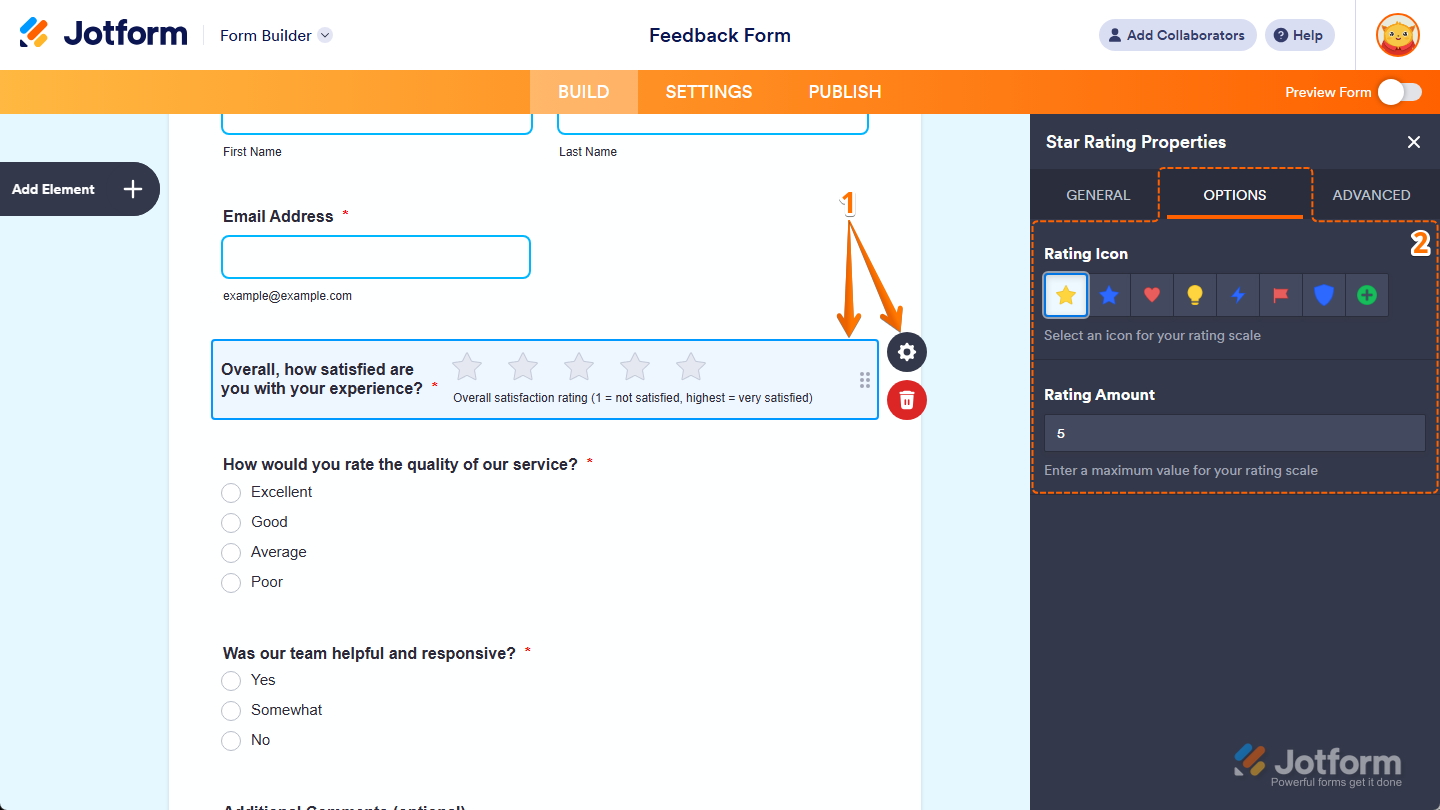
- Rating Icon — Keep this set to the Star icon or select a different icon you want to use for the rating. You can select from eight different icons in Classic Forms, and only the Star and Heart icons in Card Forms.
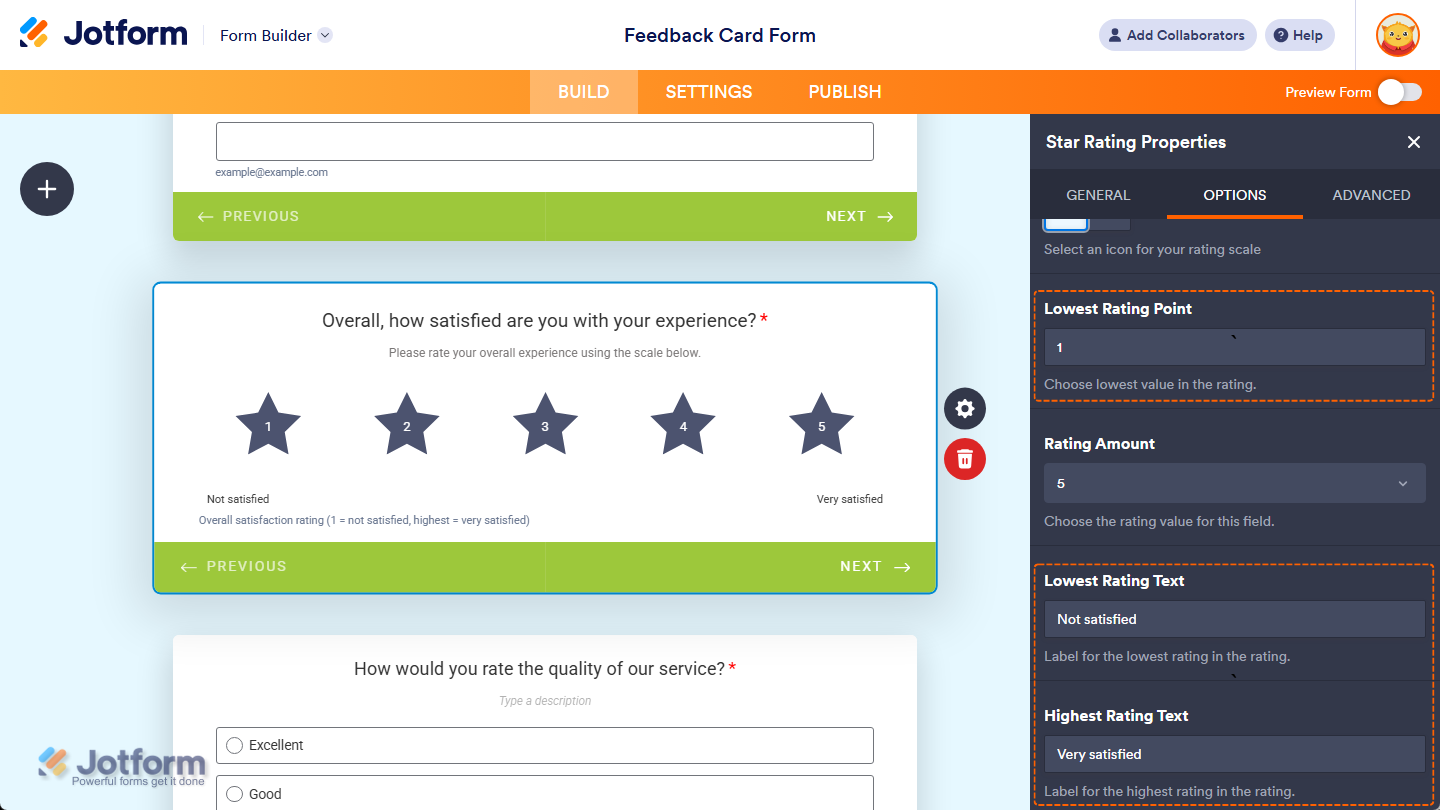
- Rating Amount — Keep this set to 5 or enter a different value from 1 to 21 if you want to define a new number of rating points users can select in your Star Rating field. You can select an option from 1 to 10 in the dropdown menu for this property in Card Forms.
You’ll also find these additional properties in Card Forms:
- Lowest Rating Point — Keep this set to 1 or enter the lowest value you want to use for the rating.
- Lowest Rating Text — Enter a label you want to use for the lowest rating.
- Highest Rating Text — Enter a label you want to use for the highest rating.
That’s it. You’ve set up the Options tab properties of the Star Rating element on your form.
Customizing Advanced Tab Properties
Once you’ve added the Star Rating element to your form, you can customize its additional properties to manage how it works with different form features. Here’s what to do next:
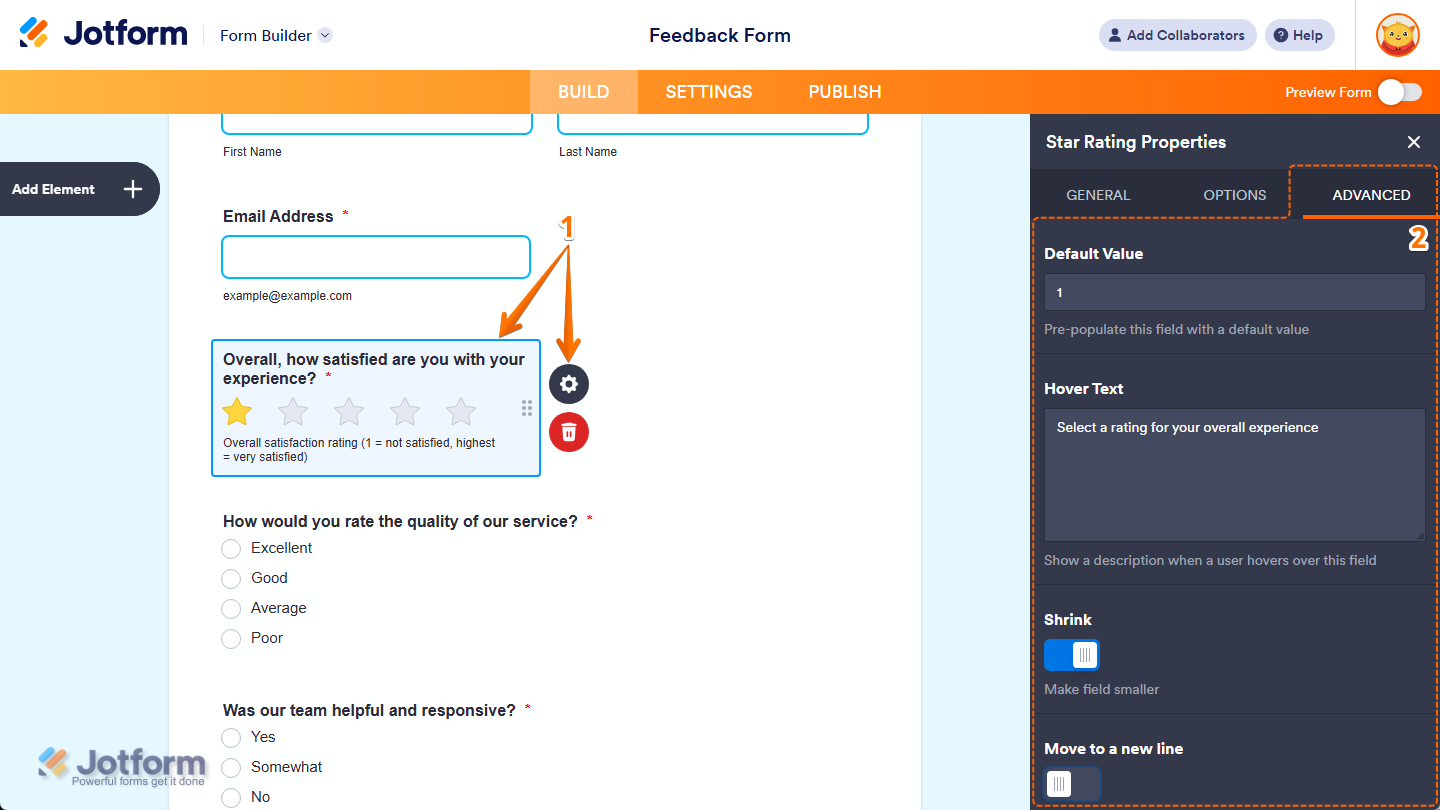
- In Form Builder, while your Star Rating element is selected on your form, click on the Gear icon on the right side of it.
- Then, in the Star Rating Properties menu that opens on the right side of the page, under the Advanced tab, you’ll see this list of properties you can customize:
- Default Value — Enter a rating you want to be selected by default for your Star Rating field.
- Hover Text — Enter the text you want to show as a short description when users hover their mouse over your Star Rating field. You’ll only find this property in Classic Forms.
- Shrink — Toggle this on if you want to reduce your Star Rating field’s width to half or to fit within the width of your form’s column. You can check out our guide on Setting Up Form Columns to learn more. You’ll only find this property in Classic Forms.
- Move to a New Line — You’ll only see this when the Shrink property is enabled. Toggle this on if you want to move your Star Rating field to a new line instead of placing it next to another shrunk field.
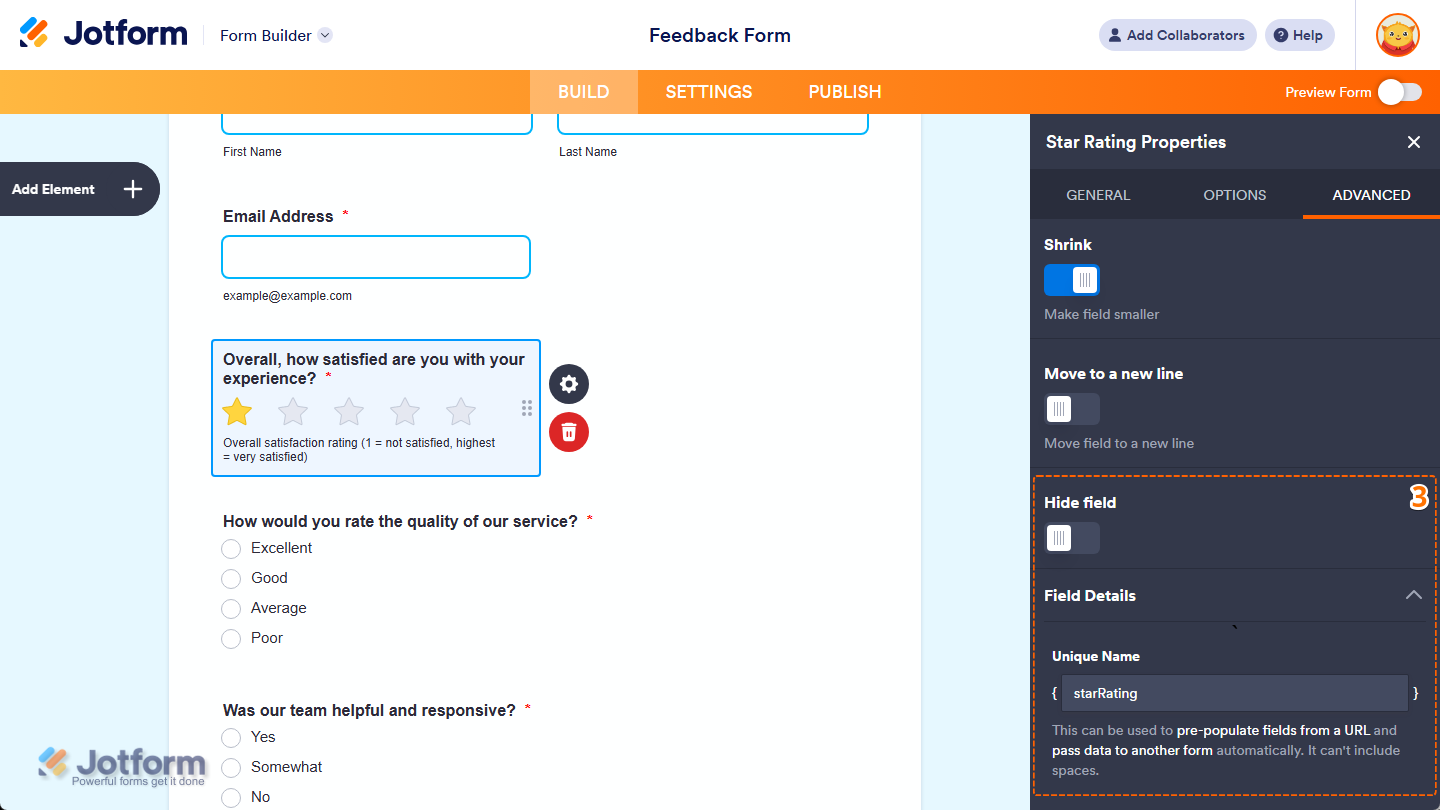
- Next, scroll down to the bottom and continue customizing these properties:
- Hide Field — Toggle this on if you want to hide the Star Rating field on your form. Take a look at our guide on How to Hide Form Elements for more details.
- Field Details — Click on this section to expand it and view, copy, or update your Star Rating field’s Unique Name, which is used to reference it in integrations, calculations, and other advanced form features. Check out our guide on How to Find Field IDs and Unique Names to learn more.
That’s it. You’ve customized the Advanced tab properties of the Star Rating element on your form.
Note
Any changes you make in the Star Rating Properties menu are automatically saved on your form.

Send Comment: