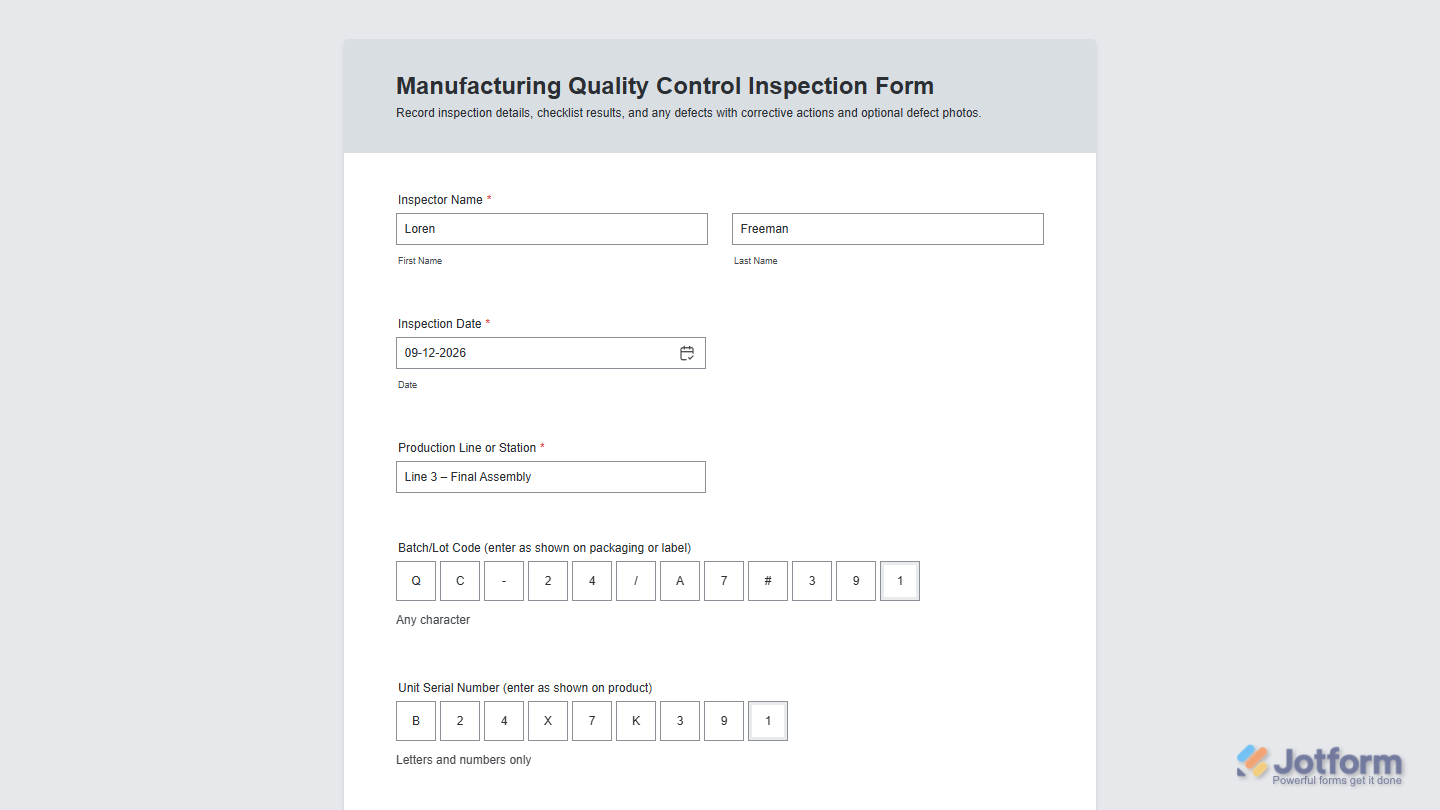
Jotform’s Character Boxes widget lets you collect fixed-format responses one character at a time, making structured entries easier to read and complete. It works well for codes, serial numbers, puzzle answers, classroom activities, and quality-control forms where each character needs its own position. By keeping responses neatly organized, it helps standardize entries and makes them easier to review after submission.
Here are a few ways to use it:
- Collect answer codes from puzzle participants.
- Record serial numbers for operations teams.
- Capture fixed-format answers from students.
- Record inspection codes for quality-control teams.
Note
The Character Boxes widget is available on both Classic and Card Forms. Check out our guide on When to Use Card Forms to learn more.
Whether youʼre creating a new form or updating an existing one, you can add and set up the Character Boxes widget in just a few steps. Hereʼs how to set it up:
- In Form Builder, click on Add Element on the left side of the page.
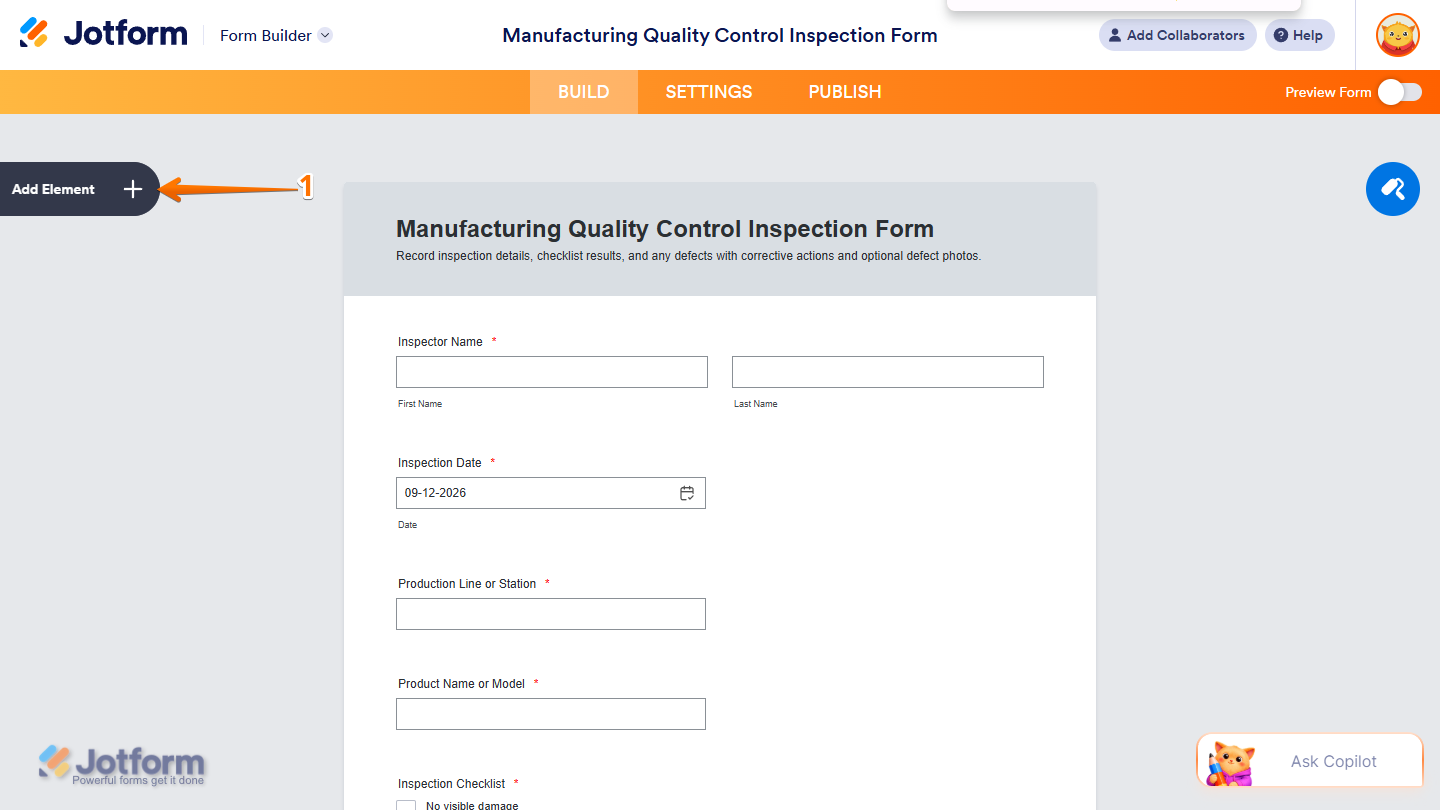
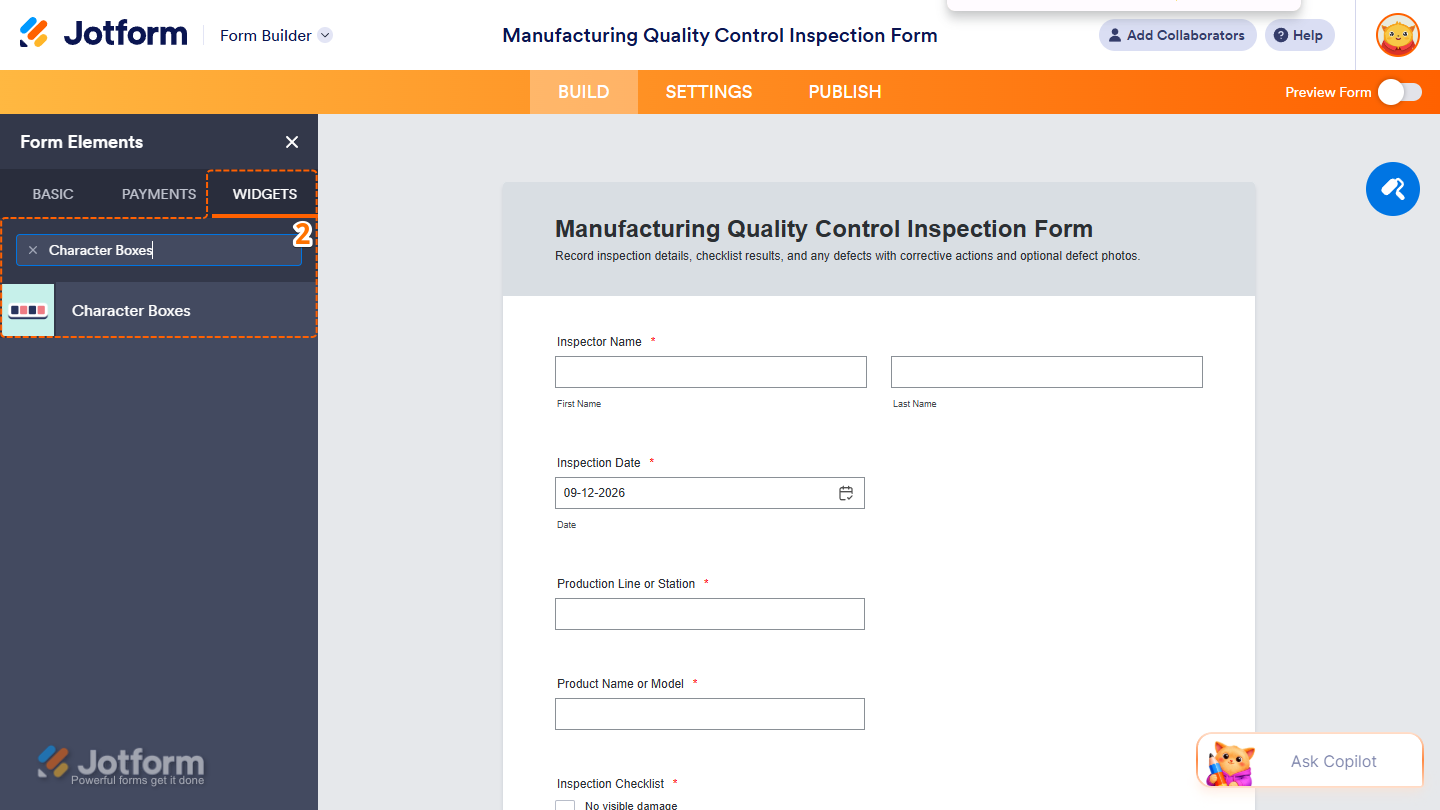
- Now, in the Form Elements menu, under the Widgets tab, search for Character Boxes and click on it. Or, drag and drop it to where you want it to appear on your form.
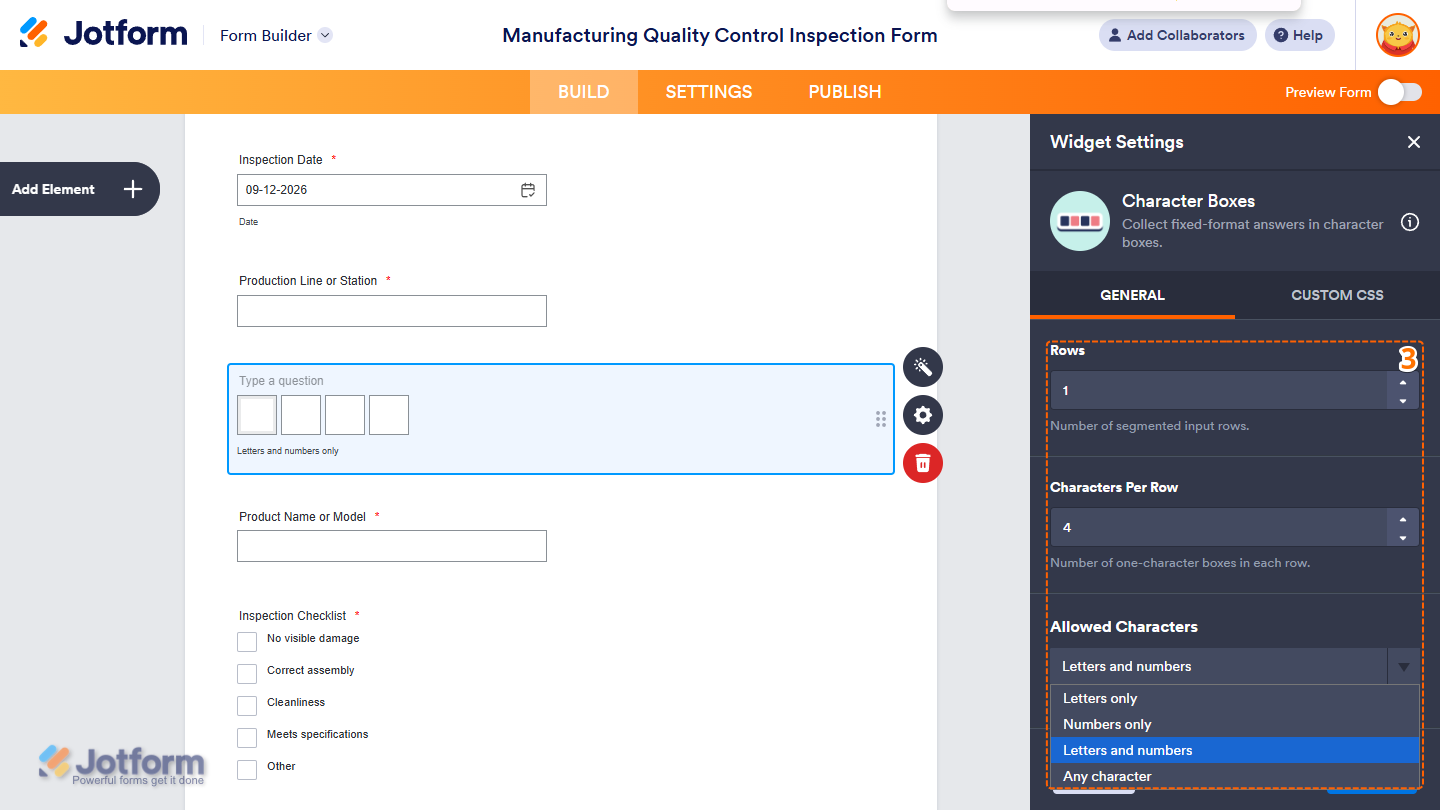
- Next, in the Widget Settings menu that opens on the right side of the page, you’ll see this list of settings you can configure:
- Rows — Enter the number of rows you want to use.
- Characters Per Row — Enter the number of character boxes you want in each row.
- Allowed Characters — Click on the Downward Arrow icon and in the Dropdown menu, select whether respondents can enter only letters, only numbers, both letters and numbers, or any character.
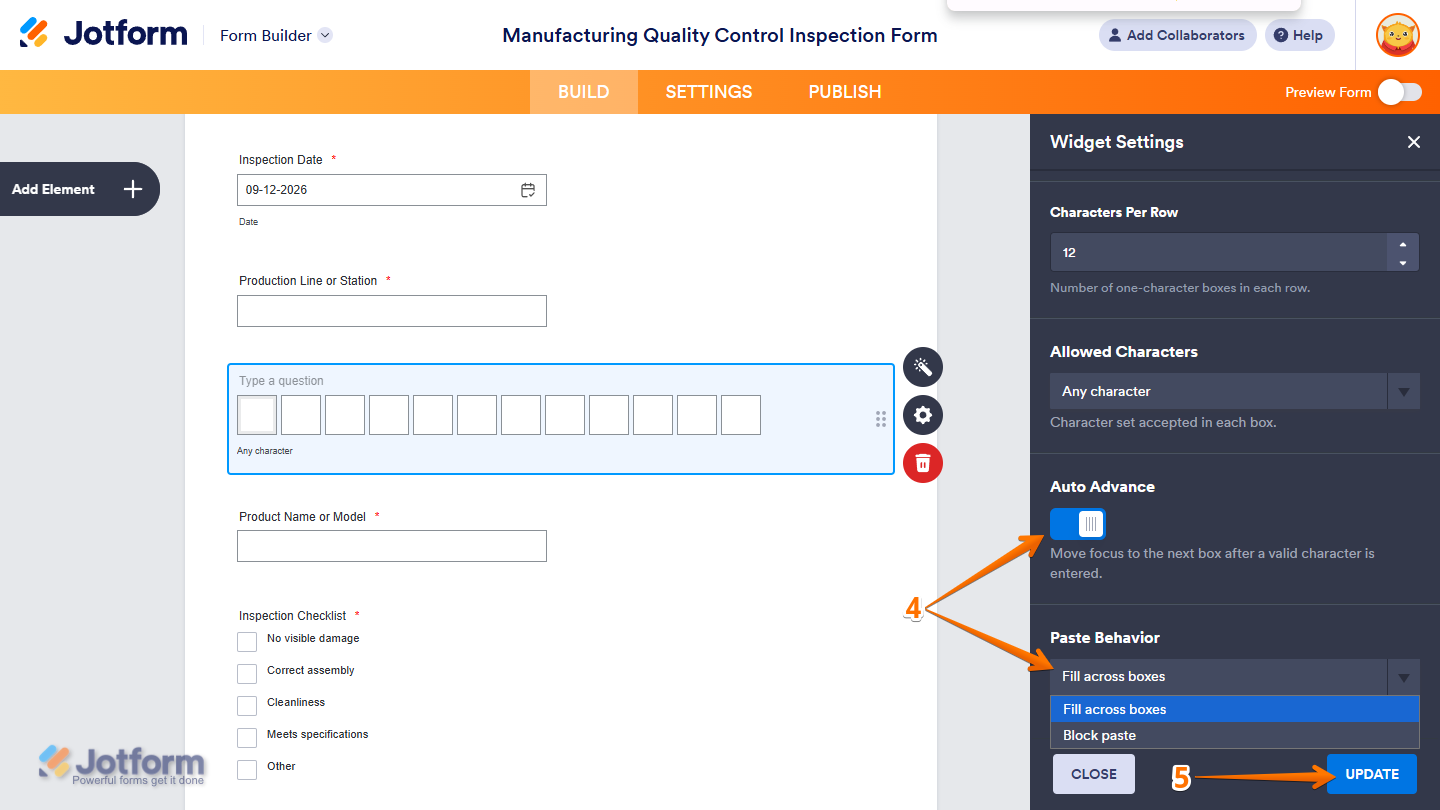
- Then, scroll down to the bottom and continue to set up these settings:
- Auto Advance — Toggle this on to move focus to the next box after a valid character is entered.
- Paste Behavior — Click on the Downward Arrow icon and in the Dropdown menu, select whether pasted text fills consecutive boxes or pasting is blocked.
- Once everythingʼs set, click on Update.
That’s it! You’ve now successfully added and set up the Character Boxes widget on your form. Wondering how it looks in action? Check out this Demo form.
Notes
- For advanced styling of the Character Boxes widget, you can add your own custom CSS code under the Custom CSS tab in the Widget Settings. Our guide on How to Inject CSS Codes to Widgets walks you through everything.
- You can also configure the widget properties, like alignment, labels, size, visibility, and more, to control how it looks and behaves on your form. Check out our guide on How to Access and Configure the Question Properties of a Widget to learn more.

Send Comment: