
Ensuring that all forms are inclusive and accessible is a standard requirement. By activating the Form Accessibility toggle within the Admin Console, admins can ensure that every new form created by a user automatically includes the real-time Accessibility Checker. This guides creators to fix contrast issues, missing labels, and navigation barriers as they build. Here’s all you need to do:
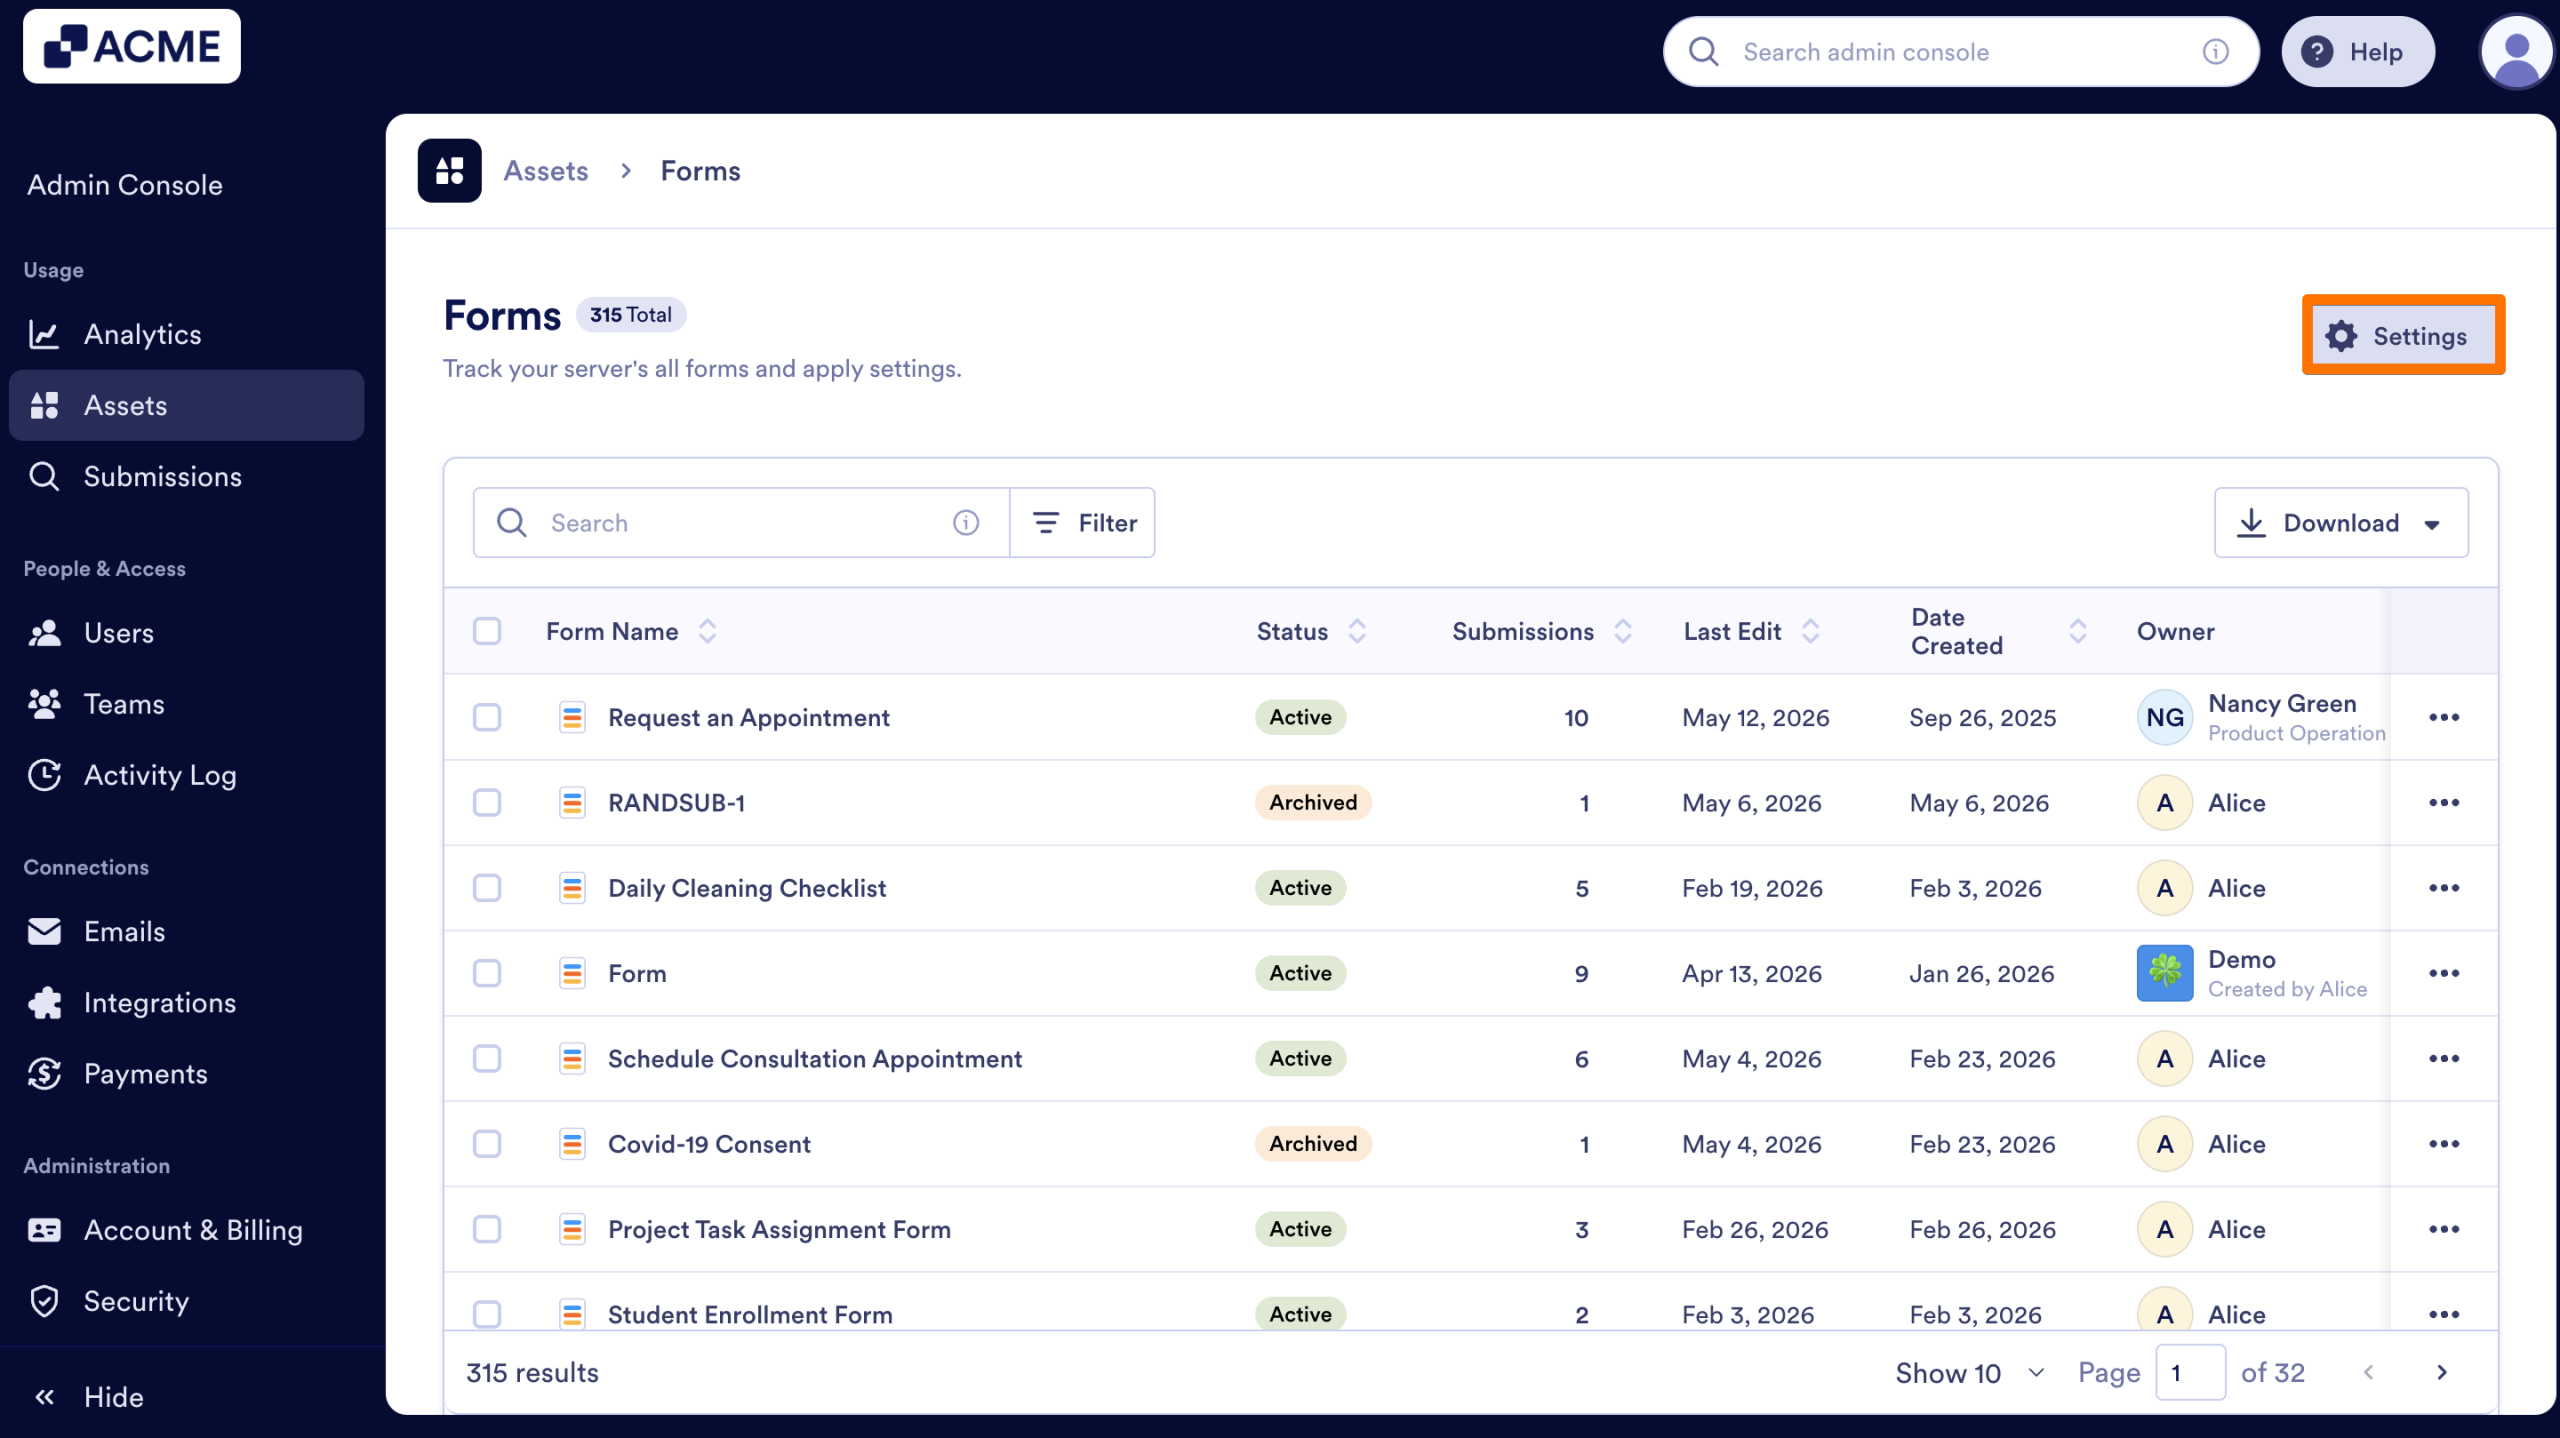
- In the Admin Console, in the left menu, select Assets.
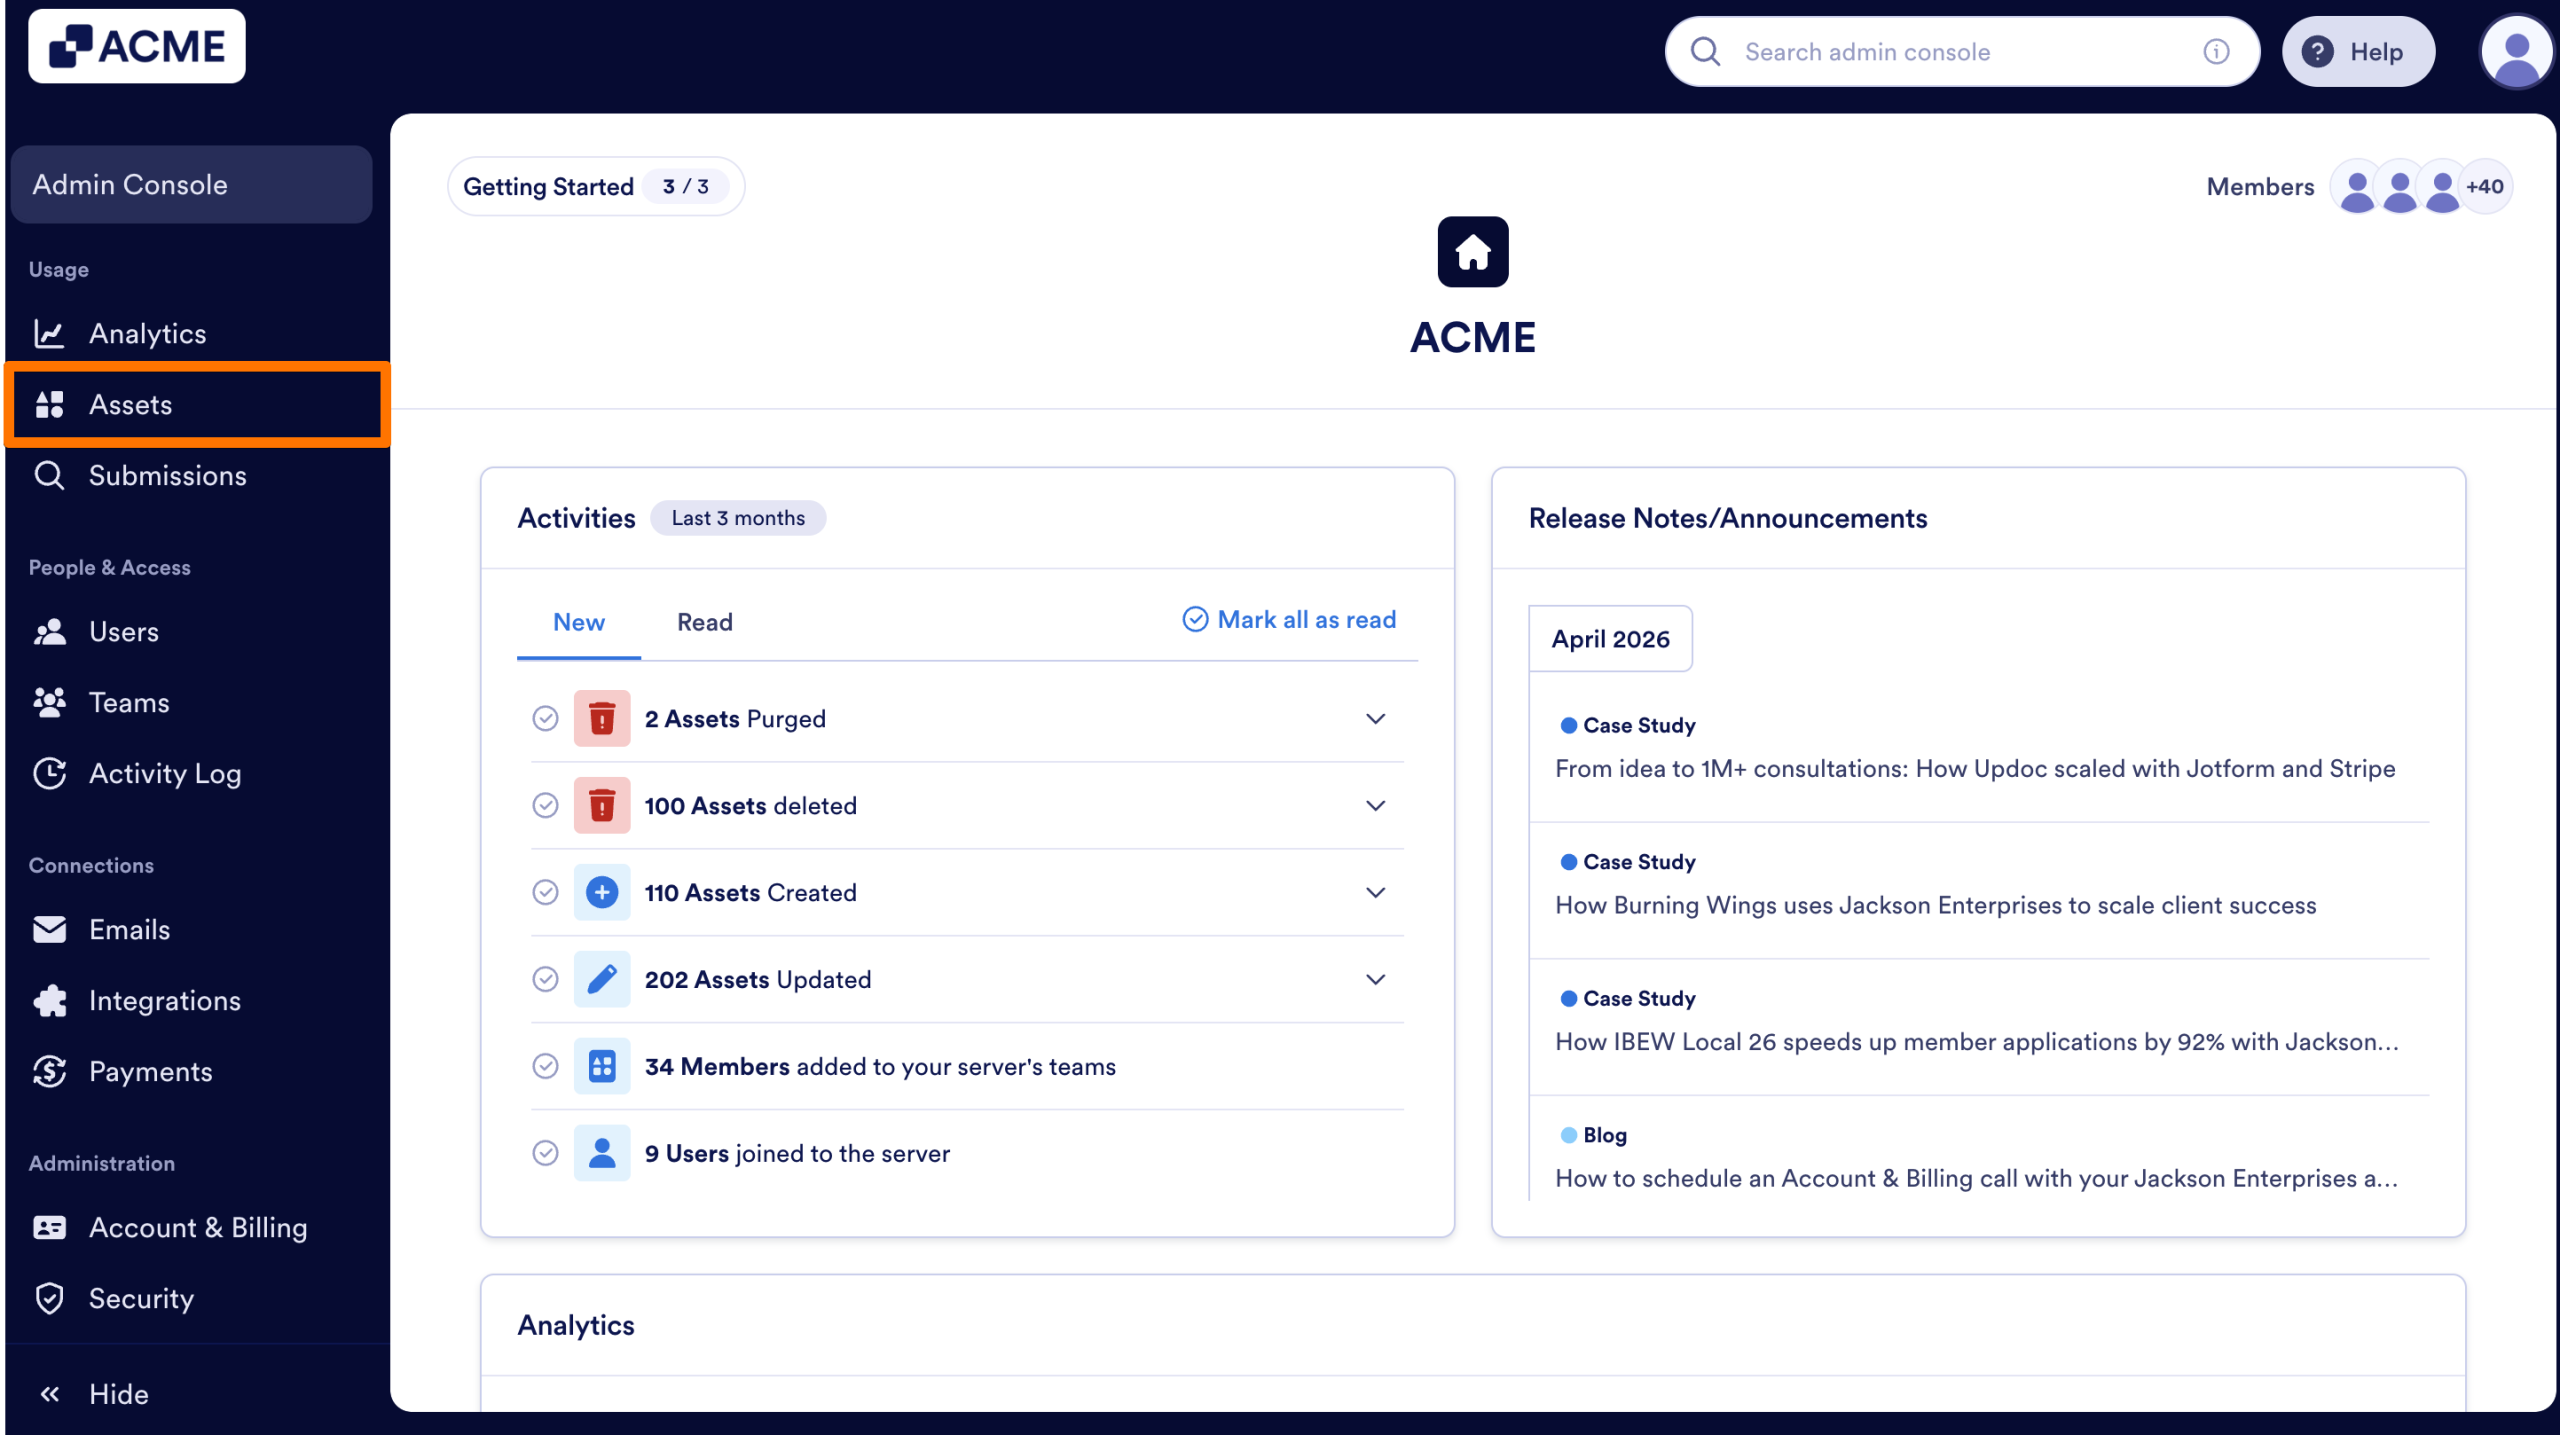
- Next, click on Forms.
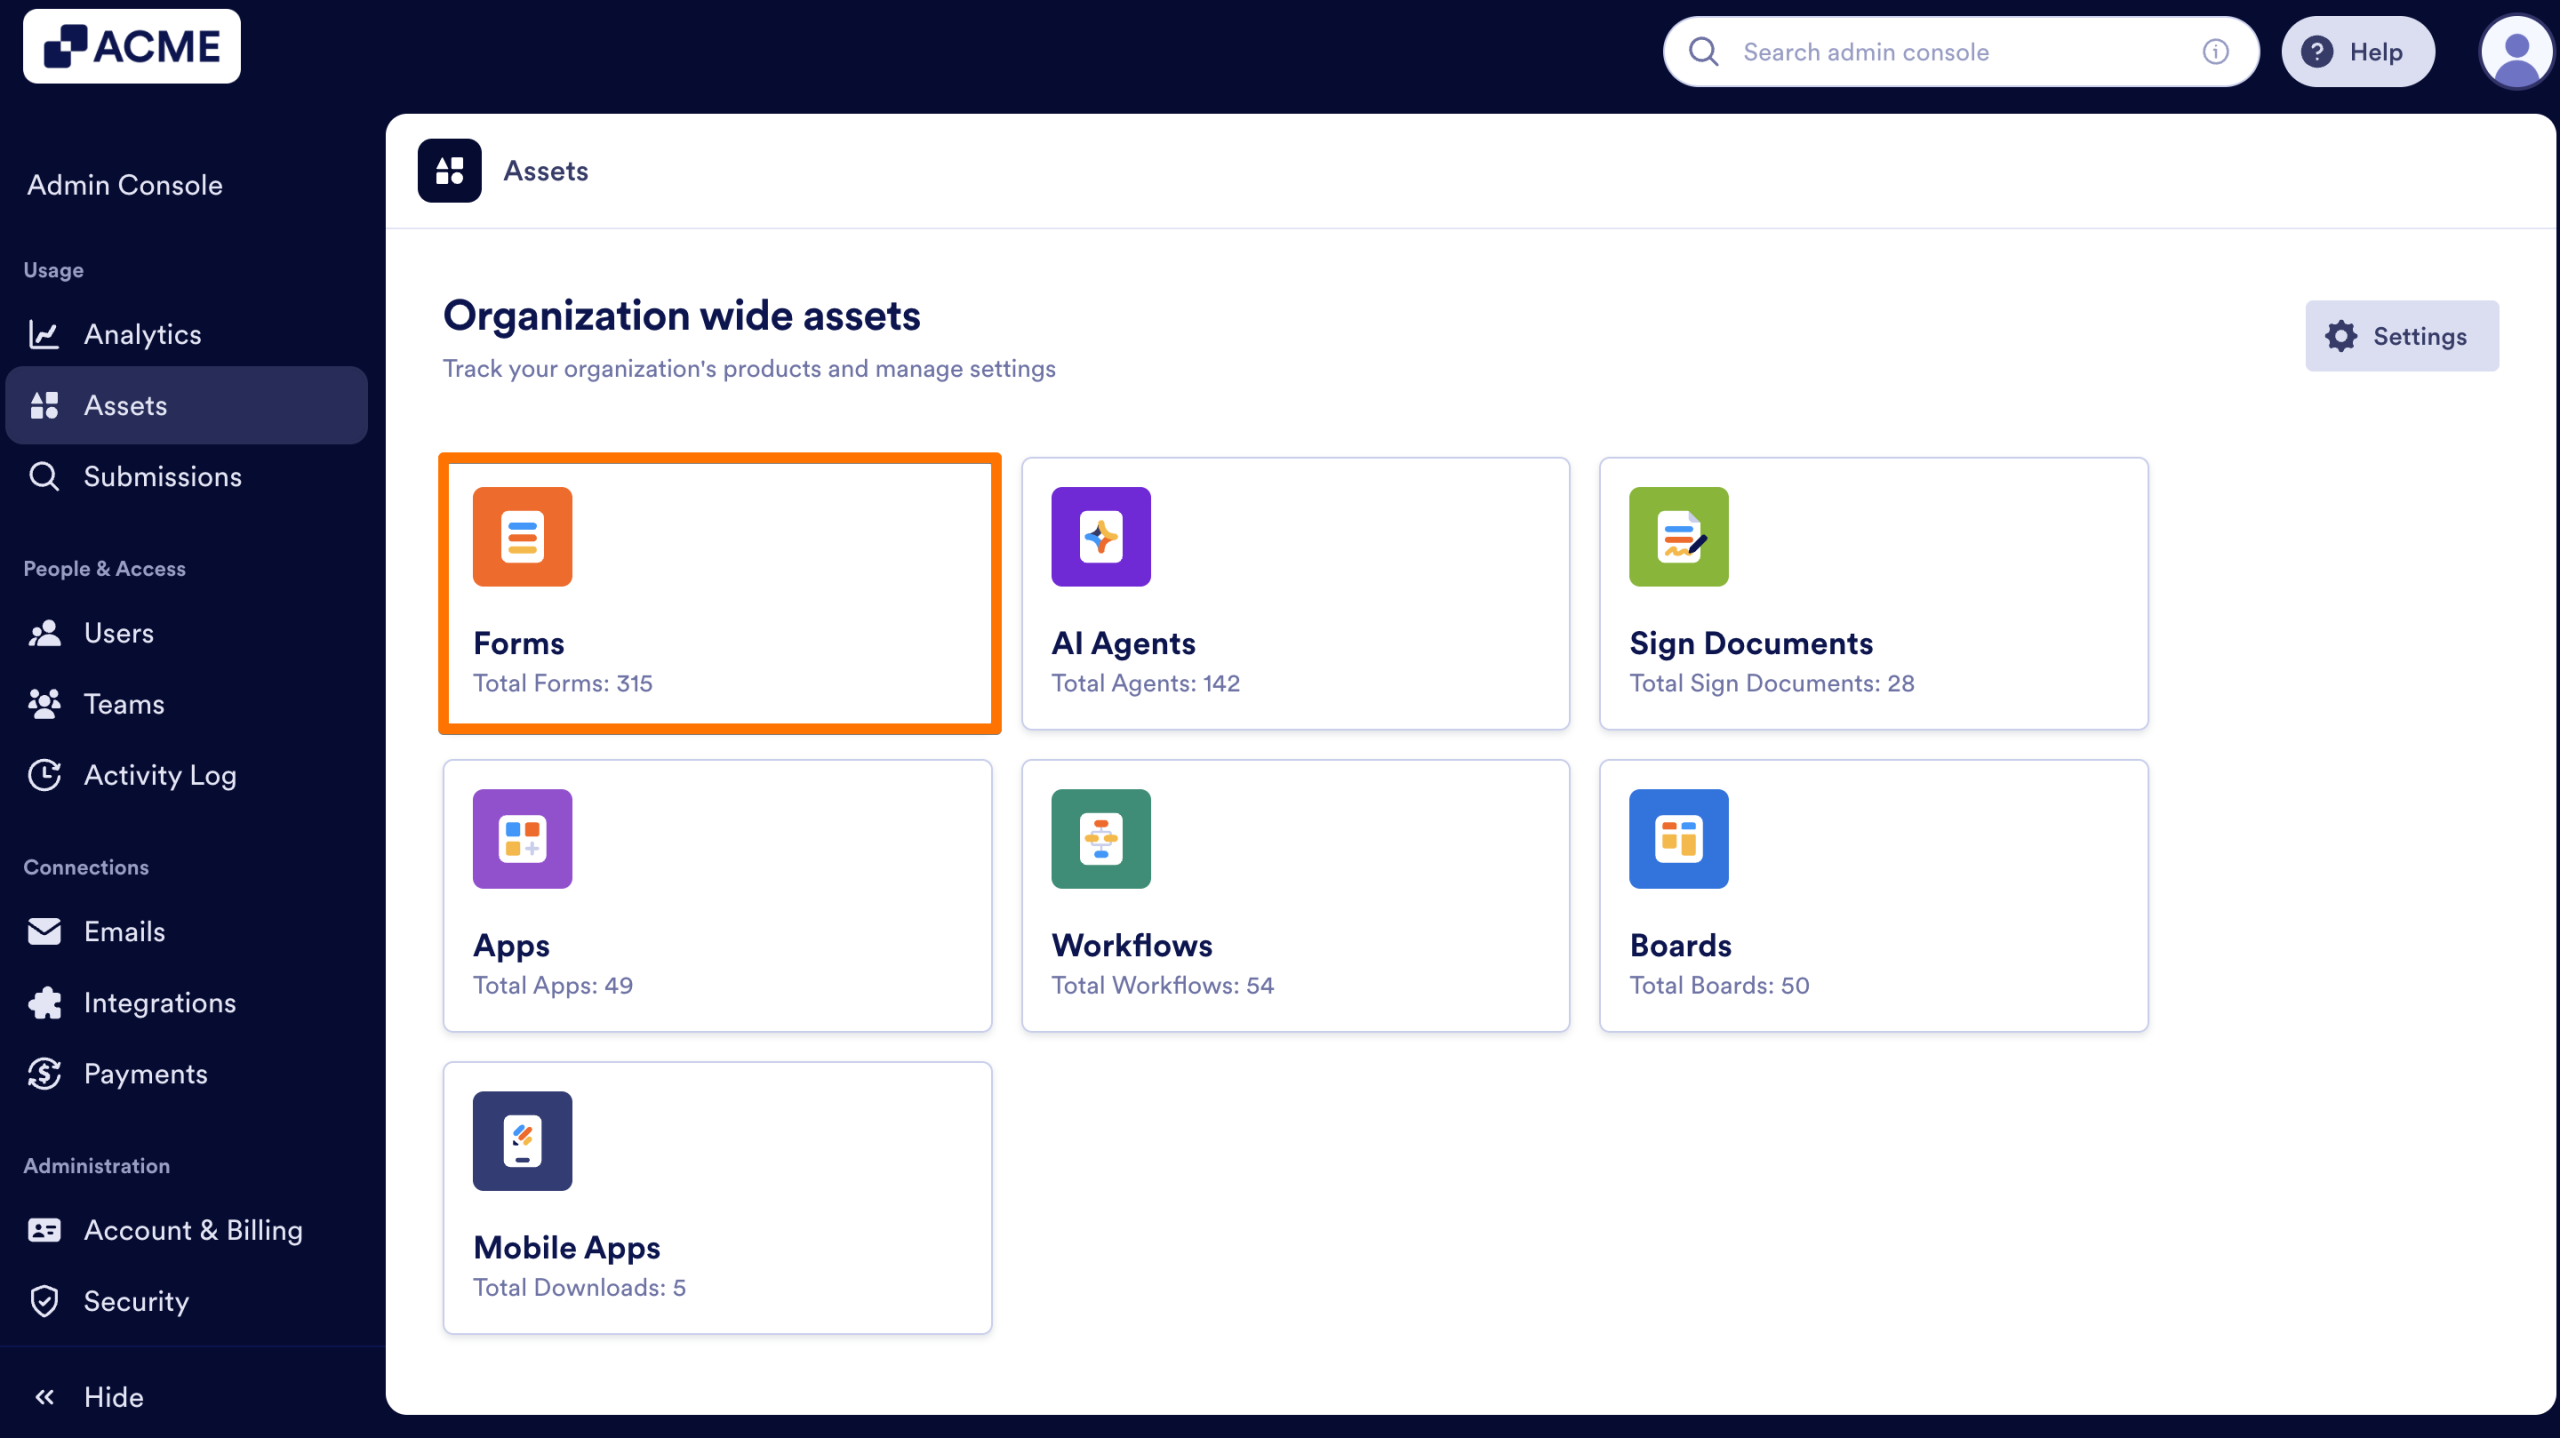
- Then, click on the Settings button on the right.
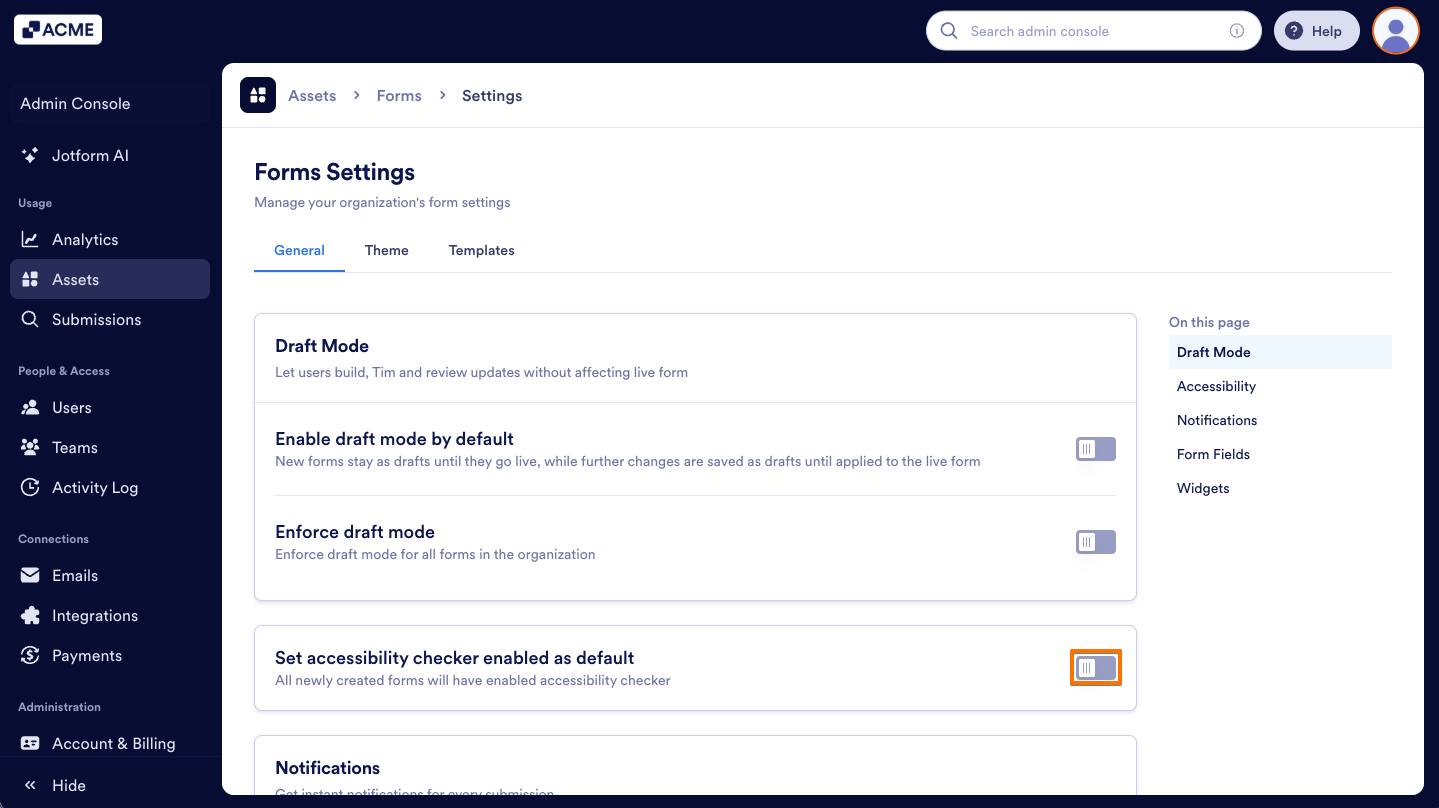
- Toggle on Set accessibility checker enabled as default.
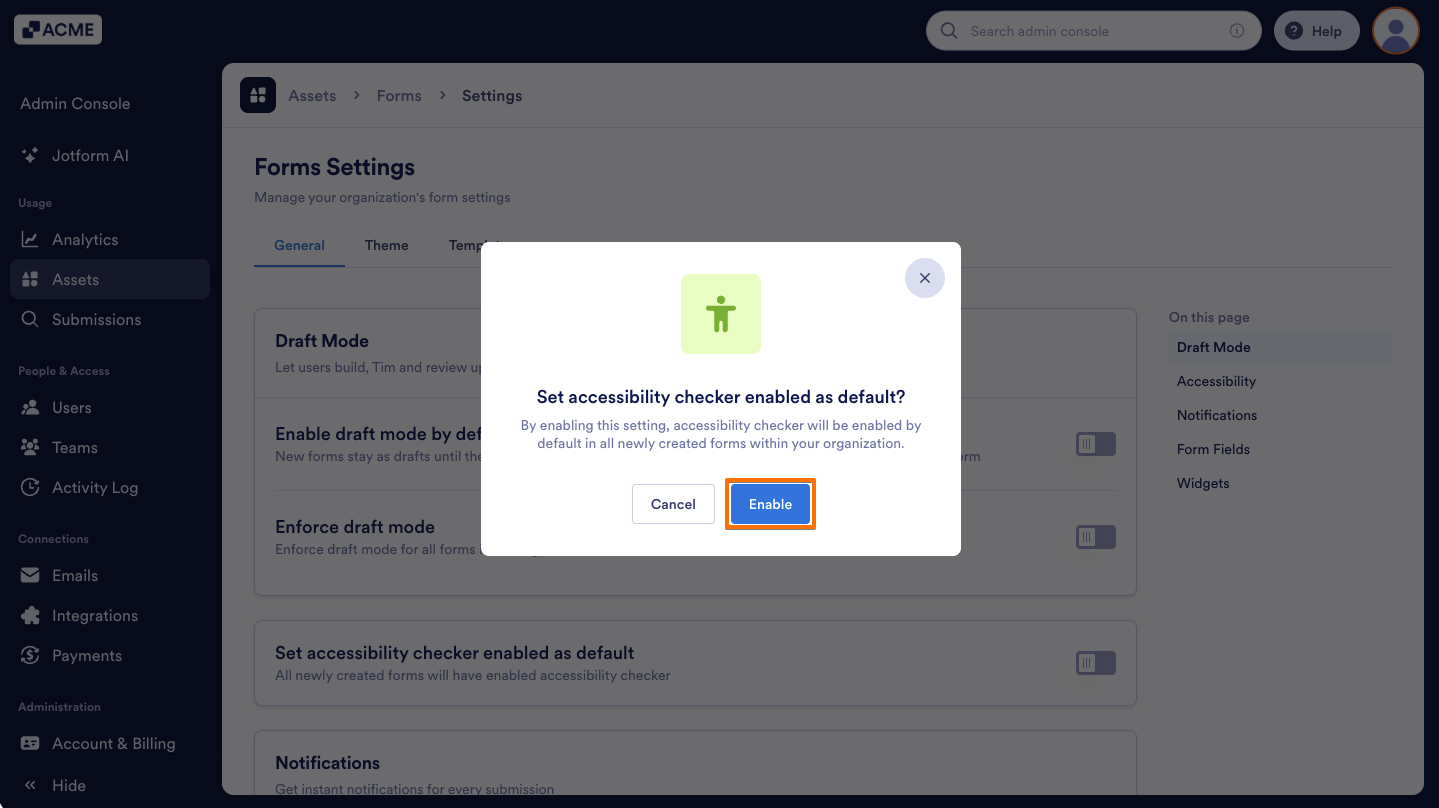
- Finally, click on Enable.
Note
This setting applies to all forms created after the toggle is enabled. For older forms, you must manually enable the checker individually.
Now that the checker is enabled, use the following resources to master form accessibility:
- How to Run an Accessibility Scan on Your Form
- How to Add and Improve Image Alt-Text
- How to Fix Color Contrast Issues for Better Readability
- How to Structure Headings for Screen Readers
- How to Improve Form Labels for Better Accessibility
Tip
To further ensure brand and accessibility consistency, you can create an organizational template with a pre-verified accessible theme for the form creators to use.

Send Comment: