Jotform Enterprise makes it easy to map SAML attributes so user information is transferred correctly during the login process. SAML (Security Assertion Markup Language) is a secure login method that lets users sign in through your organization’s identity provider instead of using separate login credentials for Jotform.
By mapping SAML attributes, you can control how details like names, email addresses, and user roles are matched between your identity provider and Jotform Enterprise. This helps streamline user management, automate account access, and keep your login setup more organized and secure.
Note
You must first enable the SSO Integration and configure the SAML Attributes in your identity provider before mapping them in Jotform Enterprise. Check out these helpful guides to learn more:
- How to Enable SSO Integration
- How to Configure SAML Attributes for Okta SSO Prefill
- How to Configure SAML Attributes for Google SSO Prefill
- How to Configure SAML Attributes for Microsoft Entra ID SSO Prefill
- How to Configure SAML Attributes for OneLogin SSO Prefill
- How to Configure SAML Attributes for AD FS SSO Prefill
After configuring your SAML Attributes in your identity provider, you can map them in Jotform Enterprise in just a few steps. Here’s how to get going:
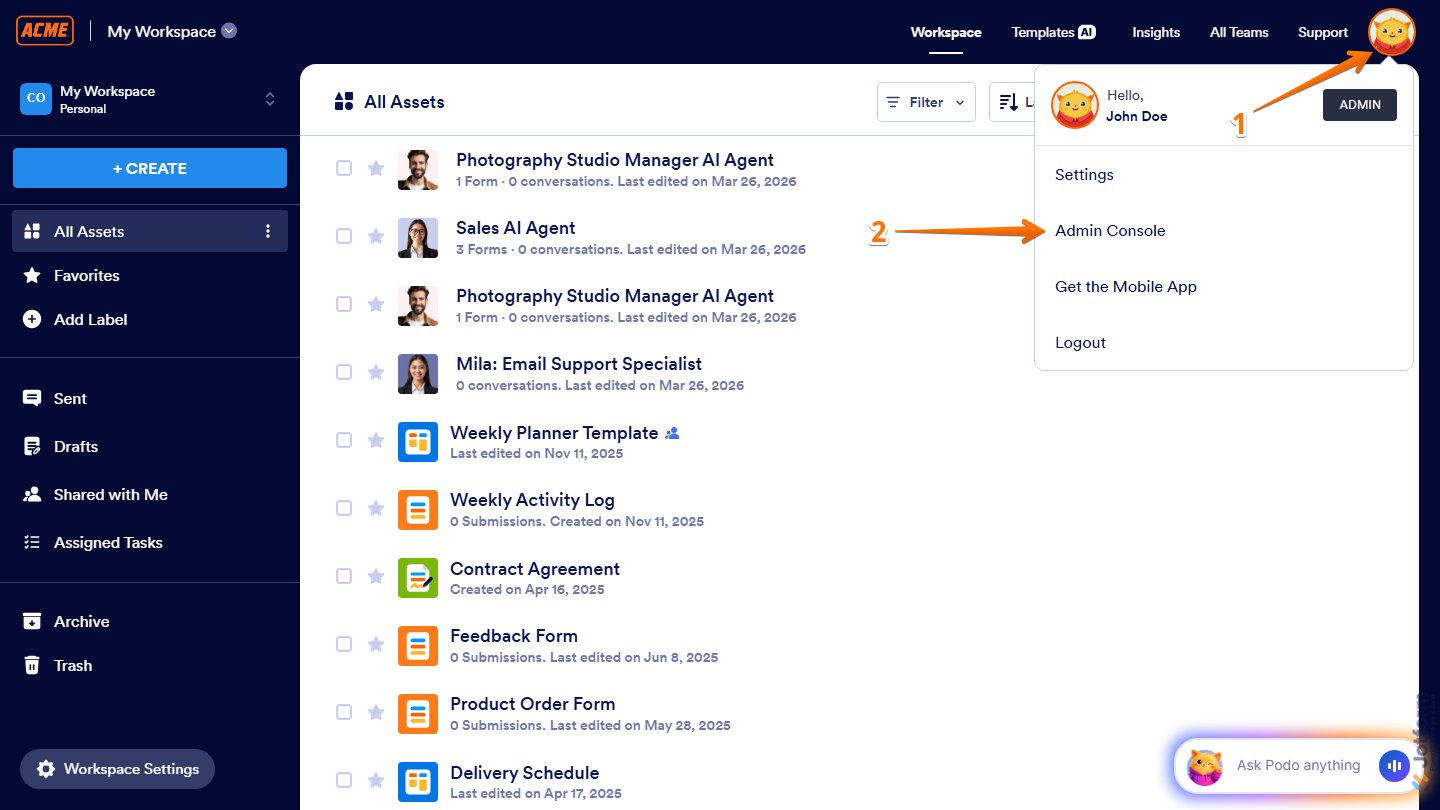
- On the top-right corner of your Workspace page, click on your Profile Picture/Avatar.
- Then, in the menu that comes up, click on Admin Console.
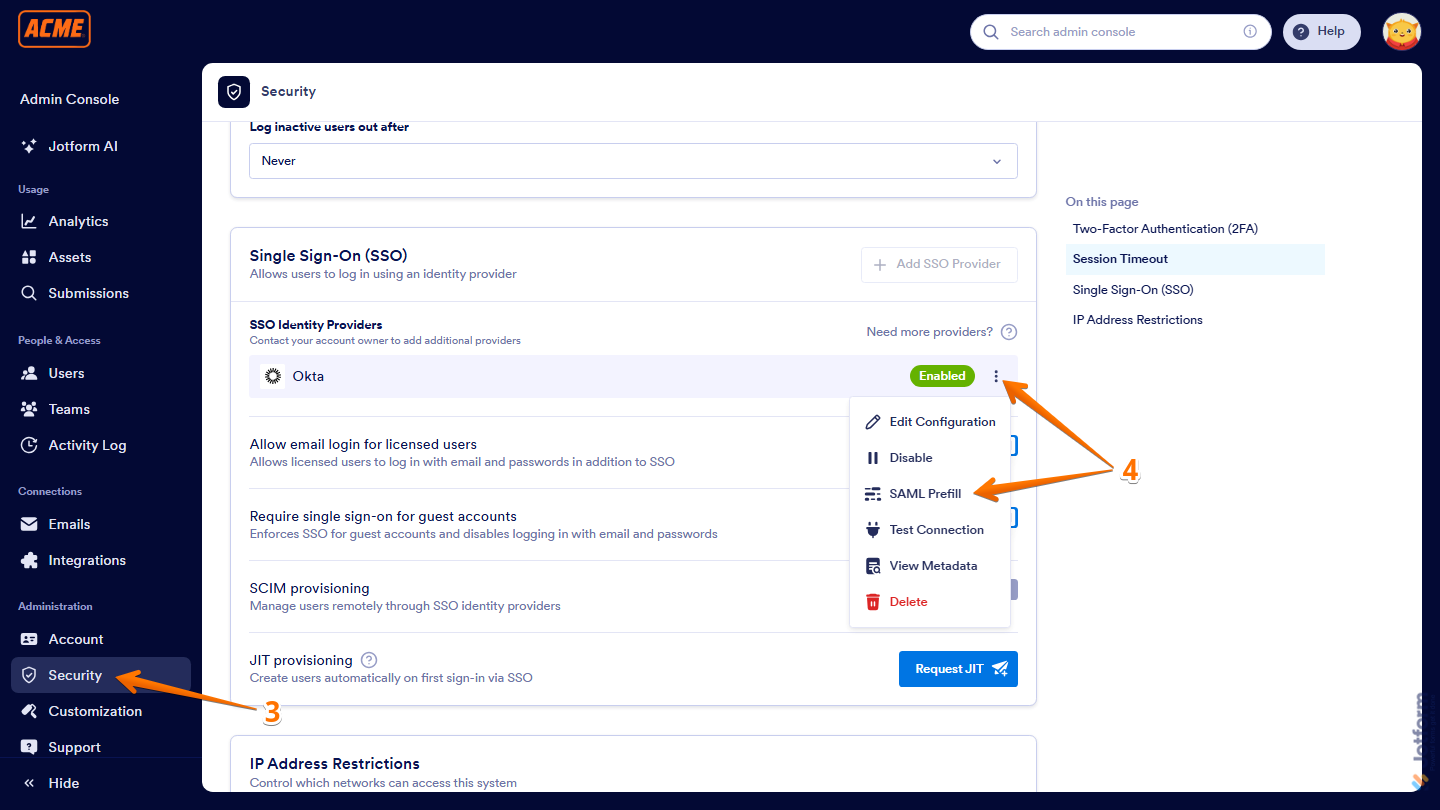
- Now, in the menu on the left side of the Admin Console page, click on Security.
- Next, scroll down and in the SSO Identity Providers section, click on the Three Dots icon on the right side of the provider, and then select SAML Prefill.
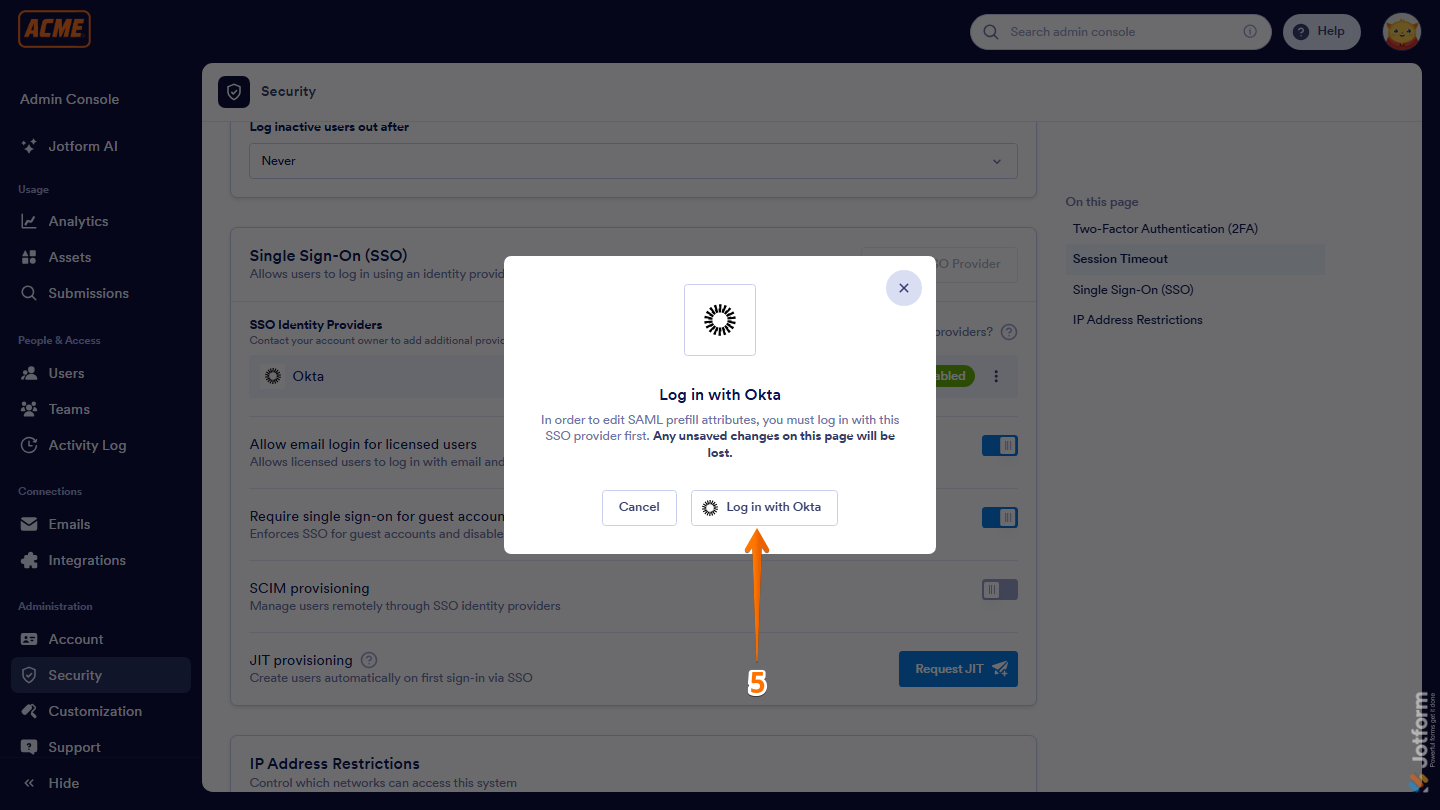
- Then, in the window that comes up, click on Login with your chosen provider to authenticate.
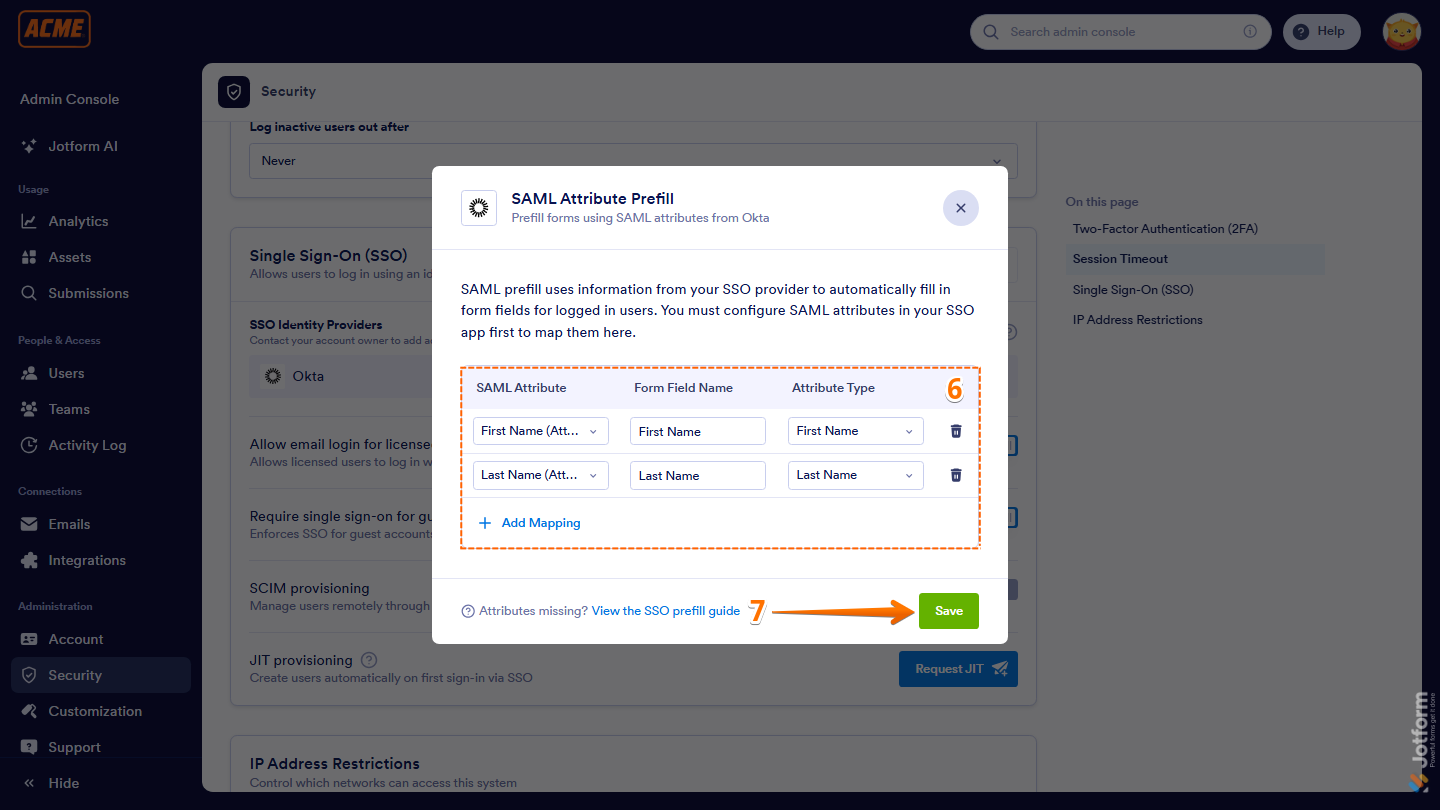
- Now, once logged in, in the SAML Attribute Prefillwindow that opens, configure the following mapping fields:
- SAML Attribute — Select the attribute from your identity provider.
- Form Field Name — Enter the form field name you want to map.
- Attribute Type — Select the type of user data you want to use.
- Once everything’s set, click on Save at the bottom of the window, and you’re done.
Pro Tip
Click Add Mapping to add more fields and map additional SAML attributes at once.
That’s it! Once saved, your SAML attributes will be mapped and ready to use. Now your users can enjoy a smoother login experience and have their info automatically filled in—no extra steps needed.

Send Comment: