


Azure Active Directory (Azure AD) is an enterprise identity service that provides single sign-on (SSO), multifactor authentication, and conditional access services that you can easily integrate with Jotform. To get started you need to enable Single Sign-On in your Jotform Enterprise server. You also need an Azure AD account with admin permissions.
Creating Your Own Application
Jotform does not have an enterprise gallery application in Azure AD, so you need to add a non-gallery application to your Azure AD and configure it to use SAML-based SSO.
To create your own application
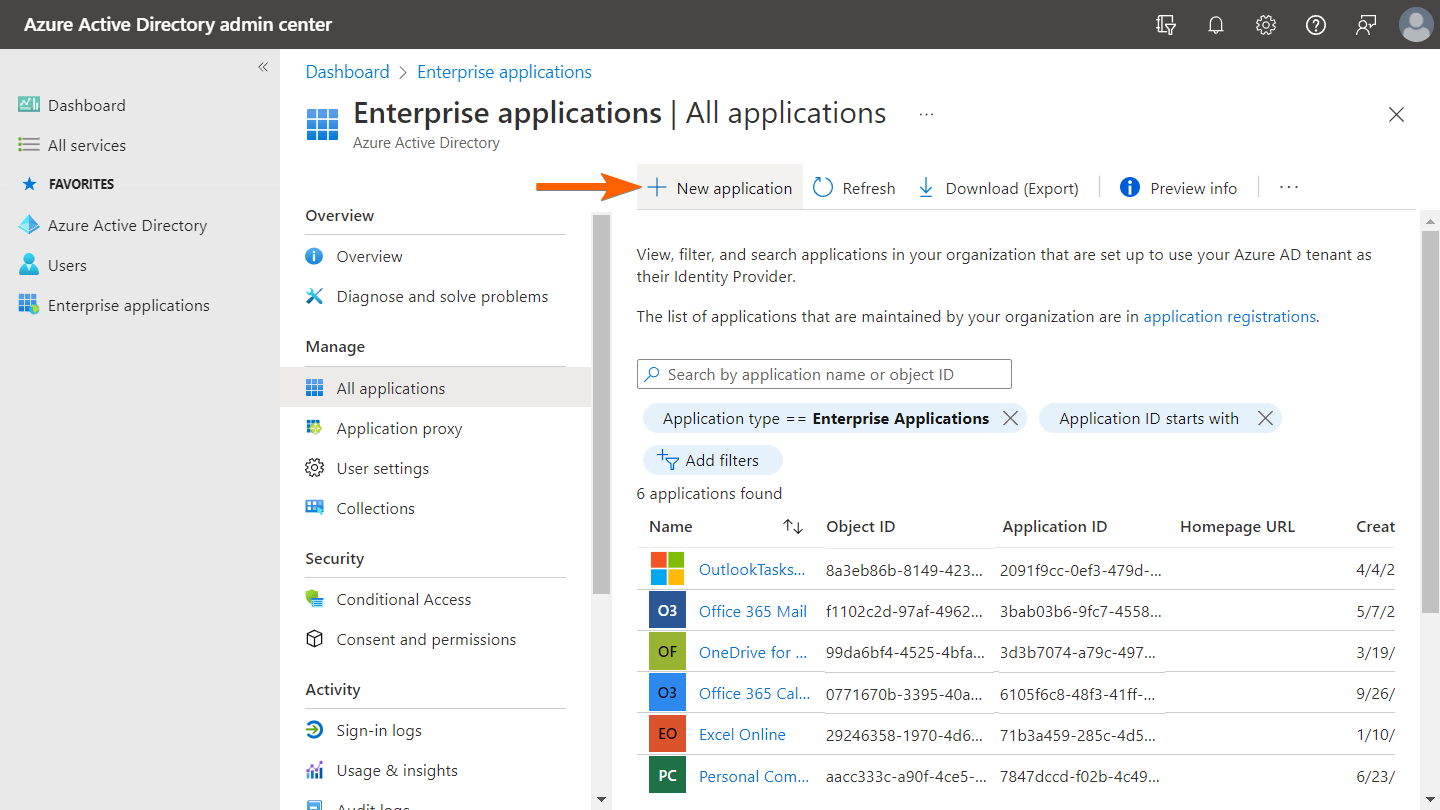
- Log in to your Azure AD admin center.
- On the left, go to Enterprise applications.

- On the next page, select New application.
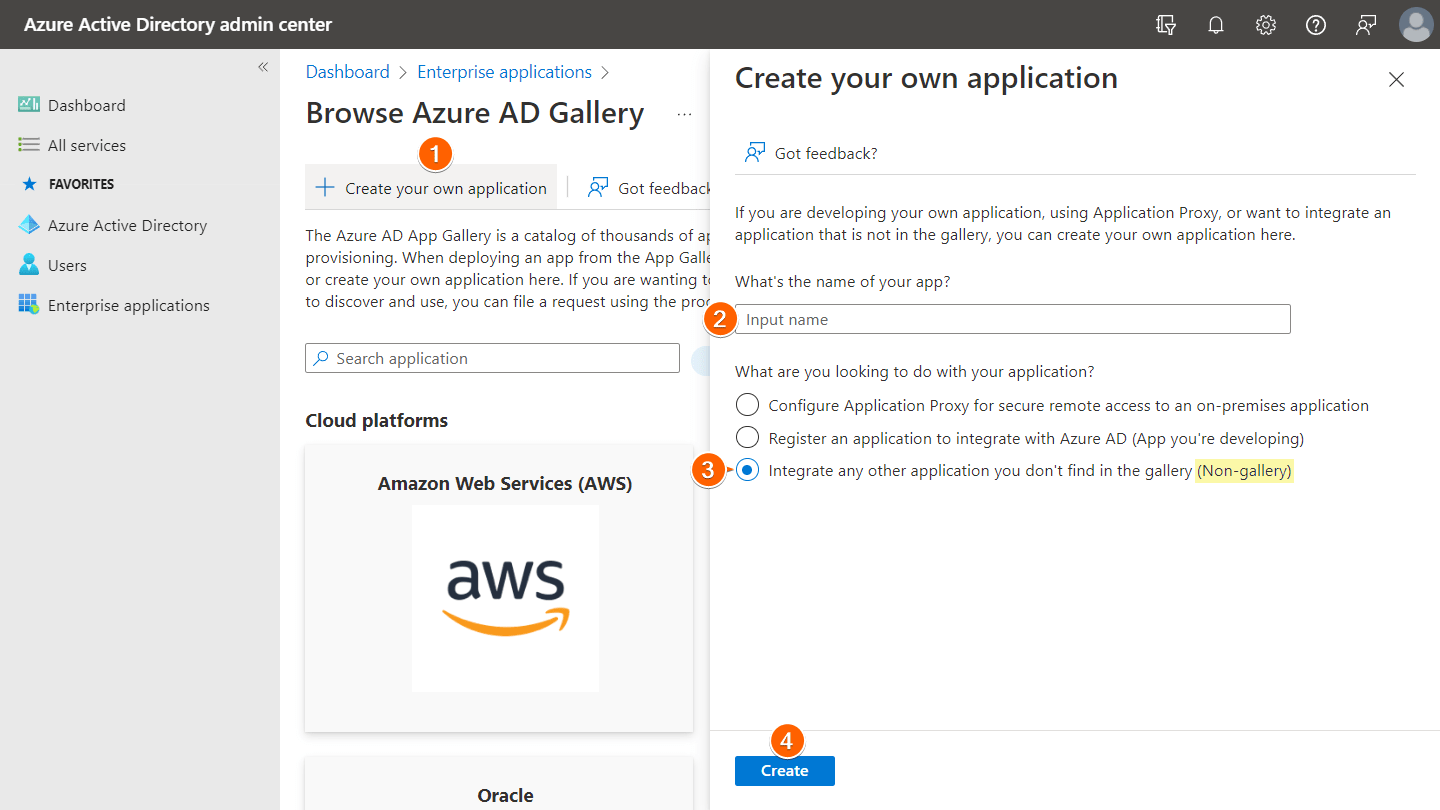
- Next, select Create your own application.
- Enter a name for your app.
- Select the Non-gallery option, then Create at the bottom.
The setup wizard will redirect you to the app’s overview page once your app is created. Proceed to the next section to configure your Security Assertion Markup Language (SAML).
Setting Up Single Sign-On With SAML
To configure SAML
- On your app‘s overview page, go to Single sign-on under Manage on the left, then select SAML.
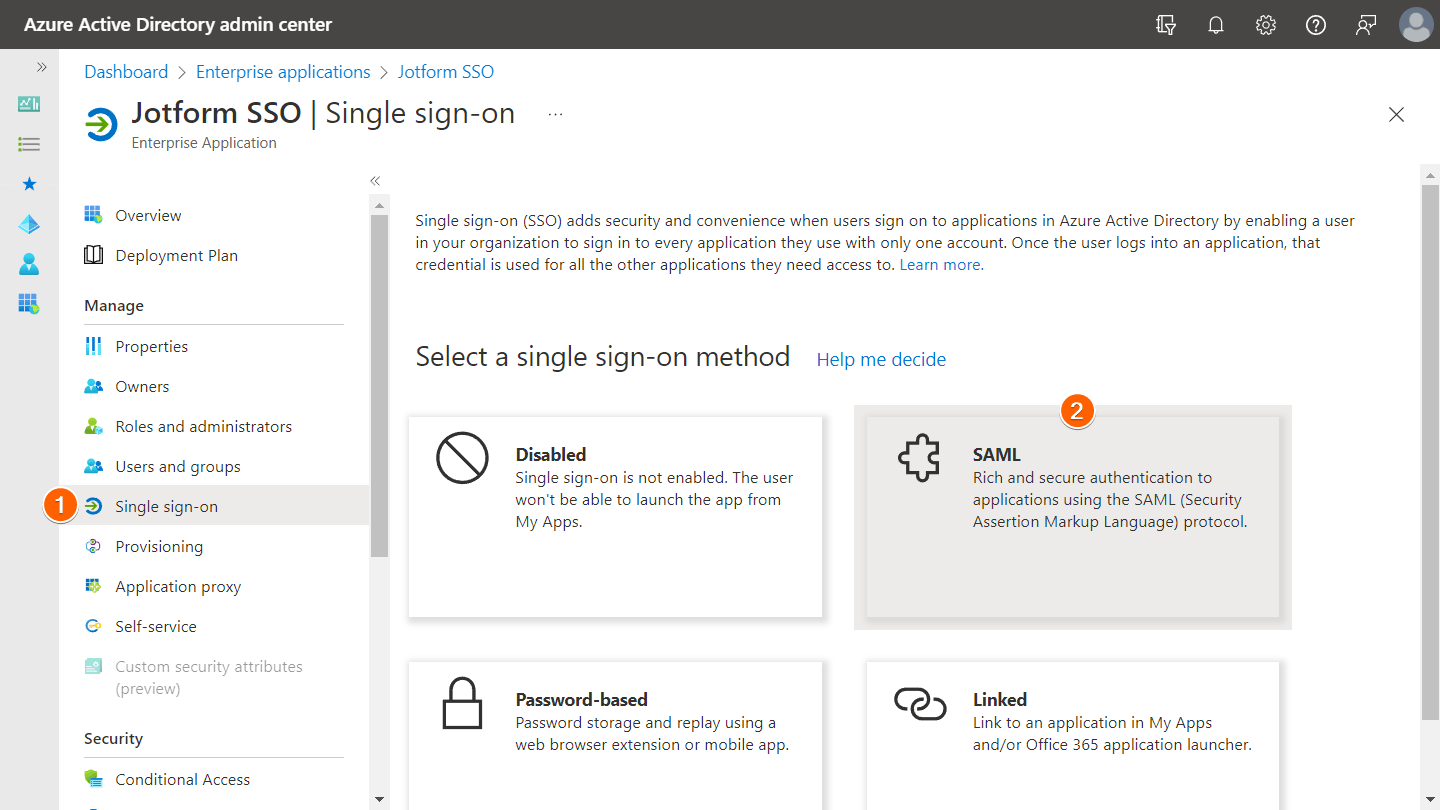
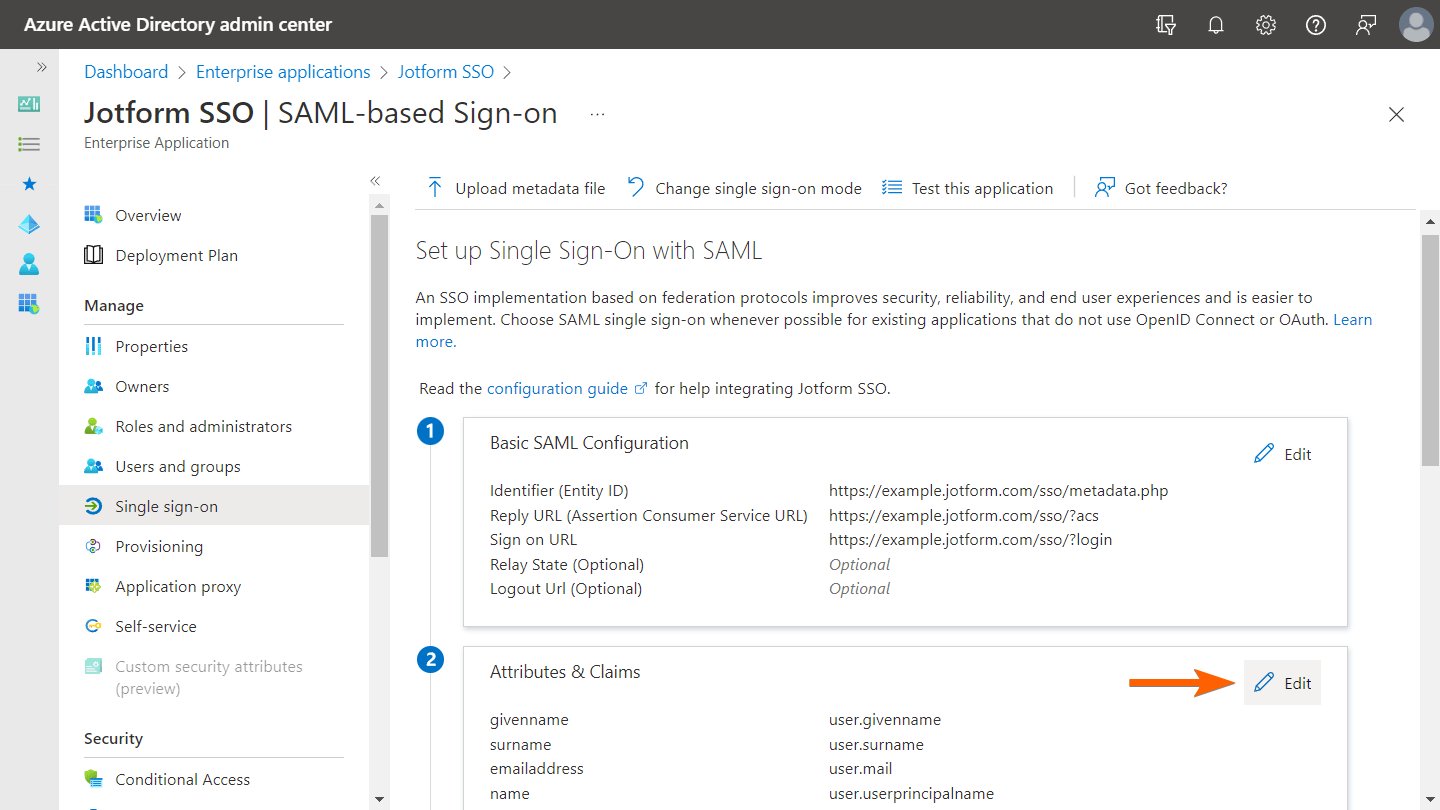
This will open the “Set up Single Sign-On with SAML” setup wizard which consists of five parts. Continue by completing the first two parts — Basic SAML Configuration and User Attributes & Claims.
- Edit the first part, Basic SAML Configuration.
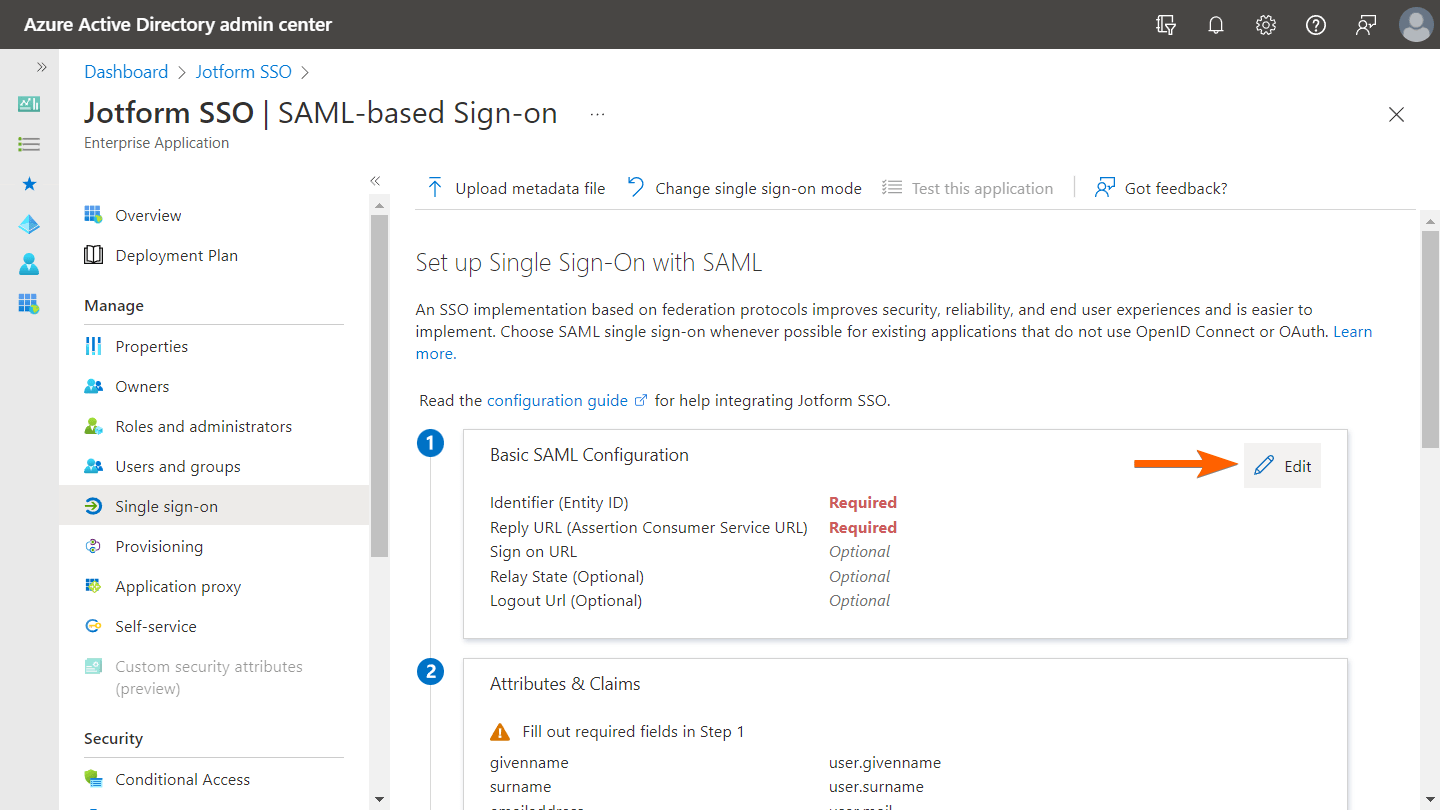
- Next, enter your Service Provider Metadata links.
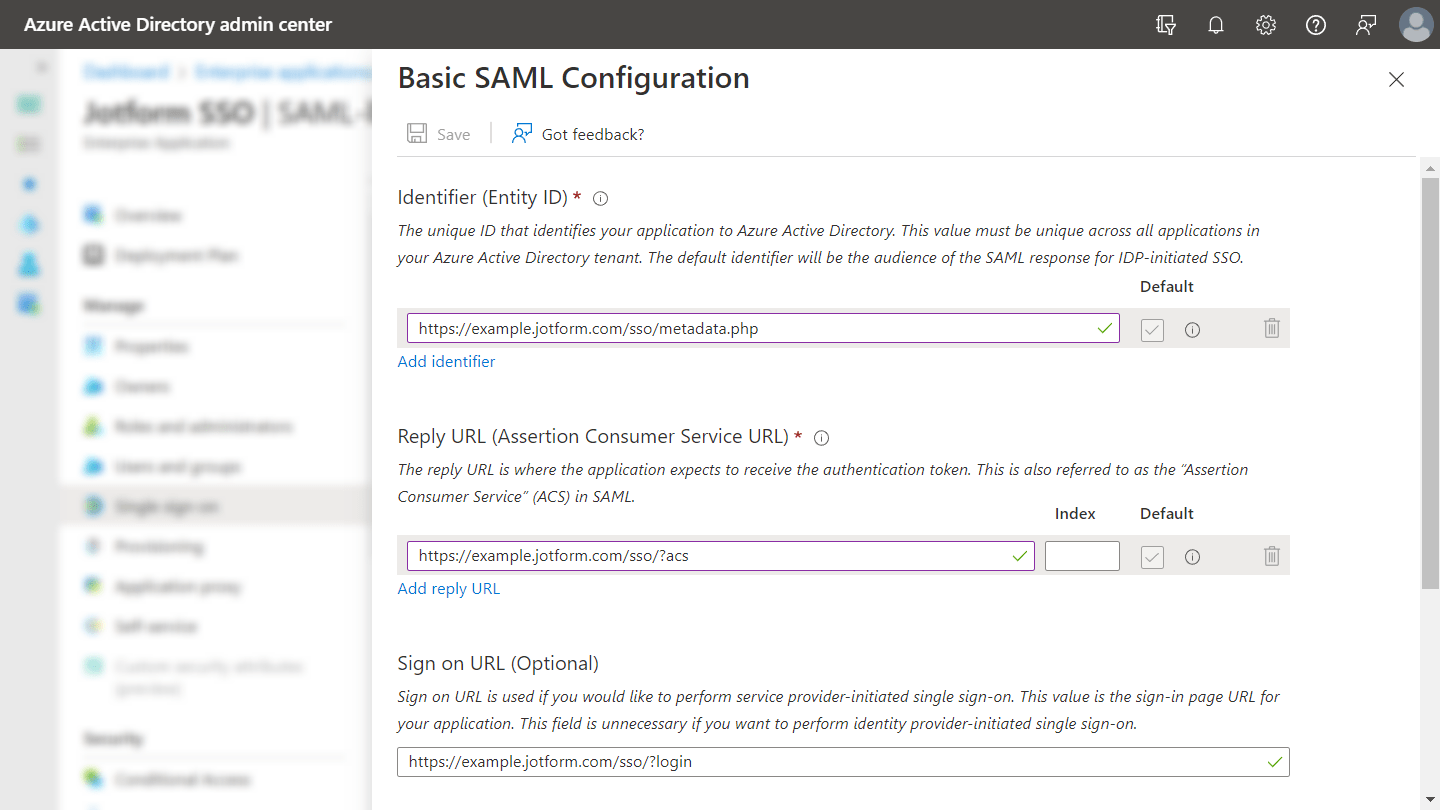
The value to use for each field is as follows:
- Identifier (Entity ID) — Use your Jotform Entity ID
(e.g., https://example.jotform.com/sso/metadata.php). - Reply URL (Assertion Consumer Service URL) — Use your Jotform Service Provider Assertion Consumer Service URL
(e.g., https://example.jotform.com/sso/?acs). - Sign on URL (Optional) — Use your Jotform Service Provider Assertion Consumer Service URL but replace
?acswith?login
(e.g., https://example.jotform.com/sso/?login).
- Save the changes, then exit the Basic SAML Configuration wizard.
- Now, edit the second part, Attributes & Claims.
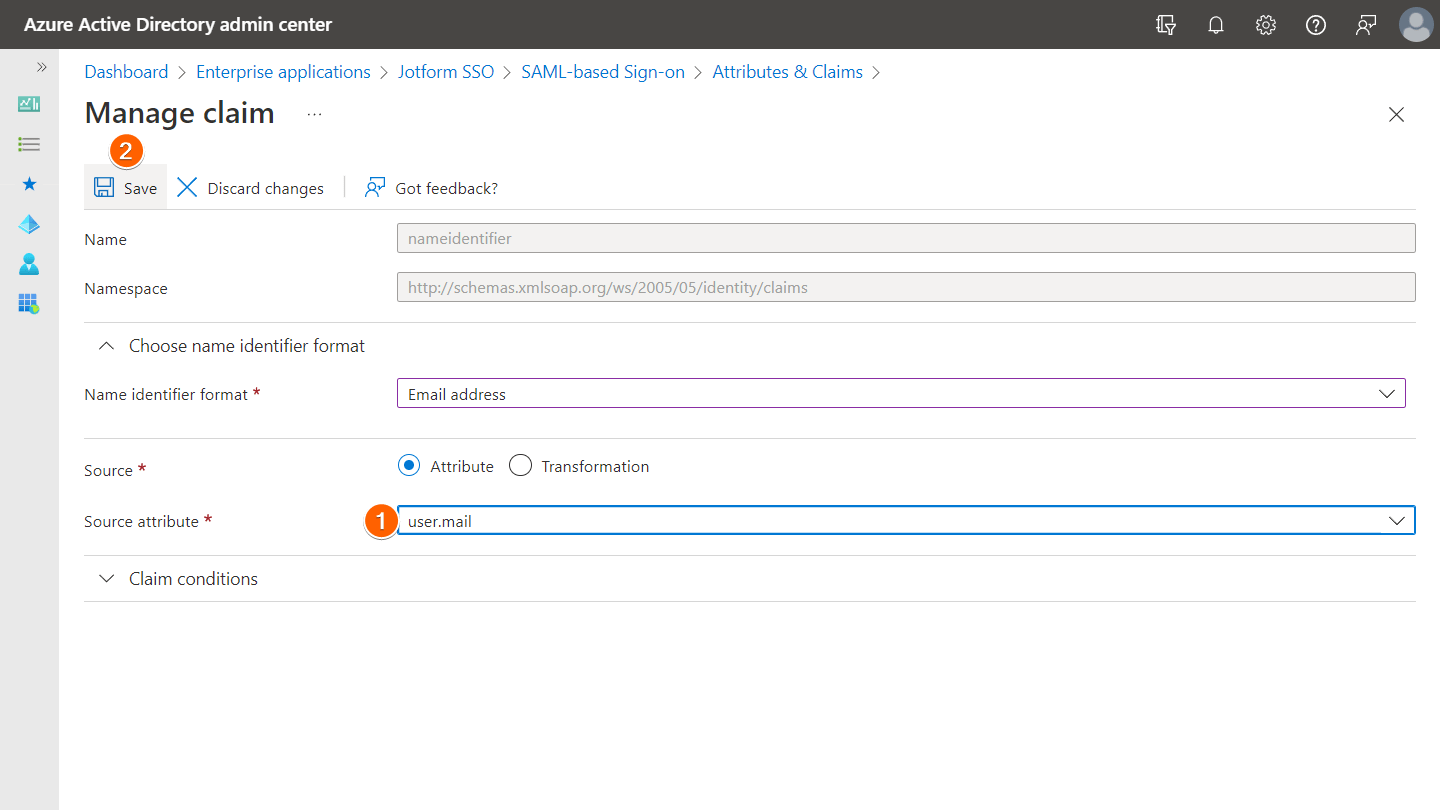
- On the next page, select Unique User Identifier (Name ID).
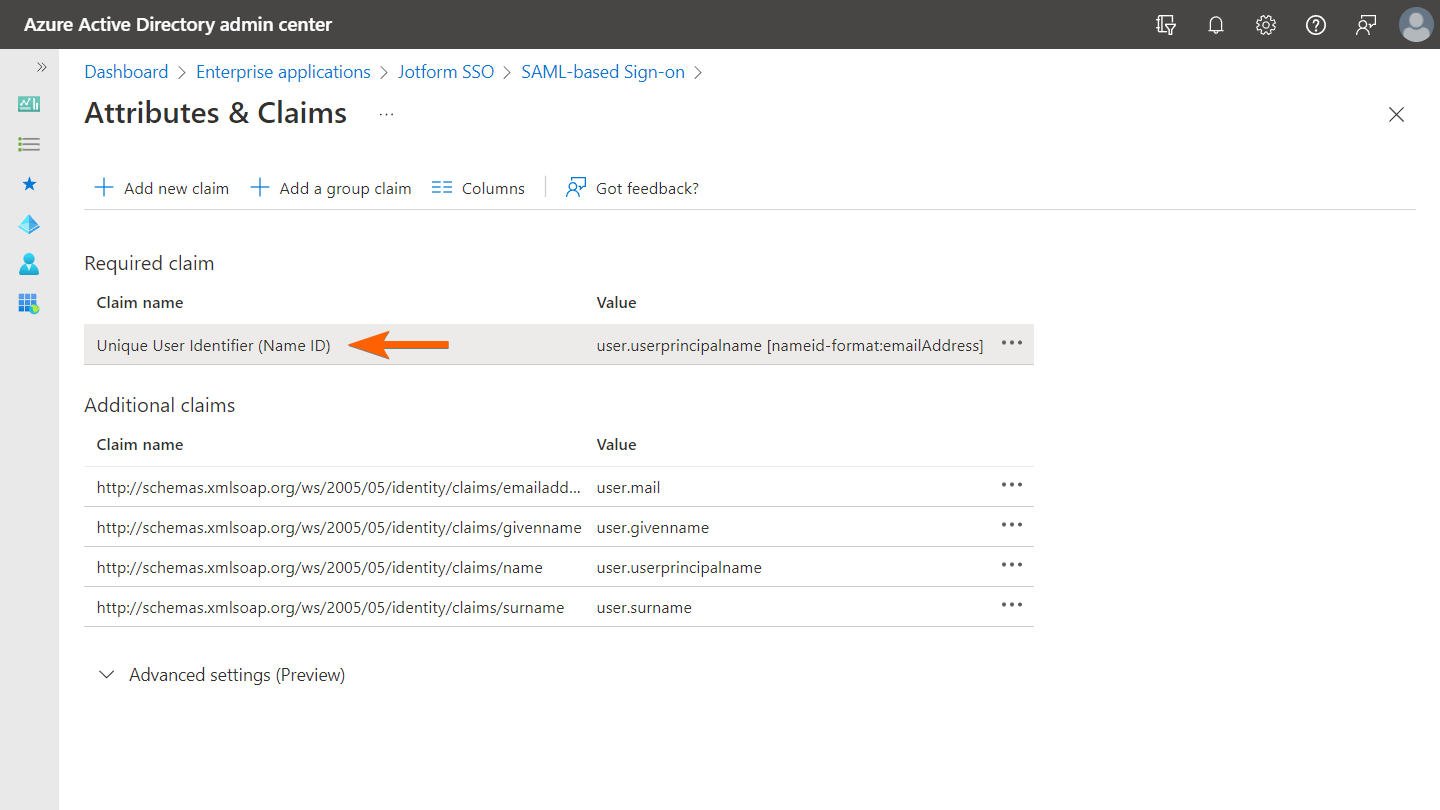
- In the Source attribute field, enter user.mail.
- Save the changes, then exit the Attributes & Claims setup wizard.
Once that’s done, proceed to the next section to configure the Identity Provider Metadata settings in Jotform.
Integrating Azure AD SSO With Jotform
After completing the initial setup, Basic SAML Configuration and User Attributes & Claims settings, in your app, the next step is to provide your Azure AD details — which you can find in parts three and four of the “Set up Single Sign-On with SAML” setup wizard — to Jotform.
To integrate your Azure AD SSO with Jotform
- In the “Set up Single Sign-On with SAML” setup wizard, scroll down to the SAML Signing Certificate section and download Certificate (Base64).
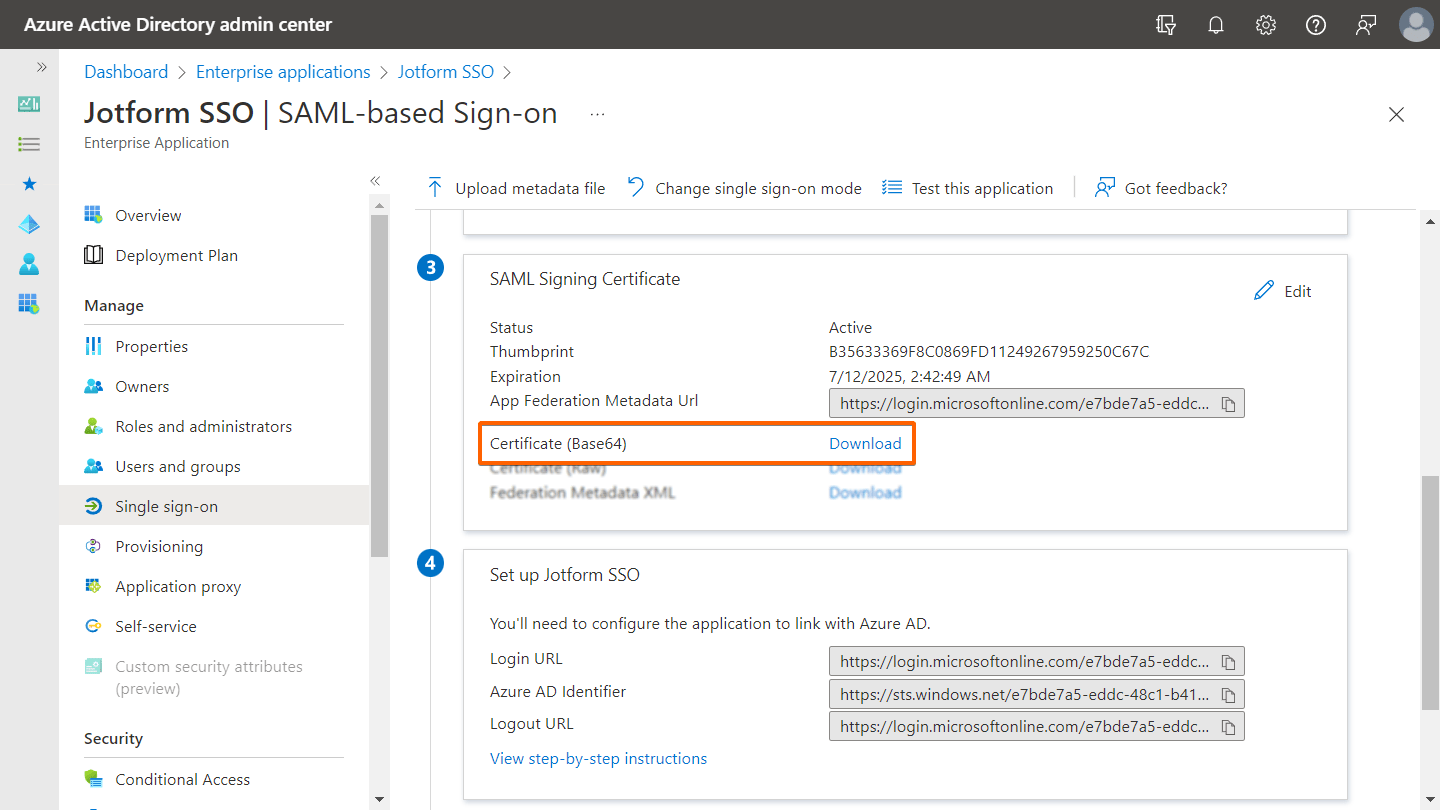
- Next, take note of your app’s Login URL and Azure AD Identifier URLs just below the certificate section.
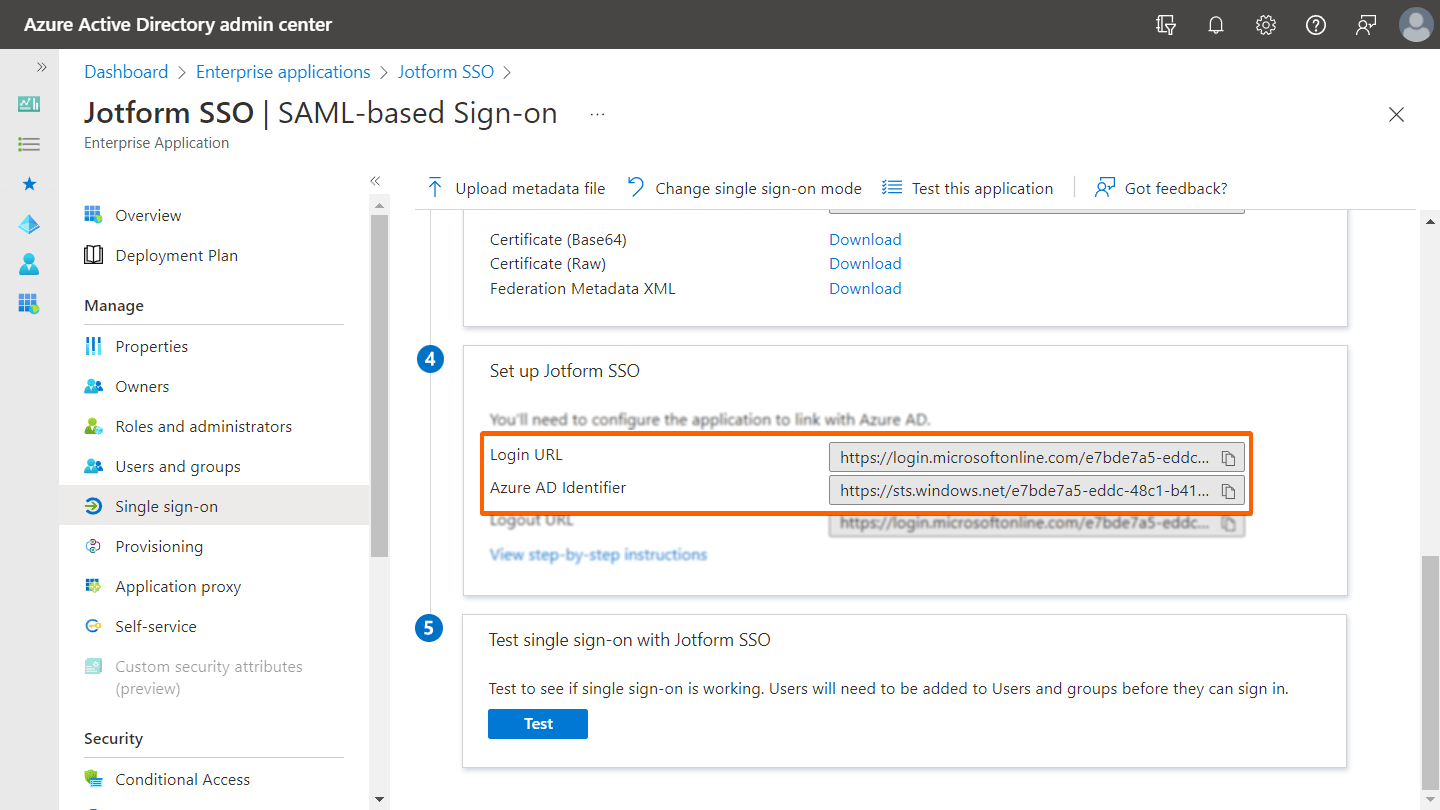
- Now, open your Jotform SSO settings page in a new tab and enter the details in the Identity Provider Metadata fields.

The value to use for each field is as follows:
- Entity ID — Use your Azure AD Identifier.
- SSO URL — Use your Azure AD Login URL.
- Certificate — Use your Azure AD Certificate (Base64) file’s content.
Note: To view your certificate, open it with a text editor (i.e., Notepad, TextEdit).
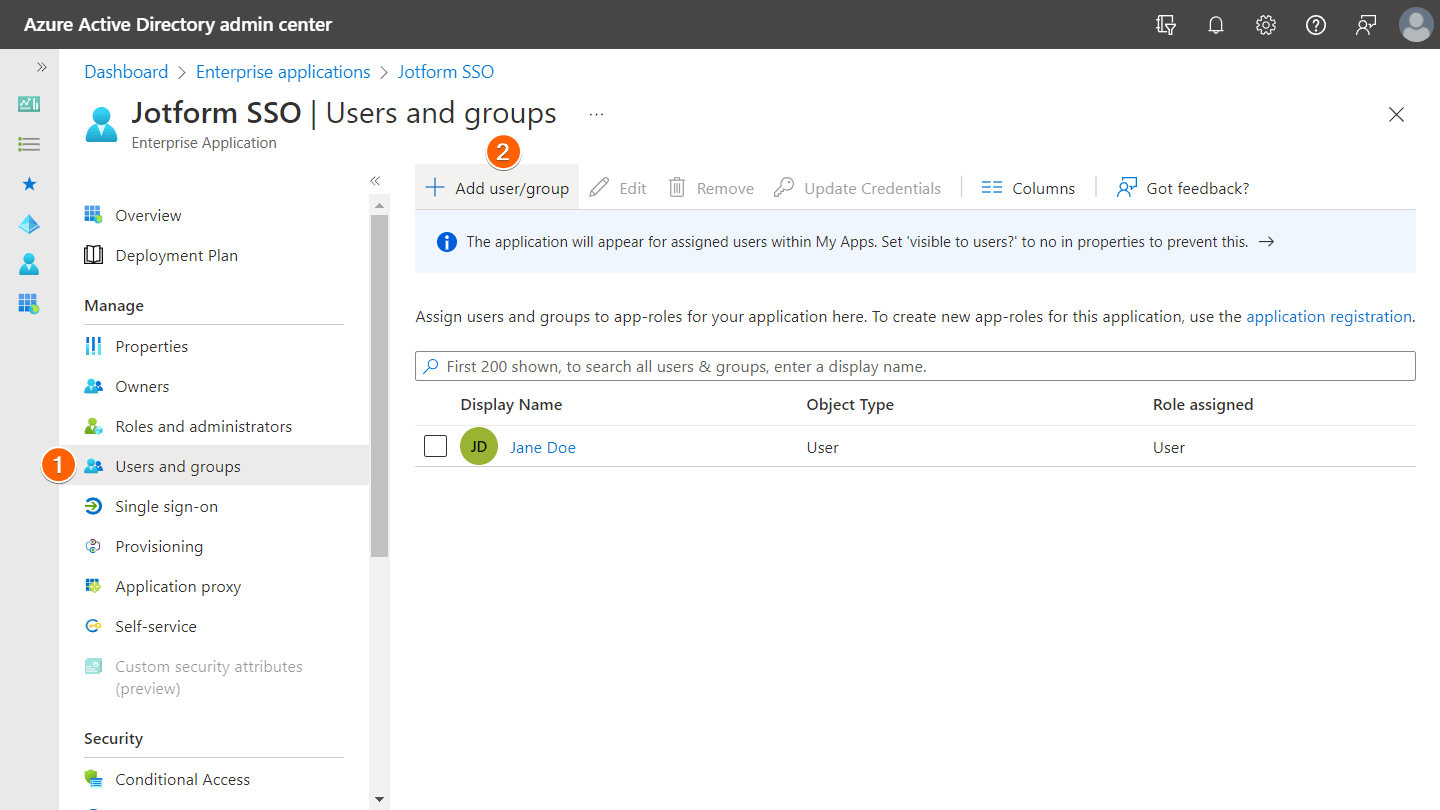
- Go back to your Azure AD SAML app page and assign your app to a user or group.
- Finally, go back to your Jotform SSO settings page and save your configuration.
Send Comment: