As any fiscal year draws to a close, businesses of all shapes and sizes would be tallying their inventory. This data will serve as a benchmark to inform their stock requirements for the year ahead, which makes it a crucial tool for businesses to ensure they’ll have enough supply to meet projected demand for the next year — but not so much that they’ll lose money because of surplus inventory.
An inventory spreadsheet can help you track and catalog your inventory data. While there are plenty of resources out there to help you make your own inventory spreadsheet, using a tool like Jotform Tables is even easier. This spreadsheet-powered online database platform has all the functionality you need to accurately and securely record your inventory data anytime, anywhere, from any device. And best of all — it’s free!
With Jotform Tables, you can start an inventory spreadsheet from scratch, or choose from our selection of over a dozen premade inventory templates so you can start entering your data right away. If you need to enter any additional information, don’t worry. These templates are fully customizable. You can use them as a starting point to meet your specific inventory management requirements.
Below is an overview of how to get started with both options, so you can decide what’s right for you.
Starting from scratch
Step 1: Create a new table
Maybe your business doesn’t require all the complexity of our inventory templates. Perhaps you just want something quick and easy to catalog a few items. In that case, it might be simpler to start by creating a new table from scratch.
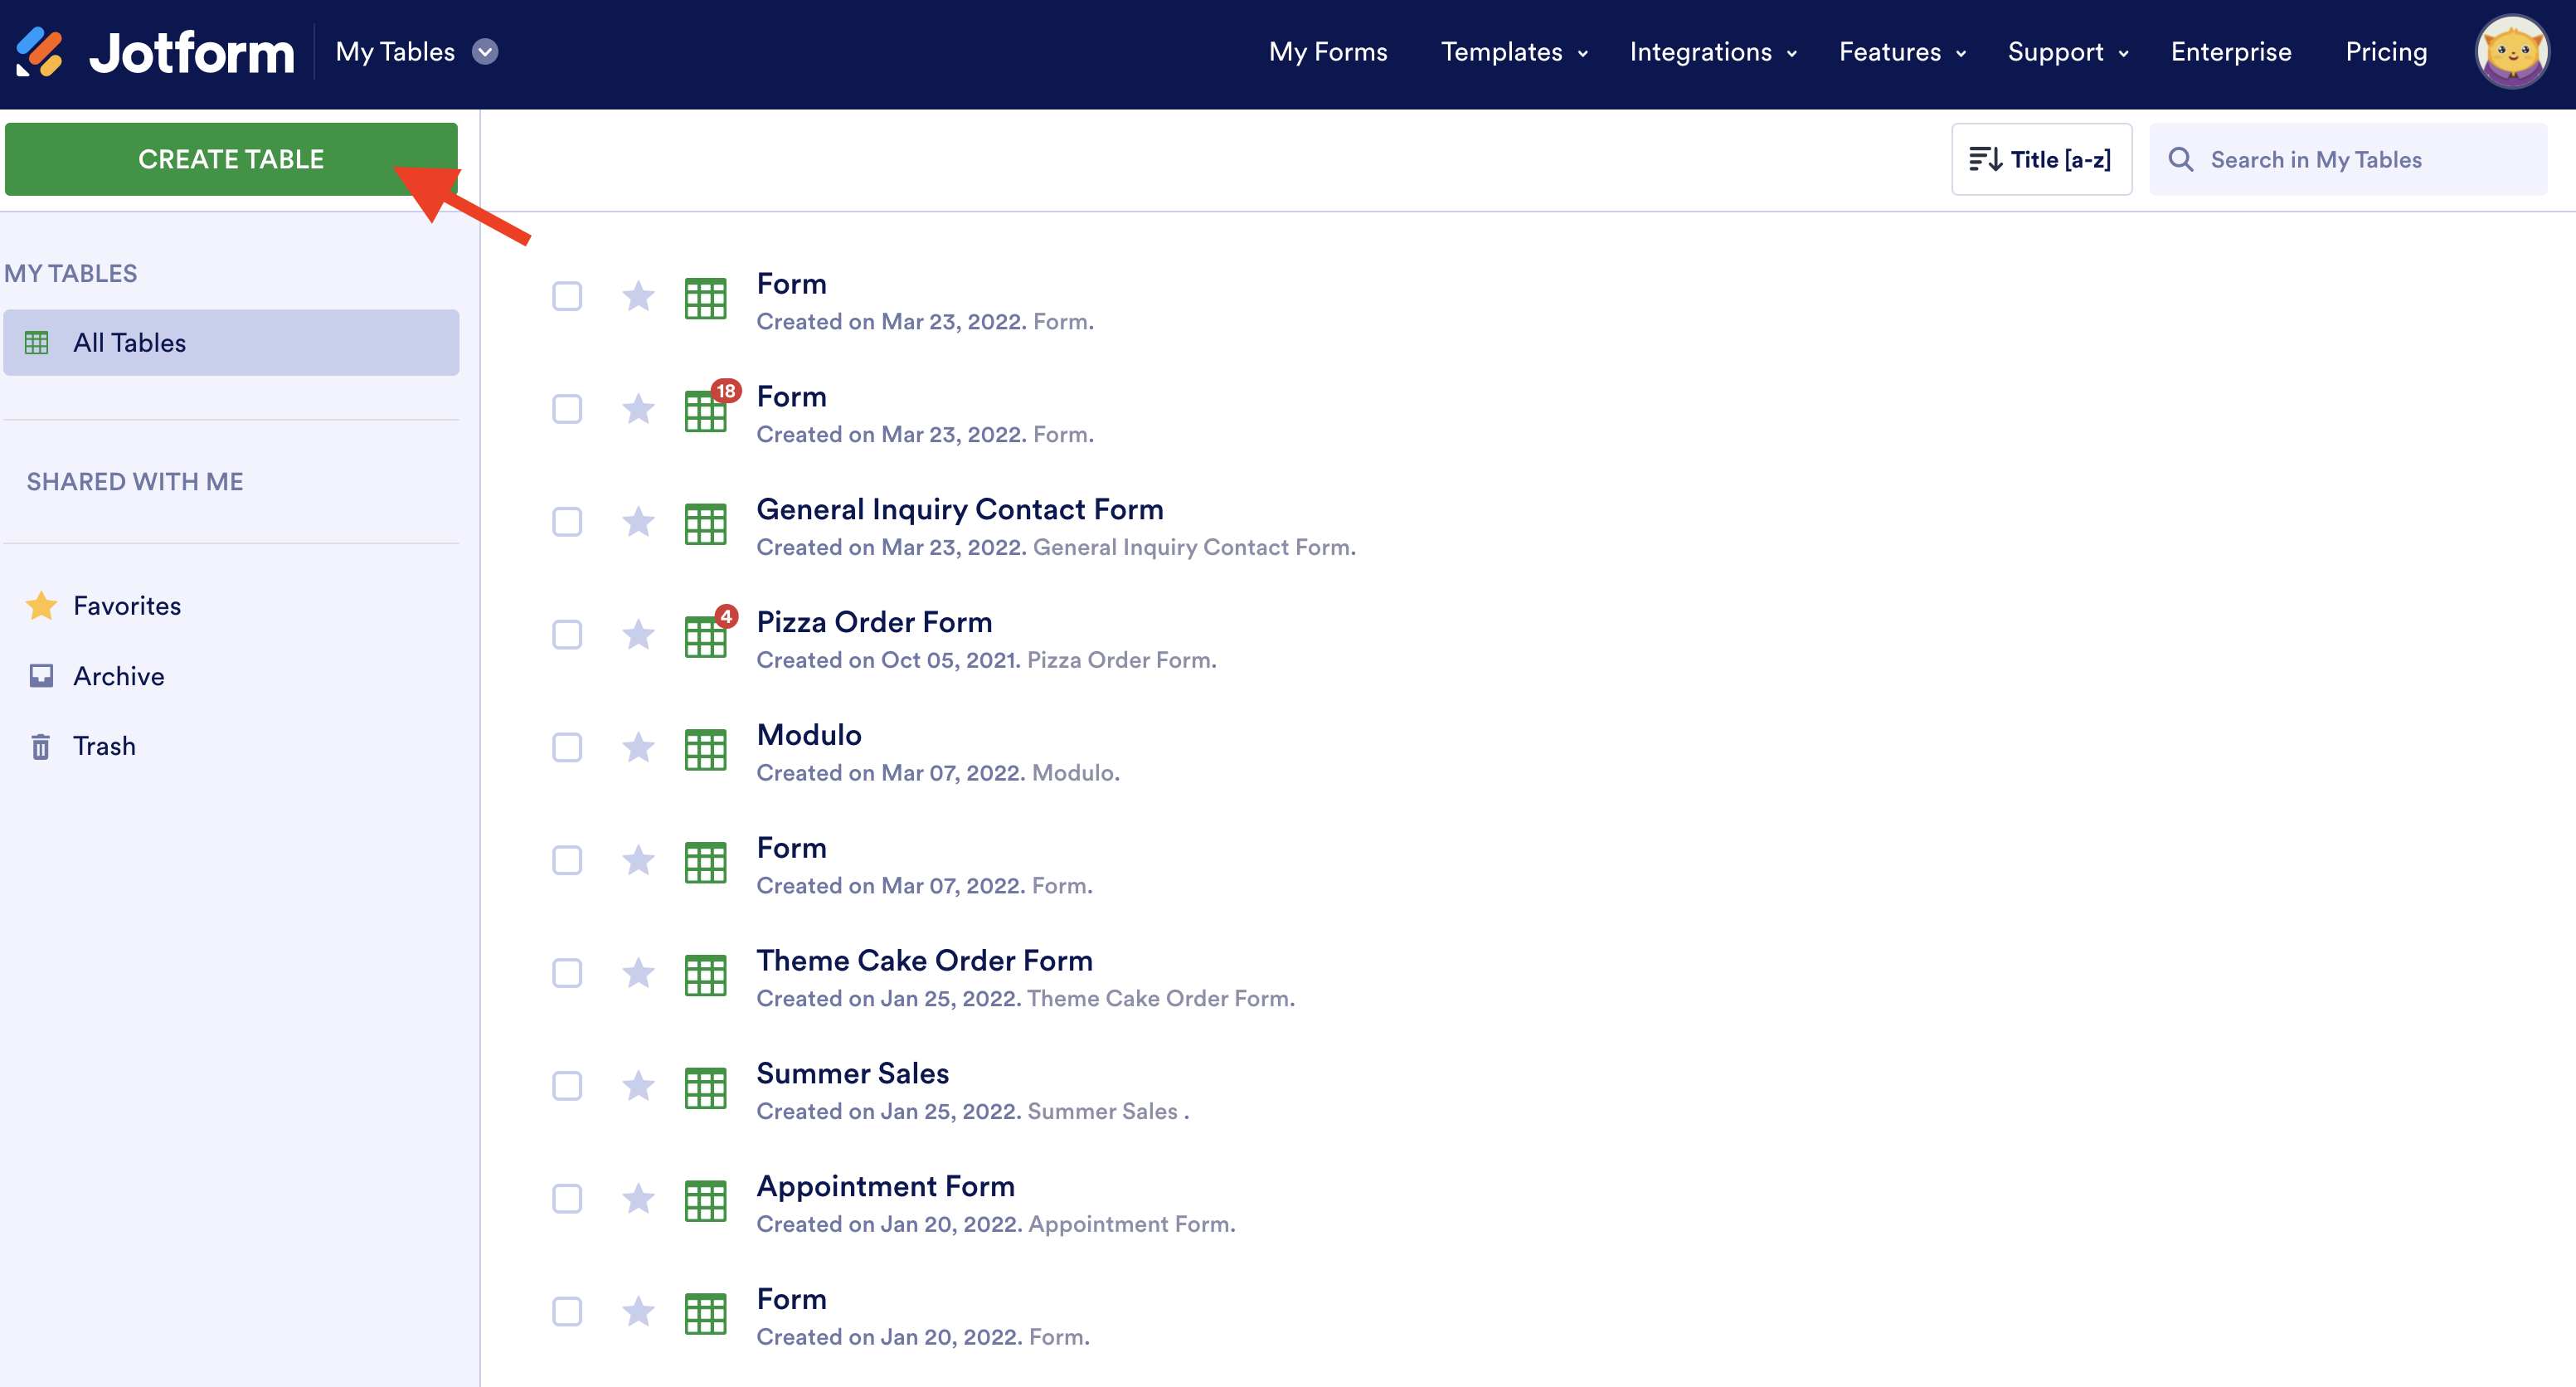
From the My Tables page, click on Create Table at the top left of your screen.
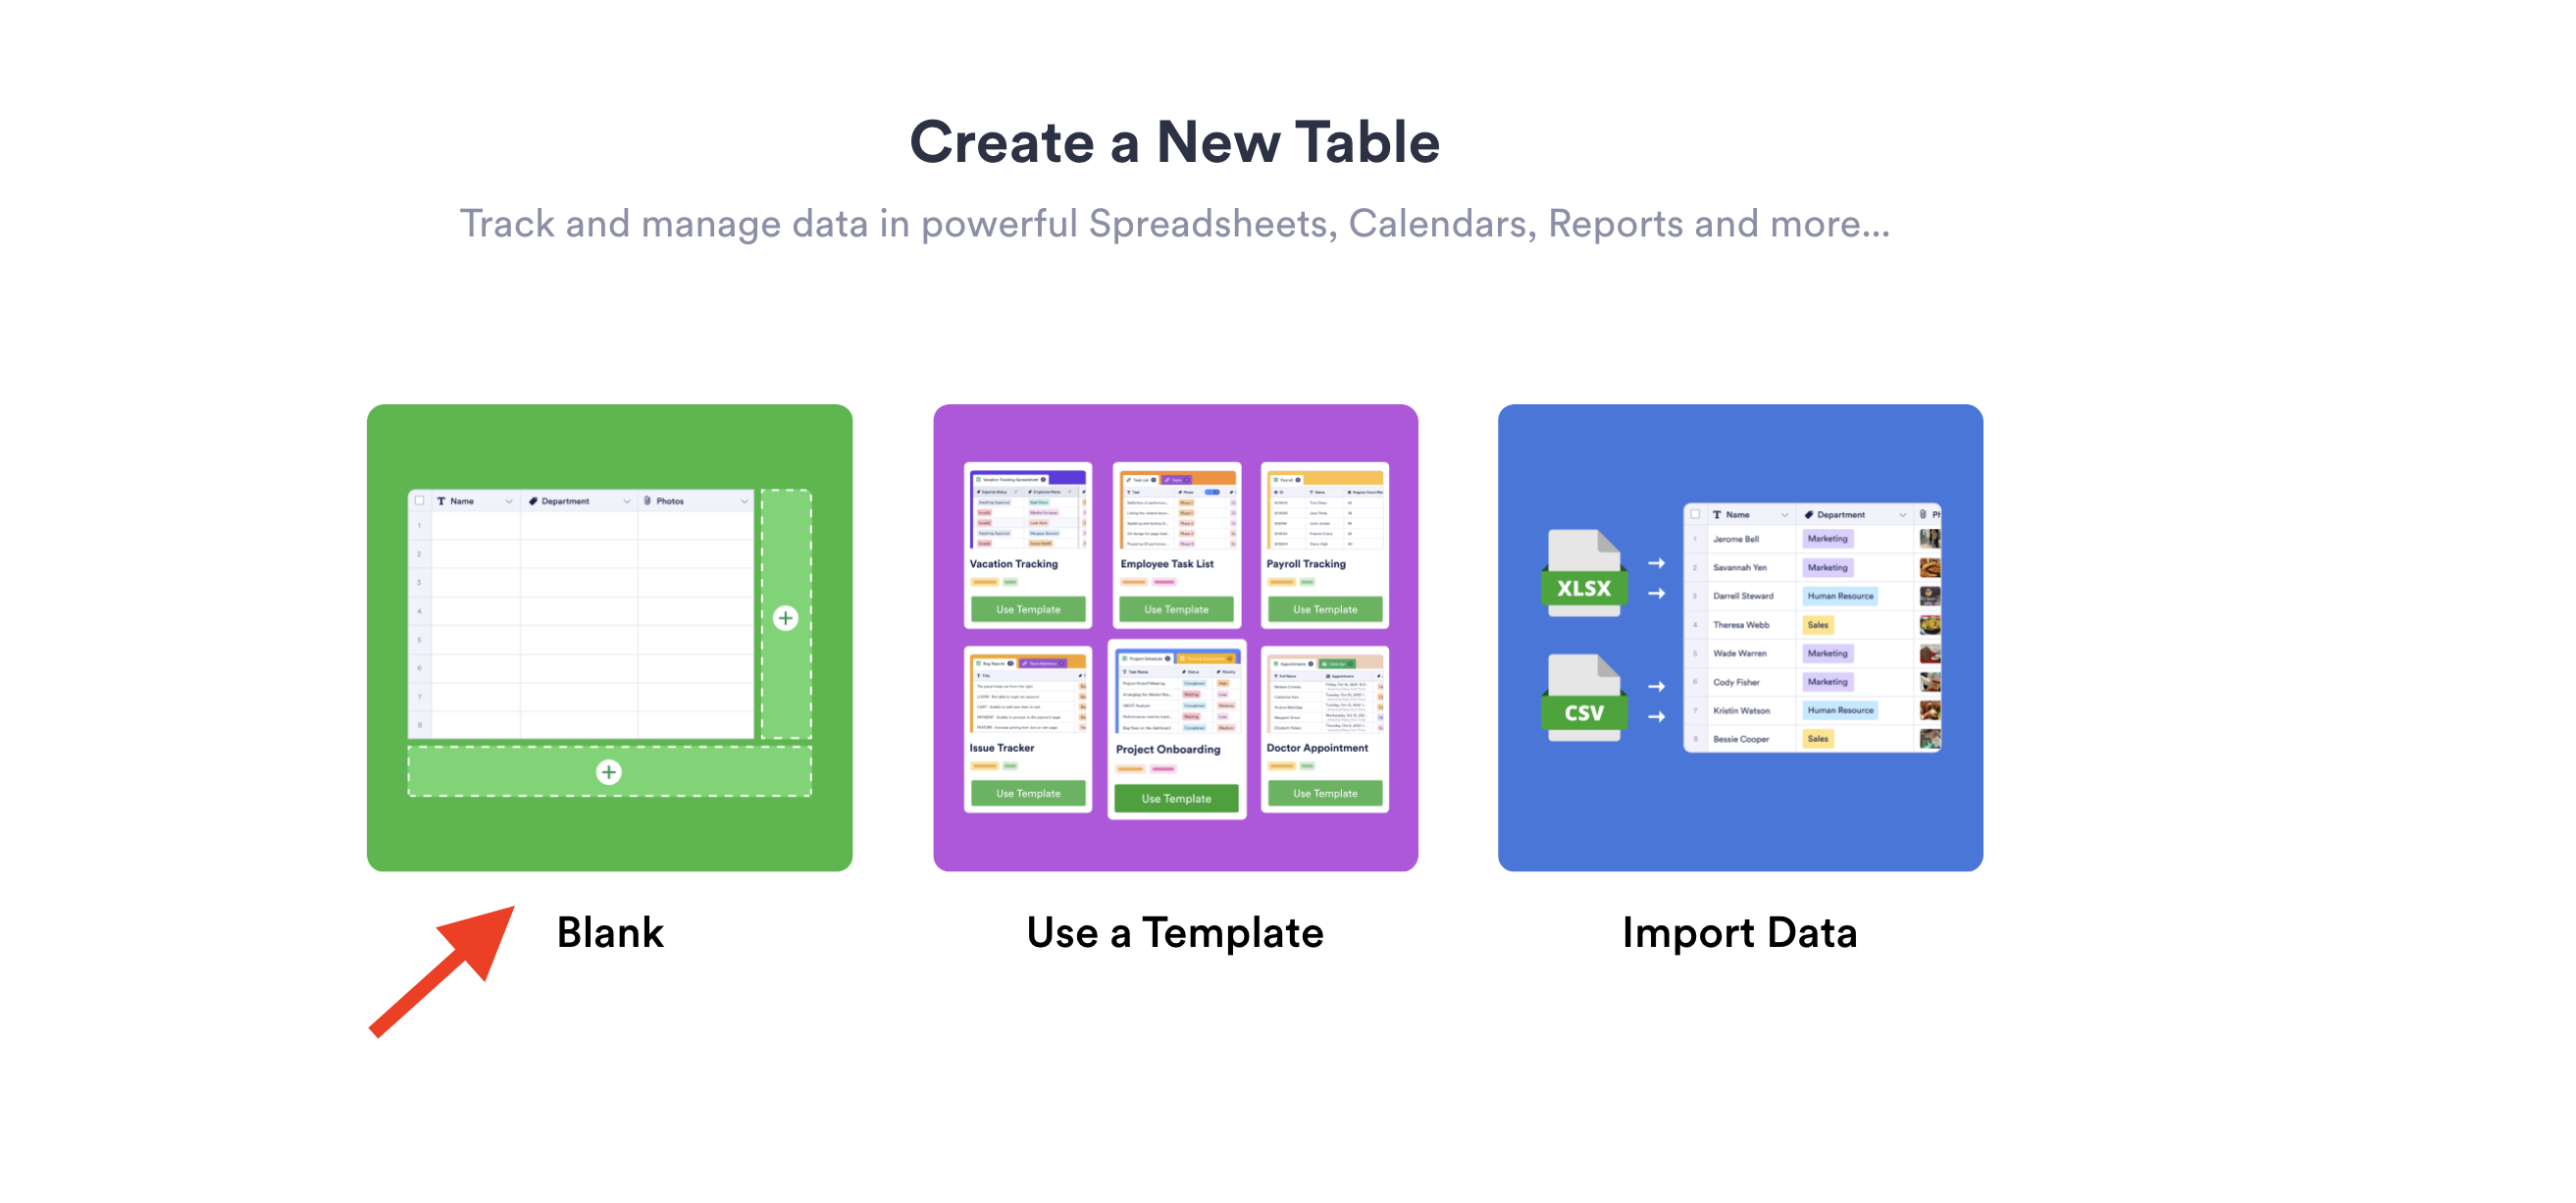
From there, you’ll have three options: Create a Blank table, Use a Template, or Import Data. We’ll select Blank to bring up an empty table.
Step 2: Set up your columns
After naming your spreadsheet, set up your columns to capture the type of inventory data you need to track. (By default, blank tables start with columns labeled Name, Email, and Notes, which you can probably delete in this case). These columns will vary depending on your specific needs. In almost all cases though, you’ll need to denote Product name, Quantity, and Price.
To begin, add a column by clicking the Add button toward the top right of the page, and select an option that corresponds with the type of data you’ll be tracking — e.g., Short text for product name, Number for quantity and price (you can enable currency mode with this option), etc.
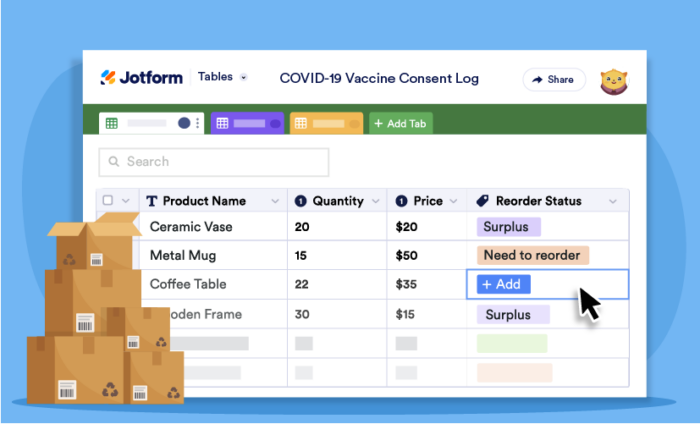
In most situations, you’ll need more than just these three columns to properly manage your inventory. It might be useful to have a Reorder status column, where you can select a status option. To add this type of column, choose Multiple Selection when given the choice, then type in the answers you want to be able to choose for that column.
The screenshot below shows how this very simple inventory spreadsheet will look:

You can build off this layout until it meets your specific requirements; just follow the steps above to add new columns.
As easy as that, you have your very own custom-made inventory spreadsheet tailored to your business!
Starting with a template
Step 1: Select a template that matches your use case
If your inventory system is more complex, or if you just want a fully functioning spreadsheet to customize at the click of a button, then our inventory templates gallery might be the best place for you to start. Here you’ll find 13 templates — some generic, others tailored to suit a variety of industries, such as
- Product Inventory Template
- Equipment Inventory Template
- Restaurant Inventory Template
- Order Tracker Template
- Office Inventory Template
- Art Inventory Template
- Asset Inventory Template
If you can’t find something that matches your industry, odds are you can find an alternative that’s pretty close and easily adapt it to fit your needs.
Pro tip
You can “preview” each template to learn more about its uses and to see a demo.
Step 2: Customize your template
Once you’ve selected your template and opened it, you’ll see how it’s automatically set up to track specific products or inventory for a specific industry. You’ll also see sample data already populated in the cells to give you an idea how it should be filled out. (Feel free to delete this once you’ve got a hang of the formatting.) Many templates even have additional tabs where you can track items related to the inventory in question.

From here, you can customize your spreadsheet in a similar manner as described above. Need to add a few dozen rows to your column for additional inventory entries or a new column with a checkbox to denote completed ship dates? Go for it.
Need to rearrange or delete a few columns or rows that aren’t relevant to what you’re tracking? Be our guest. You can even import a shipping address list via CSV file to have ready and available for reference on the same table as the inventory that needs to be shipped. (Psst! To do this — or to import any other data from an existing file — when you add a new column or tab, just select Import from file and upload.)
As you’ll discover, the data, columns, and framework of each template are 100-percent adaptable to help you get what you need out of your inventory spreadsheet.
Conclusion
Businesses certainly have their own challenges, but tracking the ending inventory for the fiscal year doesn’t need to be one of them. Hopefully one of the methods outlined here can help you leverage Jotform Tables to provide a solution, or simply a smoother process, for managing your business’s year-end inventory.


Send Comment: