


When a form is submitted, a thank you message is displayed. Most of the time, your workflow ends there. In some instances, you might want to let users fill the same form again or redirect users to another form, blank form or carry the same data. In old times, you manually create a link and add that link to the thank you page. The same when providing a way for users to edit their submission and download a PDF copy of their entry. Action Buttons in your form’s Thank You Page will make all these seamlessly possible in just a few clicks.
Action Buttons are available in both Classic and Card Forms. For Card Forms, you have to scroll down at the bottom of the form and click the Edit Thank You Page. For Classic Forms, navigate to the following:
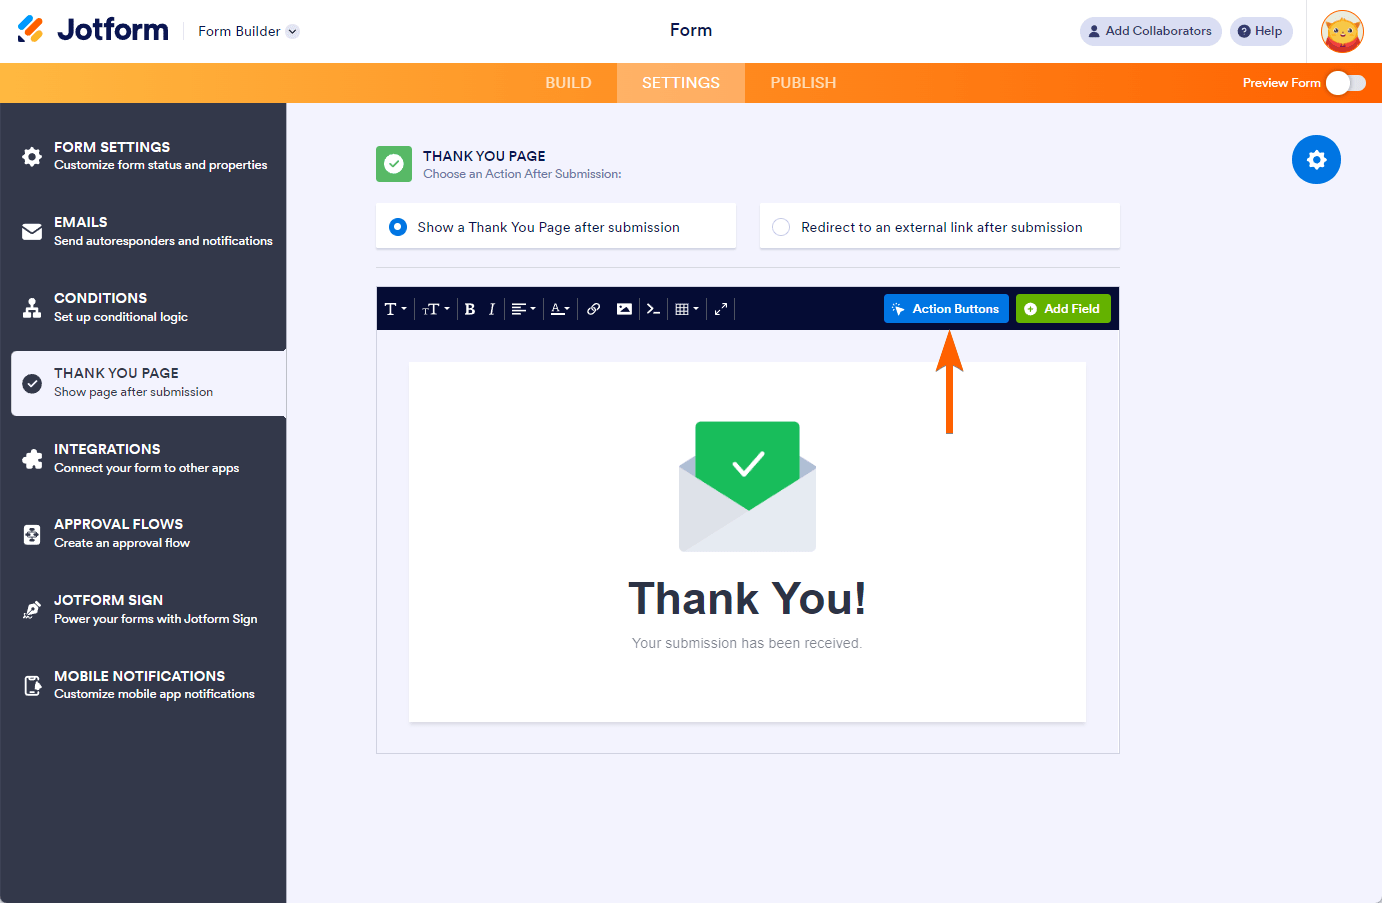
- Click the Settings at the top part.
- Go to the Thank You Page tab.
- Click the Action Button.
With Action Buttons, you have the following options:
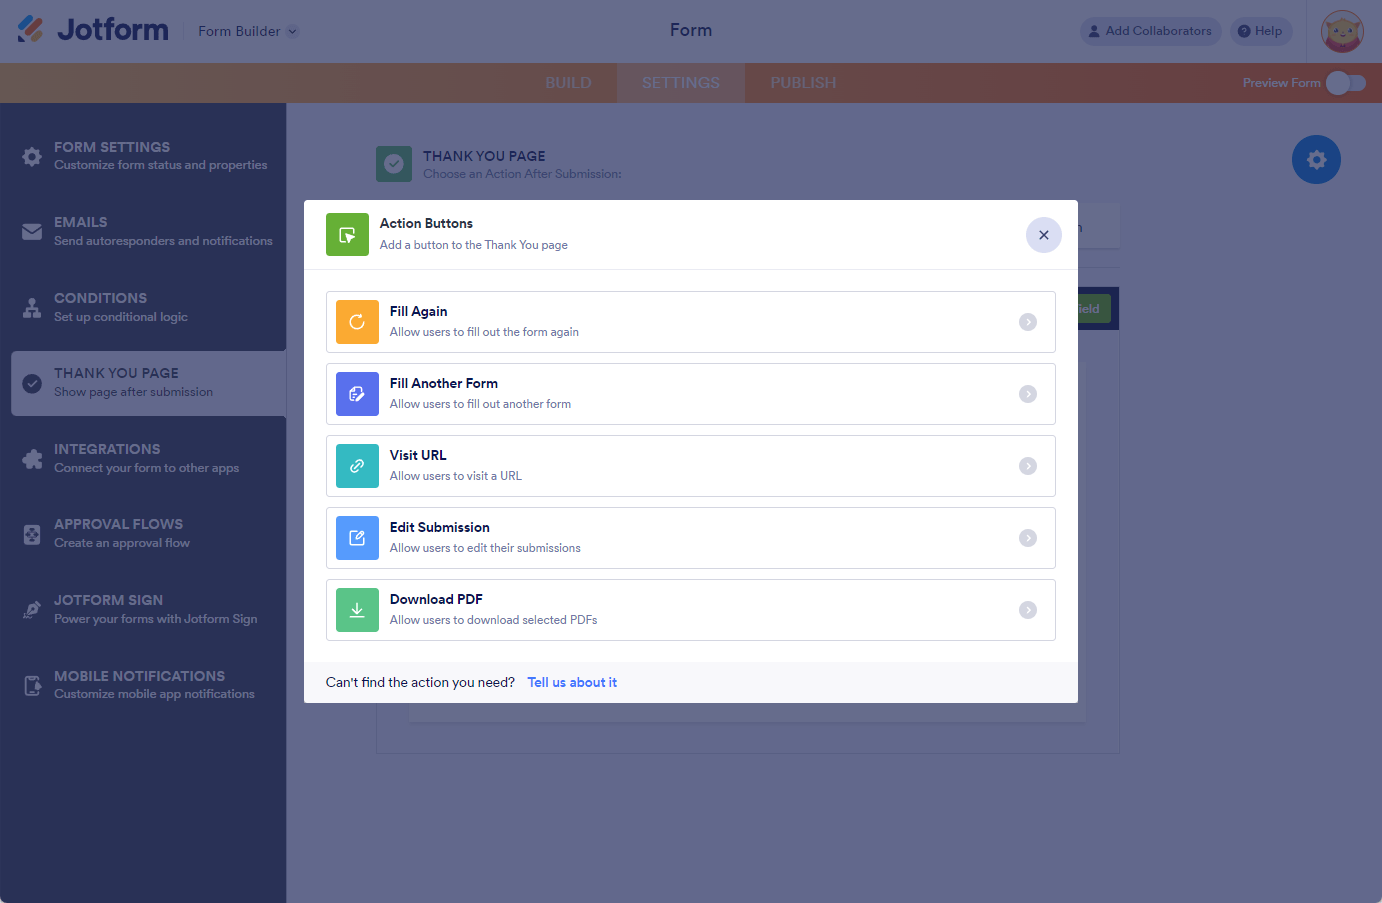
Fill Again
The Fill Again option will allow users to fill out the same form again. You can set up Prefill in this option to let users fill the form again with the same data they have submitted. Click the option, and do the following:
- Enter the Button Name, which is the label of the button when it is displayed in the thank you page.
- Click the Save button to finish it or click the Set Prefill button if you want to pre-populate the same fields with the data from their submission.

Assuming you click the Set Prefill option, do the following next:
- Toggle Prefill Form Fields.
- Select the form fields to prefill.
- Click the Save button to save the selected fields.

- Finally, click the Save button to save the changes for the Fill Again settings.
Fill Another Form
The Fill Another Form option will allow users to fill out another form from your account. You can also set up Prefill in this option to let users fill the other form with the same data they have submitted in the main form. Choose the option, and do the following:
- Enter the Button Name, which is the label of the button when it is displayed in the thank you page.
- Select the other form from the list. You can add many form as you like by clicking the Add a New Form button.
- Click the Save button to finish it or click the Set Prefill button beside the form name if you want to pre-populate the fields of the choosen form with the data from their submission.

If you choose to Set Prefill, do the following:
- Toggle Prefill Form Fields to turn it on.
- Match your Form Fields. You can match more fields by clicking the Add More Field button at the bottom part.
- Click the Save button to save the selected fields.

- Click the Create button at the next window to add the form to the thank you page.
Edit Submission
As the name suggests, add the Edit Submission button to allow users to edit their submission right after submitting the form. Choose the option, enter the Button Name, and click the Create button.

Download PDF
The Download PDF option allows users to download a PDF copy of the submitted data. Click this option, enter the Button Name, select the PDF document, and click the Create button to add it.

If you have multiple PDF documents created in the form, you’ll be able to select and add them to the thank you page. Click the Add a new PDF as shown from the above screenshot.
Feel free to submit the following demo form to see the output for all of these options: https://www.jotform.com/220653017279051.
If you have questions, feedback, or suggestions, kindly send them below or create a support ticket.
Send Comment:
2 Comments:
More than a year ago
Hi! I can't add an action button on as custom thank you page.
More than a year ago
fill another forms is NOT WORKING