With Jotform Tables, you can easily import existing data from CSV, XLS, or XLSX files and continue working with it in one place. This is useful when you’re moving data from spreadsheets or other systems, combining information from different sources, or bringing existing records into Jotform Tables for ongoing work. Importing saves you from having to enter data manually and makes it easier for individuals and teams to organize and work with information they already have.
Creating a Table with Imported Data
There are two ways to create a new table with your existing data. You can convert your file using Import Data or use AI to set up the new table for the data you’re importing.
Importing Data Into a New Table
Importing your existing data into a new table is easy. You can do it in just a few steps:
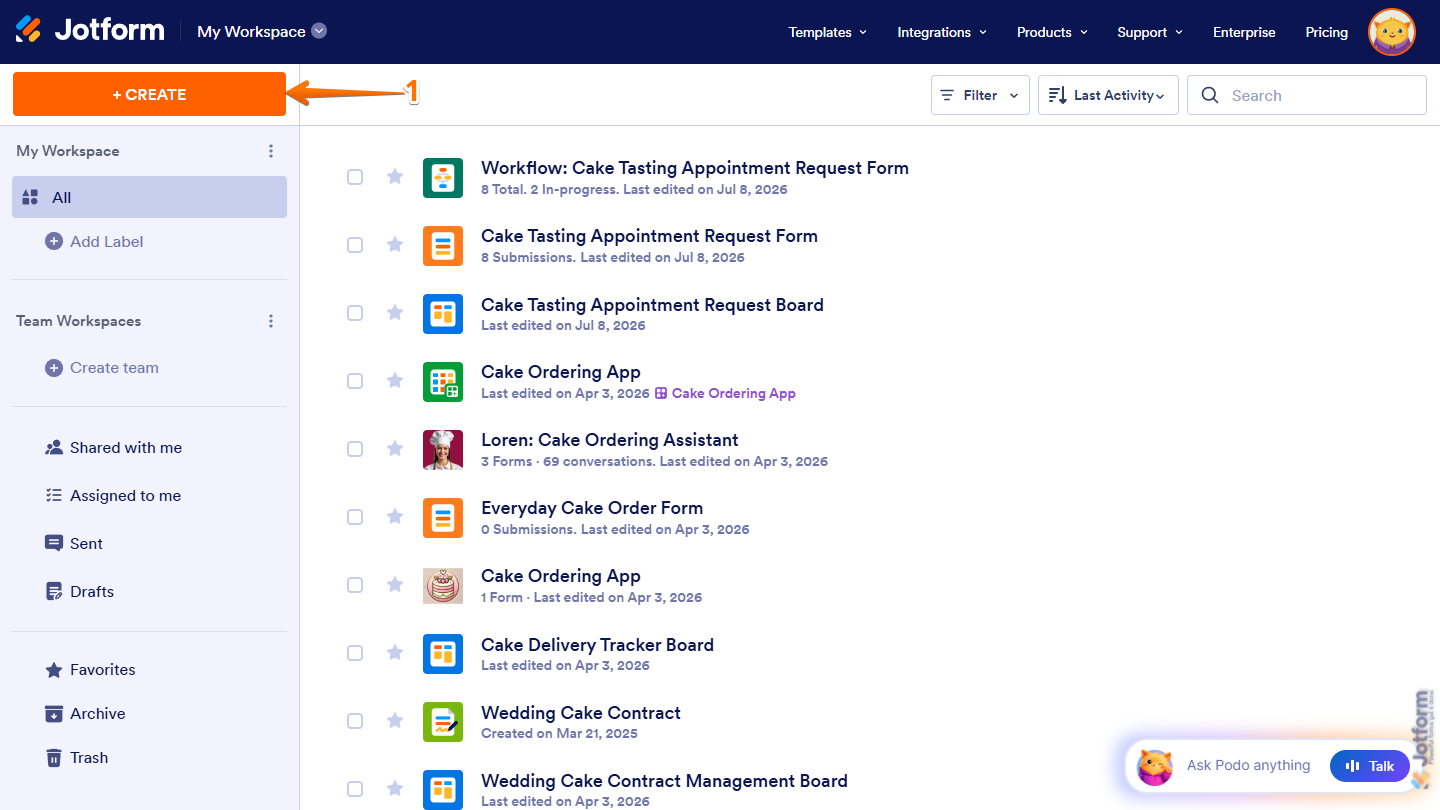
- On the top-left side of your Workspace page, click on Create.
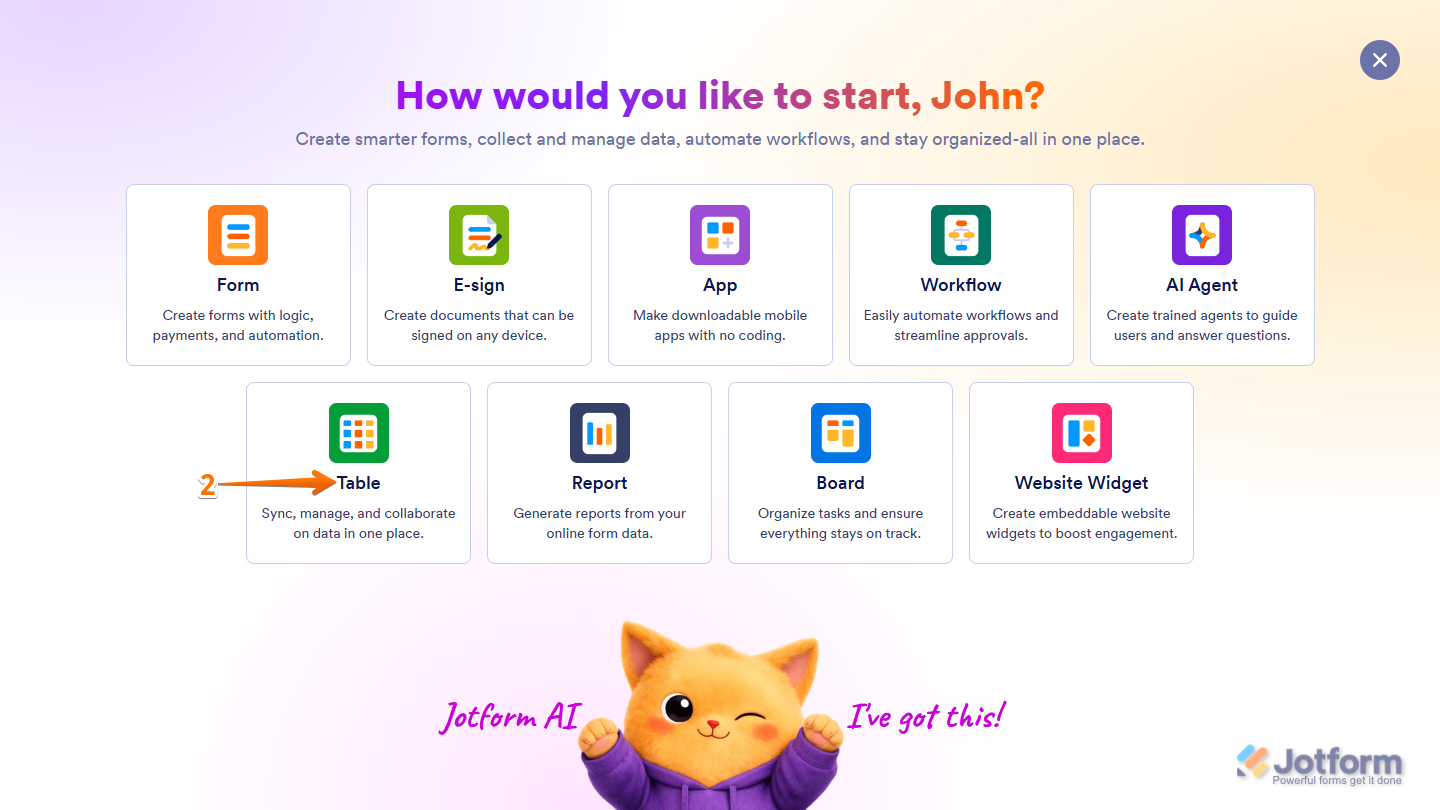
- Now, in the menu that opens up, select Table.
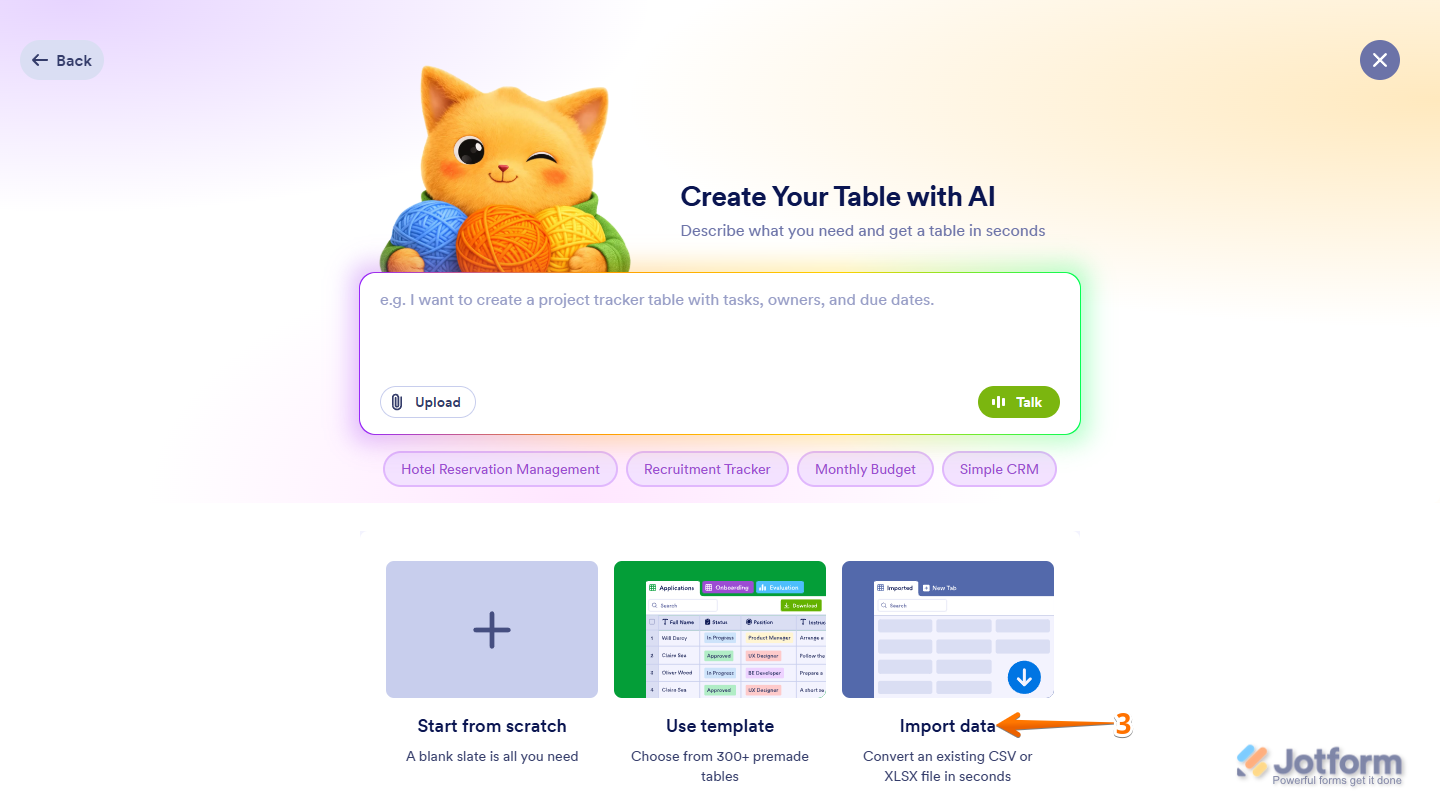
- Then, at the bottom, select Import Data.
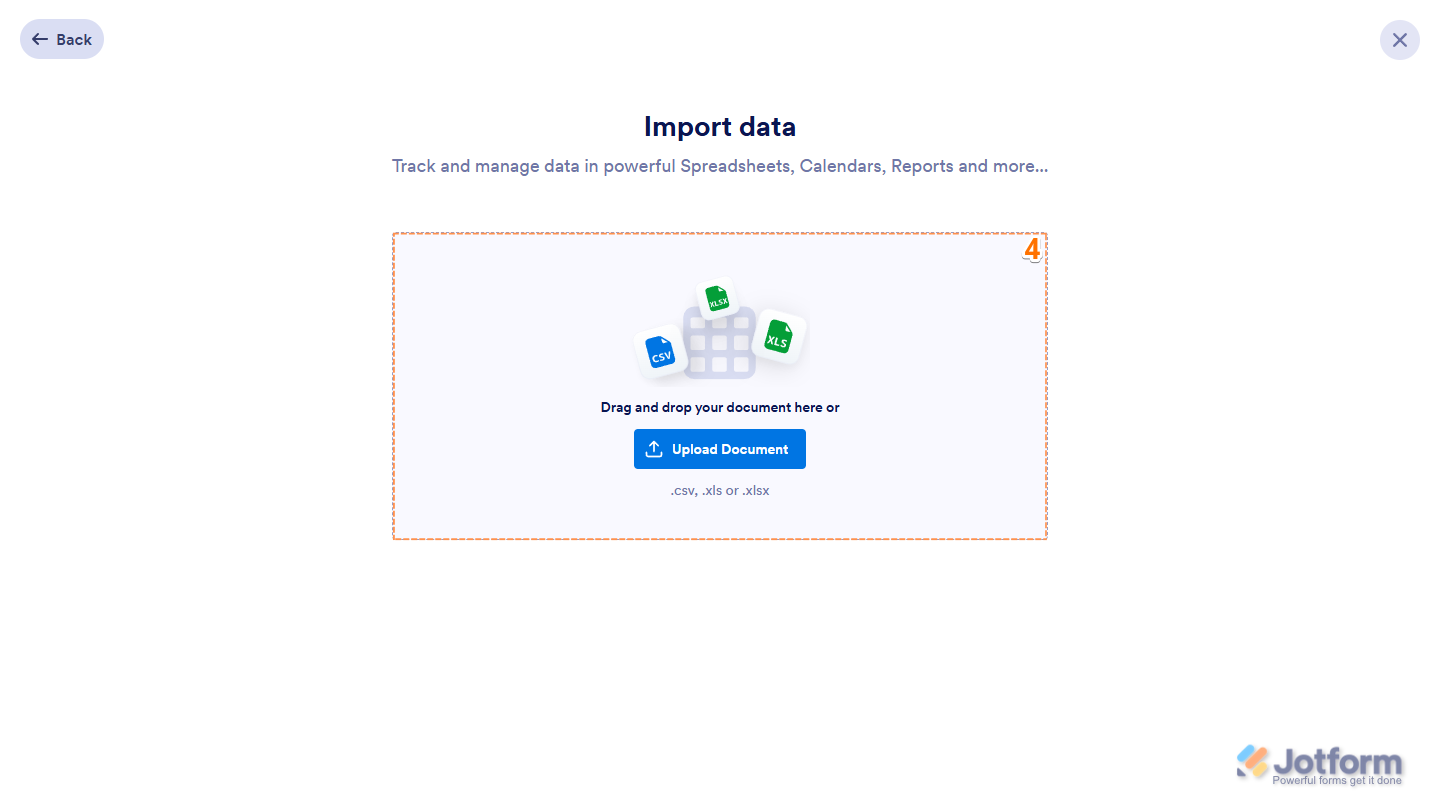
- In the Import Data menu, drag and drop a CSV, XLS, or XLSX file into the Upload area, or click on Upload Document, and select the file from your device to import its data into a new table.
- To change the type set for a column, click on its header in the table preview and, in the menu that opens, select a different one.
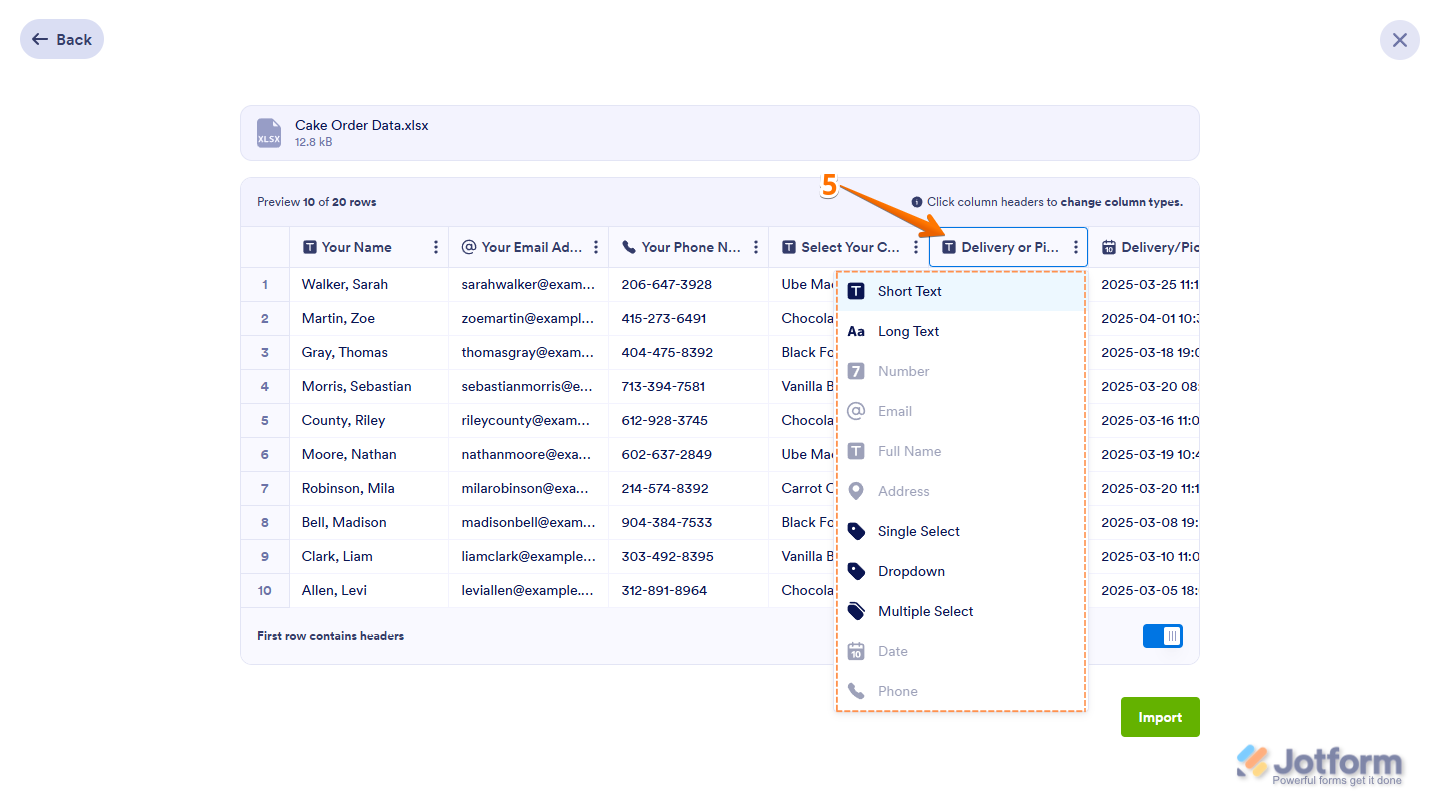
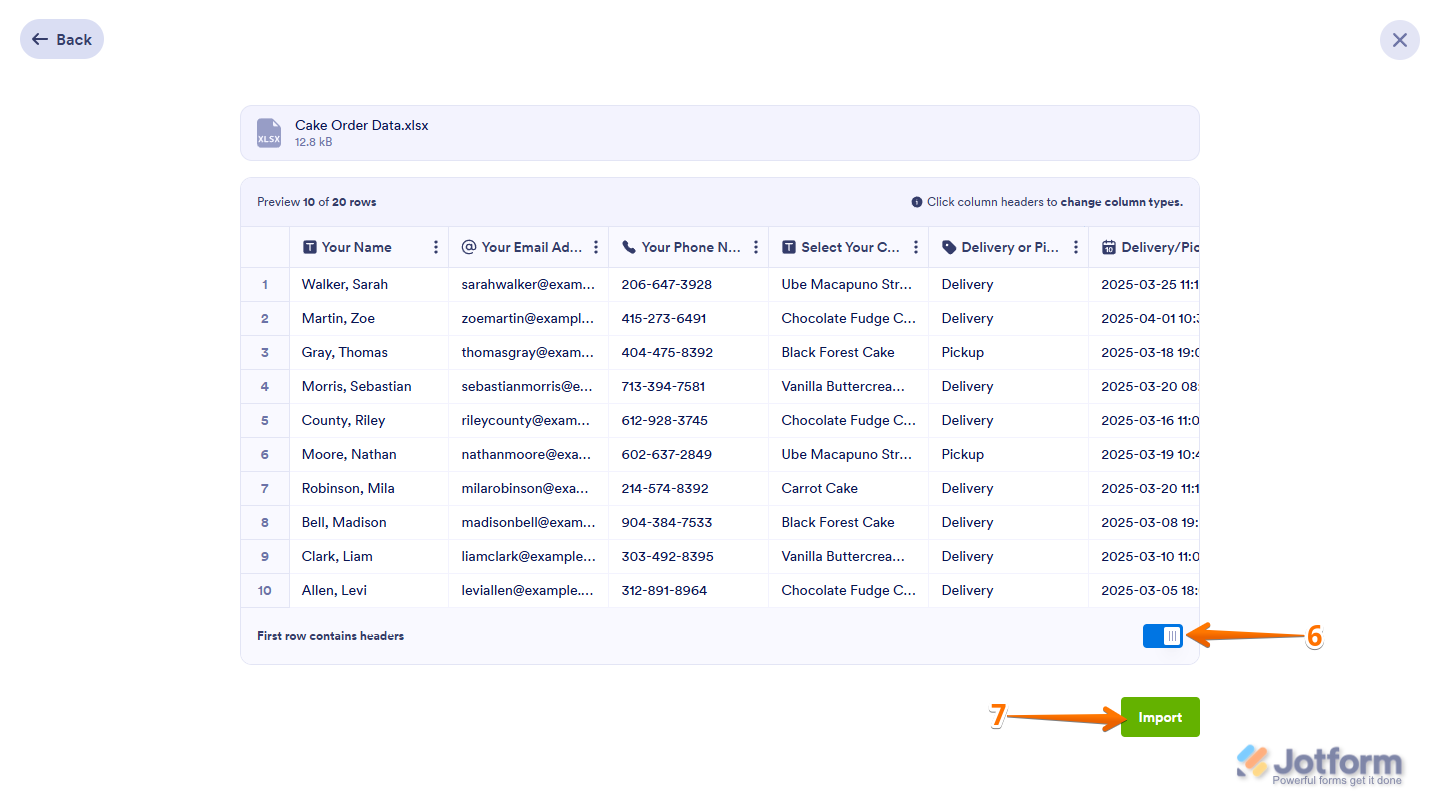
- At the bottom of the preview, on the right side of First Row Contains Headers, toggle it off to import data starting from the first row using the default column letters. You can change these column headers later. Check out our guide on How to Rename Columns in Jotform Tables to learn how.
- Once everything’s set, click on Import.
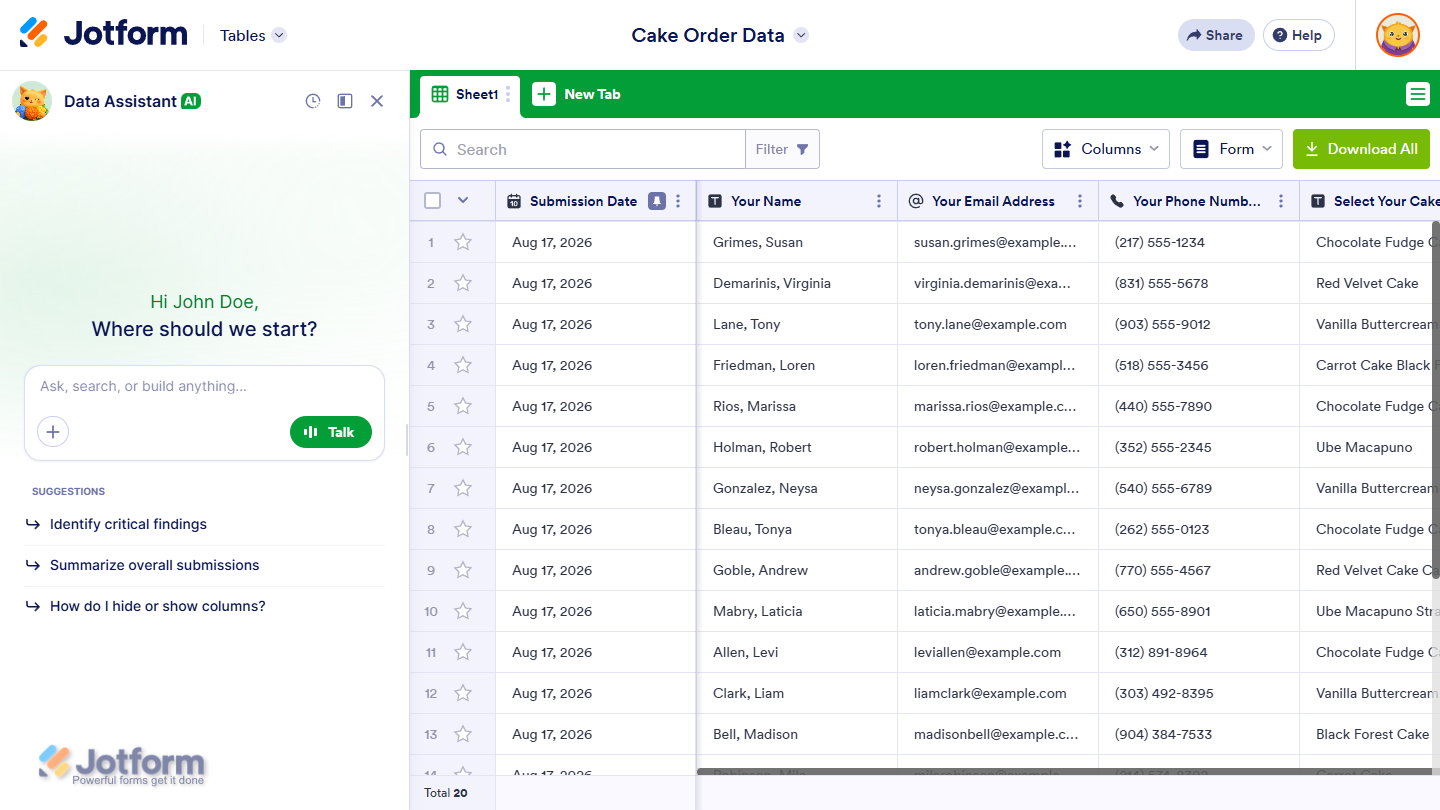
That’s it! Your existing data is now imported into the main tab of a new table.
Importing Data Into a New Table Using AI
Importing your existing data into a new table using AI is quick and easy. Here’s what to do:
- On the top-left side of your Workspace page, click on Create.
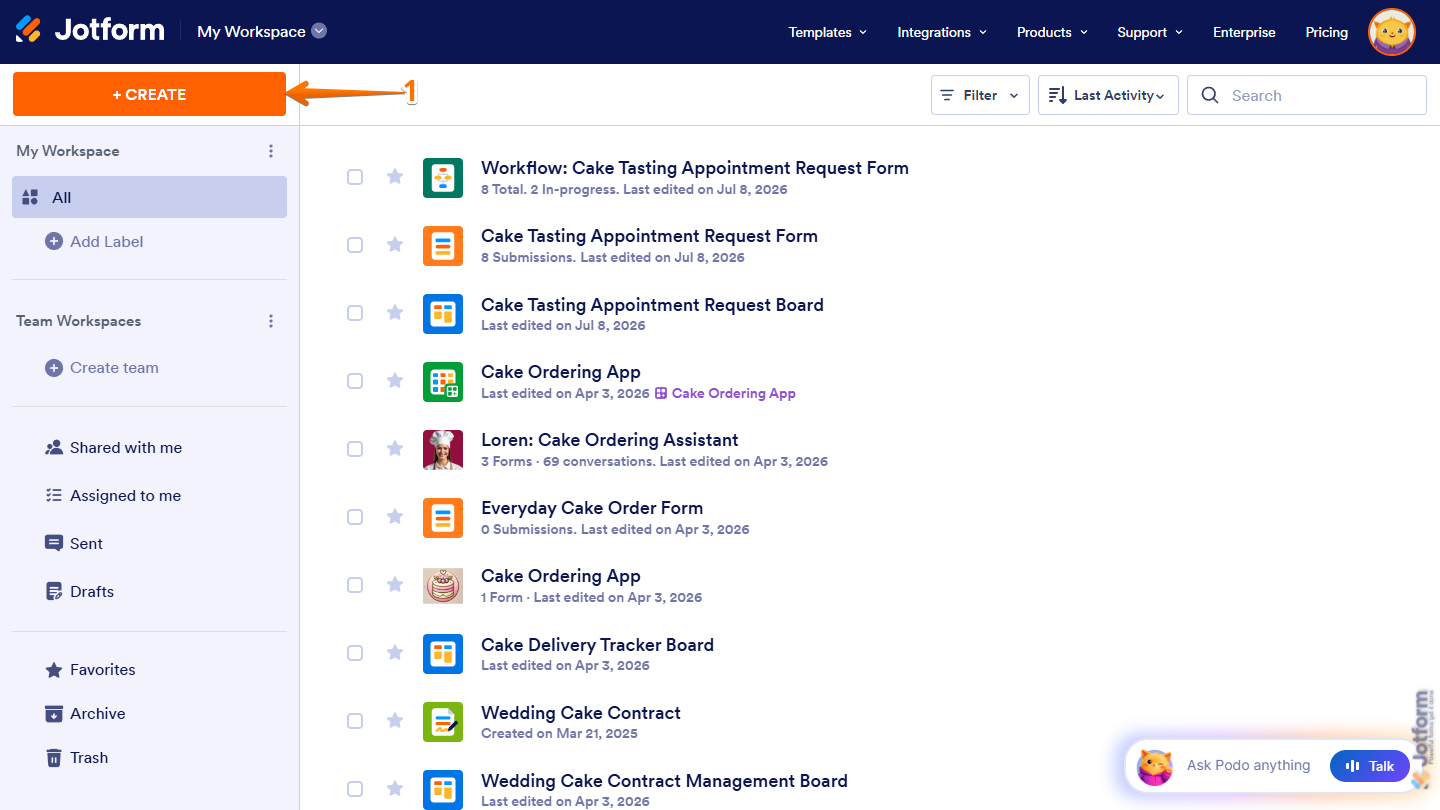
- Now, in the menu that opens up, select Table.
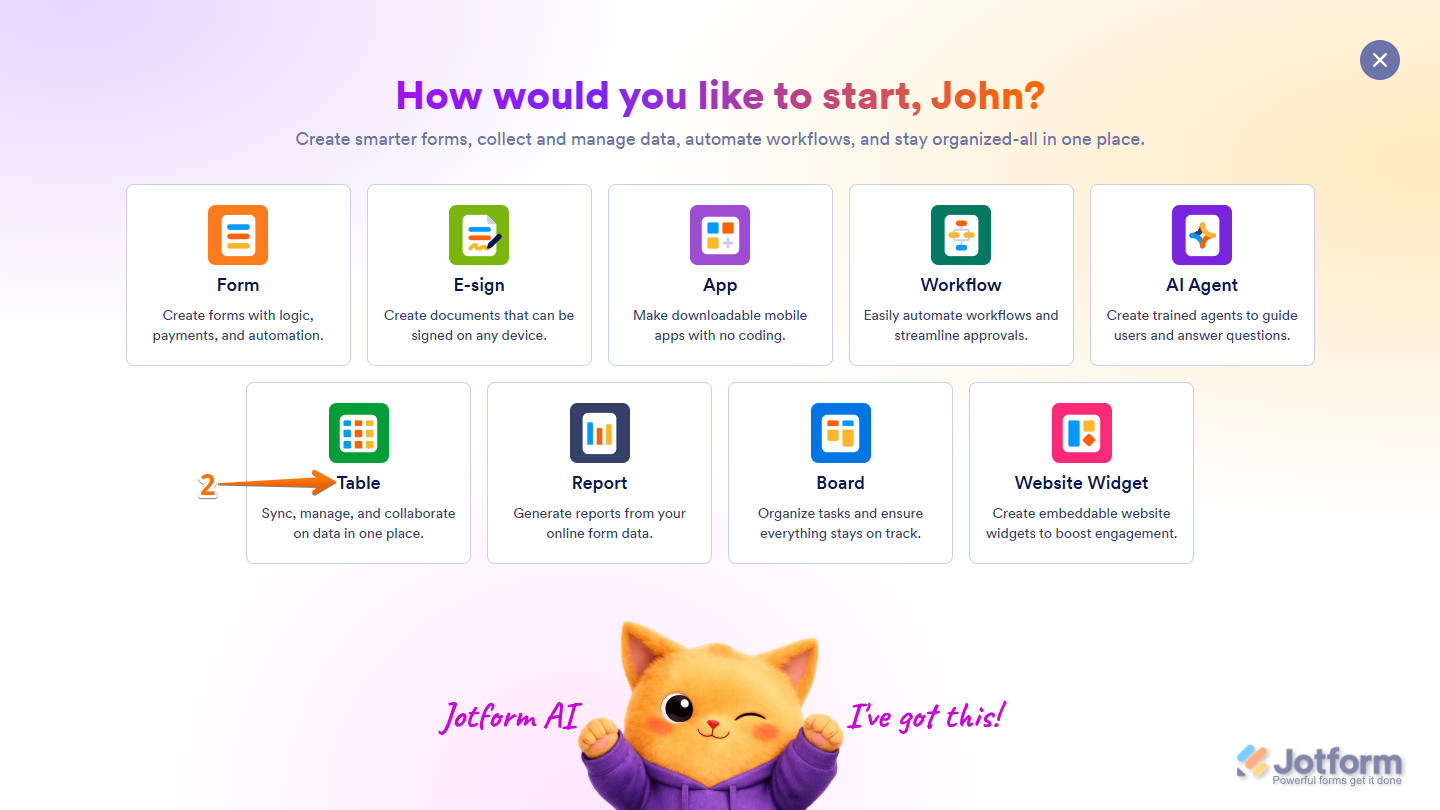
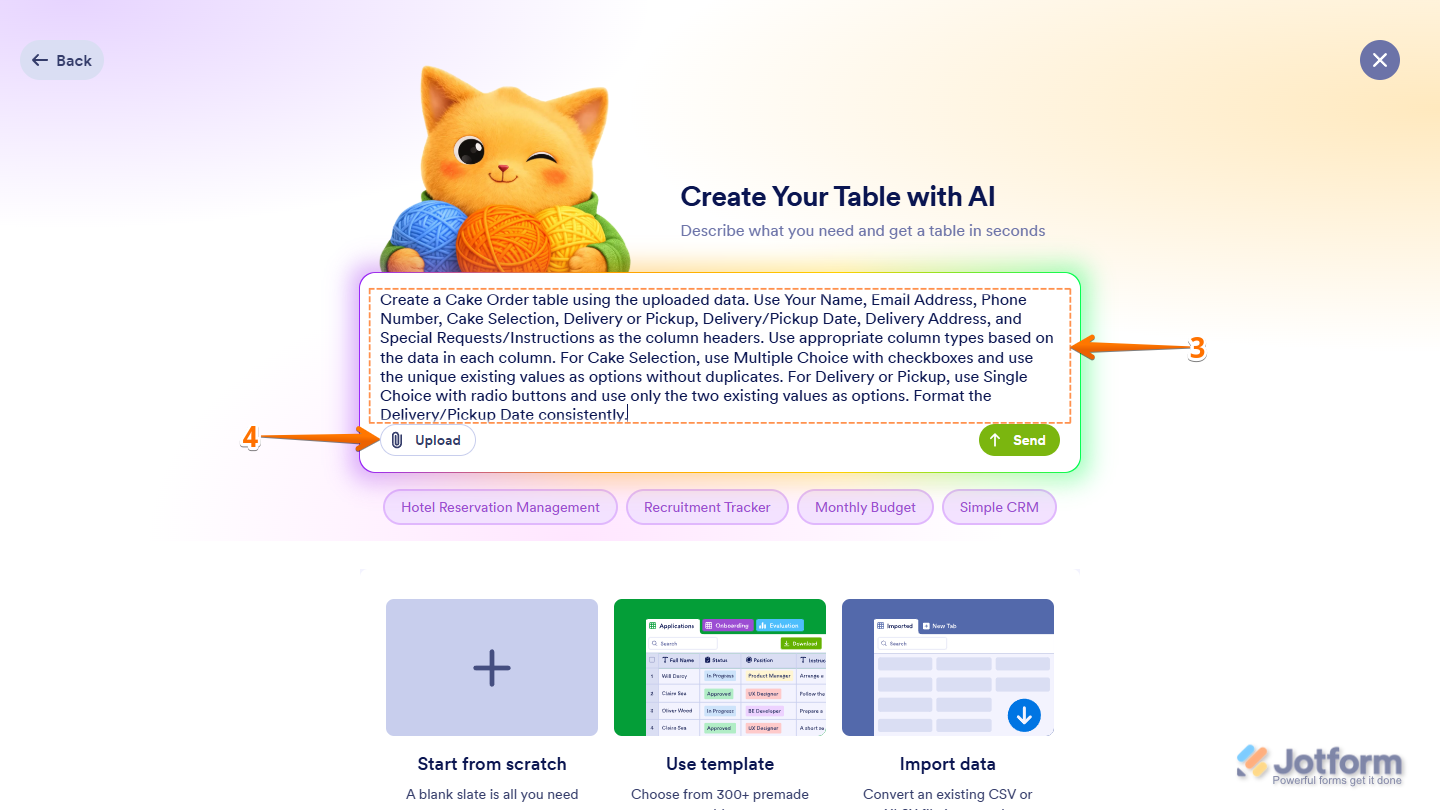
- Then, in the Create Your Table with AI Prompt box, describe the table you want to create from your existing data.
- Next, in the bottom-left corner of the Prompt box, click on Upload and select the CSV, XLS, or XLSX file from your device to import its data into a new table.
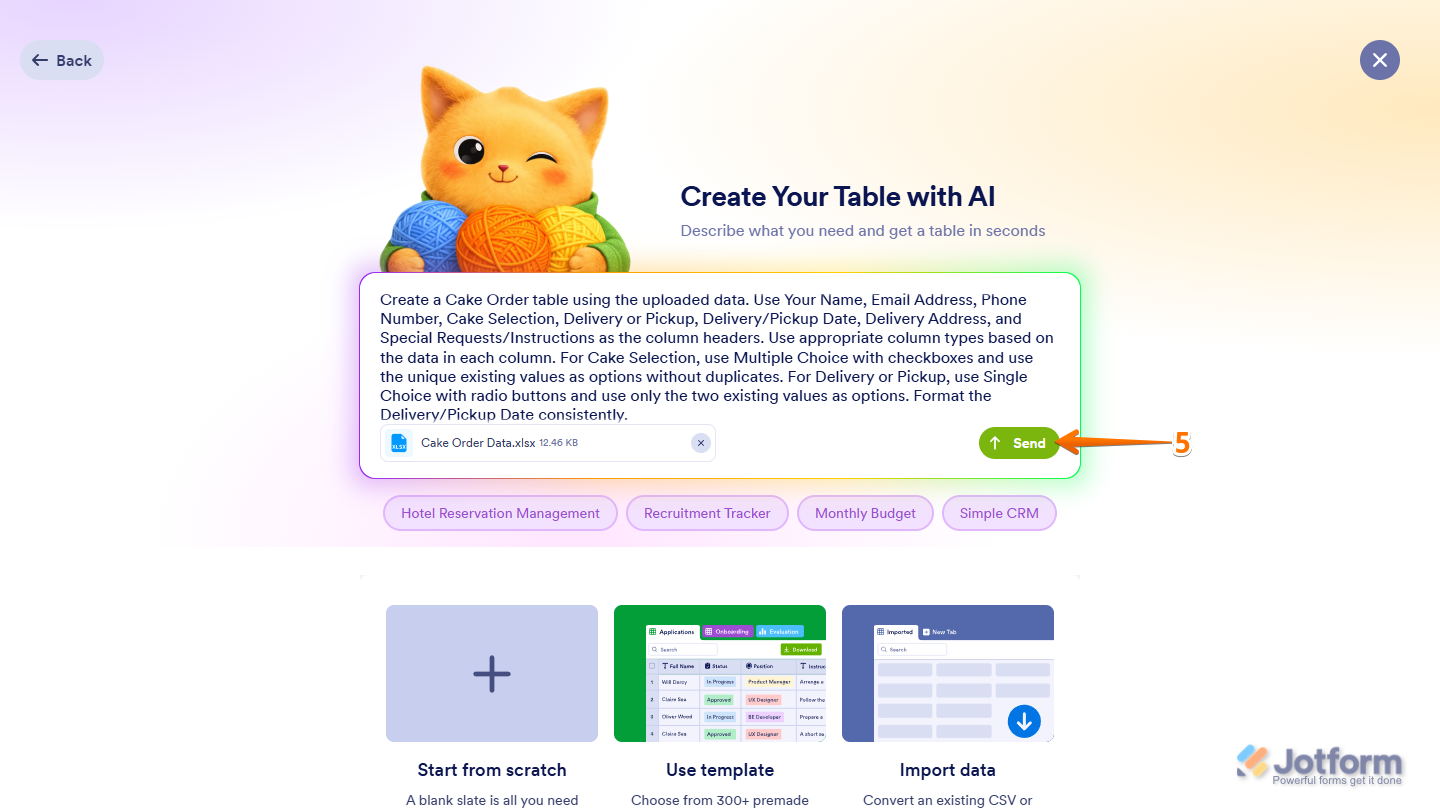
- Once you’re done, click on Send.
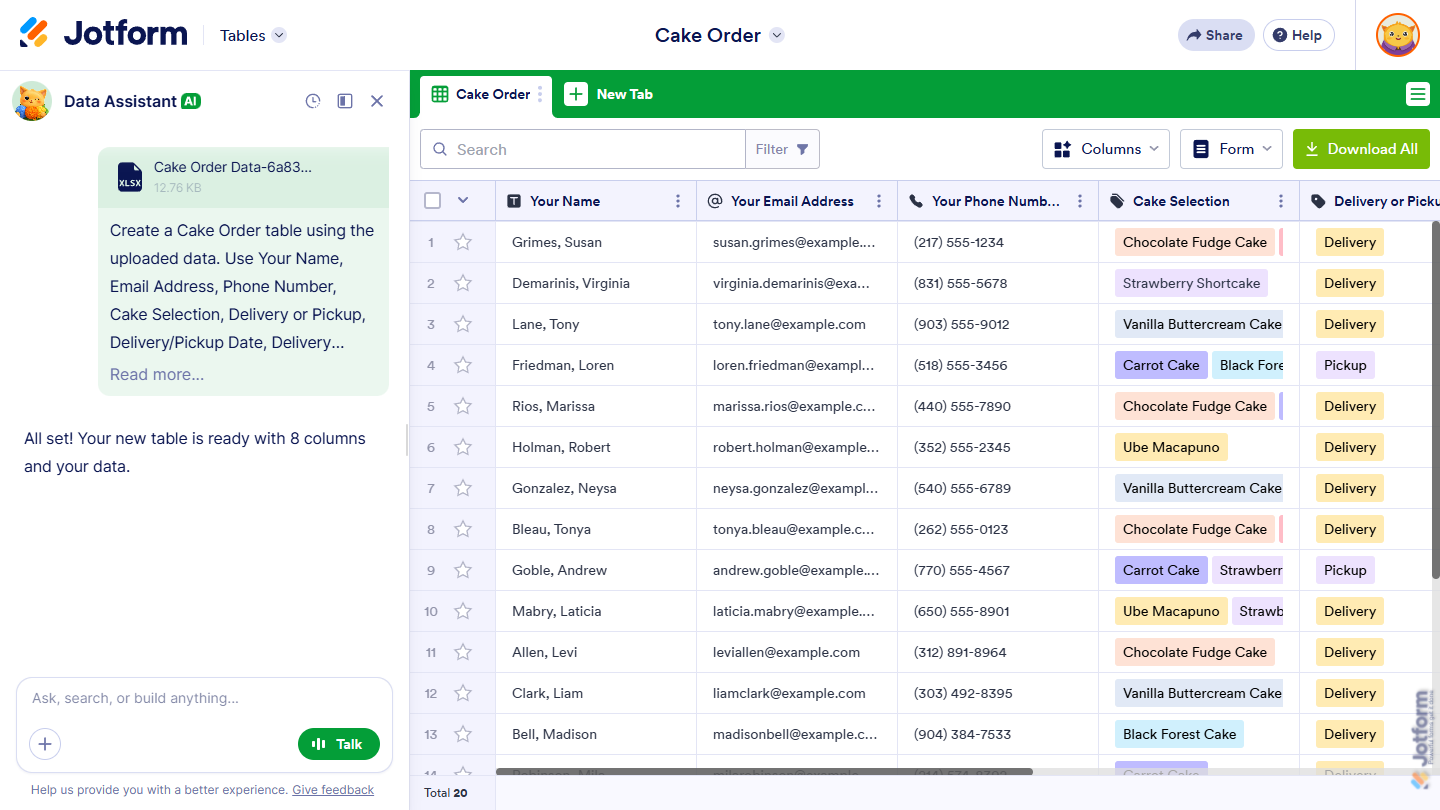
That’s it! A new table is created with your imported data in its main tab.
Adding a New Tab with Imported Data
There are two ways to add a new tab to an existing table with your imported data. You can convert your file using Import Data or use AI to set up the new tab for the data you’re importing.
Importing Data Into a New Tab
Adding your existing data to a new tab is simple. Here’s how to get started:
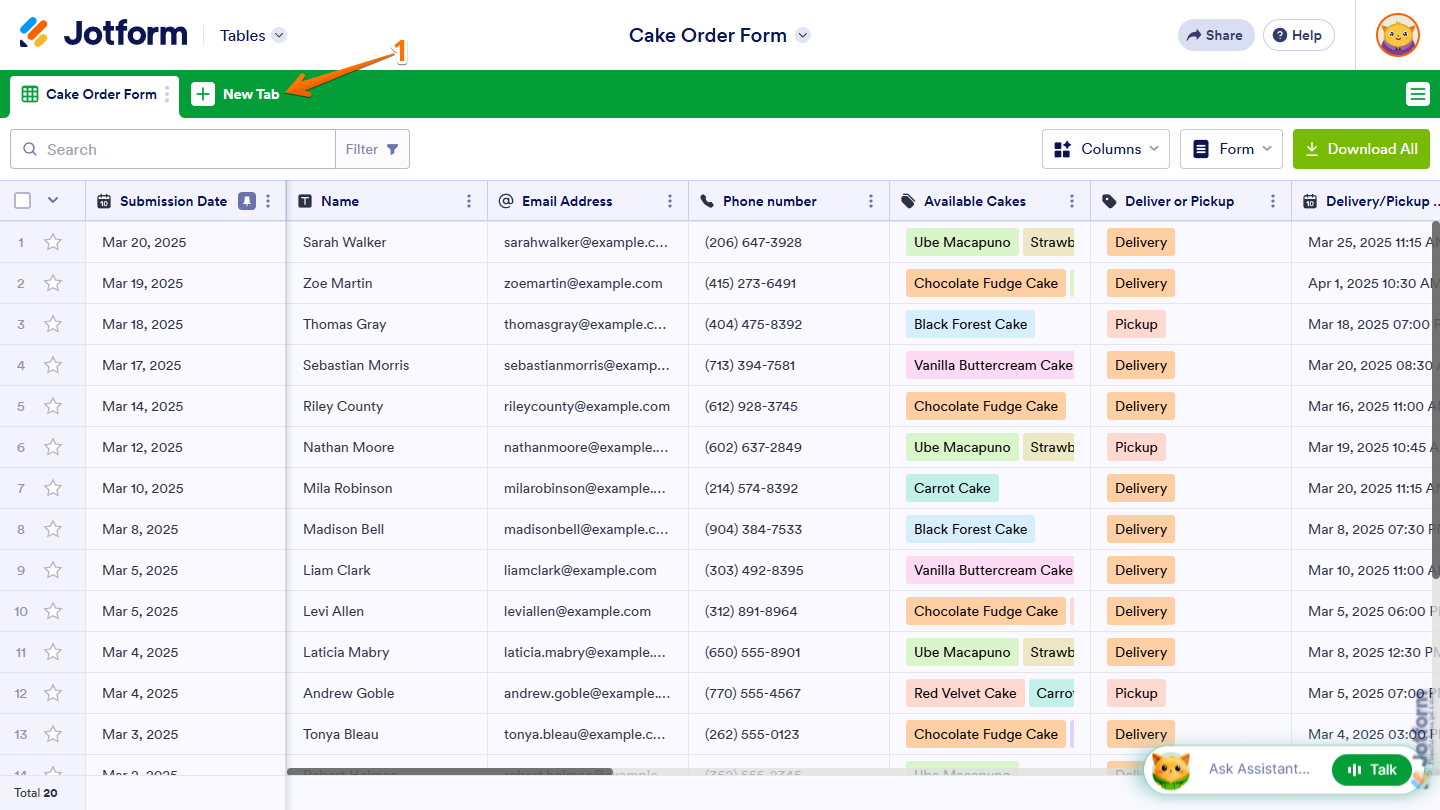
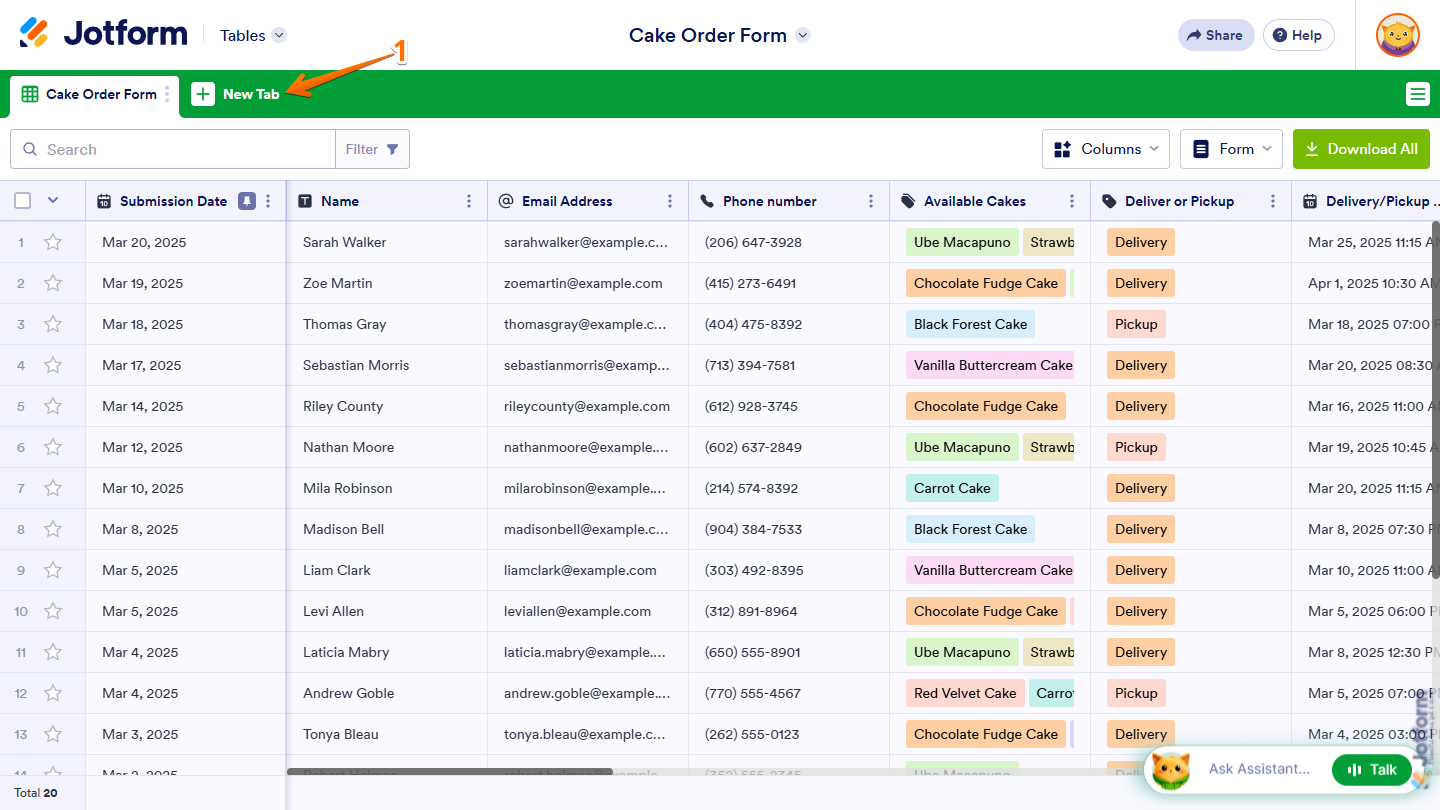
- In Tables, in the green navigation bar at the top of the page, click on New Tab.
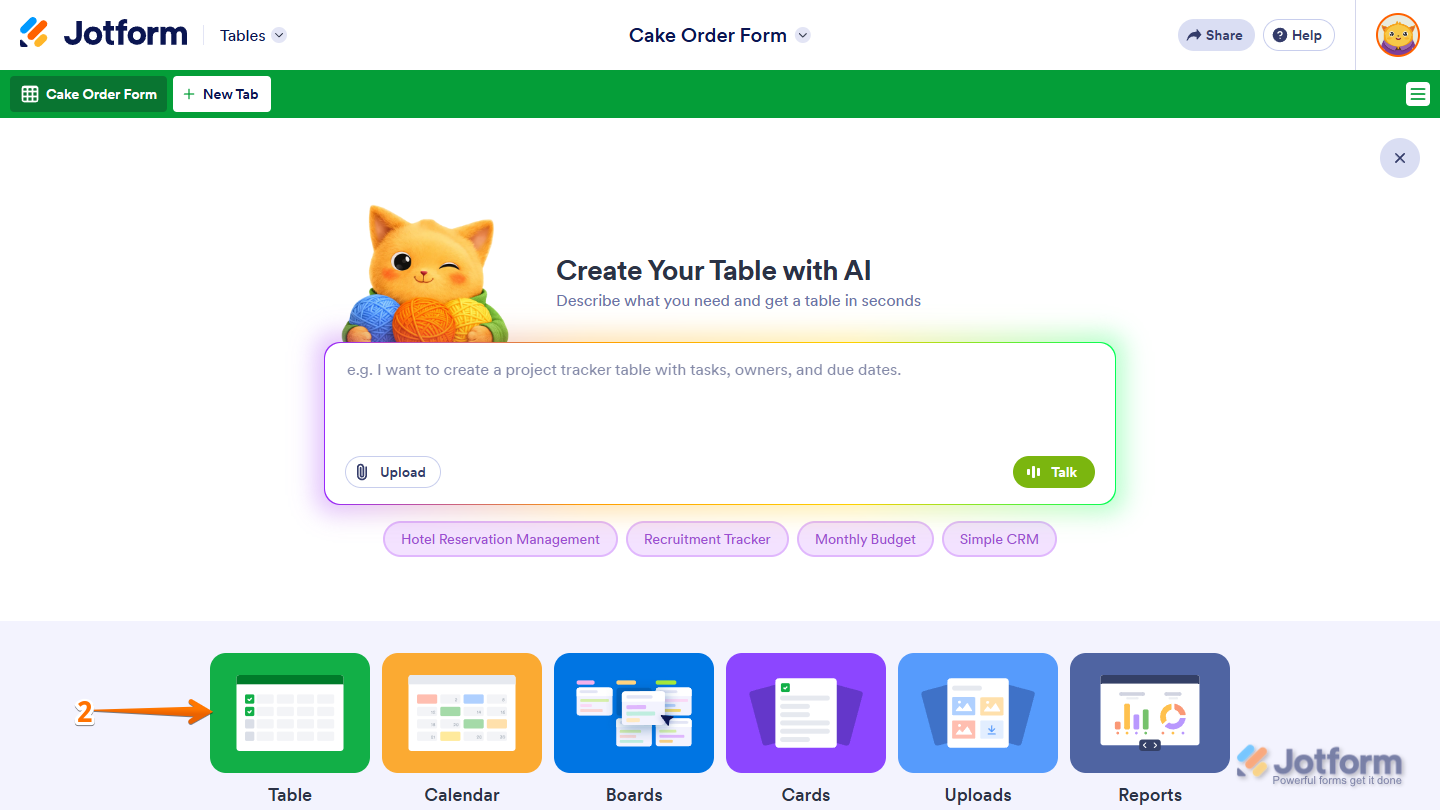
- Now, at the bottom of the menu that opens up, select Table.
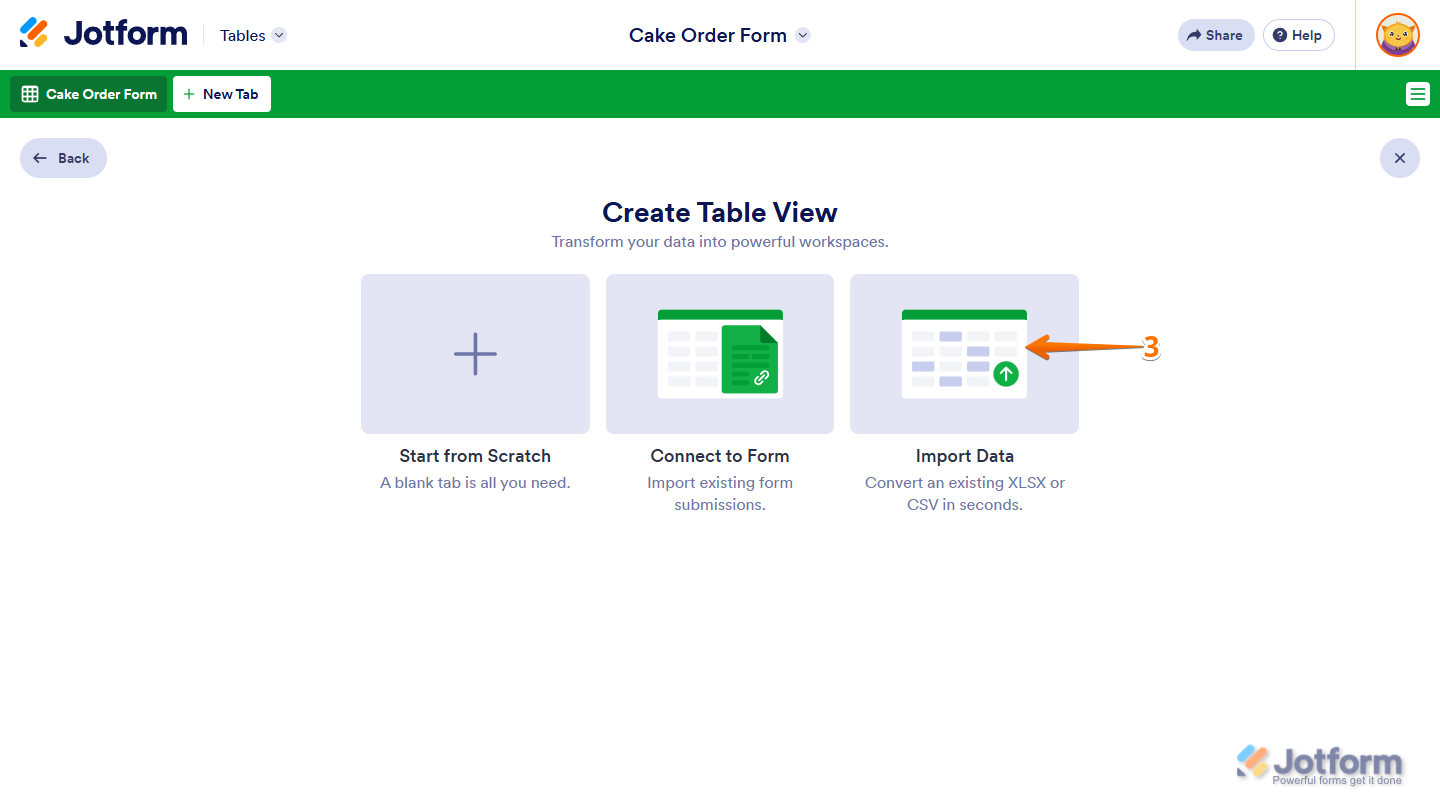
- Then, in Create Table View, select Import Data.
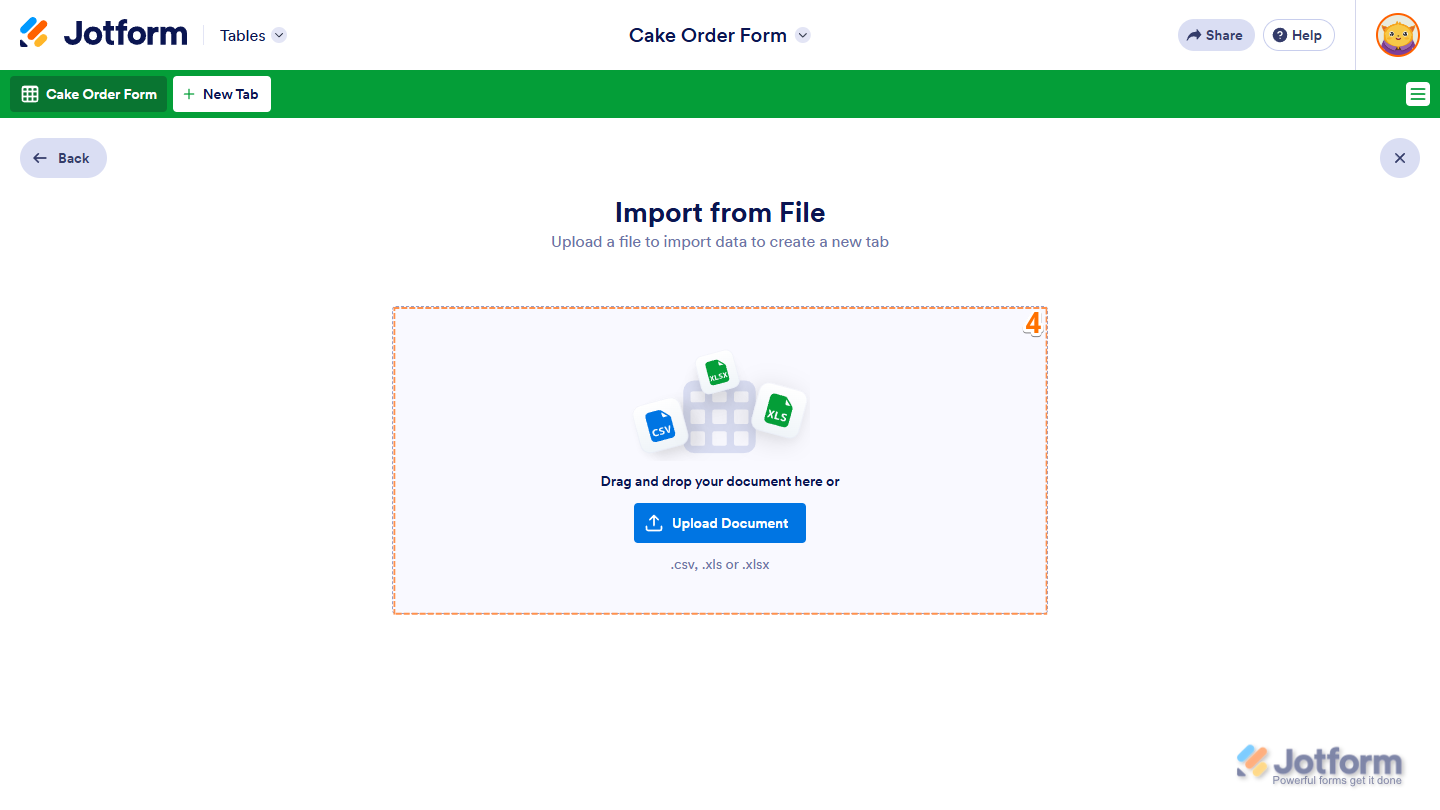
- In Import From File, drag and drop a CSV, XLS, or XLSX file into the Upload area, or click on Upload Document, and select the file from your device to import its data into a new tab.
- To change the type set for a column, click on its header in the table preview and, in the menu that opens, select a different one.
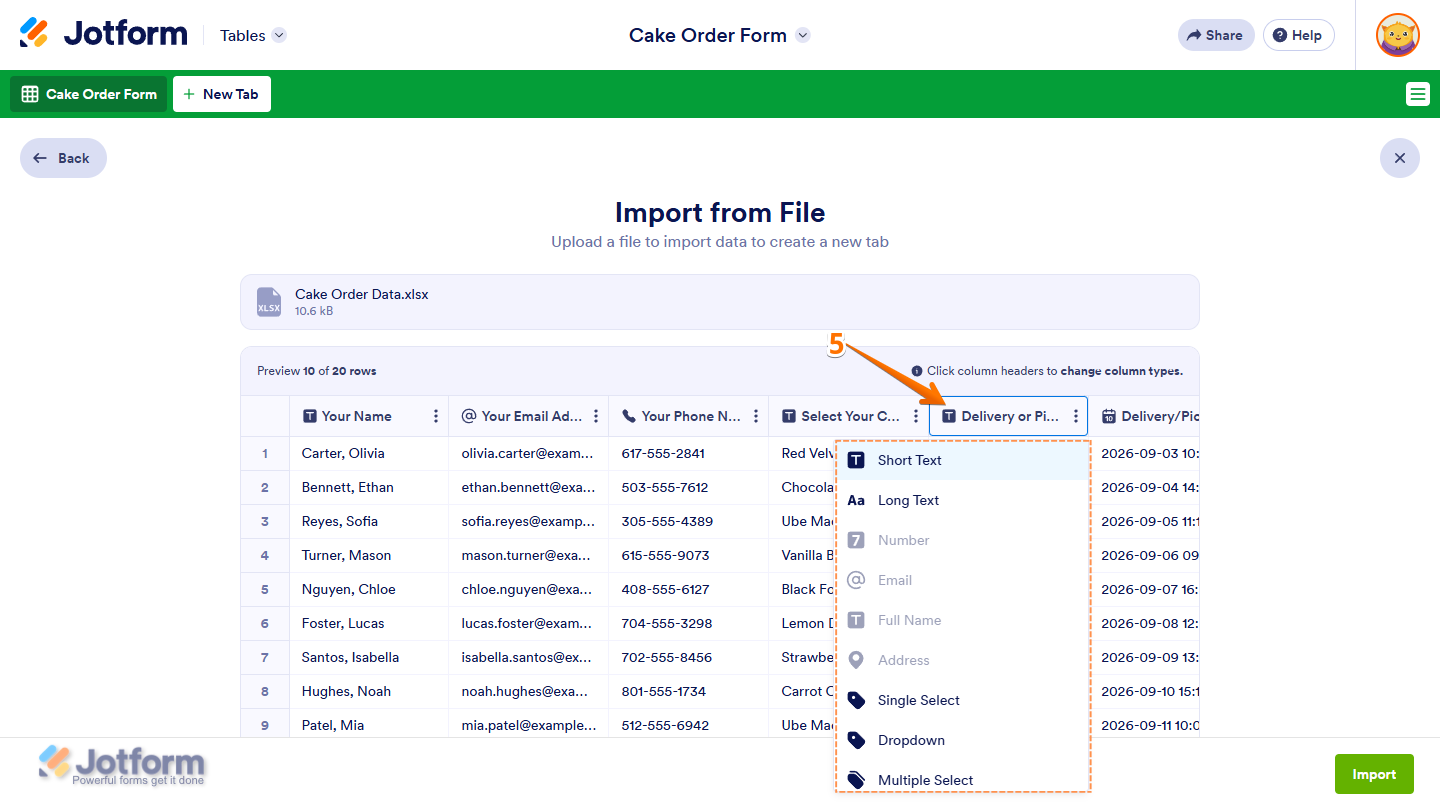
- To import data starting from the first row with default column letters, scroll to the bottom of the preview and, on the right side of First Row Contains Headers, toggle it off. You can change these column headers later. Check out our guide on How to Rename Columns in Jotform Tables to learn how.
- Once everything’s set, click on Import in the bottom-right corner of the page.
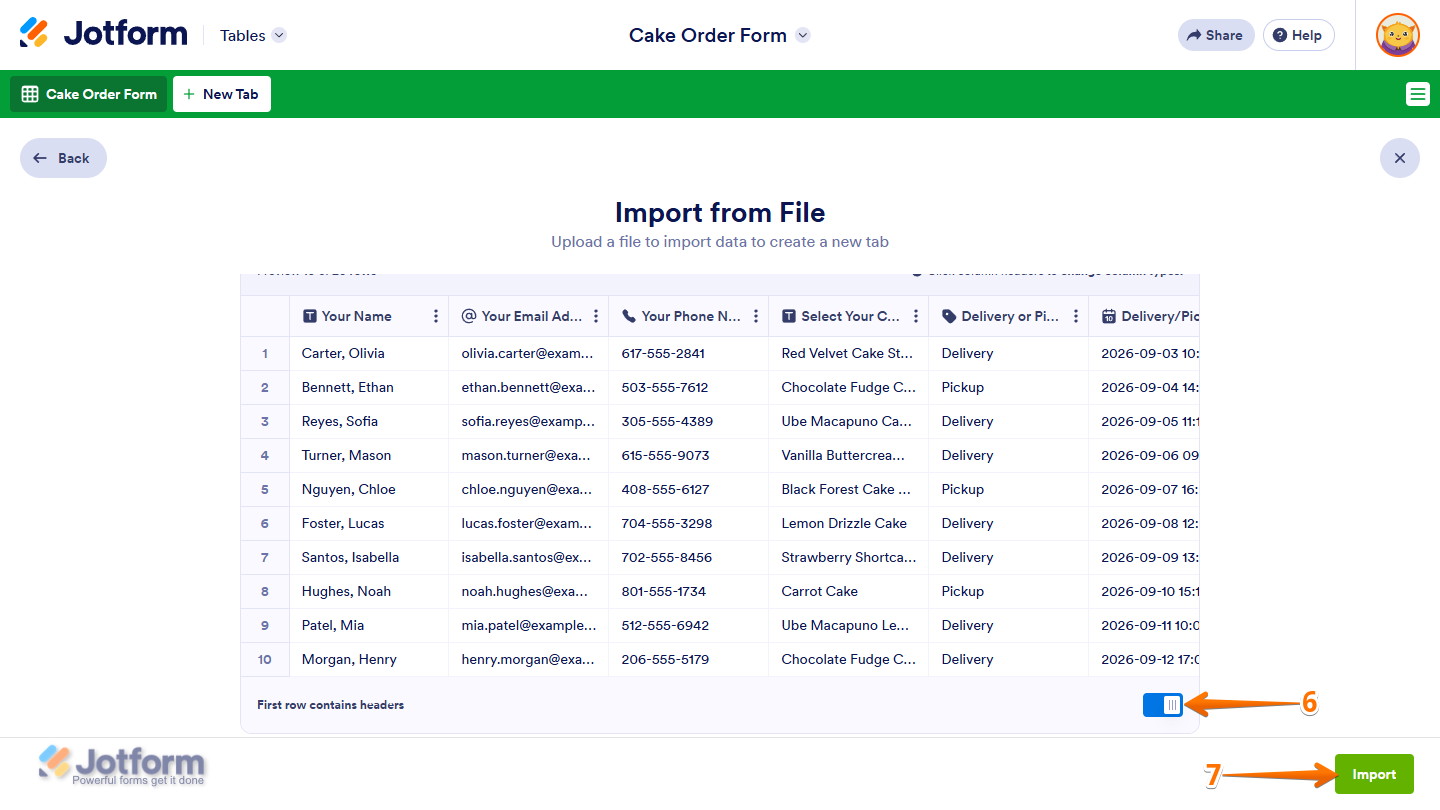
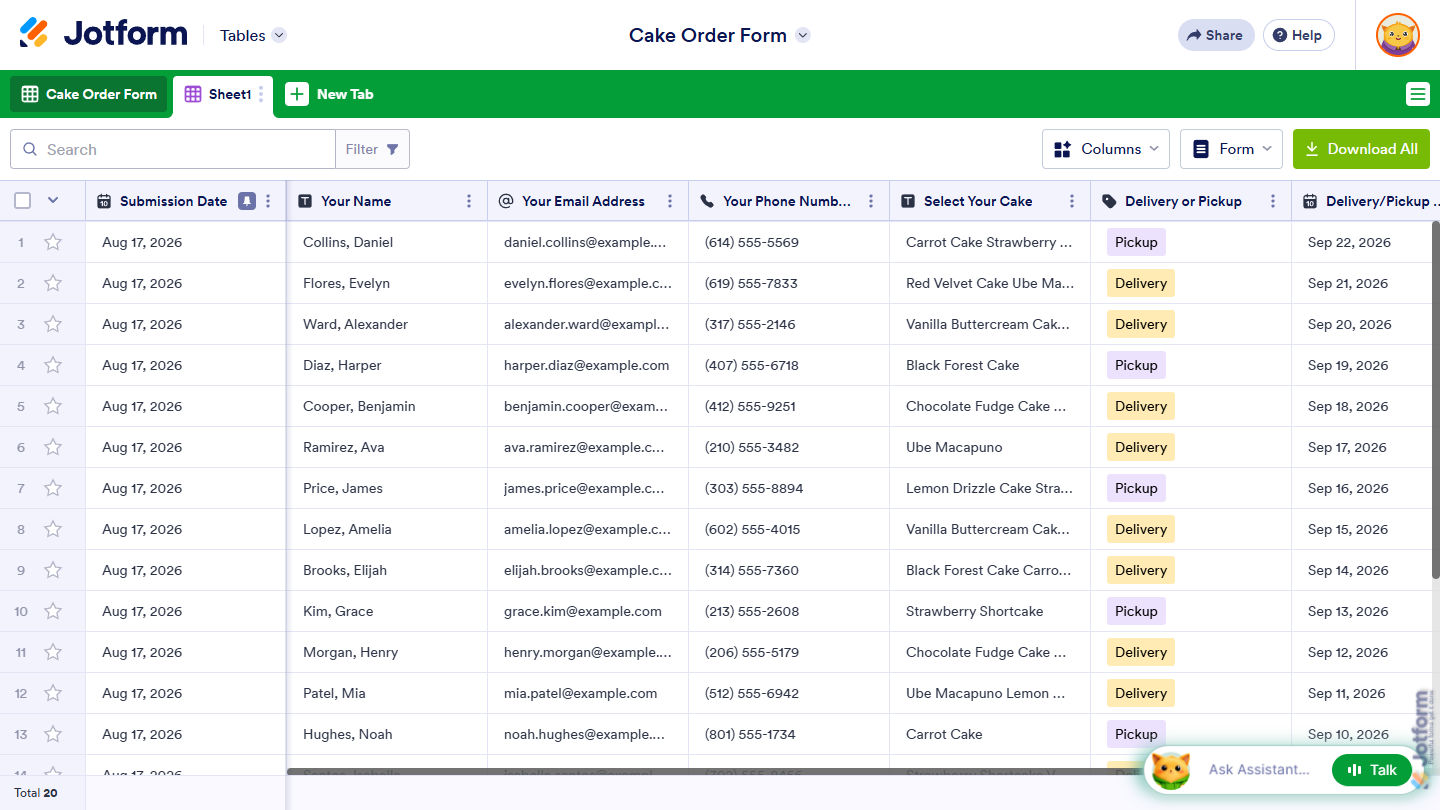
That’s it! Your data is now imported into a new tab in the table.
Importing Data Into a New Tab Using AI
Using AI to import your existing data into a new tab only takes a few steps. Here’s the quick way to do it:
- In Tables, in the green navigation bar at the top of the page, click on New Tab.
- Then, in the Create Your Table with AI Prompt box, describe the table you want to create from your existing data.
- Next, in the bottom-left corner of the Prompt box, click on Upload and select the CSV, XLS, or XLSX file from your device to import its data into a new tab.
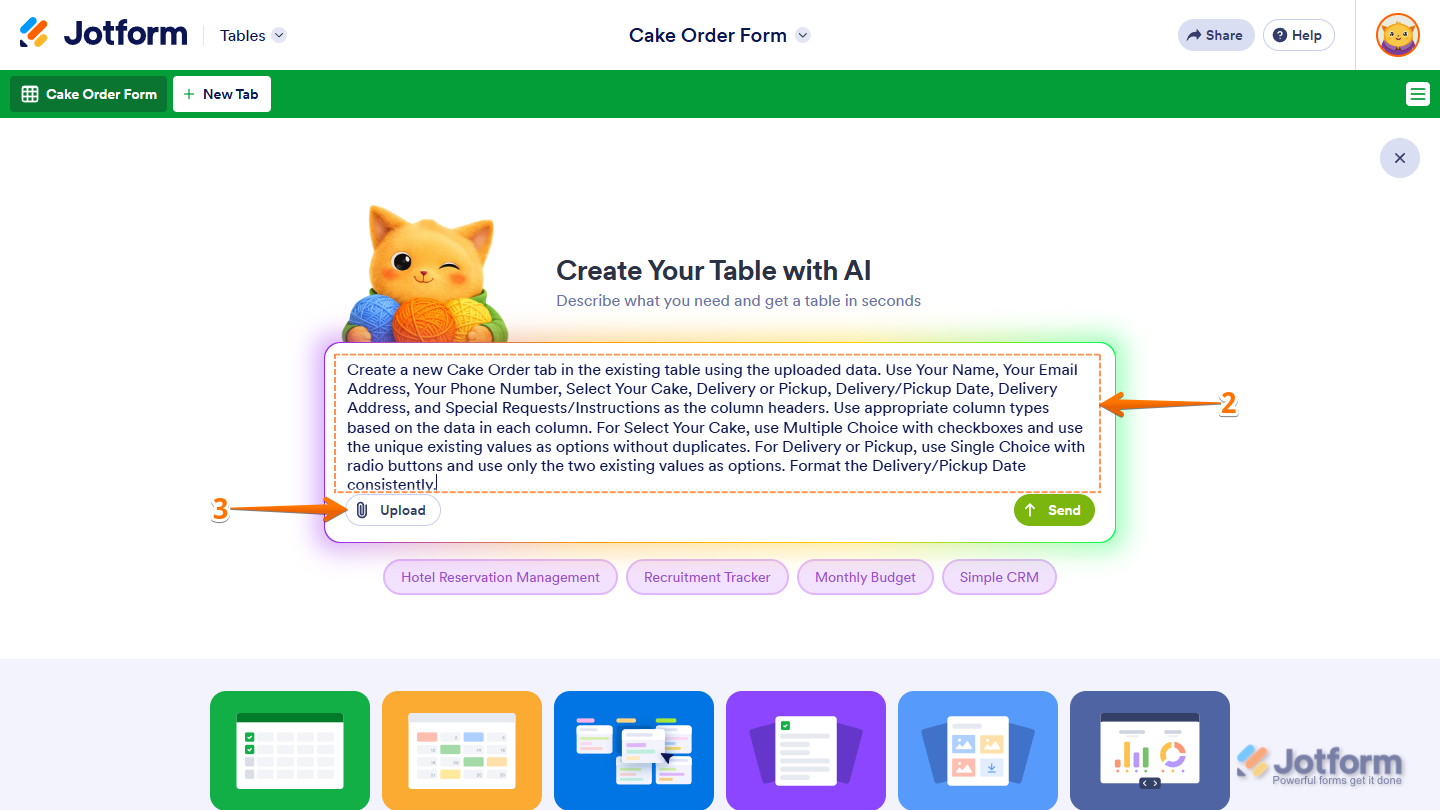
- Once you’re done, click on Send.
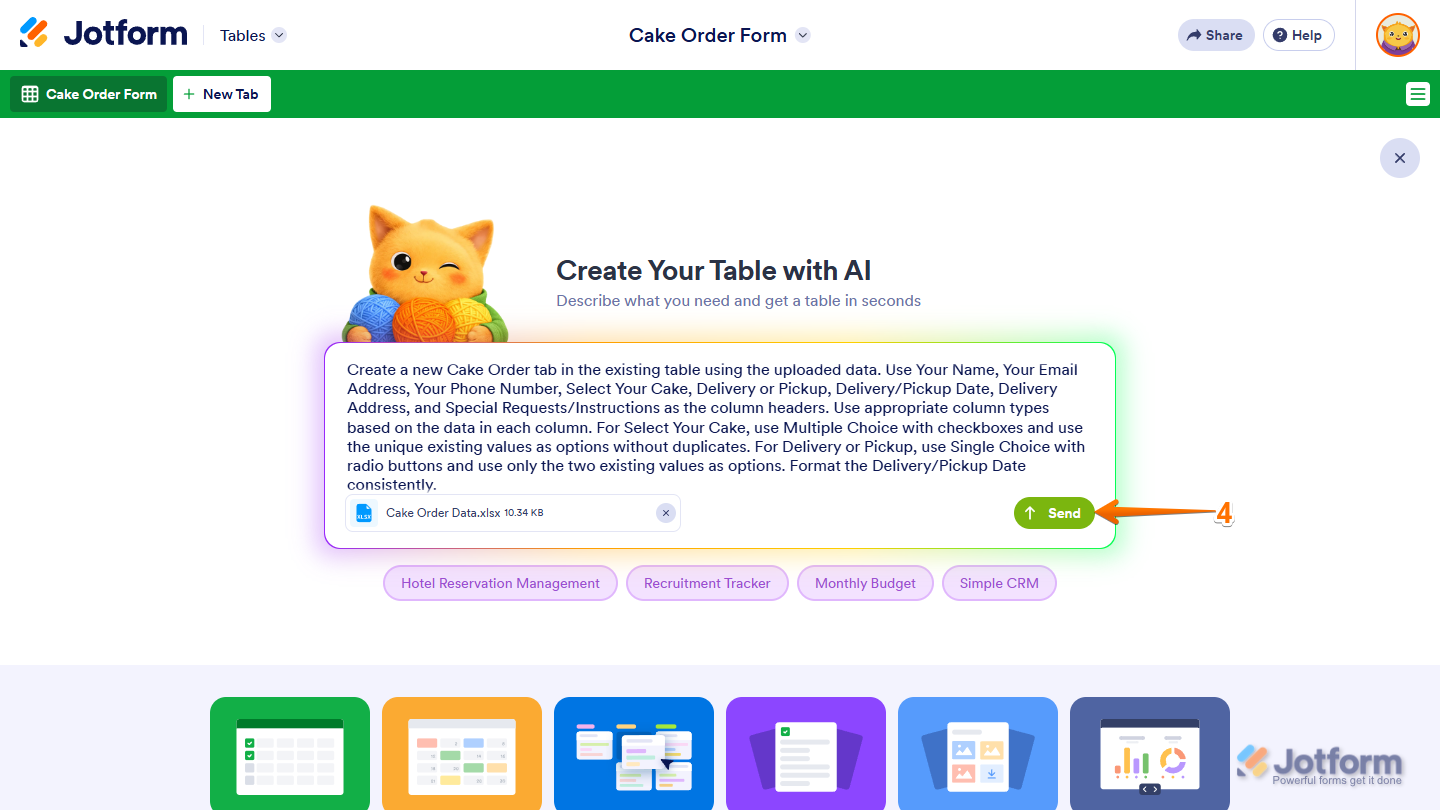
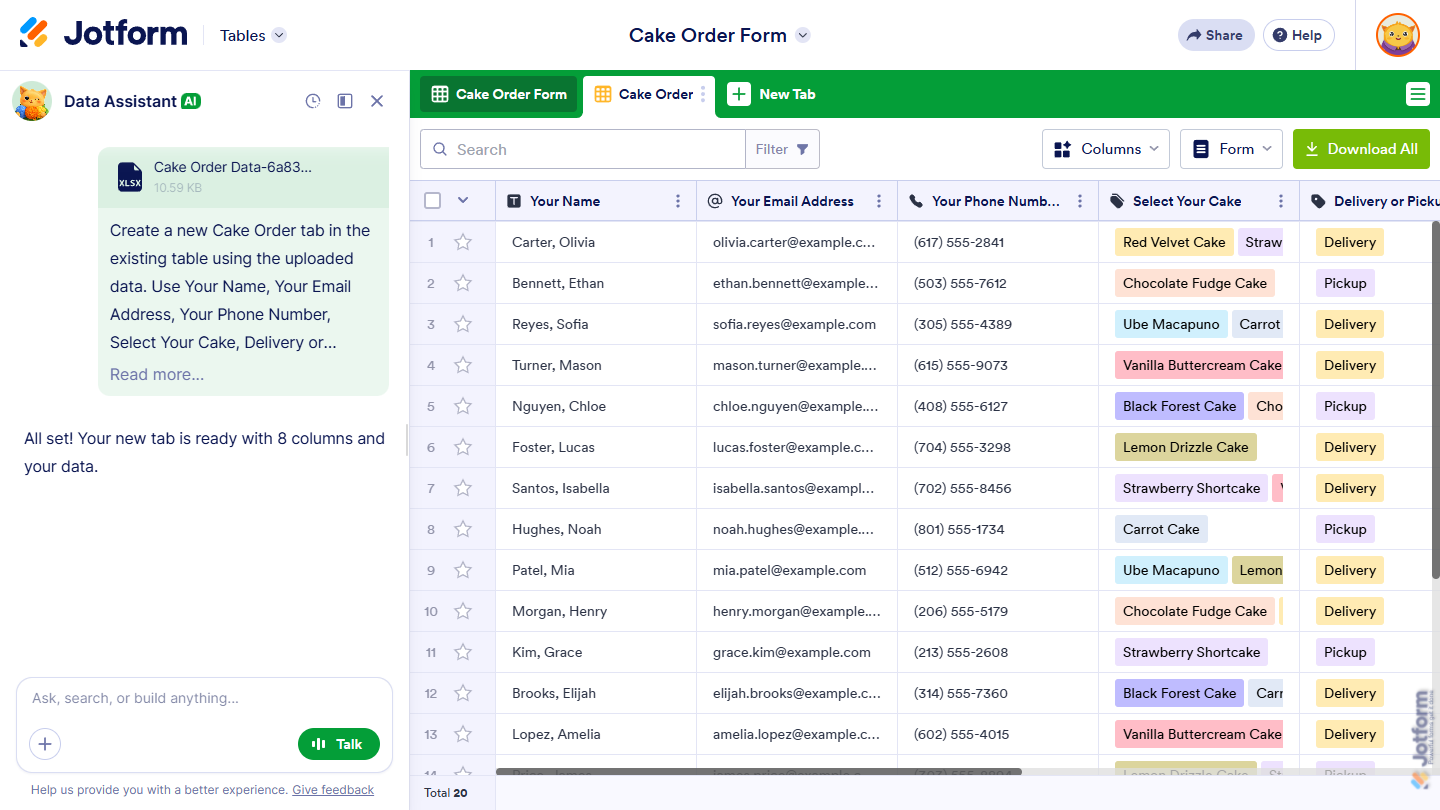
That’s it! A new tab is created with your imported data.
Importing Data Into an Existing Tab
Importing data into an existing tab is easy, whether it already has data or is blank. Here’s how to get started:
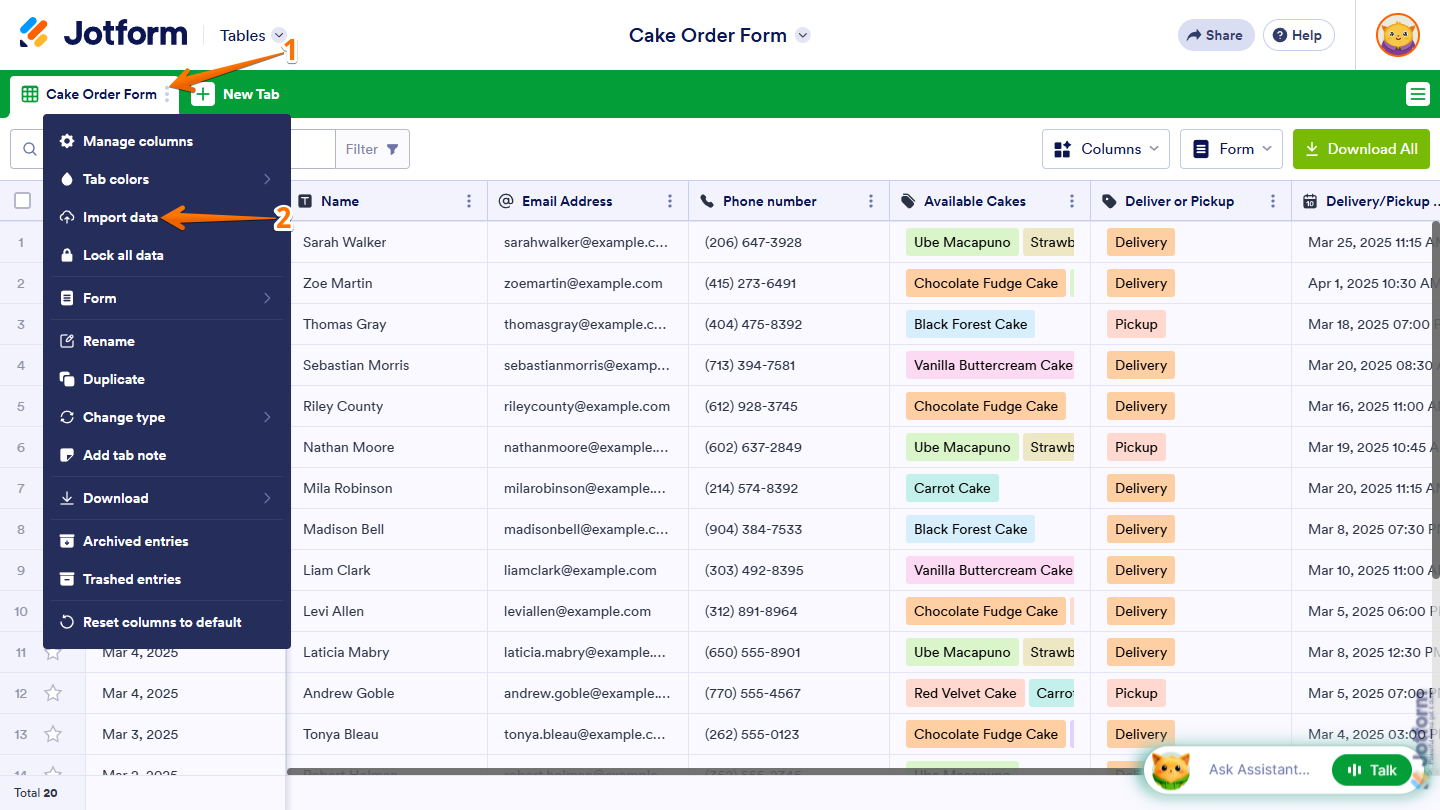
- In Tables, on the right side of an existing tab name, click on the Three Dots icon.
- Then, in the menu that opens, select Import Data.
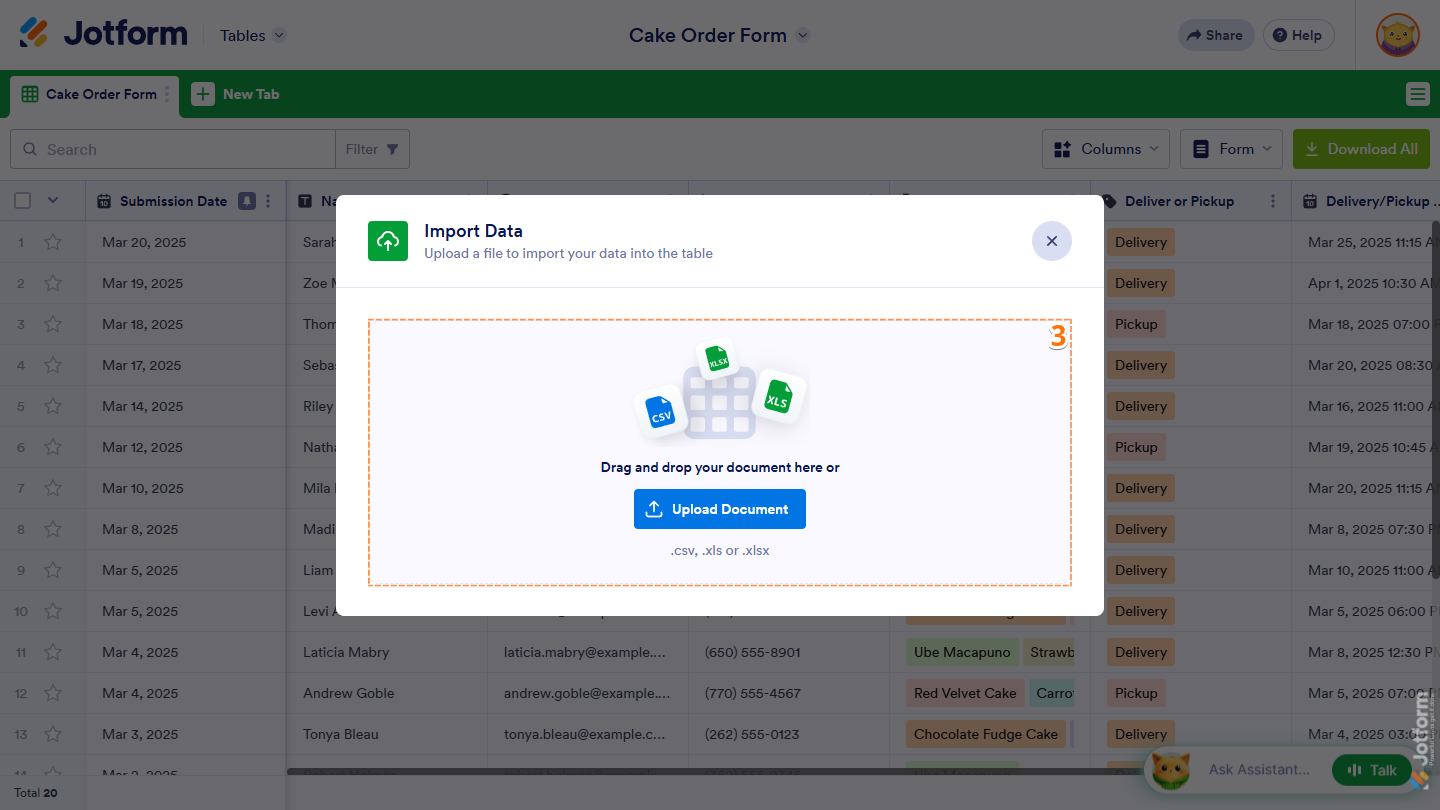
- In the Import Data window that comes up, drag and drop a CSV, XLS, or XLSX file into the Upload area, or click on Upload Document, and select the file from your device to import its data into the existing tab.
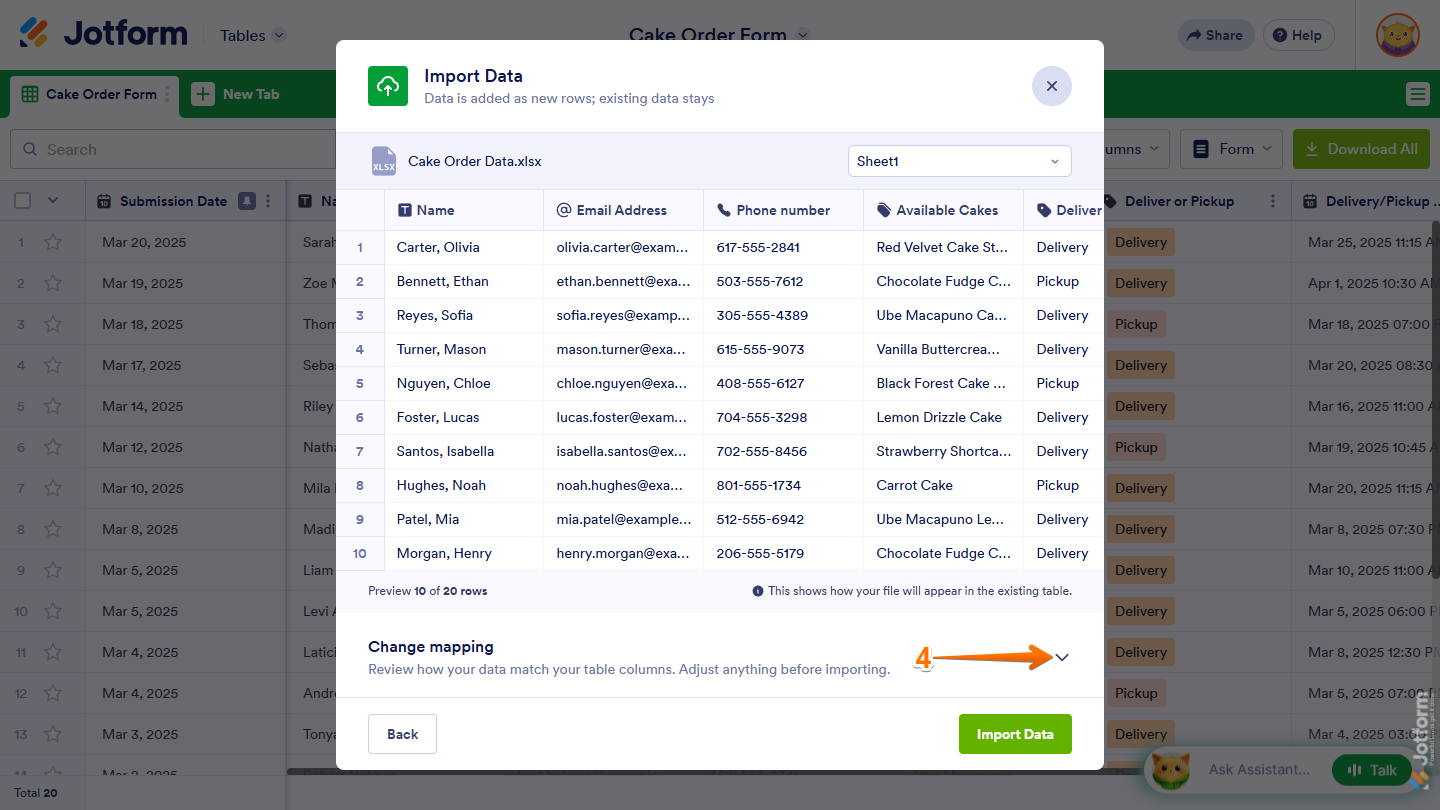
- Now, below the table preview, on the right side of Change Mapping, click on the Downward Arrow icon to change how the columns in your imported file are matched to the table columns.
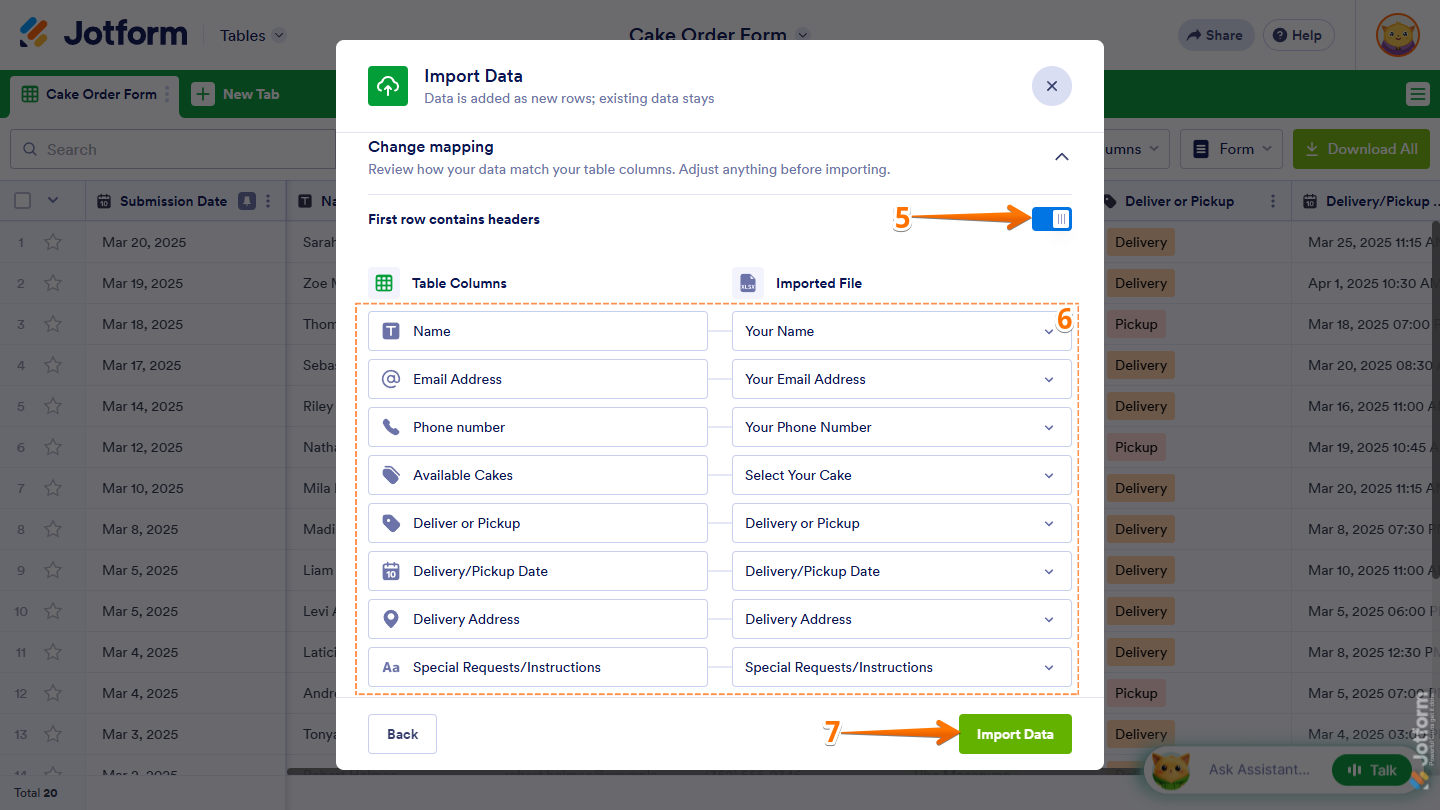
- To import data starting from the first row, scroll down and, on the right side of First Row Contains Headers, toggle it off.
- Then, under the Imported File column, click on a Downward Arrow icon, and in the menu that opens, select a different column to match to the column next to it under Table Columns. Or, if you’re importing data starting from the first row, select the corresponding default column letter instead.
- Once everything’s set, click on Import Data.
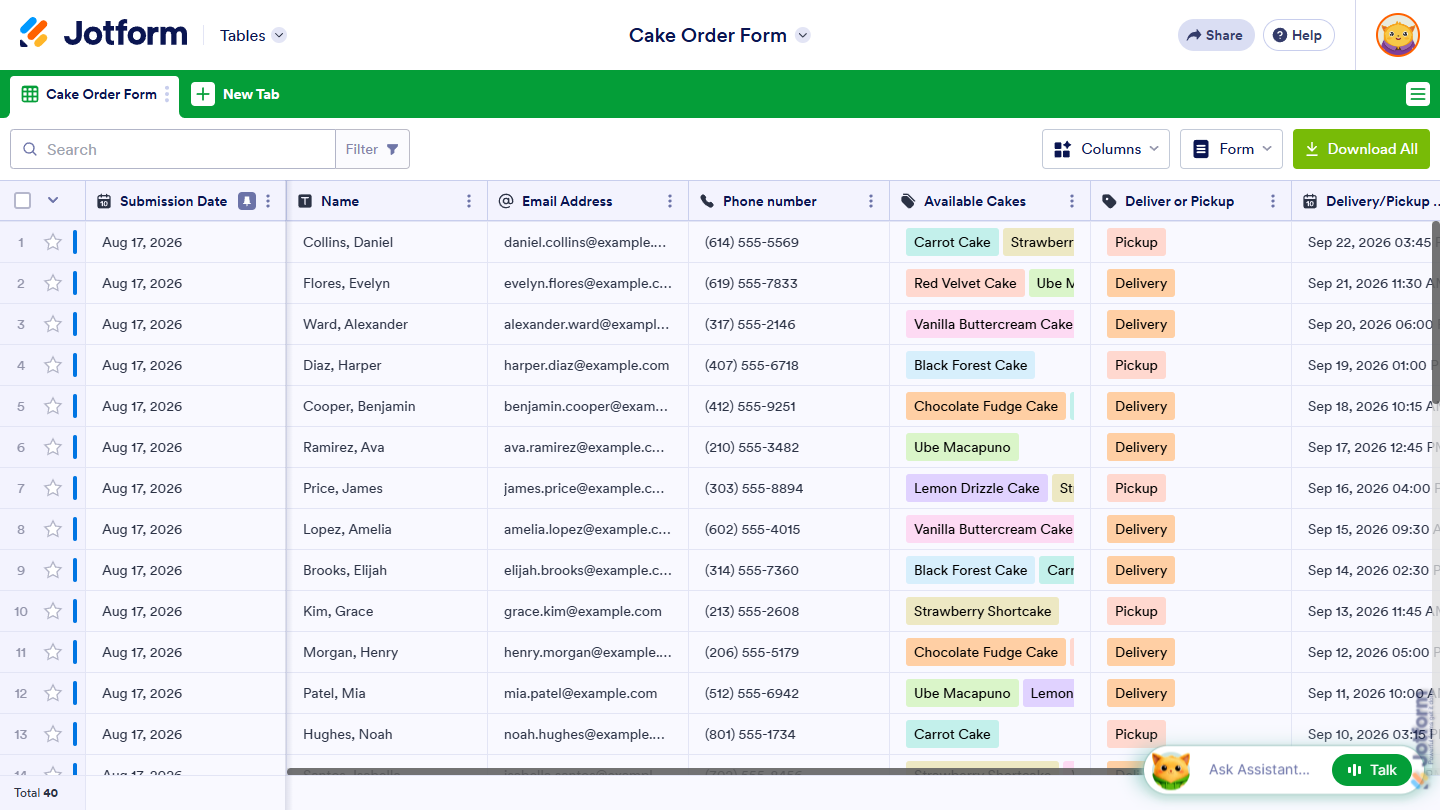
That’s it! Your data is now imported into the existing tab.

Send Comment:
12 Comments:
February 10, 2026
how to now sync the tables
November 27, 2025
in step 4. Set the column types, then select Create.
It is impossible to select a column type = Email
and therefore, when using my table to prefill a form, my email column which cannot be set as Email type, is not recognized by the prefill as email, and I cannot send invitations
February 11, 2024
The column type options when importing from an existing excel do not have all column types listed. For example email.... We cannot use the widgets or send forms with the accurate data because we cant import the column as an email field. only short text... long text etc... found in your demo. How do we fix this
April 17, 2023
how do you import into an existing table, not a new tab
October 30, 2022
I have a list of products and their suppliers, and I want create a form to send to each supplier, listing only their products. I was wondering if that's possible.
for clarification, I import 4 products, where item's 1 and 2 are supplied by supplier A, and 3 and 4 are supplier B. then the form I send to supplier A will only show items 1 and 2, and not 3 and 4, and vice versa for supplier B.
I have a lot of suppliers with different amount of products
I would prefer not to have to create 2 separate forms for the 2 suppliers.
October 10, 2022
Is it possible to merge imported data with an existing table - i.e. not have the imported data on a separate tab? We are using jotform for new membership applications and already have some entries - but want to add all the pre-jotform members to the same table. thank you
September 21, 2022
How many records (rows) can I import into a Table Form?
July 7, 2021
I uploaded an excel file with money figures, short text, and formulas from within excel for calculating percentages etc. When I uploaded, no data shows up in the table. The tab I uploaded into is "Tims Rates" and is in this table https://www.jotform.com/tables/211815820622045/211876286204054 Help...
May 17, 2021
How do you limit import of data from Excel to only include rows with data? I imported an Excel sheet with 66 rows populated and got 990 entries in my table. Made sorting an issue.
April 29, 2021
How do you get a date to import correctly? It imports as the julien date (ie. 44297), verses a usable date (4/29/2021)
April 28, 2021
can you save or back up a table?
November 15, 2020
Can you add the data to tables and integrate it with a form? If headers match fields in Form will it auto populate?