If you’re using Facebook ads, then you’re probably familiar with Facebook Pixel. It’s a small Javascript snippet that allows you to track visitor’s activity on your website so you’ll know their interests and be able to optimize your campaign. To learn more, visit Facebook Pixel.
Note
Some adblockers can block Facebook Pixel to capture and send data. Thus, while testing, it would be better to temporarily disable adblockers to see the results. Likewise, tracking the activity of your users may be impossible if they have adblockers installed.
You can install the Facebook Pixel on almost any platform. In Jotform, you can use the Facebook Pixel widget to easily add the snippet to your form. The widget lists the standard events you can select from, allowing you to track these activities when needed. For reference, here’s the list of all Standard Events and their purposes.
Installing Facebook Pixel in the Form
To install Facebook Pixel on your form, follow these steps:
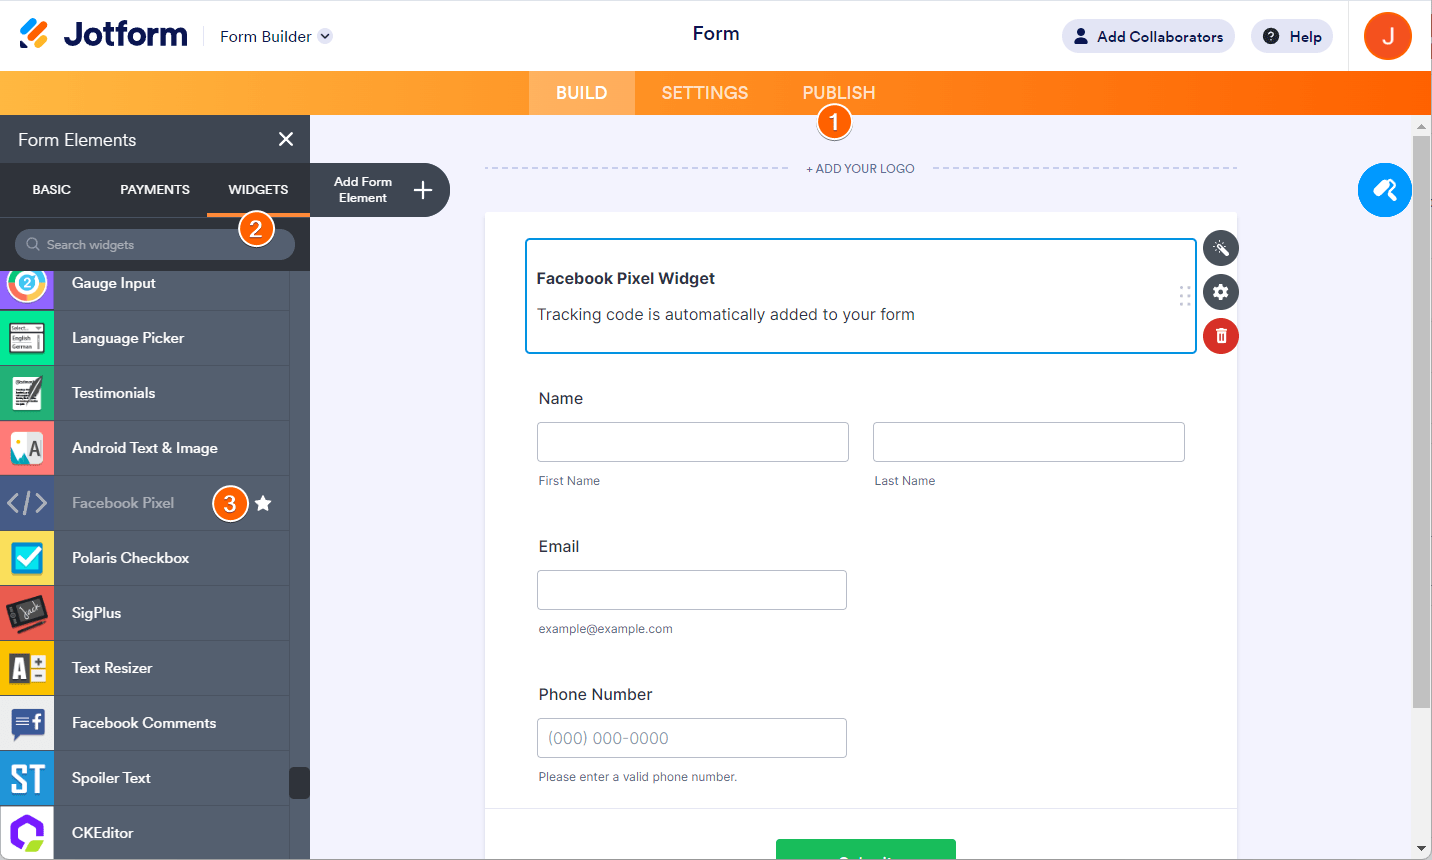
- In the Form Builder, click the Add Form Element button on the top left of the page.
- Go to the Widgets section.
- Search for and click Facebook Pixel to add it to your form. You can also drag/drop it to add.

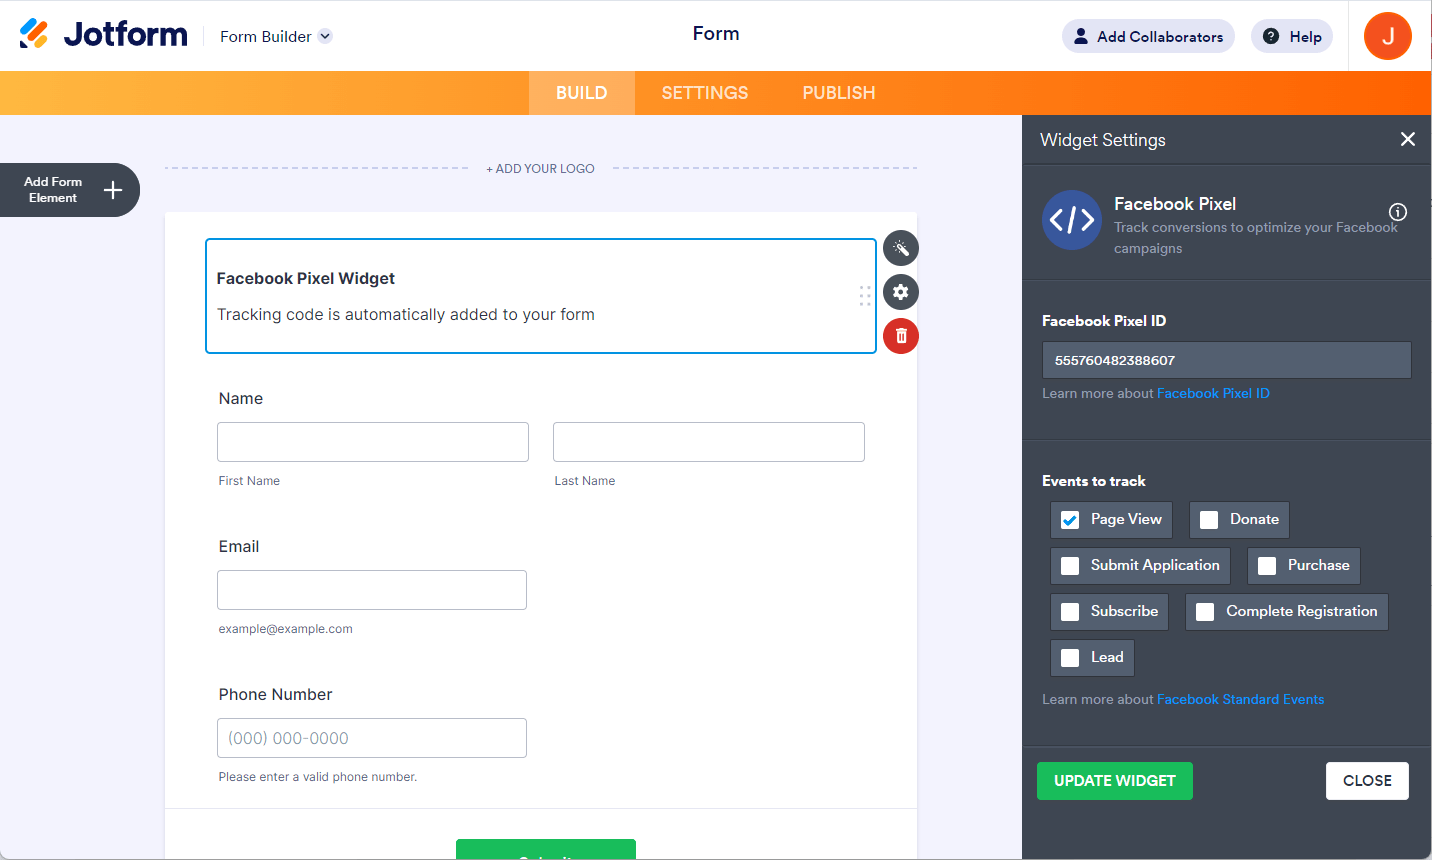
- In the widget Settings, enter your Facebook Pixel ID.
- Check all items you wish to track from the Events to track section.

- Finally, click the Update Widget button to save the changes.
Testing Pixel
Now that you’ve installed the pixel on your form, you can perform tests to see if it’s working. Here’s the easiest way to test your pixel:
- Select your pixel from the Facebook Pixel Event Manager section.
- Go to the Test Events tab.
- Enter your form URL and click the Open Website button.

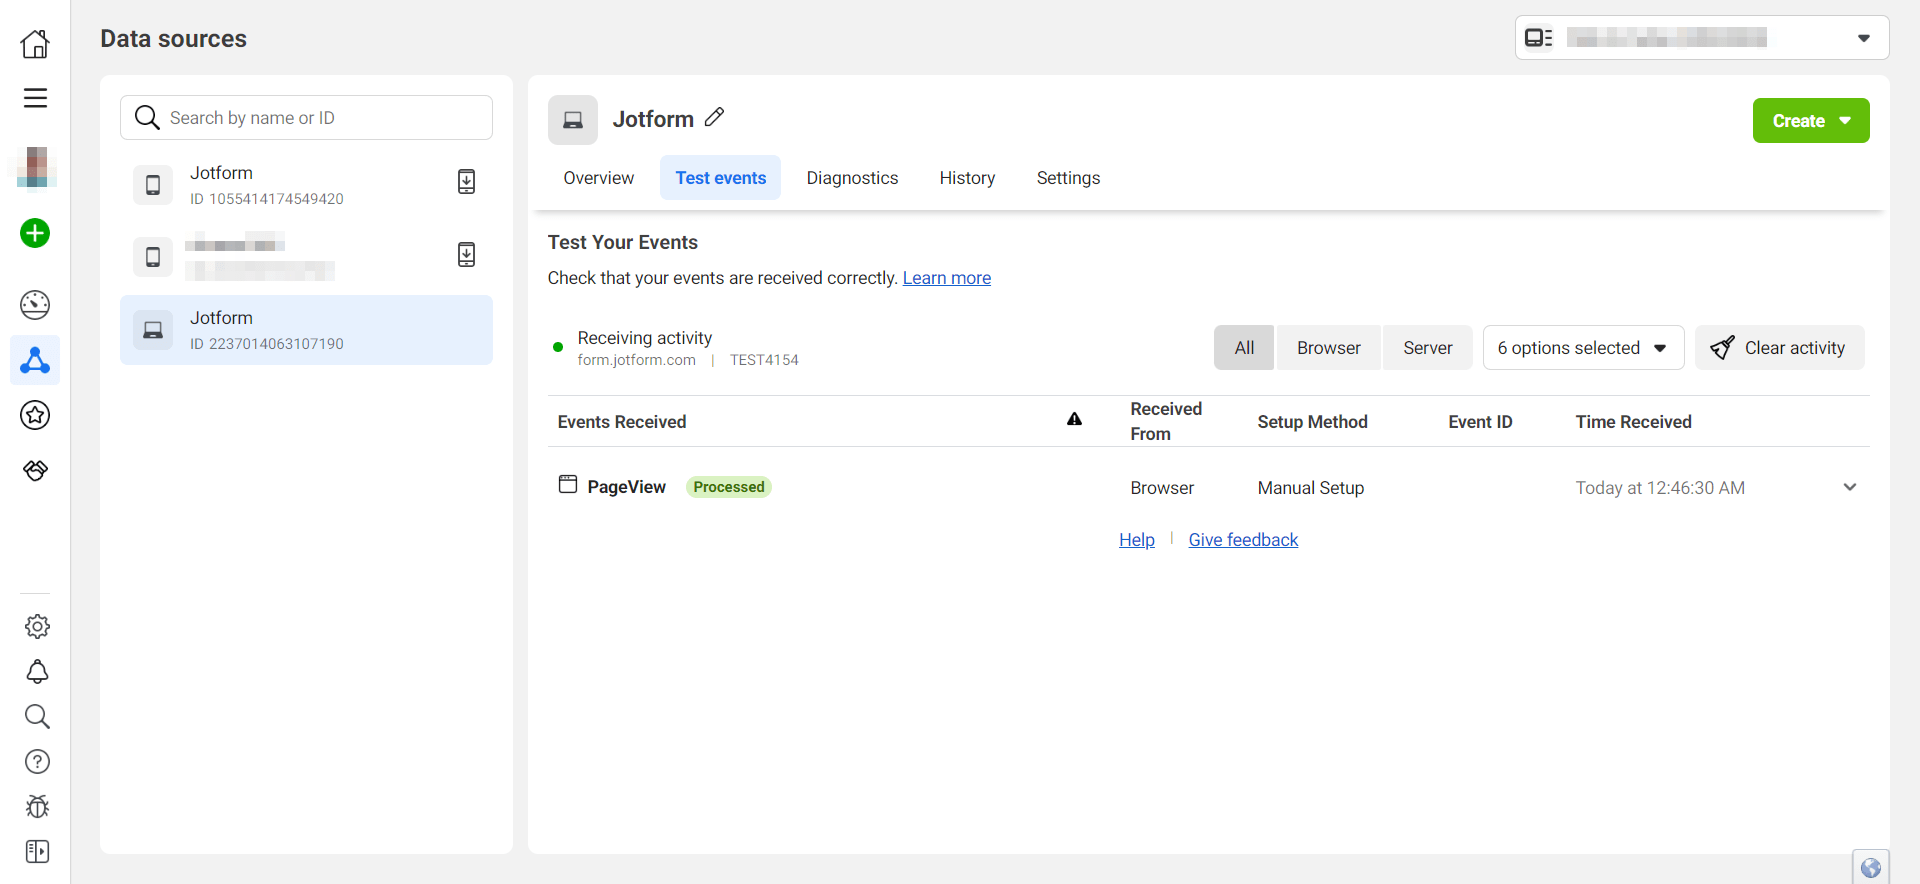
If you select the PageView event in the Facebook Pixel Widget Settings, you’ll immediately see the PageView standard event on the same tab when you view your form. For example:

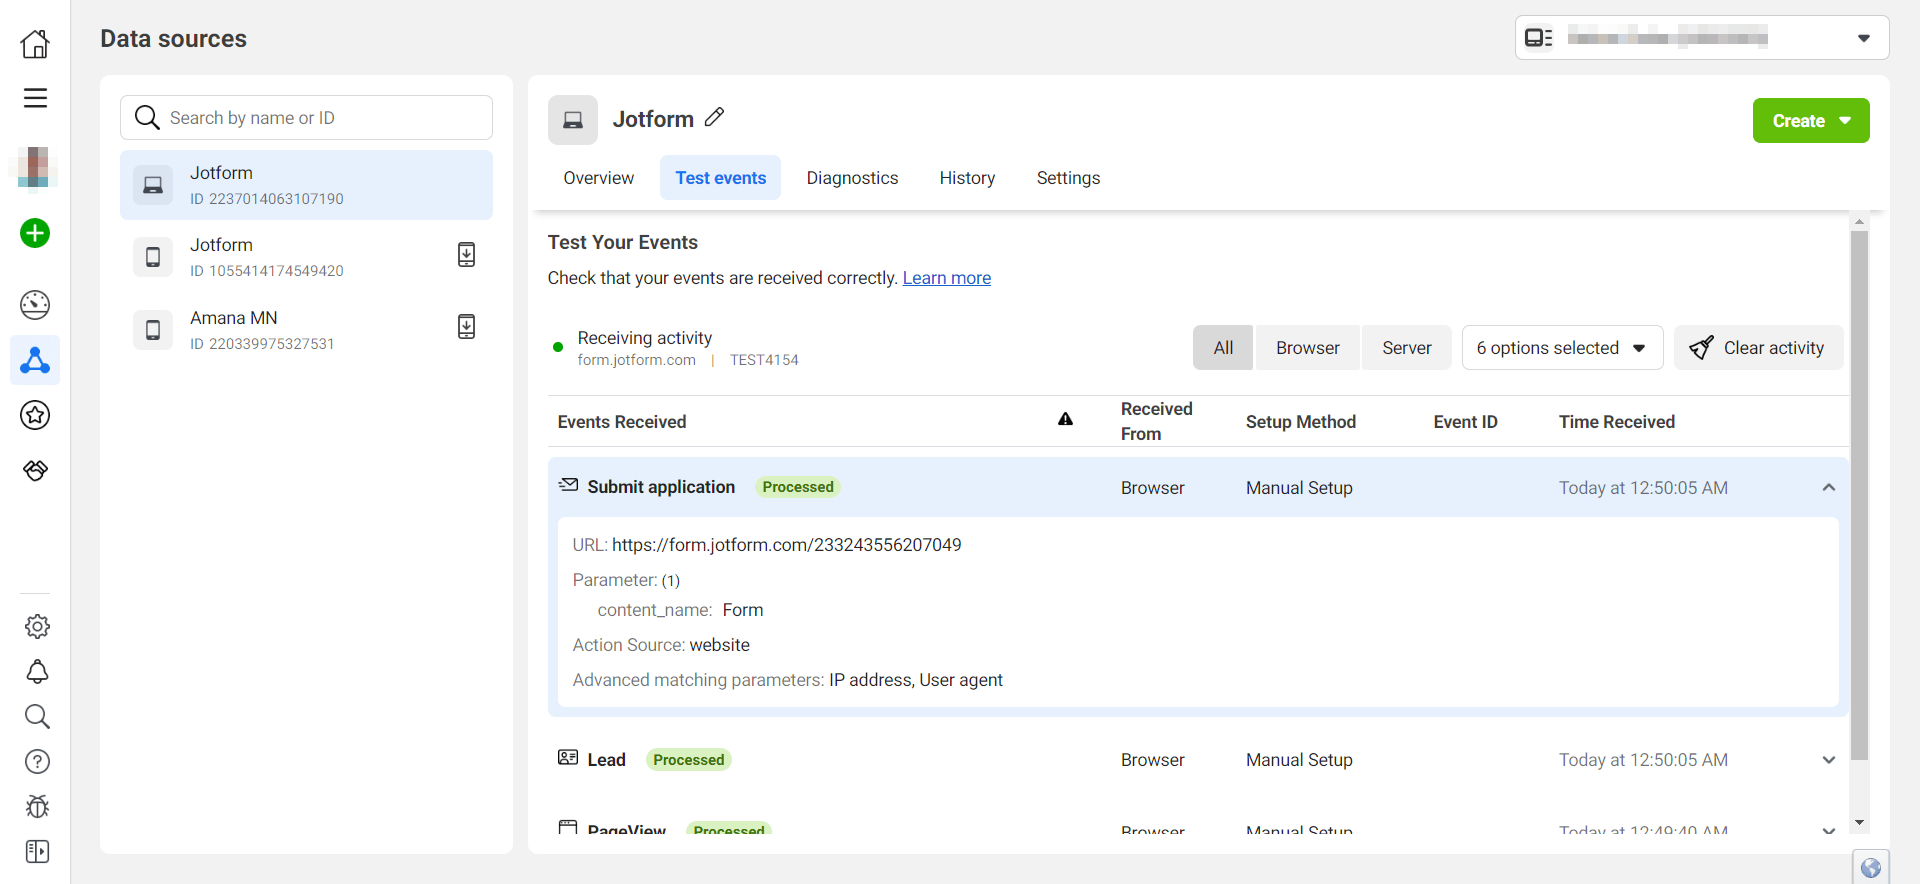
To track the rest of the standard events, fill out your form and submit it. This will send the selected standard events into the pixel dashboard as shown below:

That’s pretty much it. You now have a fully working Facebook Pixel running on your form, so you can start tracking conversions and creating custom audiences for almost any of the standard events you want, whether it’s form visits, completed payments, or completed registrations.


Send Comment:
8 Comments:
151 days ago
I need some help with this topic
305 days ago
Hello -- it seems like a similar question has been asked but I don't see a resolution at any of the links below. I also have a multi step form and have added the FB pixel widget to the bottom of my form on the final page. I am seeing Pageviews tracked correctly, but not my selected conversion event. I am directing to a thank you page on submit. Do I need to add the pixel to the thank you page? I am using a Jotform thank you page, not an external link.
I found that when I use the lead conversion event it does work, but I am having trouble with other conversion events such as “Complete Registration.”
More than a year ago
Is this a browser only based pixel option? Or do we need anytrack or madgicx.com or some cloud or dns tracking solution to use the FB Capi ? Is there a video about setting the FB Capi?
More than a year ago
Hello... I followed the steps, but I have a message from Events Manger on Facebook saying that :
Unsupported web browser
The web browser you're using is not supported by the Test Events tool. Please try another web browser to toubleshoot your events.
More than a year ago
I have a step by step form, i inserted the widget and it isn't firing. i NEED some help here please
More than a year ago
Doesn't work if you embed the form on your website. It triggers only the PageView event. Amateurs. ?
More than a year ago
Same question as above... I have multiple step form.
More than a year ago
Hello,
for first thank you a lot.
If i have a step by step form, in which step have i to insert the facebook pixel widget to track a lead?