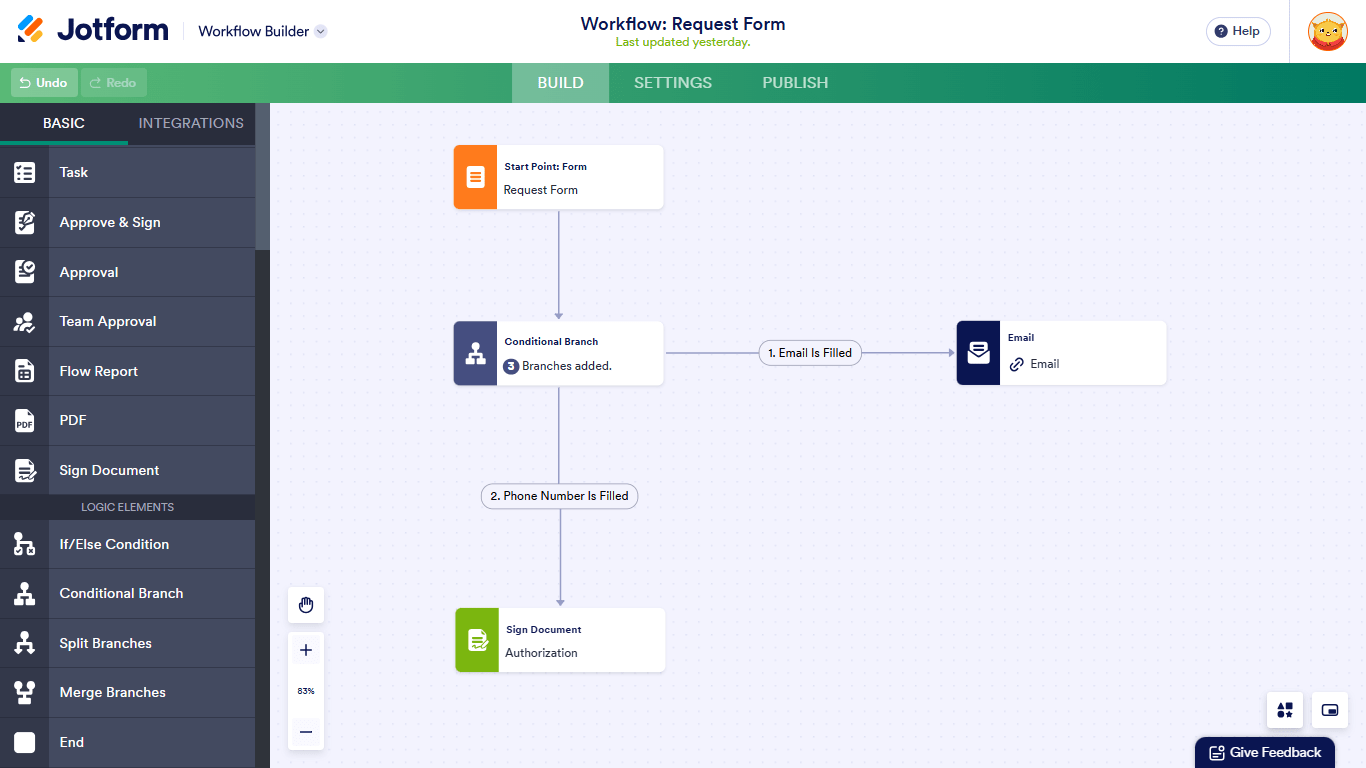
Unlike the If/Else Condition element which can only support up to two branches (true or false), the Conditional Branch element allows you to direct your workflow to the number of conditions or branches you define. You can tailor your workflow based on specific criteria making your approval processes more flexible and efficient.


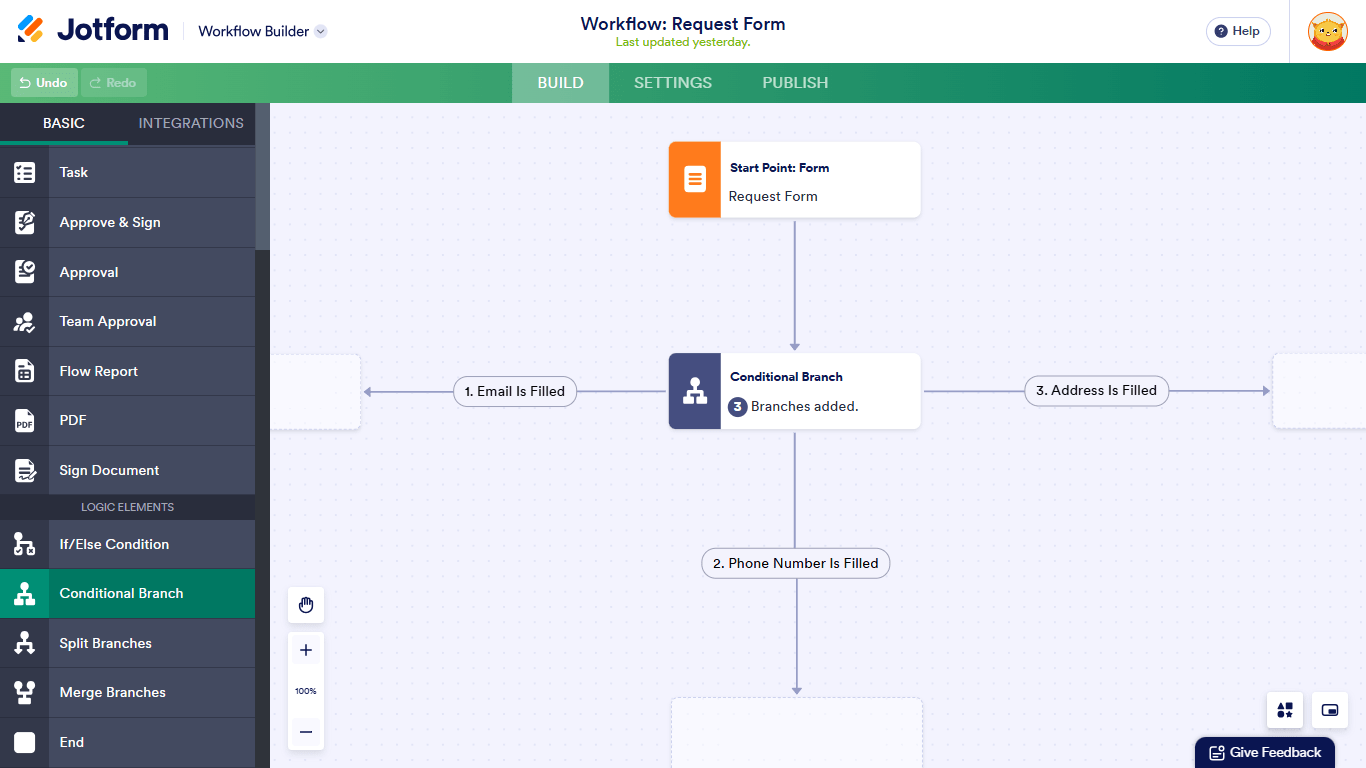
To use Conditional Branch
- In the Workflows Builder, add a Conditional Branch element to your flow.
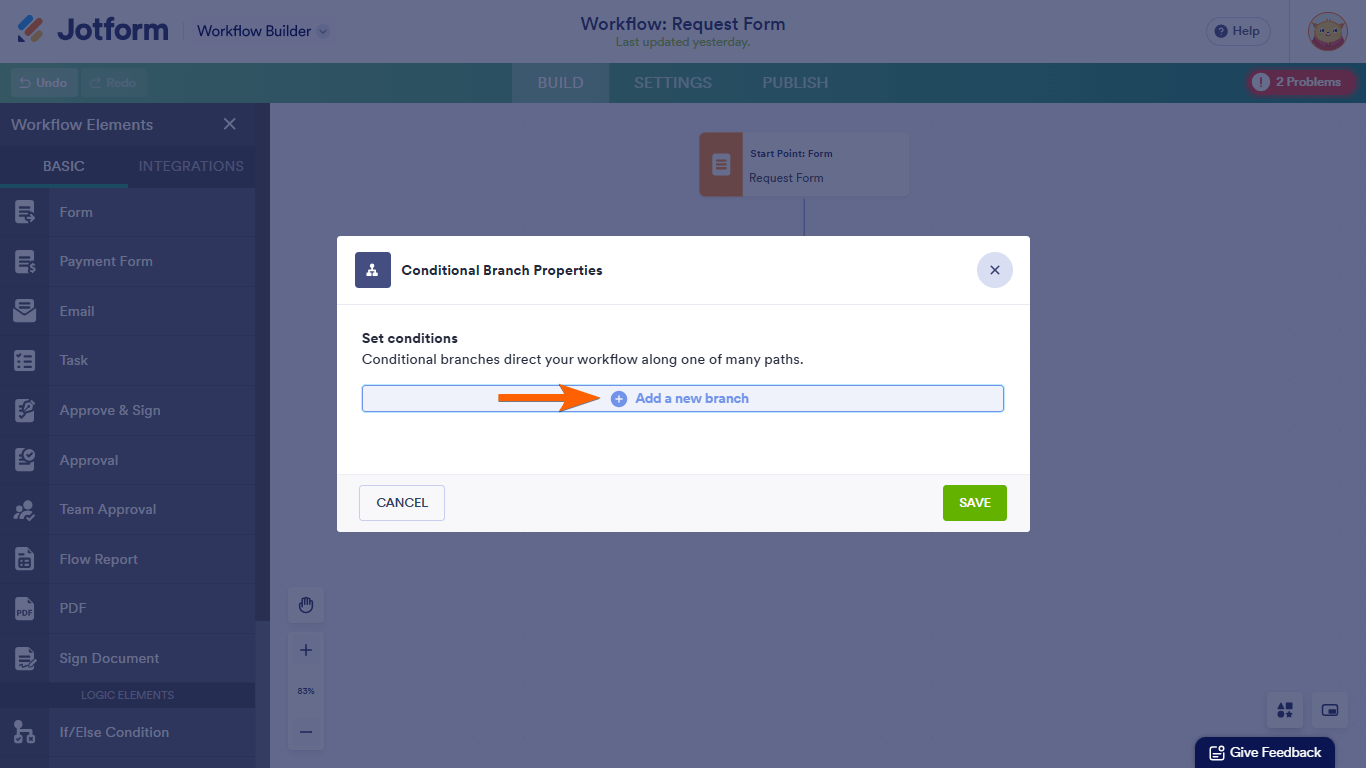
- Select the gear icon to open settings.
- Add a new condition branch.
- Configure and save your condition.
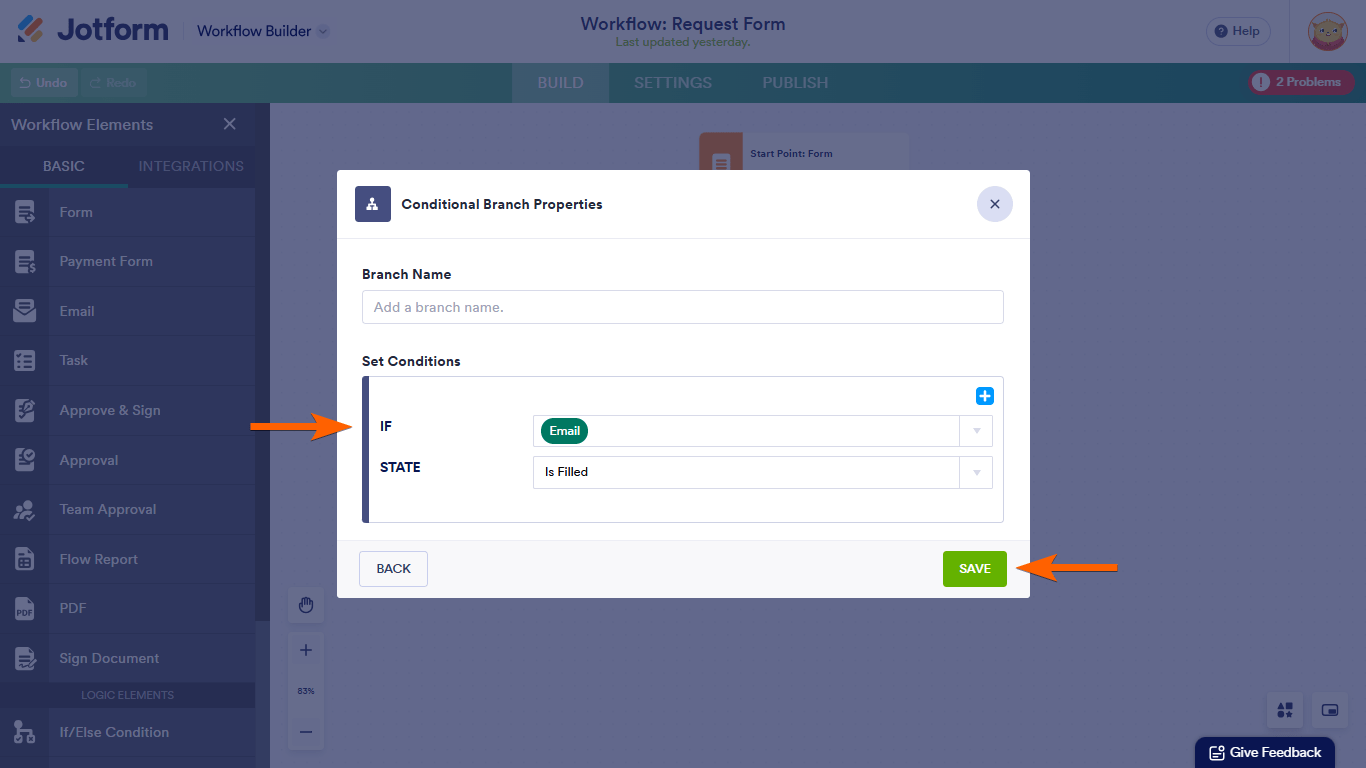
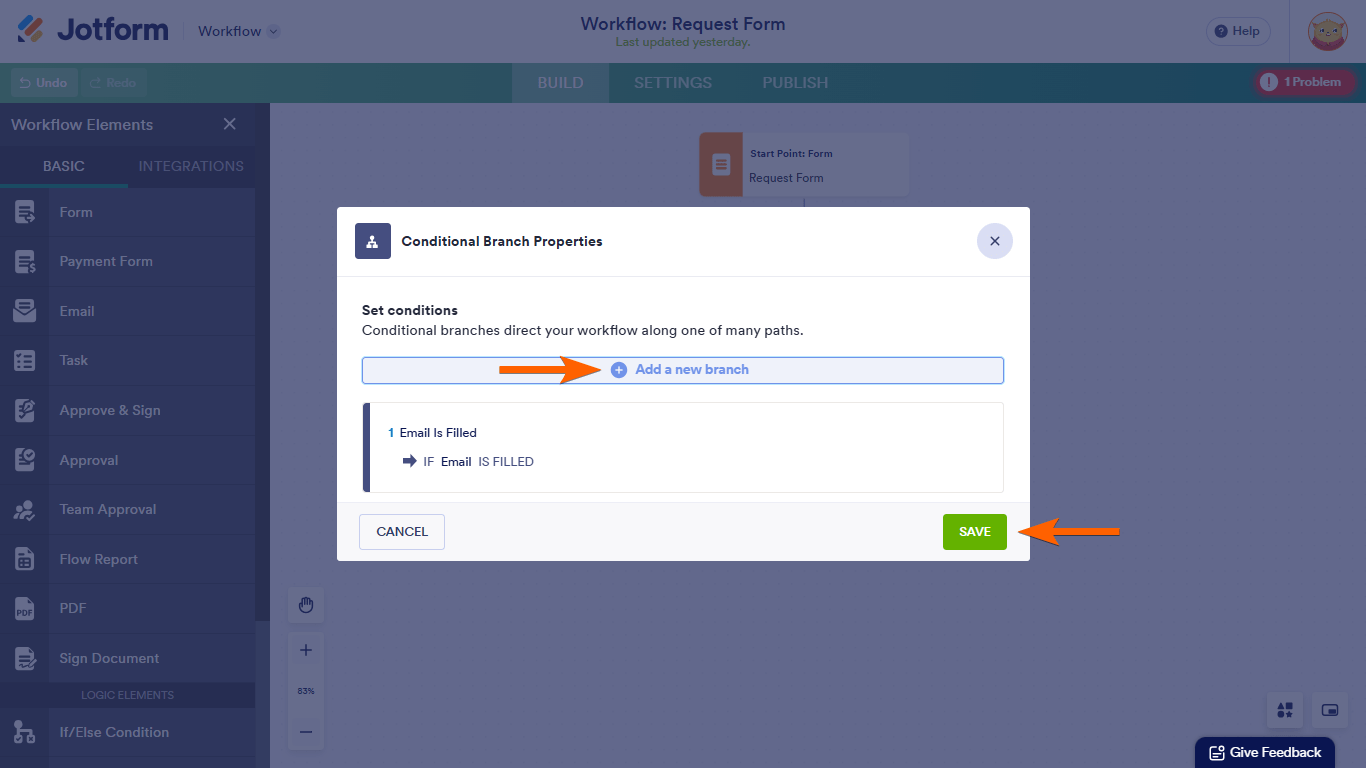
- Add another condition branch or select Save to close the dialog.
- Create a flow and assign a condition from your Conditional Branch. See How to Add and Connect Approval Elements for more information.
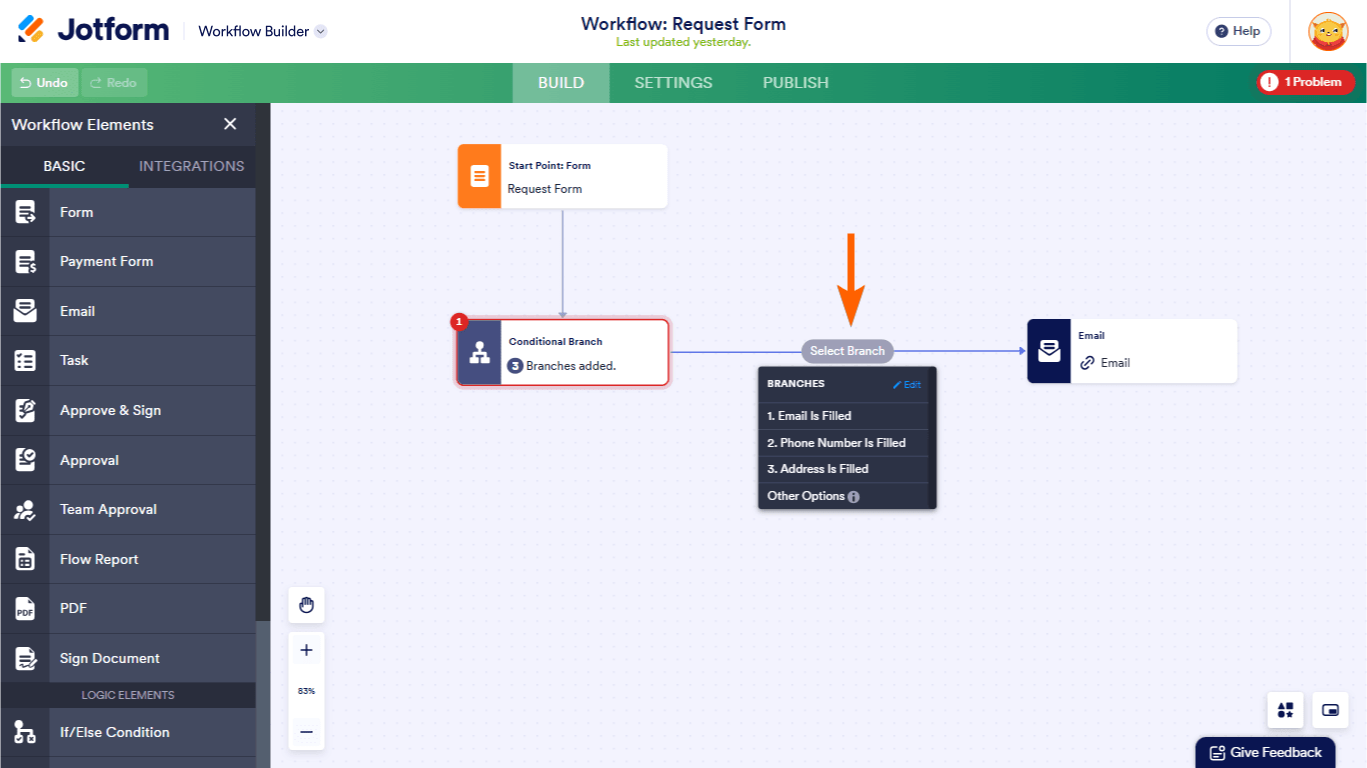
- Do the same for the rest of your configured conditions or branches.

Send Comment:
6 Comments:
January 14, 2025
I'd like to prefil a form based on a question beiing equal to an entry in a submission table.
1. client is a customer of ours, so they have filled out a contact form
2. client comes back to our store on a different visit, we don't want to have them fill out the form again. If we get their phone number. We'd like to have their info prefil another form.
How do we do this?
June 26, 2024
Hi,
I am new to the approval functionality. Is it possible to have separated the emails based on the state entered in the form from the user?
For example, in my branch, if a user submits a form saying they are from Delaware, Maryland, or Washington DC, I would want to receive the email for approval. But if someone from the Los Angeles branch had a user in California, I would want them to receive the approval email instead of me.
Thank you
May 29, 2024
Hi,
I am new to jotform. Is it possible to send a link to jotform element based on a response in a different jotform element?
For example, I want a reference contact to receive a link to a jotform survey after a student applicant fills out their jotform element.
Thank you
November 30, 2021
Como faço para não chegar nenhum e-mail nos e-mails que eu colocar quando eu preencher os formularios?
May 19, 2021
When I create an approval flow, I am generating the email for approval. I then click on approve and the web page opens up with a flashing email icon. I check the tables and the approval status is In Progress. I am not sure why the approval is not changing to approved. Any suggestions?
Thank You
Richard
May 5, 2021
Hello.
Can an approval branch be used to send a specific autoresponder email to the person who completed the form depending on what they selected?
thanks Loretta.