When integrating forms into your existing workflow, you may encounter specific challenges. Let’s take the following example:
Regardless of the use case, understanding how to work with text (strings) can be a significant advantage when building interactive forms. The goal is to apply these techniques to the use cases mentioned above and to use them as building blocks for more dynamic, responsive forms. Ultimately, your imagination and creativity are only limited by how well you understand conditions and calculations.


Want to see it in action? Take a look at this Demo Form.
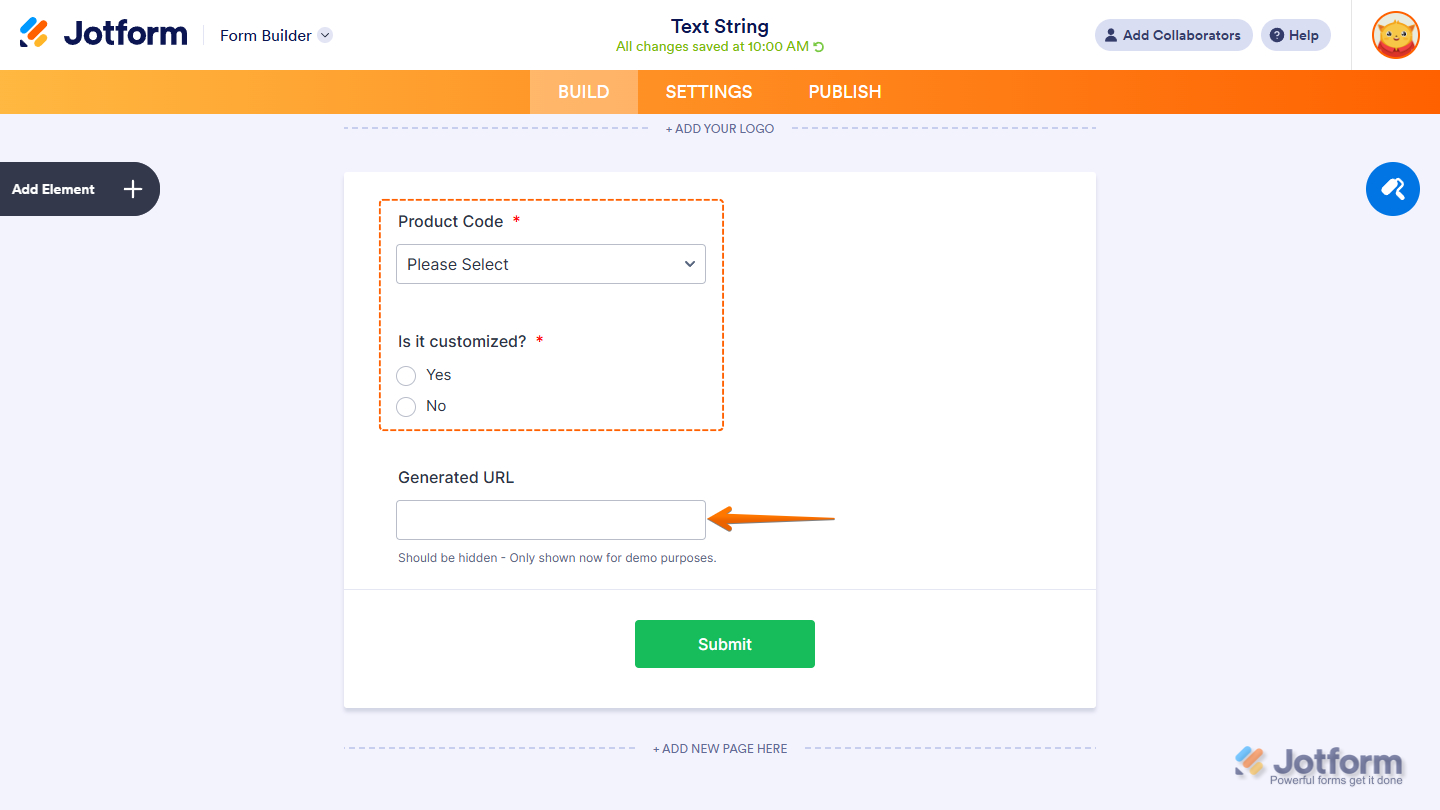
Generate URL Based on User Input
For this method, add the fields required to build the URL. For example, you can use the Dropdown and Single Choice elements, as shown in the demo form. Also, be sure to add a Short Text Entry field, where the condition will generate and display the URL.
For the conditional logic, you need to first set up the IF statement. You can add both Dropdown and Single Choice elements in it with Is Filled as the State, then choose All from the If Any/All dropdown menu.

For the DO statement, just do it as follows:
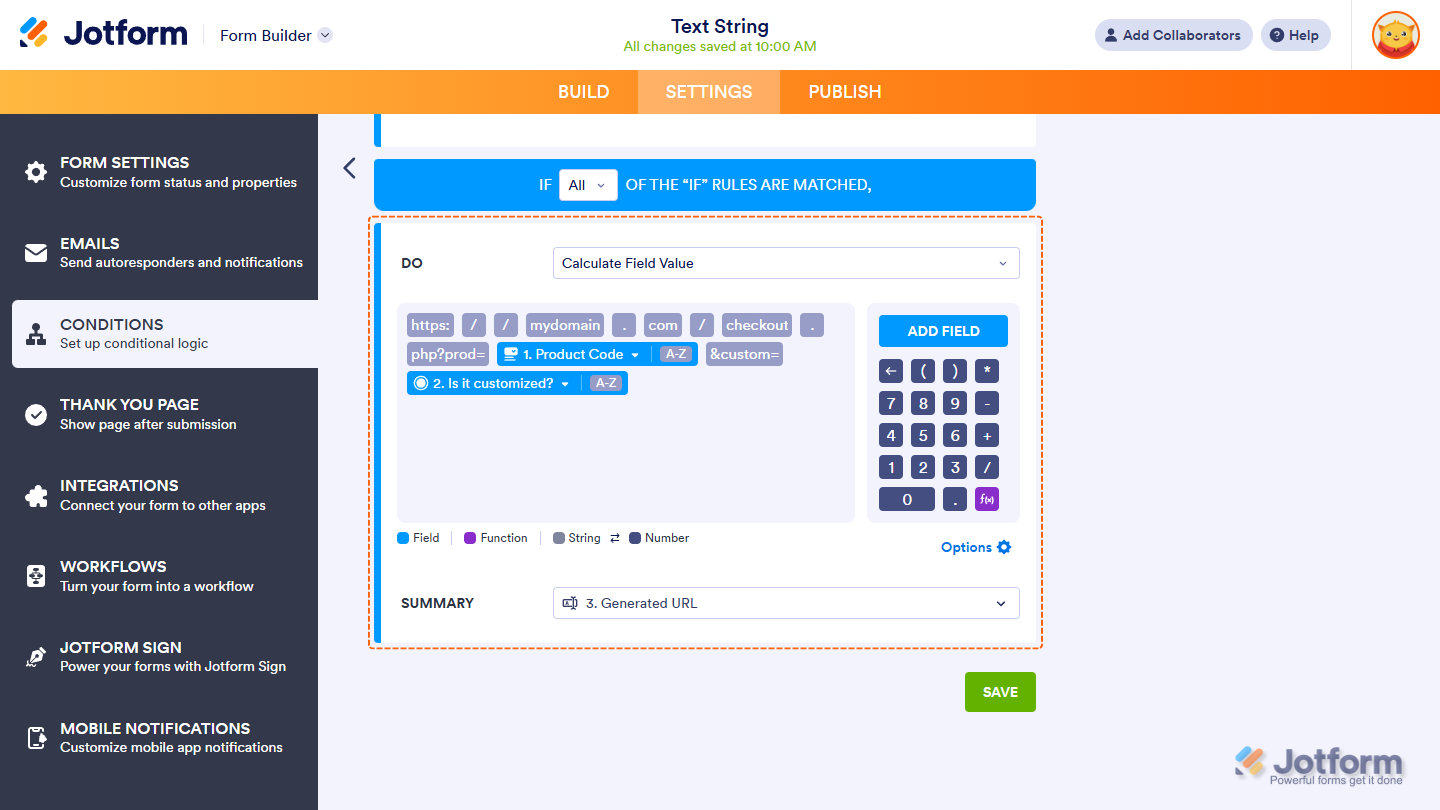
As you can see, there are no operators needed between text and form fields. Simply type the text and insert the fields where needed.
https://mydomain.com/checkout.php?prod={addFieldHere}&custom={addFieldHere}For the Summary, select the Short Text element as the target field, as shown in the above image.
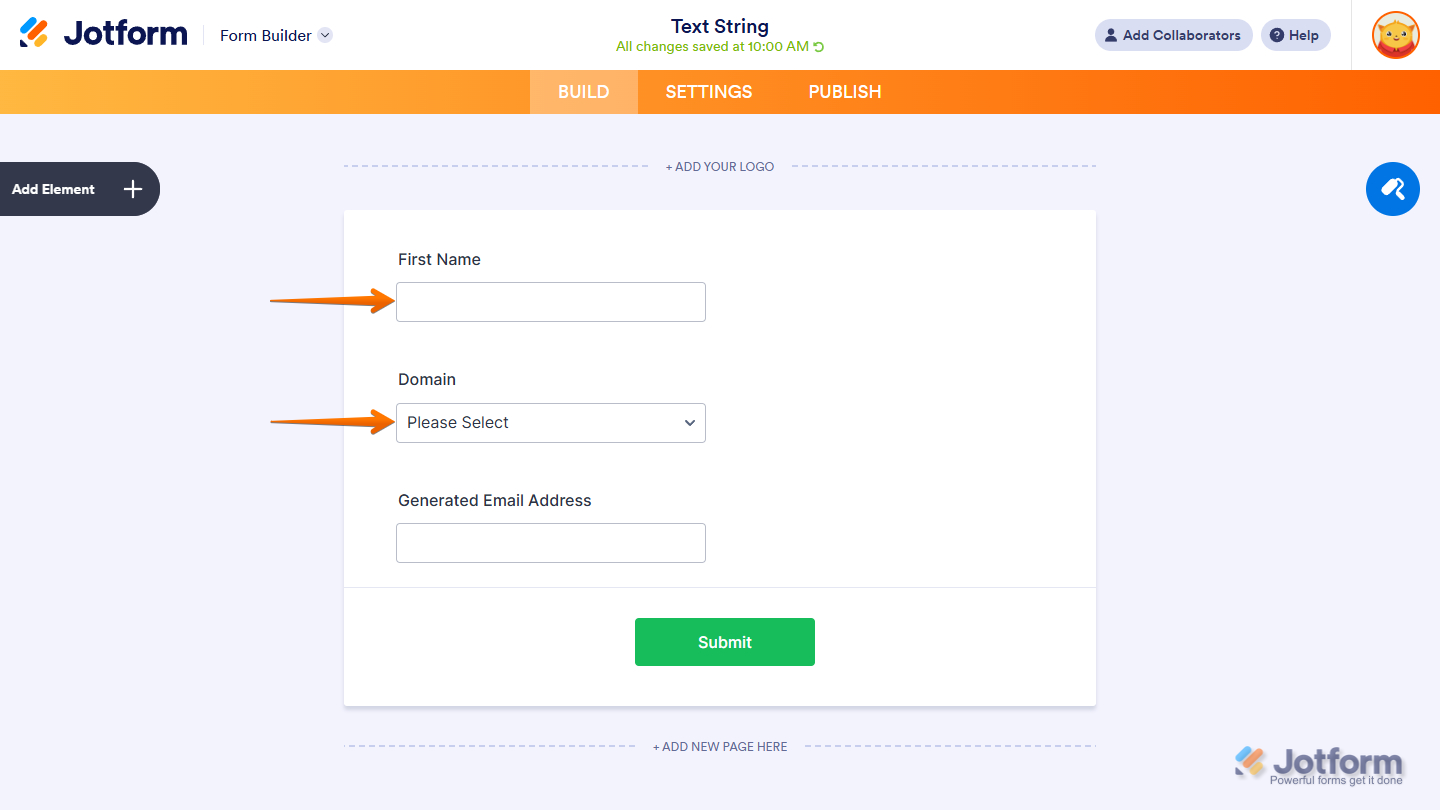
Generate Email Address
Add the elements needed to generate a properly formatted email address. The portion before the @ symbol identifies the mailbox name, which is typically the recipient’s username (for example, johndoe). The portion after the @ symbol is the domain name, representing the mailbox’s administrative realm (for example, example.com, the company’s domain).
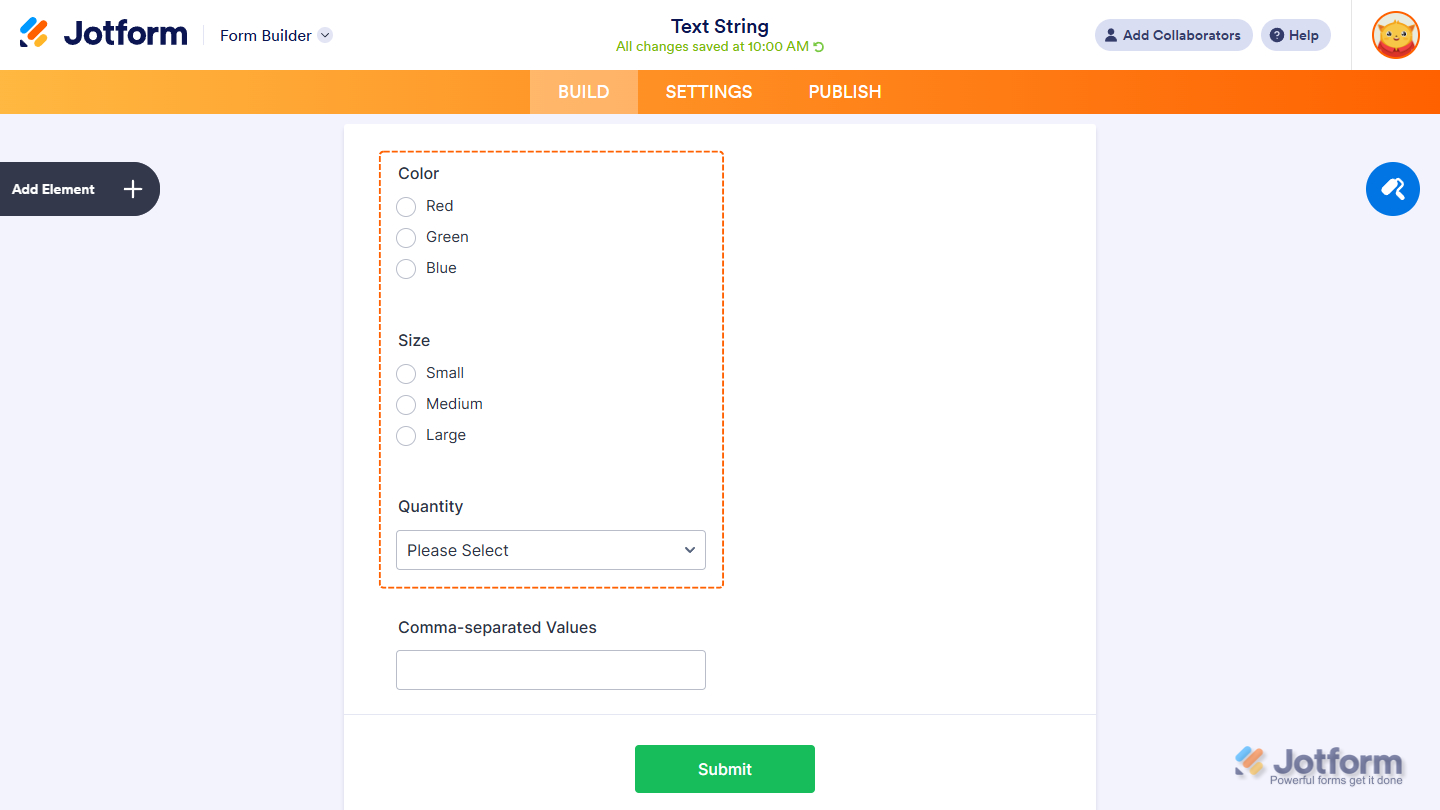
In the demo form, the Short Text Entry element captures the name, while the Dropdown element lists available domain options.
For the conditional logic, you need to first set up the IF statement. Add both the Short Text and Dropdown elements with Is Filled as the State, then choose All from the If Any/All dropdown menu.
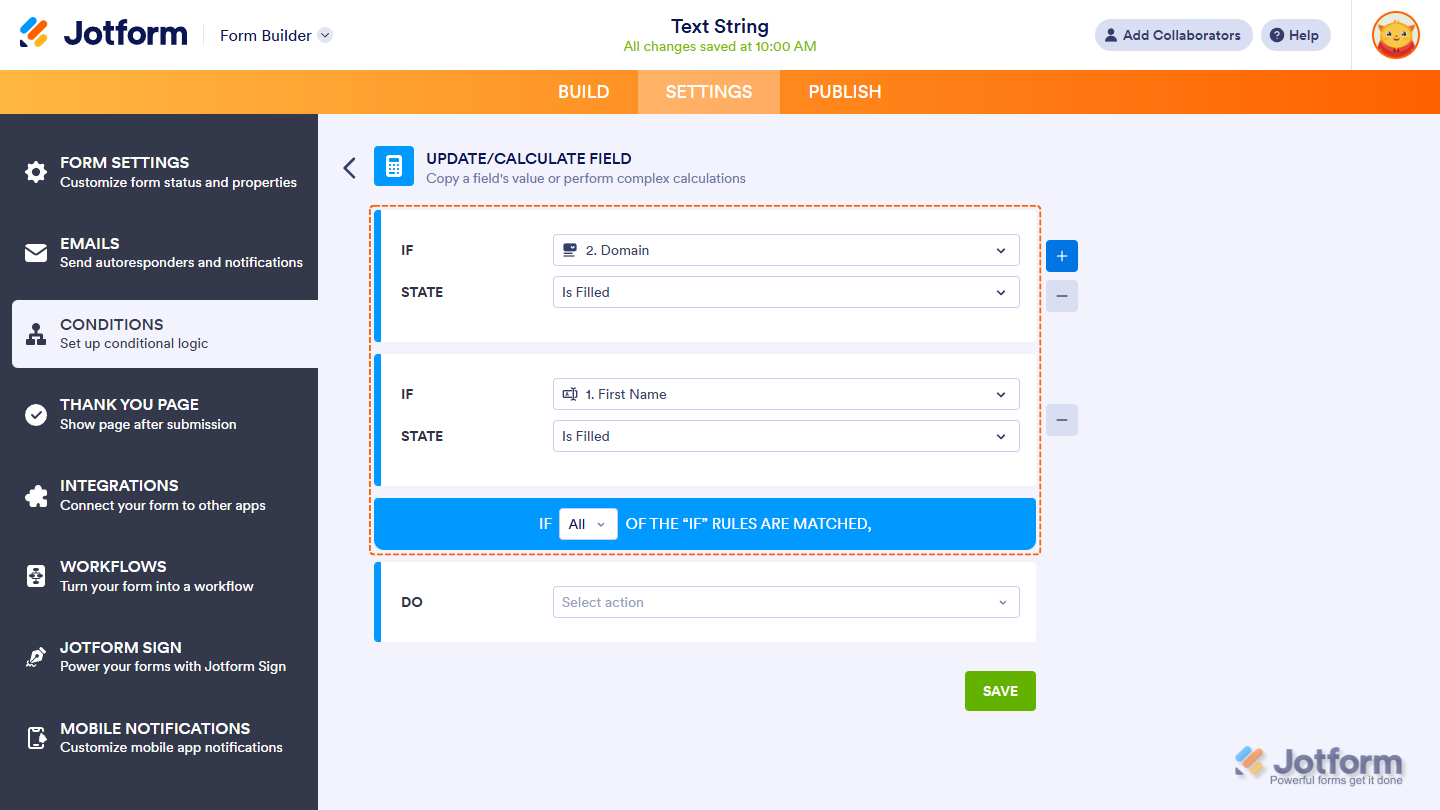
For the DO statement, just do it as follows:
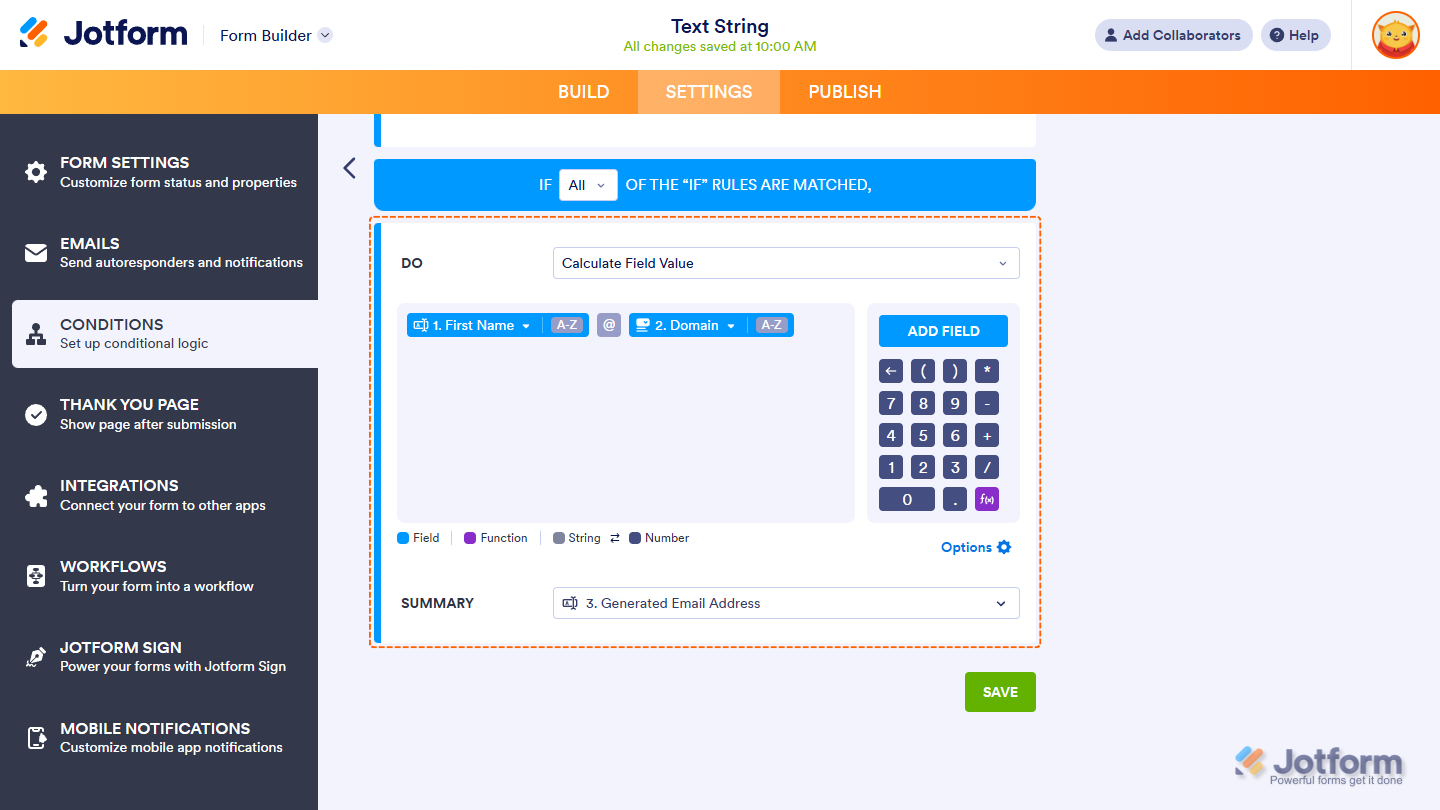
As with the previous method, there’s no need to use operators to concatenate text or strings. Simply type the values in order—first the Short Text Entry, then the @ symbol, followed by the Dropdown field.
{addFieldHere}@{addFieldHere}For the Summary, select the Short Text element as the target field, as shown in the above image.
Generate a Comma-Separated Set of Values
Lastly, the same principle applies here. Simply add the required elements and insert a comma between them in the condition, making sure they are rendered as text. In this example, two elements are used: a Single Choice field and a Dropdown field.
For the conditional logic, add all elements with If Filled as the State, then choose All from the If Any/All dropdown menu.

For the DO statement, still add the fields separated by commas.
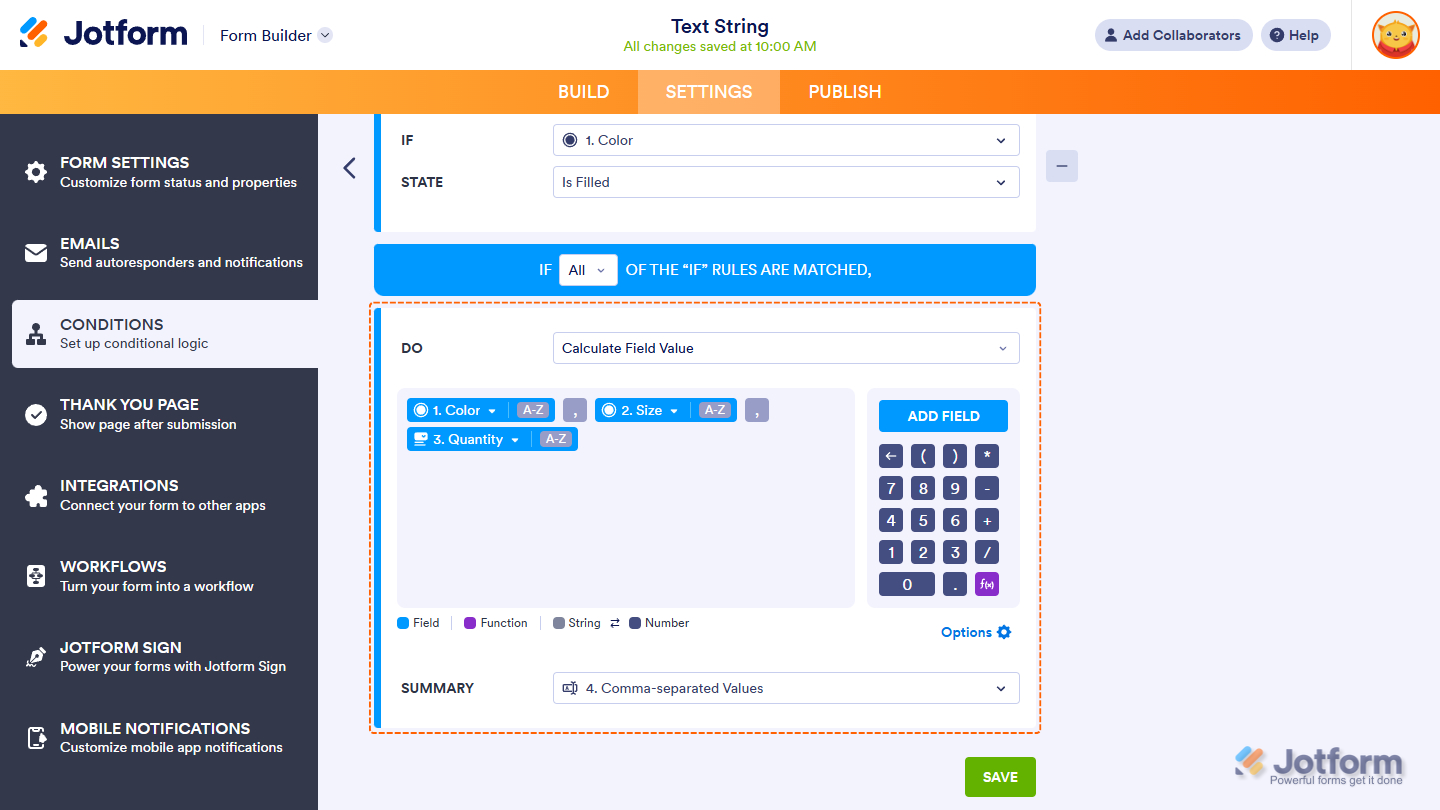
For the Summary, select the Short Text element as the target field, as shown in the above image.
Notes
- Any text you manually type in the Calculate screen is treated as text by default and appears with a gray background.
- Any field you add by clicking Add Field is treated as a number by default and appears with a navy blue background.
- To switch a field between text string and number (and vice versa), click the 0–9 or A–Z toggle at the end of the field.
- Pressing the Tab key automatically converts the text you typed into a text/string block.
- Don’t forget to click Save to apply and save your conditional logic.


Send Comment:
6 Comments:
May 6, 2024
Hola, quiero hacer un formulario de Multiple opcion, donde coloco cual es la pregunta correcta y donde le puedo dar valores a esos campos de preguntas...
March 29, 2023
I am using the "Generate URL Based on User Input" method. User inputs may contain spaces. I am using the calculated value in a rich text question. The generated URL is correctly displayed, but the actual destination of the link is truncated at the first space in the user input.
Is there a way to URL encode / escape the user input? Or do a basic replacement of spaces with + or %20 ?
January 22, 2023
I have a multiple choice question, I was able to do a conditional calculation for the most of the answers, but how can I get the information from the "Other" field to copy into this other field?
July 9, 2022
Can you remove the spaces from a text field (or change the spaces to underscores) to generate a valid url using this method?
May 25, 2022
I want to copy or fix the value upon selection of a single choice field to a particular dropdown of configurable list. Can this be done?
April 4, 2022
I have been trying to generate emails from the standard Full Name field, however unsuccessfully. the convention is Firstname.Lastname@domain - this separation of first and last names is what I have been having trouble with.
Any advice will be much appreciated