Integrating your form with CardConnect lets you securely collect payments directly from your respondents without redirecting them from your form experience. By connecting your CardConnect account, you can streamline transactions, reduce manual processing, and ensure sensitive payment data is handled with advanced security measures.
This integration is ideal for businesses and organizations that need a reliable way to accept credit and debit card payments for registrations, product orders, service fees, donations, and more. Once set up, payments will be processed automatically whenever a form is submitted, helping you save time and maintain accurate transaction records.
With CardConnect, you can do the following:
- Sell Online Products
- Sell Merchandise
- Collect Donations Online
- Accept Custom Payments
Setting up CardConnect Integration Using the Legacy Method
Adding CardConnect to your form lets you start accepting secure online payments quickly and efficiently. By properly configuring the integration, you can ensure transactions are processed smoothly and payment details are handled safely.
Whether you’re setting up a new form or updating an existing one, integrating your form with CardConnect takes no time at all—here’s how:
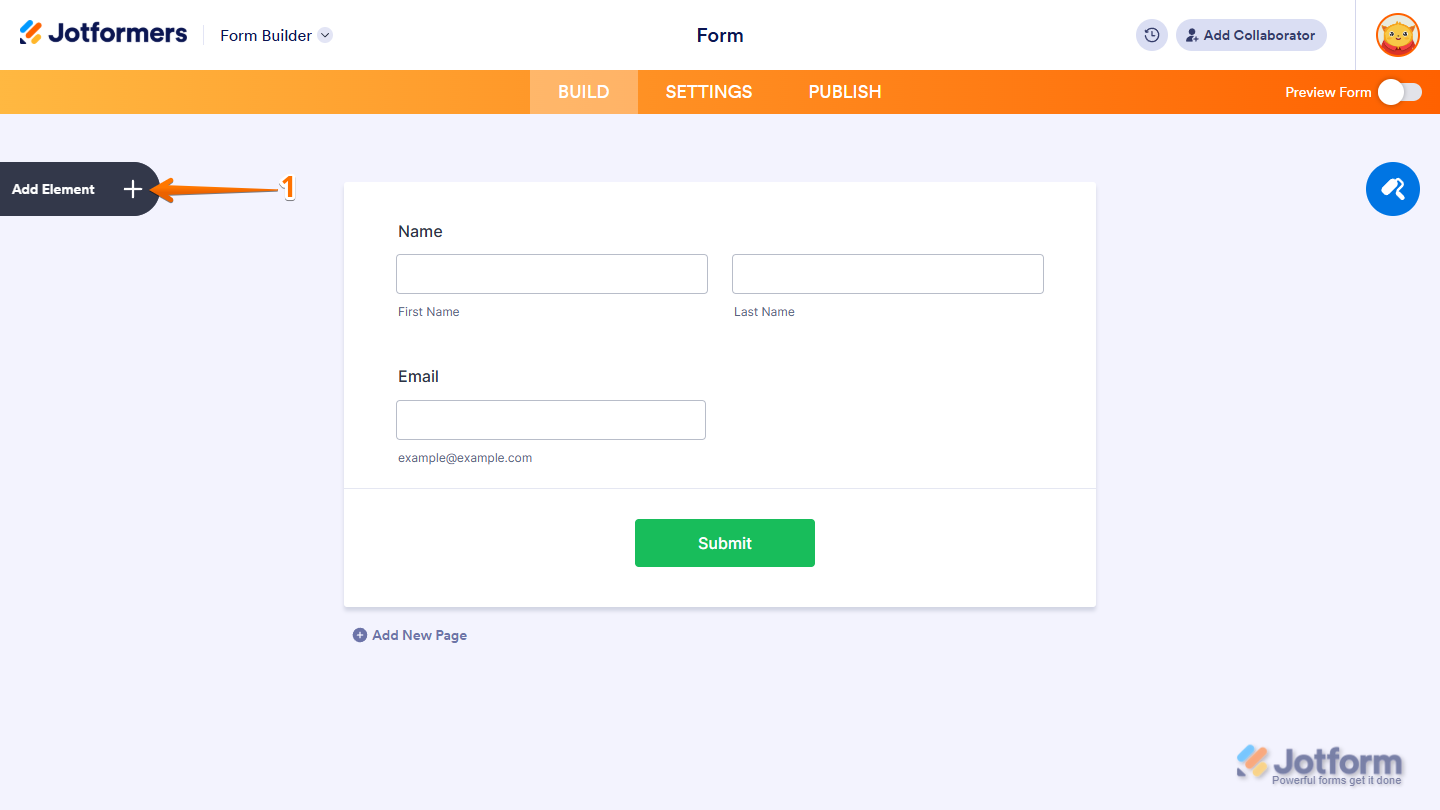
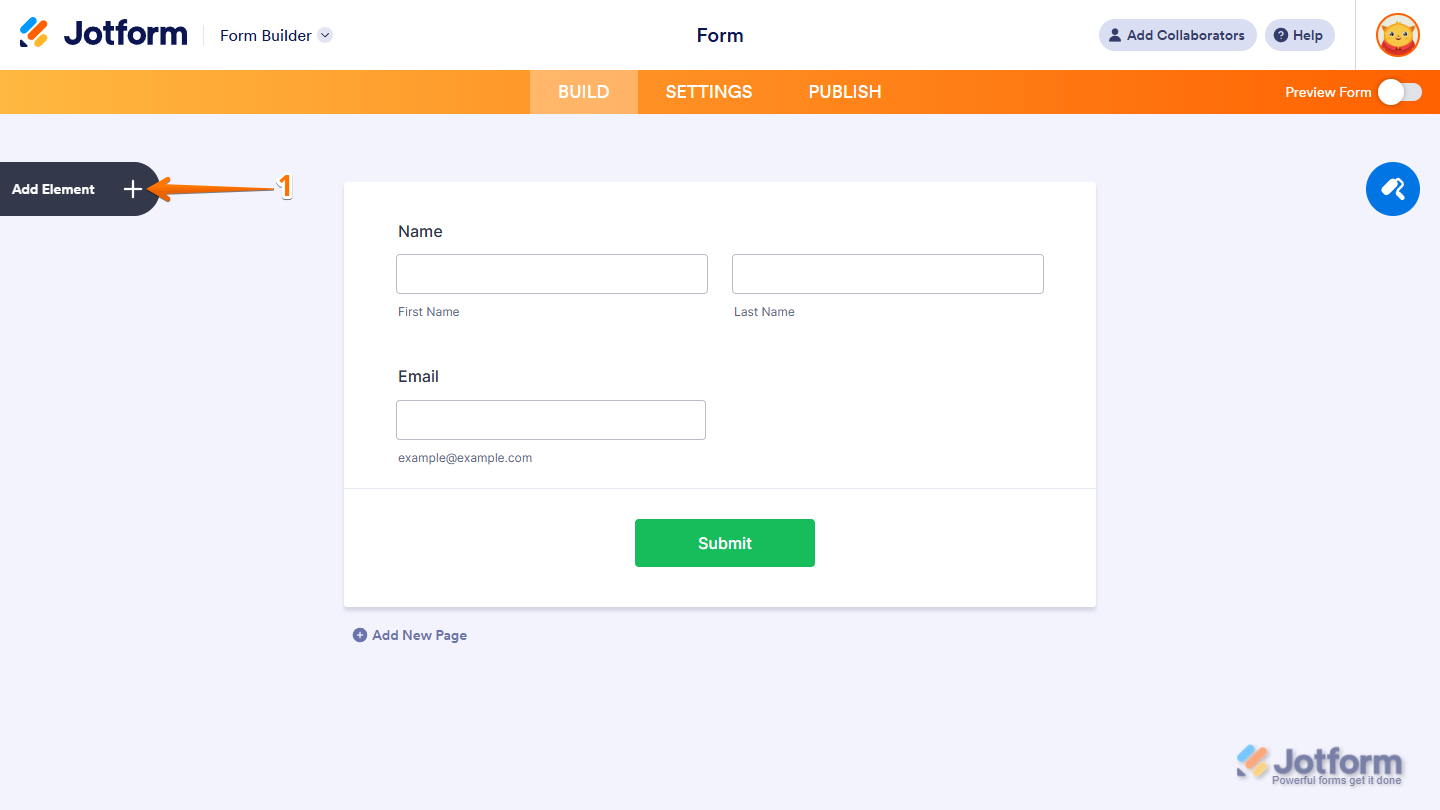
- In Form Builder, click on Add Element on the left side of the page.
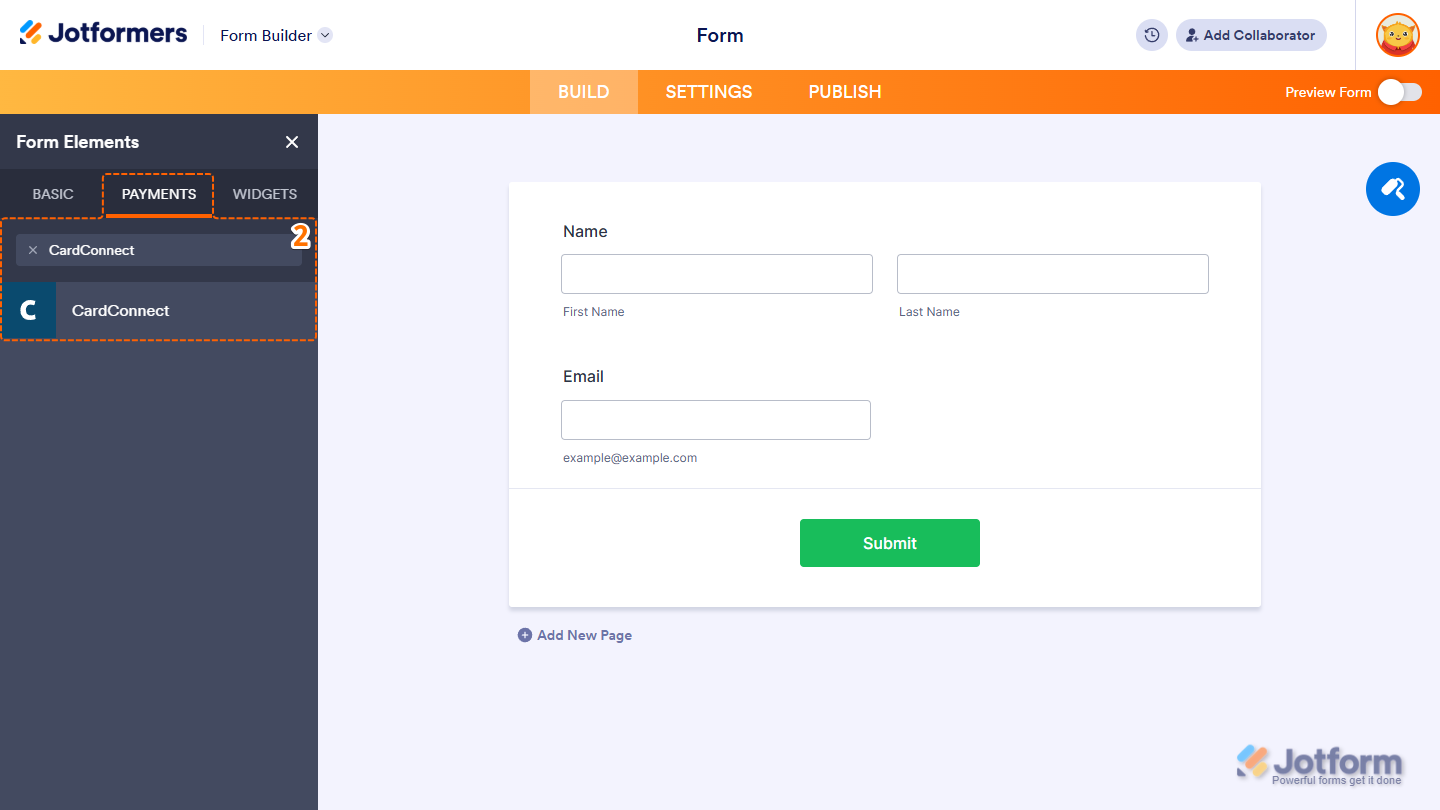
- Now, in the Form Elements menu, under the Payments tab, search for CardConnect and click on it. Or just drag and drop it to where you want it on your form.
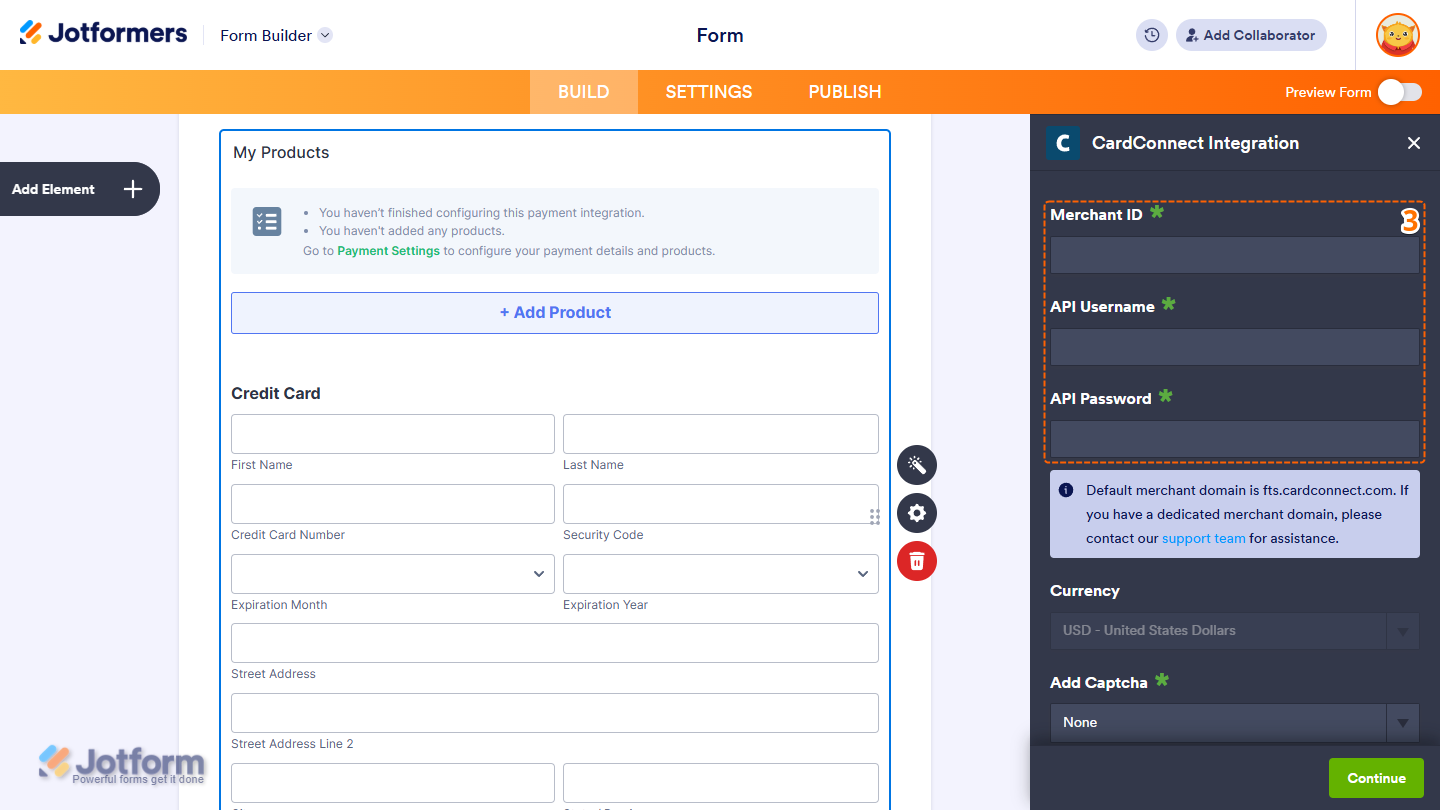
- Next, in the CardConnect Integration window on the right, set up these things first:
- Merchant ID — You can find the Merchant ID under the My Accounts page of your CardConnect account.
- API Username
- API Password — If you haven’t created an API Username and Password, visit CardConnect – Creating Credentials for the steps.
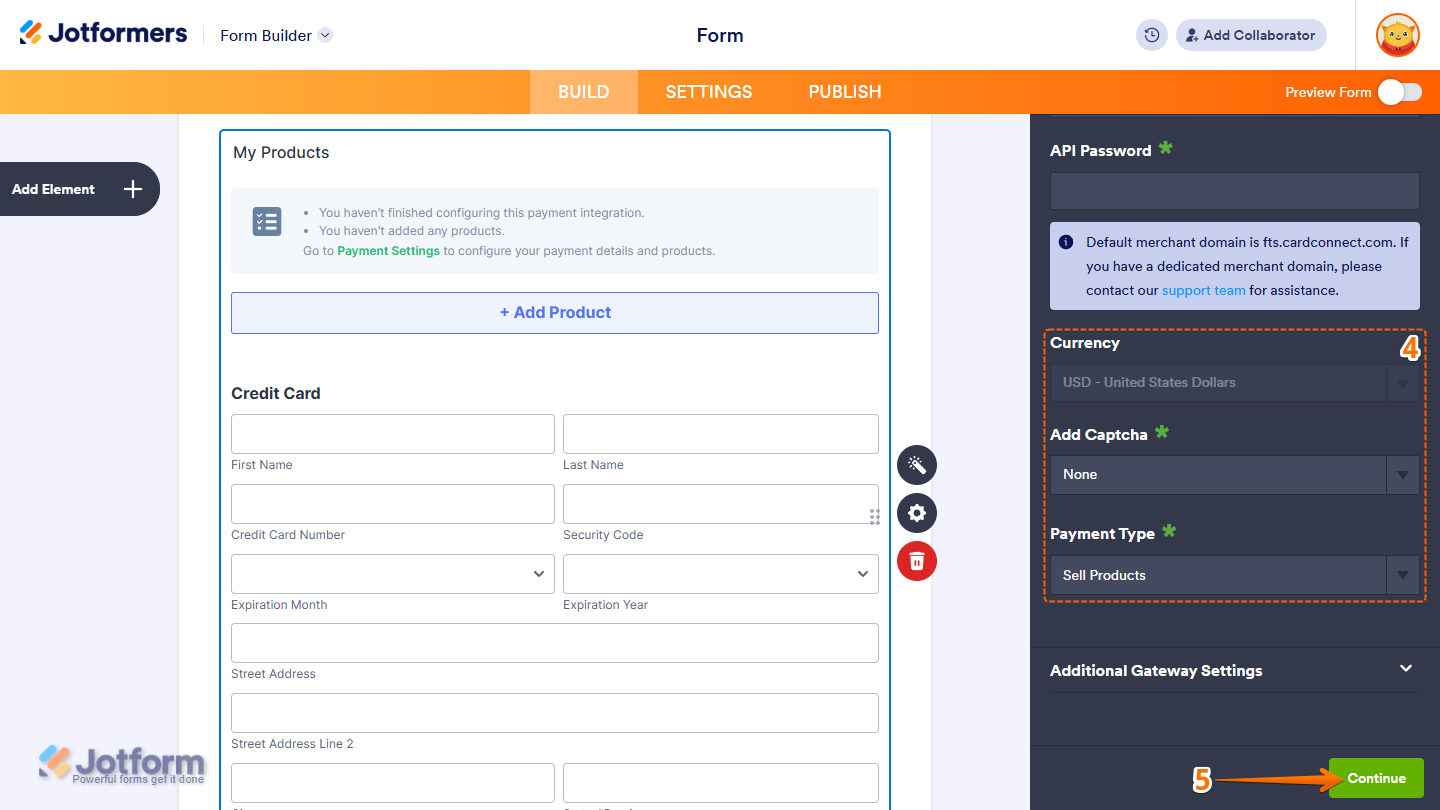
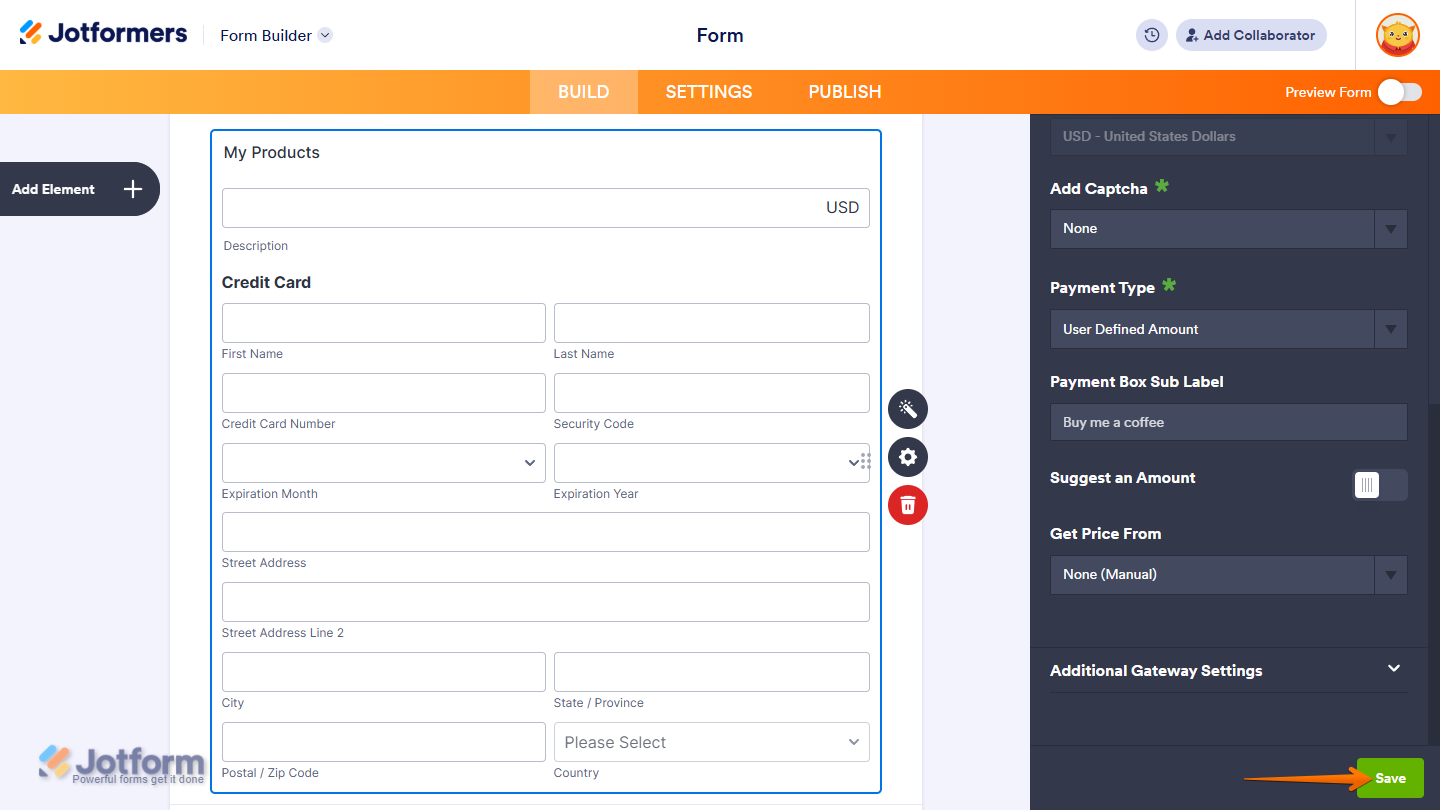
- Then, scroll down to the middle part and continue to configure these things:
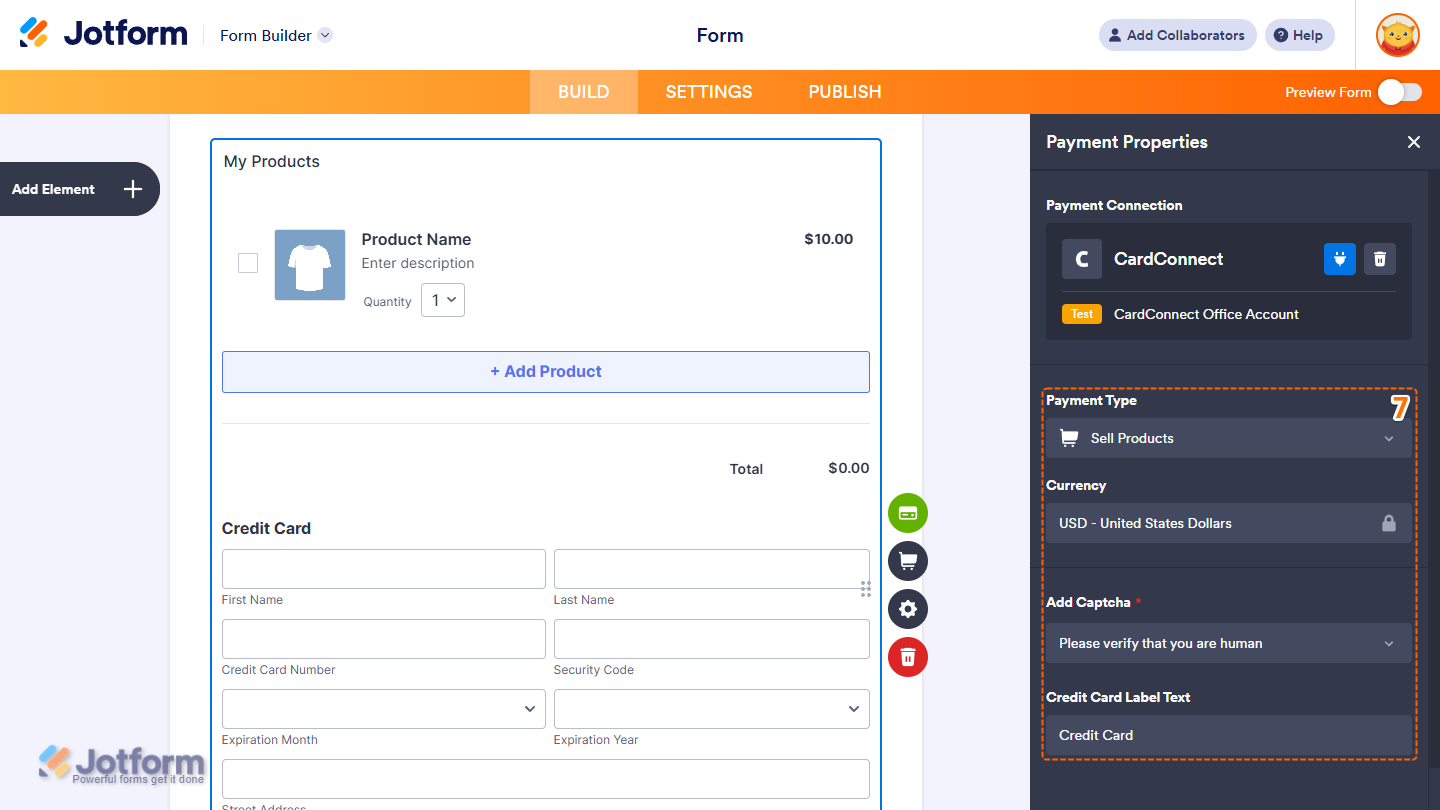
- Currency — CardConnect supports USD only.
- Add Captcha — Optionally select or add a captcha through the dropdown menu.
- Payment Type — Select the type of payment you want to collect: Sell Products, User-Defined Amount, or Collect Donations.
- Once everything’s set for the Sell Products option, click on Continue to start creating products for your payment field.
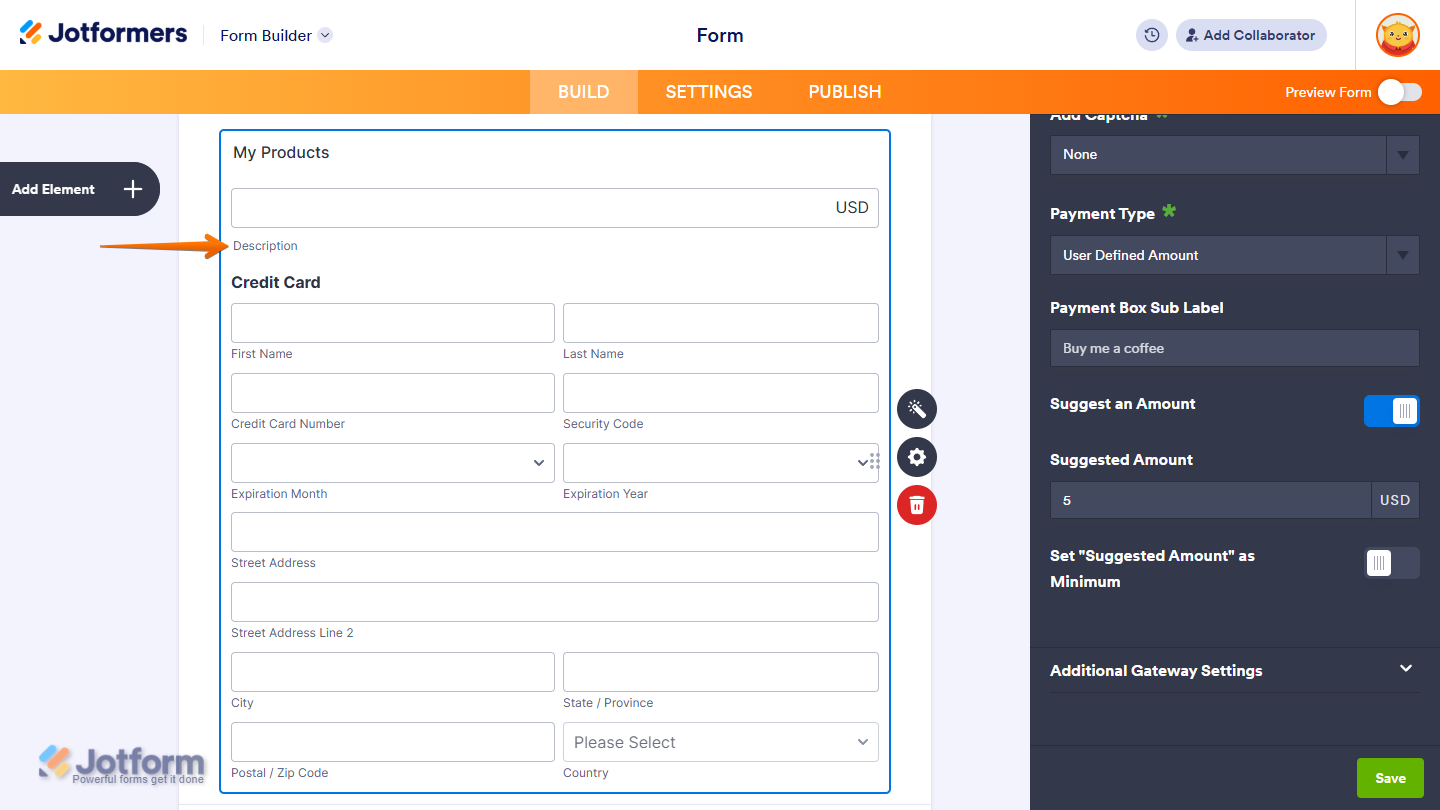
For the User Defined Amount and Collect Donations payment types, just click on Save at the bottom.
For the User-Defined Amount and Collect Donations payment types, you can enter a description that’ll be shown under the payment box on your form. You can also suggest an amount and set it as the minimum, or use a Form Calculation widget to get the price, which is useful when you want to pass a calculated amount to your payment field instead of asking users for it. For a full breakdown of how to do it, head over to our guide on How to Pass a Calculation to a Payment Field.
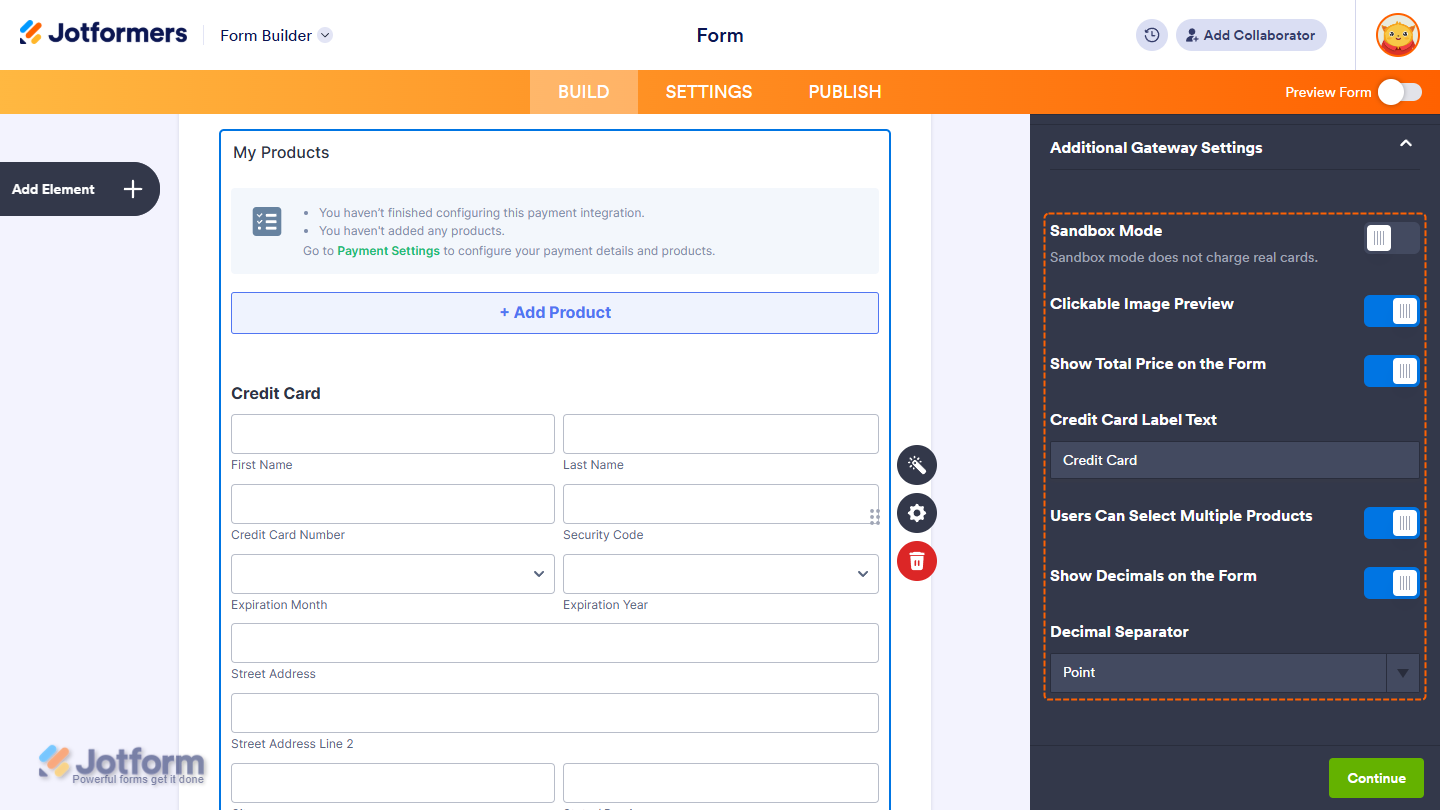
When you expand the Additional Gateway Settings of the CardConnect Integration section, you’ll see this list of options you can adjust based on the payment type you chose:
- Sandbox Mode — Toggle this on to enable CardConnect’s testing environment. Scroll down below to know more.
- Clickable Image Preview — This is only available with the Sell Products and Sell Subscriptions payment types and is enabled by default. You can toggle this off to prevent customers from enlarging product or subscription images.
- Show Total Price on the Form — Enable this to display the total amount directly on your form before users are redirected to the checkout page.
- Credit Card Label Text — Enter the label for the Credit Card section of the payment field. You can leave it default.
- Users Can Select Multiple Products — Available only with the Sell Products payment type and enabled by default. Toggle it off to allow customers to select only one product per submission.
- Show Decimals on the Form — Toggle this on to display decimals for pricing.
- Decimal Separator — Choose the character to separate decimals (e.g., a period or a comma).
Setting Up CardConnect with Reusable Payment Connections
Jotform’s Reusable Payment Connections feature allows you to set up payment integrations like CardConnect and reuse the same configuration on your other forms or apps created with Jotform, without needing to configure it again. Here’s how to set it up:
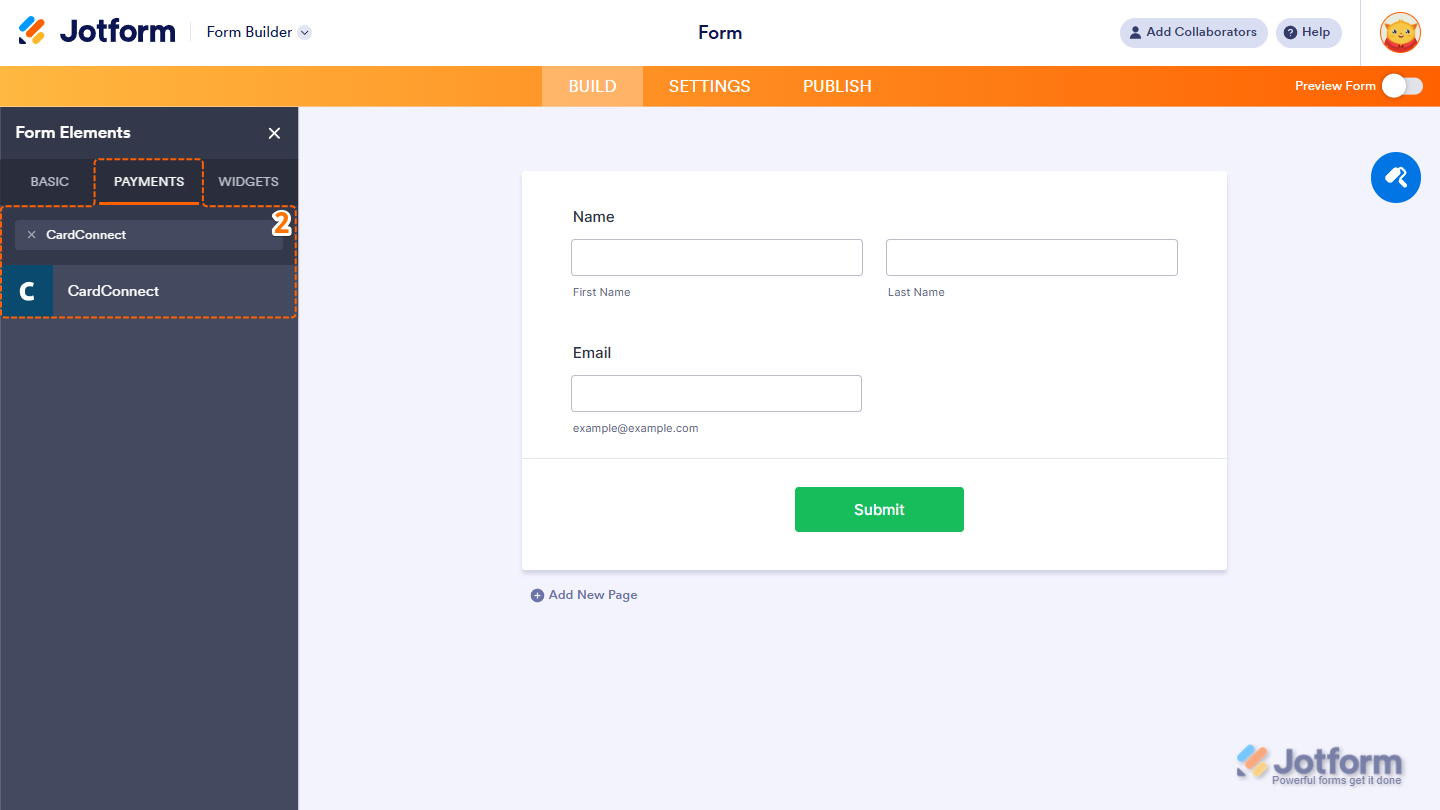
- In Form Builder, click on Add Element on the left side of the page.
- Now, in the Form Elements menu, under the Payments tab, click on CardConnect to add it to your form.
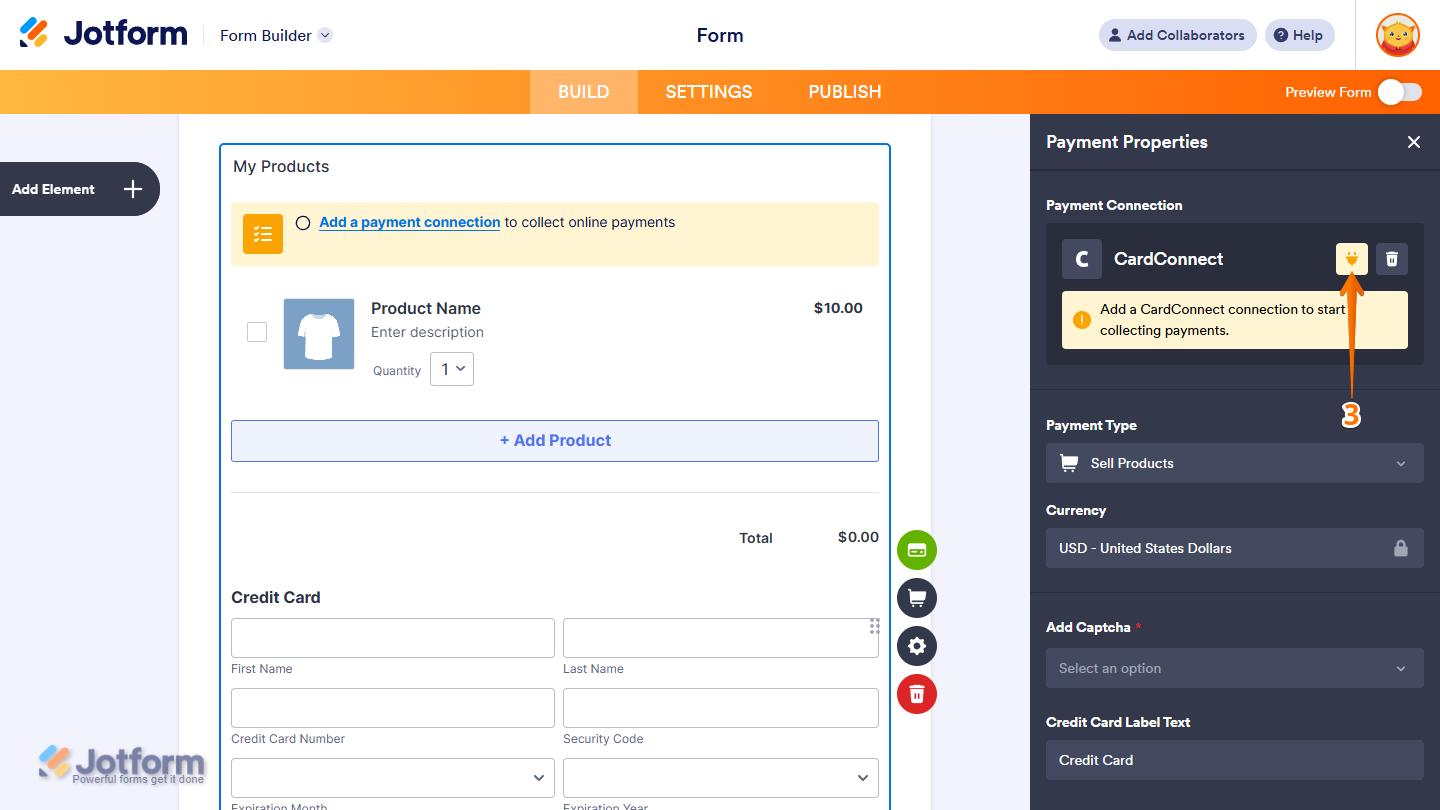
- Then, in the Payment Properties section that opens on the right side of the page, click on the Plug icon.
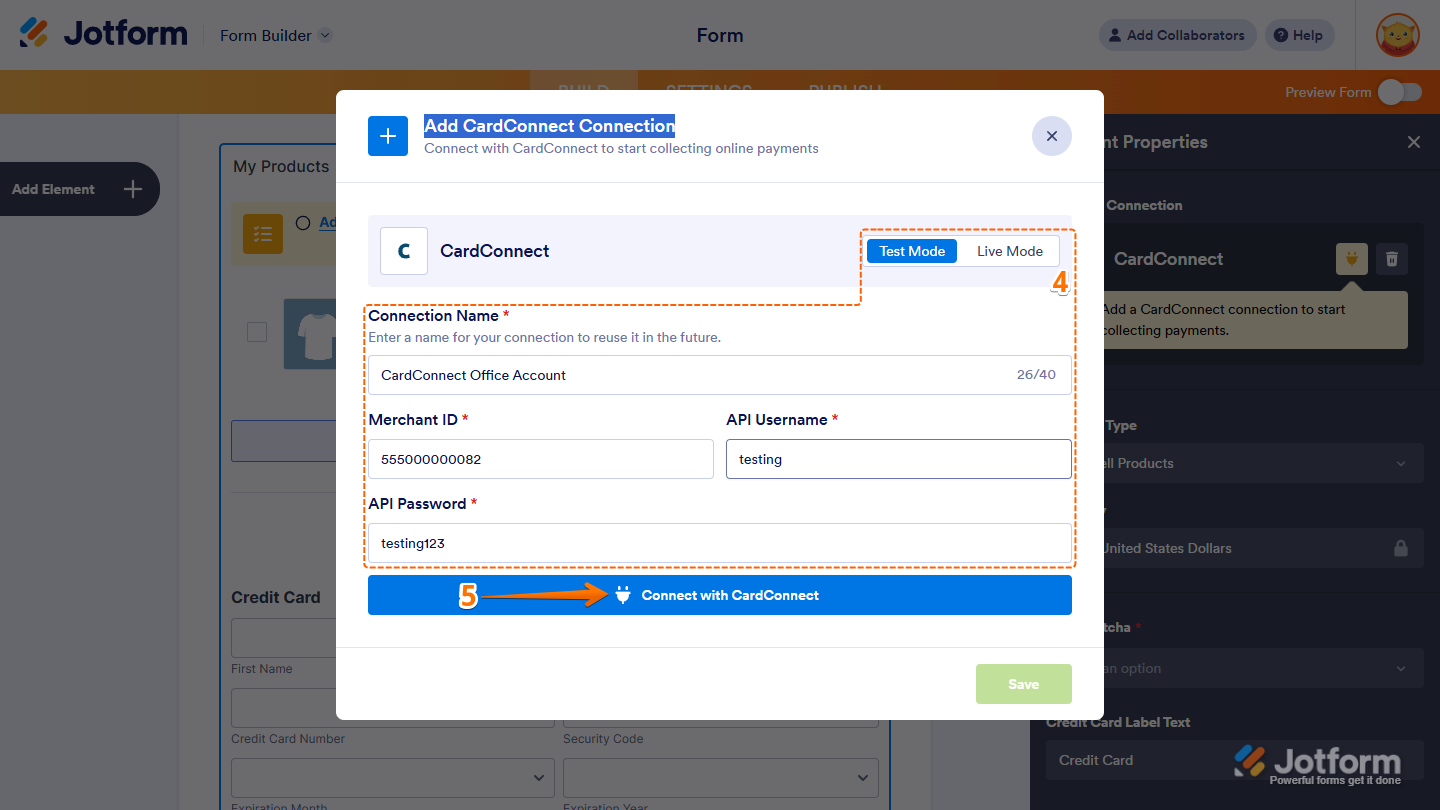
- Next, in the Add CardConnect Connection window, configure these things:
- Mode — Select Live mode to process real transactions or Sandbox mode to test payments in a secure, non-production environment.
- Connection Name — Enter a custom label to identify this CardConnect connection within your account, especially helpful if you manage multiple payment integrations.
- Merchant ID — You can find the Merchant ID under the My Accounts page of your CardConnect account.
- API Username — Enter your API Username.
- API Password — Enter your API Password. If you haven’t created an API Username and Password, visit CardConnect – Creating Credentials for the steps.
- Now, click on Connect with CardConnect to authenticate and link your CardConnect account.
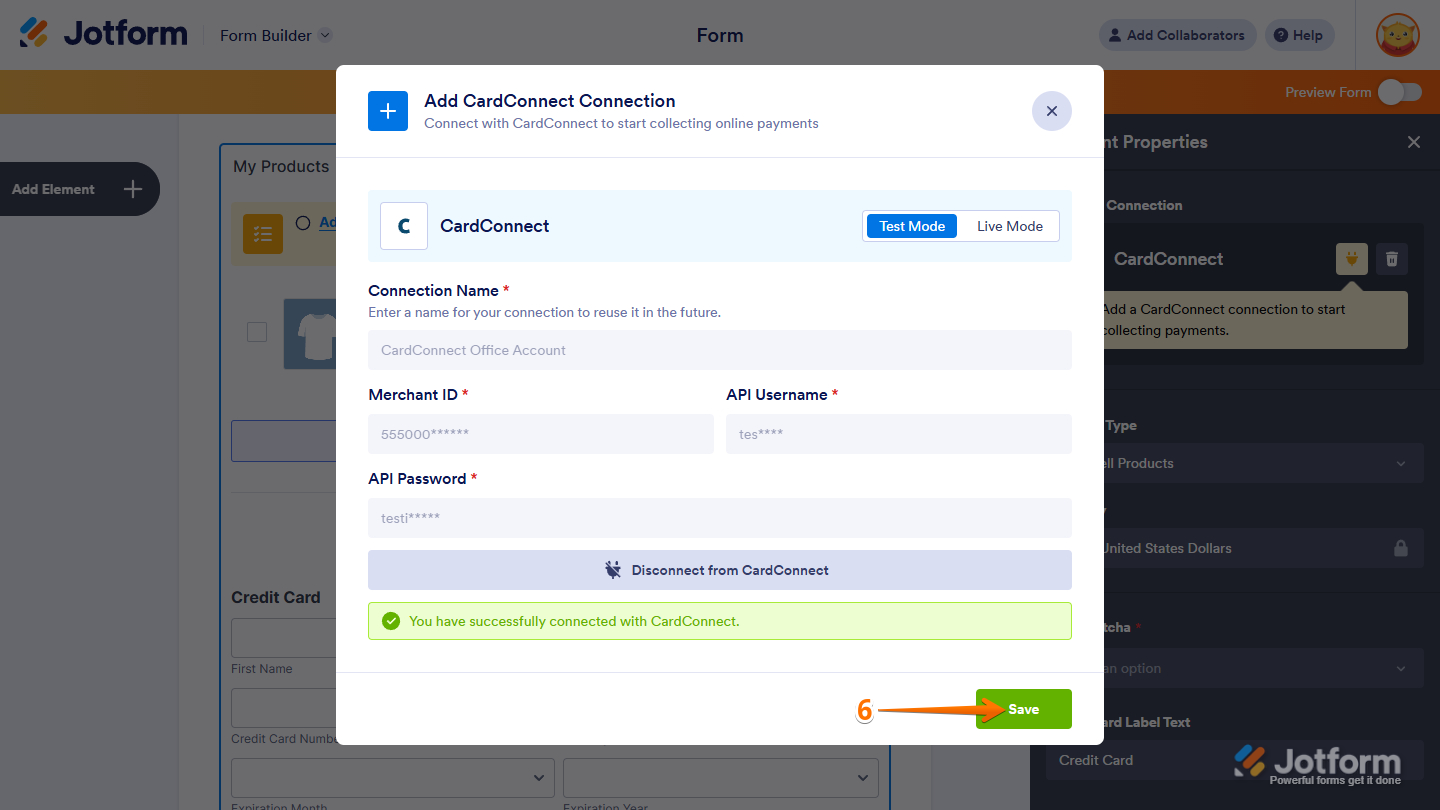
- Once connected, click on Save.
- Finally, set up these things, and you’re done:
- Payment Type — With CardConnect, you can sell products, collect user-defined amounts, and accept donations.
- Currency — CardConnect supports only USD.
- Add Captcha — This is required for the integration. Add and select a captcha from this Dropdown menu.
- Credit Card Label Text — Enter a custom label for the Credit Card section in the payment field, or keep it default.
Testing CardConnect Integration
For the Legacy integration, enable the Sandbox option under Additional Gateway Settings to test your CardConnect setup in a secure testing environment. If you’re using Reusable Payment Connections, you’ll need to enter sandbox credentials to proceed. To obtain these credentials, please contact CardConnect support directly.
You can use the following details to submit a test payment:
| Label | Details |
|---|---|
| Full Name | Any |
| Credit Card Number | 4242-4242-4242-4242 |
| CVV | 123 |
| Expiration | Any Future Date |
| Billing Address | Any Address |
Looking for more info? Check out these helpful guides for more details:

Send Comment:
9 Comments:
January 3, 2025
Why I can't see sell subscriptions with "Card Connect" ?
August 1, 2024
Hello,
I work for Propelr Payments and we have the ability to use the CardConnect/Cardpointe platform to do business. A few of our reps have tried to get their customers setup with Jotform using the CardConnect platform and have all ran into the same issue. In your instructions on how to integrate, you don't mention at all the merchant site needing to be provided and nobody knows how to get it. Can you please assist? We are able to get the merchant number and the username and password for the api credentials, we just can't get that. Please advise.
November 4, 2022
can we use a different merchant provider, example Fiserv/ First Data?
August 23, 2022
What is the best payment method for that..
June 10, 2022
I am seeing payments hit my PayPal under "Pending" but cannot see where I can aprove them through the Jotform
August 5, 2020
I keep getting an error message when my customers try to submit a credit card payment using Stripe. I contacted Stripe and the payment process is working on their side but on the Jotform submission side, the error code is asking for "API code" to be integrated. I have integrated my Stripe account during the build process in settings. It says the connection is successful on the Jotform side and Stripe side. I just don't know why I would need to integrate API code if the connection is already successful. Help please.
May 20, 2020
Hi,
For the payment method, does it apply to Malaysia payment type?
February 18, 2020
Is the payment processed right away? Can we tell if credit card was declined immediately?
March 16, 2018
What percentage is taken from each payment???