Jotform Sign makes it easy to connect your documents with Zoho CRM so you can automatically send signer information to your CRM account. This helps keep your leads, contacts, and customer records updated without needing to enter data manually.
Once the integration is connected, you can choose your Zoho CRM module and layout, then match your Jotform Sign fields with the corresponding Zoho CRM fields. It’s a simple way to keep your documents and CRM data organized and working together more efficiently.
You can connect your Zoho CRM account to Jotform Sign in just a few steps. Here’s how to get going:
- In Sign Builder, in the green navigation bar at the top of the page, click on Settings.
- Then, in the menu on the left side of the page, click on the Integrations tab.
- Now, search for Zoho CRM, and click on it.
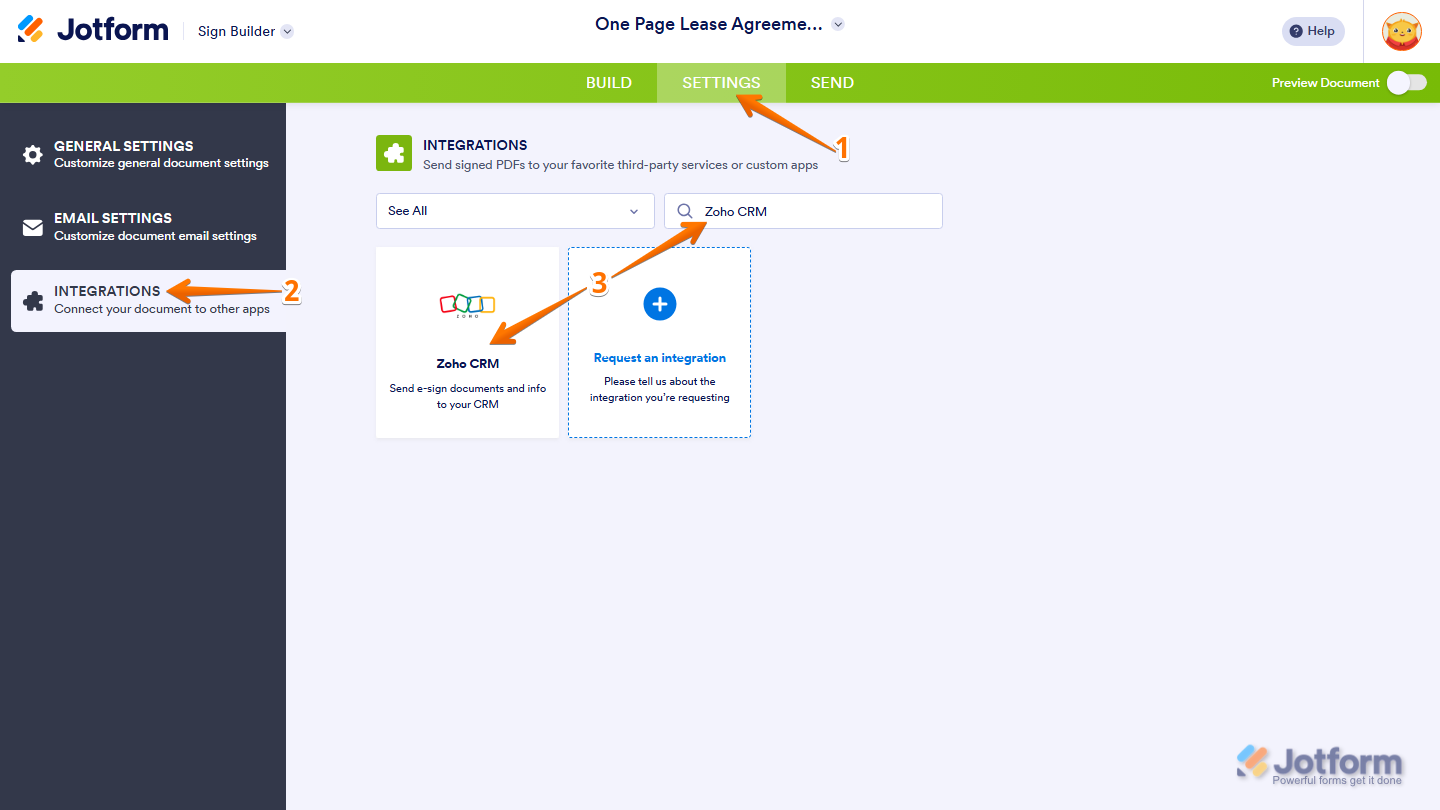
- Next, click on Authenticate and log in to your Zoho CRM account.
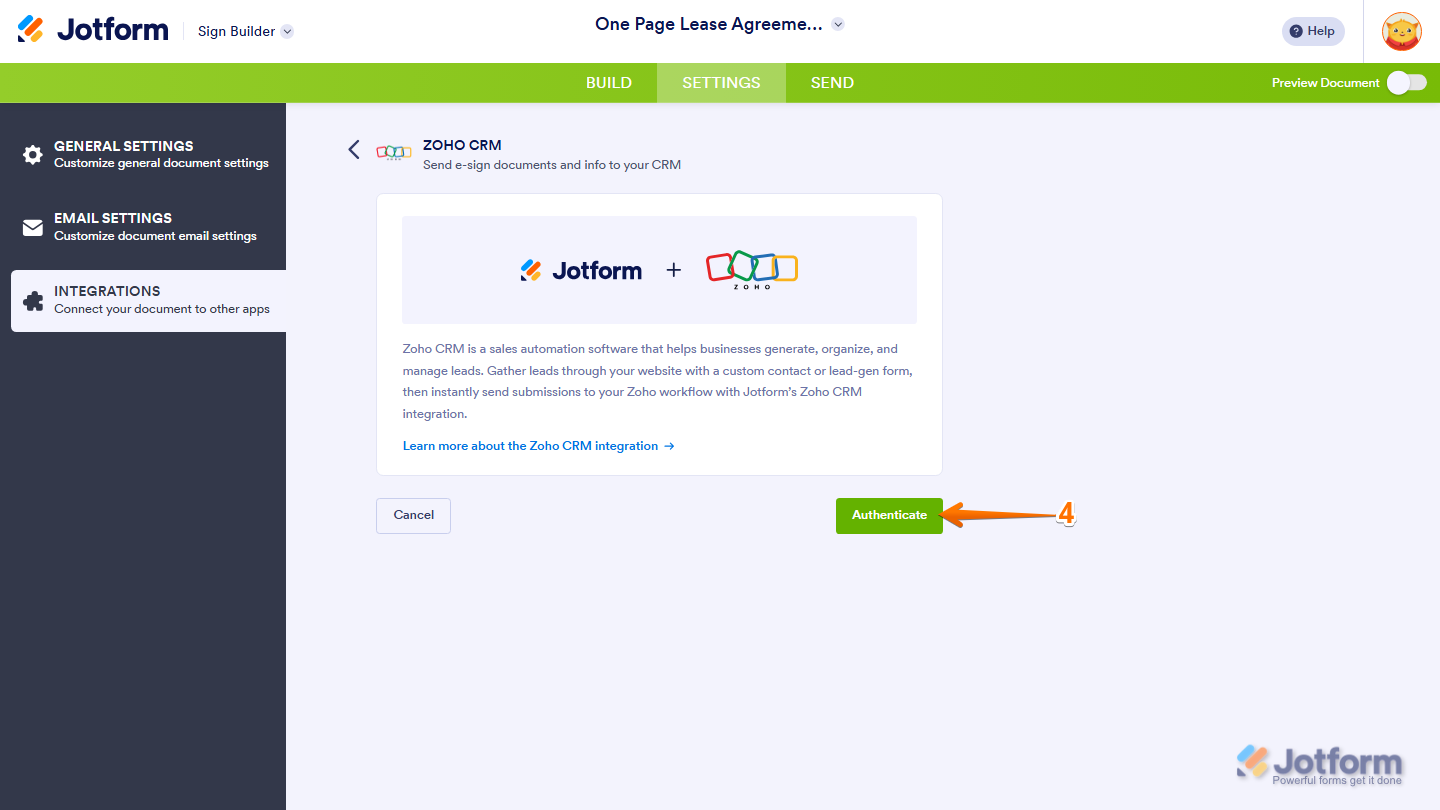
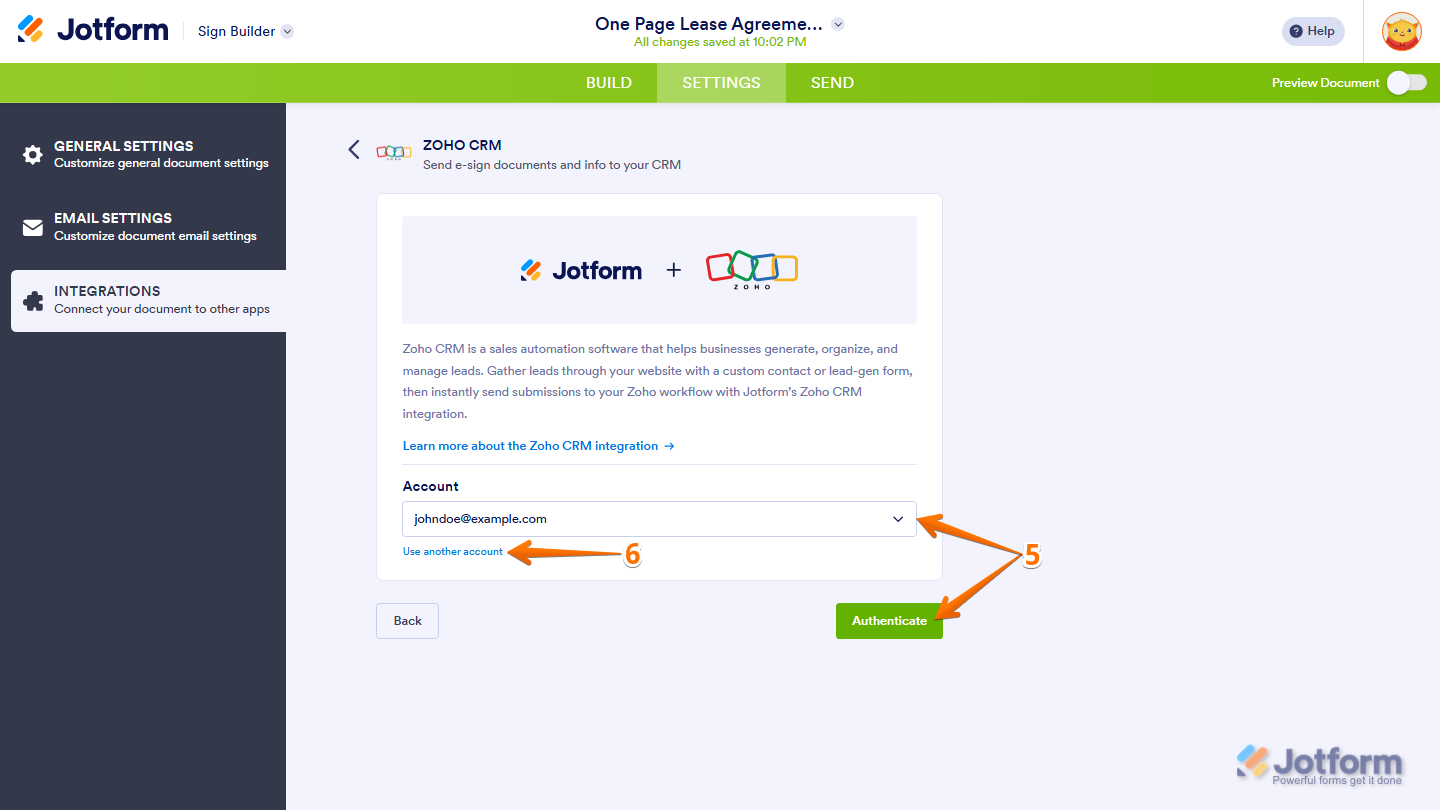
- If you’ve logged in before through one of your other forms, select that Zoho CRM account from the Dropdown menu and then click on Authenticate.
- Or, to use a different one, click on Use Another Account.
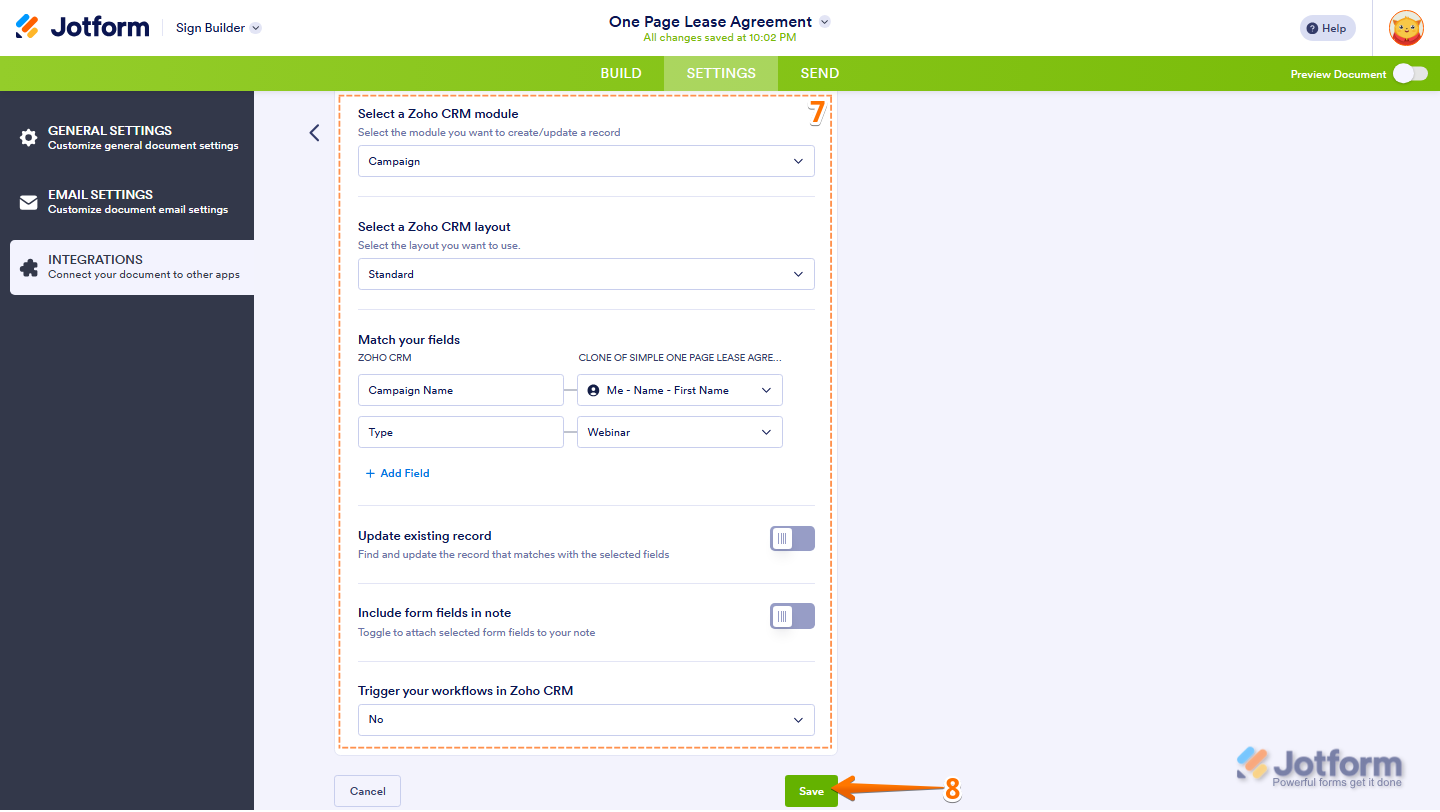
- Once connected, configure these things:
- Select a Zoho CRM module — Choose where you want to send your data (like Leads or Contacts).
- Select a Zoho CRM layout — Pick the layout you want to use.
- Match your fields — Connect your form fields to the matching fields in Zoho. To add more fields, click on Add Field.
- Update existing record — Toggle this on if you want to find and update a matching record based on the selected fields.
- Include form fields in note — Toggle this on if you want to attach selected form fields to a note.
- Send upload fields — Toggle this on to include file uploads when sending data to Zoho CRM.
- Trigger your workflows in Zoho CRM — Select Yes if you want your automated workflows to run when the integration is triggered.
- Finally, click on Save and you’re all set.
That’s it. Your Zoho CRM integration is now active, and your Jotform Sign submissions will automatically be sent to the selected Zoho CRM module and layout.
Managing Your Zoho CRM Integration Actions
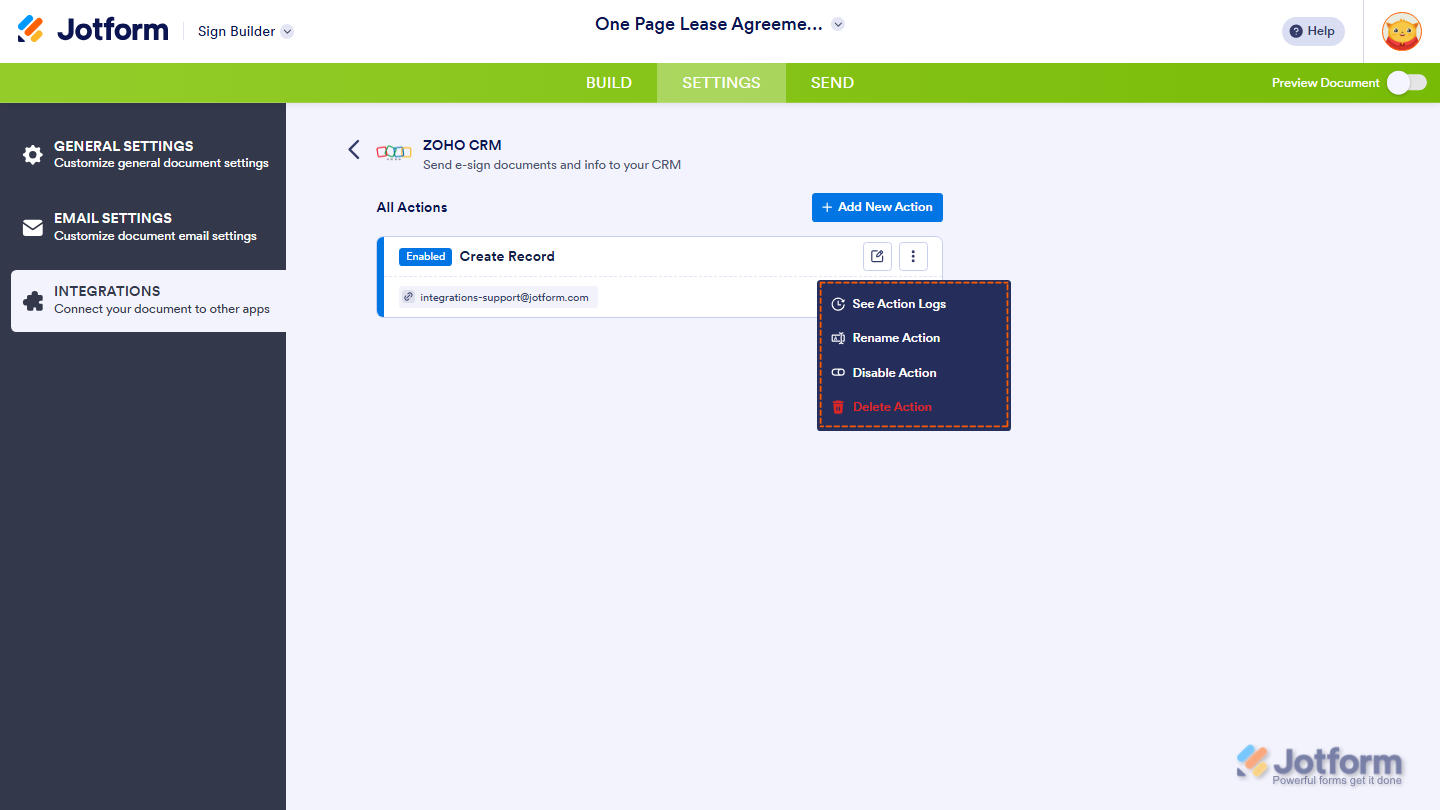
After saving the integration, you’ll see the action you’ve set up on the page. Hover your mouse over it and click on the Pencil icon to edit it or the Three Dots icon to access more options:
- See Action Logs — View successful and failed runs. It’s helpful for troubleshooting.
- Rename Action — Change the action’s title.
- Disable Action — Temporarily stop the integration from sending data.
- Delete Action — Remove the action from your Sign Document.

Send Comment: