With Jotform Sign, you can turn your existing PDFs into e-sign documents and collect signatures from your clients with ease. Once uploaded, you can add fillable fields, assign signer roles, and automate the signing process through email or by sharing a link—making document management faster and more efficient.
Uploading a PDF to Jotform Sign only takes a few steps. Here’s how to get started:
- On your Workspace page, click on Create on the top-left side of the screen.

- Then, in the window that opens up, click on E-Sign.

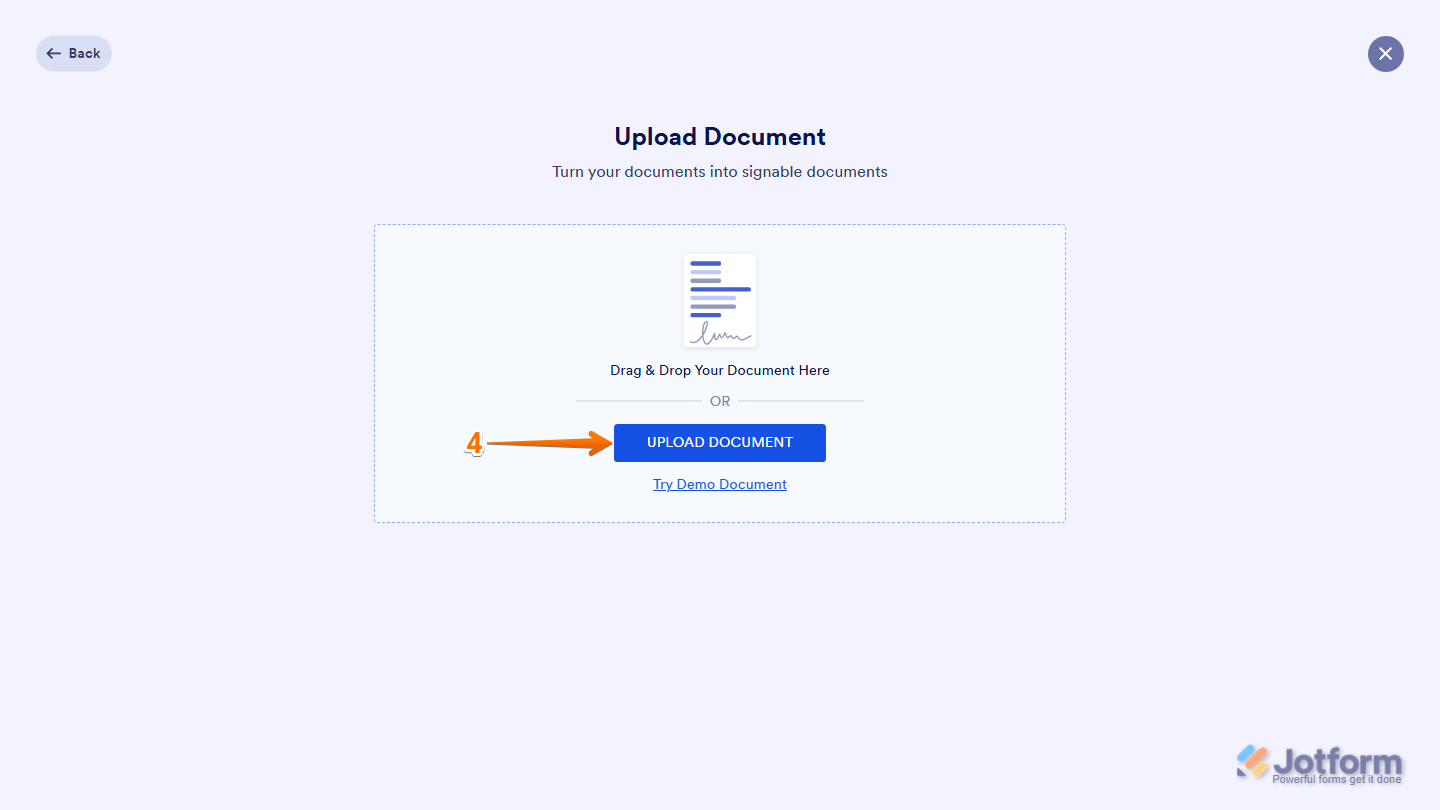
- Now, click on Upload Document.

- Next, click on the Upload Document button to select a PDF from your device. Or, simply drag and drop your PDF into the upload area.
Note
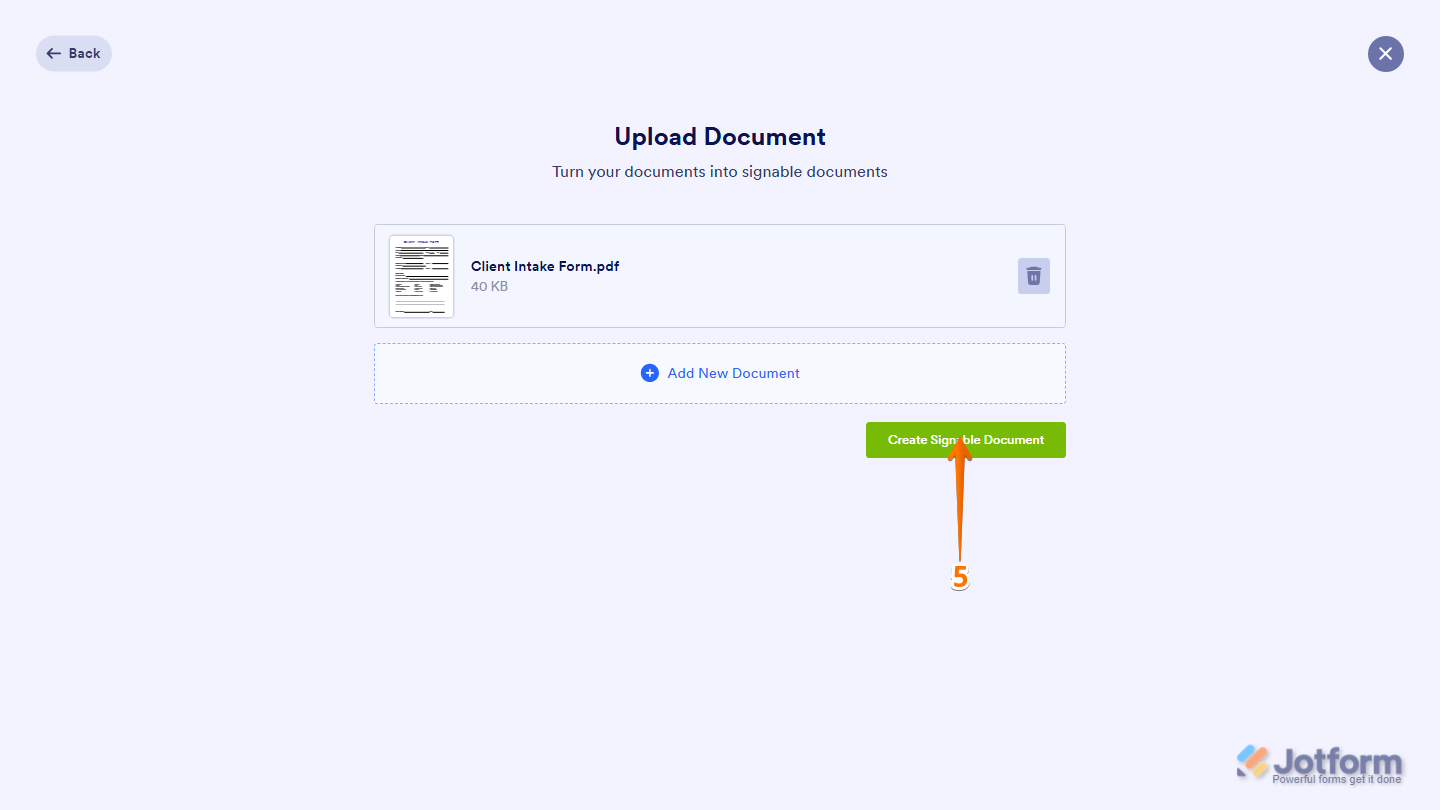
You can upload multiple documents at once. Jotform Sign will automatically merge them into a single signable document, and you can rearrange or remove files before creating it.
- Once your PDF has been uploaded, click on Create Signable Document.
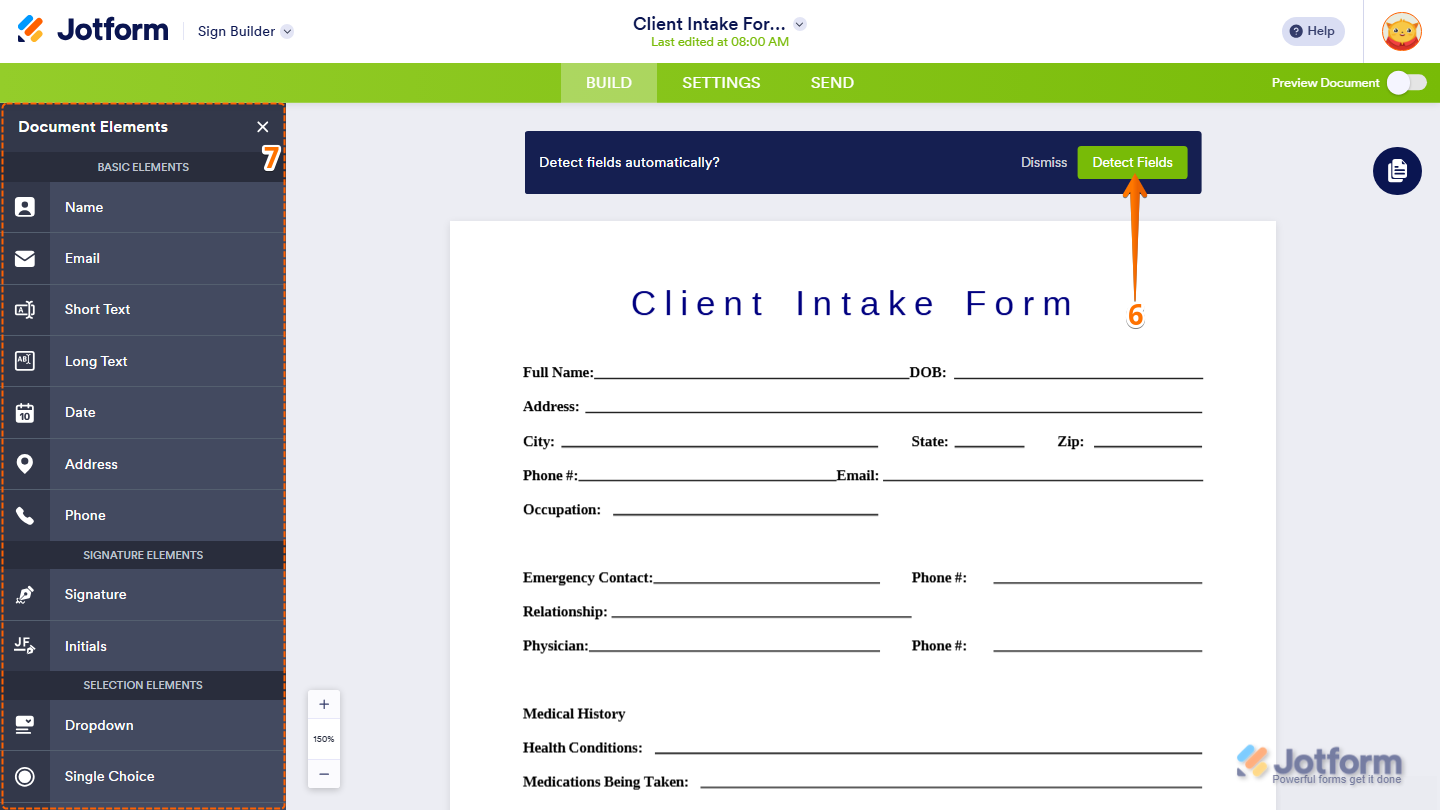
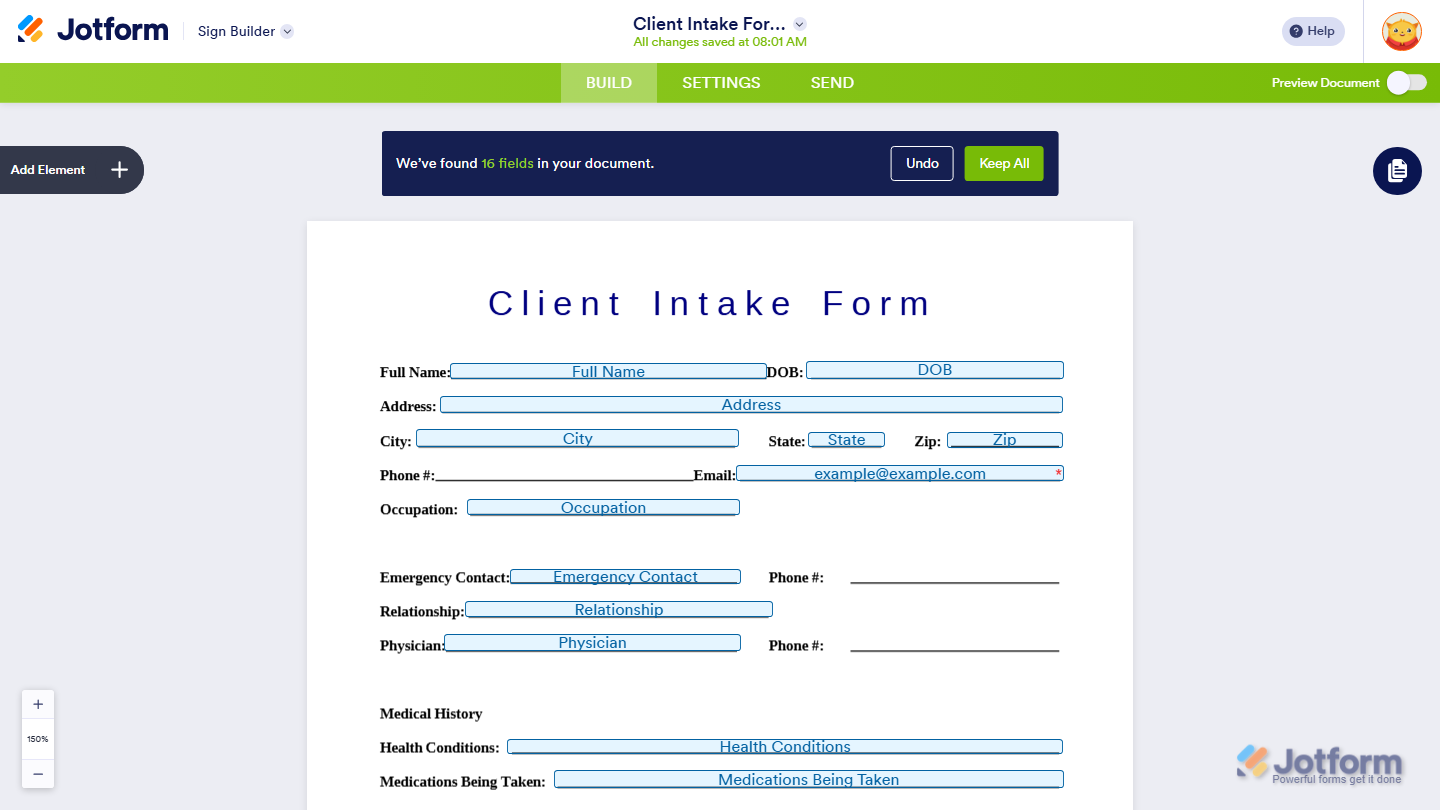
- Finally, click on Detect Fields to automatically identify fillable fields in your document.
- Or, add fields manually from the Document Elements window on the left side of the page.
That’s it! Your PDF has been converted into a Signable Document that you can customize before sending it for signature.
If you want to explore more features about Jotform Sign, here are some helpful guides:

Send Comment:
1 Comment:
August 28, 2023
can you add another uploaded pdf after creating the form by editing?