


NOTE- Yahoo users:
In an attempt to stop fraudulent emails, Yahoo changed its DMARC authentication policy to reject emails that claim to come from yahoo.com but actually originate at non-Yahoo servers.
So, if you are using Mandrill to setup Jotform email notifiers, email notifications configured to use the Sender Email field as the “From” email address will not work when yahoo users submit the form. Please read more about Yahoo and Mailchimp DMARC POLICY here
We have now implemented a solution to set a Sender Address as you wish. You just need to use a mandrill account. Mandrill is now a paid service for all level of accounts.
1. Create a Mandrill account and set up as described in this tutorial.
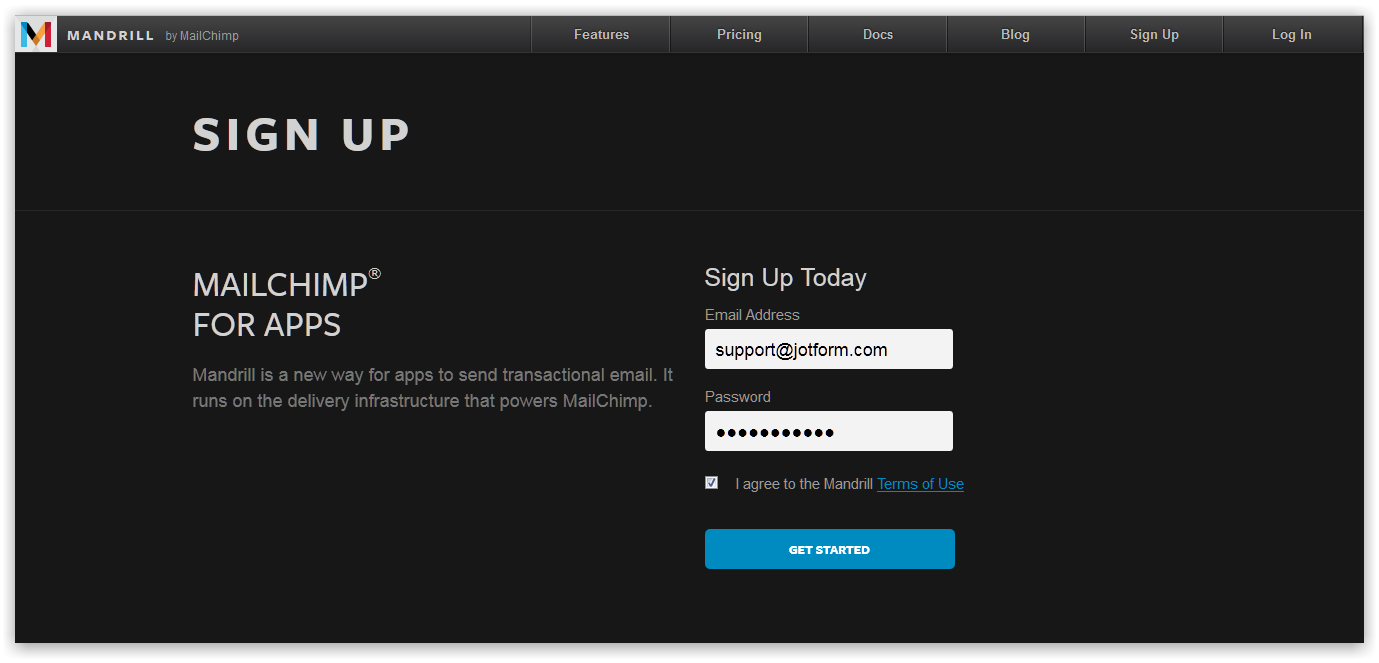
a. First, create a Mandrill account. (Mandrill is no longer a Free service)
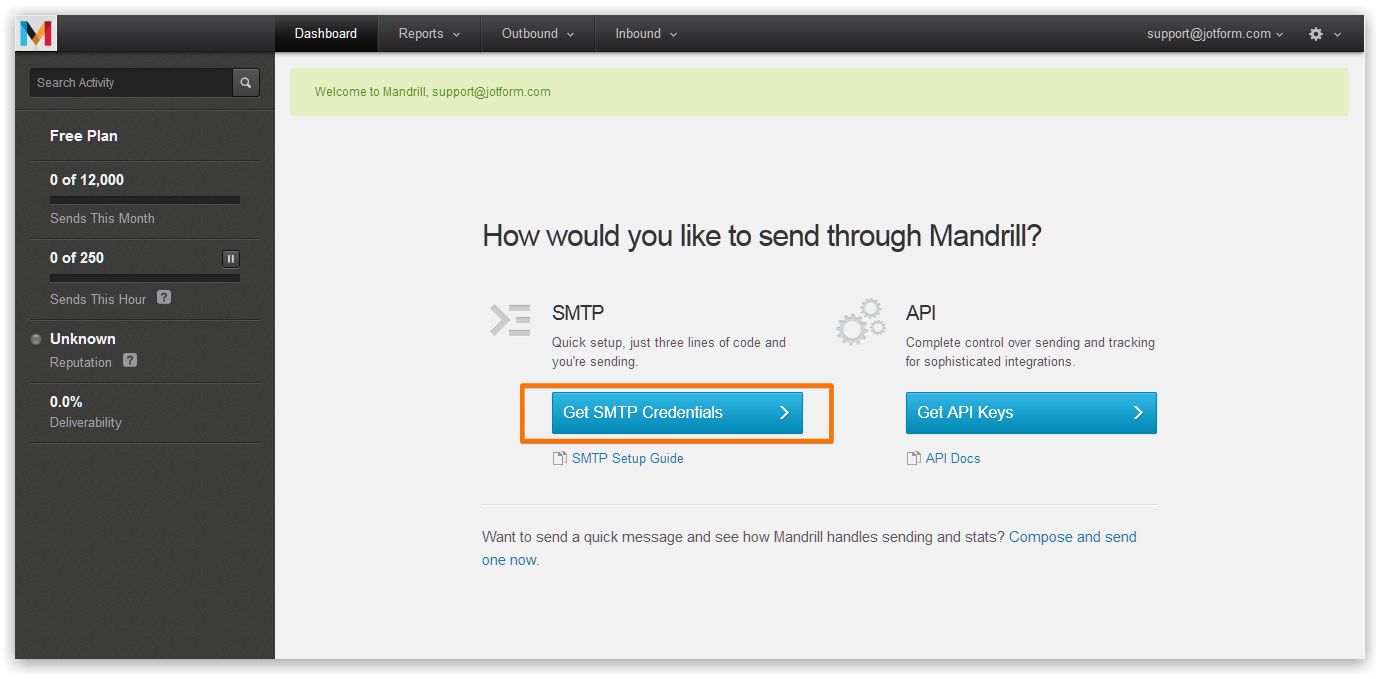
b. Go to Dashboard and Hit the “Get SMTP Credentials” button.
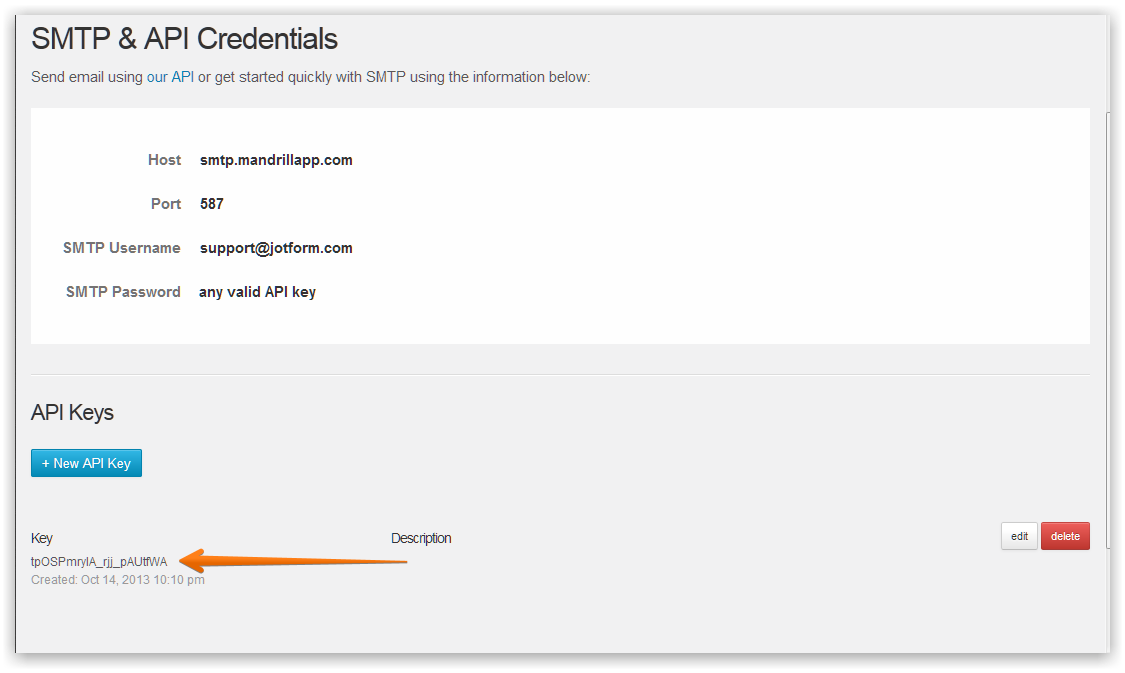
c. Copy your SMTP credentials and create a new API Key.
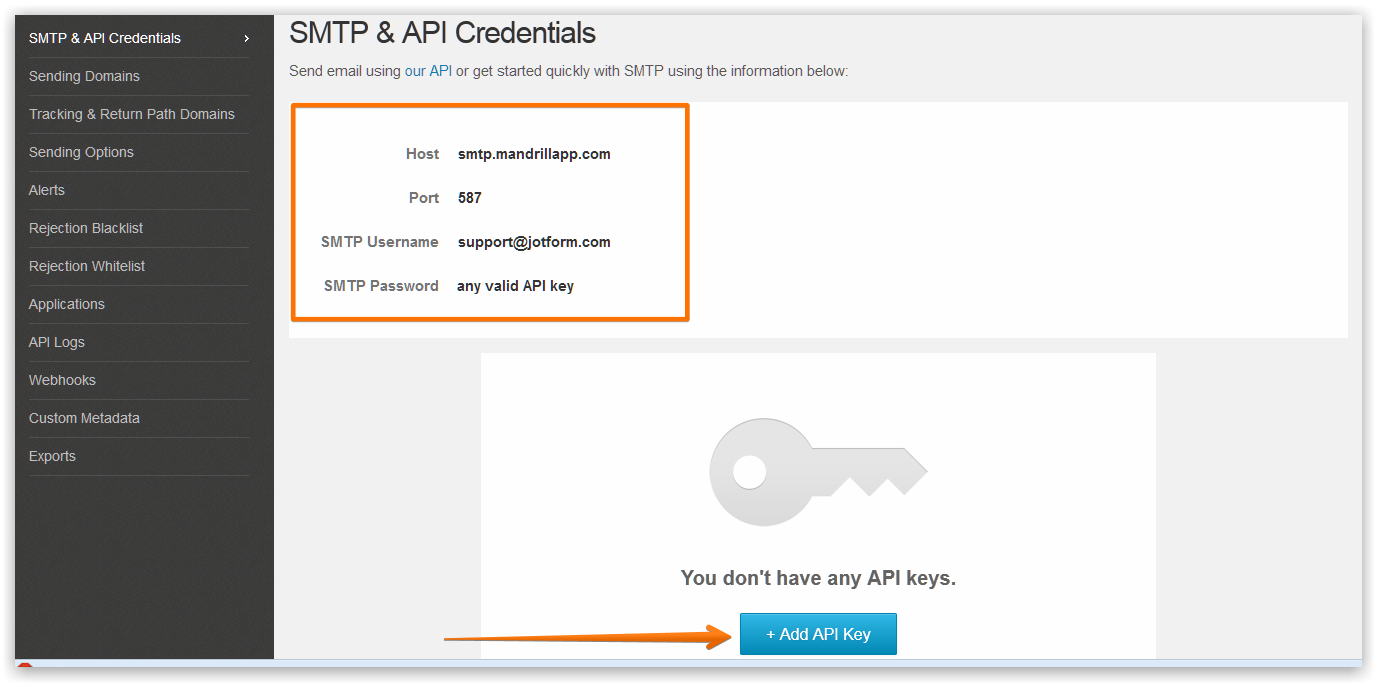
d. Copy your API Key as well.
2. Add your Mandrill Email Address as SMTP in two ways:
a. In Email Alerts:
1. Click the Emails button in the form builder
2. Select your Notifier and click “Edit” option

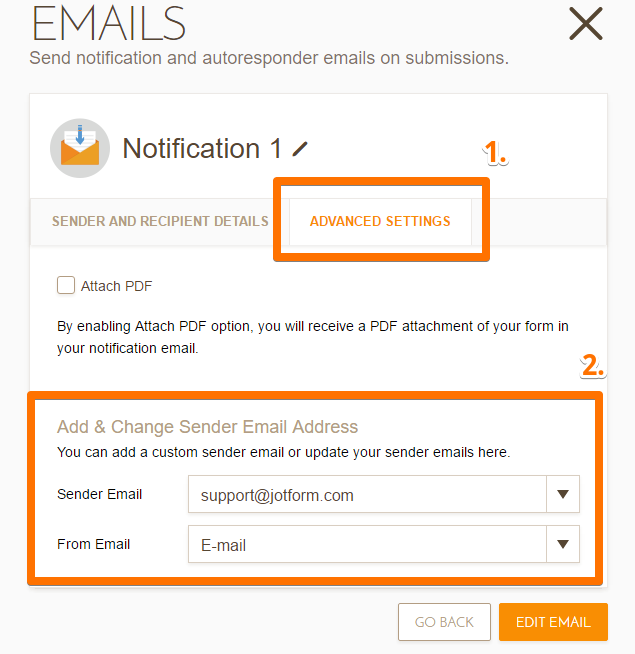
3. Access the Advance Settings tab
4. In the Sender Email dropdown, choose “Add new email address” option and the Email Type dropdown will appear.
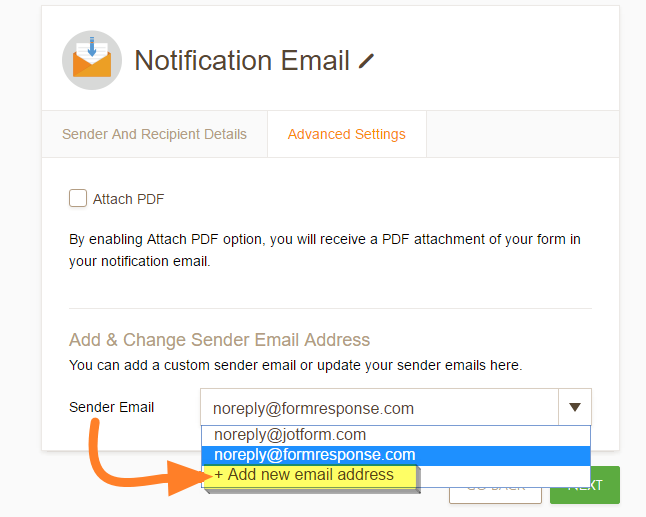
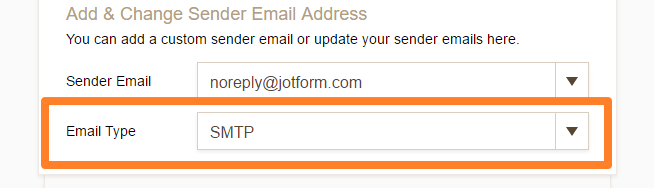
5. From the “Email Type“, select “SMTP” option
6. Provide your Mandrill SMTP Credentials. The “Password” should be your Mandrill API Keys:
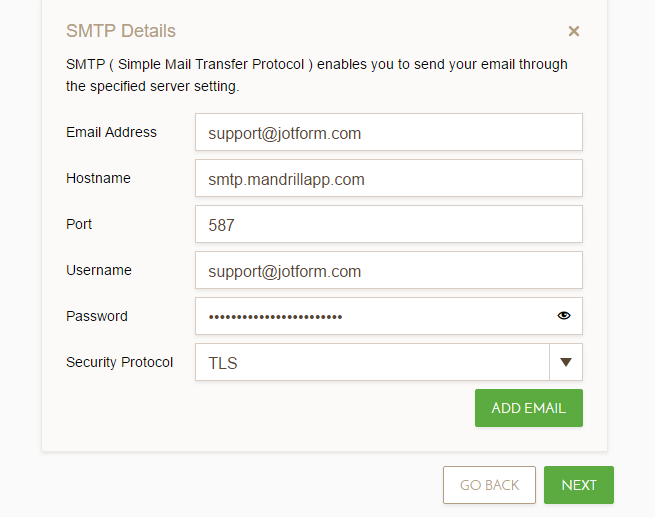
7. Click Add Email button or click “Next” button to save the custom SMTP settings.
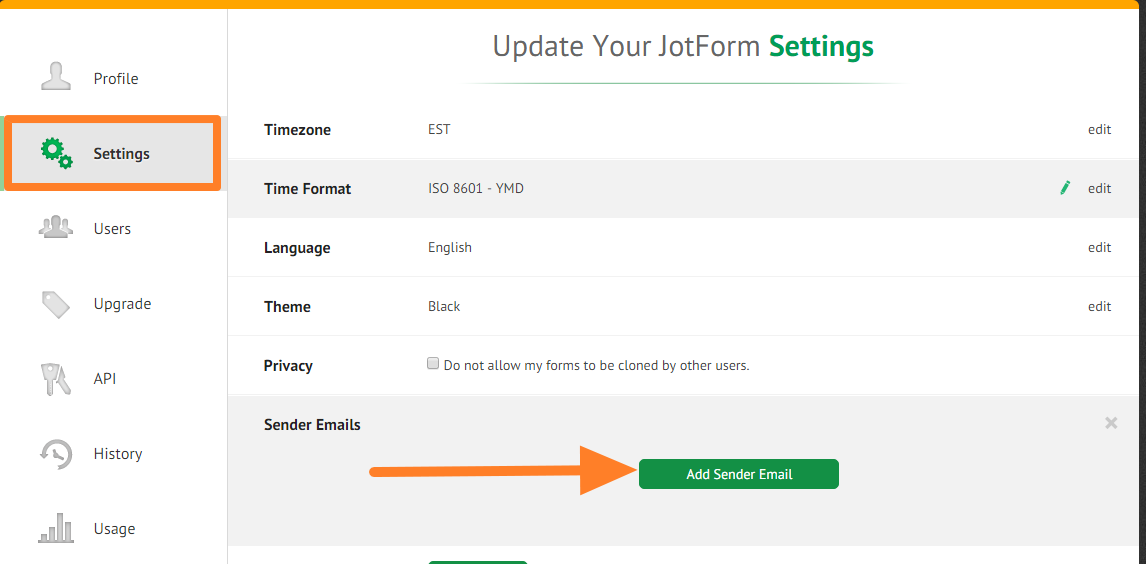
b. In My Account page:
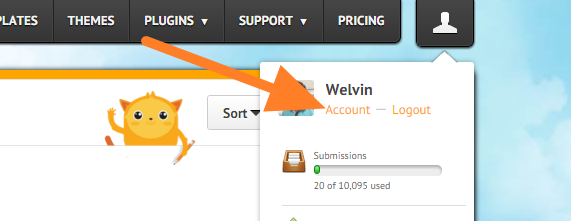
1. Access My Account by clicking the “Head” icon from the website navigation and click “Account” from the dropdown window:
2. Click the “Settings” tab
3. Click the “Sender Emails” from the settings to edit
4. Click the “Add Sender Email” button
5. Enter your SMTP details for Mandrill:
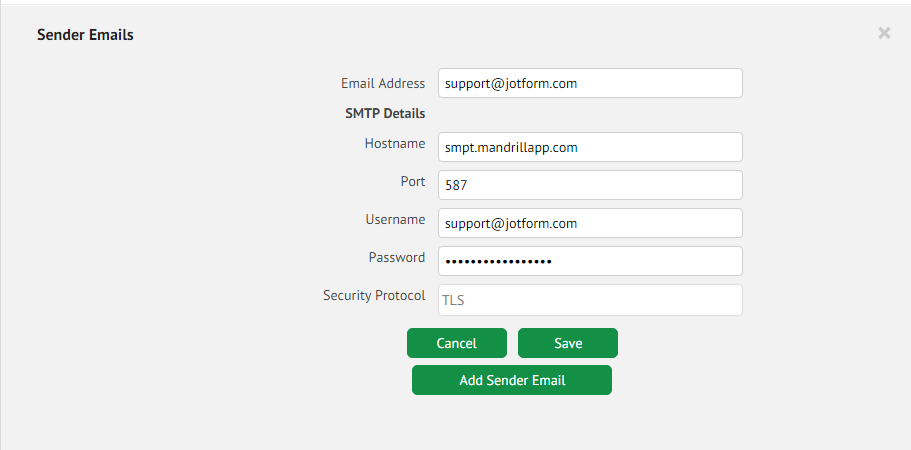
6. Click the “Save” button to save your settings.
Under the “Advance Settings” tab. When you set the “Sender Email” using a Mandrill SMTP account, another option will show, you’ll see the “From Email” field and here you can select the email field listed in your from.
If you have questions, feel free to post it below.
Send Comment: