Form email alerts, along with direct messages like forwarding and replying to submissions, and approval workflow emails, all benefit from using a custom sender email through SMTP. By doing so, you can enhance your branding, improve email deliverability through your own domain’s email server, and maintain a professional appearance. This approach helps strengthen your brand identity and reduces the likelihood of your emails being flagged as spam.
What you need to set up SMTP:
- Know the Required Credentials — Contact your email service provider or hosting provider for help if you don’t have them.
- Whitelist Jotform IP Addresses — Check with your hosting provider if their platform requires whitelisting before sending emails through SMTP. You can check our guide on Whitelisting Jotform IP Addresses and Domains for details.
Adding and Setting Up Sender Emails
You can add custom sender emails to your account and set them up with SMTP in a few easy steps. Here’s how to do it:
- On the top-right side of your Workspace page, click on your Avatar/Profile Image icon.
- Then, in the Dropdown menu that opens, click on Settings to open your Account Settings page in a new browser tab.

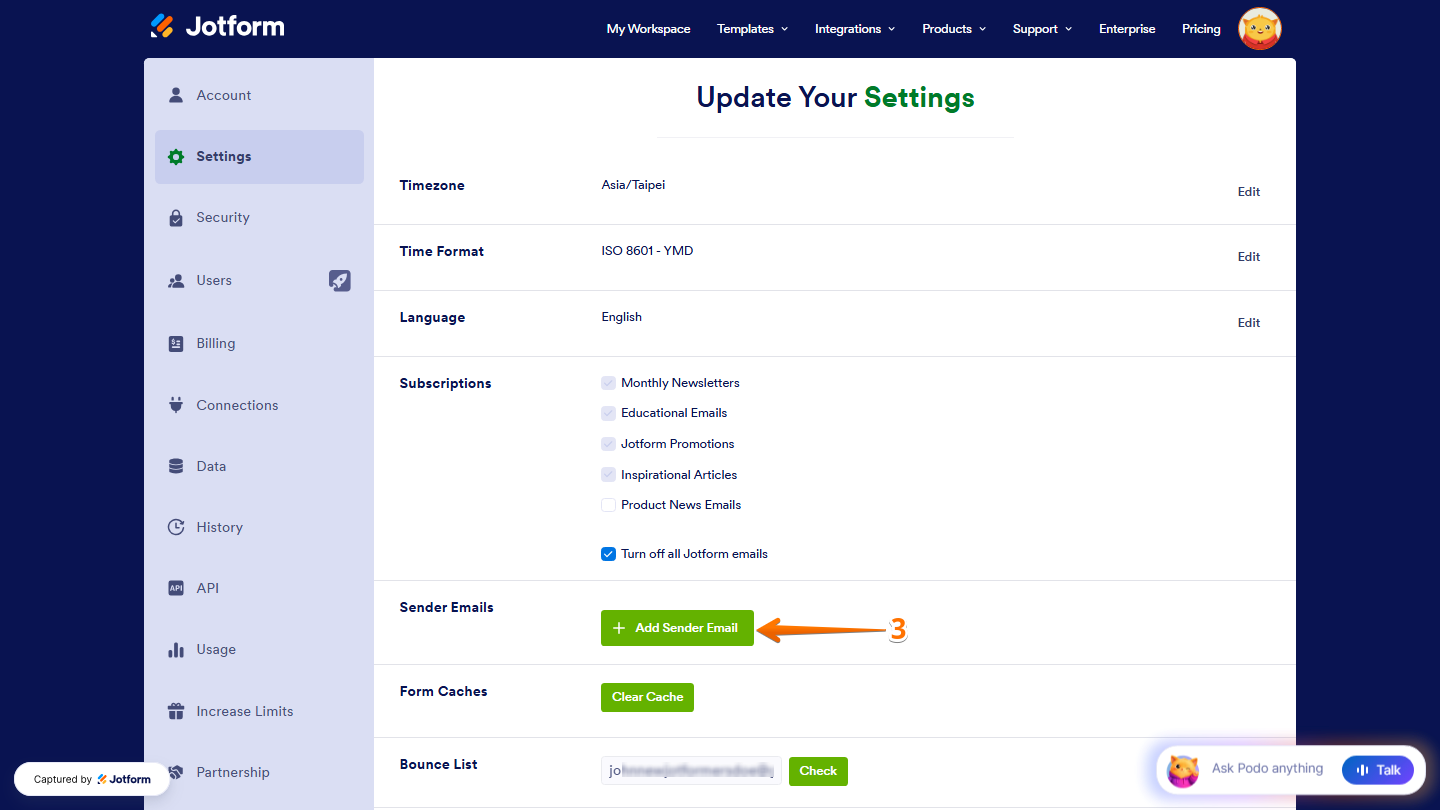
- Now, on the right side of the Send Emails section, click on Add Sender Email.
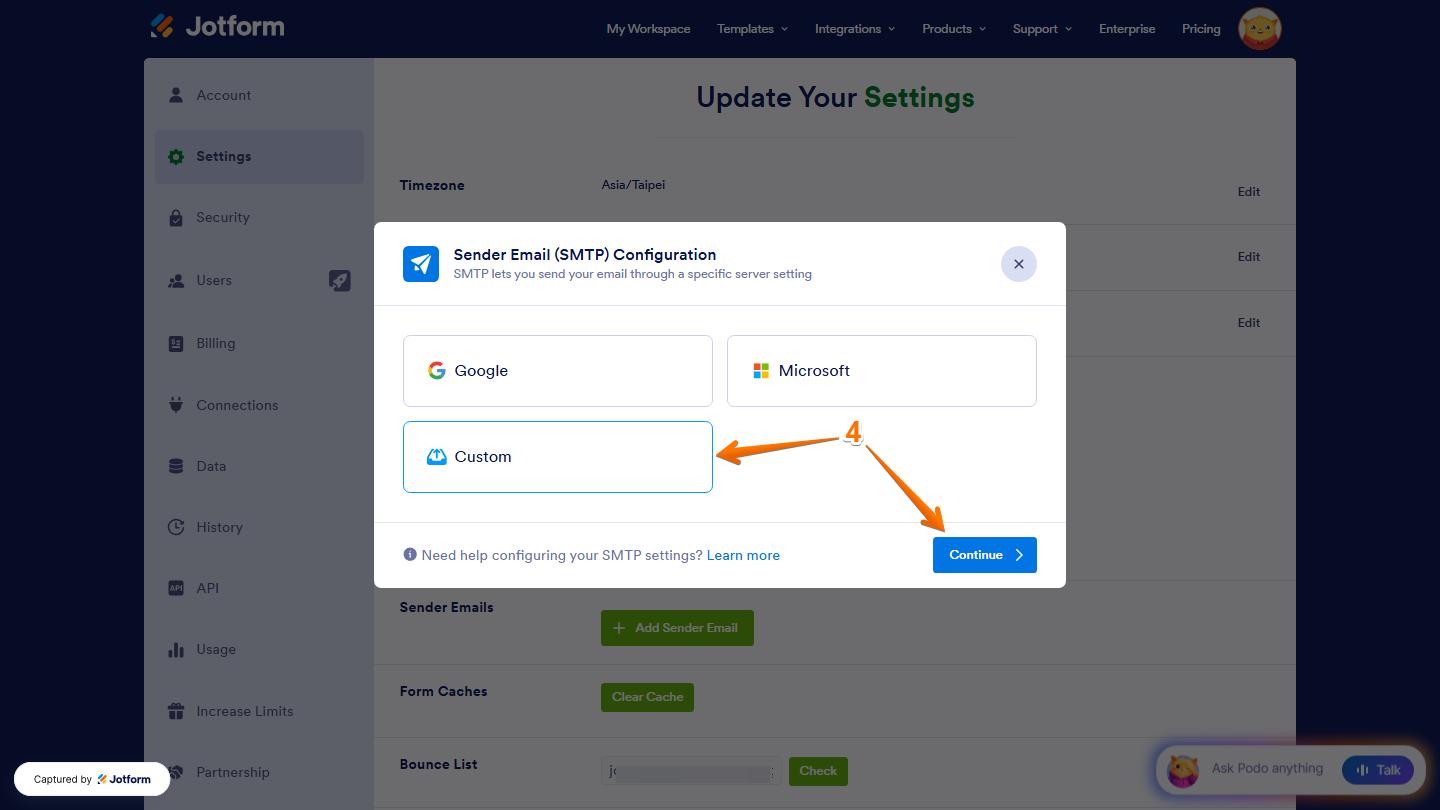
- Then, in the Sender Email (SMTP) Configuration window, select Custom and click on Continue.
- Next, enter the SMTP configuration details for your email address:
- SMTP Account Username — Usually your full email address, unless your email provider specifies a unique username.
- SMTP Account Password — The password associated with your email account. Some email providers may require an app-specific password instead of your regular login password.
- Host Name — The SMTP (outgoing mail) server address provided by your email provider.
- Email Address — The email address you want to use as the sender. This usually matches your SMTP account username.
- Security Protocol — Choose TLS or SSL based on your email provider’s recommendation.
- Port — Enter 587 for TLS or 465 for SSL.
- Once you’ve confirmed that everything is correct, click on Save to create the custom sender email with your email address.

Note
We recommend using the Send Test Email button to check if all the information you provided is correct. You should see a message at the bottom of the Sender Email (SMTP) Configuration window confirming that a test email has been sent to the address you’re setting up as a sender email for your account. If you get an error message during the test, you won’t be able to complete the setup.
That’s it! You’ve successfully set up a custom SMTP sender email for your account.
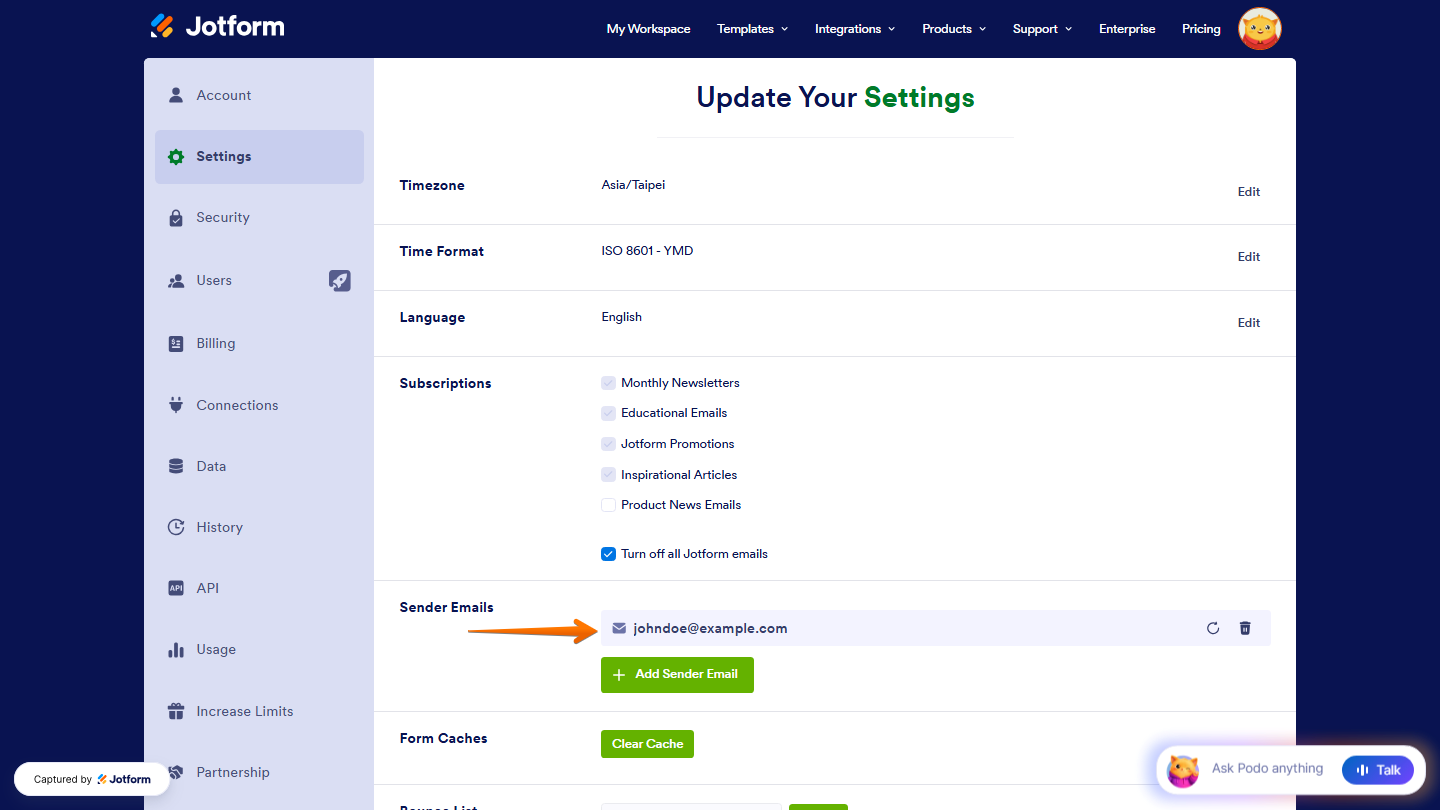
In addition to setting up custom sender emails, you can also configure Gmail and Microsoft Outlook with SMTP, or use free email providers like Yahoo and AOL. To help you with setting up your sender emails, you might also want to check out these guides:
- How to Use Gmail as Your Email Sender via SMTP
- How to Use Microsoft Outlook as Sender Email via SMTP
- How to Set Up SMTP for Free Email Addresses Like AOL and Yahoo
Using the Custom Sender Email in Form Email Alerts
Once you’ve set up your custom sender email, you can use it for your form email alerts, such as Notification and Autoresponder emails. You only need to set up the custom sender email once, and you can use it across all the form assets in your account. Here’s how:
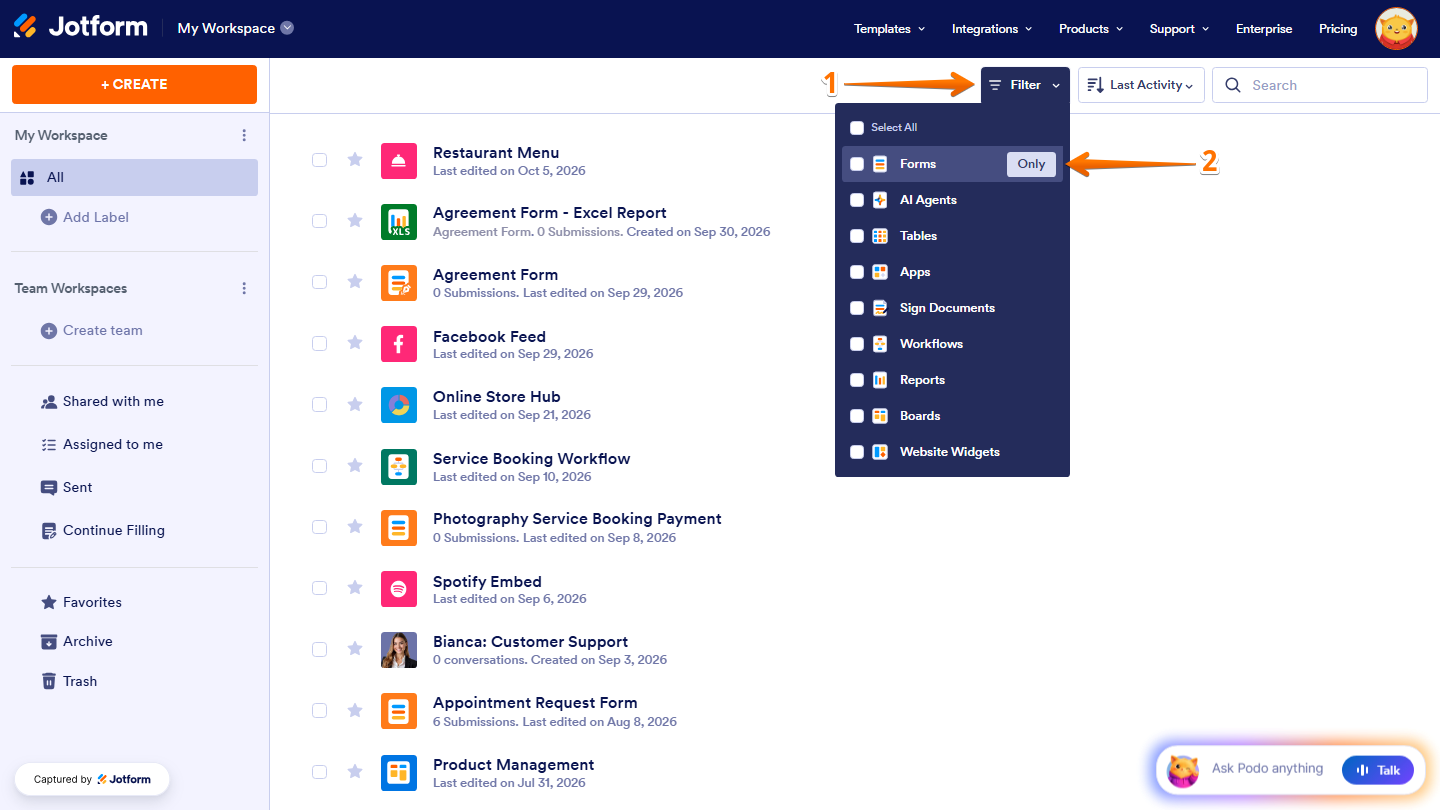
- At the top of your Workspace page, click on Filter.
- Then, in the Dropdown menu that opens, hover your mouse over Forms, and on the right side of it, click on Only.
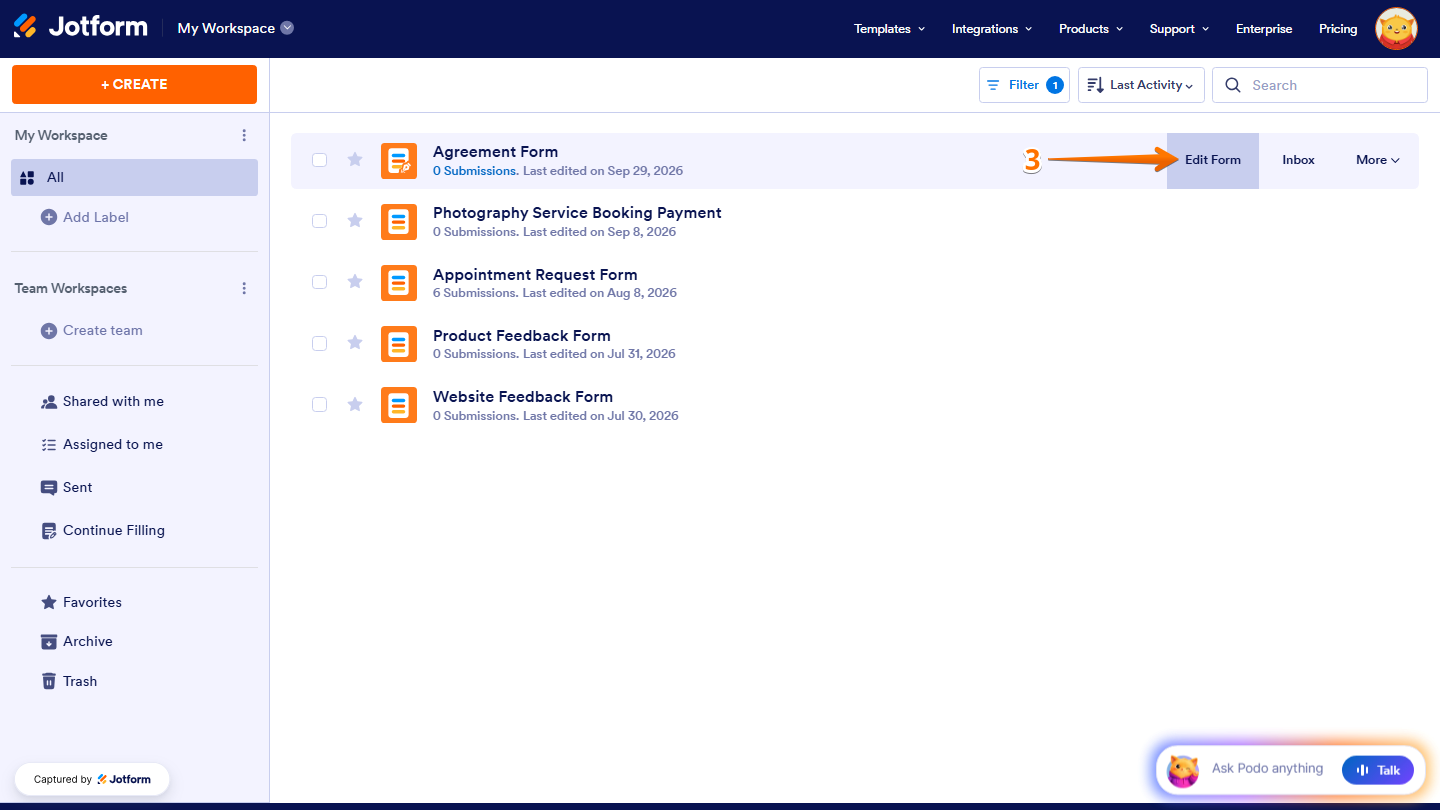
- Then, hover your mouse over the form you want to set up a custom sender email for, and click on Edit Form on the right side of the page.
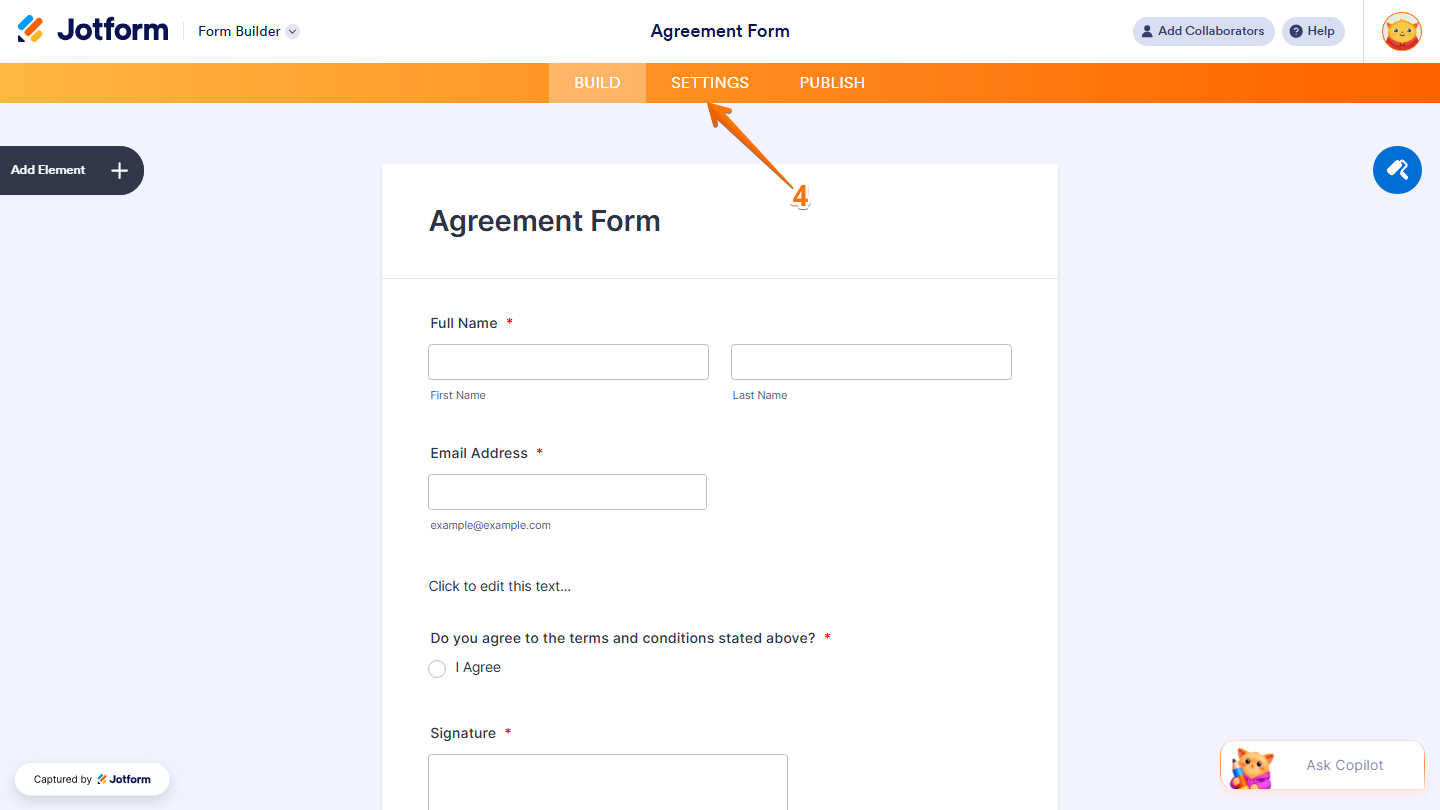
- Now, in Form Builder, in the orange navigation bar at the top of the page, click on Settings.
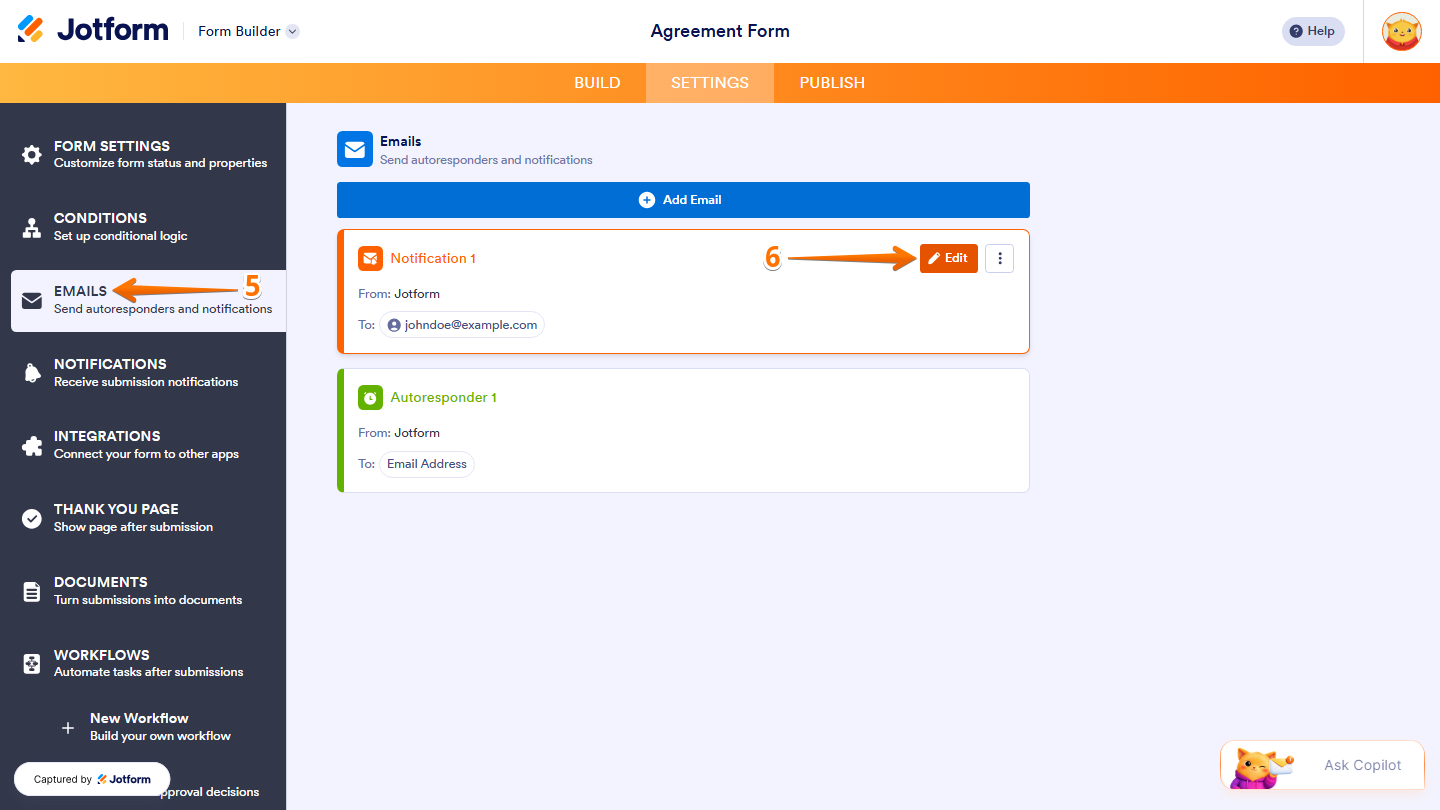
- Next, click on Emails in the menu on the left.
- Then, hover your mouse over the Notification Email or Autoresponder Email and click on the Pencil icon to edit it.
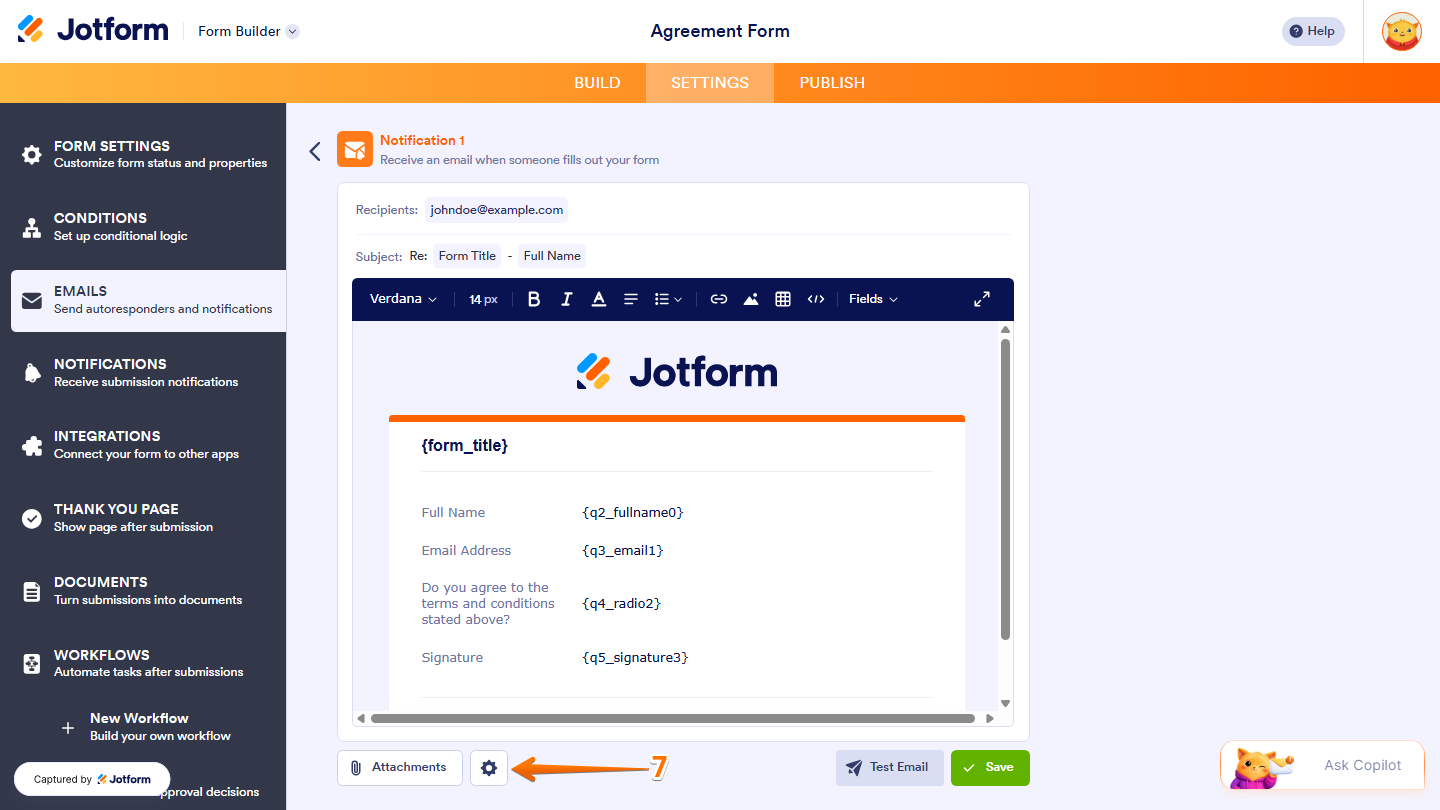
- Now, at the bottom-left corner of the Email Editor, click on the Gear icon.
- Then, in the Settings window that opens, under Sender Email, click on the Downward Arrow icon and then select your custom sender email.
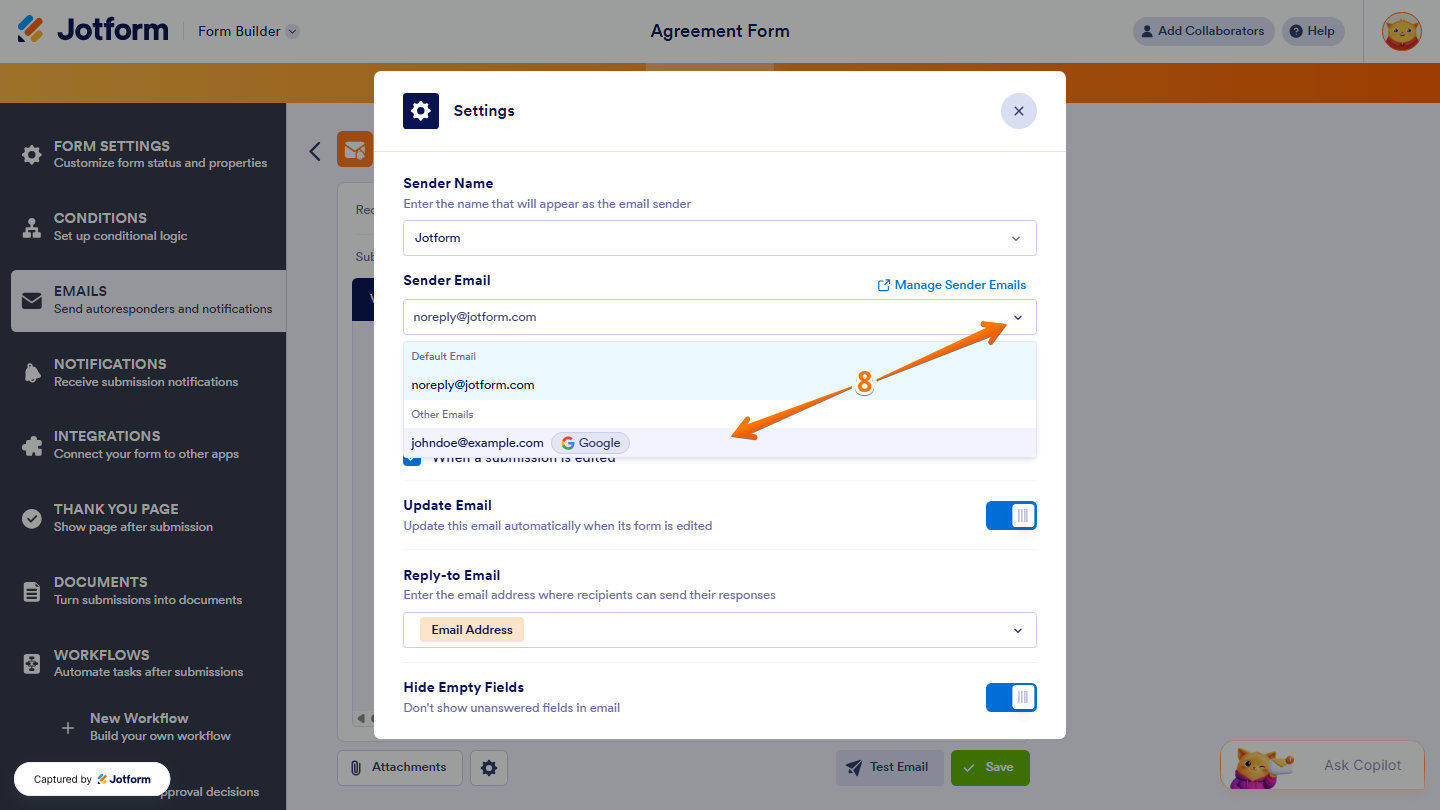
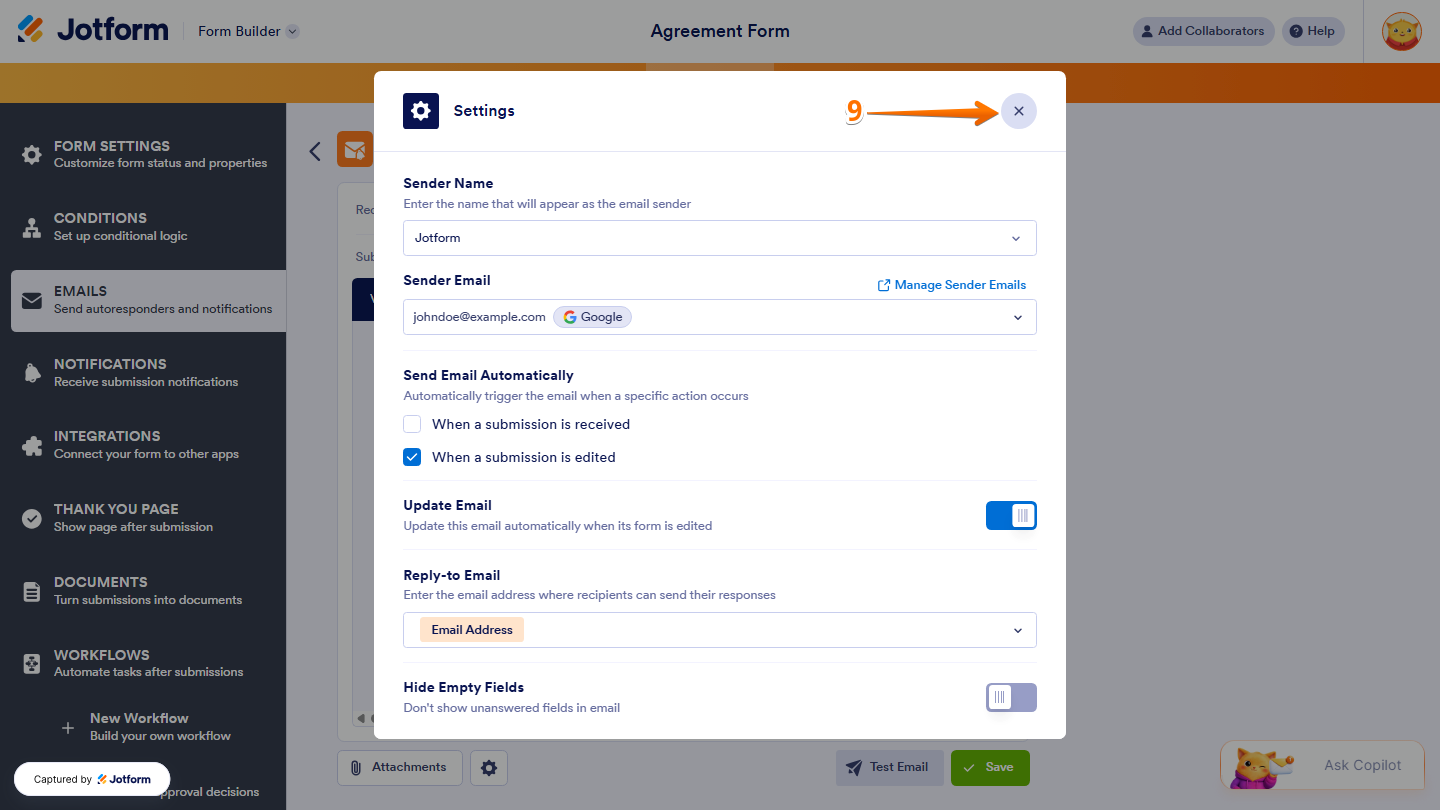
- Next, in the top-right corner of the Settings window, click on the X icon to close the window.
- Once everything’s set, click on Save.
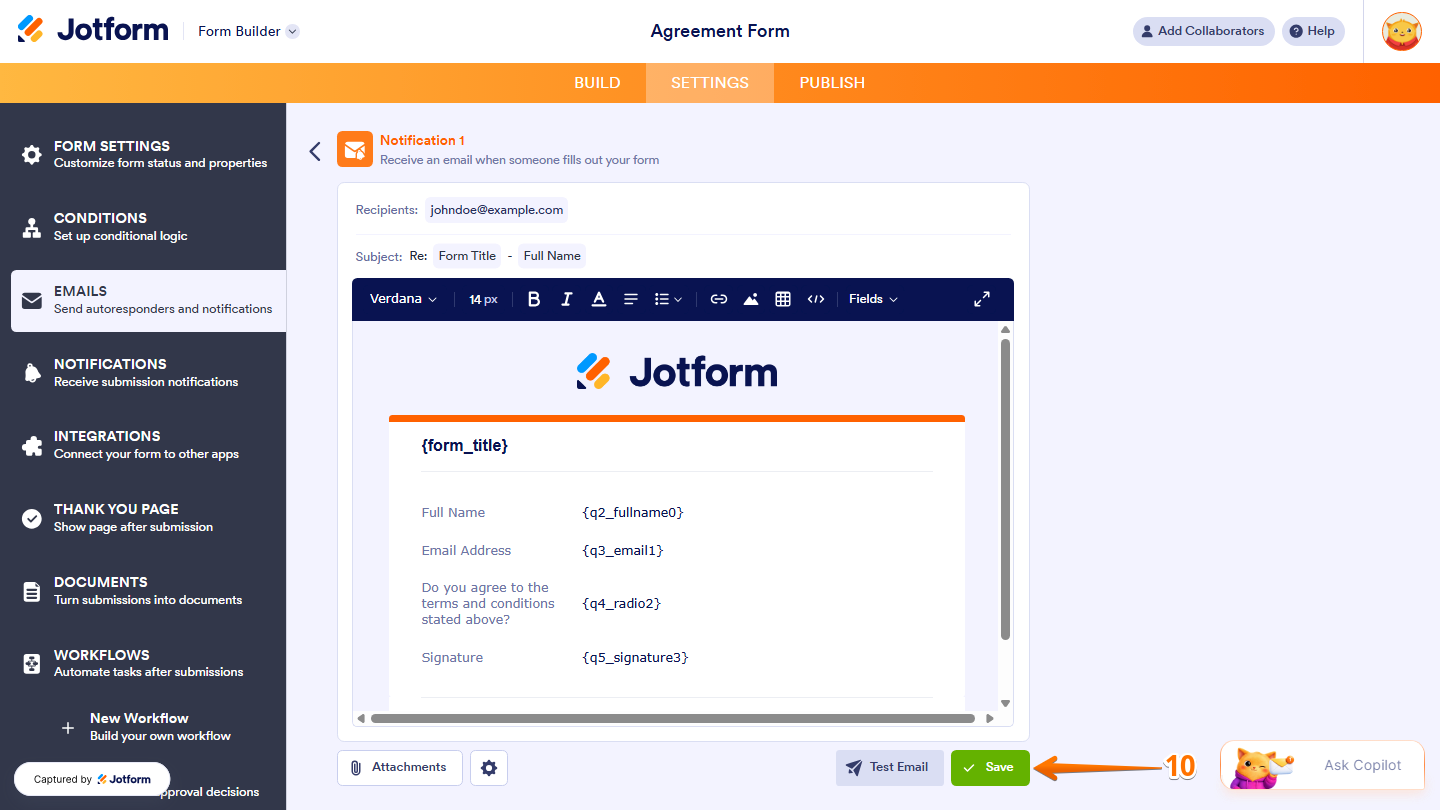
That’s it! Now, whenever Notification or Autoresponder emails are sent for your form, it’ll use the custom sender email you selected.
Note
Some email service providers implement limits on the number of SMTP requests that can be made per day. For example, Gmail allows up to 500 emails per day for free accounts and 2,000 emails per day for Google Workspace accounts, while Yahoo Mail and AOL Mail limit you to around 500 emails per day. Microsoft Outlook typically allows up to 300 emails per day for free accounts, and GoDaddy has a limit of 500 emails per day for basic email hosting. Exceeding these limits can result in temporary blocks, ranging from 1 to 24 hours, depending on the provider. So, it’s important to check with your email service provider for the latest limits and guidelines.


Send Comment:
12 Comments:
June 24, 2026
You have identified two email addresses that should be setup with SMTP. The two emails are:
ce***ry-re***tr***on@s***c.org
cl***ing@s***c.org
These addresses are created in association with our website slobs.org that is hosted by Network Solutions. Your instructions do not seem to address our setup. I am not sure who is our email provider. Can you help?
September 25, 2025
Can you have a form send submissions to more than one email?
September 18, 2025
oi eu não sei muito difícil ajuda ? onde vou clicar settings add emails e new email onde é clicar ? por favor ajudar obrigado jotform
February 21, 2025
How about on app builder? how to change the email autoresponder?
December 6, 2024
I somehow cant believe this low level of support - after years of being a loyal customer. In another chat 66 days ago I already brought up the problem, that with this guide there is no possibility to set up an email with a google alias. There was a suggested solution with using app passwords, but it does not work because in jotform it does not show the required authentification-symbol. And now I cant even answer to the previous chat anymore! So I have to write everything again and things get complicatet. The other chat is https://www.jotform.com/answers/19569581-how-to-use-an-alternative-alias-email-as-the-sender-email-with-google-workspace
October 1, 2024
So, this is a real problem. How do i make an alternative email of a google workspace user the sender-email?
With the alternative email you cant use the "google" method, and the "individual" method does not seem to work either!
So, how does that work? It is extremely urgent and important!!! Can´t believe you dont provide a guide first hand
February 29, 2024
Did you mean there could be limits of 5000 emails (not 500 emails) to Google and Yahoo?
As stated here, Google and Yahoo will limit senders who send more than 5000 emails a day IF their email account isn't authenticated as per spec
my url didn't go through on my previous post. You can google "Requirements for sending 5,000 or more messages per day."
It's a pity that jotform doesn't have the capabilities yet to authenticate using DKIM and SPF
June 19, 2023
We are currently using MS O365 but it only support StartTLS and we tried it in Jotform email SMTP, it could not support TLS / SSL / Non-secure as we could not receive the test email
Pls help to add STARTTLS in the list if possible (using port 587)
thks
October 20, 2022
OAuth authentication (for Office365 accounts with MFA) is not currently available for SMTP setup in JotForm. With the recent blocking of legacy authentication methods by Microsoft, implementing secure authentication methods is becoming ever more urgent.
Are there plans by the Jotform Development Team to implement OAuth authentication for SMTP emails?
September 12, 2022
We use Office365 with MFA enabled and legacy authentication blocked. Am I right to assume that SMTP will not work with JotForms?
November 30, 2021
Can you call me. I want to use your service
October 13, 2021
This is simply BS.
If one was to use SMTP, Gmail will alert the recipients that the email is potentially harmful, as it looks like a spoof.
There is no solution to Jotform reliability. It is simply an antiquated & was-never-even-adequate service.
There's no bright future for JotForm. AVOID!