Jotform Payment Forms let you set up special pricing for product options—giving you the flexibility to offer different prices based on quantities or specific choices. Whether you’re offering bulk discounts or setting prices for different quantity ranges, this makes it easy to adjust pricing based on what you need. You can also set unique prices for various options like the color, size, and type—essentially any choice available for your product.
Setting Up Special Pricing Per Quantity
You can set price tiers based on the quantity a customer buys, offering discounts or adjusted prices for different order amounts.
Whether you’re setting up a new payment form or updating an existing one, setting this up is simple, and you can do it in a few easy steps. Here’s how:
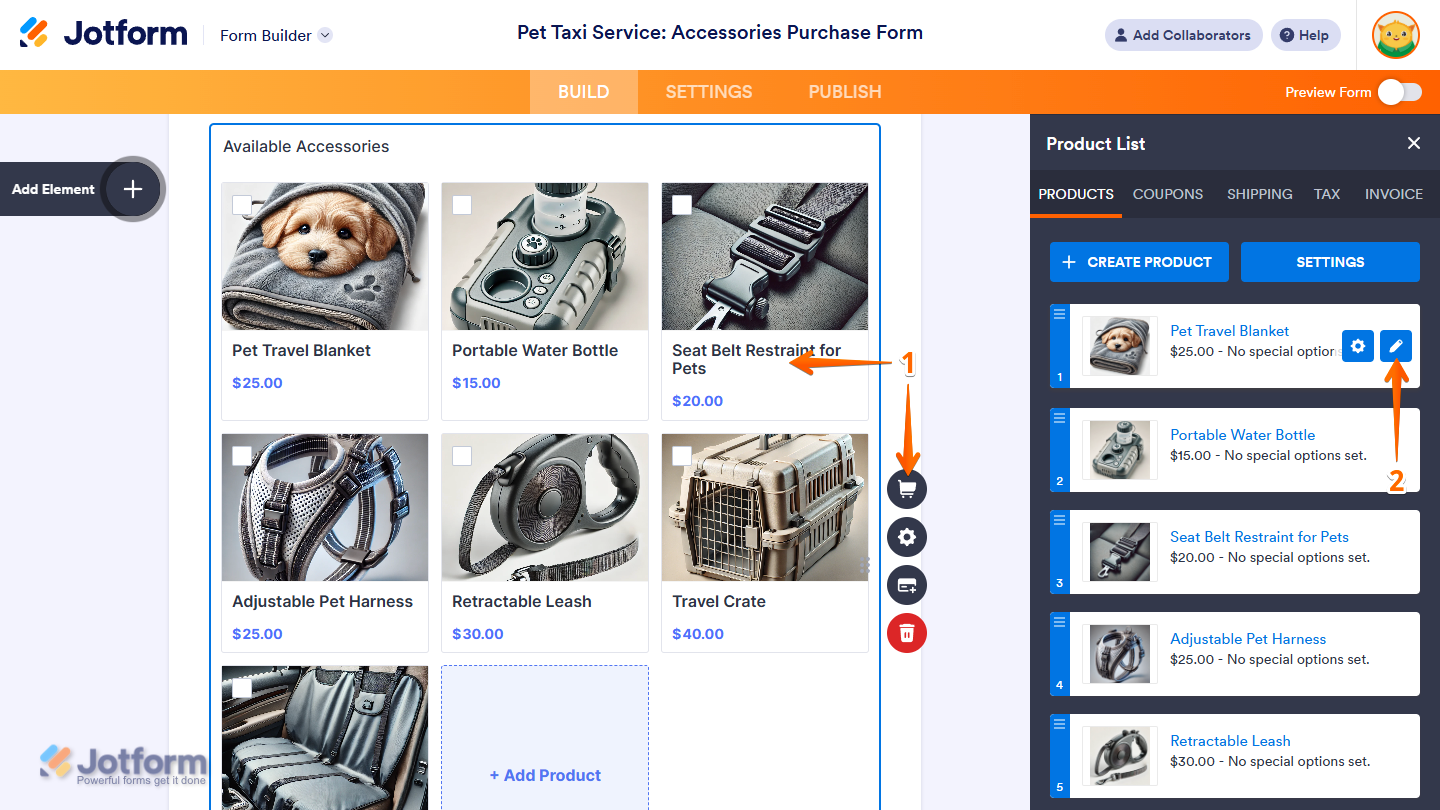
- In Form Builder, click on your Product List field and then click on the Shopping Cart icon on the right side of it.
- Now, in the Product List window on the right side of the page, hover your mouse over your product and then click on the Pencil icon on the right side of it.

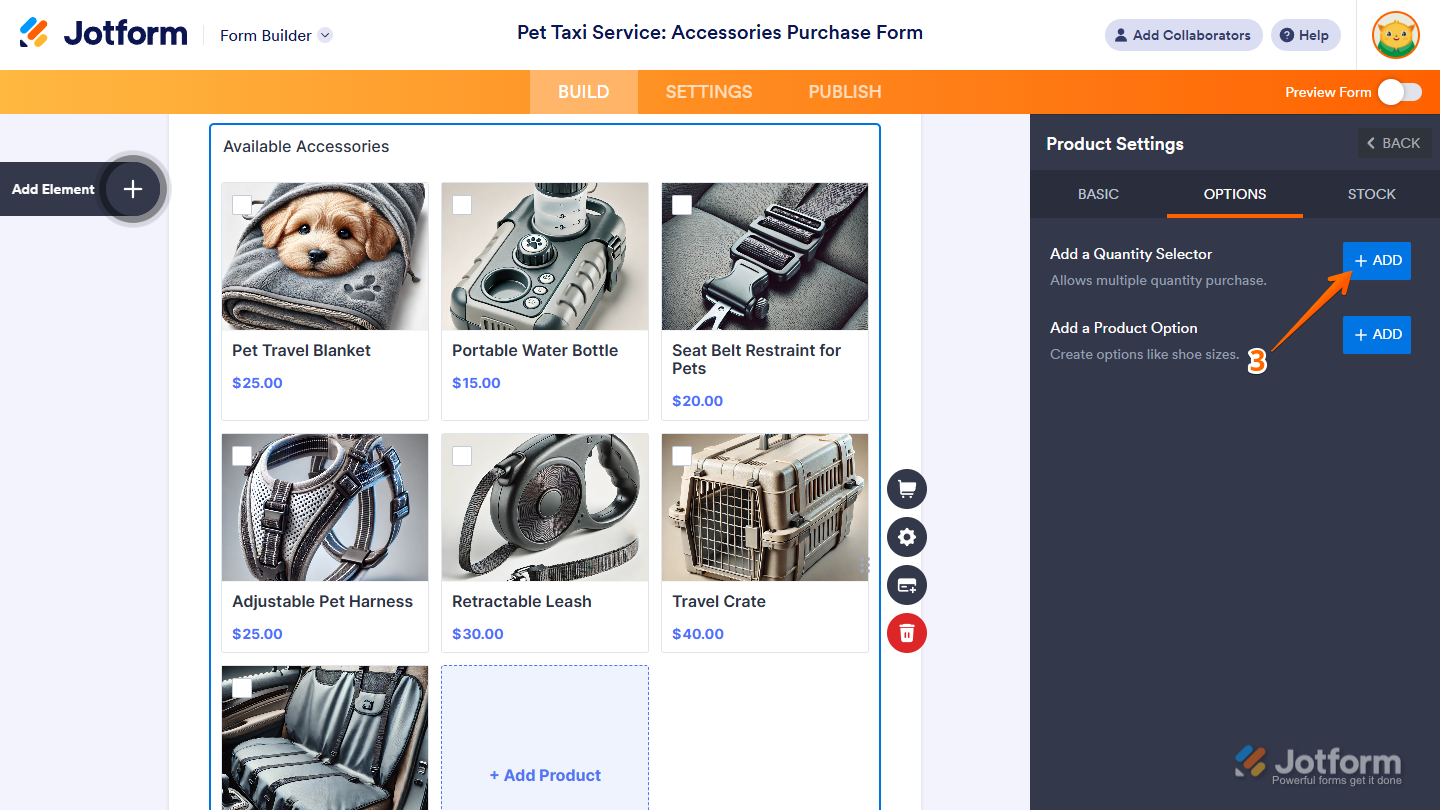
- Then, in the Product Settings window, under the Options tab, click on Add on the right side of Add a Quantity Selector.
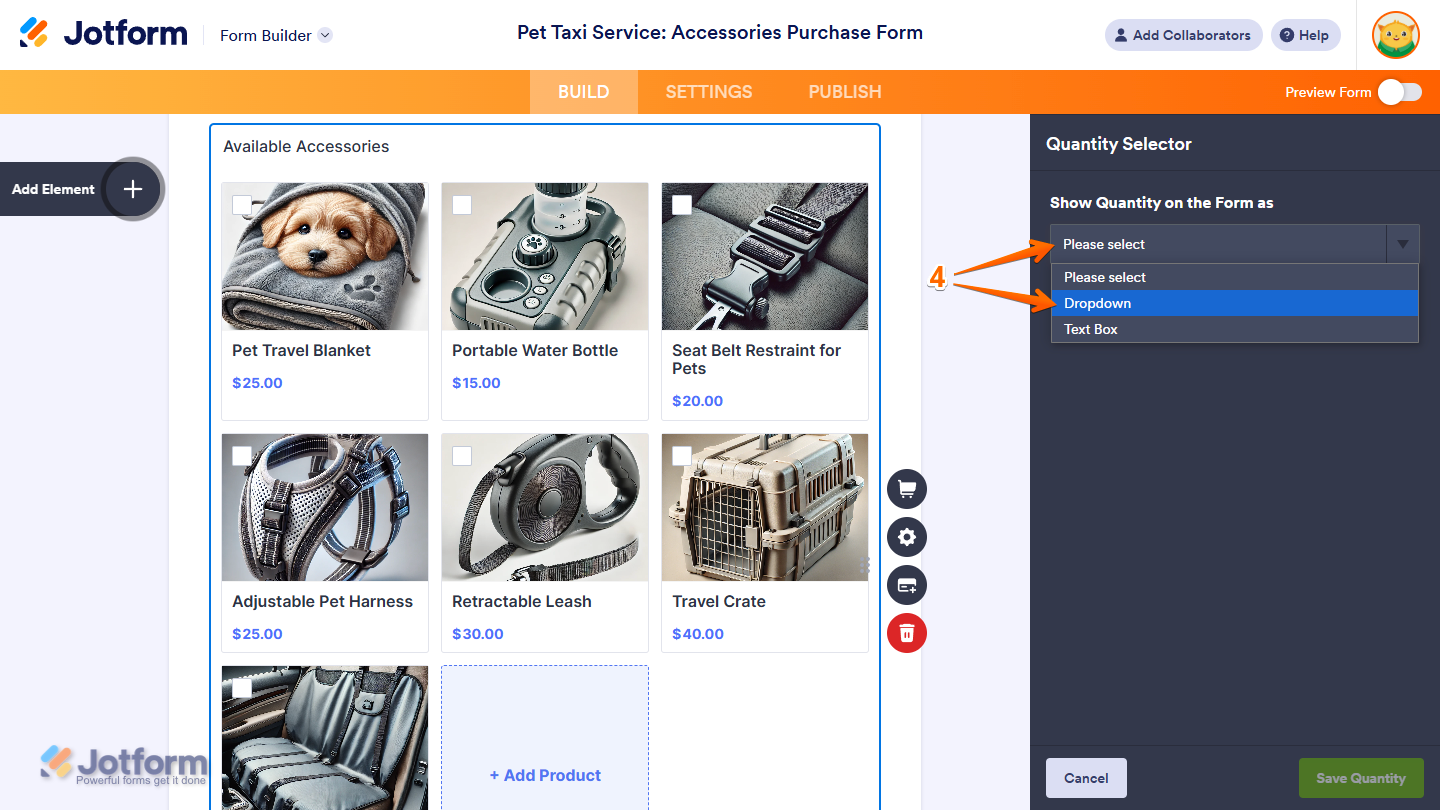
- In the Quantity Selector section, click on the Show Quantity On the Form As Dropdown menu and select Dropdown.
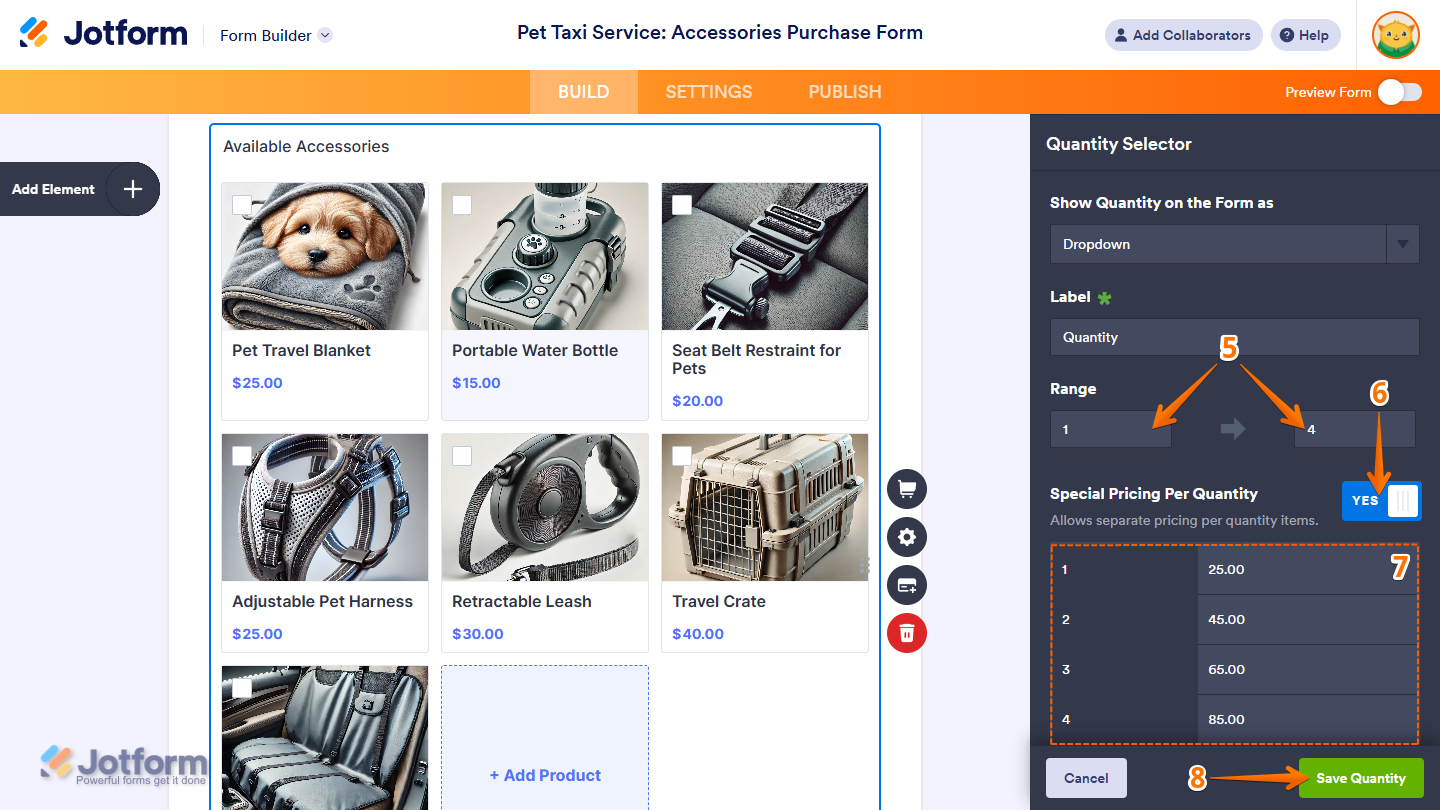
- Now, depending on the product item you’re setting up, you can change the default Quantity Selector’s label and the minimum and maximum range of its options.
- Then, toggle On the Special Pricing Per Quantity to allow the separate pricing per quantity option.
- In the table that comes up at the bottom, enter an amount next to each quantity option to set its custom price.
- Once you’ve set the prices, click on Save Quantity at the bottom.
Note
The special pricing feature is only available in the Quantity Selector when it’s displayed as a dropdown on the form.
Setting Up Special Pricing Per Option
You can also assign different prices to each product option, like the color, size, or type. This gives you flexibility in pricing each selection according to its value.
Setting it up is quick and easy. Here’s how to do it:
- In Form Builder, click on your Product List field and then click on the Shopping Cart icon on the right side of it.
- Now, in the Product List window on the right side of the page, hover your mouse over the product and then click on the Pencil icon on the right side of it.
- Then, in the Product Settings window, under the Options tab, click on Add on the right side of Add a Product Option.
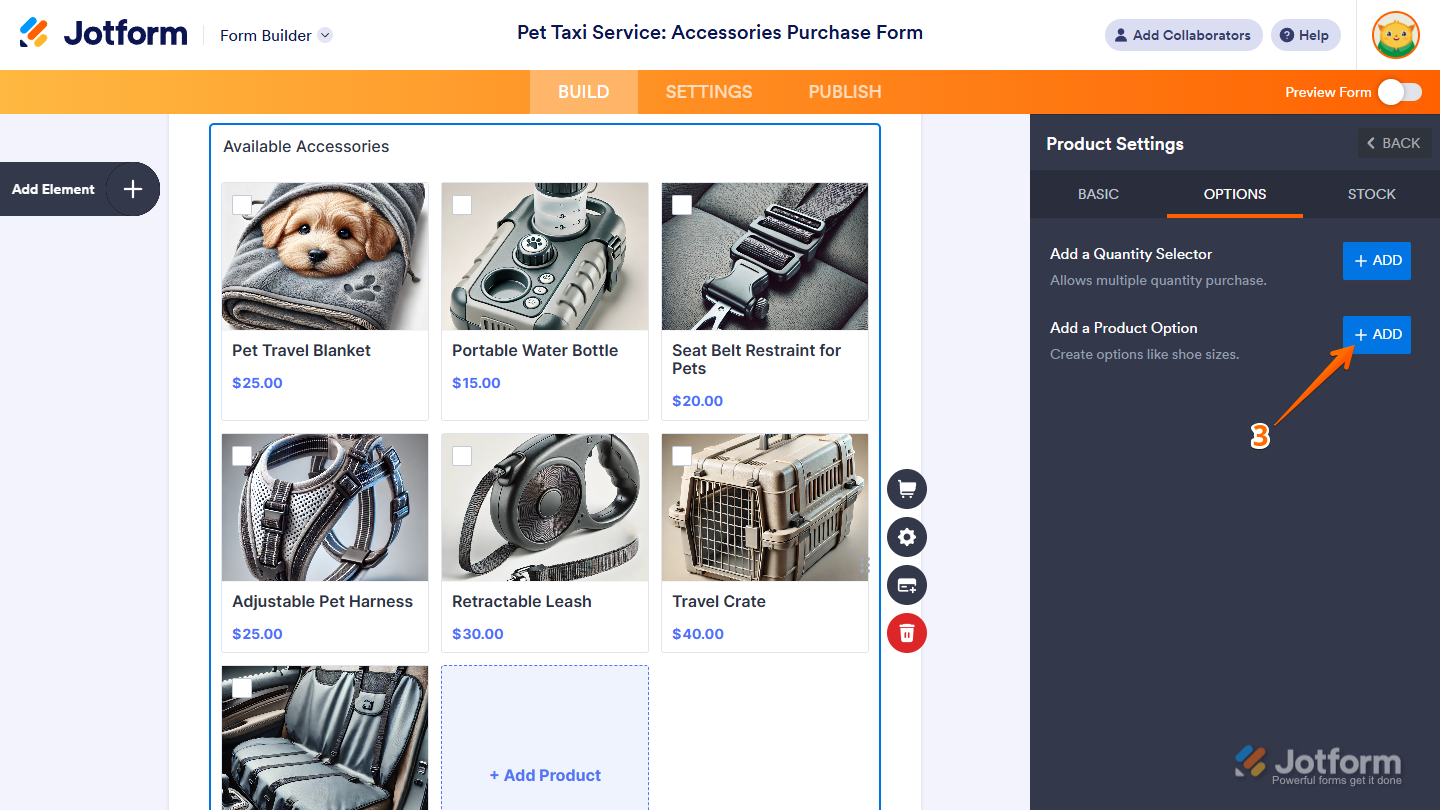
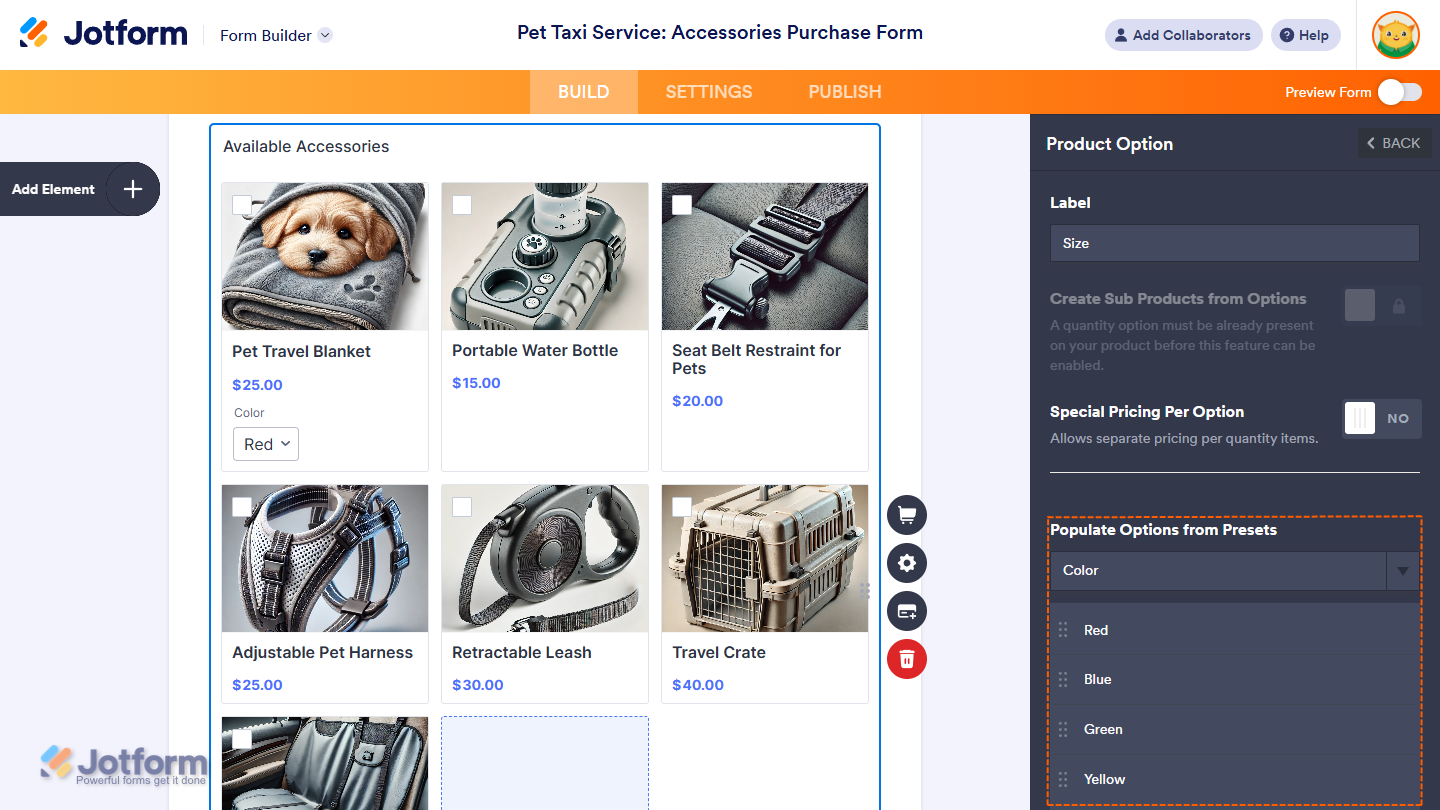
- In the Product Option section, enter a product option into each row of the table at the bottom to create and save a Product Option Dropdown for your product.
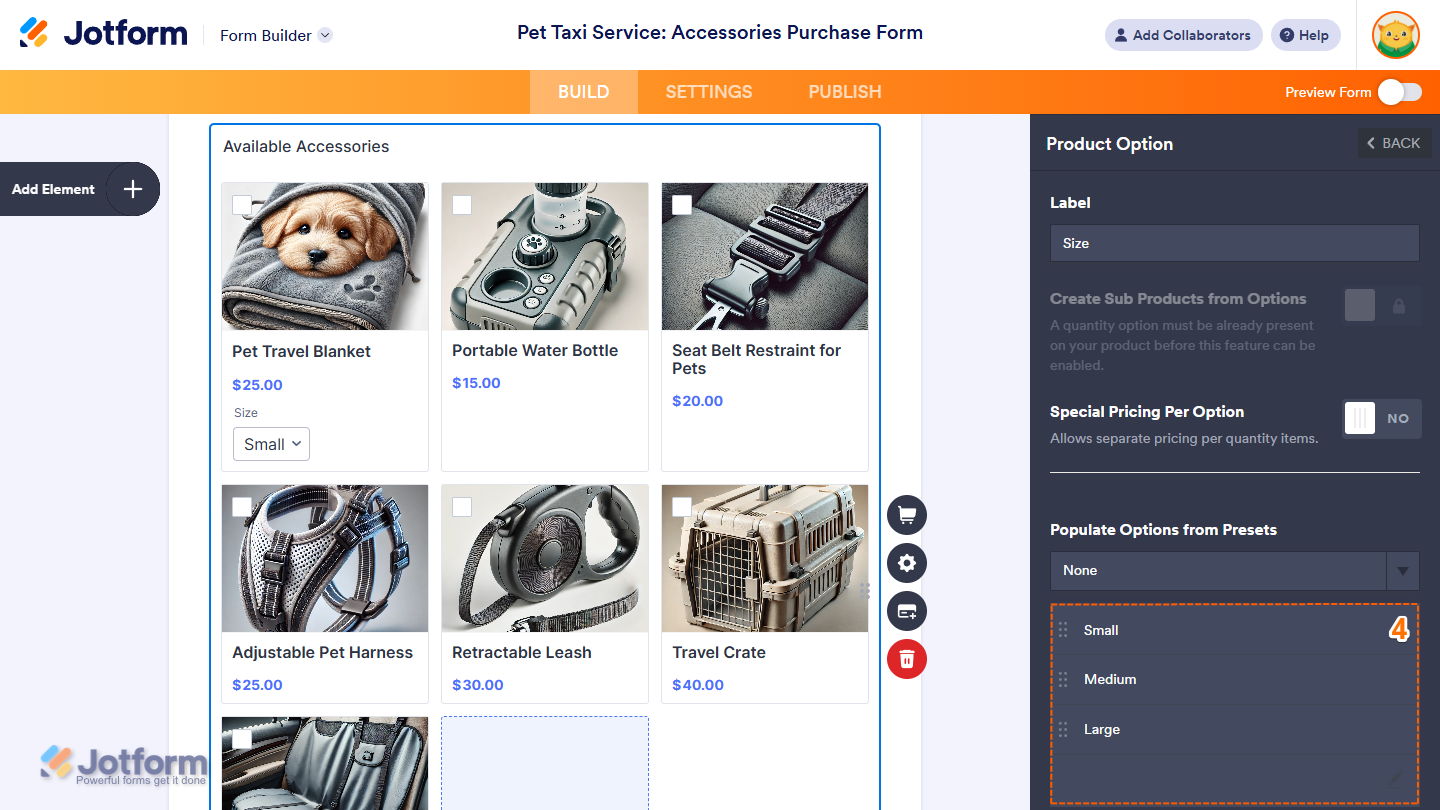
You can also select the Color, T-Shirt Size, Print Size, Screen Resolution, or Shoe Size in the Populate Options section in the Presets Dropdown menu, which will automatically populate the table with predefined options you can modify later as needed.
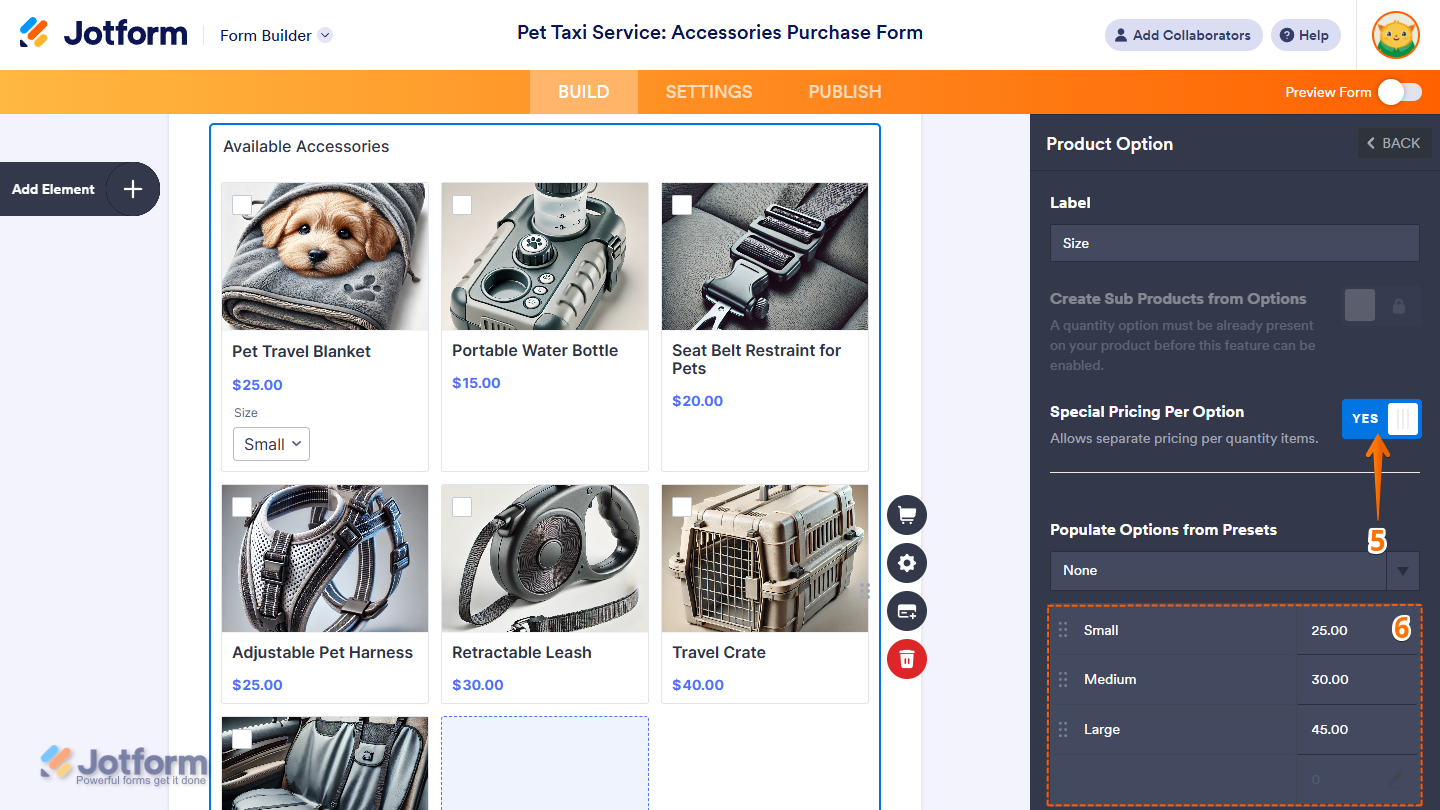
- Next, toggle On the Special Pricing Per Option to allow the separate pricing per product option.
- Then, in the table at the bottom, enter an amount next to each product option to set its custom price.
Notes
- Unlike the Quantity Selector, you can choose whether to set a label for the Product Option Dropdown.
- All the options in the Product Option Dropdown must be named differently.
- Any changes you make in the Product Option section are saved automatically.
- Once special pricing is enabled for one Product Option or a Quantity Selector, it’ll be disabled for the others.
- Special pricing overrides the main product price. When set up, the Price box under the Basic tab of the Product Settings section will be disabled.
- You can add multiple Product Options with no limit and turn their options into sub-products. To learn more about setting up other Quantity Selector and Product Option properties, you can check out our guides on How to Add Options to Payment Forms and How to Turn Product Options into Sub-Products.

Send Comment:
5 Comments:
July 31, 2025
hi, is it possible to set special pricing for each product when the final total bill exceed X amount?
example:
if total bill exceed $50K, product A price will drop from $50 to $40, applies to other selected products too
March 24, 2024
Can this be done using jotform app?
February 2, 2024
I what like to know how to create a t shirt tab for my registrants
November 30, 2023
Hi, this is only can be done in jot form builder? Not in apps store builder?
August 1, 2023
I figured out the payment where I don’t have it on the page, which is what I wanted.
My next question is if you knew how I could combine prices? For example, people can order any flavors for a certain price for my business but, when I try to do it online, when I try to combine different ones, it charges the full price. Do you happen to know how and if I can change that.
For example order for 5 juices it’s $35 but if I want someone to be able to get 3 green juices and 2 red juices I want it to equal $35 and not charge me full price for two of the red juices . Since I have the option of 1-10 special prices it charges me the full price when I get out of the column and order from another. Hopefully that makes sense