Passing a calculated value from one form to another form’s payment total field allows you to connect different forms within your workflow seamlessly. Your form fillers can smoothly transition from one form (where calculations occur) to another (where payments are made) without disruptions. Below are the steps to pass a calculated value from one form to another form’s payment total field.
Build the Forms
You’ll need two different forms. Form 1 will handle the calculation and Form 2 is where the payment field will be populated. For example
- Form 1 (calculation form) — https://www.jotform.com/213473520367959
- Form 2 (payment form) — https://www.jotform.com/213473516582054
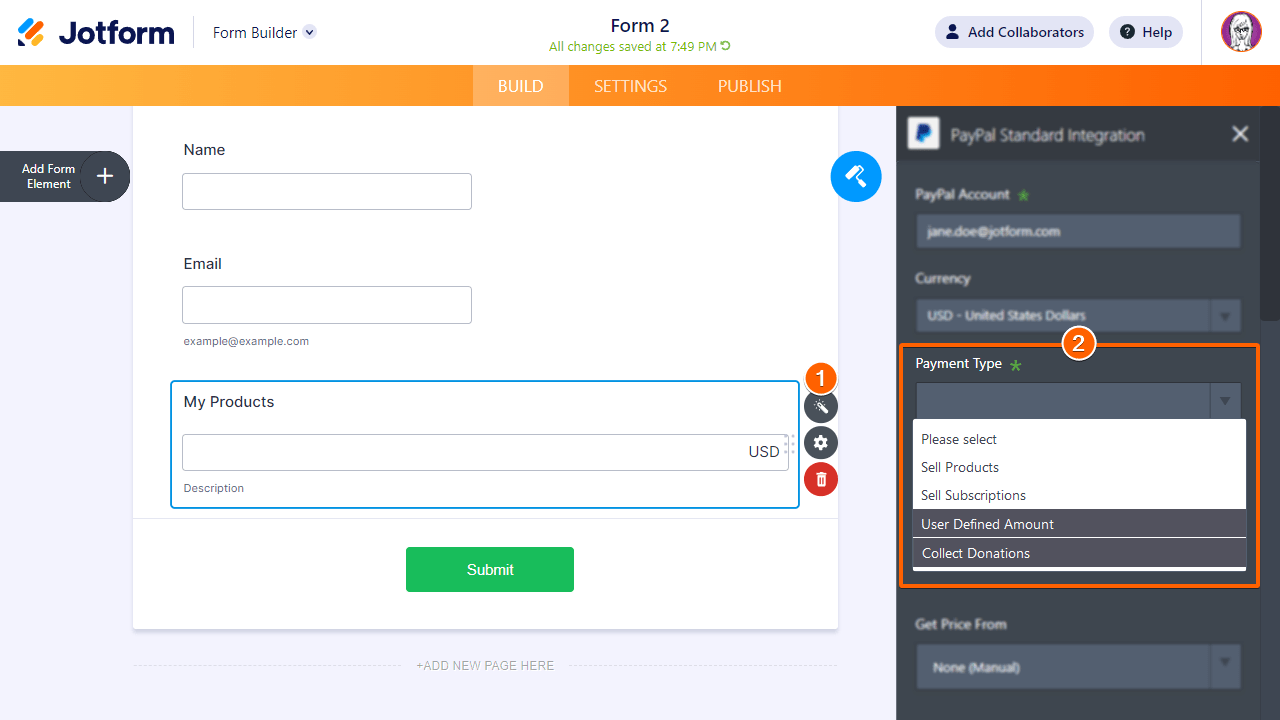
Note that you can only pass a calculated value to a payment element if its Payment Type is either Collect Donations or User Defined Amount.
Create the Thank You Page URL
Form 2 will serve as the Thank You page of Form 1. Create your custom Thank You page URL using Form 2’s URL. For example
https://www.jotform.com/213473516582054?myProducts[price]={calculation}To break that down
- https://www.jotform.com/213473516582054 — The URL of Form 2.
- ? — The question mark serves as a separator.
- myProducts[price]={calculation} — The unique names of the payment and calculation elements in Form 2 and 1 respectively in key-value format. See Unique Names for more information.
Get Unique Names (Tags)
In the myProducts[price]={calculation} example, myProducts is the unique name of the payment element in Form 2 and calculation is the unique name of the calculation element in Form 1.
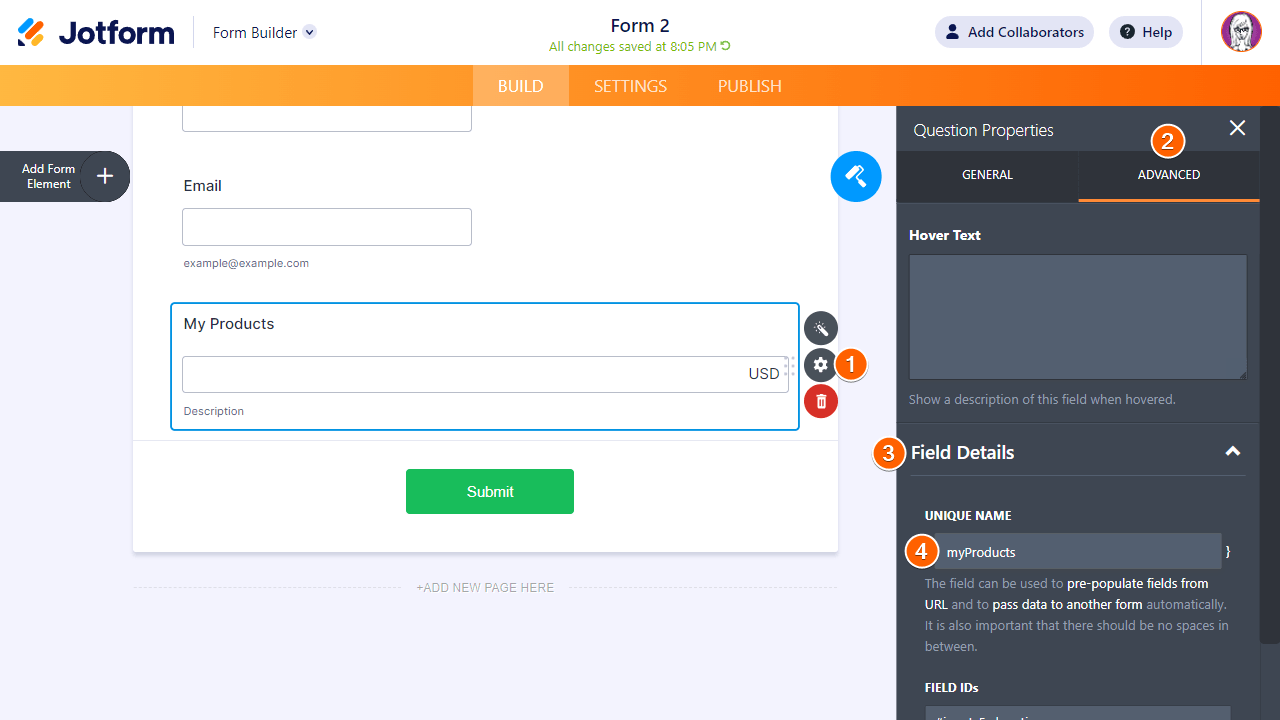
To get your payment element’s unique name
- Edit Form 2 in the Form Builder and select your payment element’s gear icon.
- In the right panel, go to the Advanced at the top.
- Select Field Details.
- Copy the value under Unique Name and append [price] to it (e.g., myProducts[price]).
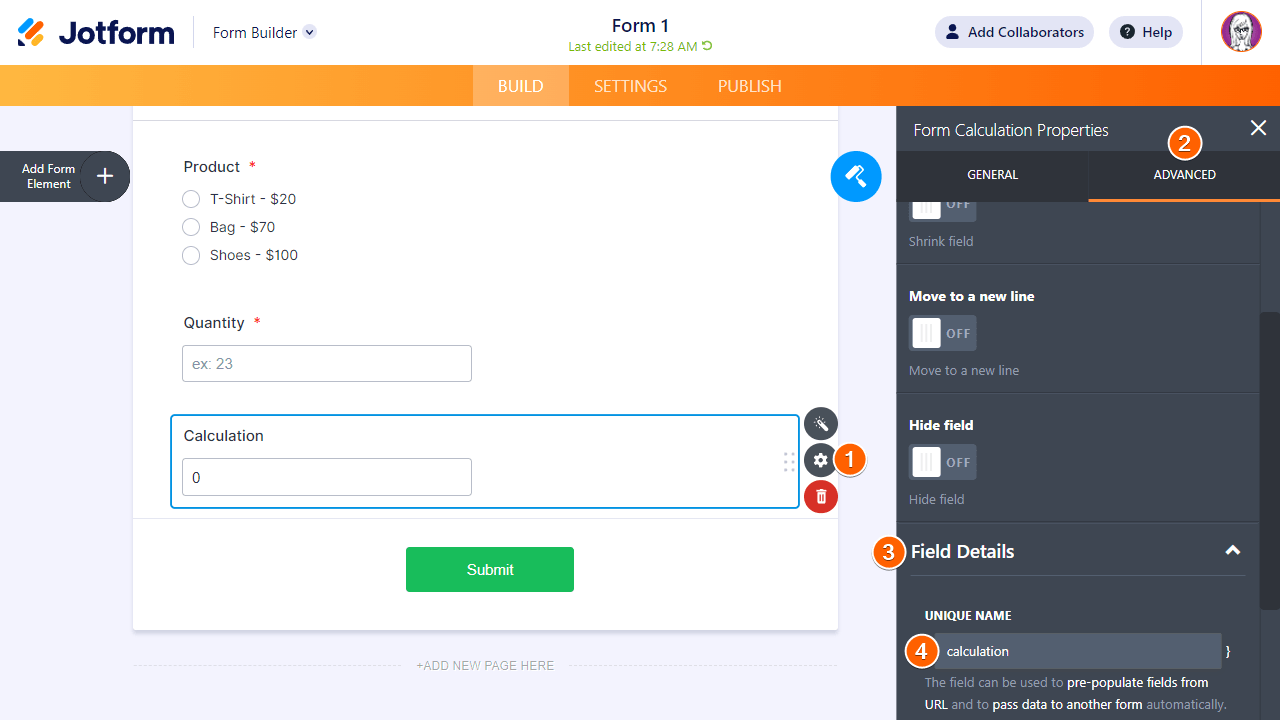
To get your calculation element’s unique name
- Edit Form 1 in the Form Builder and select the gear icon of your calculation element (e.g., Form Calculation widget).
- In the right panel, go to Advanced at the top.
- Select Field Details.
- Copy the value under Unique Name and enclose it with curly brackets (e.g., {calculation}).
Now that you have all the components, create your custom Thank You page URL using the example here.
Set the Thank You Page URL
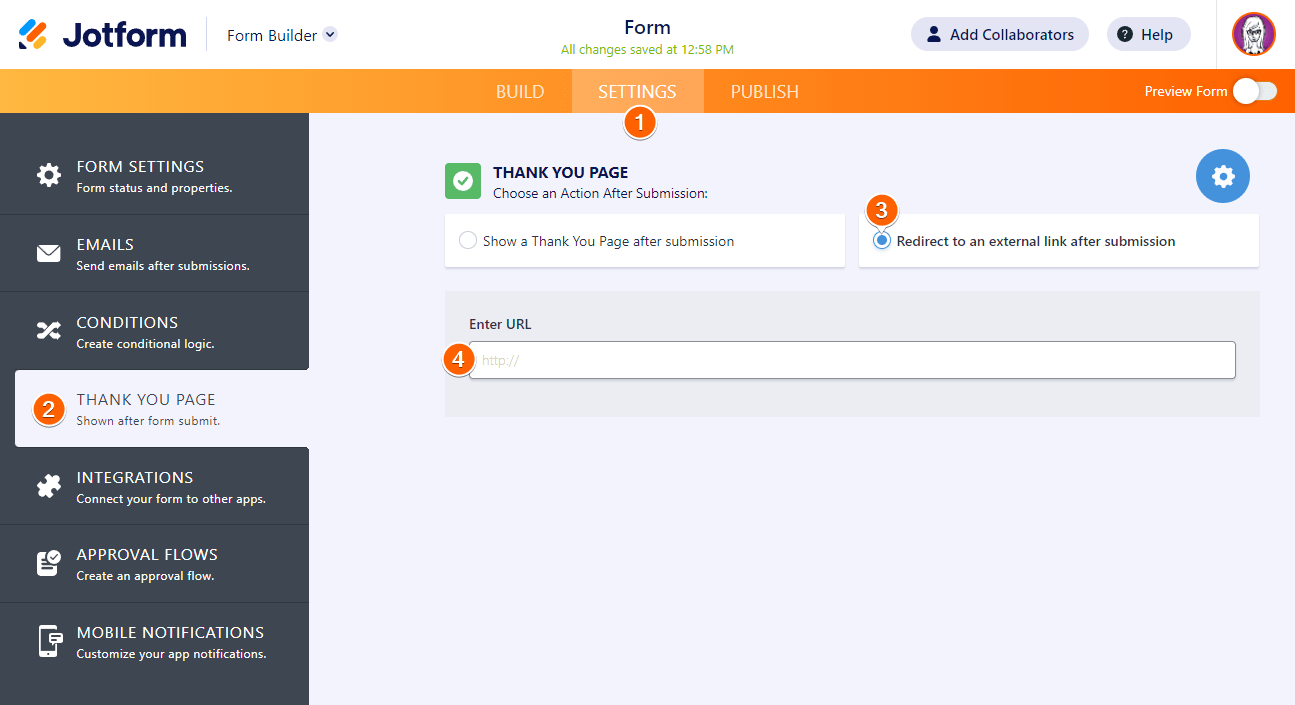
Once you have your custom Thank You page URL, configure Form 1 to redirect and pass the calculation to Form 2:
- Edit Form 1 in the Form Builder and go to Settings at the top.
- Select Thank You Page on the left.
- Select Redirect to an external link after submission.
- Enter your custom Thank You page URL (e.g., https://www.jotform.com/213473520367959?myProducts[price]={calculation})
By following these steps, you’ll be able to pass the calculated value from Form 1 to Form 2’s payment field, especially when using the payment gateway for donations or custom payments. Remember to adjust the field names and URLs according to your specific forms.

Send Comment:
2 Comments:
October 31, 2024
How do I add up the values in a column and then present the total amount below? The cost entries will be entered manually.
August 24, 2024
hi,
The Form 1 (calculation form) is single selection, is it possible to sum the multiple choice? For example: if T-shirt($20)* 2 + Shoes ($100)* 1 , as a result, the calculation will display as 140?