Automated Clearing House (ACH) payments allow you to receive payments directly from a customer’s bank account instead of using credit or debit cards. ACH payments are provided with lower fees than card payments but require additional payer verification and introduce longer delays of payment and refund.

With Stripe ACH, you can do the following:
- Sell online products
- Sell merchandise
- Collect donations online
- Accept custom payments
Stripe supports ACH payments, and you can integrate it through your form. Stripe used Plaid for bank account verification to get ACH payments.
What is Plaid?
ACH payments require a verification process for the payer’s bank accounts. Plaid allows payers to instantly verify their bank accounts, allowing you to charge them immediately. The verified bank account is used by Stripe later for the charging process.
How to Add and Set Up Stripe ACH in the Form?
Setting up Stripe ACH is relatively easy. Here’s how:
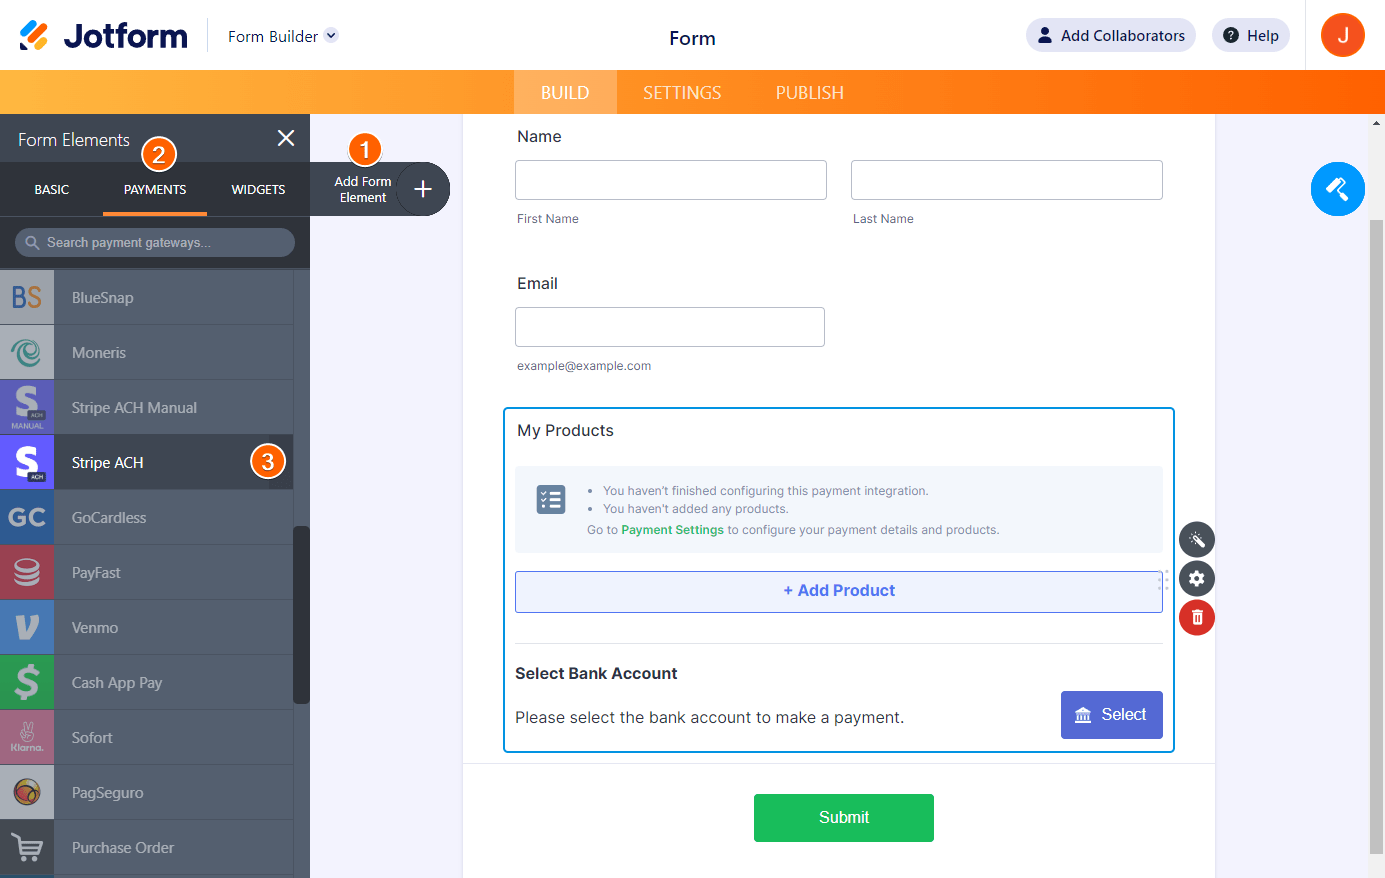
- In Form Builder, click the Add Form Element button on the left side of the screen.
- Go to the Payments tab.
- Click Stripe ACH from the list. You can also drag and drop it to add.
- In the Payment Settings, set up the following options:
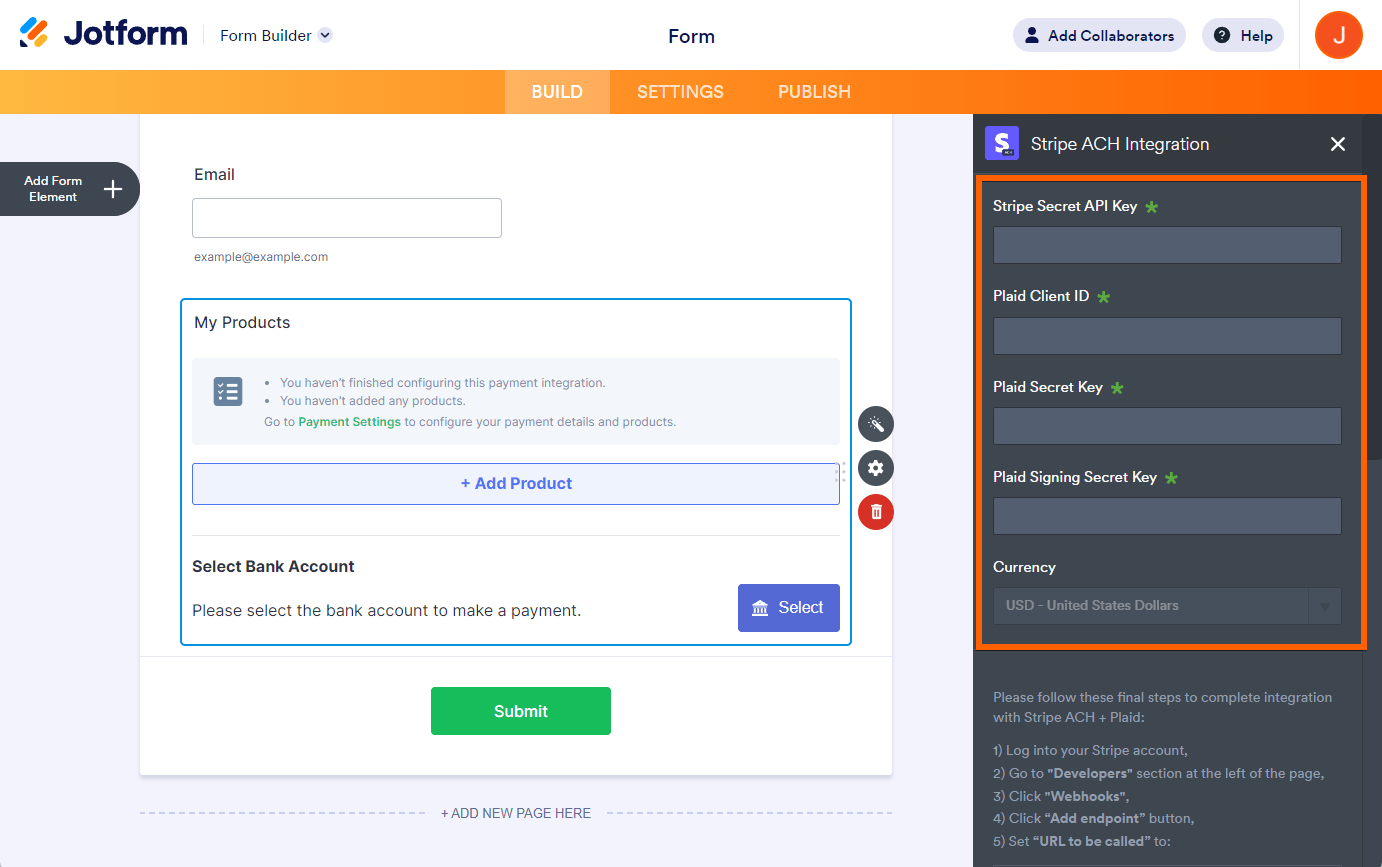
- Choose your Payment Type. With Stripe ACH, you can sell products, collect donations, or allow user-defined amounts.
- Under Additional Gateway Settings, choose the appropriate Environment:
- Sandbox
- Development
- Production

Visit the following article from Plaid for the difference between these environments.
- If you choose Sell Products from the Payment Type, click the Continue button to add your product items. Otherwise, click the Save button to complete the integration.
See also:
- Setting Up Your First Order Form
- How to Add Coupon Code to Payment Forms
- How to Add Shipping Cost to Payment Forms
- How to Add Tax to Your Payment Form
- How to Add Options to Payment Forms
- How to Generate an Invoice for Your Payment Form
How Does Plaid’s Bank Account Verification Work with Jotform?
Your customers must choose their bank, authenticate, and select an account as a funding method. Once done, they can submit the form. See the below short GIF for the payment flow:

Enabling Stripe with Plaid
The main requirement in setting up the integration is ensuring that you have Stripe enabled with Plaid. Below are the steps to do that:
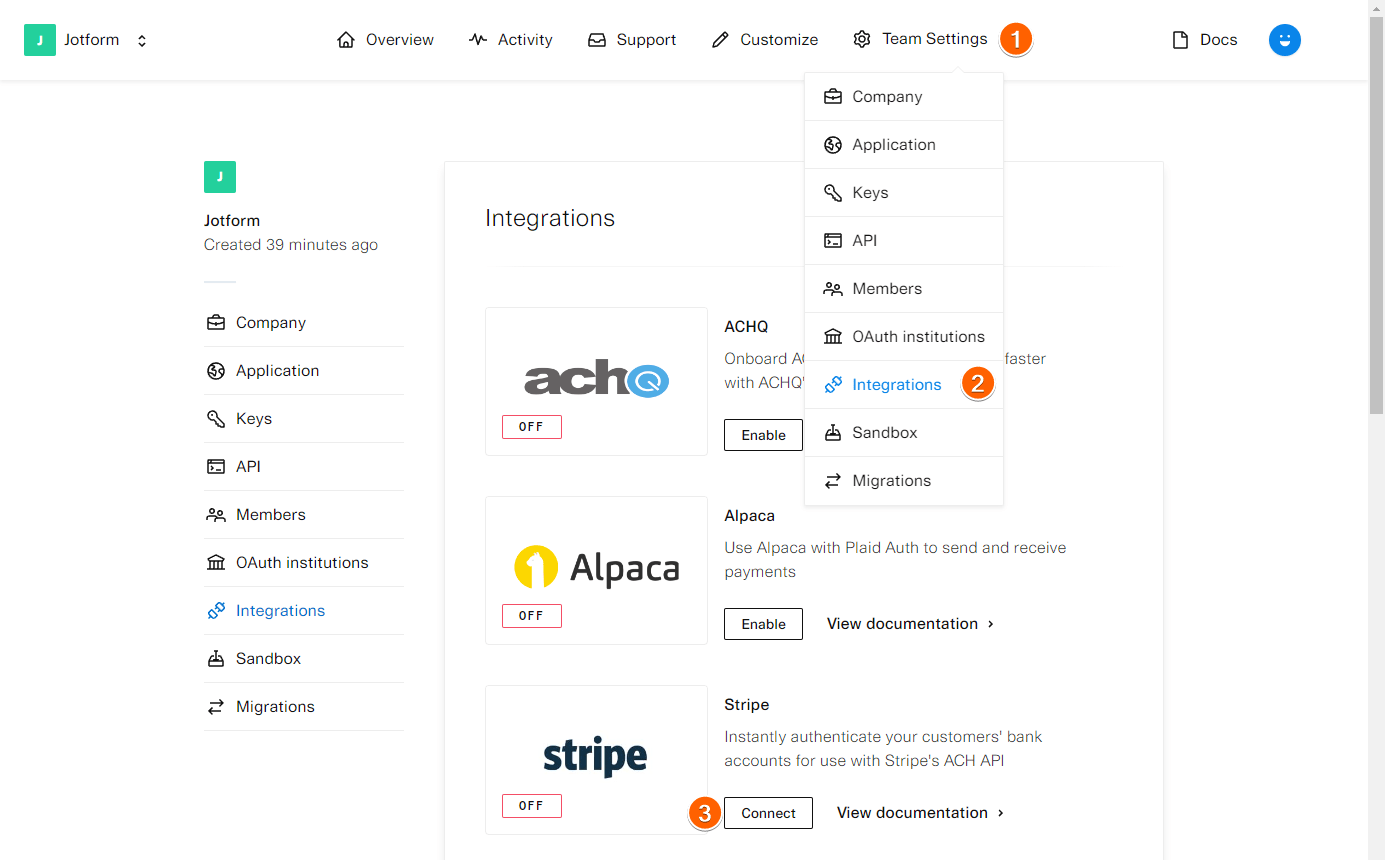
- In your Plaid dashboard, click the Team Settings from the main navigation.
- Click the Integrations options.
- Look for Stripe, and click the Connect button.
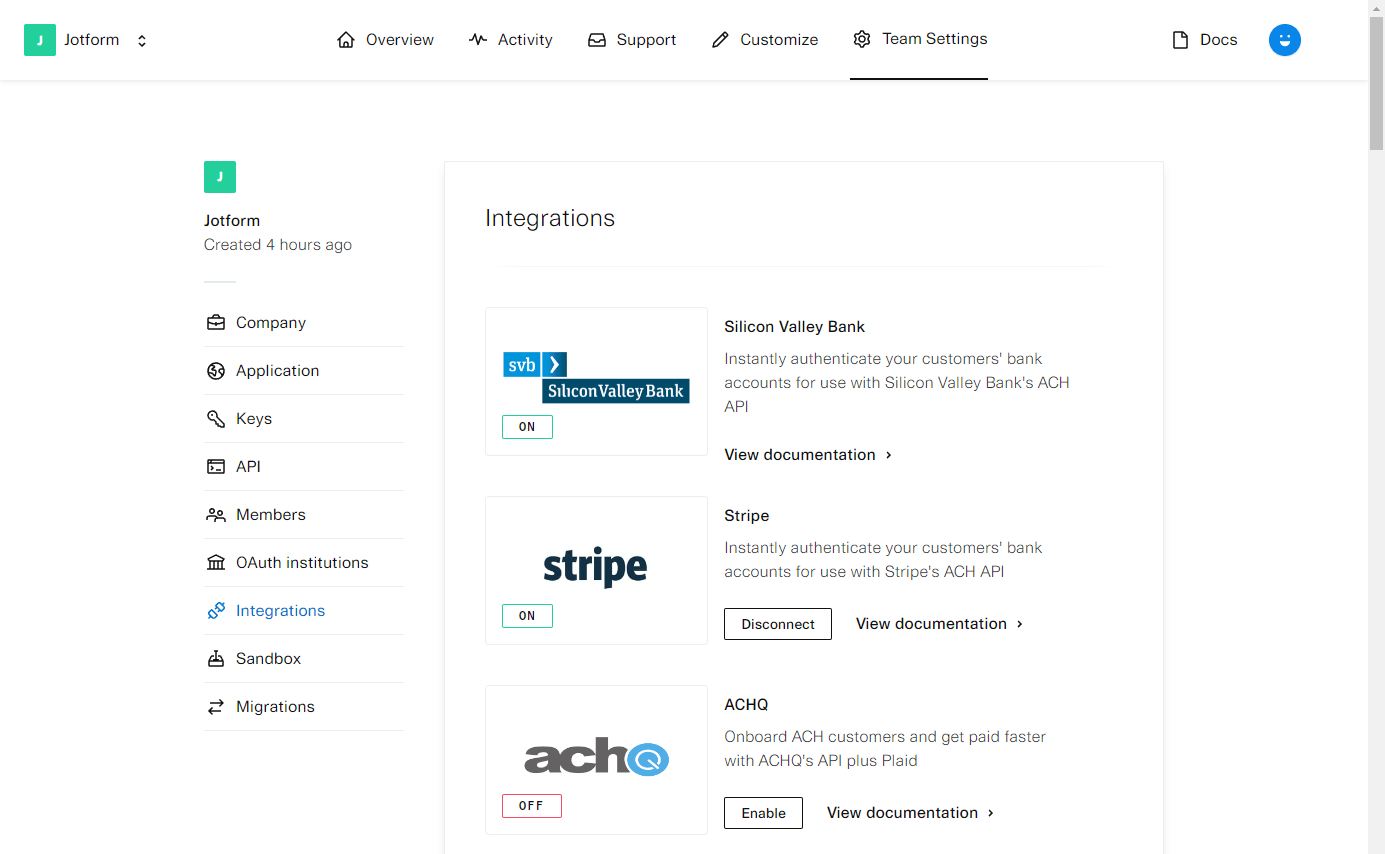
- Complete all the details that Plaid requires, and once your Stripe account is connected, you’ll see On text instead of the default Off, which means you’ve successfully enabled it.
Getting the Client ID and Secret Key from Plaid
After enabling Stripe, get your Plaid keys by following the steps below:
- Click the Team Settings from your Plaid dashboard navigation.
- Choose Keys from the list of options.
- Copy both the Client ID and Secret Key

Note:
Copy the Sandbox Secret if you plan on setting up the integration in a Sandbox environment. Otherwise, copy the Development Secret.
Getting the Secret API Key from Stripe
You can access the Developers section and get the Secret API key by following the steps below:
- In your Stripe dashboard, search and click for the Developers option.
- Go to the API Keys section.
- Reveal the Secret Key and copy it.
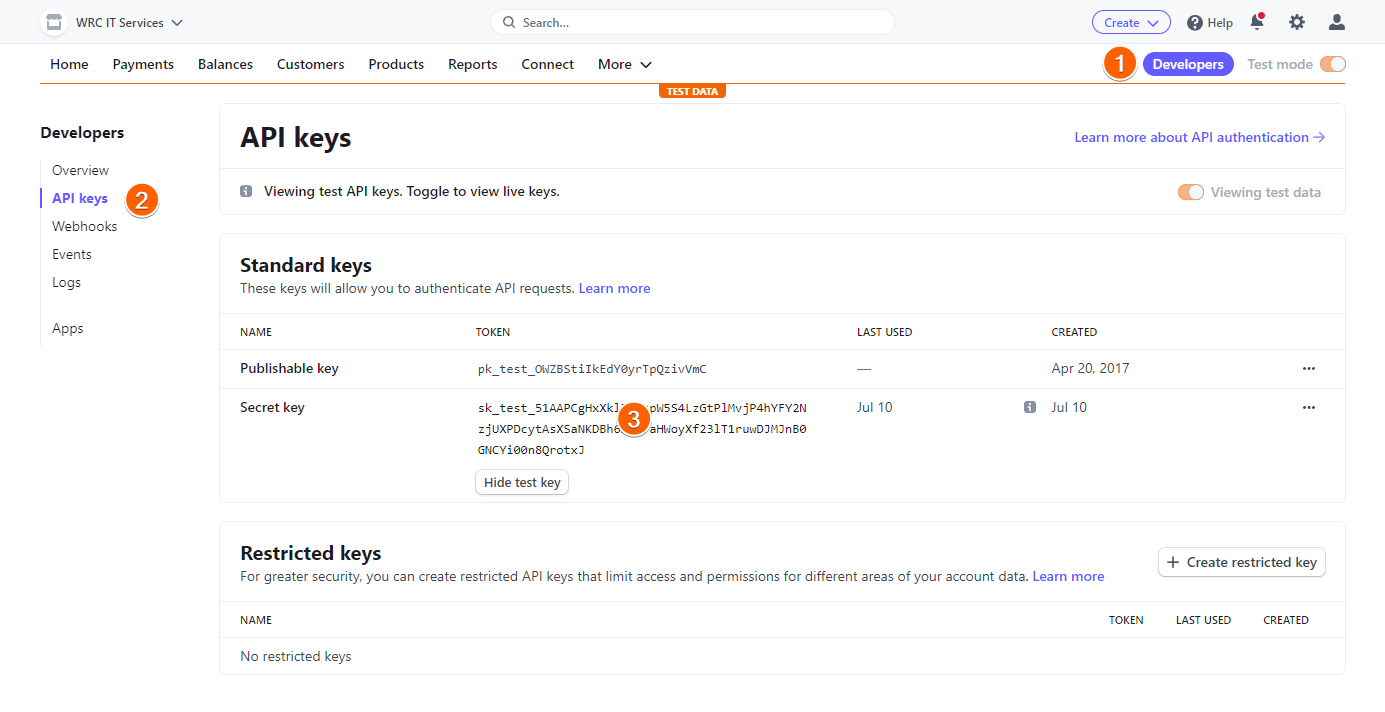
Note:
Toggle your API Keys to test data and copy the Test Secret Key if you want to test Plaid in a sandbox environment.
Adding Jotform’s Endpoint URL to Stripe
The last critical thing you must do is to add an Endpoint URL to your Stripe Webhook settings. It tells the status of each payment from Pending to Succeeded between Jotform and Stripe. Without it, your form will always record the payments as Pending.
- In your Stripe dashboard, go to the Developers page.
- Click Webhooks from the list of options.
- Click the Add an endpoint button.
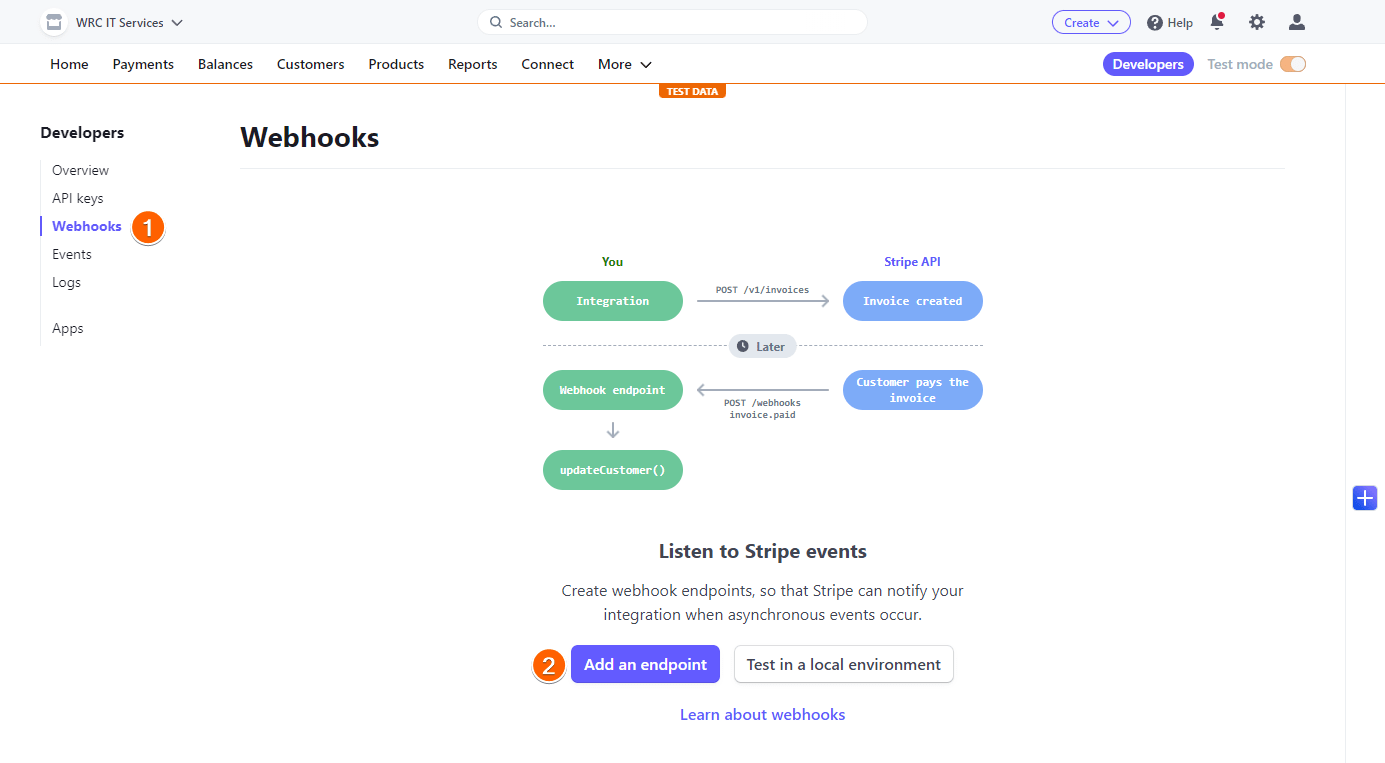
- Next, add and select the following:
- Endpoint URL — You must enter
https://ipn.jotform.com/ipns/stripeACH_Plaid.phpas the endpoint URL. - Description — You can add an optional description of what the endpoint is all about.
- Listen to — We suggest keeping this to default; Events on your account.
- Version — Keep the default.
- Select events to listen to — Jotform’s endpoint URL only needs the charge.succeeded event.
- Endpoint URL — You must enter
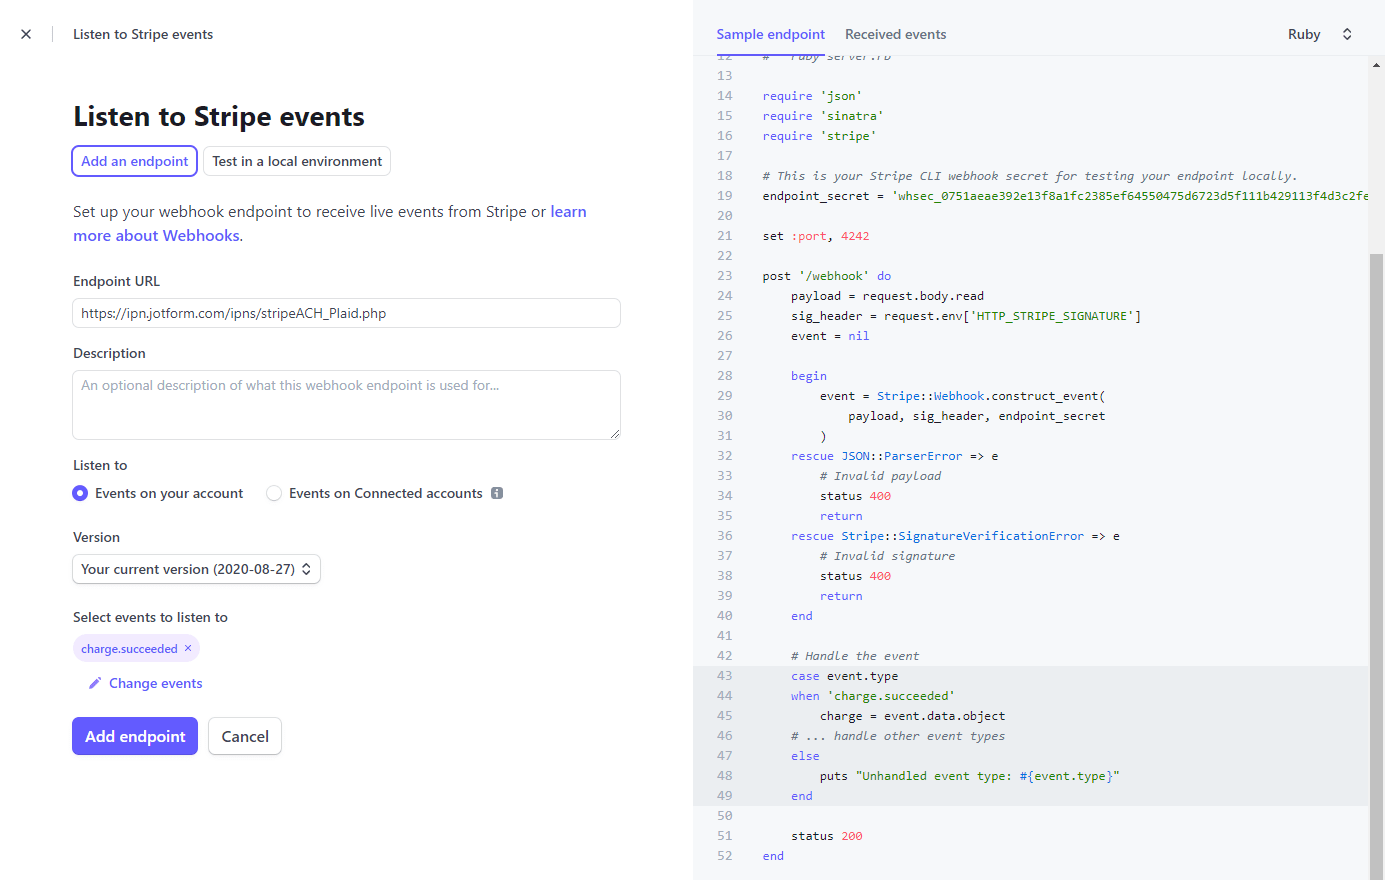
- Click the Add endpoint button to save the settings, and that’s it.
Getting the Plaid Signing Secret Key
For additional security, you must also obtain the Plaid Signing Secret Key. The Stripe ACH integration requires this as well.
After saving the endpoint URL, you will see the Signing secret on the main Webhook dashboard. Click the Reveal link, and copy the key.


Send Comment:
5 Comments:
More than a year ago
I'm doing a Stripe ACH with Plaid. Everything works well except: The account name after connection says "Test", and when I go to Stripe Payments under Customer it says "None".
How do I get the Account name to show up on the Jotform after the connection and before the Submit, and also have the name show up in Stripe Payments???
Thanks.
More than a year ago
Hi there,
Can you use this integration to verify the bank account and charge Zero dollars/ or hide the chargeable amount while completing the form but use Stipe to charge the customer the billable amount later on??
TIA.
Adrian
More than a year ago
I too had questions about which "Event" should be selected for my webhook endpoint. After looking at all my options on Stripe, I chose order.created. I think that's the most logical one. I'm open to be told a better option.
Note: you can always go back and change the event.
More than a year ago
When adding the webhook end point, which Events to send should be selected?
More than a year ago
What about starting a monthly subscription with the customer? Possible using your form? Thanks