Tags are bits of information—like labels—you can add to your contacts to help keep your list organized and easy to manage.
With Jotform, you can apply tags to contacts created through form submissions in two ways: Static and Dynamic.
Prefer to watch? Head to the end of this guide to see the video tutorial.
Static Tagging
With Static Tagging, the tags you’ve set up in the integration are automatically added to every contact that comes through your form. It’s a simple way to keep your contacts organized right from the start—no extra steps needed. Setting up Tags only takes a second—here’s what to do:
- In the Tags section of your Mailchimp integration settings, select Static Tagging.
- Then, in the Select Static Tag(s) section, click on the Blue Plus icon.
- Next, in the Dropdown menu that opens, search for and select your Tags from the list.

- Now, scroll down and click on Save to save the changes in the integration.
Note
For Static Tagging, the Tags option will only show up in the Mailchimp integration if you’ve already added tags to your list — also known as your audience — in Mailchimp. You can check out Mailchimp’s guide on Create a Mailchimp Audience to learn more.
Dynamic Tagging
Dynamic tagging lets you add tags to a contact based on how someone fills out your form. You can use fields like Dropdown, Single Choice, Multiple Choice, or even Short and Long Text. If you’re looking to apply more than one tag at a time, Multiple Choice is your best bet since it’s the only one that supports multiple values. For Dynamic Tagging, here’s what to do:
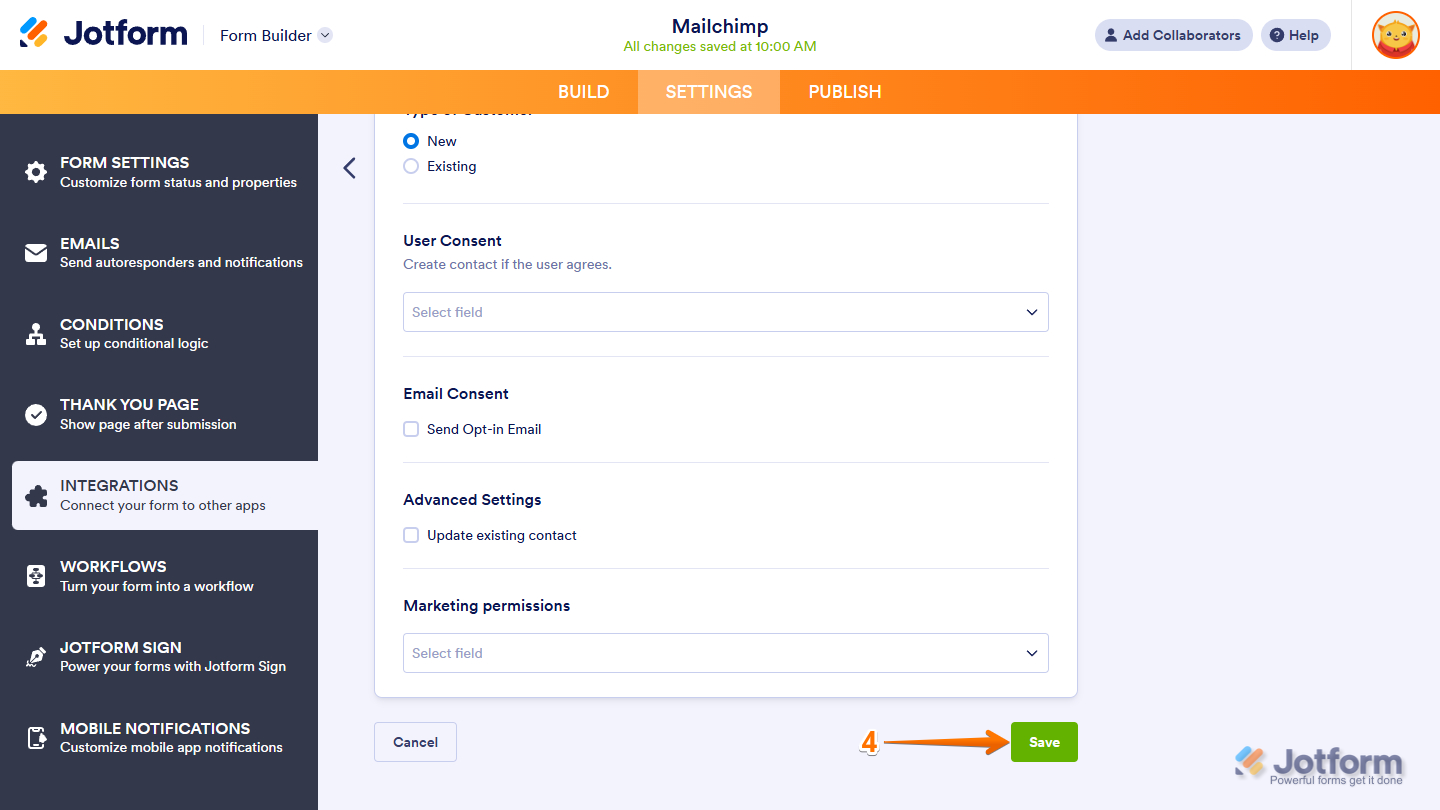
- In the Tags section of your Mailchimp integration settings, select Dynamic Tagging.
- Next, in the Select Dynamic Tag dropdown menu, select your preferred tag.
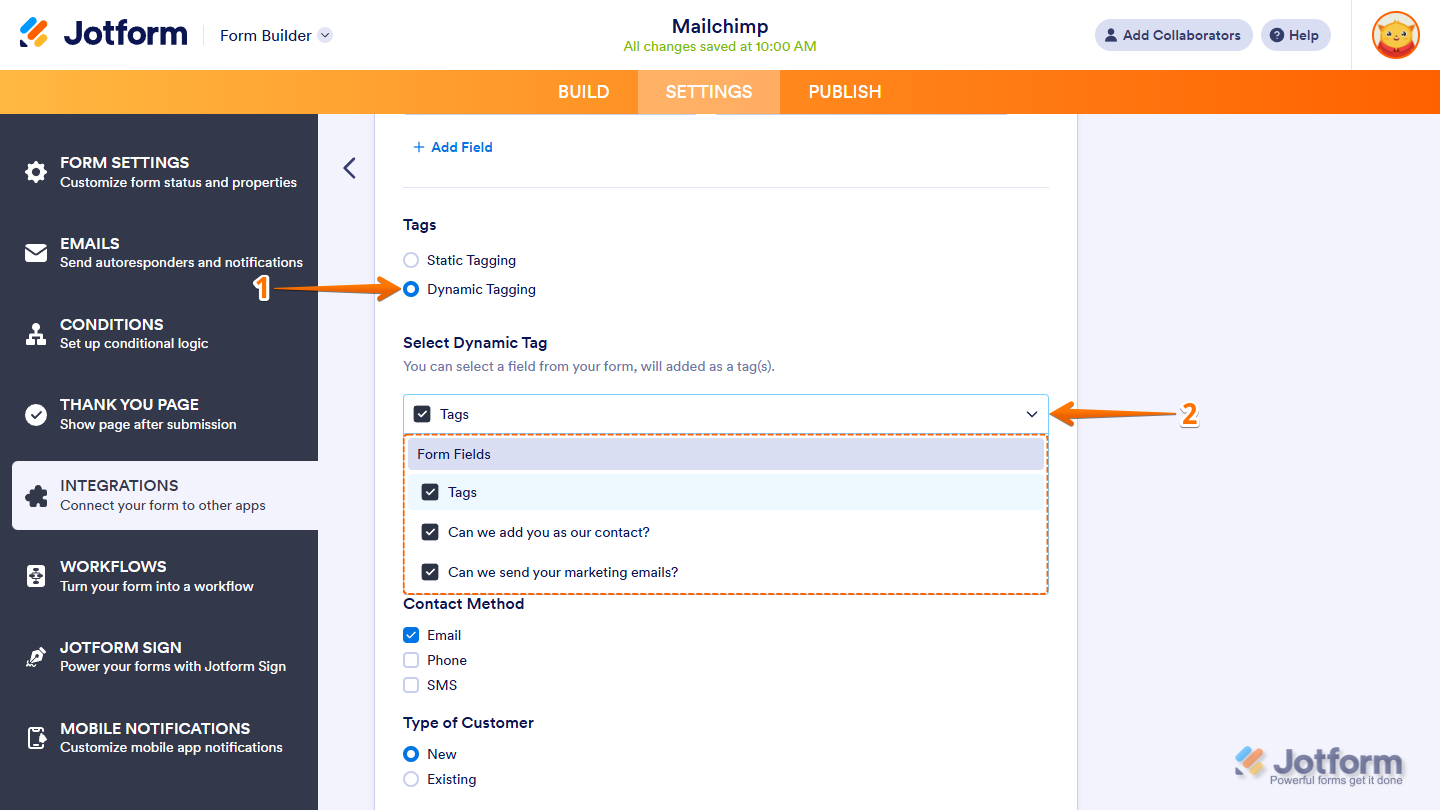
- Now, scroll down and click on Save to save the changes in the integration.

Note
If the value from the field doesn’t match any existing tag in your list, the integration will go ahead and create a new one for you.
Dynamic Tagging with Conditional Logic
Jotform’s conditional logic takes dynamic tagging to the next level. It lets you automatically combine answers from different form fields into tags. For instance, you can pull selections from both Single Choice and Multiple Choice fields.
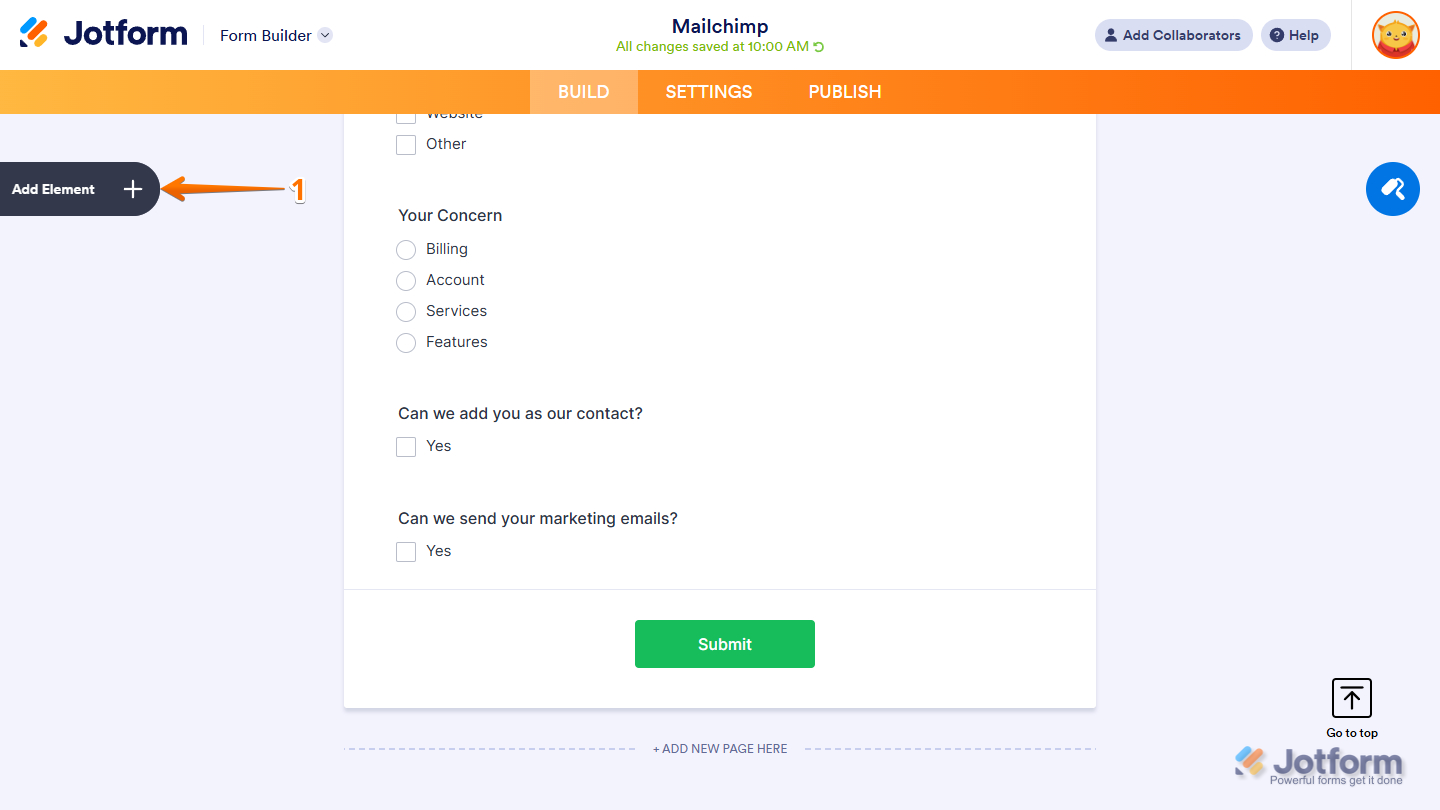
Assuming your form already has Single Choice and Multiple Choice fields, you simply need to add a Short Text field and set up the conditional logic. This is how it’s done:
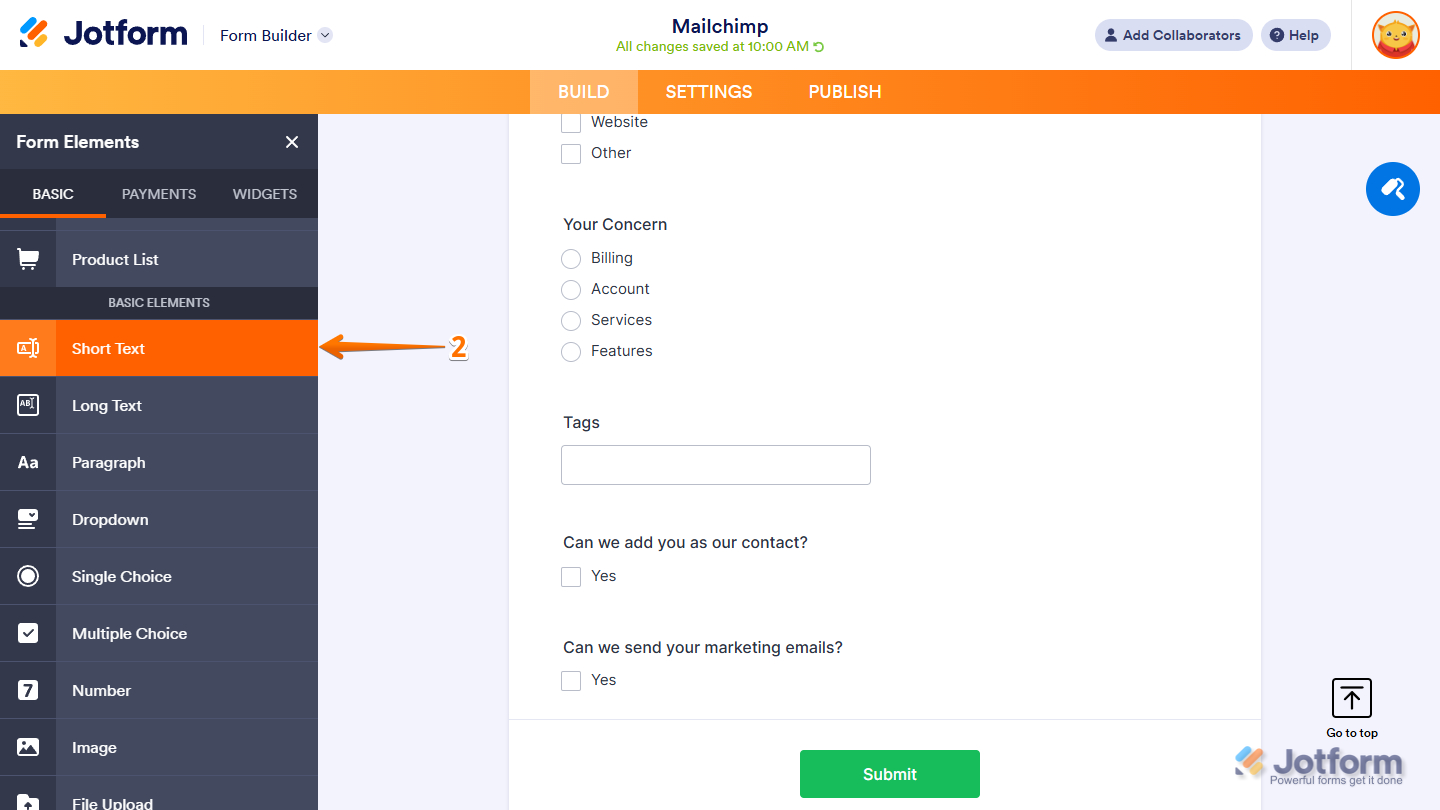
- In Form Builder, click on Add Element on the left side of the page.
- Now, in the Form Elements menu, under the Basic tab, click on Short Text. Or just drag and drop it to where you want it on your form.
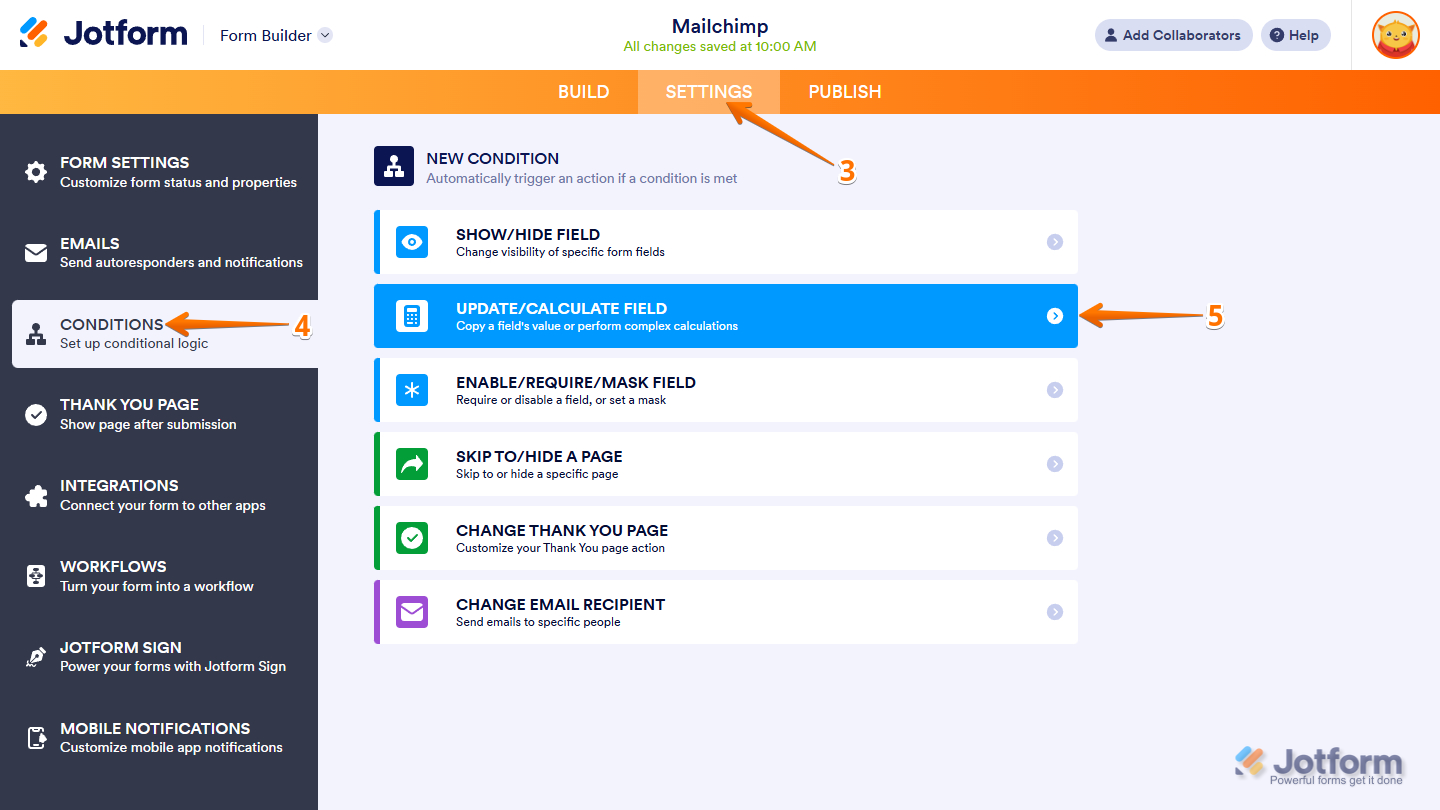
- In the orange navigation bar at the top of the page, click on Settings.
- Then, in the menu on the left, click on Conditions.
- Next, in the New Condition menu, click on Update/Calculate Field.
- Now, set up your conditional logic as follows:
- IF — Add and select both the Single Choice and Multiple Choice fields for this rule
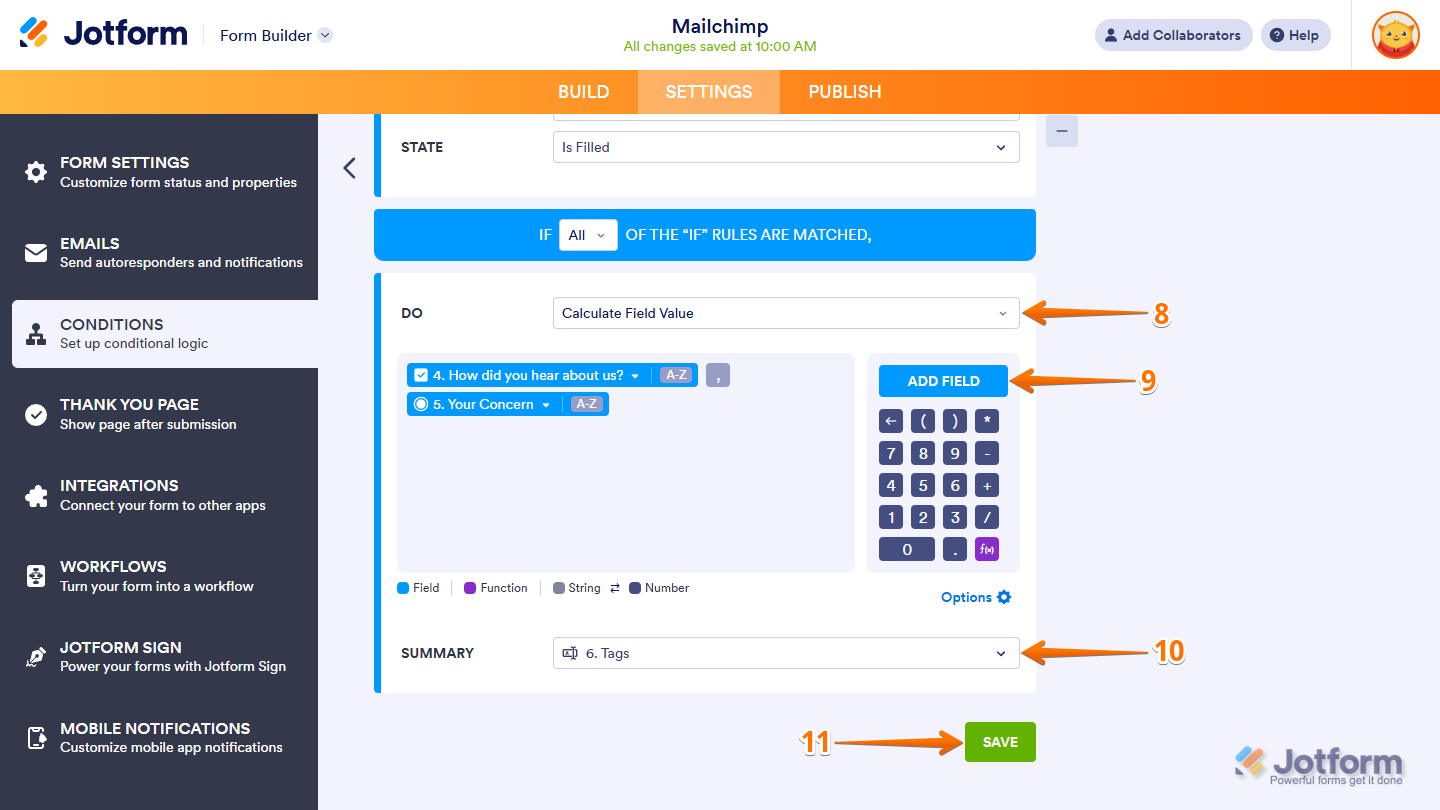
- STATE — Select Is Filled.
- In the Any/All dropdown menu, select All.

- Then, in the DO action dropdown menu, select Calculate Field Value.
- Next, click on Add Field next to the calculation box, and add both the Single Choice and Multiple Choice fields, separated by a comma.
- Now, in the Summary result dropdown menu, select the Short Text field you’ve added earlier.
- Finally, click on Save to complete the condition setup.
Notes
- Fields added to the calculation box are treated as Numbers by default. To ensure they’re copied as text, change each one to a String by clicking the 0–9 icon beside the field. It will switch to A–Z, indicating the value is now handled as a String.
- You’ll also need to type the comma directly into the calculation box. After entering it, click anywhere outside the box to ensure it’s included as part of the String.
- You’ll also need to select this Short Text field in your Dynamic Tagging settings in Mailchimp integration.
That’s about it! You’ve completed your Mailchimp tag setup, and the methods above should now help you organize, segment, and automate your audience more effectively.


Send Comment:
4 Comments:
June 26, 2024
Similar problem. Pulls text in from one of my multiple choice fields and puts in a 0 for the second multiple choice field
June 6, 2024
I cannot get this to work. Every time the 'tag' short text entry just shows '0'. I've followed the guide exactly. Any help would be great
July 18, 2023
This is really good, but would be GREAT if you could choose more than one field to save as tags. Even the example in this video makes it clear that most times you'll want multiple fields. Please add this!
June 14, 2023
The comment is wrong: "Mailchimp integration will only display the Tags option if you’ve already added Tags under your Mailchimp list/audience settings. Click here for more details." The Dynamic Tags seem to create tags on the fly. The Static Tags require (I think) to be first added to the Mailchimp.