Jotform makes it easy to customize the emails sent from your forms. Notification Emails alert you or your team when someone submits a form, while Autoresponder Emails send automatic replies to the form filler after submission.
By editing these email templates, you can personalize the subject line, update the message content, and adjust settings to match your workflow.


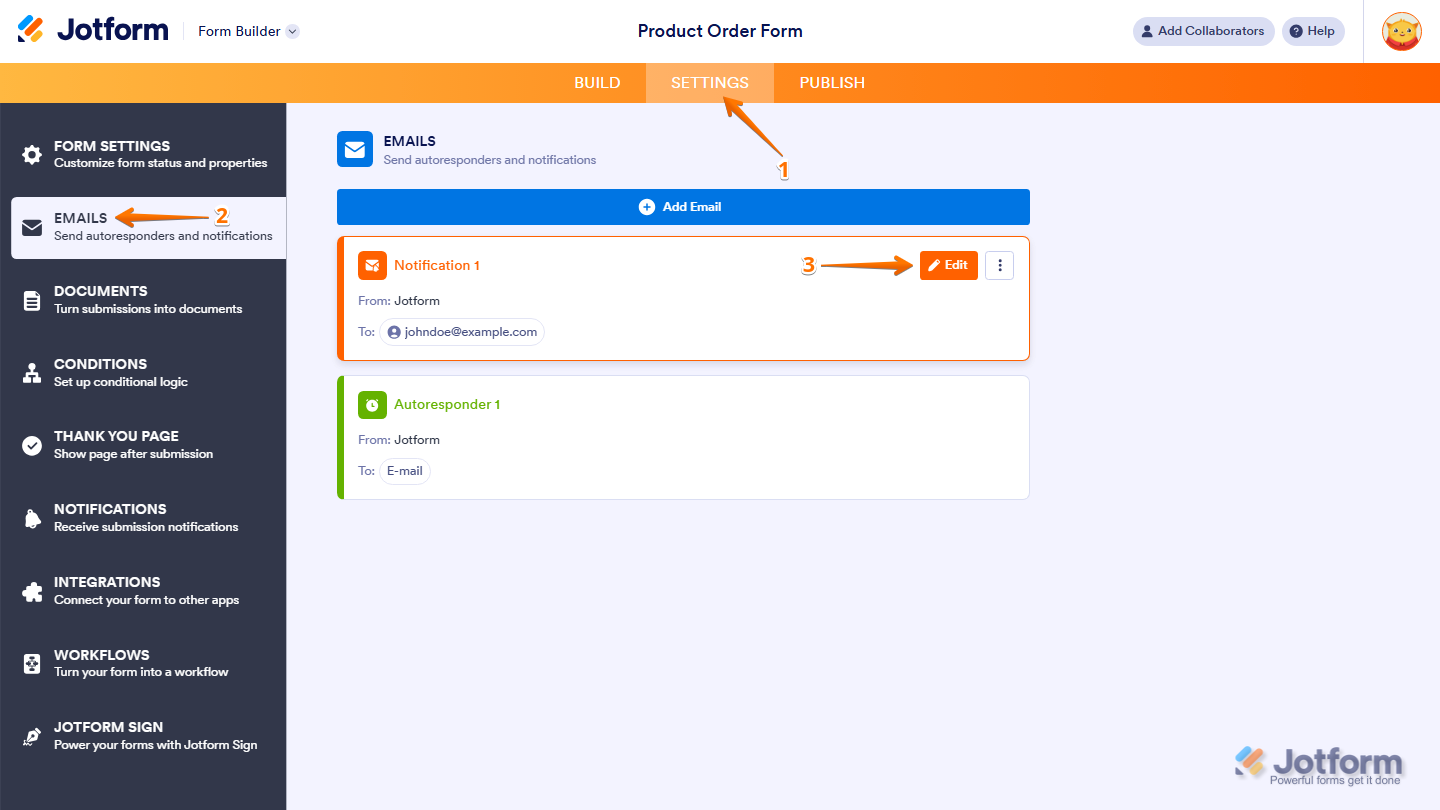
If you want to update the content or settings of your form emails, you can do it directly in Form Builder. Here’s how:
- In Form Builder, in the orange navigation bar at the top of the page, click on Settings.
- Then, in the menu on the left side of the page, click on Emails.
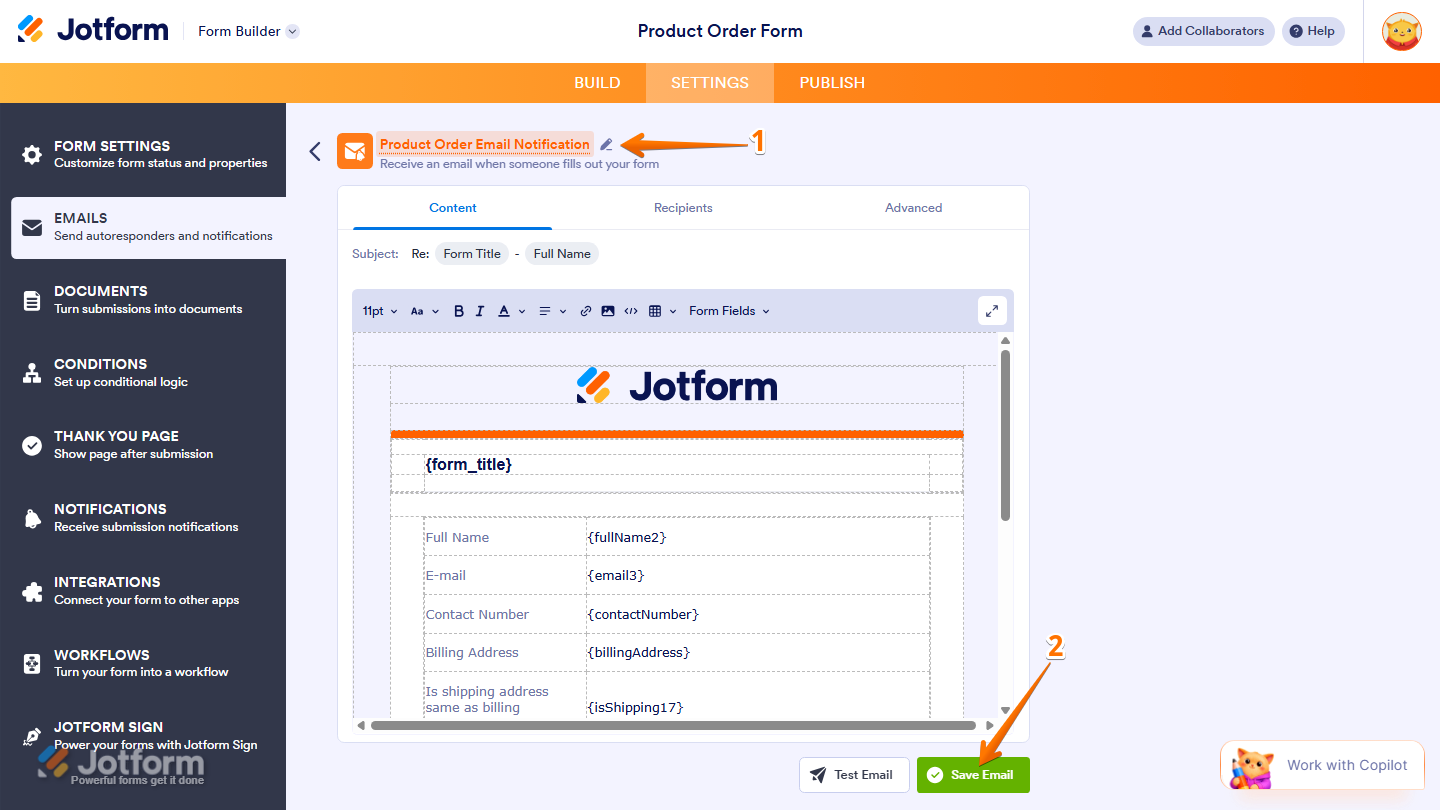
- Now, hover your mouse over the Notification or Autoresponder Email template you want to edit, and click on the Pencil icon.
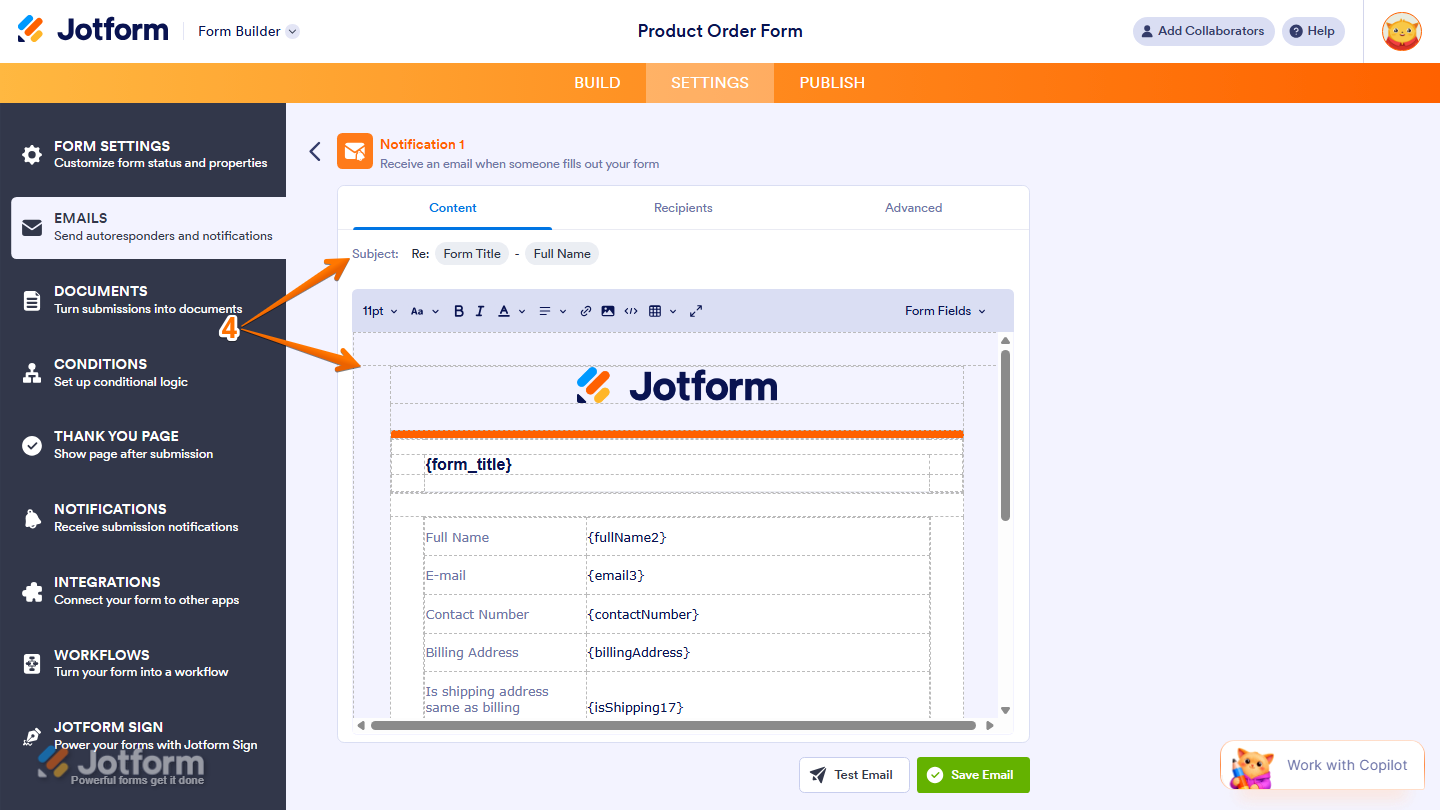
- Next, under the Email tab, you can update the subject line and message content of your email template. You can customize the following:
- Email Subject — Set the subject line that will appear in the recipient’s inbox.
- Email Content — Edit the body of the email message. You can add text, format the layout, or insert form field tags to display submitted responses.
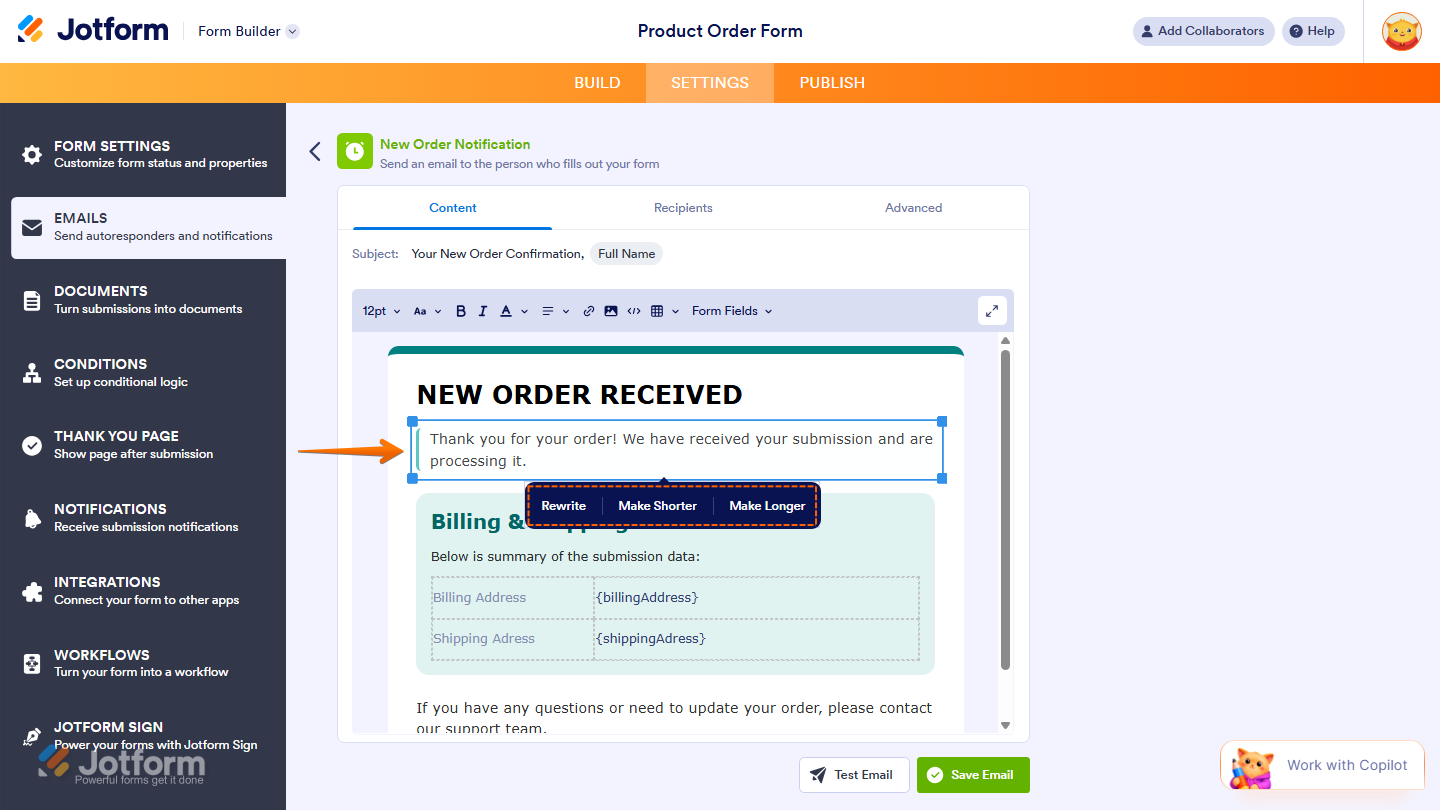
If your Notification or Autoresponder Email was generated using Email Copilot, you can further refine the message using built-in AI editing tools. You can click on any text block in the Email Content tab to access the following options. You’ll find more info in our guide on How to Set Up an Autoresponder Email and How to Set Up Email Notifications.
- Rewrite — Rephrases the selected text while keeping the same meaning.
- Make Shorter — Condenses the text into a more concise version.
- Make Longer — Expands the text with additional details.
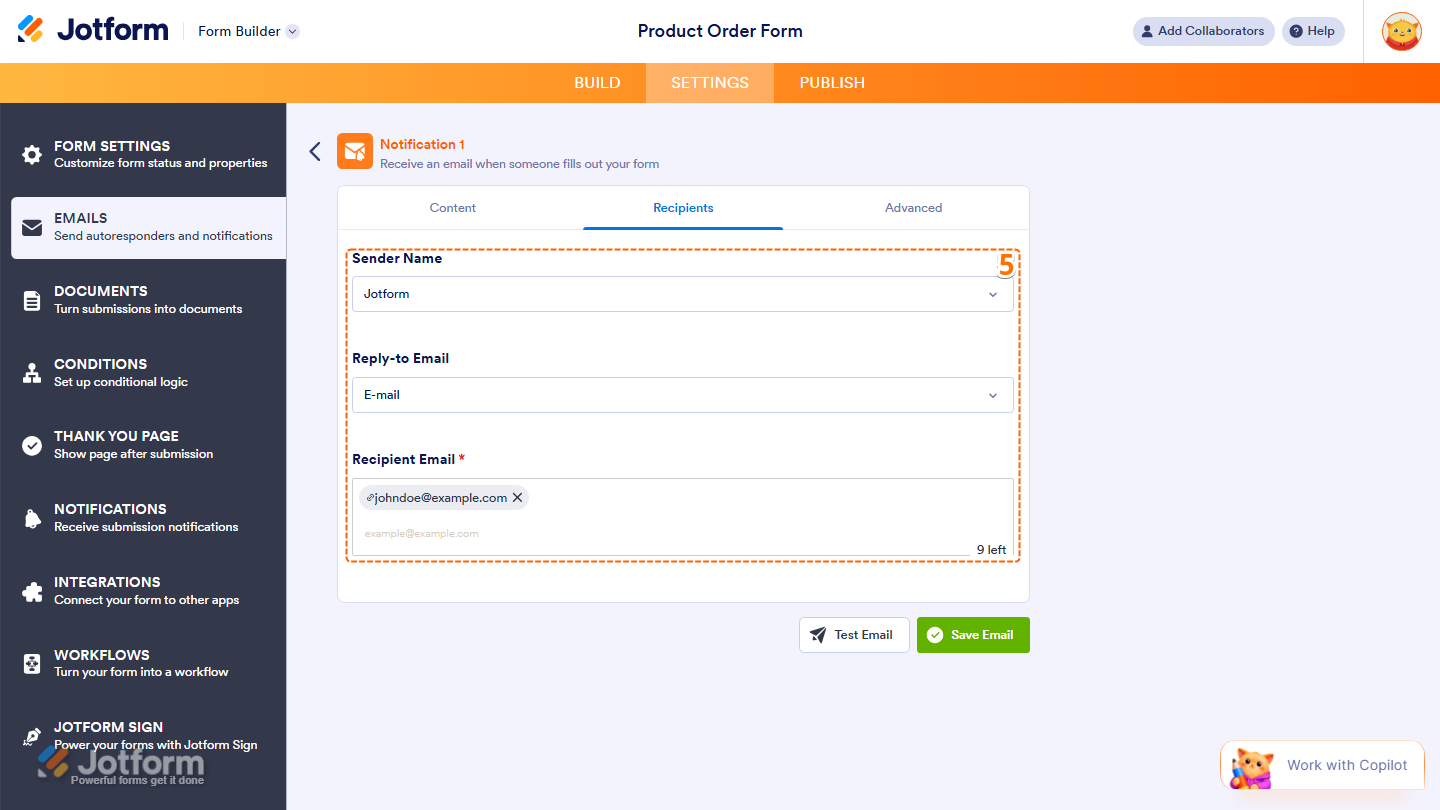
- Then, under the Recipients tab, you can configure where the email will be sent. Here are the available options:
- Sender Name — The name that appears as the sender of the email.
- Reply-to Email — The email address where replies will be directed.
- Recipient Email — The email address that will receive the notification or autoresponder.
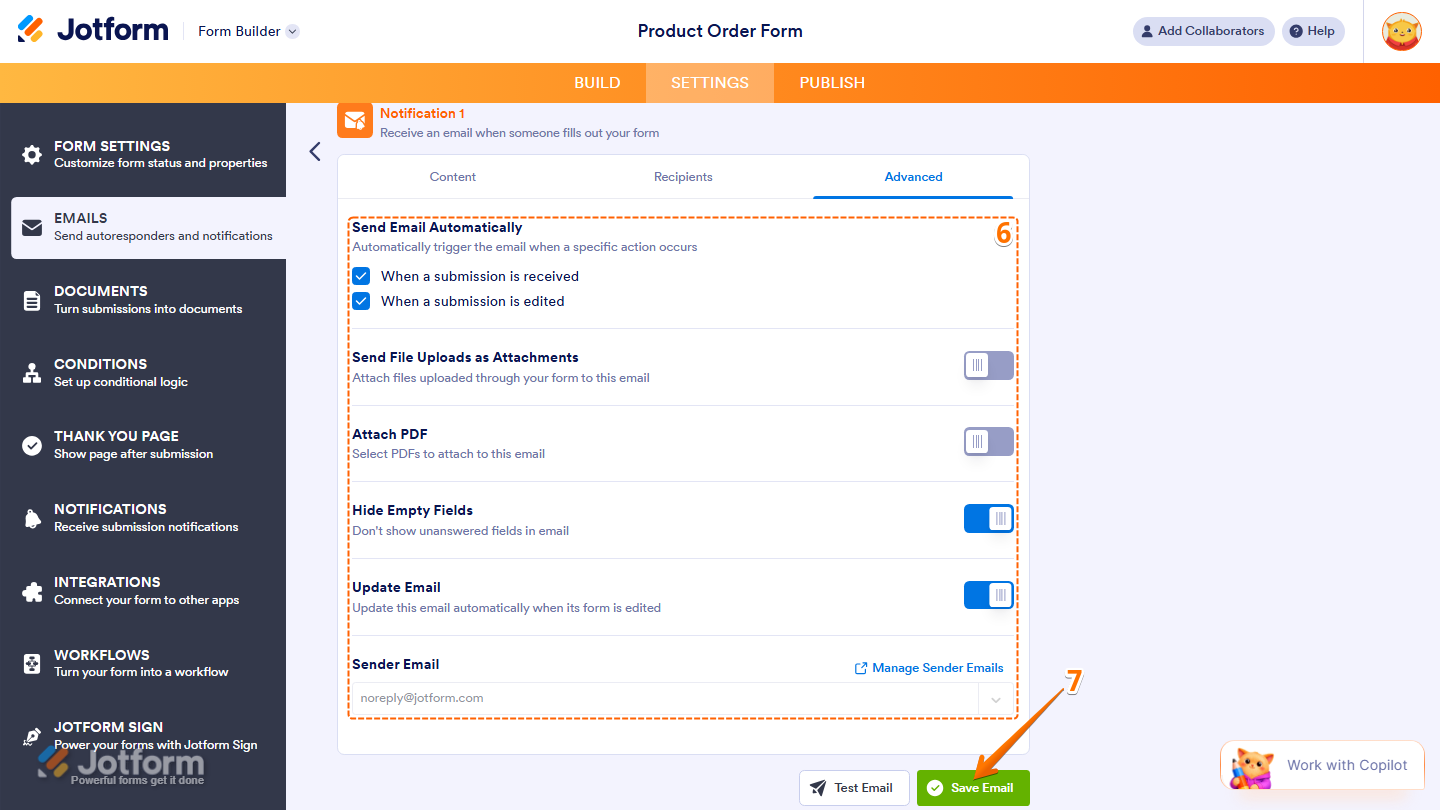
- Now, under the Advancedtab, you can configure additional options for your email template:
- Send Email Automatically — Choose when the email should be triggered.
- Send File Uploads as Attachments — Attach files uploaded through your form.
- Attach PDF — Include a PDF copy of the form submission.
- Hide Empty Fields — Exclude unanswered fields from the email content.
- Sender Email — Configure a custom sender email using SMTP.
- Finally, once everything is updated and configured, click on Save Email and you’re all set.
That’s it. You’ve successfully updated the Notification and Autoresponder Emails for your form.
Note
- Notification Emails are sent to you or your designated recipients when a form is submitted, while Autoresponder Emails are automatically sent to the form filler.
- Autoresponder Emails require an Email field in your form so Jotform knows where to send the response.
Hiding or Showing Empty Fields in Email Settings
The default submission data table in the Email Content section under the Email tab shows each form field label next to its tag. After someone submits the form, the table fills in automatically with their responses. Empty fields are skipped by default, and the table updates on its own if you add or remove fields from your form.
You can change whether an empty field shows in the emails or not in just a few steps. Here’s how to do it:
- In Form Builder, while you’re in the Notification or Autoresponder Email settings for your form, click on the Advanced tab.
- Then, toggle on the Hide Empty Fields.
- Once you’re done, click on Save Email at the bottom to apply the changes.

Note
Even if enabled, the Hide Empty Fields and Update Email settings won’t take effect if the submission data table has been edited or is no longer in its original format in the Email Content section of the email template.
Renaming Email Templates
You can rename the email templates saved on your form to identify their purpose or function easily. Here’s how to do it:
- In Form Builder, while you’re in the Notification or Autoresponder Email settings for your form, click on the Pencil icon next to its name at the top to start editing it.
- Now, click on Save Email at the bottom to apply the changes, and you’re good to go.
That’s it. You’ve successfully renamed your email template.


Send Comment:
11 Comments:
October 2, 2025
How can I change the body of the first email the customer receives as a notification to sign the form?
August 8, 2025
I have tried everything!! when I text link the jotform brand is showing
July 31, 2025
How do I change the default light purple background in my autoresponder email after form submission?
May 14, 2025
This is a bit disingenuous because actually editing the forms -- adding photos or text, changing/moving fields is incredibly awkward, non-responsive--and frustrating. At least that's been my experience with every email responder and notification I've worked on, in every form created. The editing functions are extremely limited.
October 20, 2023
I have integrated Zoom into my form. Every time when the user summits the form, a new meeting is scheduled. I want now that the link to the Zoom meeting is sent with the email. How can I do that? Thanks for your help:)
June 9, 2023
How do I change the default light purple background in my autoresponder email after form submission?
November 18, 2022
Is there a way to make a "standard" autoresponder email template that can be used across all forms? I have several forms created and was hoping to use standard company branding for the emails that are autoresponders, notifications, and thank you emails, rather than recreating them each time for each form. Is this possible?
August 24, 2022
Hello,
I would like the paragraph text in the form to be included automatically and to be updated when it changes.
Is there a way to include all the text on the form in the email that goes out to people?
Thank you!
June 13, 2022
Hi,
I hava the same issue as Field Marketing. How can we remote CSS styles from the email notification? I just need raw data and nothing else.
May 9, 2022
In my auto email, the fields that were multiple choice/checkbox/dropdown are showing as colored boxes with black text. Is there a way to make them just plain text like the rest of the text in the email?
January 21, 2022
How do I change the default light purple background in my autoresponder email after form submission?