Jotform now has a direct integration with QuickBooks. You used to need to take the extra step of creating a Zap in Zapier to integrate your forms with QuickBooks. Keep on reading to learn how to integrate QuickBooks with Jotform in a few steps.
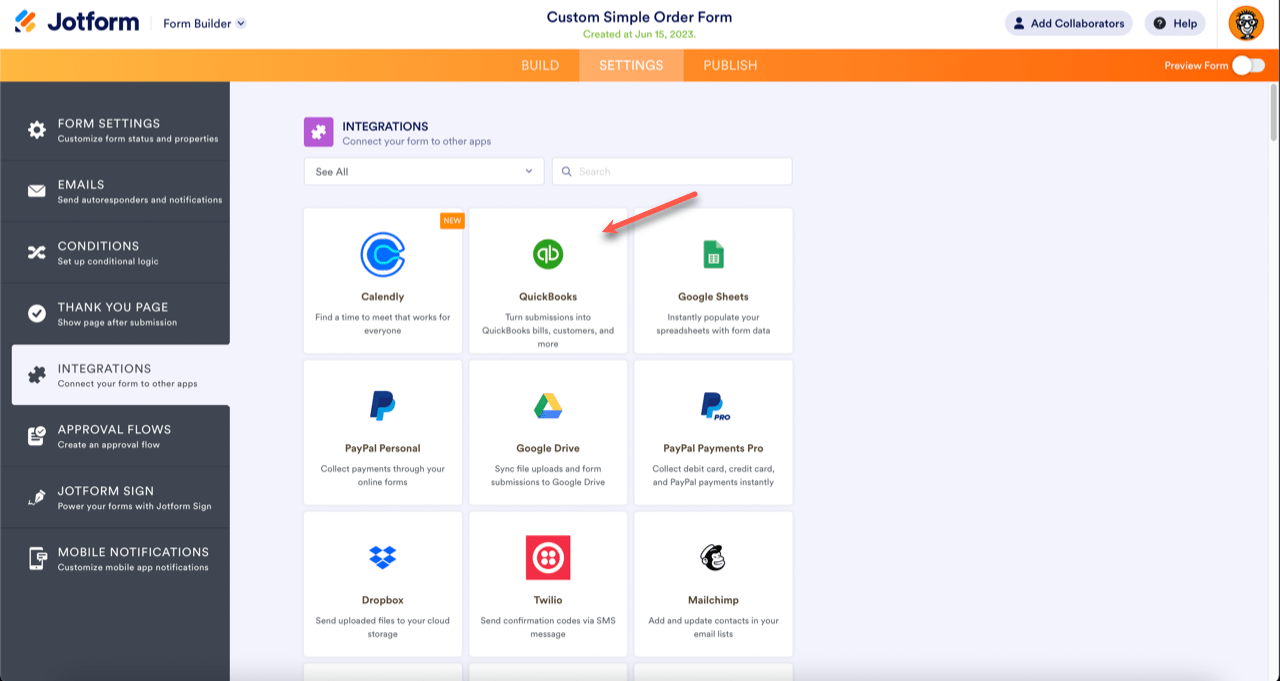
- Go to the integrations tab in the Form Builder. Click the QuickBooks tile.

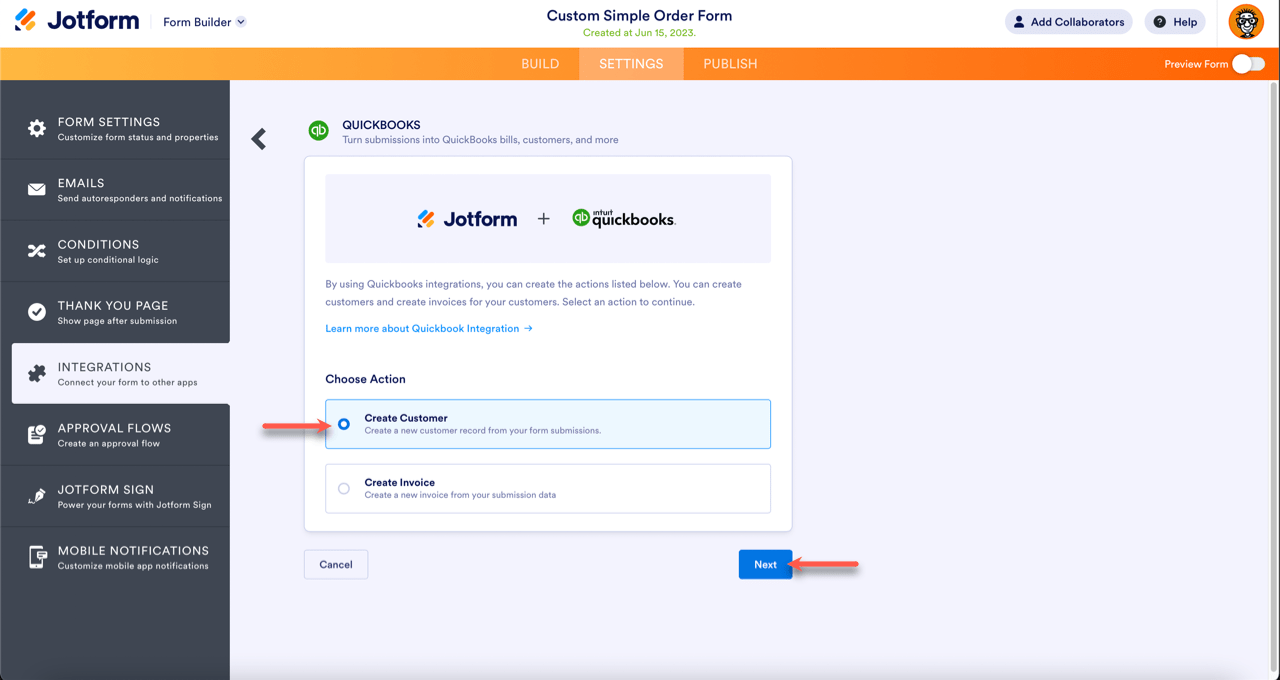
- Click Create Customer, and click Next.

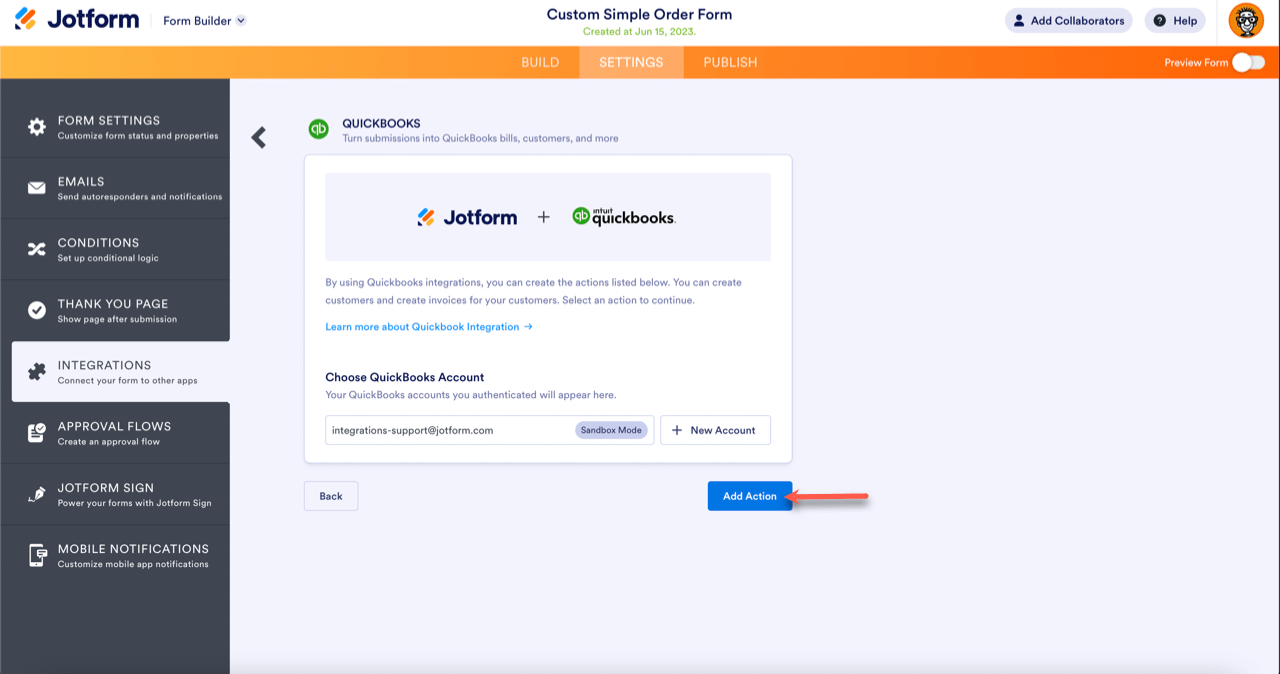
- If you’re integrating with QuickBooks for the first time, you’ll be taken to QuickBooks’ authentication page to log into your account. If you’re already logged in, click Add Action.

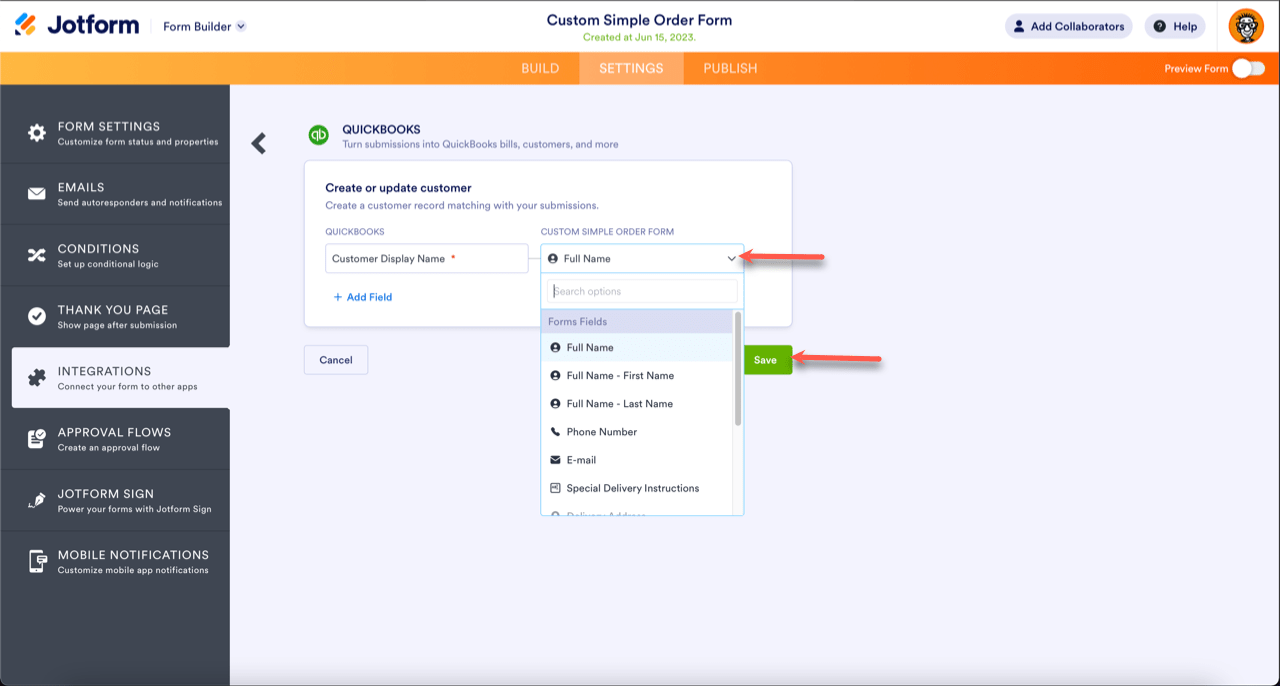
- Match your customer records to your submission data. Add fields as necessary. Click Save when you’re done. Please note if you’re updating an existing customer, make sure the Customer Display Name matches exactly, or else QuickBooks will automatically create a new customer.

And that’s it! Now you can use Quickbooks with Jotform to automate your accounting processes.


Send Comment:
5 Comments:
173 days ago
Will you be able to use with Desktop?
211 days ago
If we create an employment applications in Jotform, can we integrate with Quickbooks to create a new employee file?
363 days ago
Still want to know if you need to create two jotforms - a Create a Customer and Create an Invoice. If the customer is already on QBO, I just need an invoice created... However, if they are not yet a customer I need to create one.
364 days ago
I really appreciate you integrating Quickbooks with Jotform. It will be a real time saver for my. However, I have followed the instructions on the video and set up the customer file matching form data with Quickbooks fields. I did a test submission of the form but the new costomer profile does not show up in my client files in Quickbooks. When I do a search, it does not show up either. Both Quickbooks and Jotform show my accounts linked.
More than a year ago
It worked for us