With Jotform’s Stripe Payment Integration you can easily enable payment authorization—a two-step process that lets you place a hold on funds now and capture them later. This comes in handy if you need to confirm stock, schedule a service, or take extra steps before finishing a sale. By holding payments instead of processing them right away, you get more flexibility and control over how and when customers are charged.
Note
Stripe’s payment authorization lasts for 7 days, so it’s important to capture payments within that timeframe. If the hold expires, the funds are released and you’ll need to ask customers to submit the form again to start a new authorization.
Whether you’re creating a new Stripe payment form or updating an existing one, setting up payment authorization only takes a minute. Here’s how:
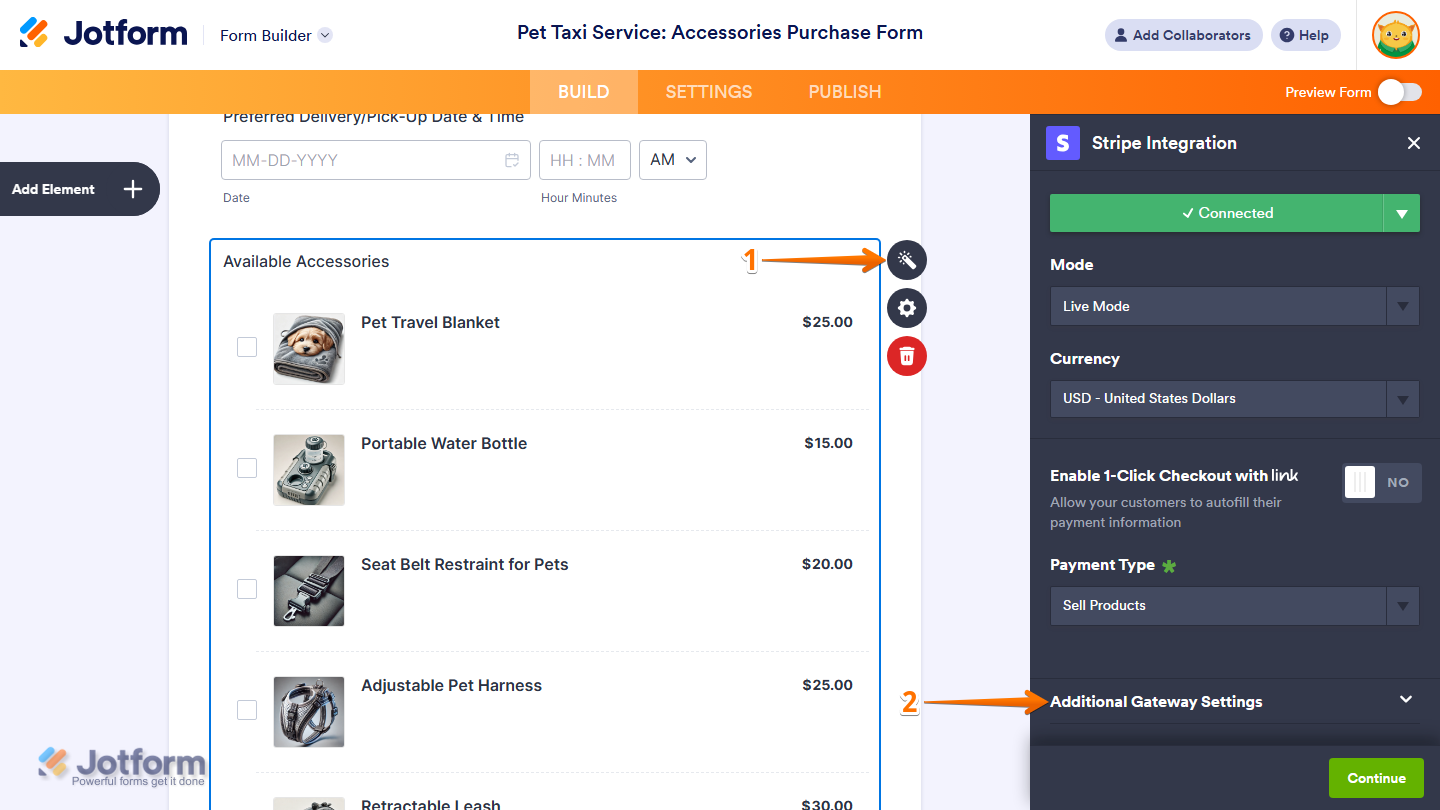
- In Form Builder, select your Payment field and then on the right side of it, click on the Wand icon.
- Now, in the Stripe Integration window that opens on the right side of the page, click on Additional Gateway Settings to expand it.
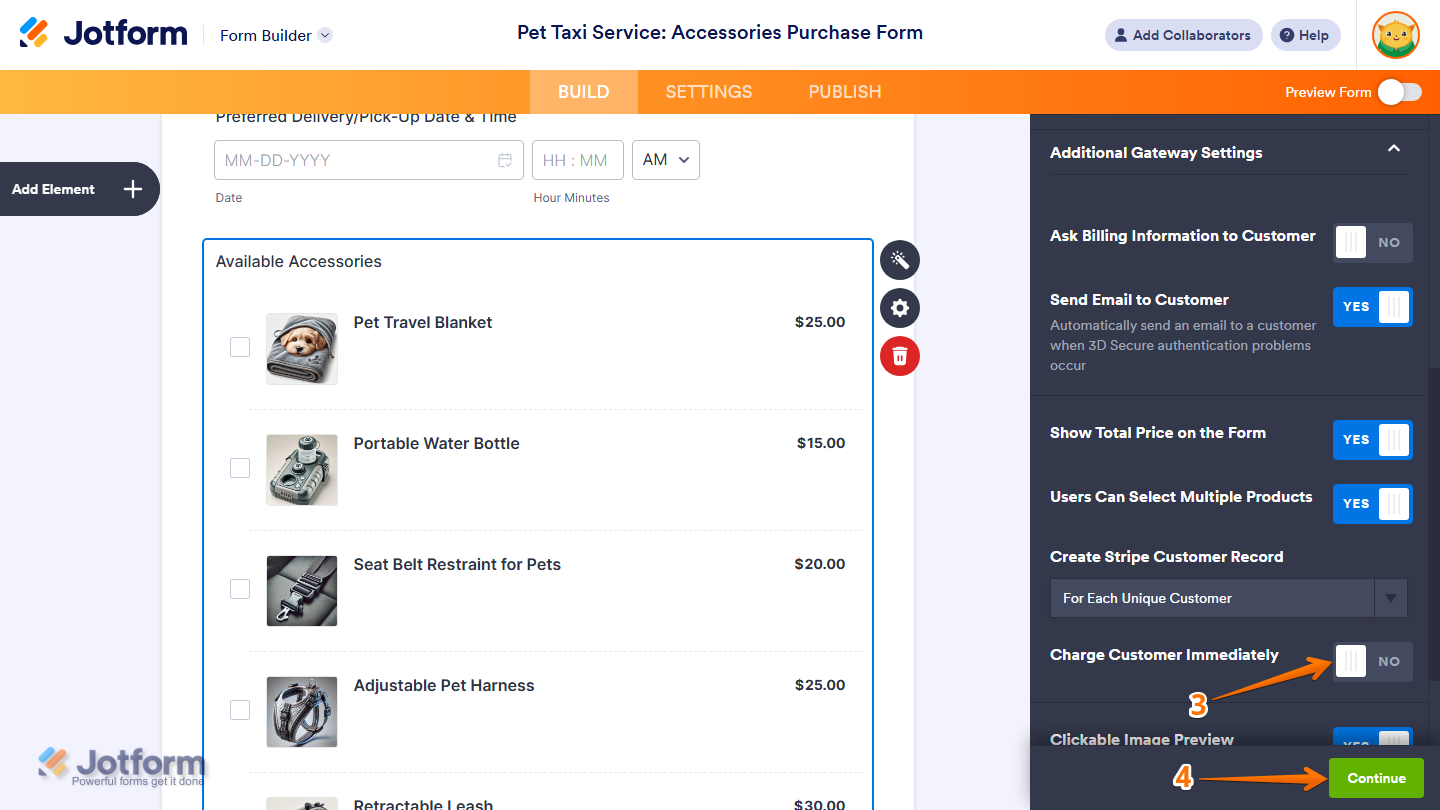
- Next, under the Additional Gateway Settings section, scroll down to Charge Customer Immediately and, on the right side of it, toggle it off.
- Once you’re done, click on Continue.
That’s it. Now you can authorize payments upfront and capture them later when everything’s ready.
Note
If you turn off Charge Customer Immediately, keep the Create Stripe Customer Record setting set to either For Each Submission or For Each Unique Customer. This ensures the Charge Now button in Tables will still function when you use it later. Curious about how it works? Check out our guide on How to Enable Payment Authorization to learn more.

Send Comment:
4 Comments:
August 25, 2023
Are we able to use this also for subscriptions?
October 9, 2021
I’m able to attach Stripe as the payment but I’m unable to see where to capture the credit card information for the remaining balance later.
September 21, 2021
Hi, the CSS doesn't seem to work on my form?
September 17, 2021
custom css is not working on my form :/