Jotform makes it easy to connect your forms with Asana, a popular project management tool that helps teams plan, organize, and track their work. With this integration, form submissions can automatically:
- Create a Task — Add a new task in Asana from a form submission.
- Create a Section — Organize your project by adding a new section.
- Create a Project — Turn form submissions into a full Asana project.
- Create a Task Comment — Add comments to existing tasks directly from your form.
This way, your team can instantly act on collected information without manual data entry, keeping your workflow organized and ensuring nothing slips through the cracks.
Create a Task
Creating tasks in Asana from your form submissions is easy and includes details like task name, assignee, due date, and notes. Here’s what to do:
- In Form Builder, in the orange navigation bar at the top of the page, click on Settings.
- In the menu on the left side of the page, click on the Integrations tab.
- Then, search for Asana and click on it.

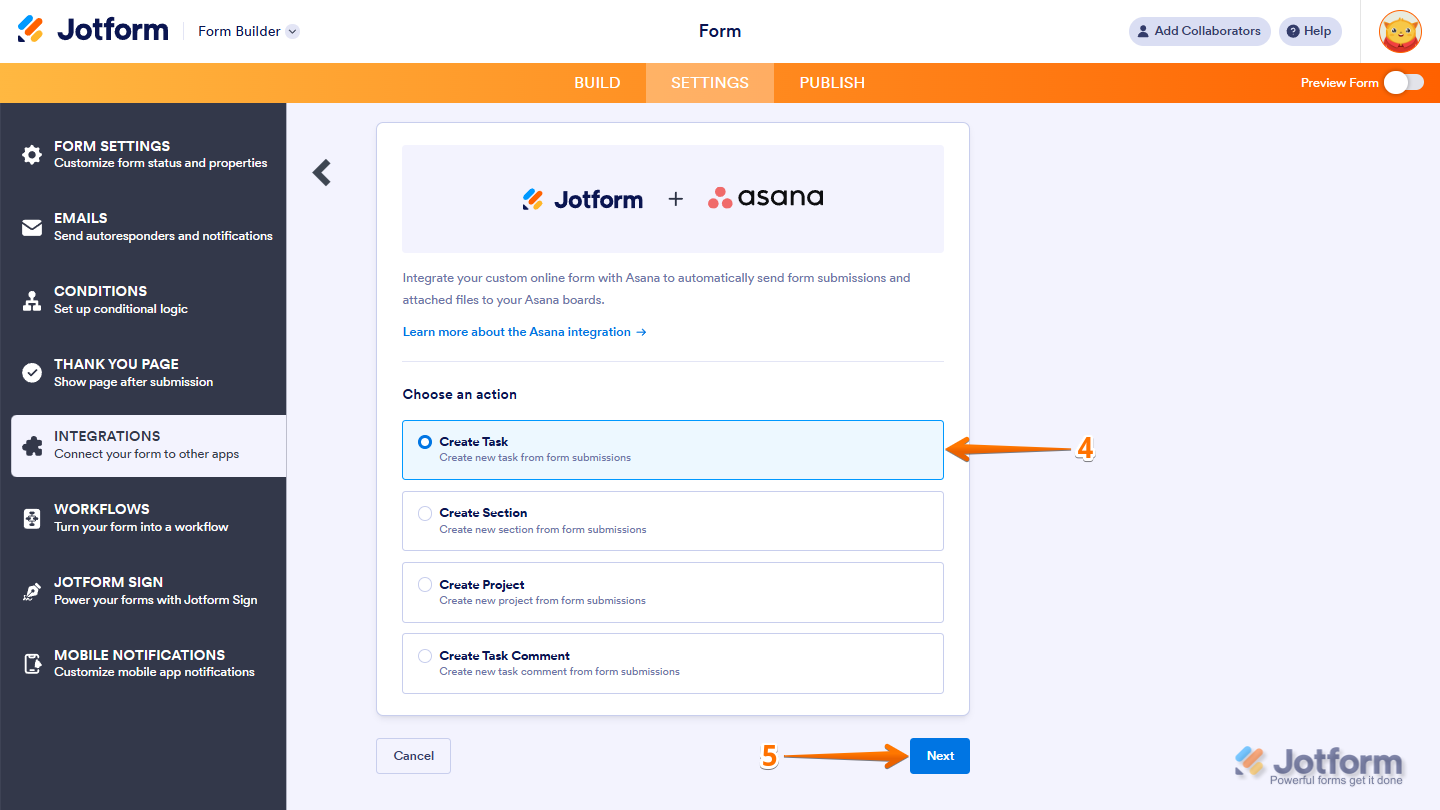
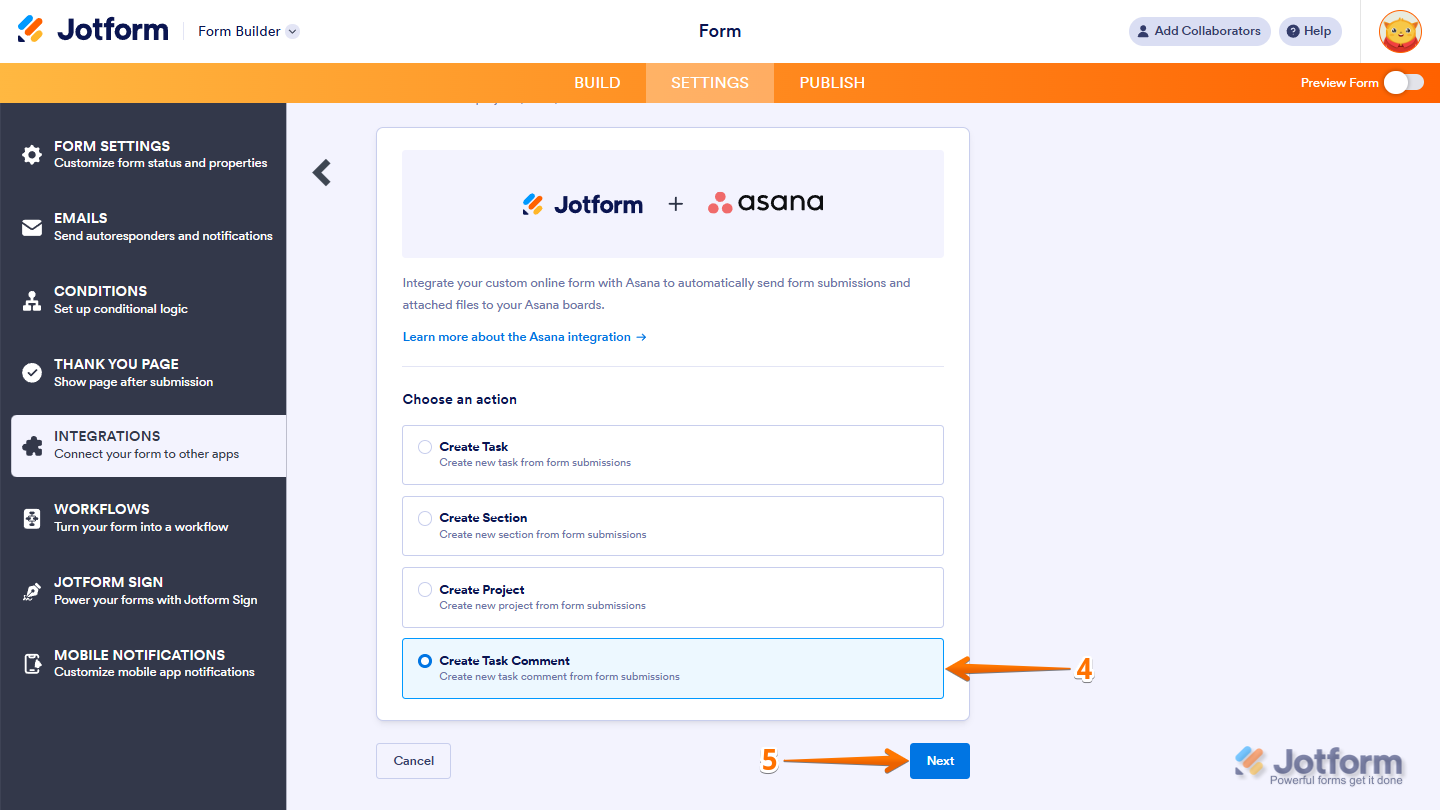
- Now, in the Choose an Action section, select Create Task.
- Then, click on Next.
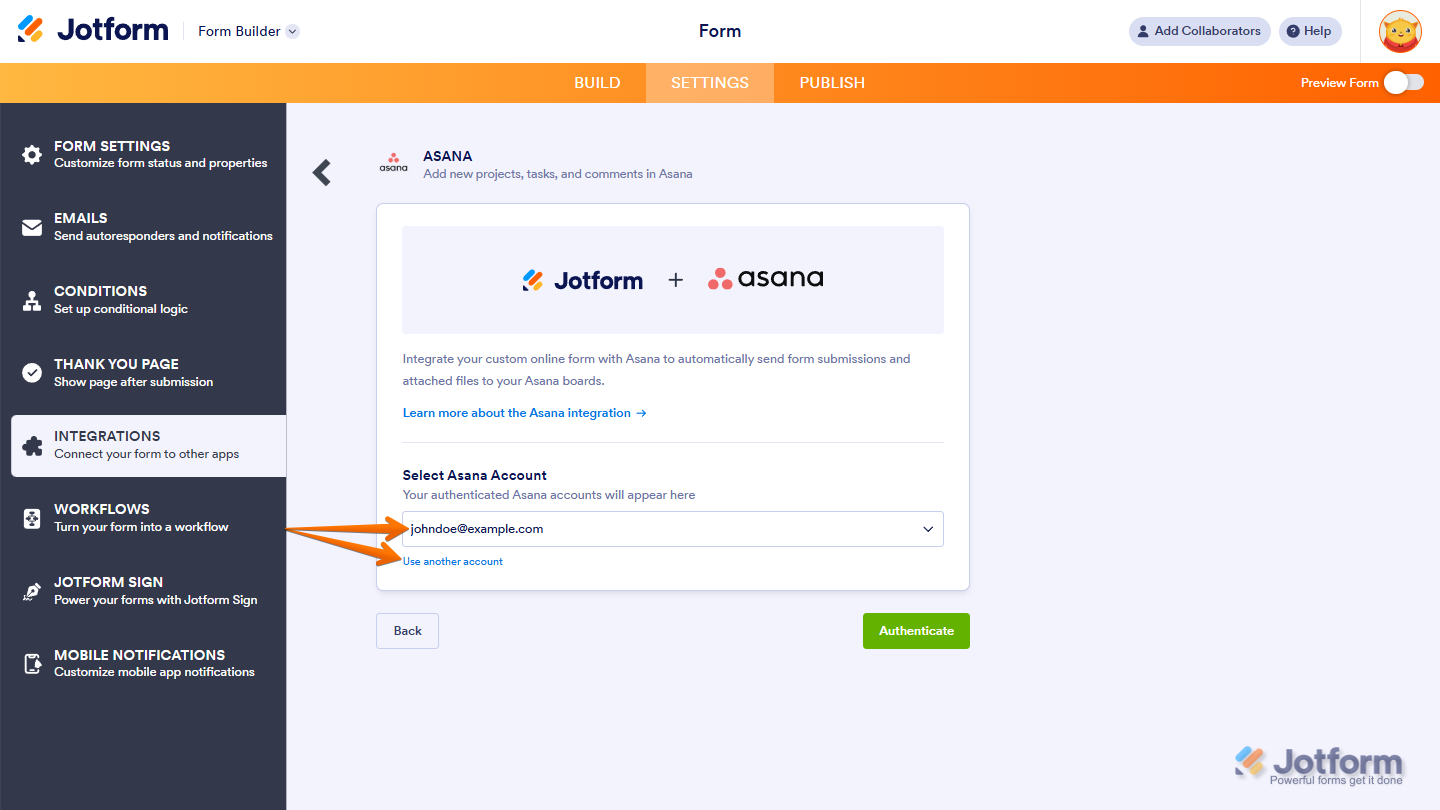
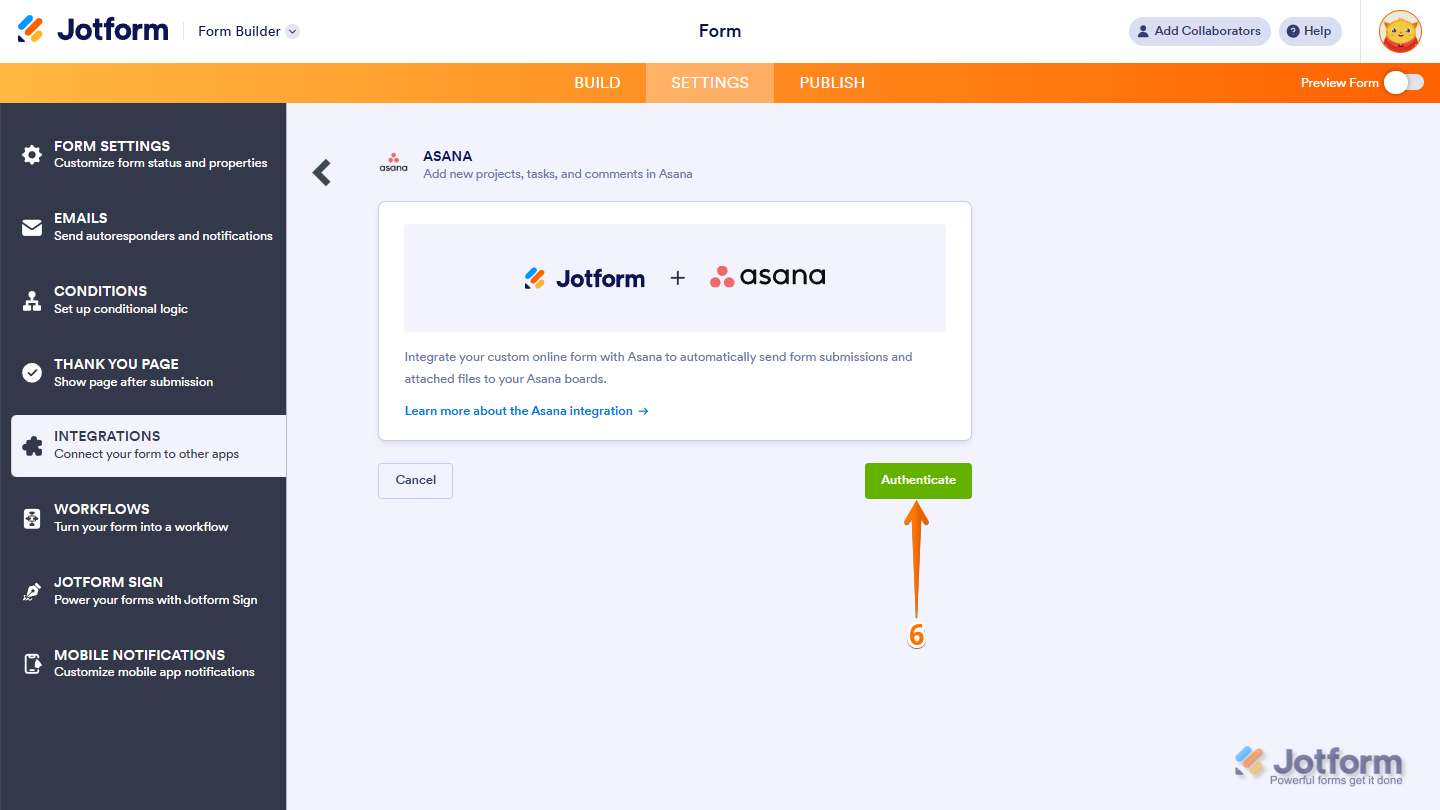
- Now, click on Authenticate and log in to your Asana account.

If you’ve logged in before, just pick your Asana account from the dropdown. To use a different one, click on Use another account.
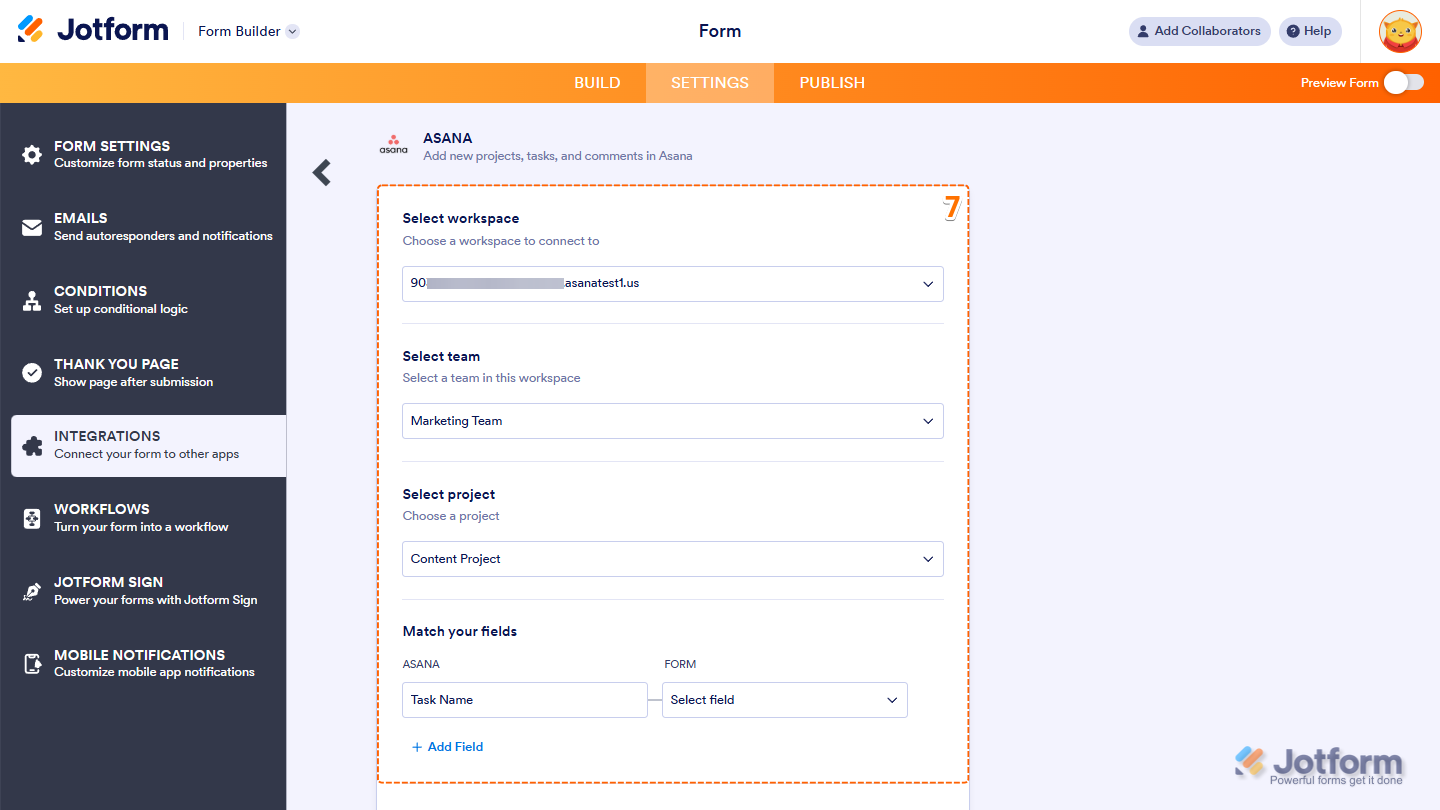
- Once connected, configure these things:
- Select Workspace — Choose the Asana workspace you want to connect.
- Select Team — Pick a team within the selected workspace.
- Select Project — Choose the project where tasks will be created.
- Match Your Fields — Map your form fields to Asana task fields, such as Task Name, Notes, Tags, Assignee, Due Date, and Followers.
- Then, scroll down to the bottom and continue to set up these settings:
- Uploaded Files — Optionally send any uploaded files along with the task to Asana.
- Create a New Record when Submission is Edited — Put a check in this box if you want a new Asana task to be created whenever a form submission is updated.
- Once you’re done, click on Save.

That’s it! Your form submissions will now create tasks in Asana automatically.
Create a Section
Adding new sections to your Asana projects from form submissions is simple and helps keep your tasks organized. Here’s how to set it up:
- In Form Builder, in the orange navigation bar at the top of the page, click on Settings.
- In the menu on the left side of the page, click on the Integrations tab.
- Then, search for Asana and click on it.

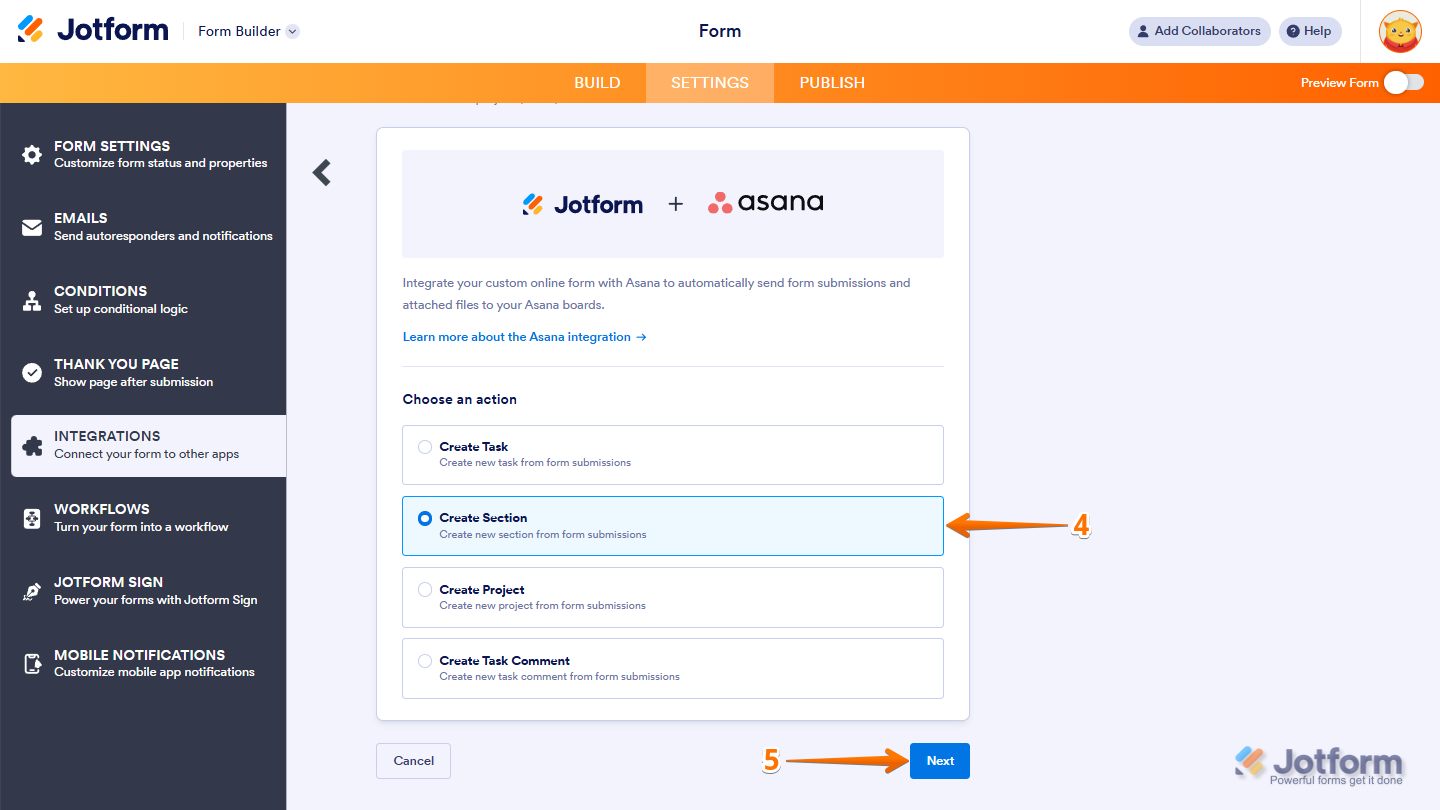
- Now, in the Choose an Action section, select Create Section.
- Then, click on Next.
- Now, click on Authenticate and log in to your Asana account.
If you’ve logged in before, just pick your Asana account from the dropdown. To use a different one, click on Use another account.

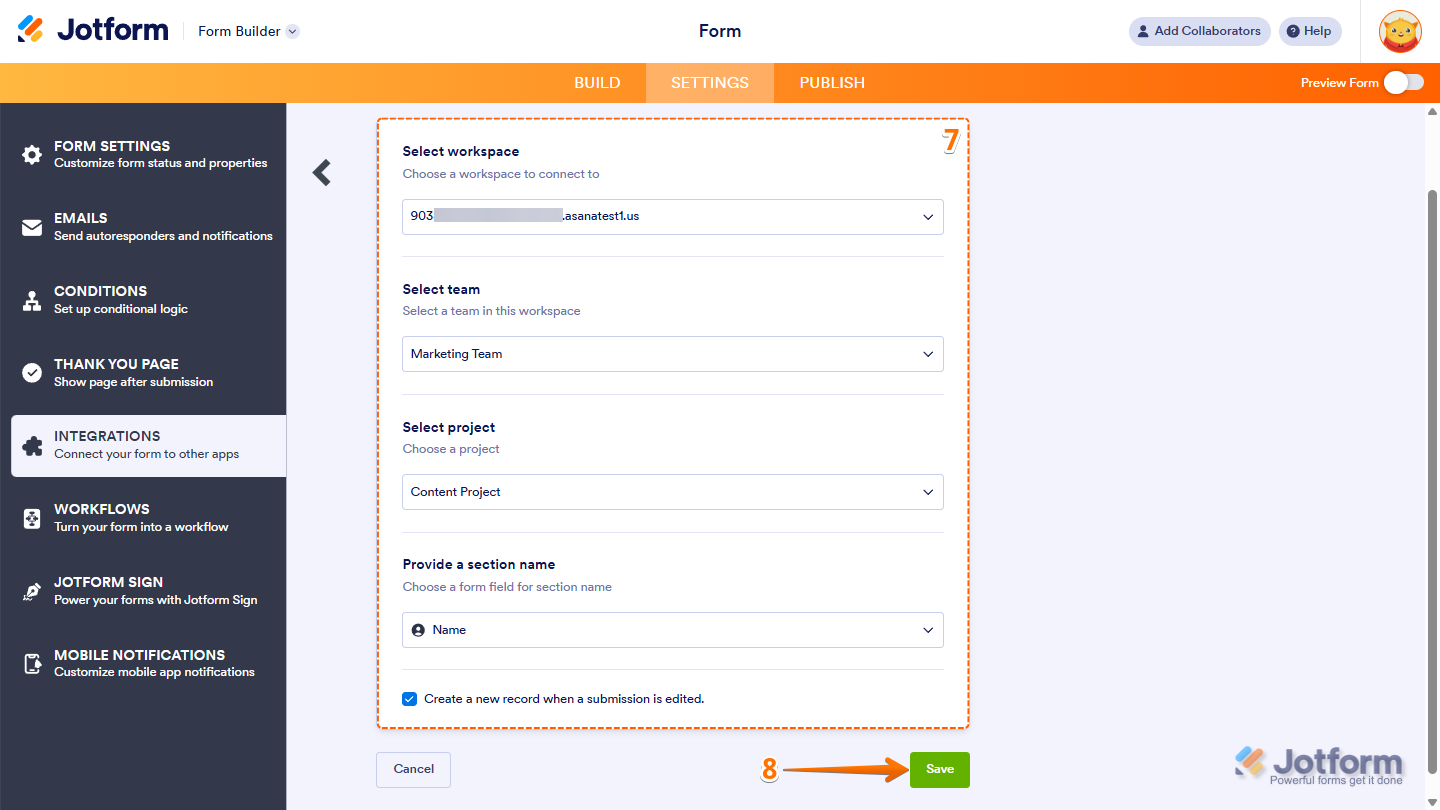
- Once connected, set up these things:
- Select Workspace — Choose the Asana workspace you want to connect.
- Select Team — Pick a team within the selected workspace.
- Select Project — Choose the project where tasks will be created.
- Provide Section Name — Map a form field to use as the section name.
- Create a New Record when Submission is Edited — Put a check in this box if you want a new Asana task to be created whenever a form submission is updated.
- After reviewing your settings, click on Save.
All done! New sections will now be added to your Asana projects from form submissions.
Create a Project
Adding new sections to your Asana projects from form submissions is simple and helps keep your tasks organized. This is how it’s done:
- In Form Builder, in the orange navigation bar at the top of the page, click on Settings.
- In the menu on the left side of the page, click on the Integrations tab.
- Then, search for Asana and click on it.

- Now, in the Choose an Action section, select Create Project.
- Then, click on Next.

- Now, click on Authenticate and log in to your Asana account.

If you’ve logged in before, just pick your Asana account from the dropdown. To use a different one, click on Use another account.

- Once connected, set up these things:
- Select Workspace — Choose the Asana workspace you want to connect.
- Select Team — Pick a team within the selected workspace.
- Match Your Fields — Choose the project where tasks will be created.
- Create a New Record when Submission is Edited — Put a check in this box if you want a new Asana task to be created whenever a form submission is updated.
- When everything looks correct, click on Save.
You’re good to go! Form submissions will now generate new projects in Asana.
Create a Task Comment
Adding comments to existing Asana tasks from form submissions is straightforward and keeps your team updated. Here’s a quick how-to:
- In Form Builder, in the orange navigation bar at the top of the page, click on Settings.
- In the menu on the left side of the page, click on the Integrations tab.
- Then, search for Asana and click on it.

- Now, in the Choose an Action section, select Create Task Comment.
- Then, click on Next.
- Now, click on Authenticate and log in to your Asana account.

If you’ve logged in before, just pick your Asana account from the dropdown. To use a different one, click on Use another account.

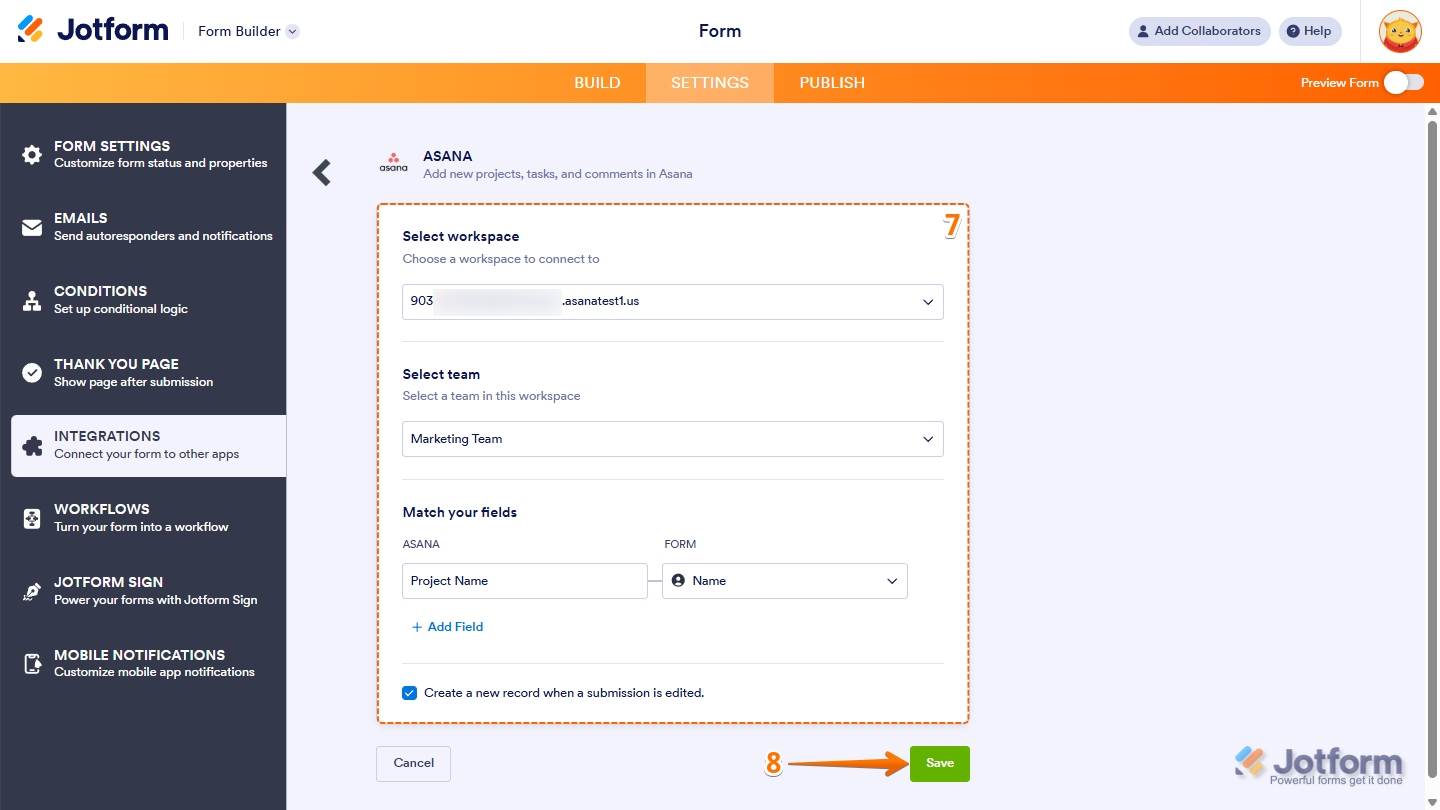
- Once connected, set up these things:
- Select Workspace — Choose the Asana workspace you want to connect.
- Select Team — Pick a team within the selected workspace.
- Select Project — Choose the project where tasks will be created.
- Select Task — Pick the task where comments will be added.
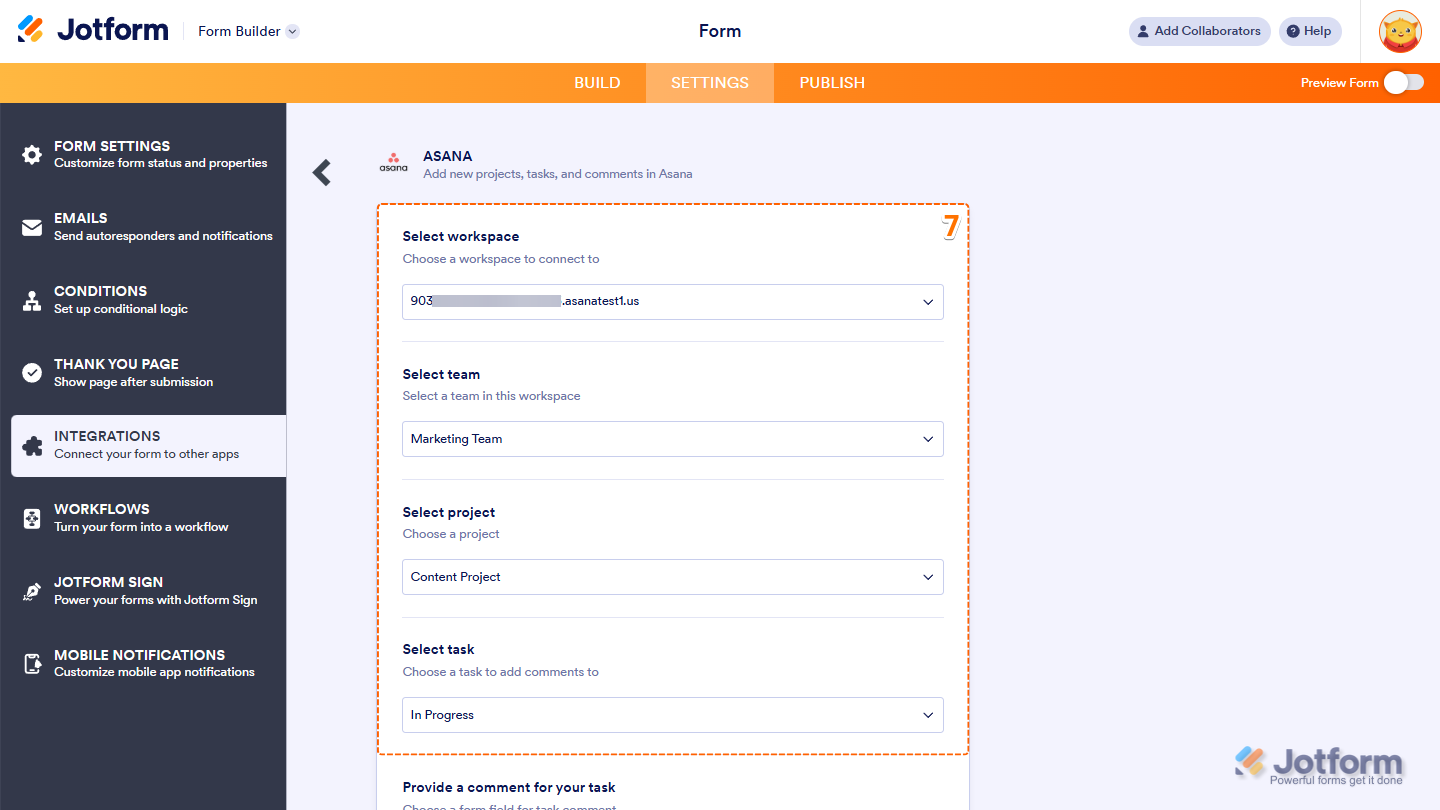
- Then, scroll down to the bottom and continue to set up these settings:
- Provide a Comment for your Task — Map a form field to be used as the comment.
- Create a New Record when Submission is Edited — Put a check in this box if you want a new Asana task to be created whenever a form submission is updated.
- Once everything’s set, click on Save.

That’s it! Comments from form submissions will now be added to your chosen Asana tasks.
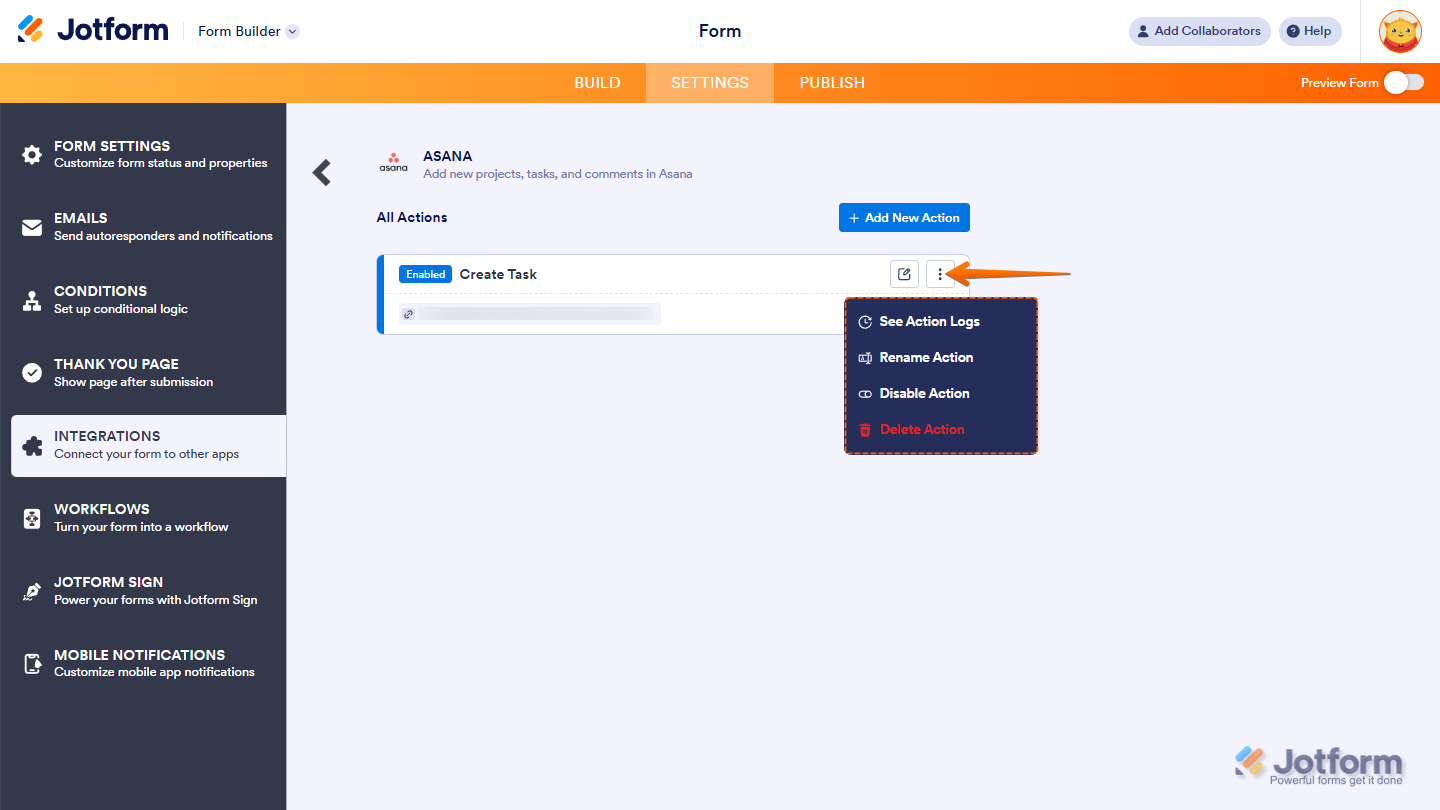
Managing Asana Integration Actions
After saving the integration, you’ll see the list of actions you’ve set up and the Add New Action button on the main page. Hover your mouse over an action and click on the Three Dots icon next to it on the right side to access more options:
- See Action Logs — View successful and failed runs, helpful for troubleshooting.
- Rename Action — Change the action’s title.
- Disable Action — Temporarily stop the integration from sending data.
- Delete Action — Remove the action from your form.


Send Comment:
10 Comments:
January 20, 2026
Hello. Wondering how I can get the entire filled out form to populate in my Asana task in its notes. Currently, it looks like only one field of my choice is able to autopopulate into asana task notes. Is there a way to send all of the element/questions to asana?
November 25, 2024
Hello,
I would like to know if it's possible to attach the submission PDF to an Asana task. I haven't found how to do it.
Thanks
Manon
June 18, 2024
The Configurable List Widget no longer works with this integration. Is there a work-around?
October 13, 2023
Can you add a Unique ID into the Asana Integration? There is no field for this or any sort of ID in the options. Is there also a way to add the submitters email address into the integration? I have tried adding Task Followers matched to Your Email (the submitters email) but nothing populates when the task is imported into Asana.
January 25, 2023
Hi how do i remove the asana i linked the wrong asana account?
January 11, 2023
Hi is there a way to map the custom fields to the jot form custom fields? For example, I have a drop down menu (as an asana custom field) and I have mapped it to the drop down in jot form, however, the dropdown selections are not showing up on the jot form.
December 2, 2022
Is it possible for one jotform to be integrated into multiple Asana projects?
August 8, 2022
How do we integrate more complicated forms to get the full detail in the 'description' of asana? including all free text boxes? It doesn't appear we can assign responses to multiple areas in asana - except for 'attachments'
If it possible to get the full survey, including questions as text in the description box?
July 28, 2022
unclear whether this requires a premier Asana account
March 7, 2022
Gave it a try and it does not create a task in the project and has no error messages or way to find out why it is not working. Support just said the fields probably don't match, but they do... Not a very good option