A confirmation message is an important part of the form experience—especially for order forms. Showing a clear review or summary of what was submitted or ordered, whether before or after submission, reassures users that their information was received correctly and helps set clear expectations for what happens next.
Jotform offers several ways to make this happen:
- Use a Text Field to reiterate the order details directly on the form.
- Add the Preview Before Submit widget so respondents can review their selections before submitting.
- Use the Thank You Page to display a detailed summary after the form is submitted.
- Send an Autoresponder email to provide a confirmation and a copy of the submission.
To achieve this, let’s focus on adding form fields that display a quick summary of the information respondents have entered.
Note
Form fields added to Text Fields, Thank You Pages, and email templates are always enclosed in curly braces, like {form_field}.
Using the Paragraph Element to Display a Summary
The Paragraph element is a rich text editor that lets you add and format text with ease. You can include styled text, insert images, add links, and even create tables, making it ideal for displaying instructions or descriptions on your form. You can also use it to display a summary of what users submit by inserting form fields into the content.
Whether you’re creating a new form or updating an existing one, you can add and set up the Paragraph element to display summaries in a few easy steps. Here’s how:
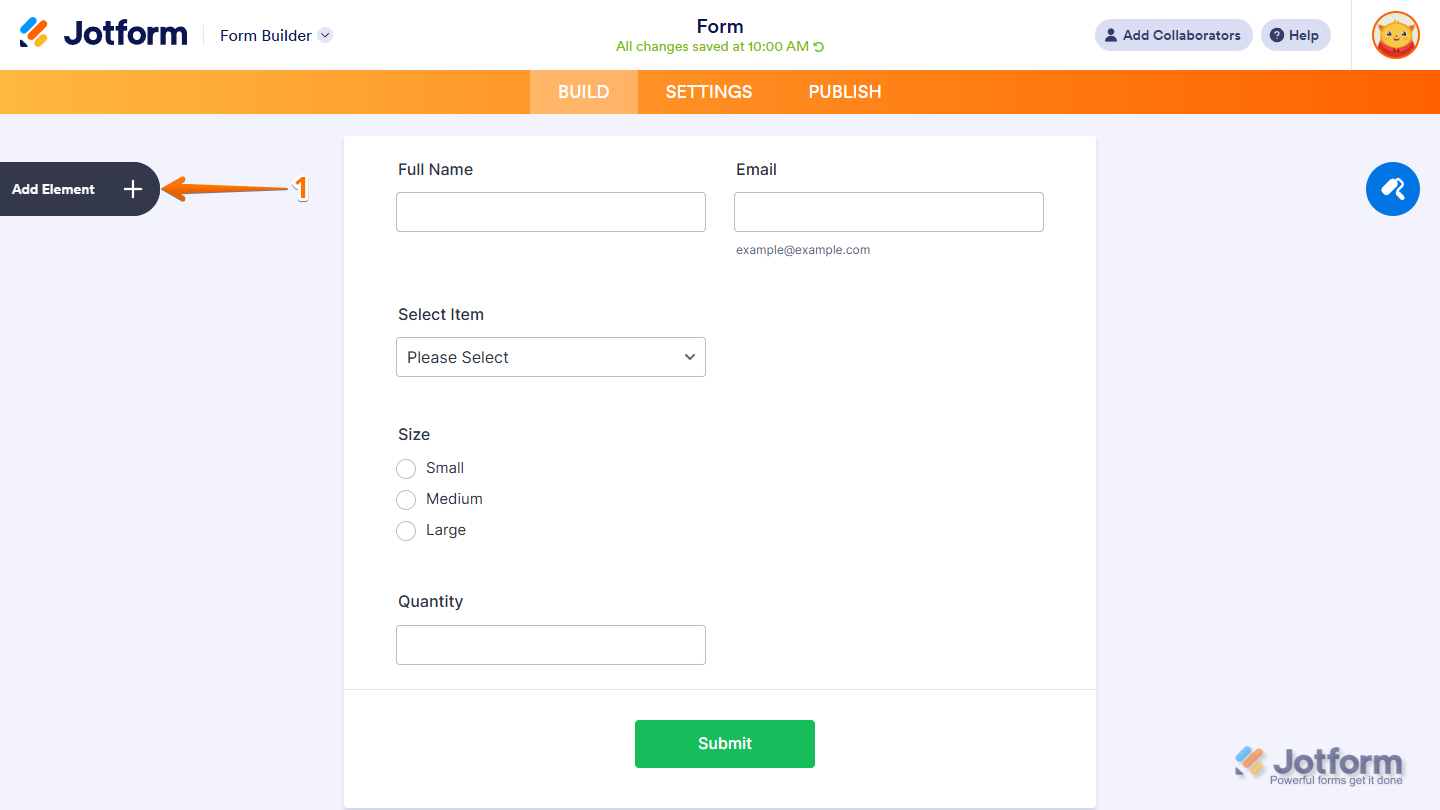
- In Form Builder, click on Add Element on the left side of the page.
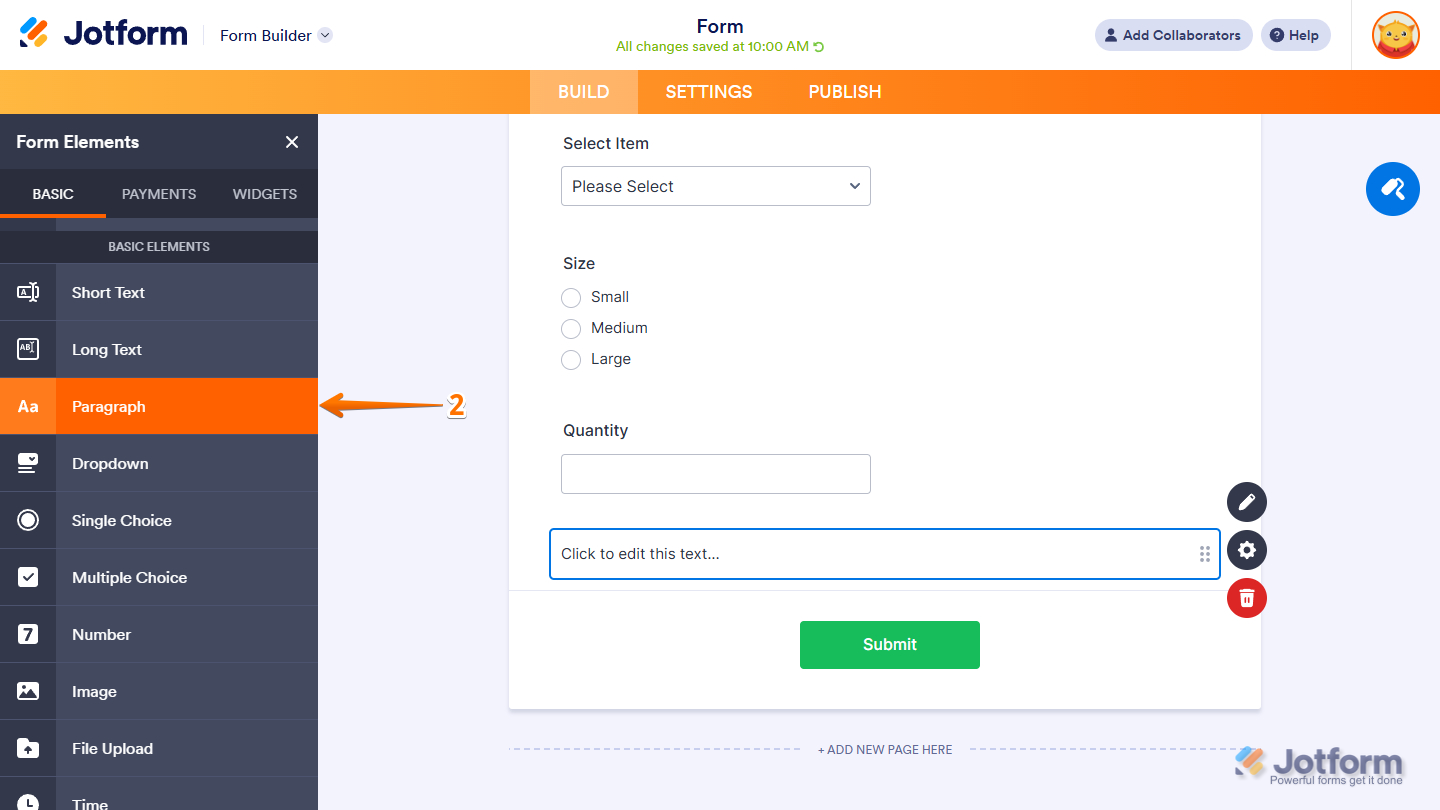
- Then, in the Form Elements menu, under the Basic Elements section of the Basic tab, click on Paragraph. Or just drag and drop it to where you want it on your form.
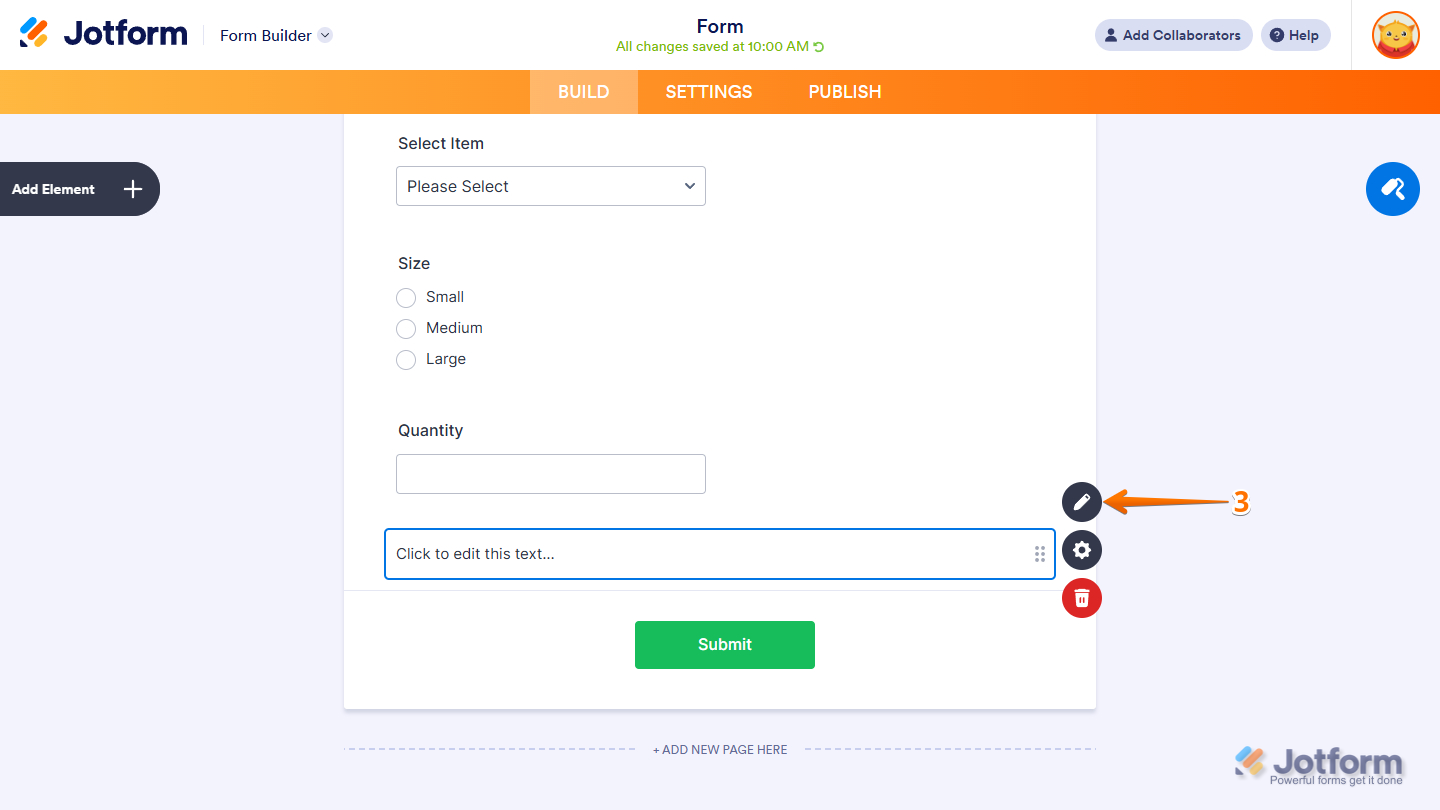
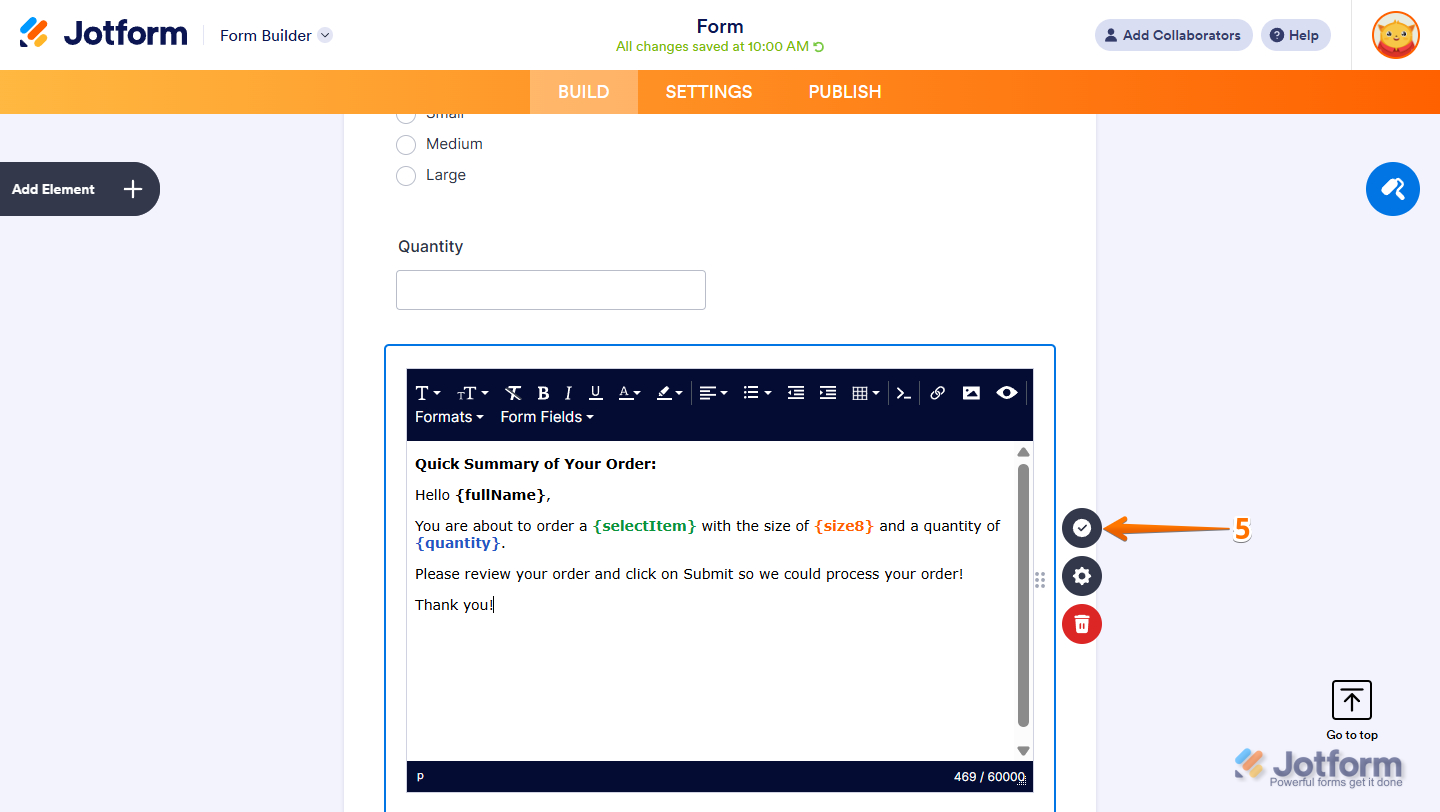
- On the right side of the Paragraph element, click on the Pencil icon.
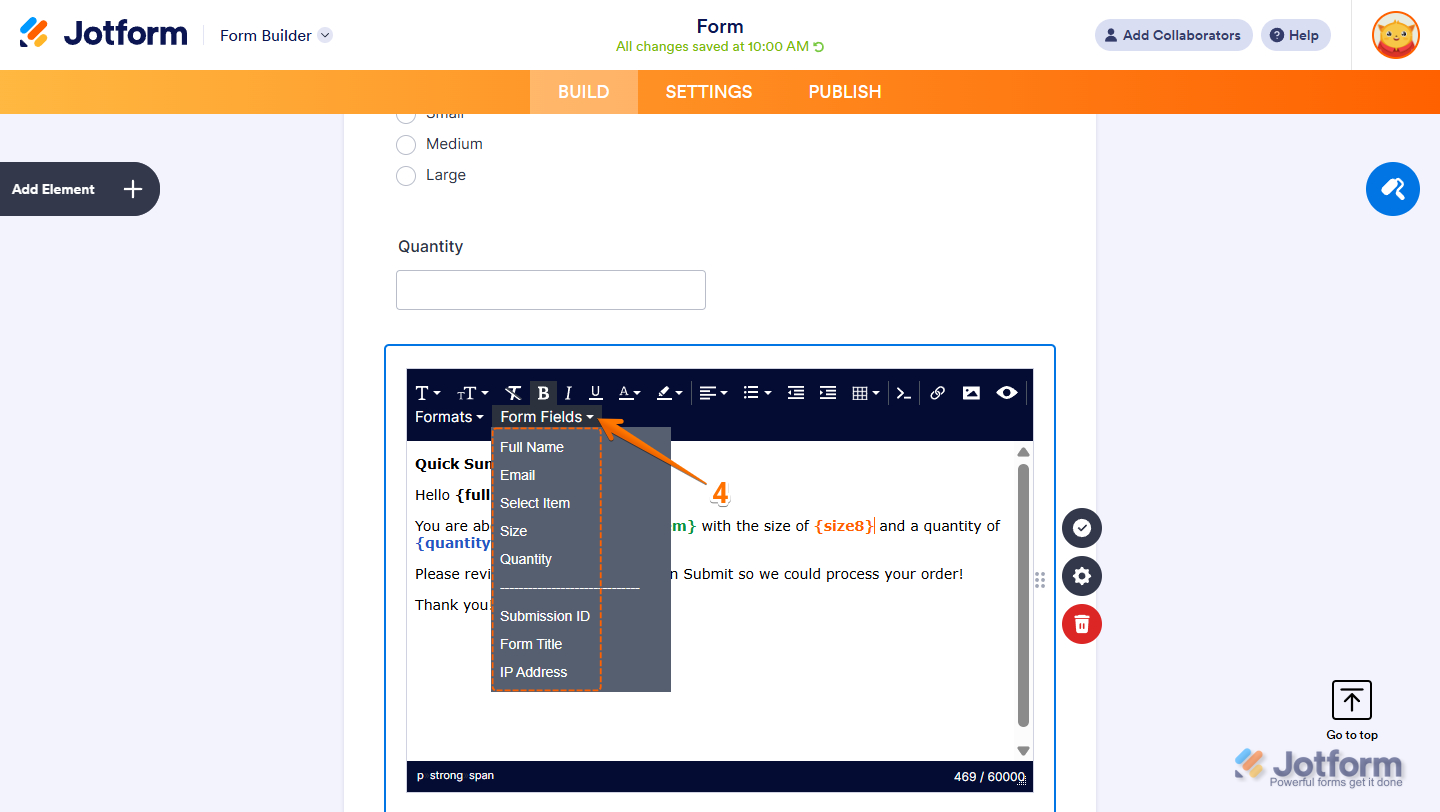
- Then, in the Text Editor, click on the Form Fields dropdown menu at the top toolbar, and select the Form field that you want to insert and be in the summary.
- Now, on the right side of the Paragraph element, click on the Encircled Checkmark icon to save your summary. Or, you can also click outside the Paragraph element to do the same.
You’ll also find all the steps in our guide on How to Display Field Values in a Paragraph Element.
Displaying the Summary on the Thank You Page
You can also display the summary on your form’s Thank You Page. This is useful for displaying information only when the form is submitted. You can set it up like this:
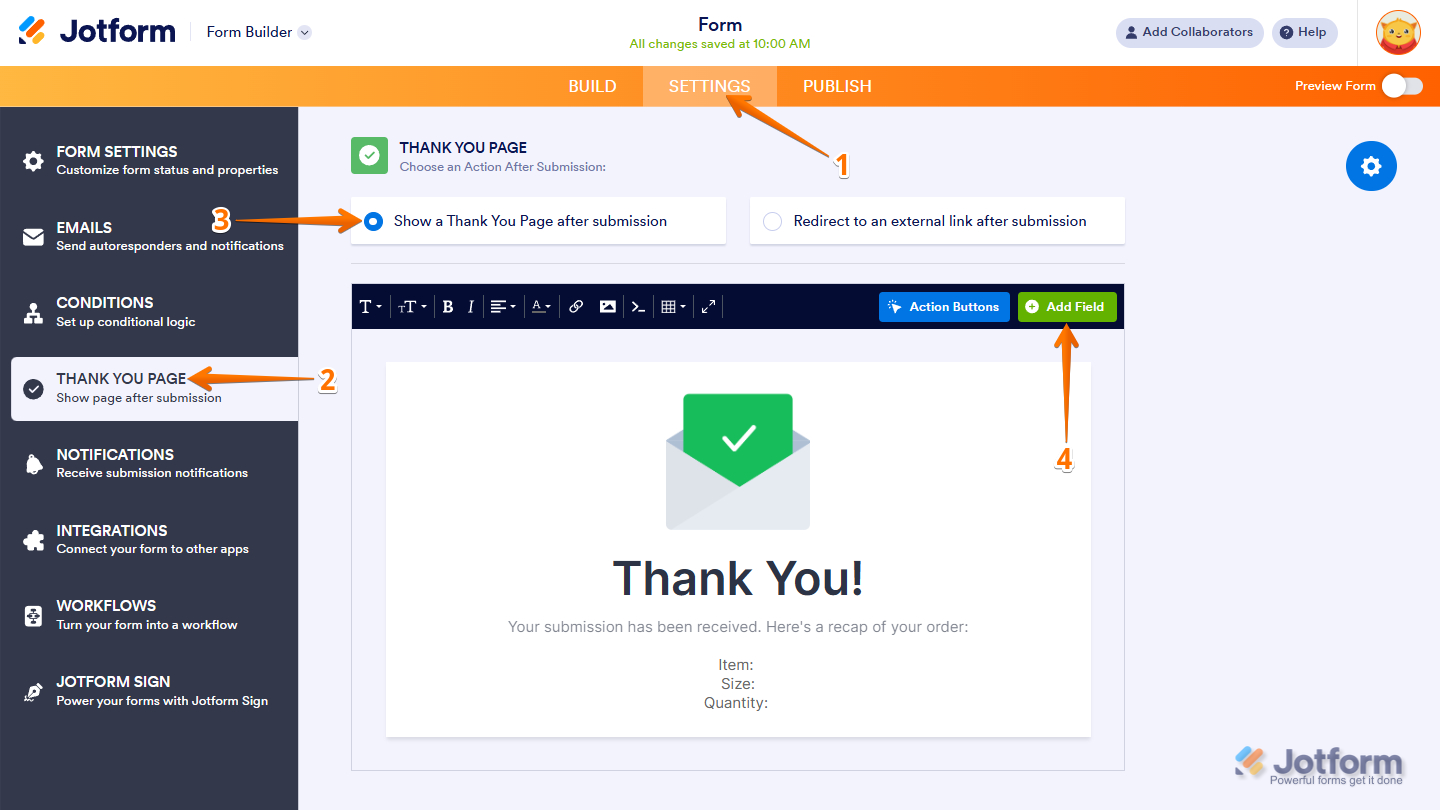
- In Form Builder, in the orange navigation bar at the top of the page, click on Settings.
- In the menu on the left side of the page, click on Thank You Page.
- Then, under the Show a Thank You Page After Submission tab, place your cursor in the section where you want the field to be inserted.
- Next, in the top toolbar, click on Add Field.
- Now, on the Thank You Page Settings menu on the right, under the Fields tab, click the Plus icon next to the field to add it.
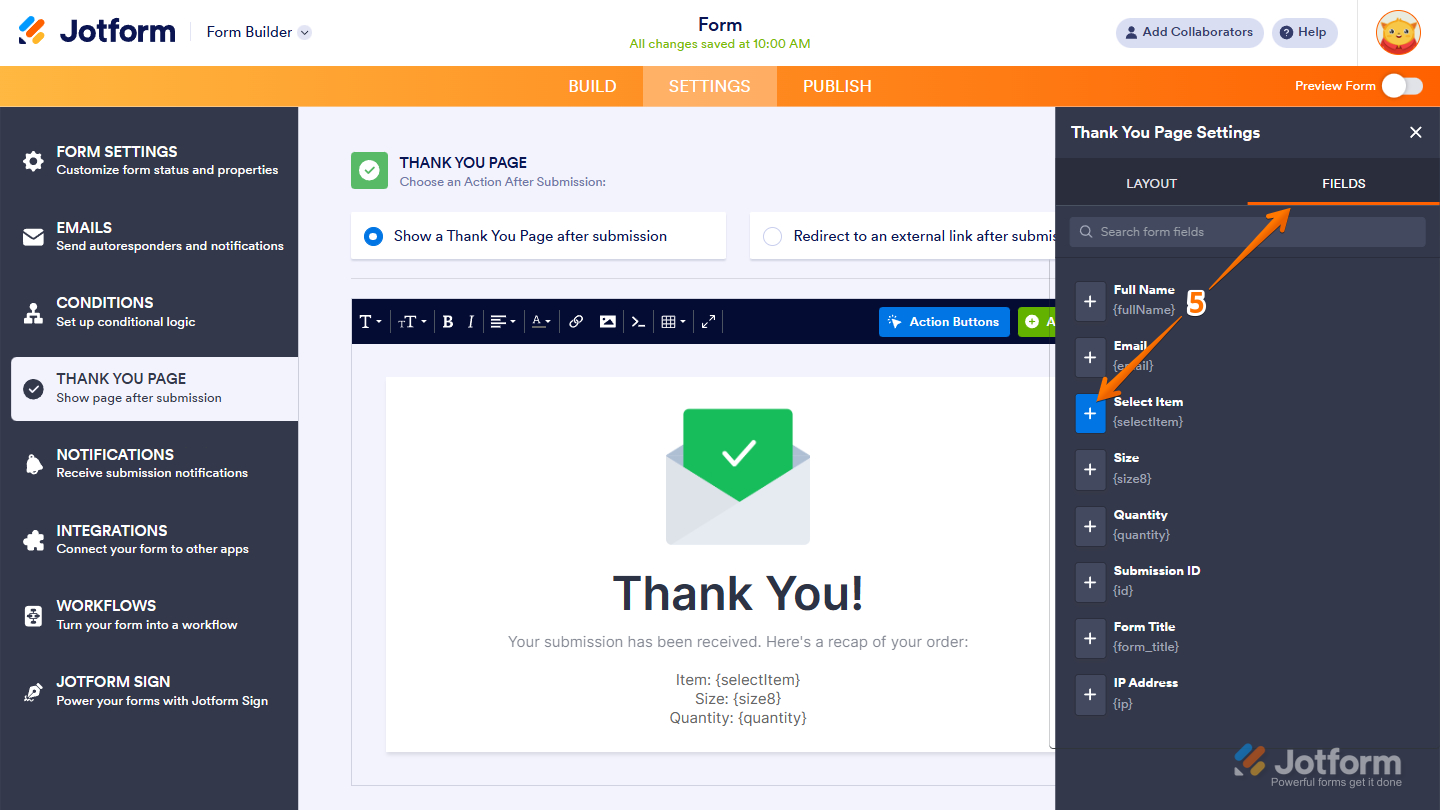
That’s it for displaying a summary on the Thank You Page settings of your form.
Sending the Summary Through Email Templates
Instead of displaying the summary on the form or the Thank You Page, you can send it to respondents after submission through an Autoresponder email. This method is beneficial because it allows them to receive a copy in their inbox for future reference. The setup works similarly to inserting form fields into the Thank You Page. Here’s how to set it up:
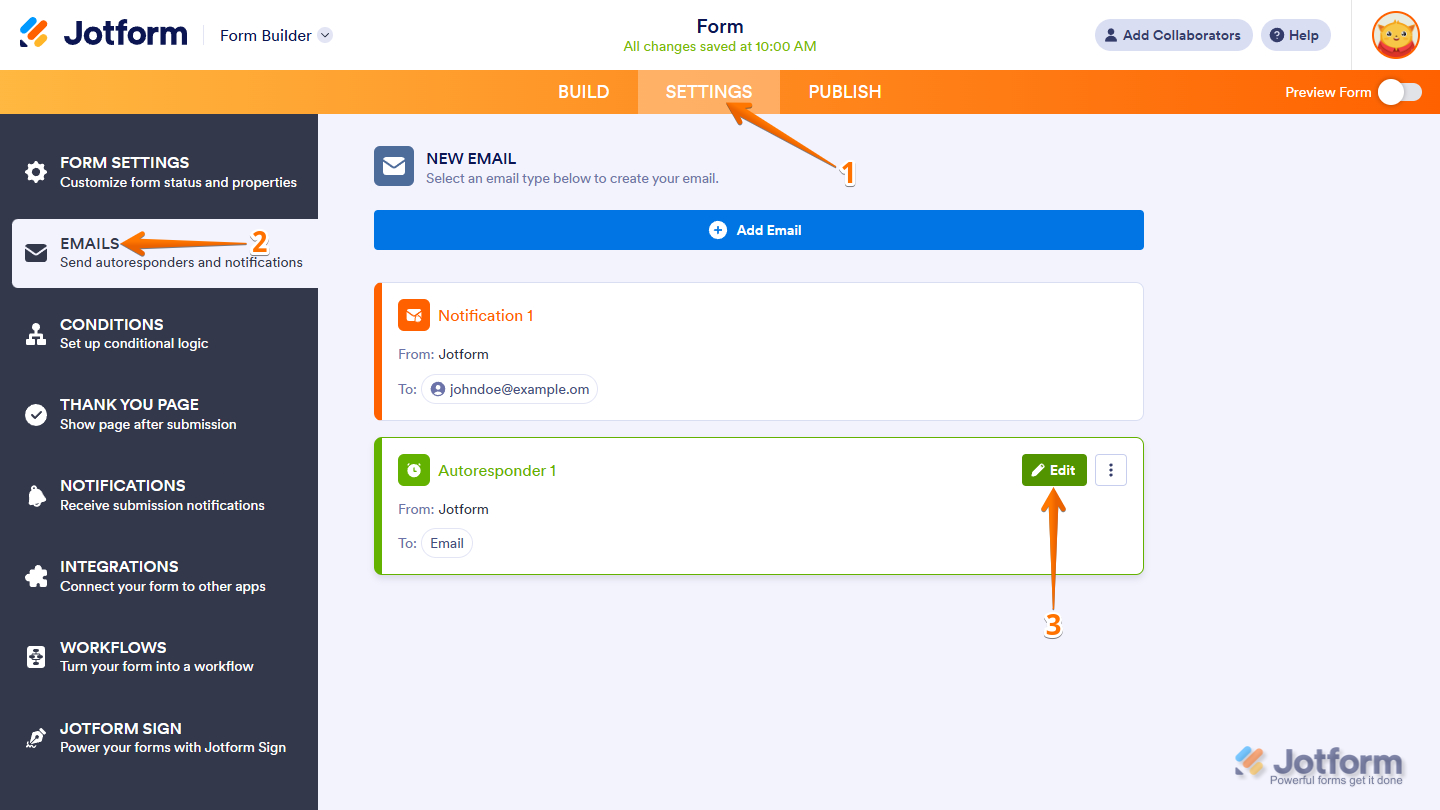
- In Form Builder, in the orange navigation bar at the top of the page, click on Settings.
- Then, in the menu on the left side of the page, click on Emails.
- Next, hover your mouse over the Autoresponder Email template, and click on Edit.
- In the Email Content section, place your cursor on the cell where you want the field to be inserted.
- Then, in the top toolbar, click on Form Fields.
- Now, in the Dropdown menu that opens, click on the field to add it.
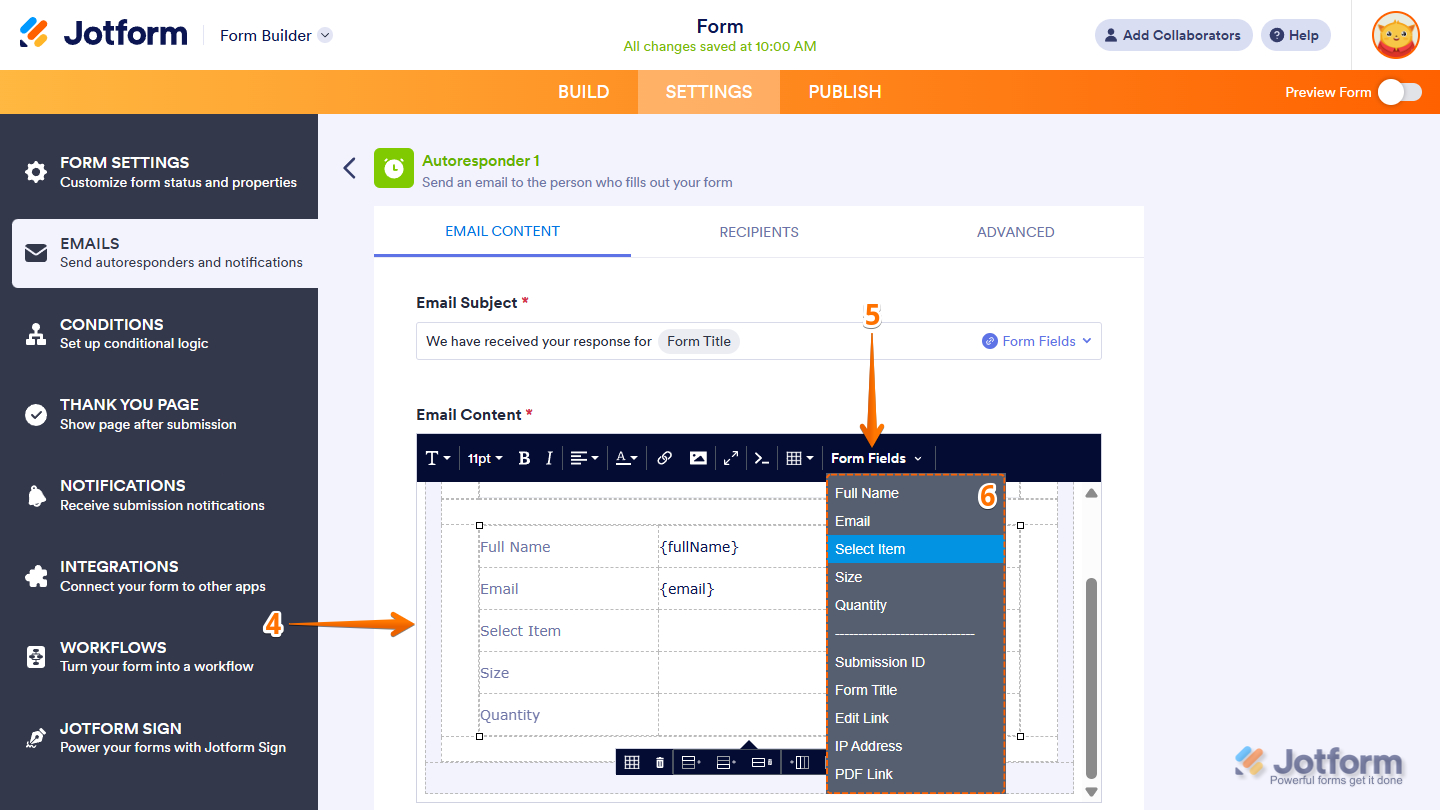
Note
The Form Fields ▼ menu only shows fields that have been added to your form and are classified as input fields. These are the fields respondents actually fill out, so elements like Header, Image, Text, or other non-input fields won’t appear in the list. If you need to include content from non-input fields in your email template, you’ll need to manually copy and paste it into the email body.
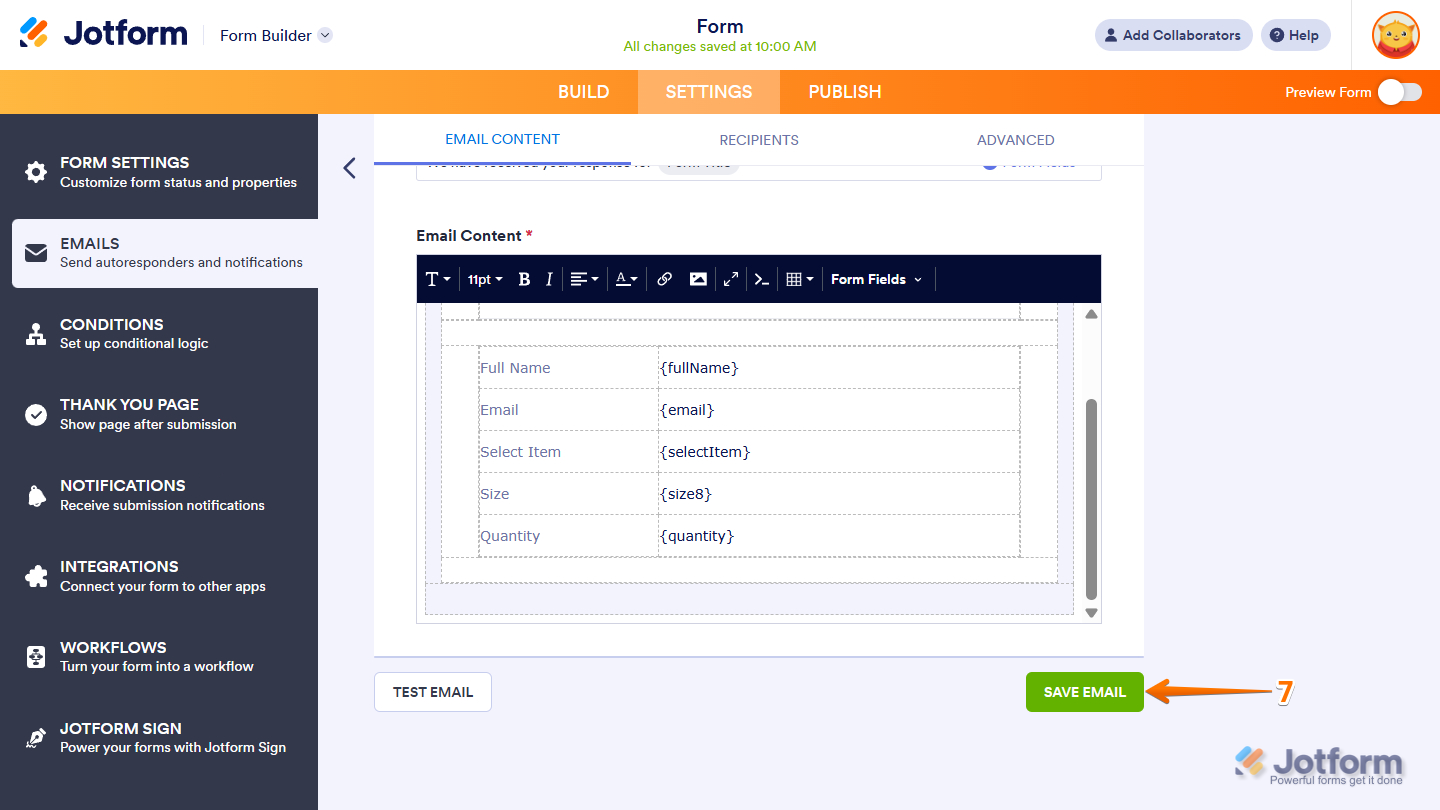
- Finally, scroll down and click on Save Email to complete the setup.
That’s about it for providing a detailed summary to your form respondents using form fields. Which method you choose is entirely up to you—and you can even combine multiple approaches at once to give respondents better visibility and a smoother experience.

Send Comment:
8 Comments:
July 18, 2023
First name only Form Field:
Example: The full name field variable is {name}, first name only becomes {name:first}
December 27, 2022
para tener un conteo de las veces que el mismo usuario ha llenado el formulario?
May 17, 2021
I am trying to summarize the order in mya order form but can only get the prize from the Product list to show up in the summary. Not the product name.
May 27, 2020
for preview, how-to including the sub-lable ? thanks
September 5, 2019
Hi,
Could Jotform have a fields in Thank you page that could show how many people have submitted my form?
August 2, 2019
Hi,
I assume that Jotform adds fields to the respondent email when they are added to the form. This email had been edited by adding rows of plain text, but newly added fields interfere with the order of the rows around these. I swapped out the plain text for long text to avoid this.
How do I get the email back to the default content prior to edits in future?
April 12, 2019
If my form is a client agreement how can my client receive an immediate copy of it in an auto response email?
February 19, 2018
In the country dropdown box that Jotform provides, the United States is the selection in the box. Is it possible to change this to another country (e.g. United Kingdom)?