
Who doesn’t like having options?
Life is full of tough choices, and finding exactly what you need is always rewarding.
Until now, Jotform users had only one way to connect a payment processor integration with their online order forms, payment forms, e-commerce forms, or credit card forms.
Today, Jotform is rolling out two new ways to connect a payment processor integration with your form. These new changes also let you create an online store before choosing a payment processor.
And that’s not all. Jotform is implementing two new ways to remove an integration from your form. Neither require you to rebuild your online store from the ground up when you select a new payment processor.
Before, you couldn’t build your online store until you’d set up an account with a payment processor and connected it to a form through one of Jotform’s integrations.
This workflow could be particularly problematic if you wanted to try out a number of payment processors before settling on one.
Now you can keep your online store intact and try out different payment processors before finding the one that meets your business’s needs.
Pro Tip
Create the perfect online payment form for your business with Jotform’s 30+ payment gateway integrations.
How to access and use the Product List field
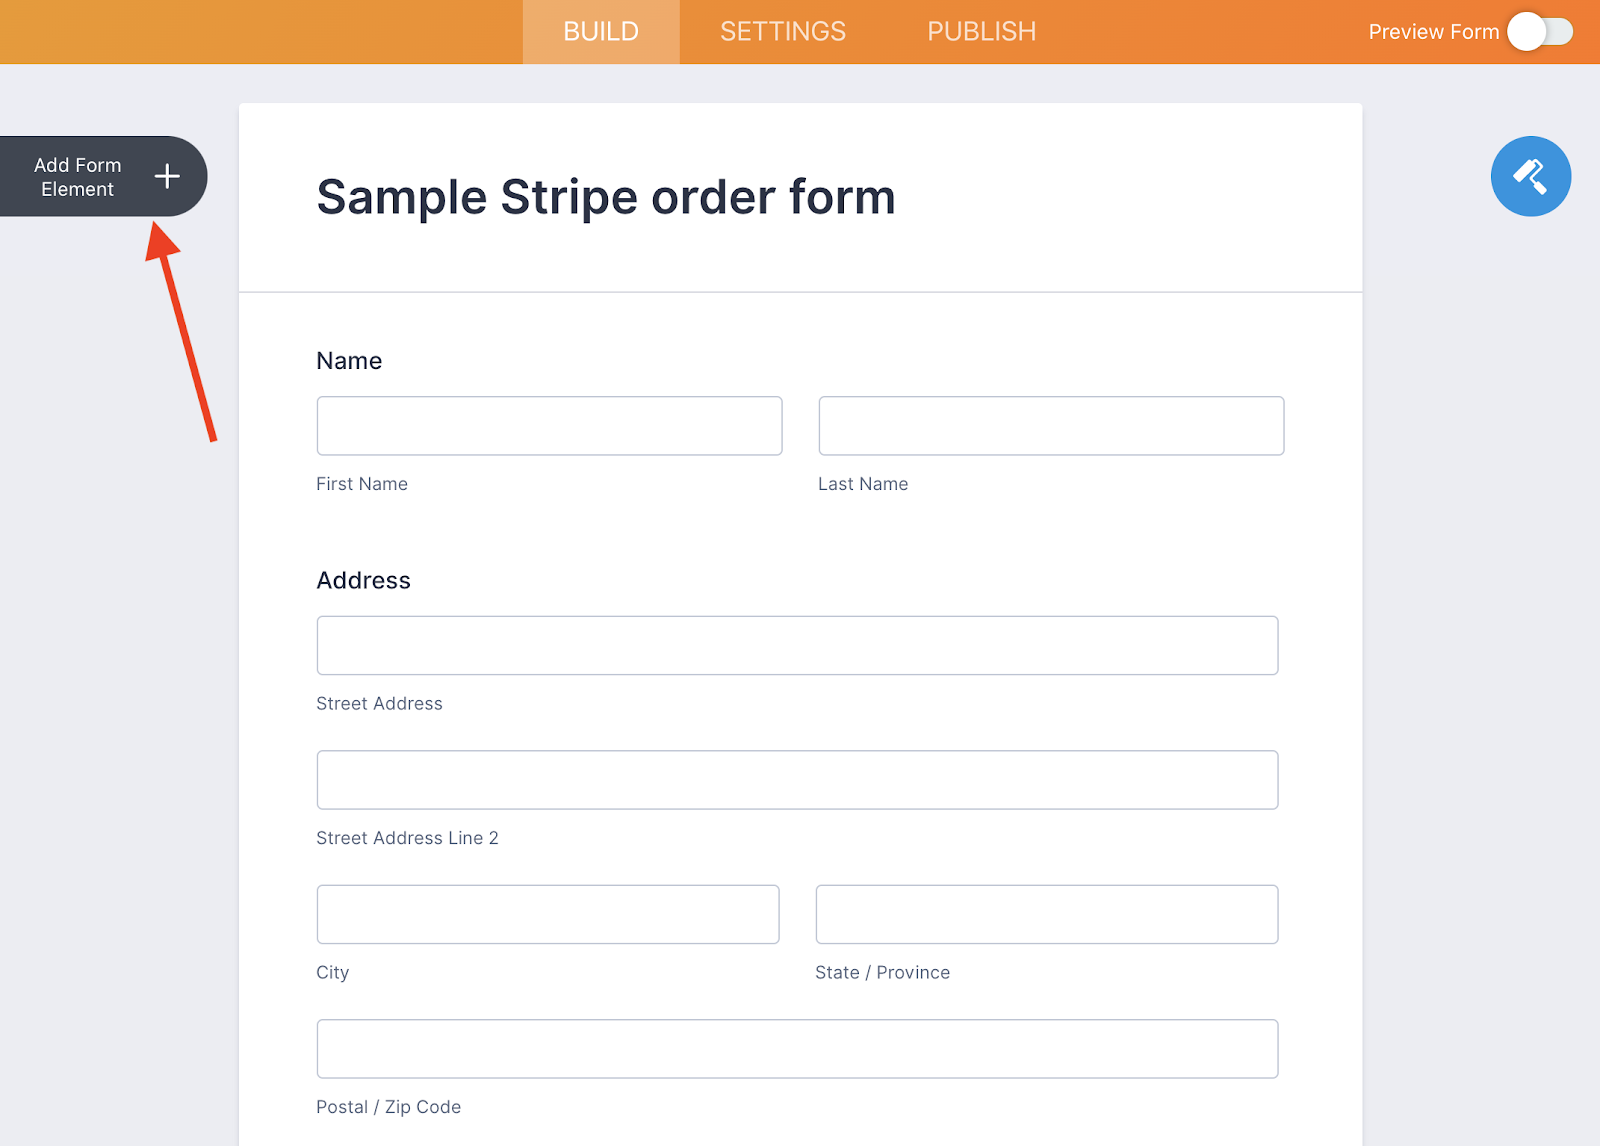
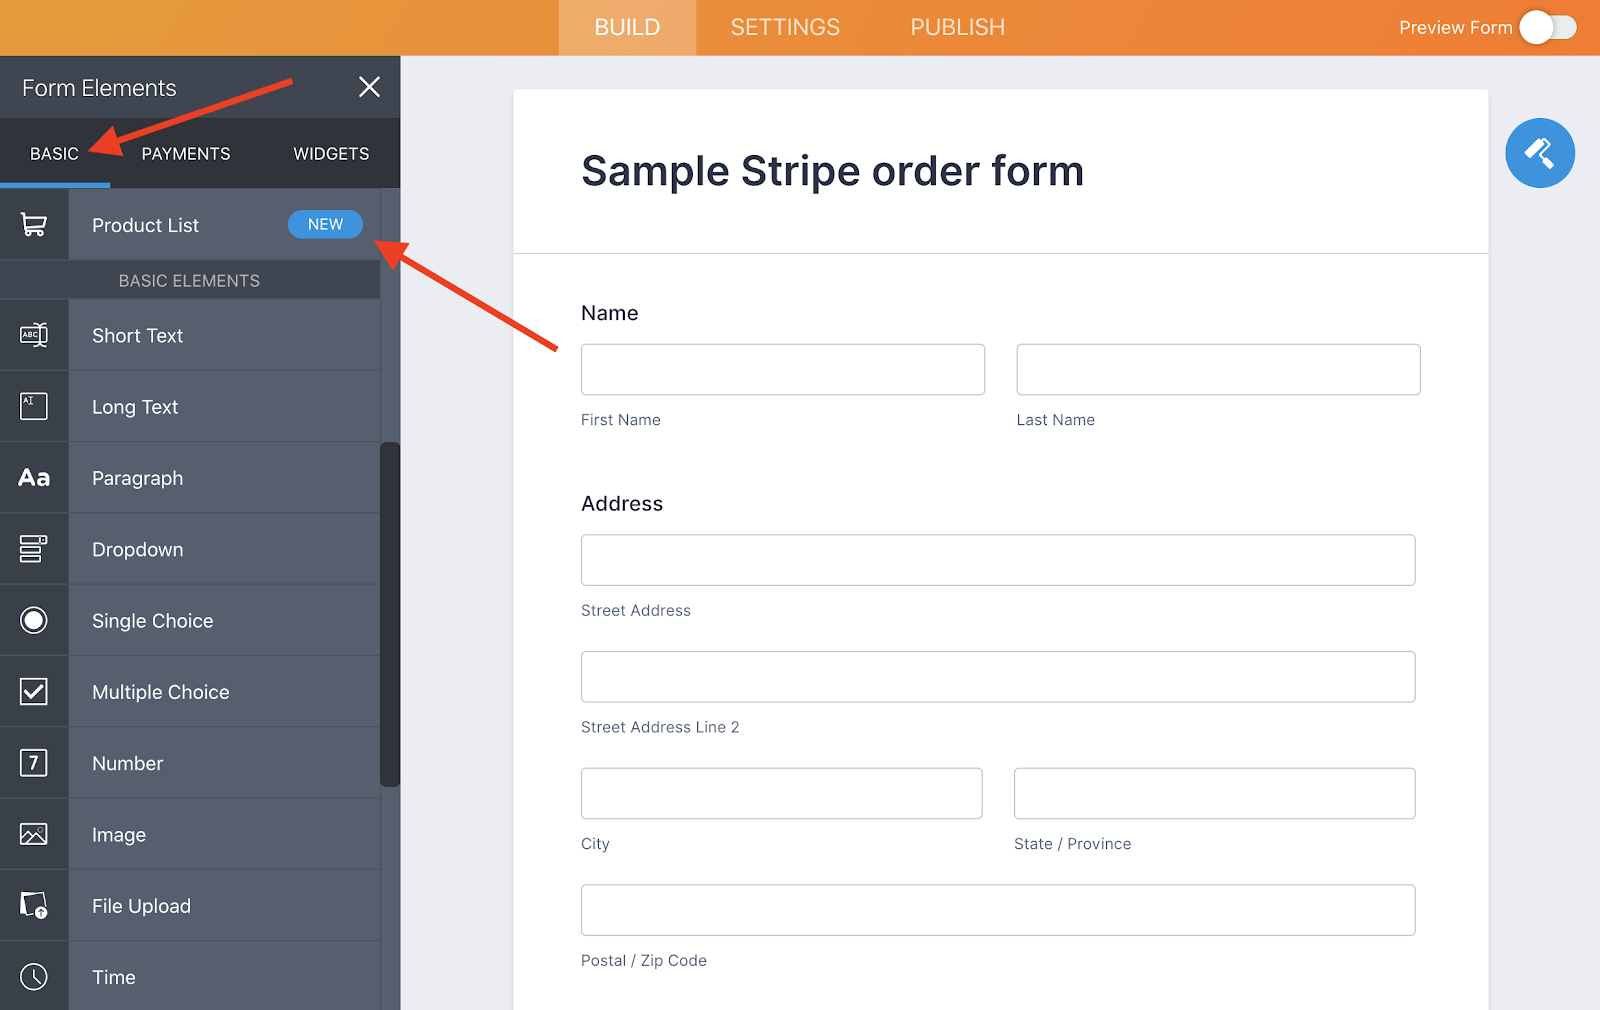
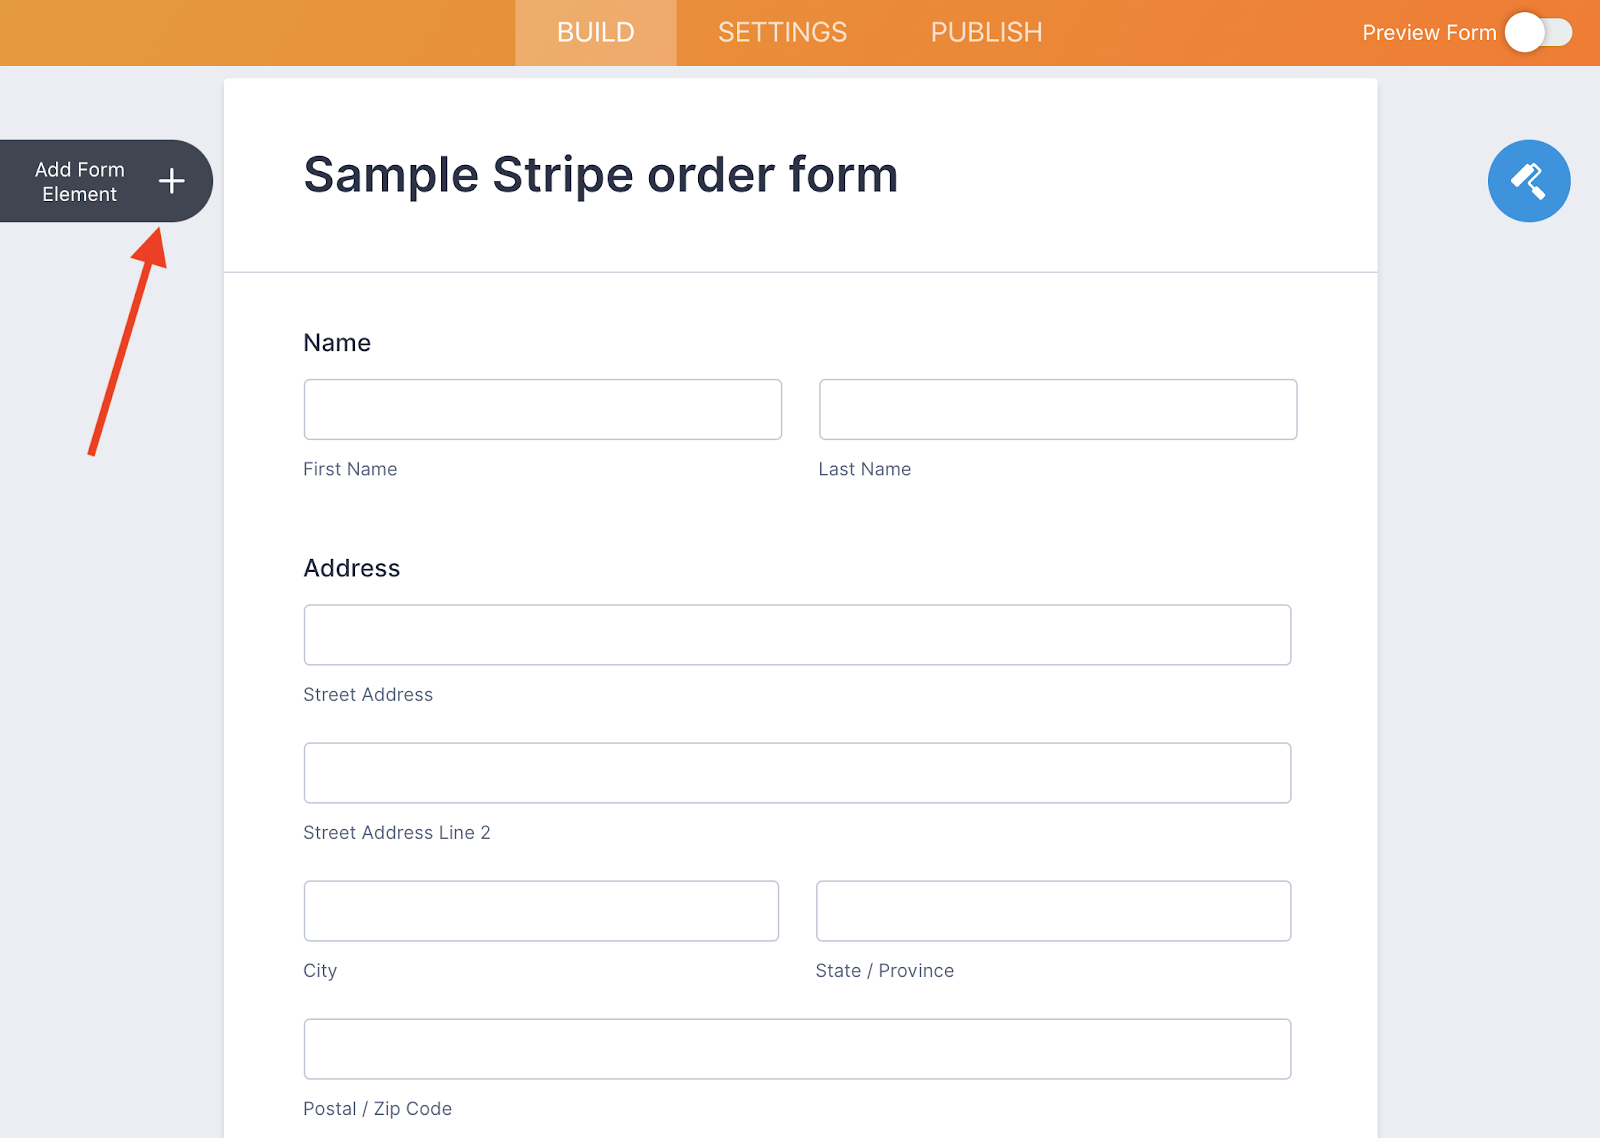
- While you’re building a form, click on the Add Form Element icon that appears on the left side of the Form Builder.
- Click on Product List under the Basic tab in the Form Elements menu.
- Click on the Product List icon on your form to add products that you want to sell, offer coupons, add shipping options, apply taxes for online orders, and set up the invoices that customers or clients can receive when they successfully place an order.
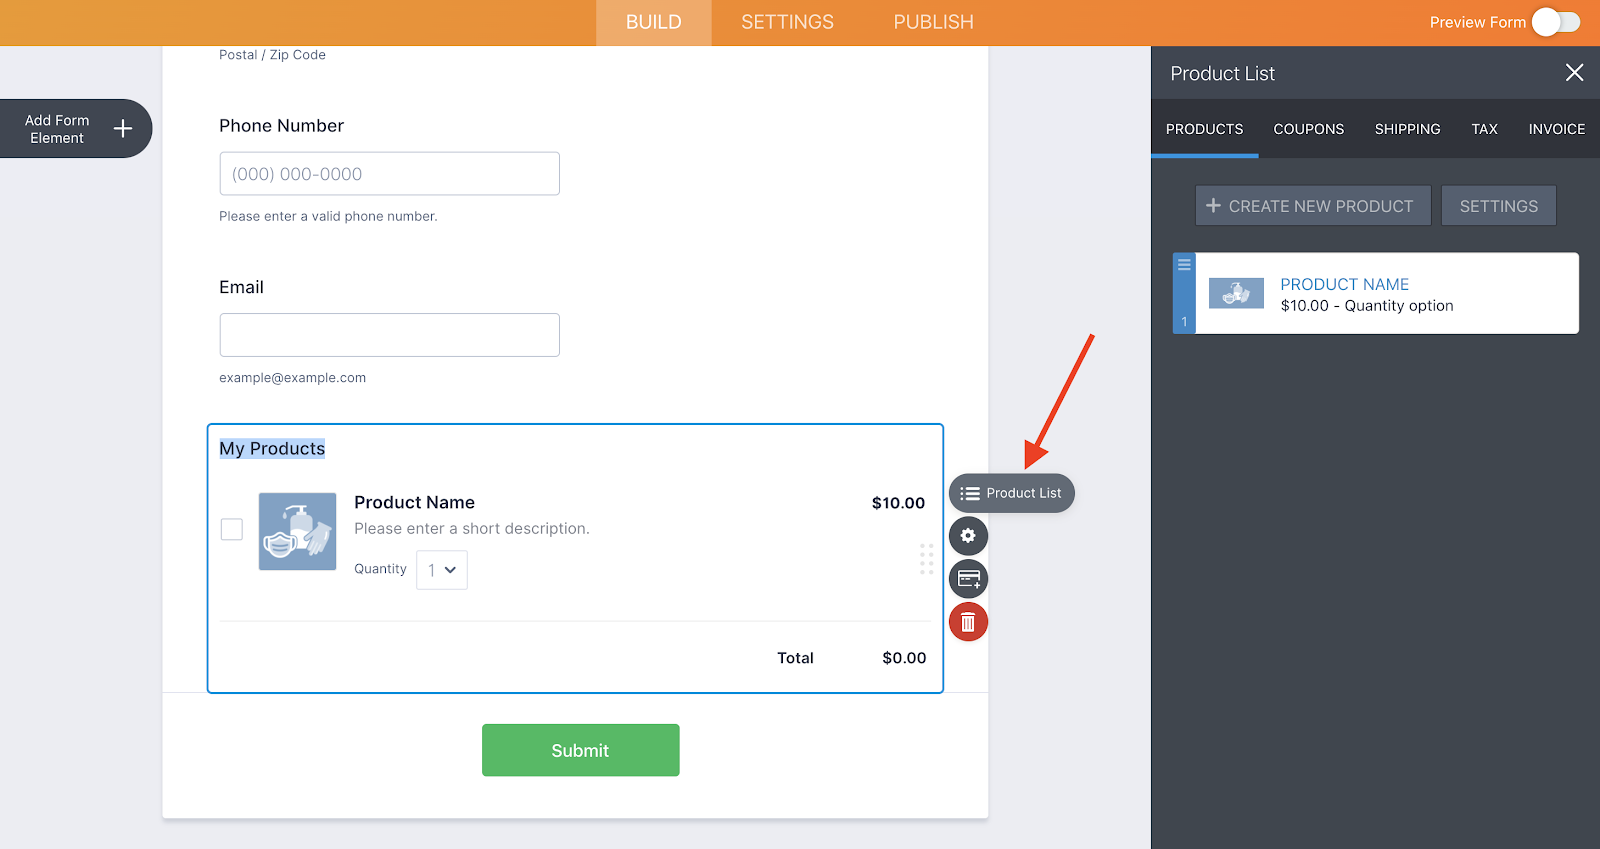
- Click on the Add Payment Integration icon next to the Product List field on your form.
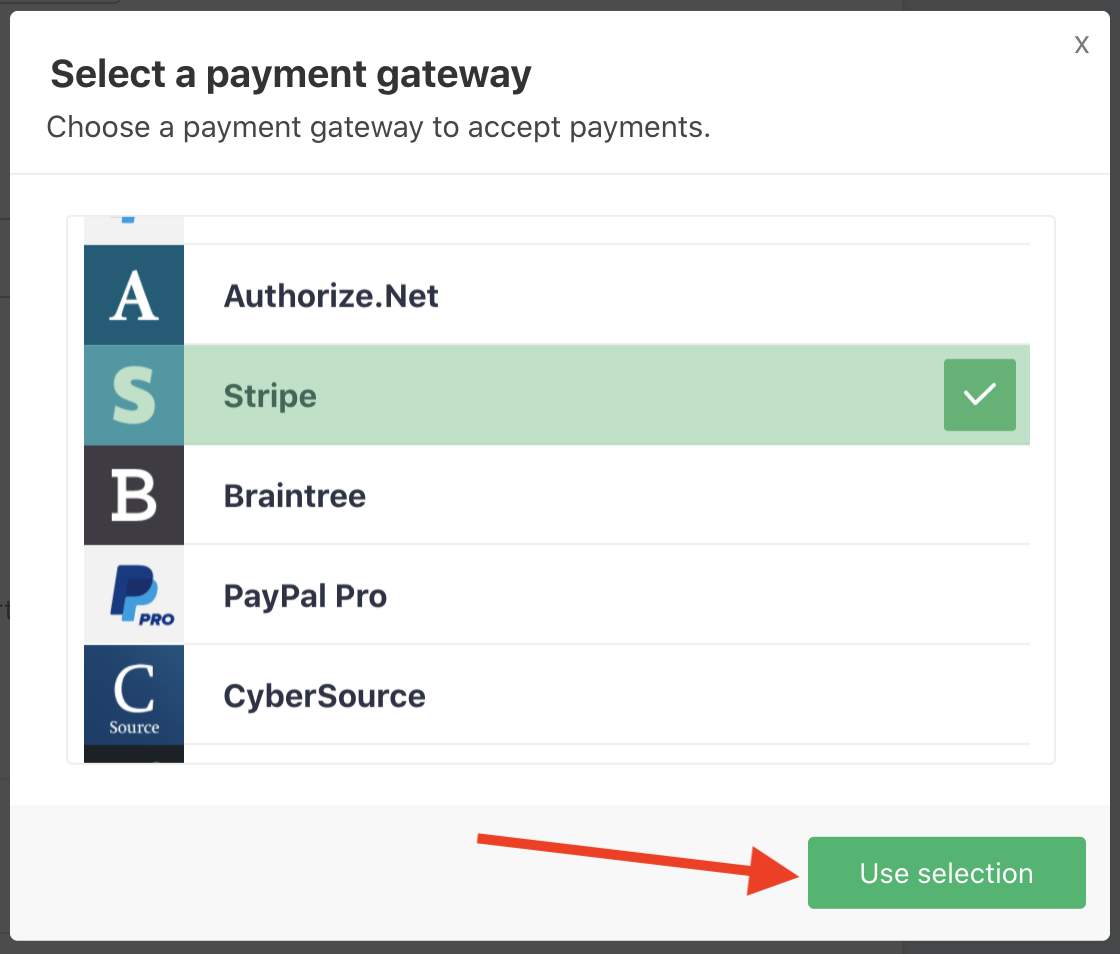
- Use the popup menu to select the payment processor integration you’d like to use. After you’ve picked a payment processor integration, click Use Selection.
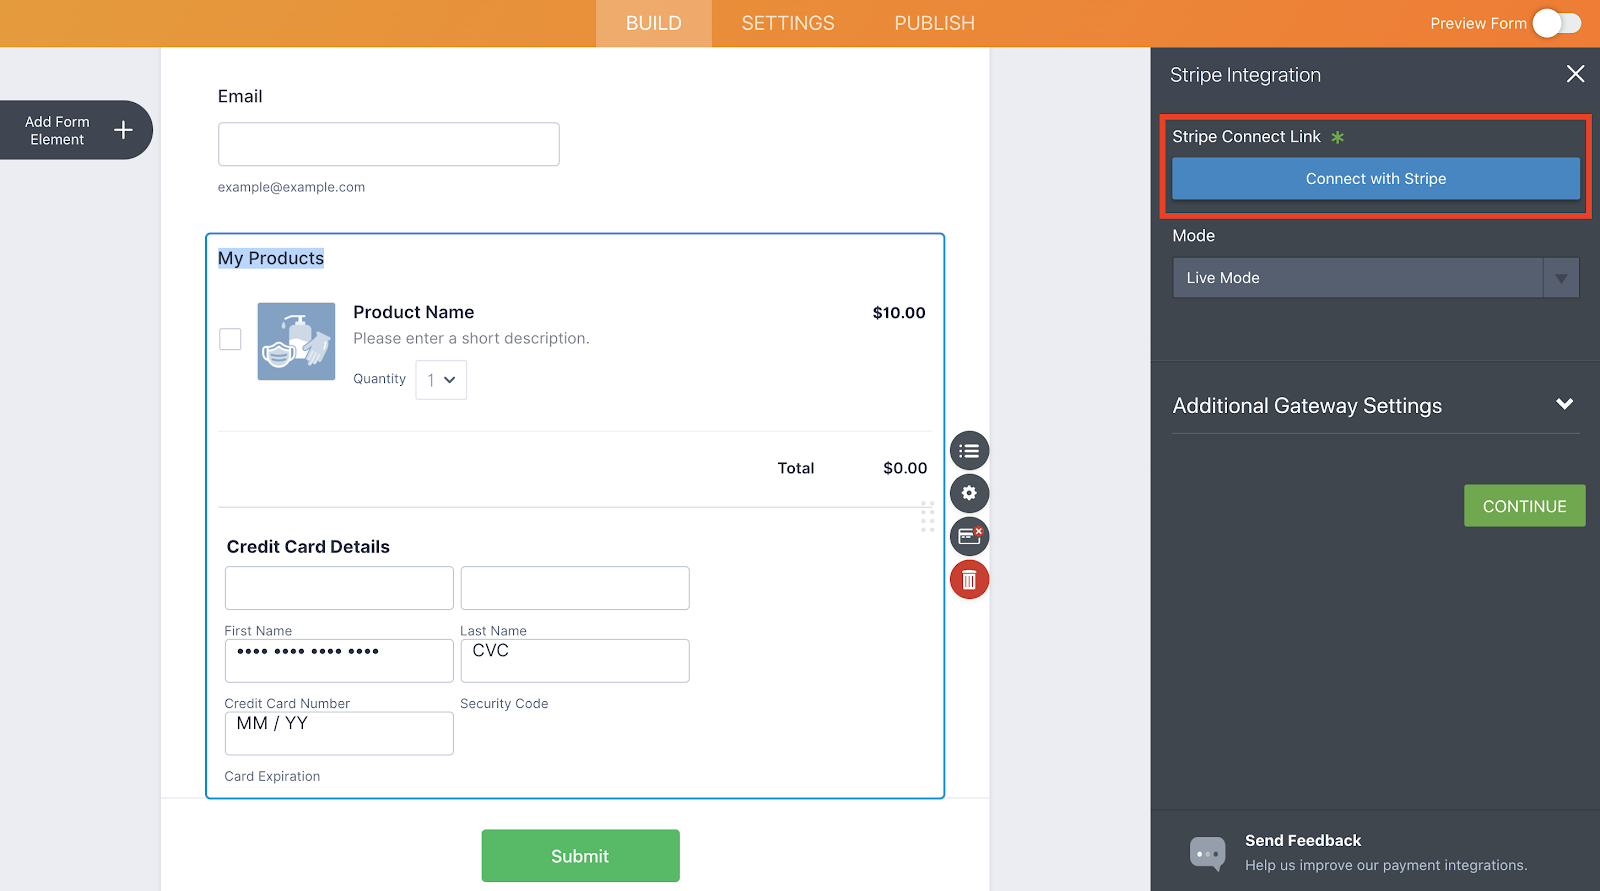
- Connect your form to your payment processor of choice by clicking the Connect button in the Integration menu.
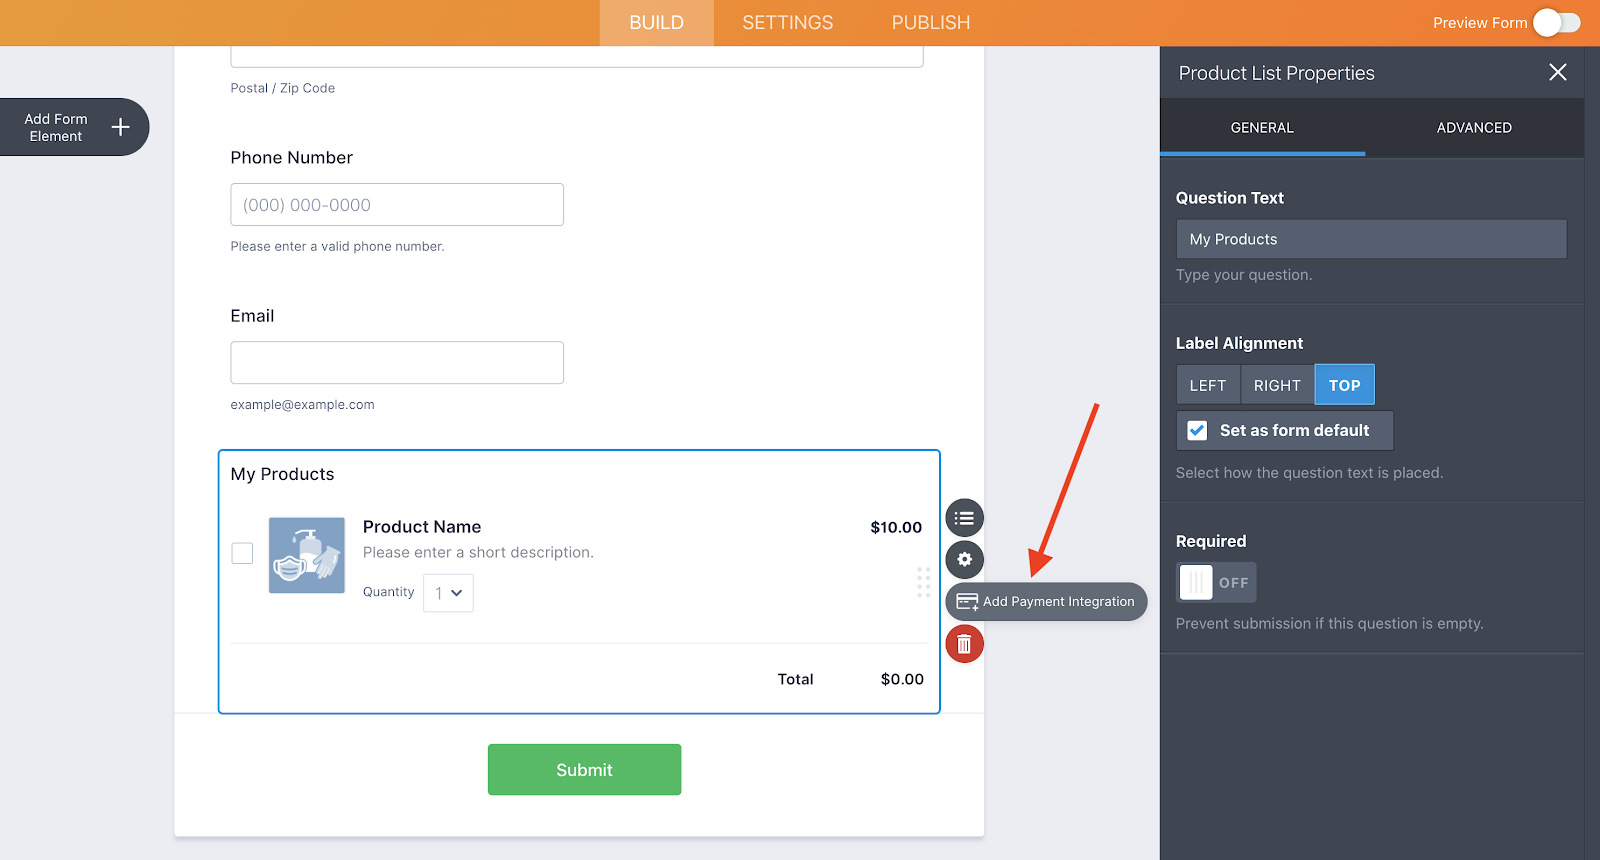
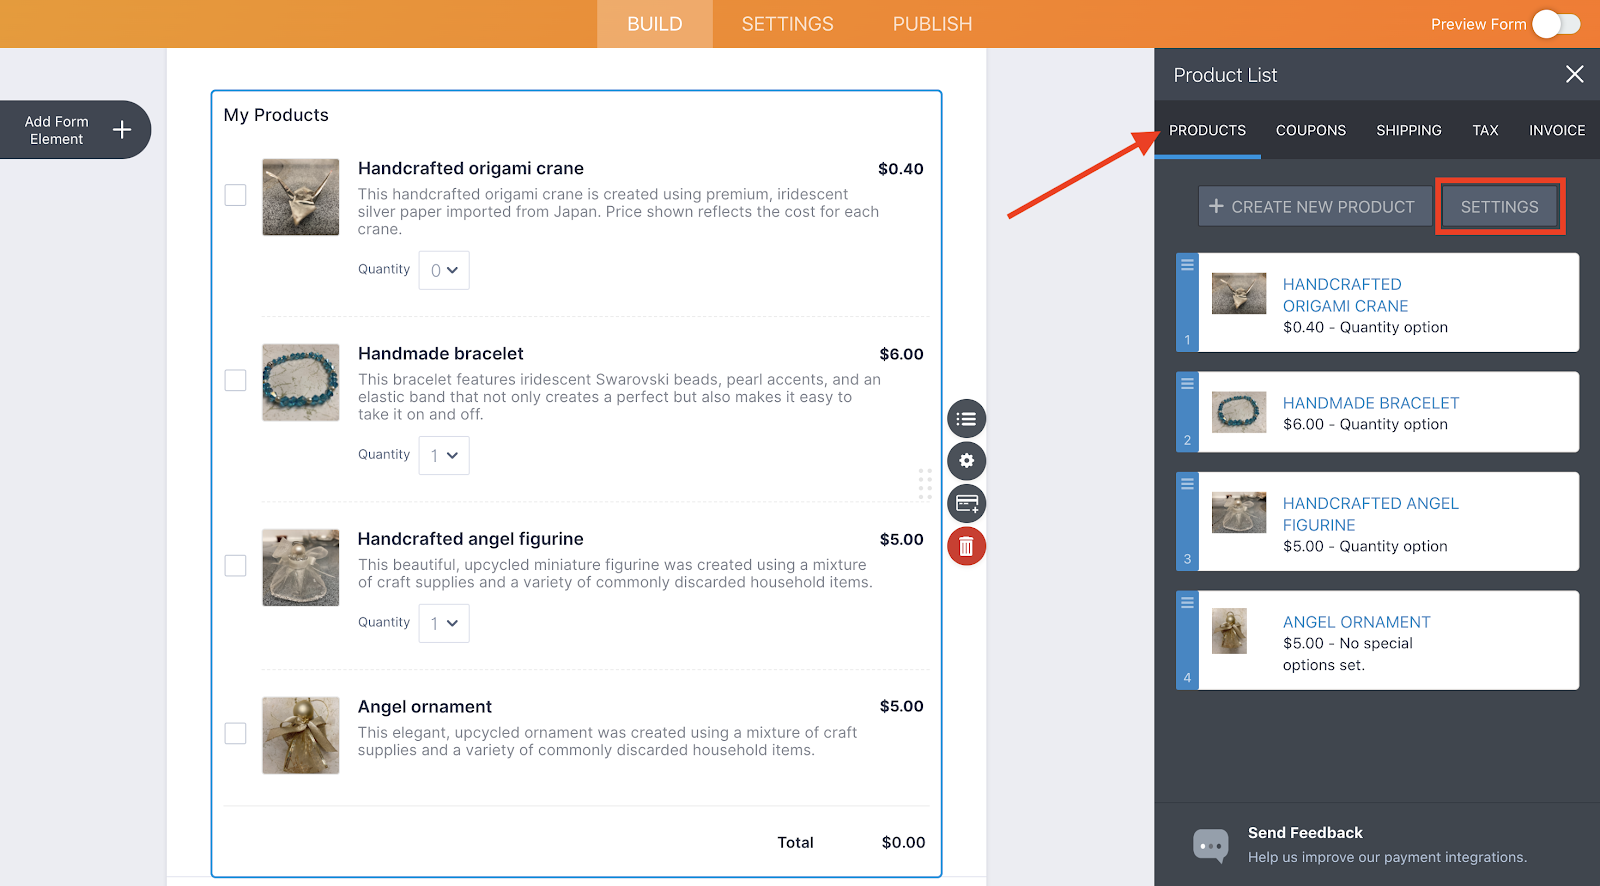
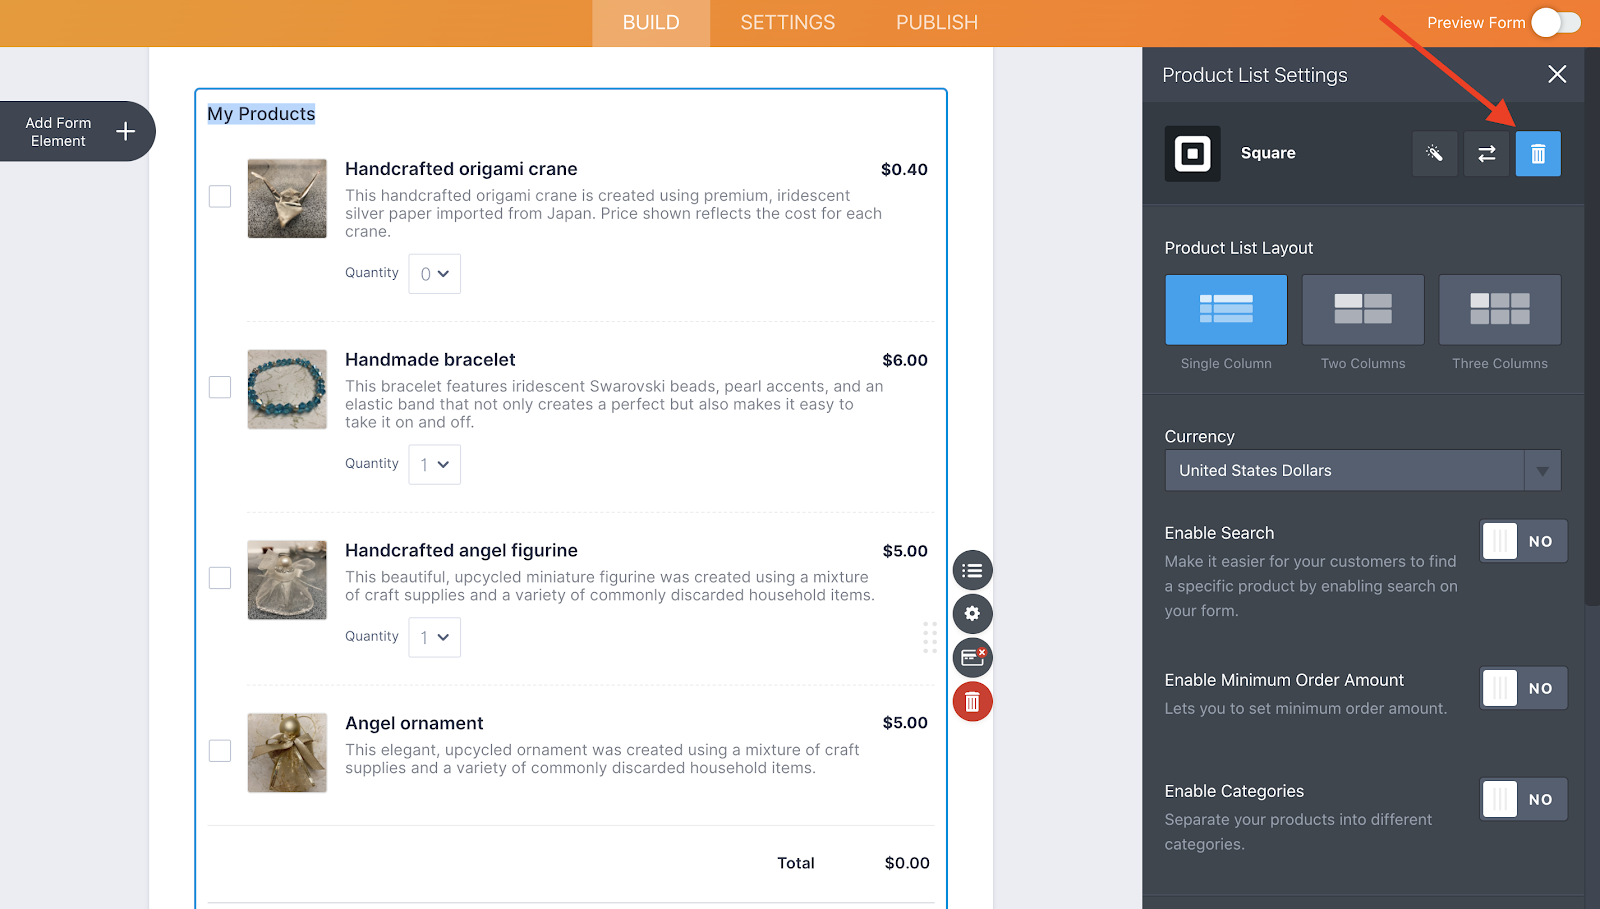
- You can also connect your form to a payment gateway by clicking on the Settings button under the Products tab in the Product List menu.
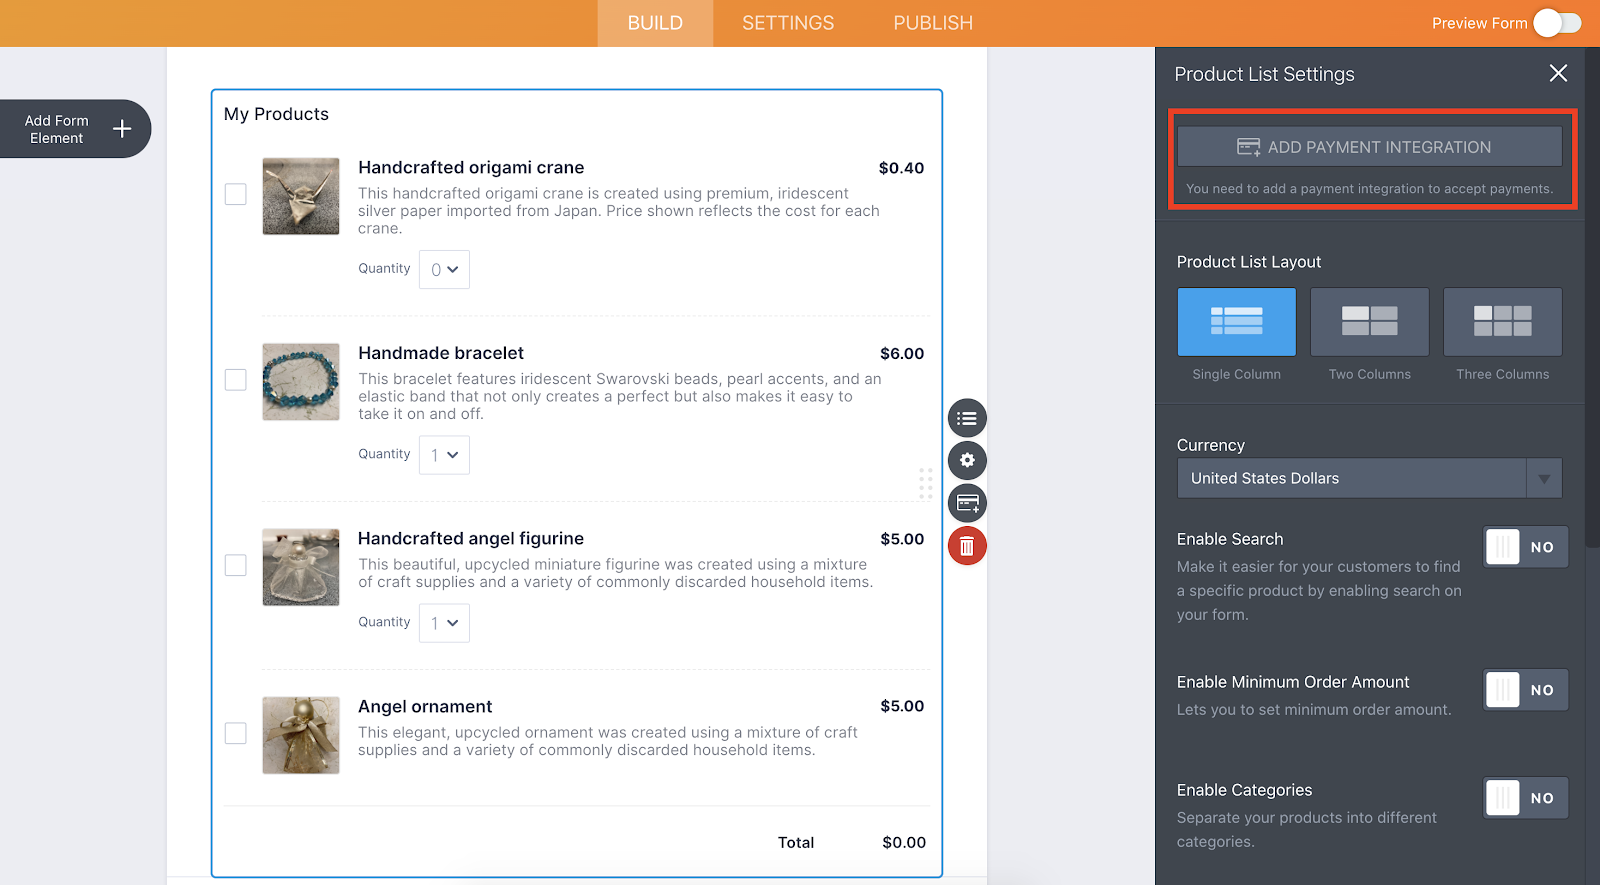
Start the integration process by clicking on the Add Payment Integration button toward the top of the Product List Settings menu.
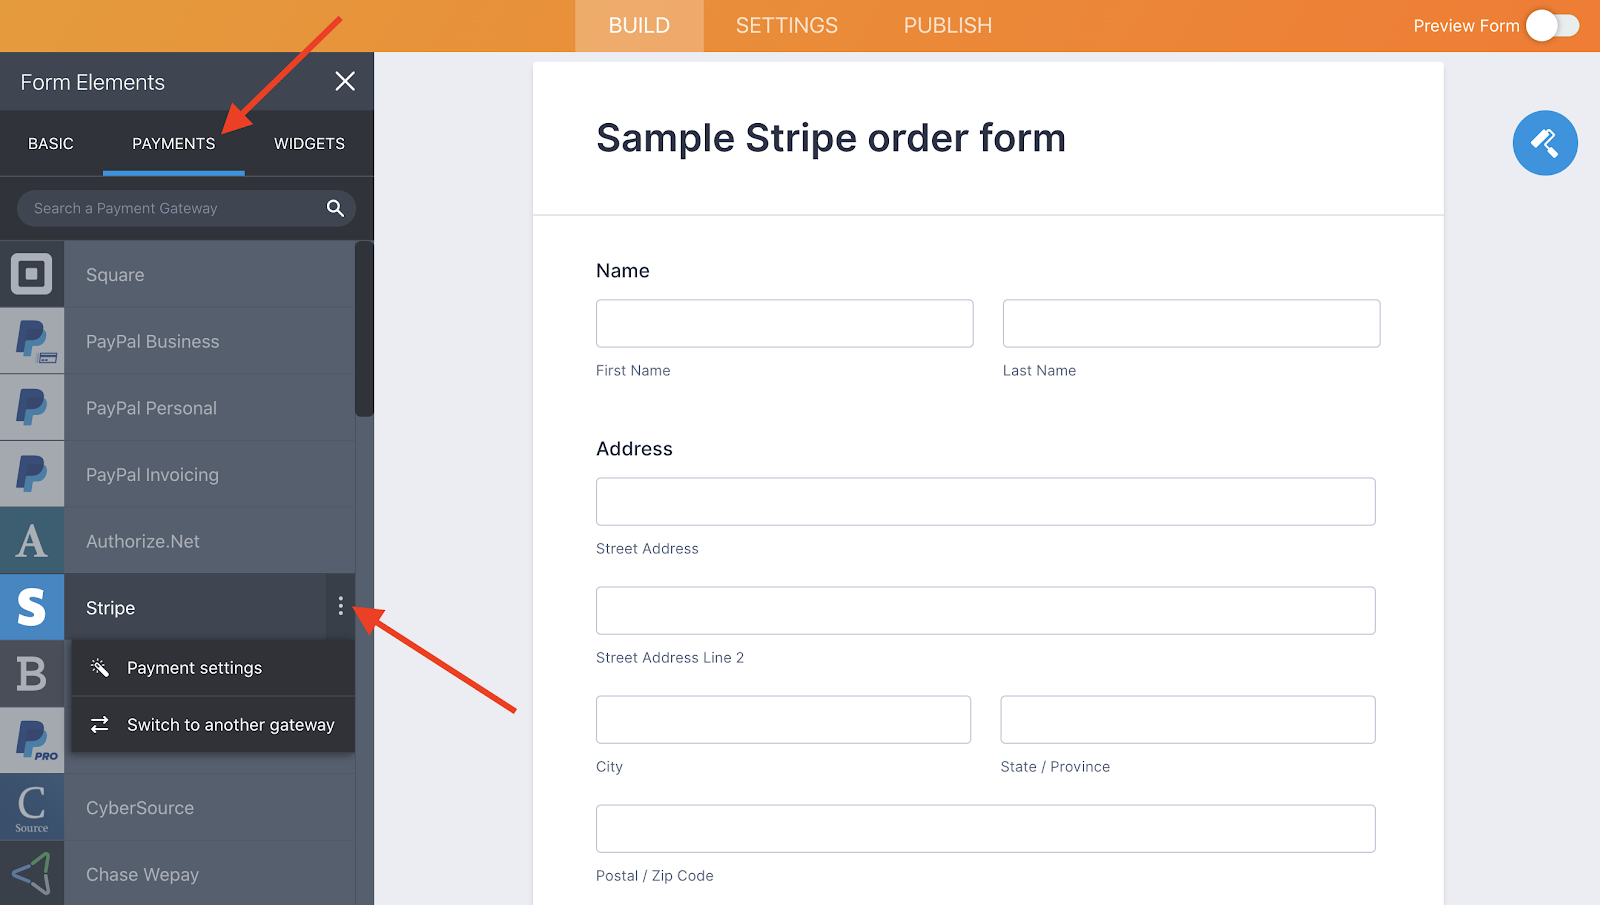
- You can still add a payment processor integration to your form by clicking on the Add Form Element icon and searching for the integration you want under the Payments tab in the Form Elements menu.
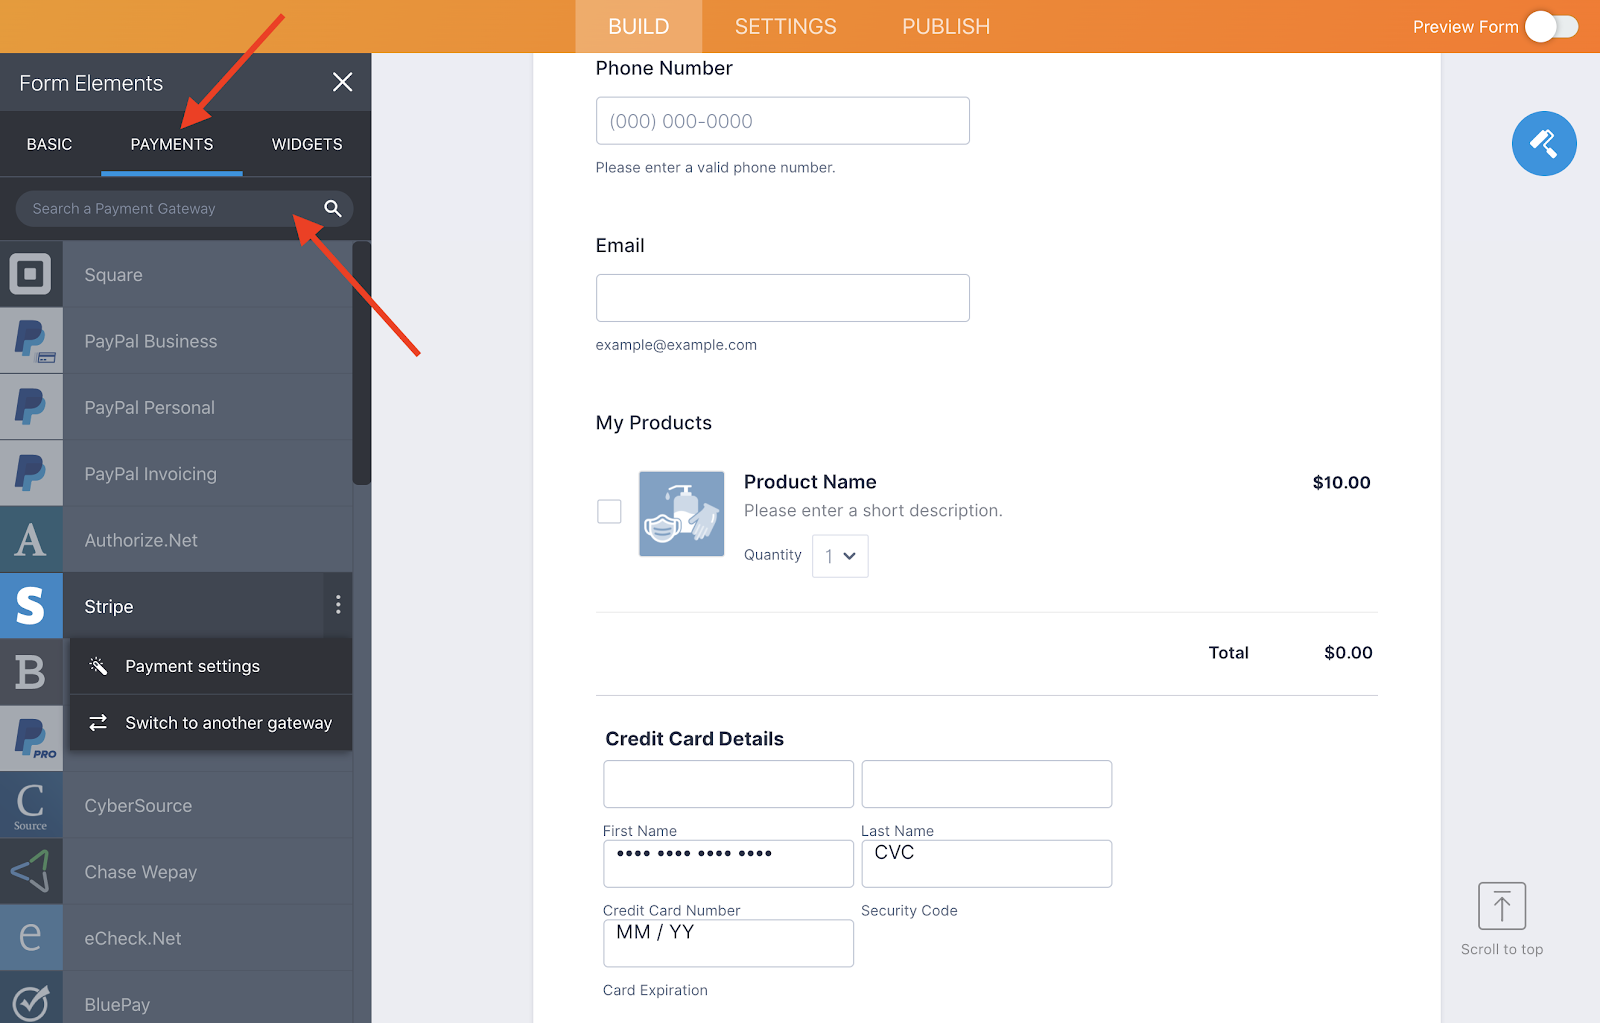
- If you want to try out a new payment processor, you can make the switch seamlessly by clicking on the Add Form Element icon and selecting the gateway you’re using under the Payments tab in the Form Elements menu.
Click on the icon with three vertical dots in the payment gateway box and select Switch to another gateway.
- If you’re using the Product List field on your form and want to remove a payment processor integration from your online store, simply click on the Remove Integration icon.

- You can also remove a payment processor integration from your online store by clicking on the Settings button under the Products tab in the Product List menu. Click on the trash can icon in the payment processor field toward the top of the Product List Settings menu, or select the arrows icon next to it to seamlessly switch to another payment gateway integration.
Conclusion
Our mission at Jotform is to continuously implement changes that will improve your data-collection experience and let you create almost any kind of form that comes to mind.
This new and improved workflow can be useful if you’re ready to build your online store but haven’t set your heart on a single payment processor just yet.
Give Jotform’s new product list form field a try today. See how we’re making it easier for businesses across the world to seamlessly find a solution that works well for them.


")


Send Comment:
10 Comments:
April 2, 2025
Is it possible to have a product list that shows prices but does not charge at all? I want people to see the prices, but not have to give any payment information.
October 20, 2021
Hi, why can't I access product list element in my starter plan? Thanks
March 11, 2021
How do I integrate payments with jotform
November 23, 2020
Is there a way to remove the price value? Or at least not say FREE if it's set to zero?
September 3, 2020
Is there any way to get the payment_total value onto the Thank You page? I can't figure out the form field syntax.
July 15, 2020
I would like to have more that one product list so that I can have subsequent options with photos. Is this possible?
July 15, 2020
My product list form is greyed out. We have a paid account, why is this?
July 7, 2020
I love the update, but i would like the use the product listing but have the payments indicated for bank transfer, not any of the payment gateways integrated in the system,such as paypal etc. When my order form gets filled out it is not successful as my customer is forced to do payment though one of this gateways. May I receive assistance for such
June 25, 2020
I love the new update but unable to have more that one product list. It will be great to have different list on different pages.
June 20, 2020
Great start but only becomes useful when products can be imported from a CSV file.
Need an indication of the max number of products it can handle
Would be nice to have product options with different prices eg door knobs could be in steel, chrome or brass all at different prices