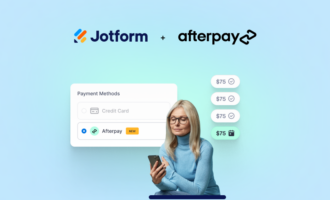
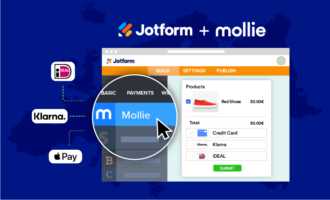
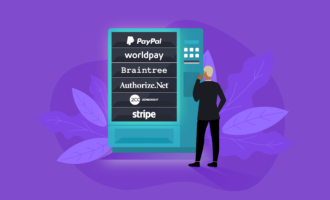
Jotform has introduced its new SensePass payment integration. This tool can increase checkout conversion rates by offering shoppers their preferred way to pay, with 100-plus payment options including mobile wallets like Apple Pay, Google Pay, PayPal, and Venmo; cryptocurrency; and stored credit cards.
According to Shopify, average e-commerce conversion rates are 2.5 to 3.5 percent. That means roughly 35 of every 1,000 visitors to an e-commerce site actually purchase an item. Clearly, that leaves a lot of room for improvement — and an opportunity for Jotform’s SensePass integration to make an impact.
According to ACI Worldwide, including the top three payment options in a market can improve your conversion rate by as much as 30 percent. On the other hand, 59 percent of shoppers will abandon their cart if their preferred payment method isn’t available.
With SensePass on your payment form, every shopper’s favorite payment method is available via a single omnichannel integration. Shoppers can complete their payments through an easy-to-use SensePass URL or directly on your payment form, eliminating a key friction point in the purchasing process.


Looking to match your Jotform checkout experience with your in-store checkout? SensePass offers a contactless point of sale for modern brick-and-mortar shops. With SensePass and Jotform, shoppers will enjoy multiple ways to pay, whether on desktop, mobile, or in-store.
Adding SensePass to your payment form
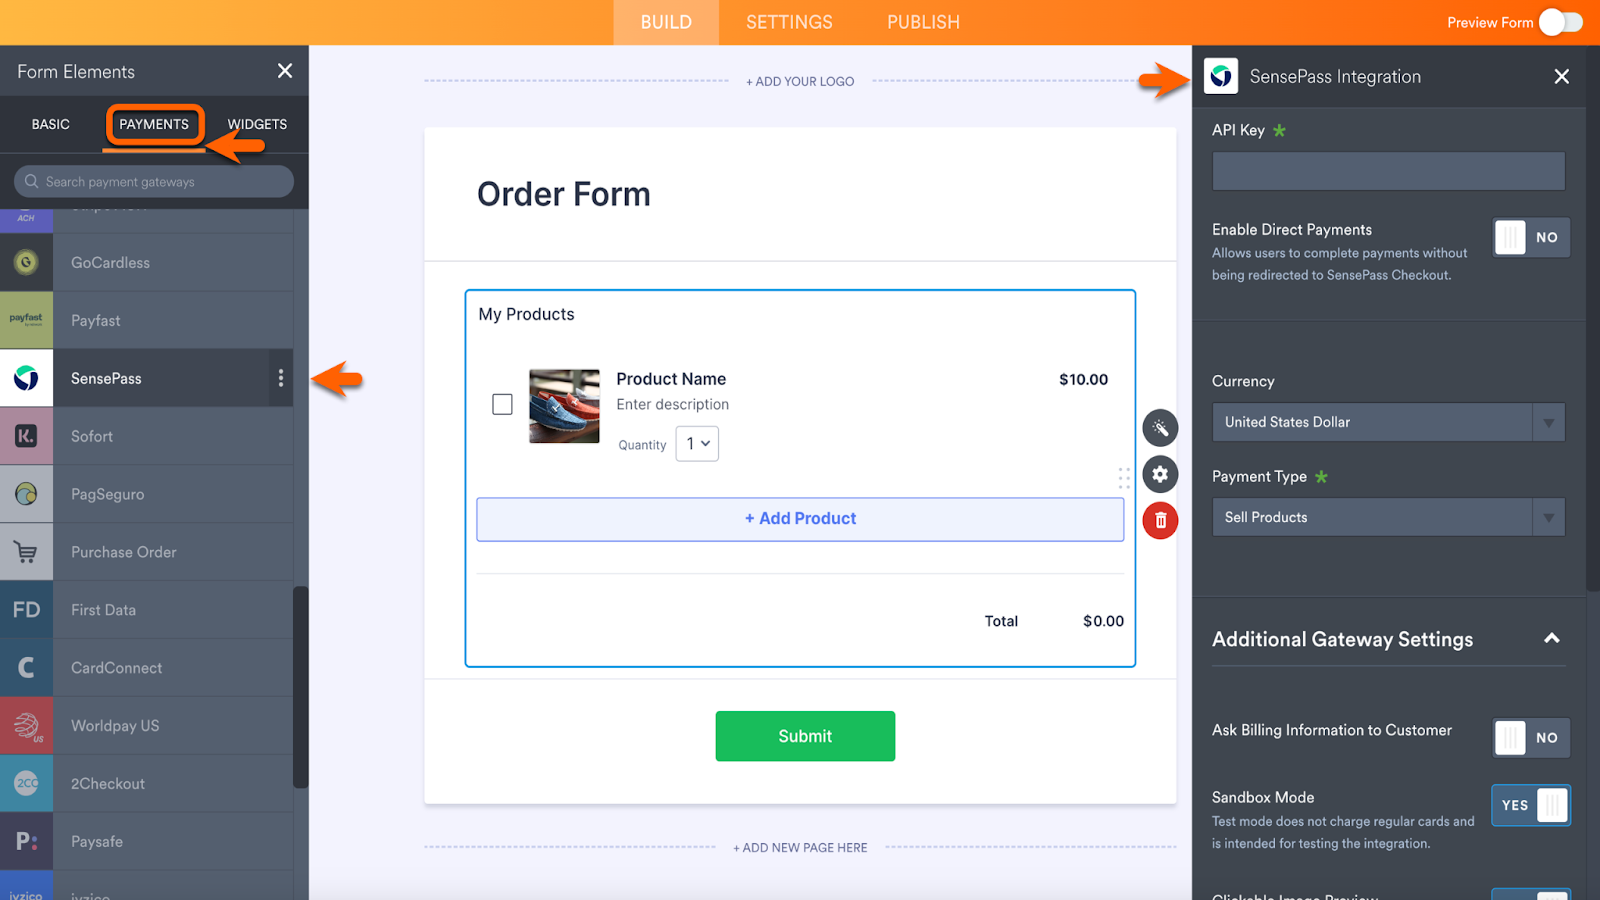
Like all of Jotorm’s payment integrations, it’s easy to add SensePass to your form. Begin by selecting Create Form on the My Forms page. Choose a form template, import a form, or start from scratch. Next, open the Form Elements menu within the Form Builder. Go to the Payments section to access Jotform’s payment integrations. This is where you’ll find SensePass.
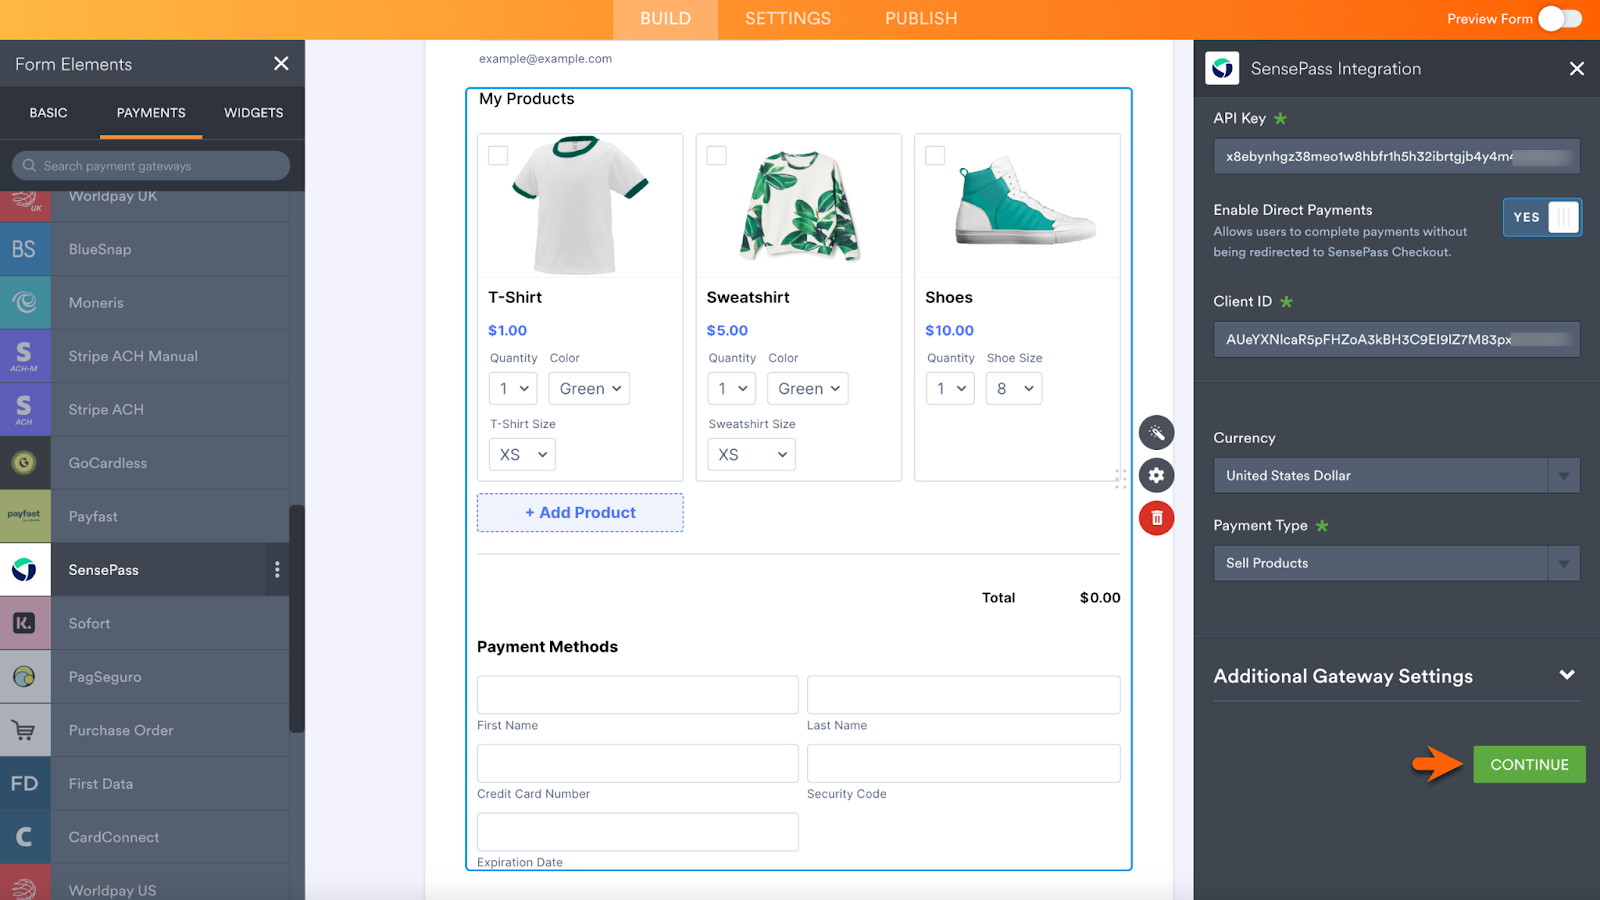
If you’ve created a form from scratch, click the SensePass integration to add it to your form. The SensePass integration settings will open on the right side of the screen.
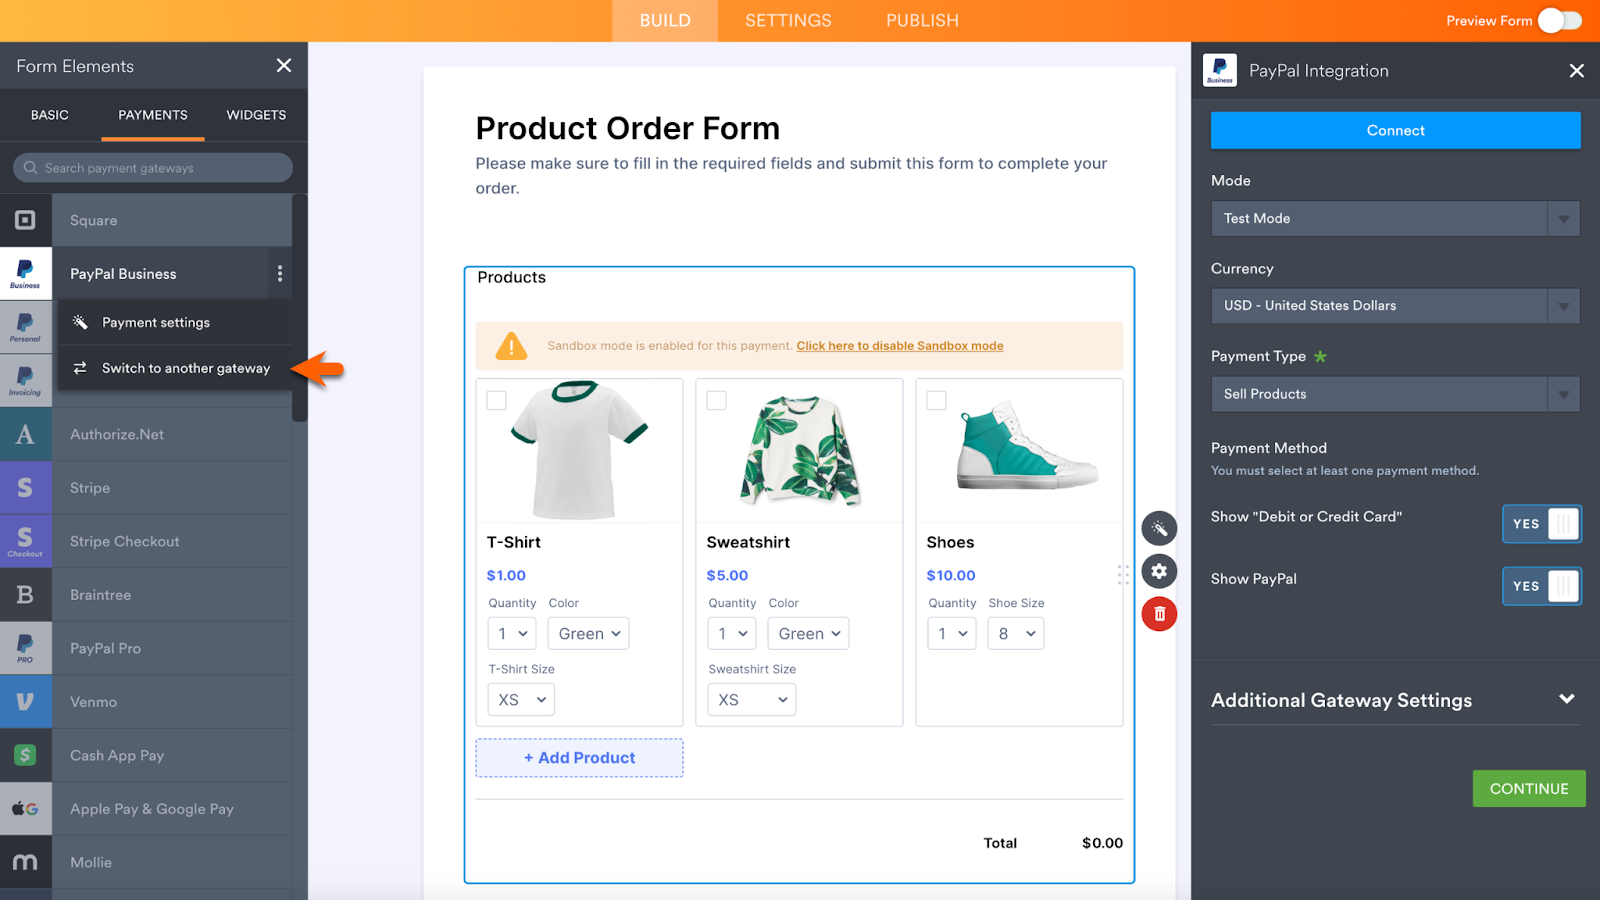
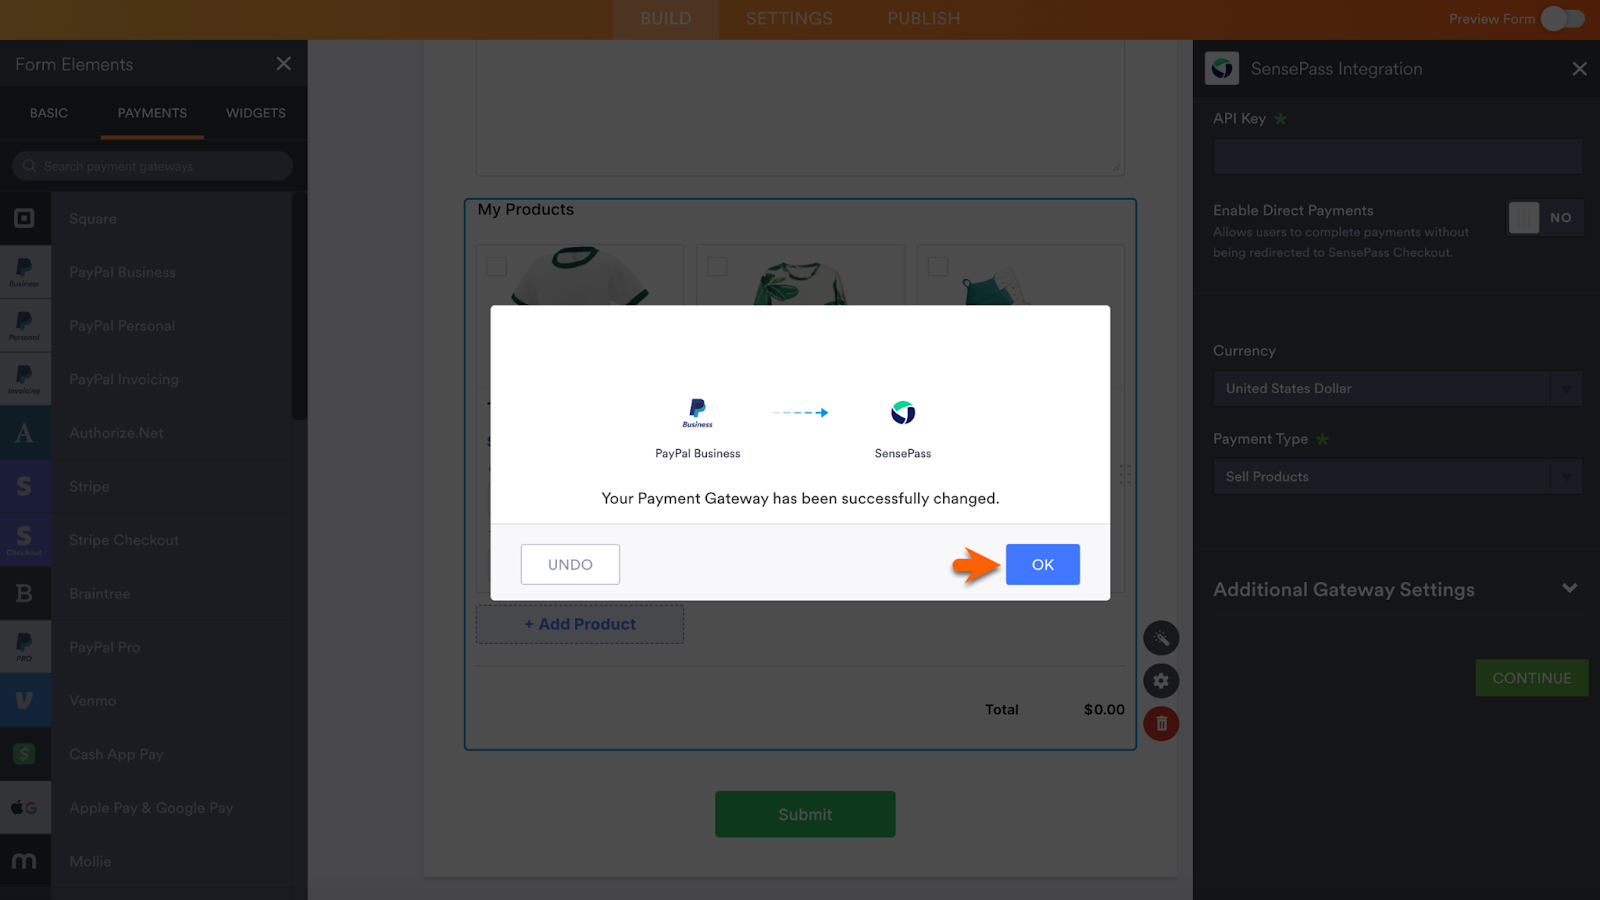
If you’ve chosen a template that comes with a payment integration other than SensePass, locate the preinstalled integration in the Payments section. Click on the integration and then choose Switch to another gateway.
Select SensePass from the popup menu and click Use Selection.
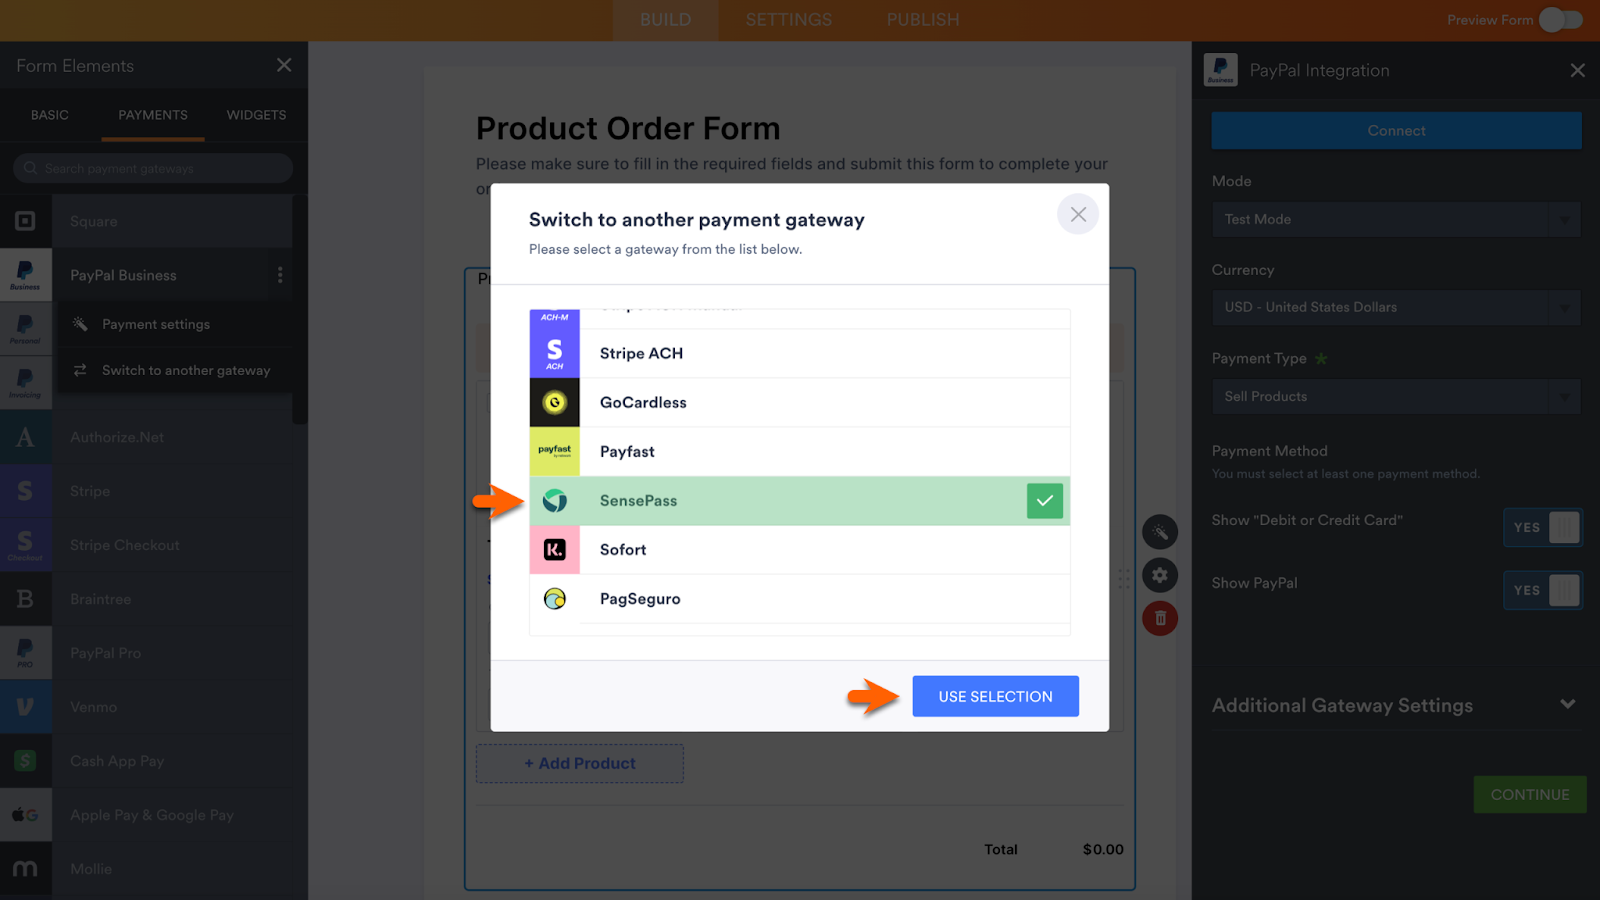
Confirm the new payment gateway on the next screen before continuing to the SensePass integration settings.
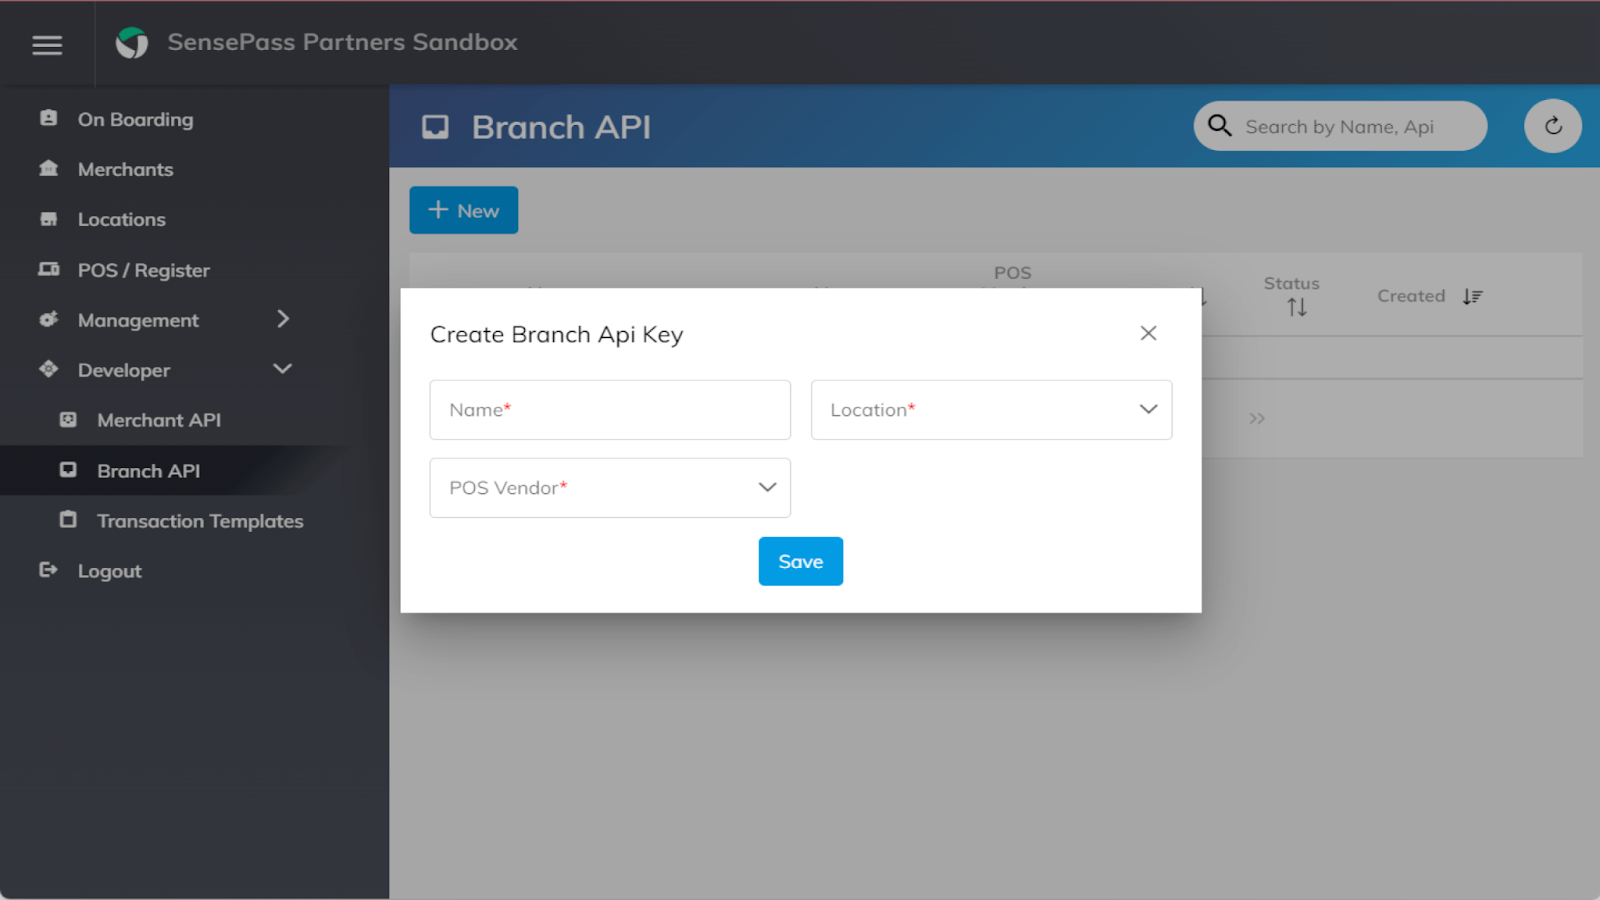
Next up, get your API key from SensePass. You can access it in the SensePass Partners dashboard. Follow these steps:
- Open the Developer dropdown menu.
- Click on the Branch API option.
- Select Merchant and Location from the popup prompt.
- Copy the API key if you’ve created a Branch API before. It will be the API login ID for the integration.
If you don’t have a Branch API yet, click the +New button. Enter the Name, and select both the Location and POS Vendor.
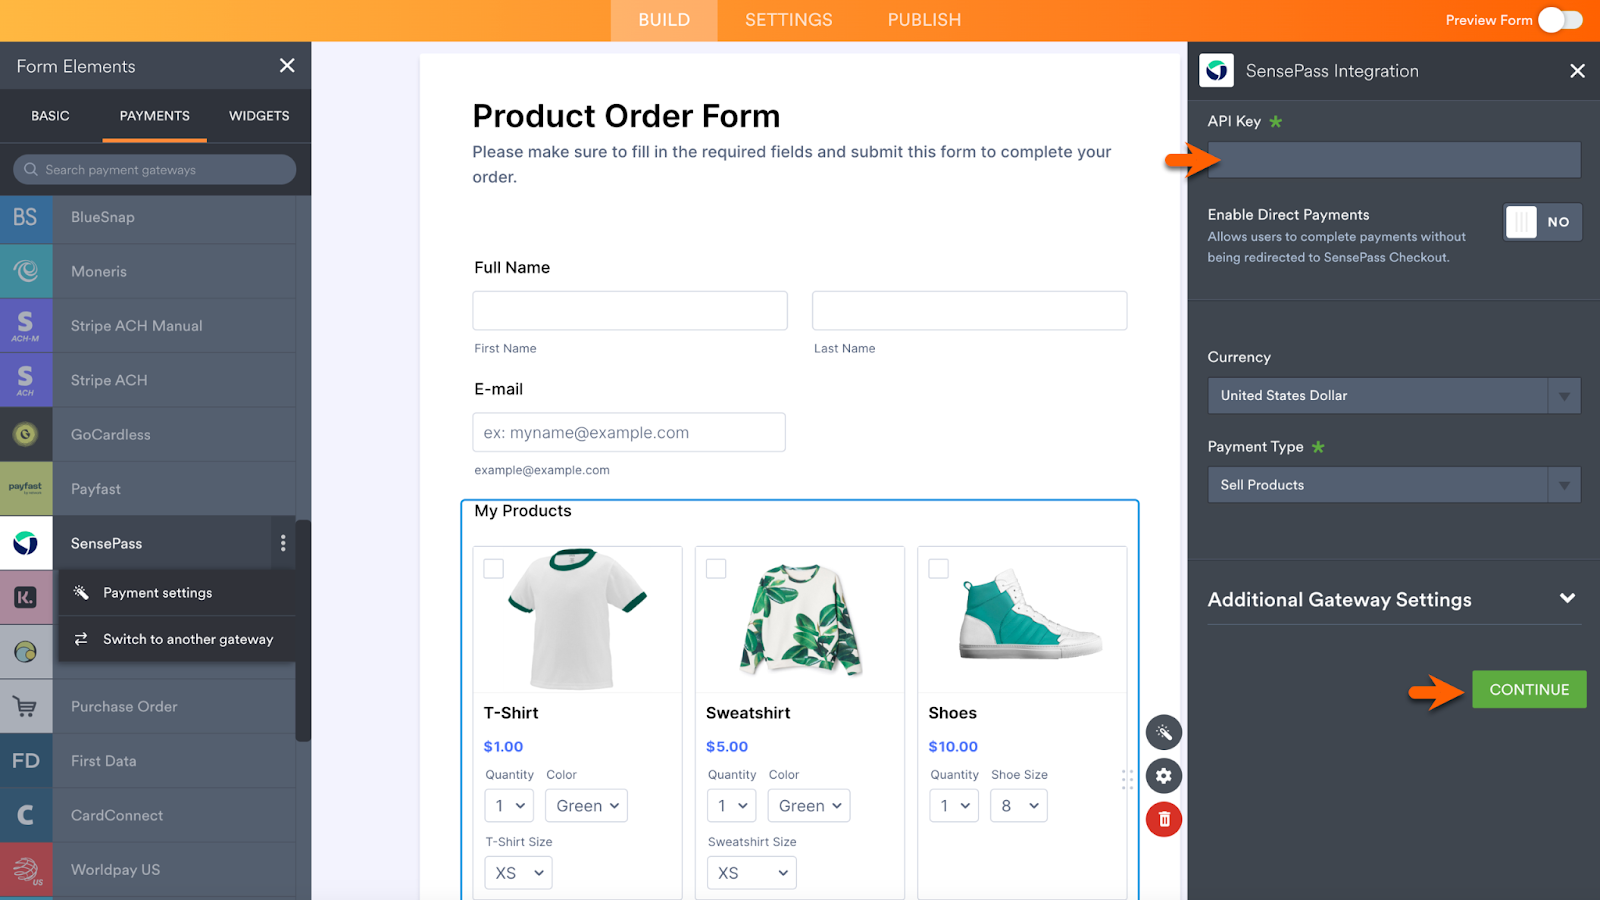
Once you’ve acquired the API key, plug it into Jotform’s SensePass Integration Payment Settings and click the Continue button.
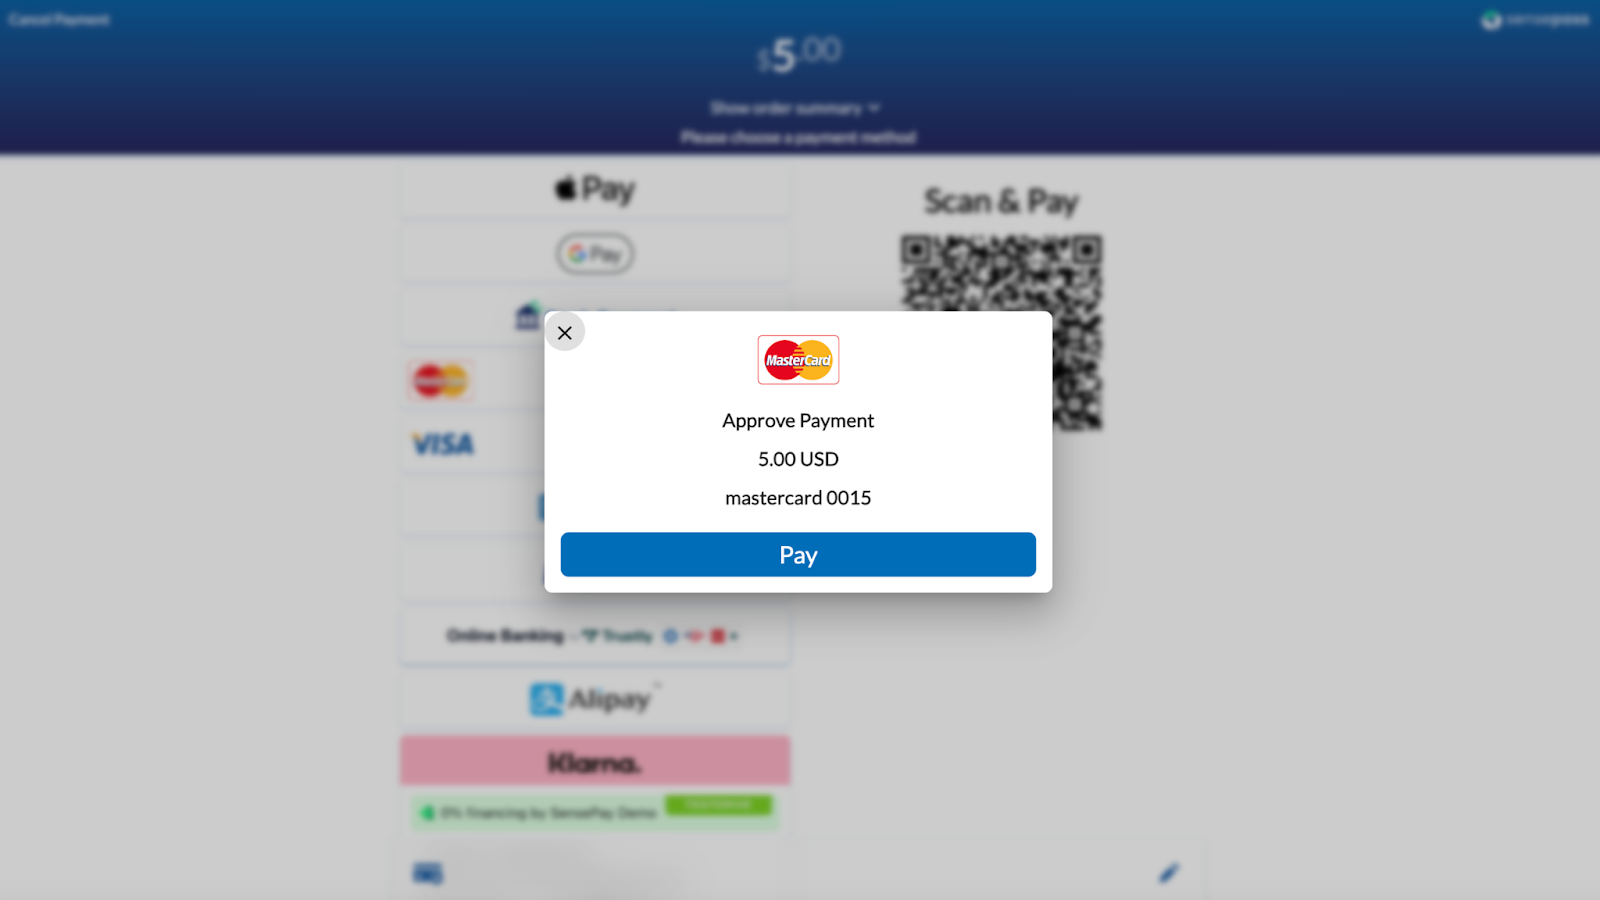
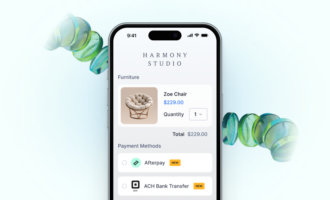
Just like that, your SensePass integration is ready to go. When customers check out, they’ll automatically go to a SensePass page with a robust list of payment options, including Buy Now Pay Later options (BNPL) like Klarna.
Did you know?
BNPL options are increasing in popularity. A study from PYMNTS and Sezzle found that 43 percent of consumers would delay a purchase or look for a less-expensive product if BNPL were unavailable. This payment method allows shoppers to preserve their lines of credit and available cash.
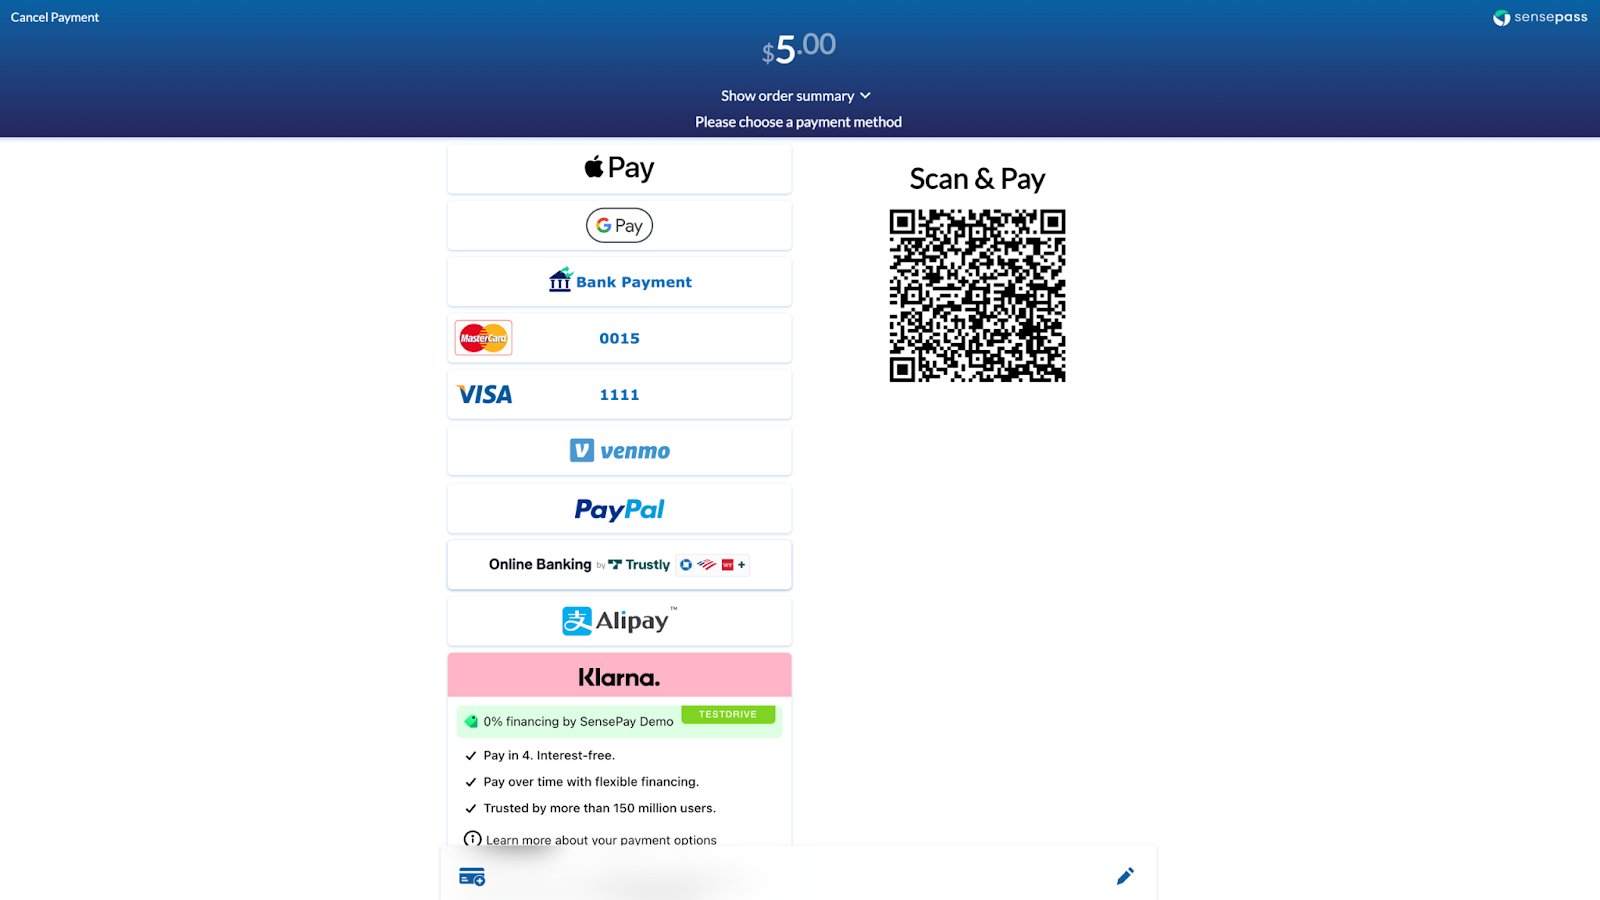
After selecting the preferred payment option, the customer will confirm their choice by clicking the Pay button. Once payment is confirmed, SensePass automatically redirects the customer to the Jotform Thank You page.
Did you know?
SensePass offers multiple cryptocurrency payment options, including Coinbase.
Direct payment on your form with SensePass
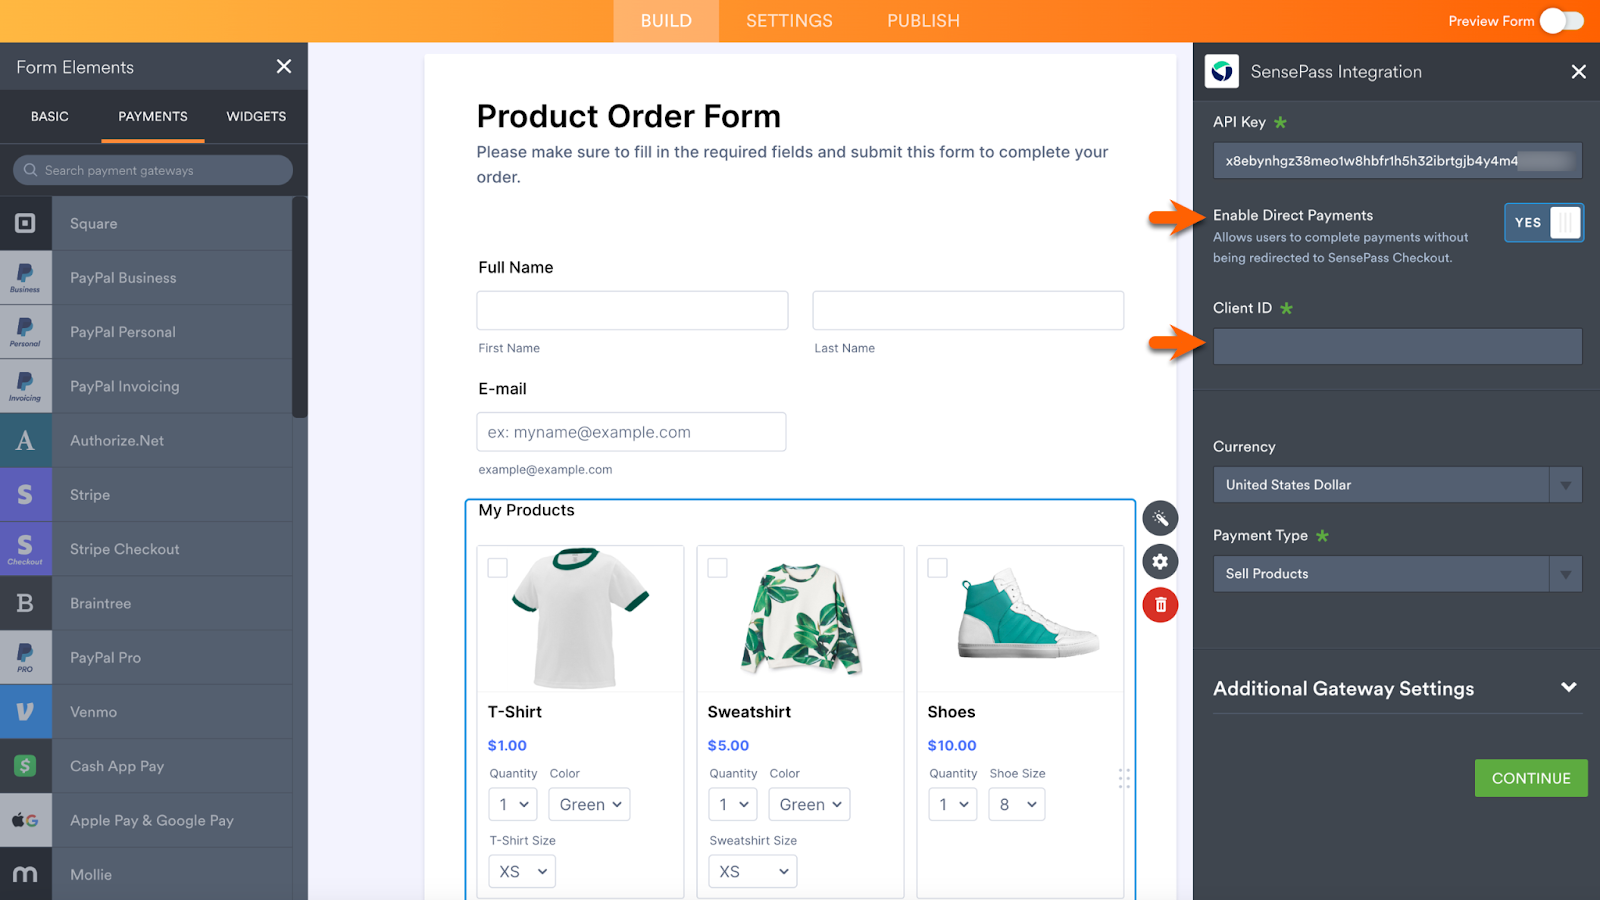
If you’d rather accept payment directly on your form via Jotform’s SensePass integration, making the change is as easy as flipping a switch.
Within the SensePass Integration Payment Settings, toggle on Enable Direct Payments to activate the direct payment feature. A field for the SensePass Client ID will appear.
To integrate with SensePass, access your SensePass Client ID using the following steps:
- Log into the SensePass Partners dashboard.
- Open the Developer dropdown menu and select Client ID.
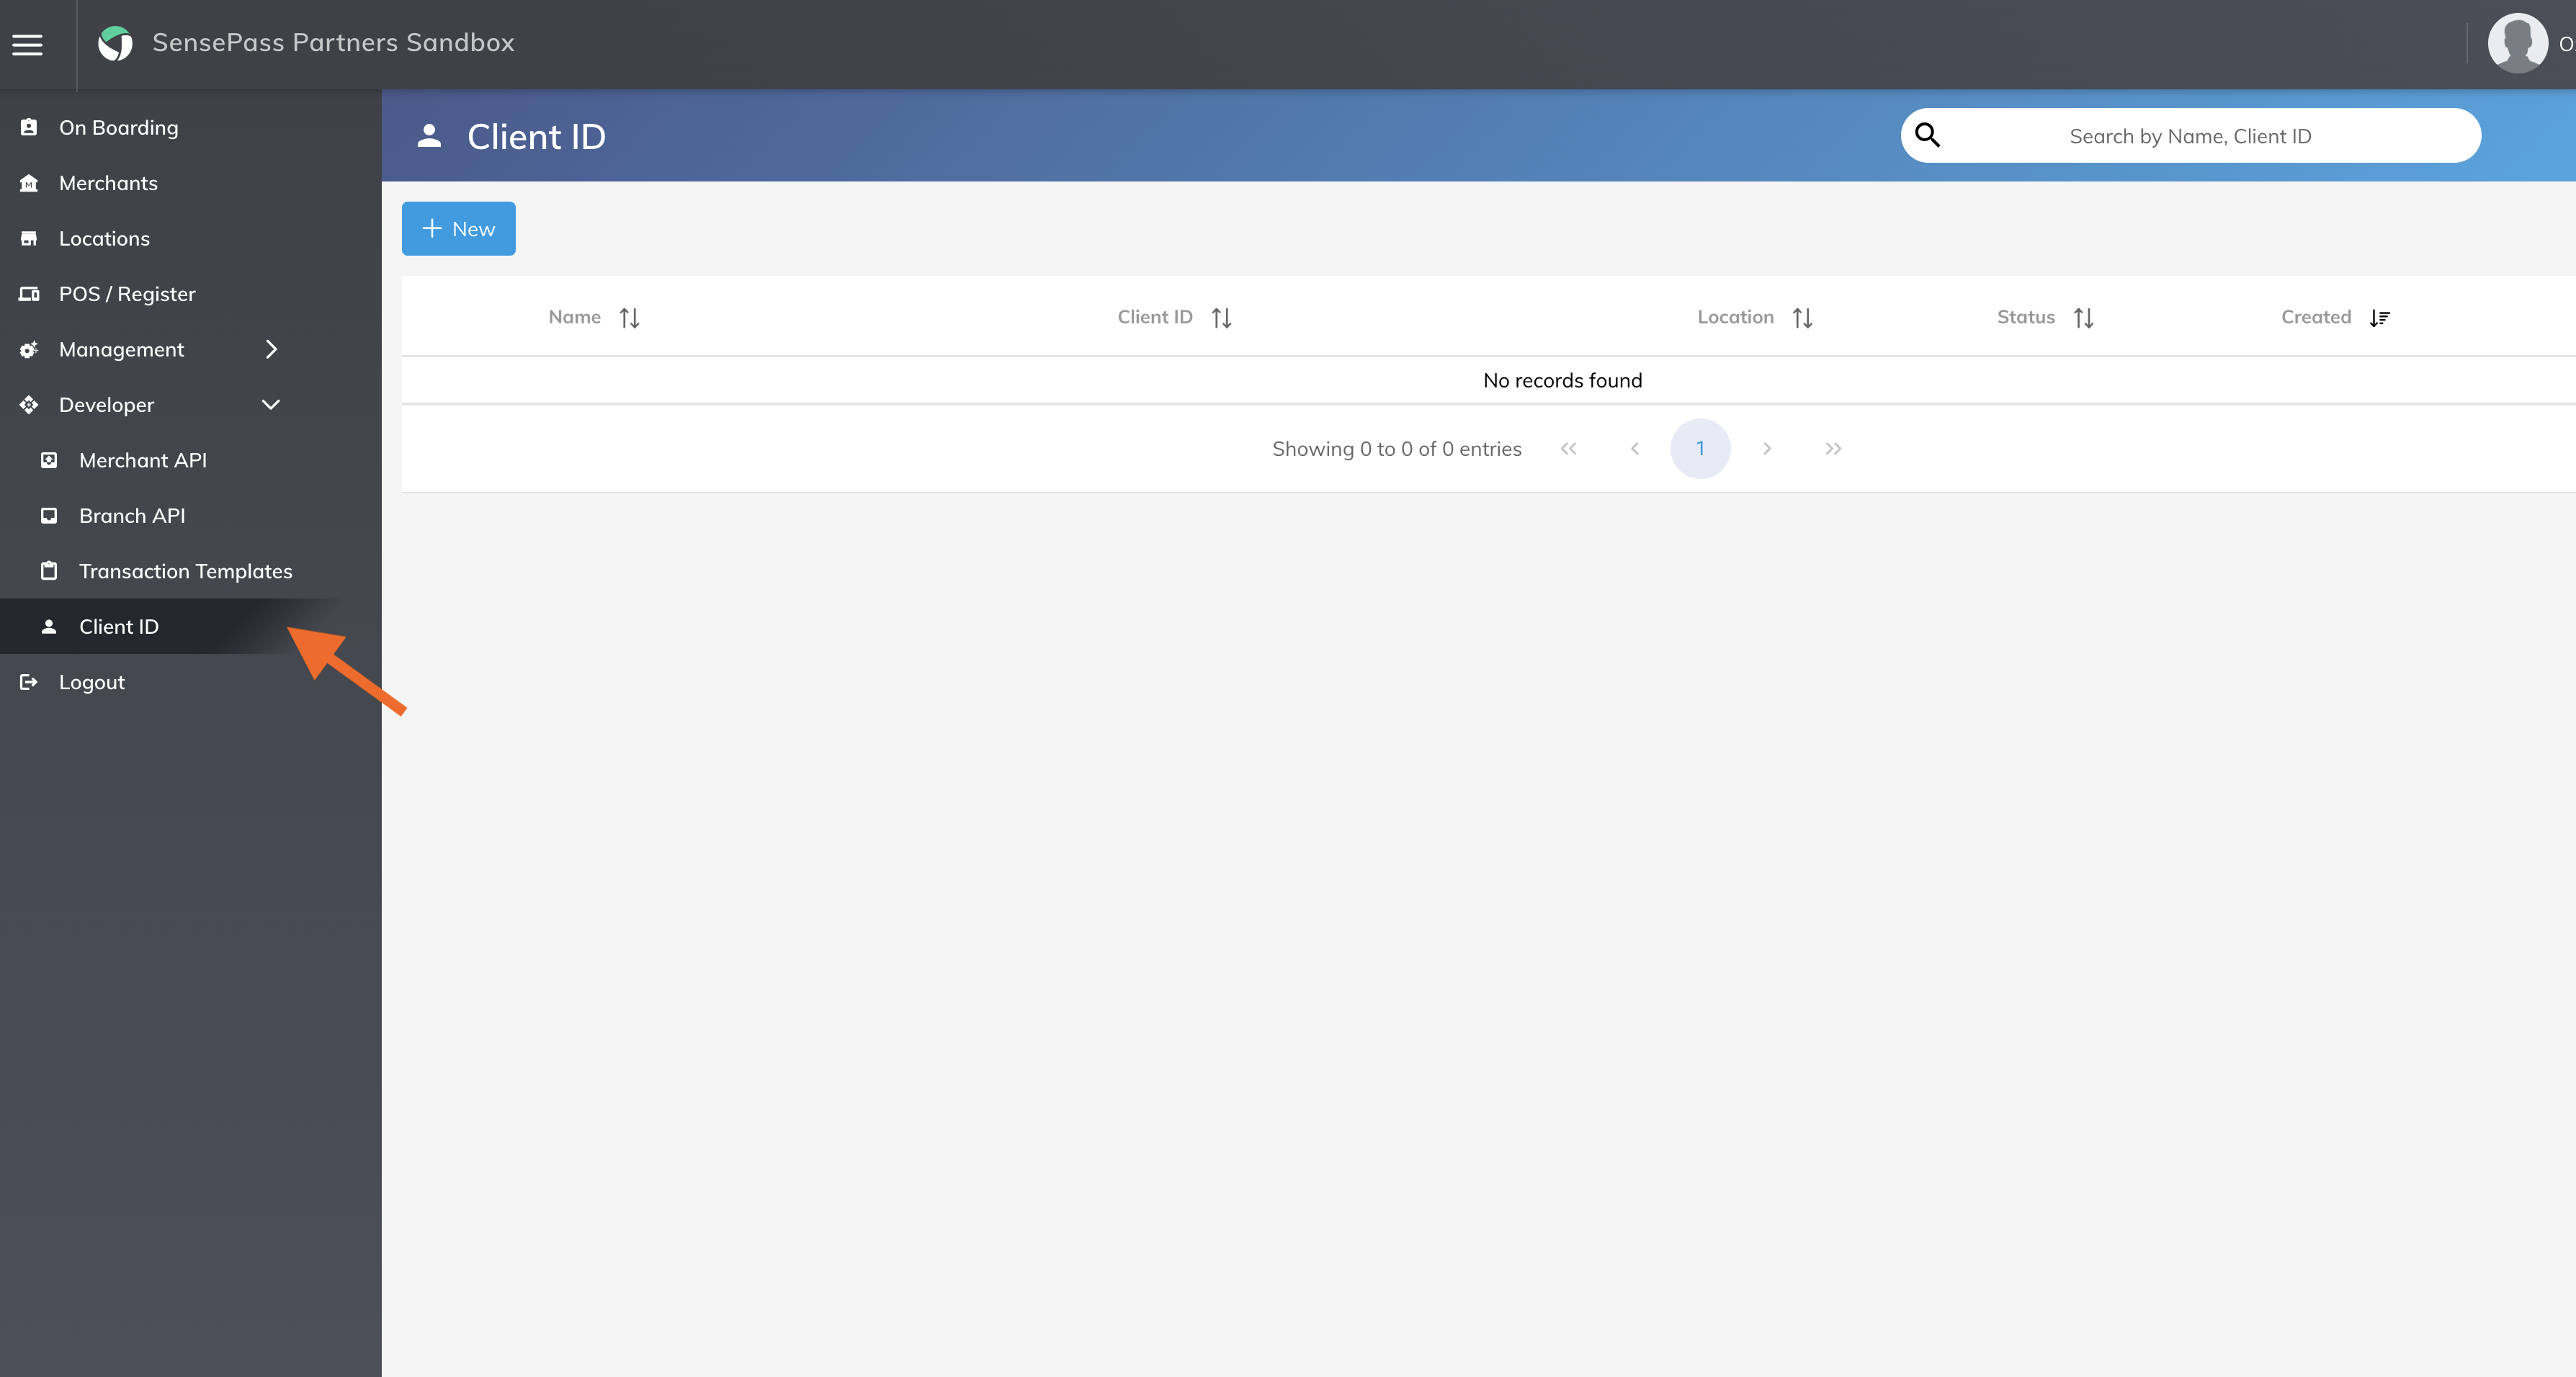
- Click the New button to create a new Client ID.
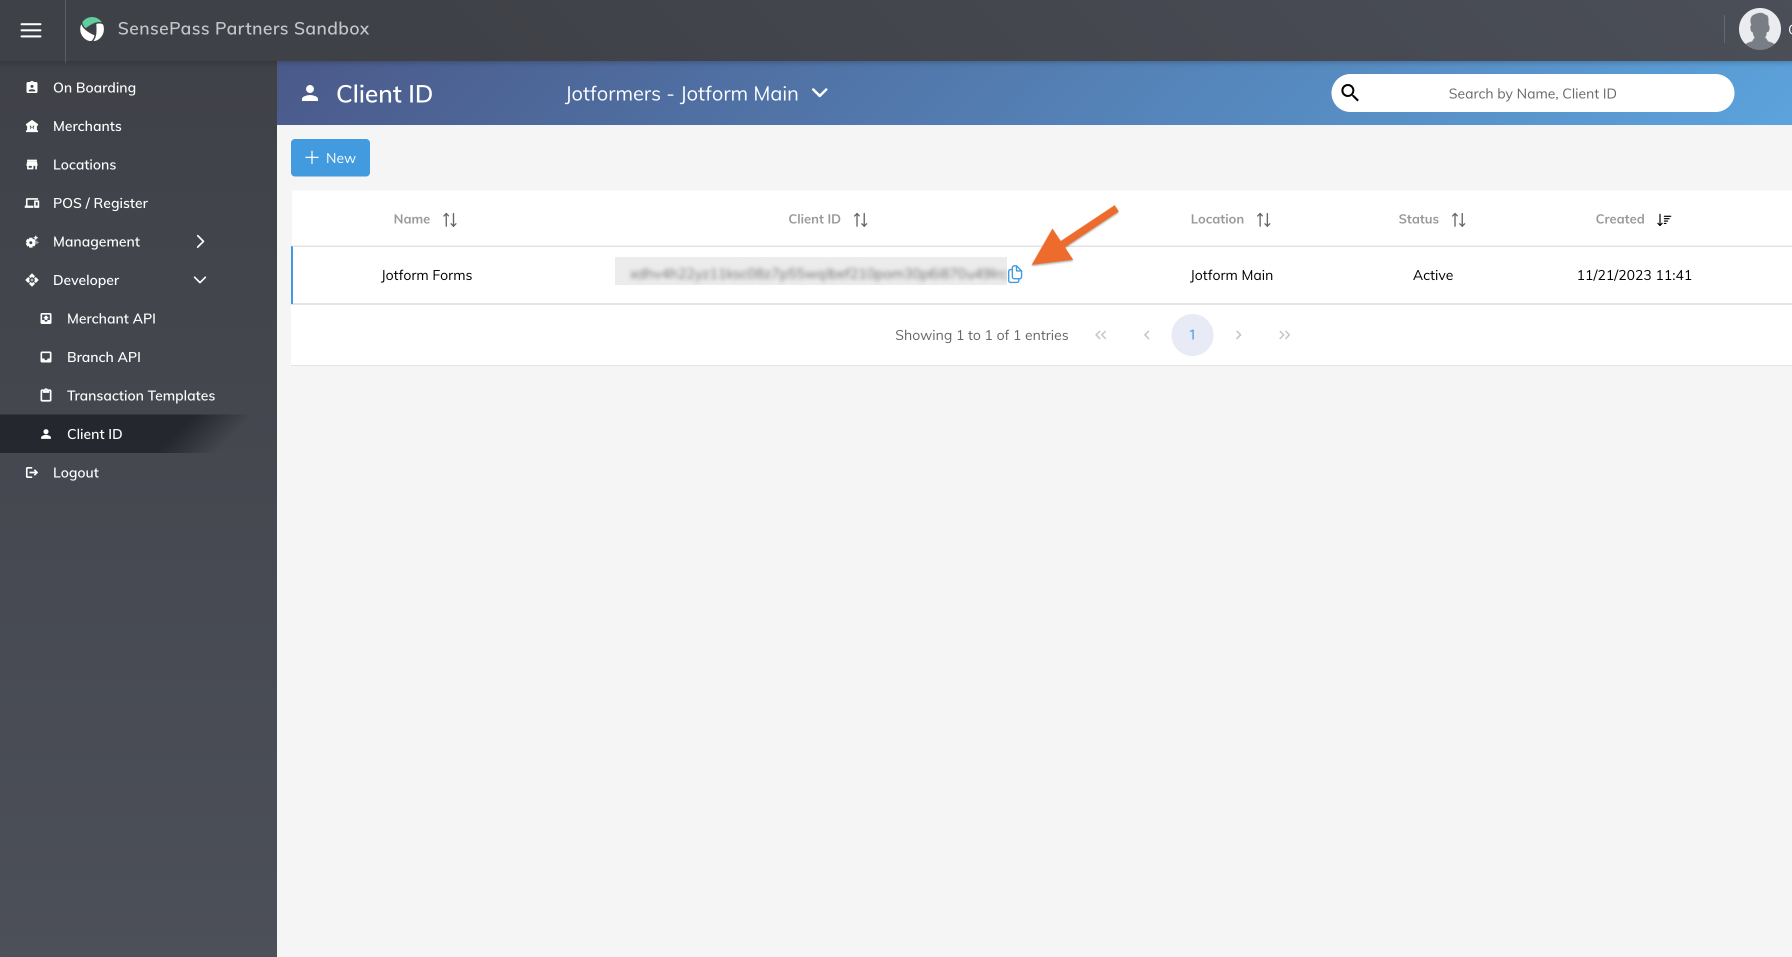
- Choose the merchant and location for which you would like to create the client ID.
- Give your Client ID a name and click Save.

- Copy your Client ID and paste it into the space provided in Jotform’s SensePass integration.
Be sure to click the Continue button to complete the installation.
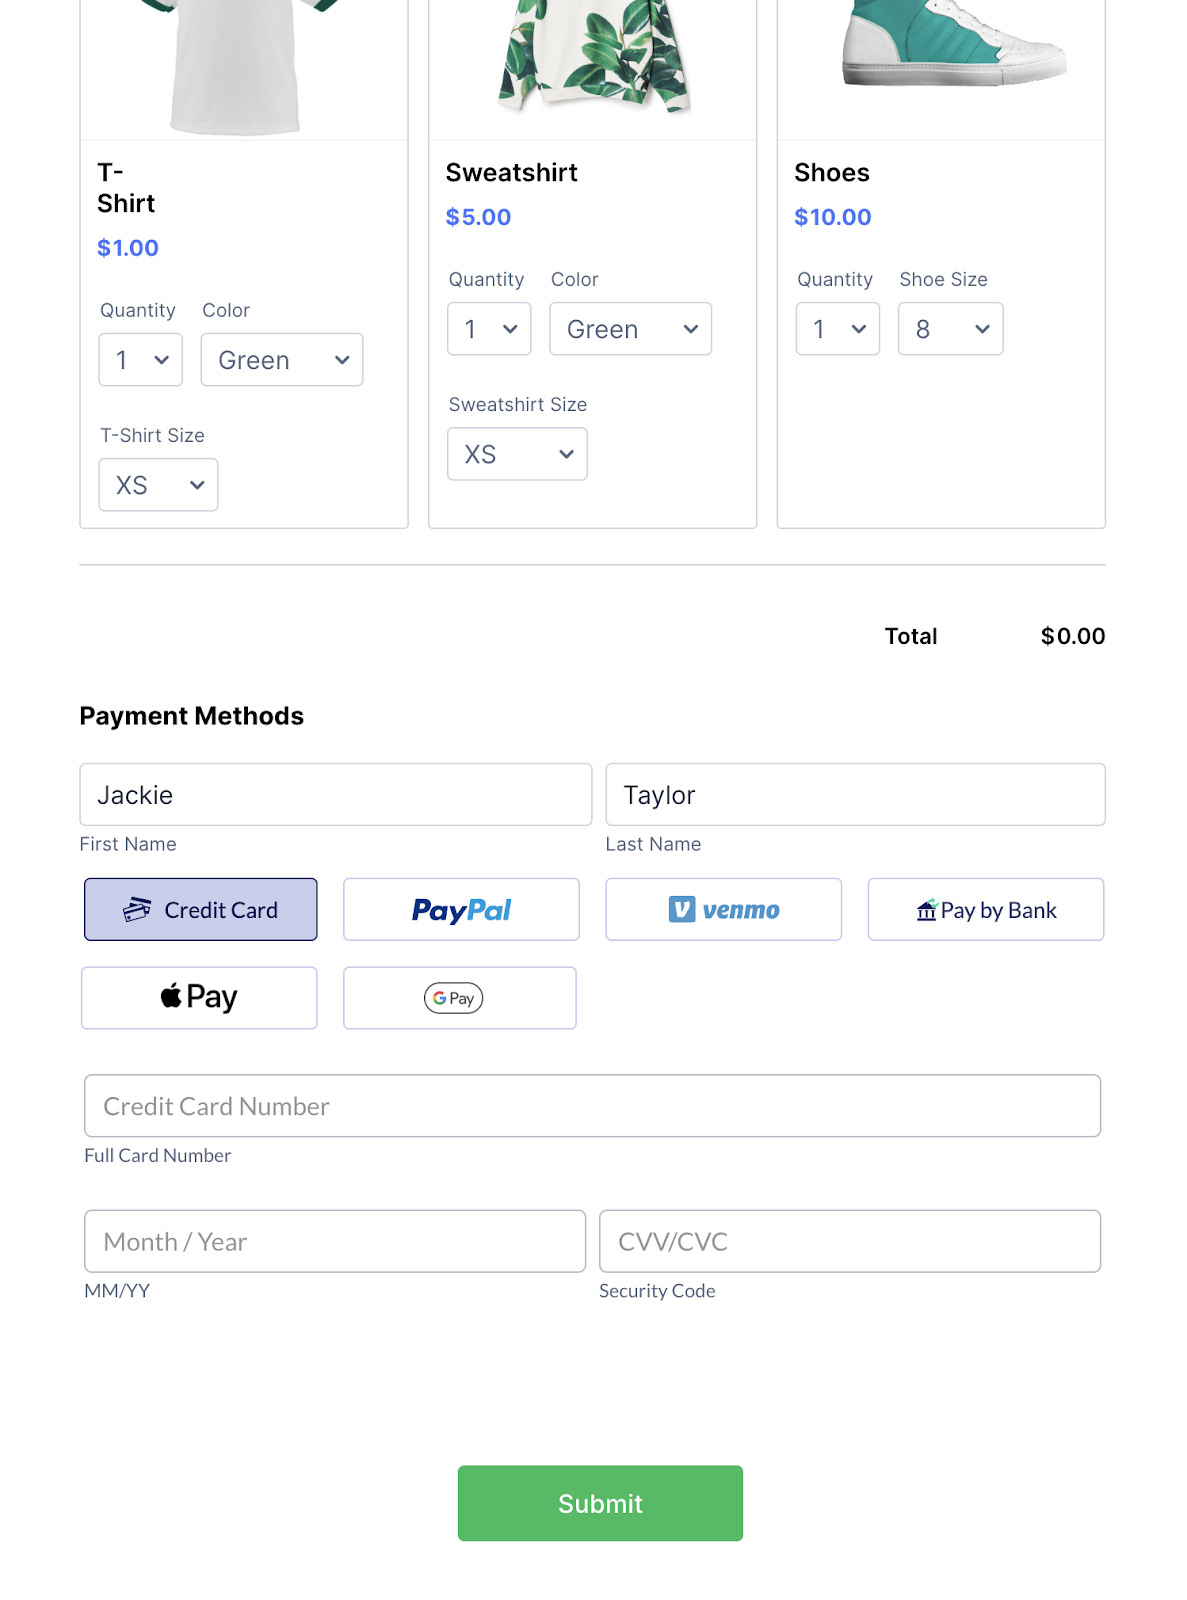
Now shoppers will see multiple payment options on your form. Once they choose a payment method and submit the form, a popup window from the preferred payment method will appear where they can finalize the transaction.
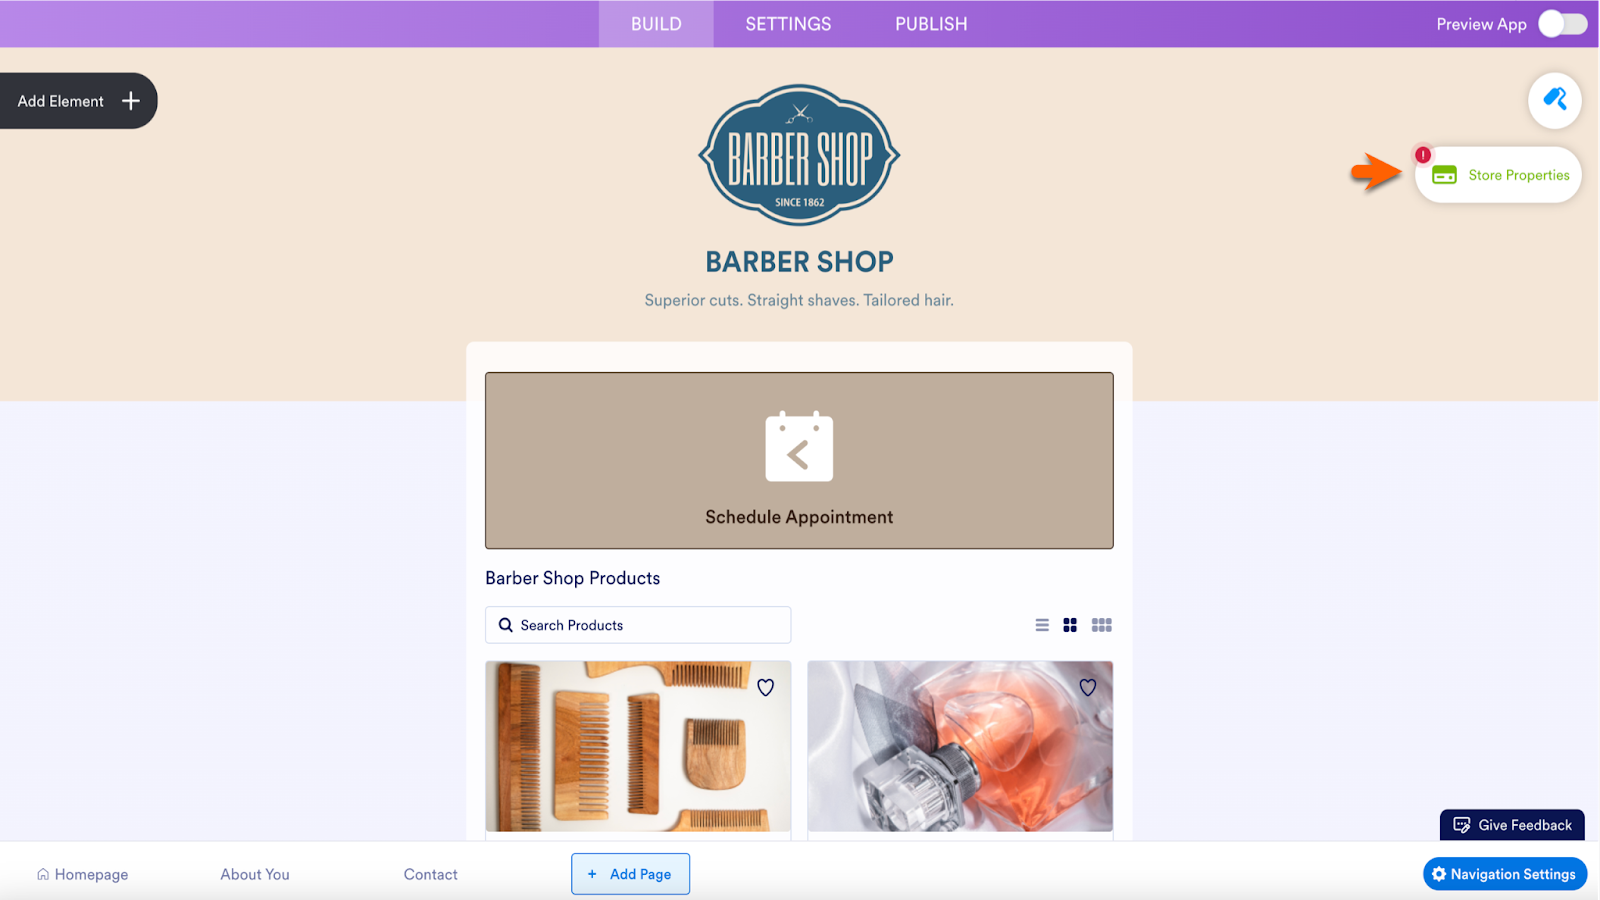
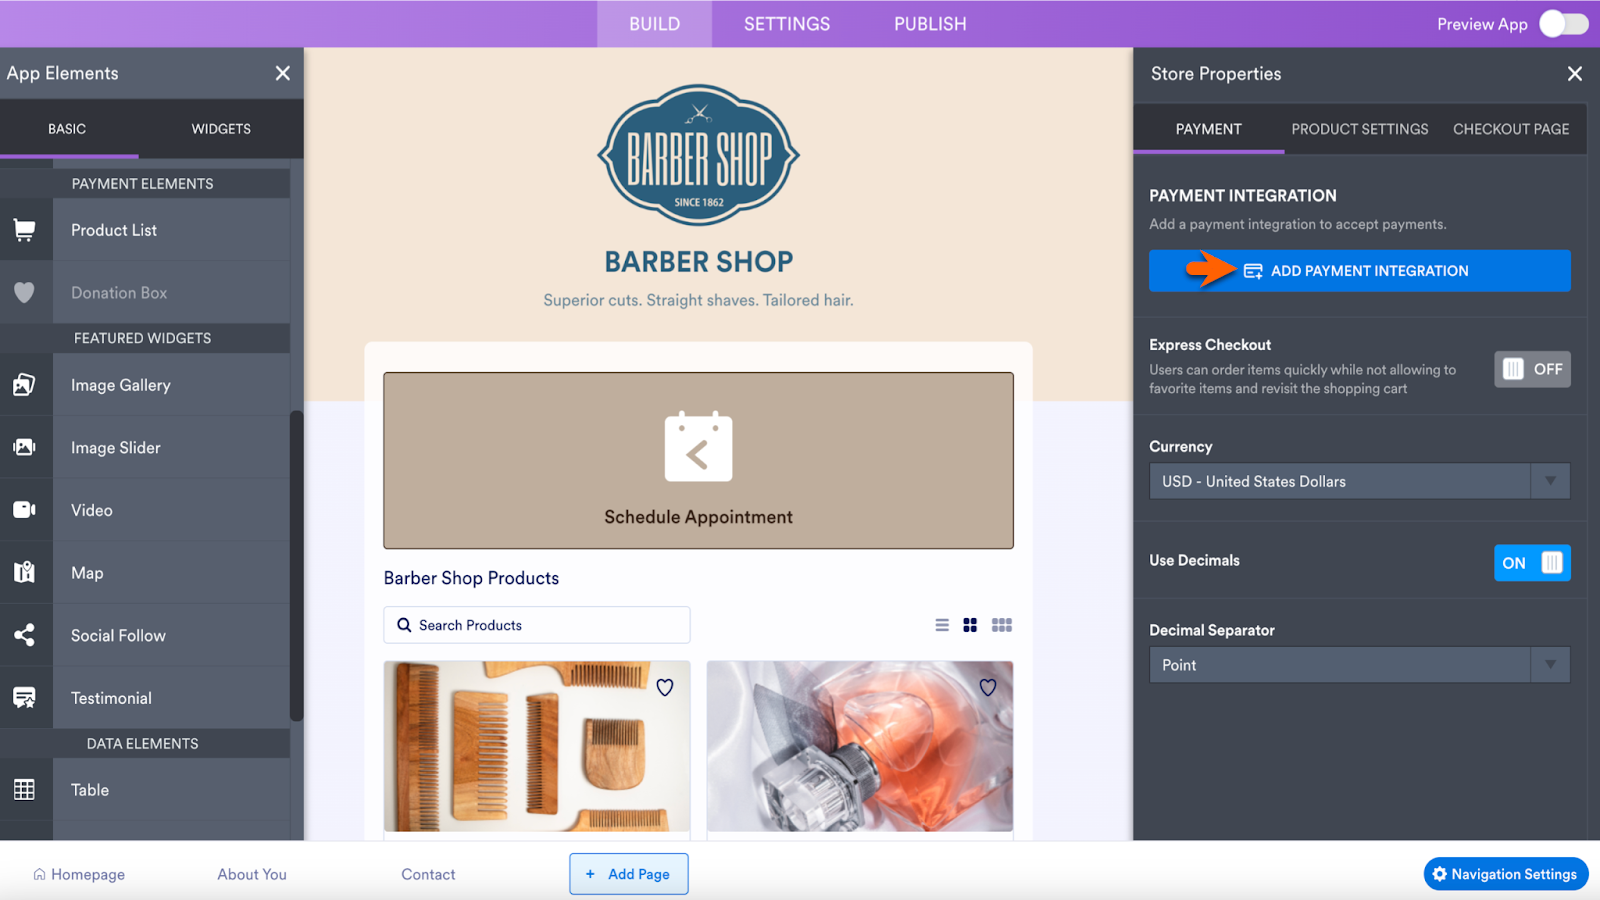
Add SensePass to your Jotform app or store
To add the SensePass integration to a Jotform app or store, open the Store Properties menu in the App Builder. When using an app or store template, the Store Properties button will include a red exclamation point icon, prompting you to install a payment integration. Click the Store Properties button to add SensePass.
Pro Tip
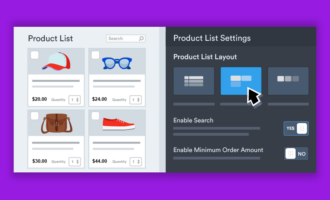
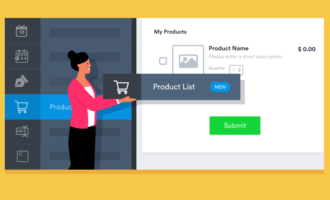
If you’re creating a store or app from scratch, first add the Product List element from the Add Element menu on the left side of the page. Then access the element’s Store Properties menu.
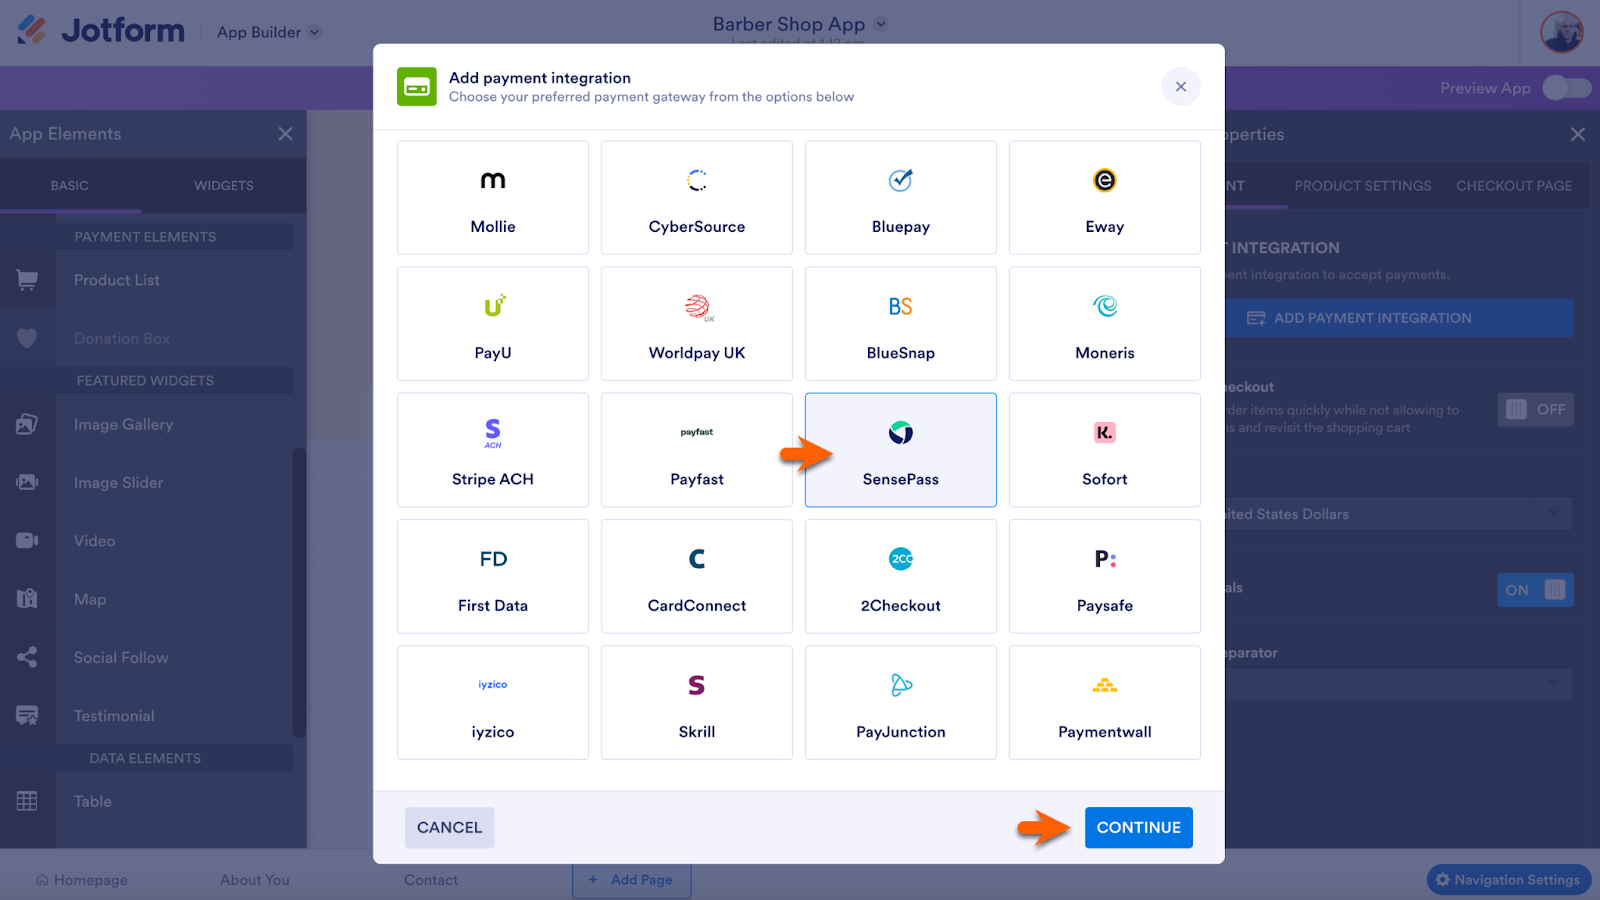
If your app or store template has a preinstalled payment integration other than SensePass, delete it using the trash icon.
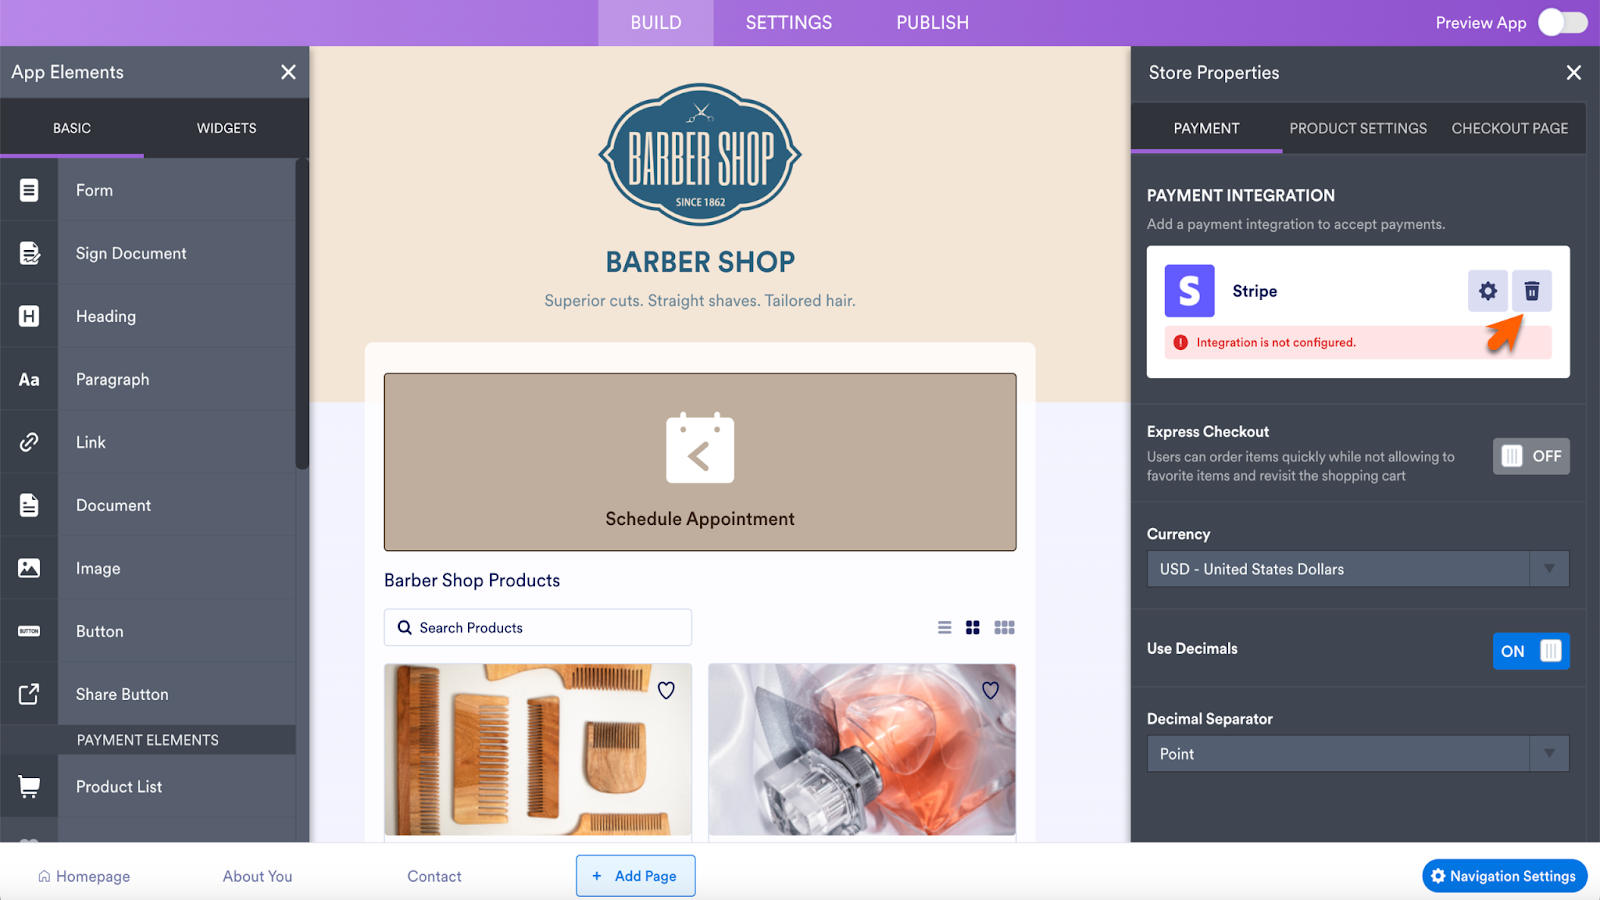
You’ll now see a blue Add Payment Integration button in the Store Properties menu. When creating an app or store from scratch, this button is immediately visible.
Next, choose SensePass from the popup menu and click the Continue button.
Pro Tip
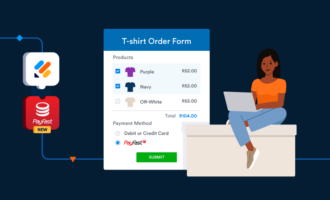
If you have a brick-and-mortar shop and want to modernize your point of sale, SensePass has a solution. The SensePass-enabled device allows customers to complete sales on their smartphones. Shoppers simply tap their phone on the SensePass device to access the SensePass checkout page on their web browser. They then choose their preferred digital wallet or card to complete the sale.
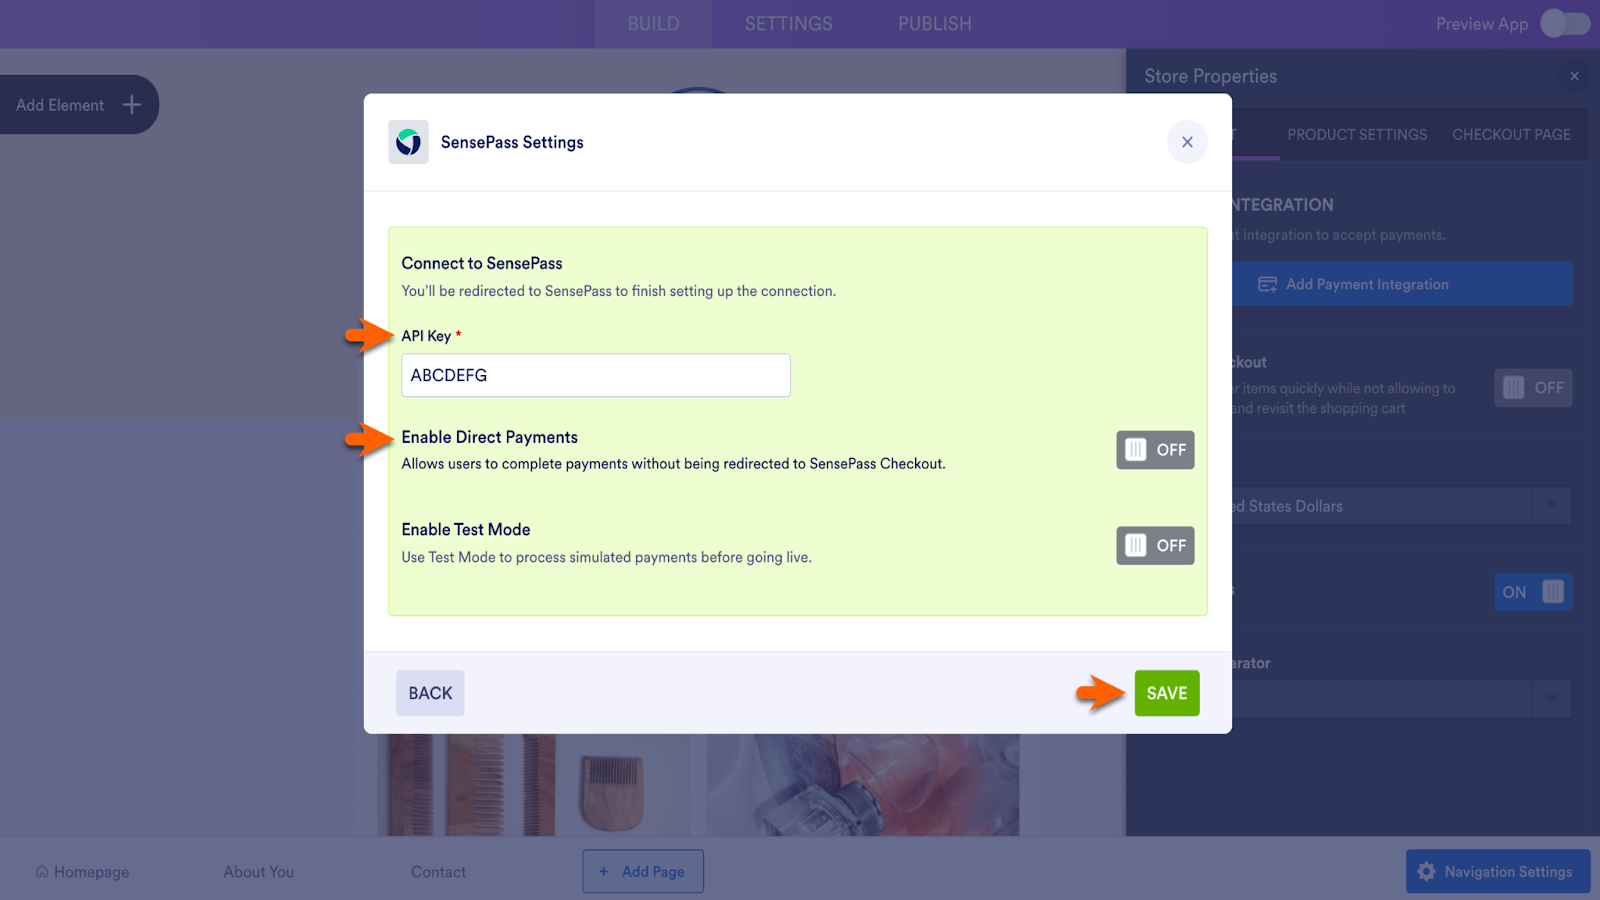
After selecting SensePass, add your API key, and then click the Save button. Note the Enable Direct Payments option. The procedure for activating this feature is the same as in the previous walkthrough.
Less friction, more sales
Adding Jotform’s SensePass integration to your forms, apps, and stores can ease a key friction point in the purchase process. Plus, it’s easy to install and use. Try it today and learn firsthand how extra payment options can incentivize shoppers to follow through on more purchases and boost your bottom line.


Send Comment: