You’ve put a lot of work into your Wix site, and steady traffic is a good sign that it’s paying off. But traffic matters only if visitors take action, and a standard contact or signup form can be easy to overlook. When visitors leave without filling it out, you have no way to keep them engaged.
A popup form helps you capture more newsletter signups, contact requests, or special-offer leads by appearing at the right moment, so you can turn passive visitors into contacts without redesigning your entire site.
If you’re not sure how to set one up, this guide will take you through the native Wix method (which tends to fall short) and offer a better solution with Jotform, which gives you more popup-friendly options.
How to create a Wix popup form using native Wix tools
Wix’s built-in Lightbox feature lets you add a popup form to your site without installing anything extra.
To set up a Wix popup form, follow these steps:
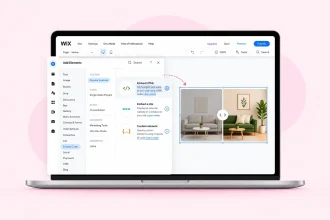
- In the Wix Editor, click + Add on the left side of the screen and click Elements. This opens the panel that lets you choose what to place on your page.
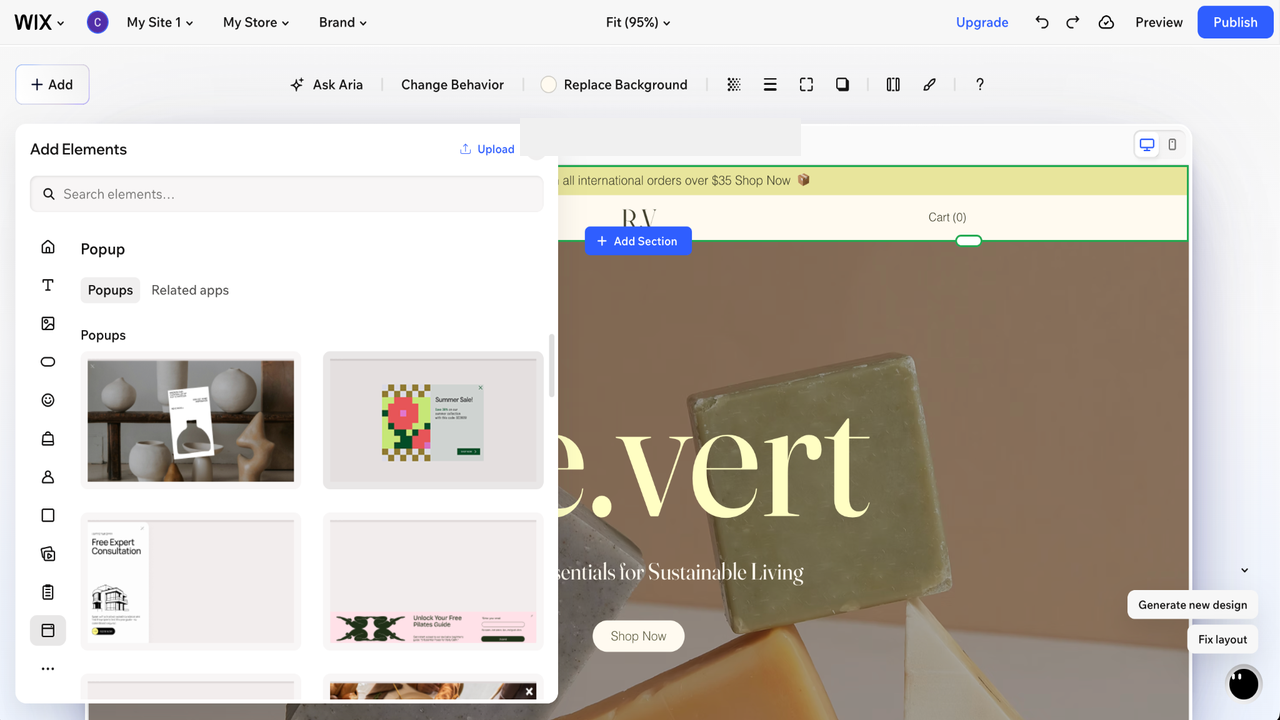
- Mouse over the Home icon, then scroll down and click Popup. You can also type “popup” in the Elements search bar. Wix opens a set of ready-made templates, so pick one and click or drag it onto your site to add it.
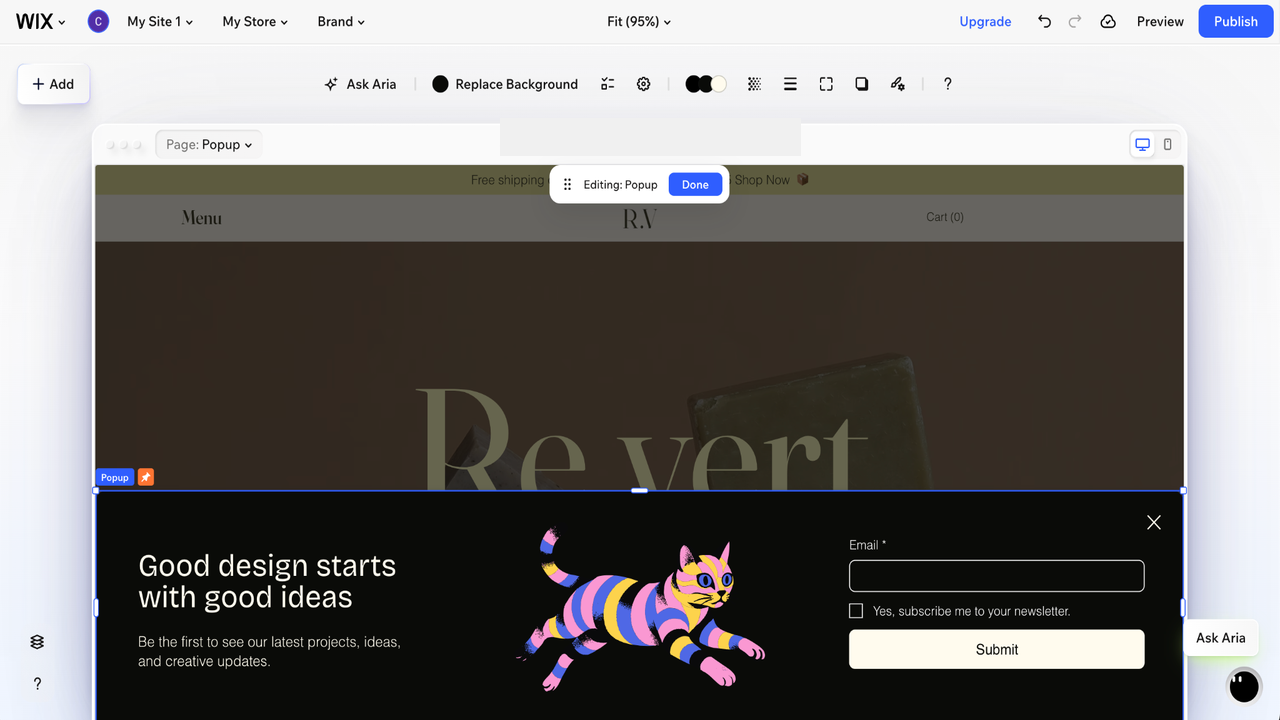
- Choose a template layout that fits your popup goal. A Subscribe layout is suitable for newsletter signups, Contact works for inquiries, and Promotion is meant for special offers.
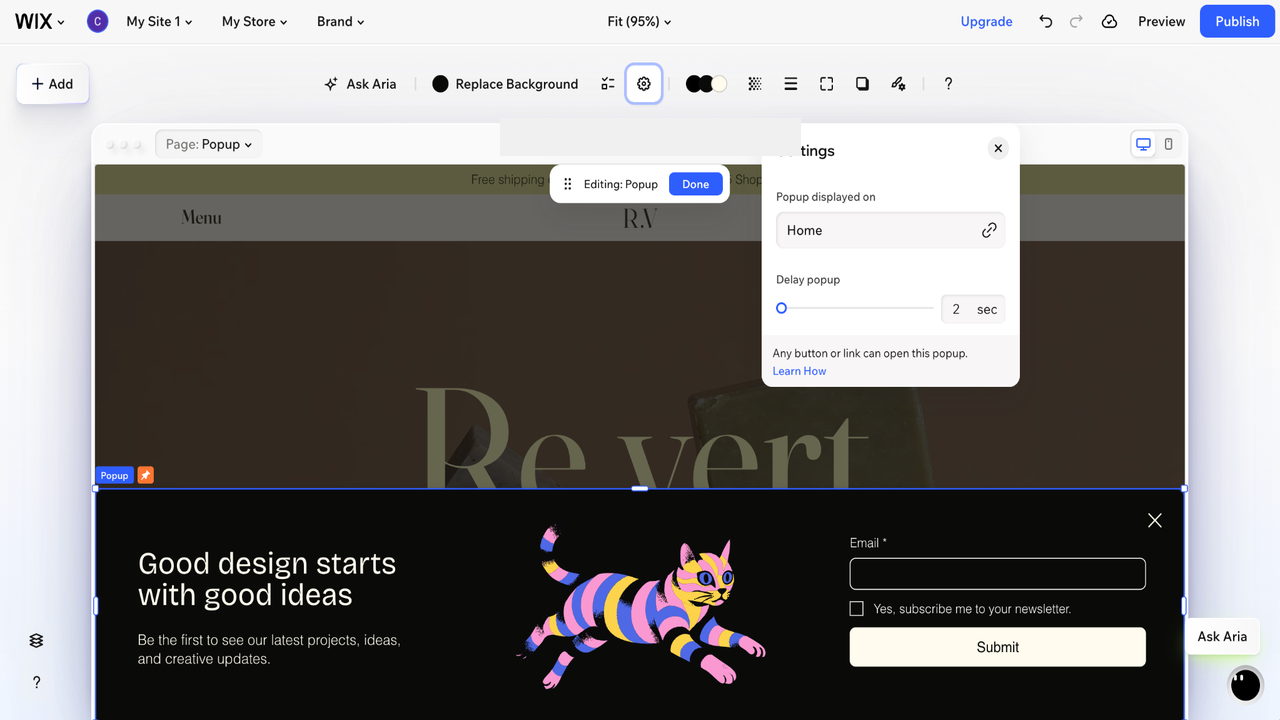
- Adjust the background and overlay and position your popup to match your branding using the design elements at the top of the web page you’re designing. Click Settings to decide when and where the popup is displayed, which can include a delay after the page loads.
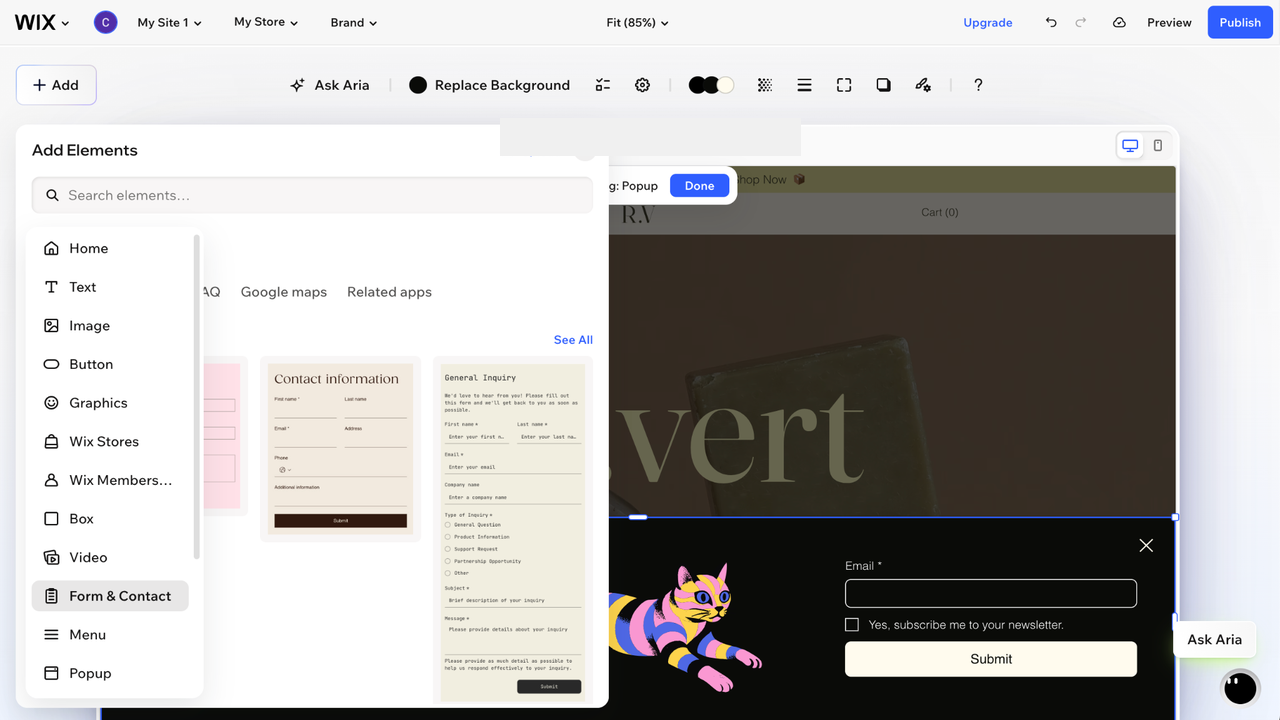
- Many templates already include forms. To add your own, drag a Forms element (under Form & Contact) from the Add Elements panel. Drag and drop it while it’s on top of the popup so it stays anchored to the popup.
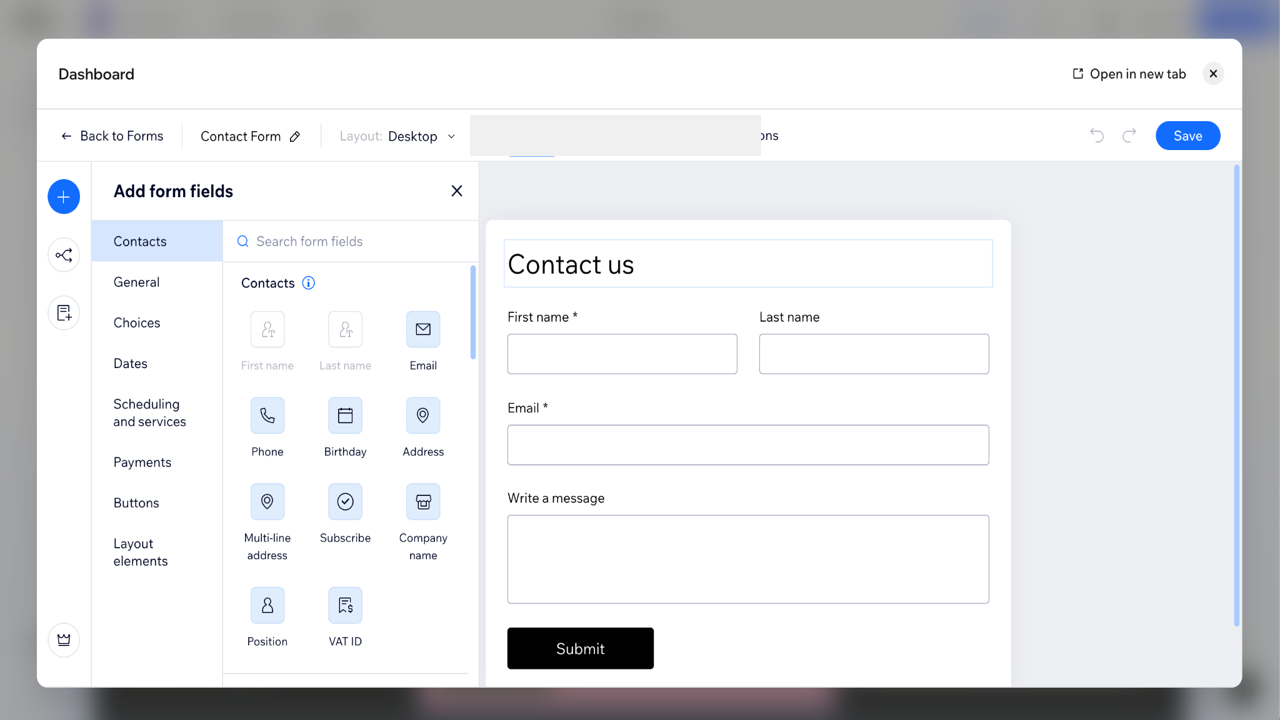
- If you add a form (on top of the popup), click on the form and then select Edit Form at the top to add or remove fields. Within the editor, click Settings at the top to write the thank-you message visitors will see after they submit their form. Click the Save button at the top right to save any changes you made to the form and exit out of the form editor by clicking the X on the top right.
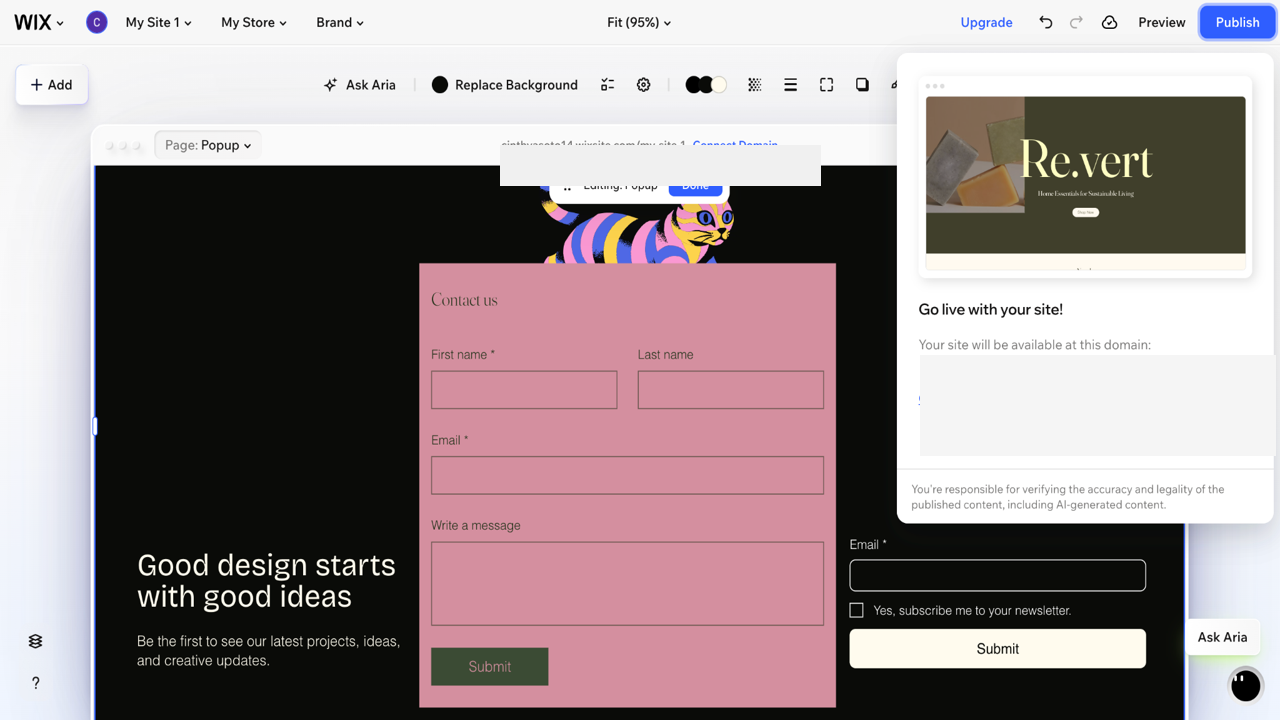
- Click Publish, then open your live site to check the popup. Auto-opening popups appear only on the published site, not in preview, so be sure to test both the desktop and mobile web pages to confirm the timing and layout work everywhere.
5 limitations of the native Wix popup form setup
Wix popup tools are capable, and for a straightforward signup or contact form, they cover the basics well. But if you use Wix Lightbox forms, it helps to know where the setup can fall short, especially if you have a specific result in mind.
If you want a popup form that can match your branding, open in response to a specific visitor action, or run alongside other popups on the same page, you might need a different solution that can do more than collect names and emails.
Here are a few constraints to keep in mind before you start building with Wix:
- Popups and forms are not single, unified tools: With Wix, you set the popups triggers and close behavior in one panel and the form’s fields and submission settings in another. It works, but it means managing two series of settings instead of one.
- Popup behavior controls are limited: Wix allows only one auto-opening popup per page. Popups don’t get their own shareable URLs, and the delay timer isn’t available on every template. These limitations matter if you’re planning on more than one automatic popup on a page or want to link directly to one.
- Styling flexibility is limited: You can adjust colors, backgrounds, fonts, and layout, but you’re working inside the popup template and Wix’s design system. If you want a highly specific branded look, that structure can feel limiting.
- Advanced behavior often requires Velo: The default settings handle common triggers and close options. If you want something more customized, such as a popup that reacts to a specific visitor action, you may need a workaround. You can also use Velo, Wix’s developer platform, which assumes some familiarity with coding.
- You can’t preview an auto-opening popup in the editor: Wix shows automatic popups only on your published site, not in the editor preview. To check the timing, layout, and trigger of an auto-open popup, you have to publish first and review it live, which adds a step each time you test a change.
For a simple lead or newsletter popup form, the native Wix setup does the job. But if you want more control over the form, how the popup behaves, or how the overall experience looks, it’s worth considering a more flexible option.
How to add a Jotform popup form to your Wix site
If you want more flexibility than the native setup allows, building your popup form in Jotform offers more embed options, greater customization, and a faster path to a polished form, all without coding.
Instead of locking you into a single in-line form, Jotform supports several embed styles, so you can experiment with the format and experience you want to give visitors. For example, you can design a popup that opens your form in a separate window when someone clicks a link or button, or a lightbox that overlays the form on the page.
Here’s how to create a popup form with Jotform or auto-popup a lightbox form, then add them to your Wix site:
- Start by building a form from scratch or picking one of Jotform’s 20,000-plus free form templates, such as the lead capture form template or one of the many newsletter signup templates. Templates open in the drag-and-drop Form Builder ready to edit, so you can skip setting up common fields manually.
- Add, remove, or reorder fields, then adjust the theme, colors, and fonts to match your brand. This is also where conditional logic lives, so the form can show or hide fields based on a visitor’s selections, which keeps it short and relevant.
- When the form is ready, click the Publish tab at the top of the Form Builder, then select Embed on the left panel.
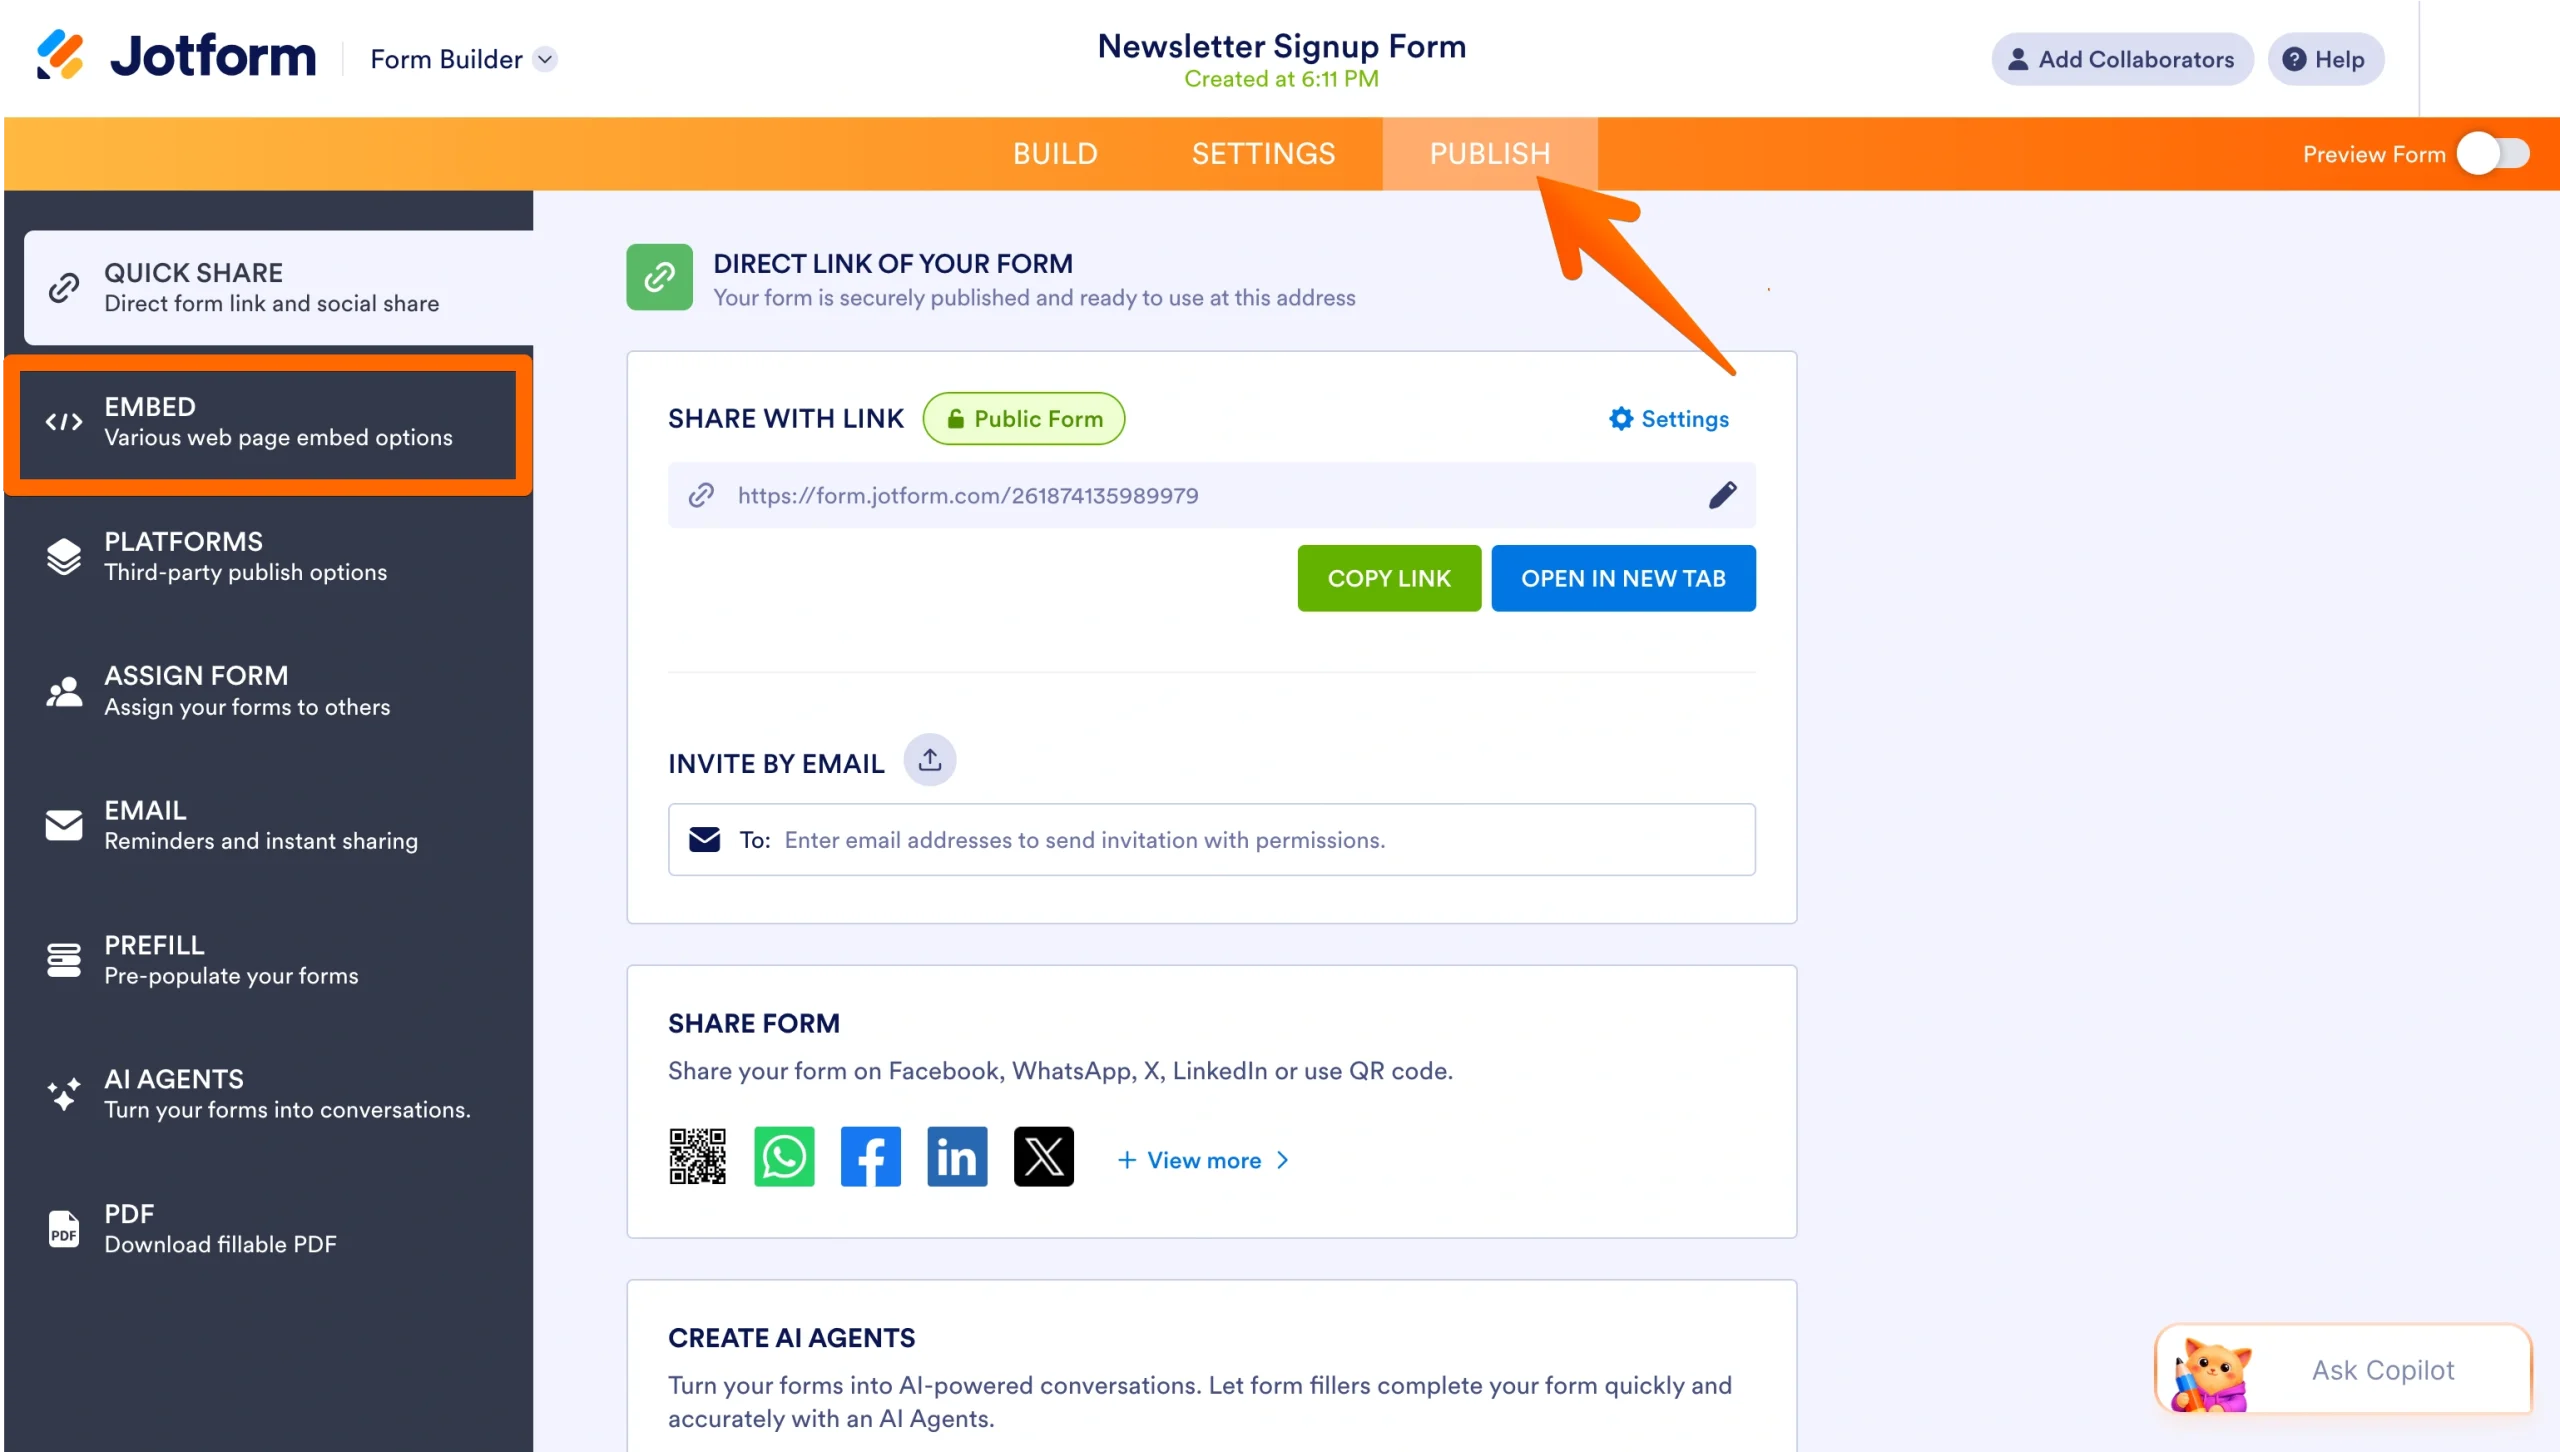
- Pick a Popup to open the form in its own window from a link or button or a Lightbox to overlay it on the page and auto-open after the page loads.
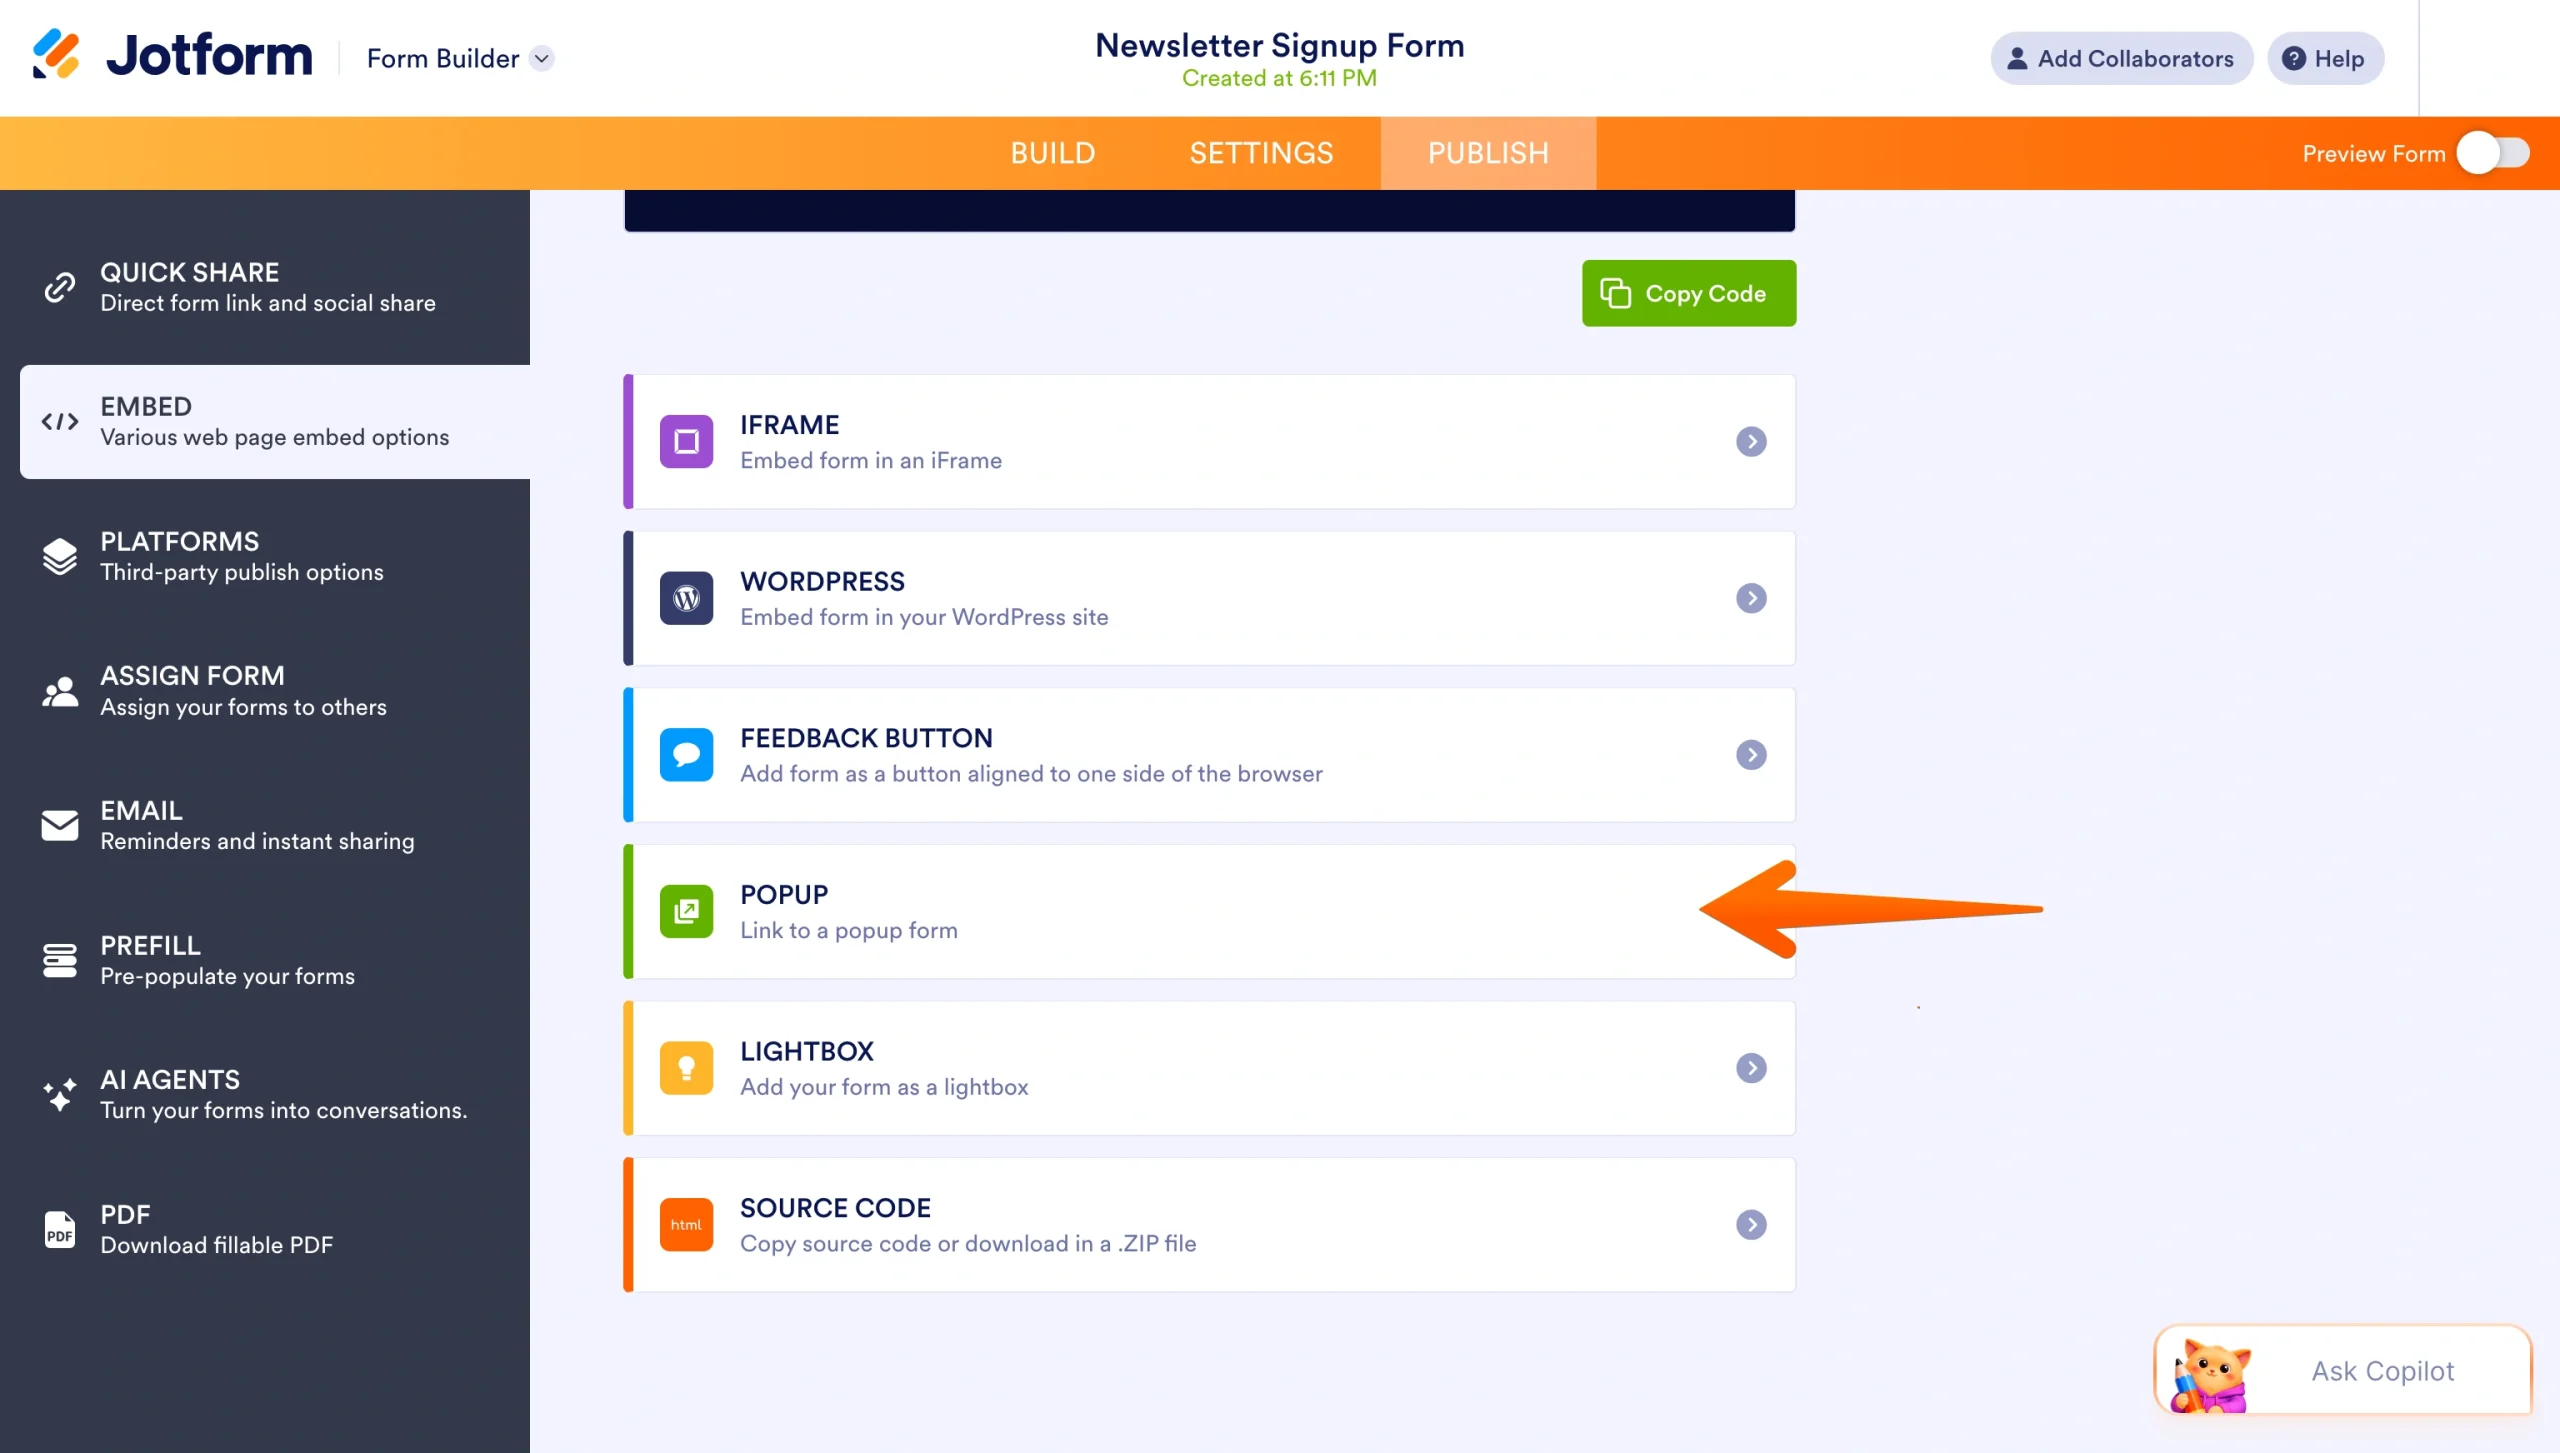
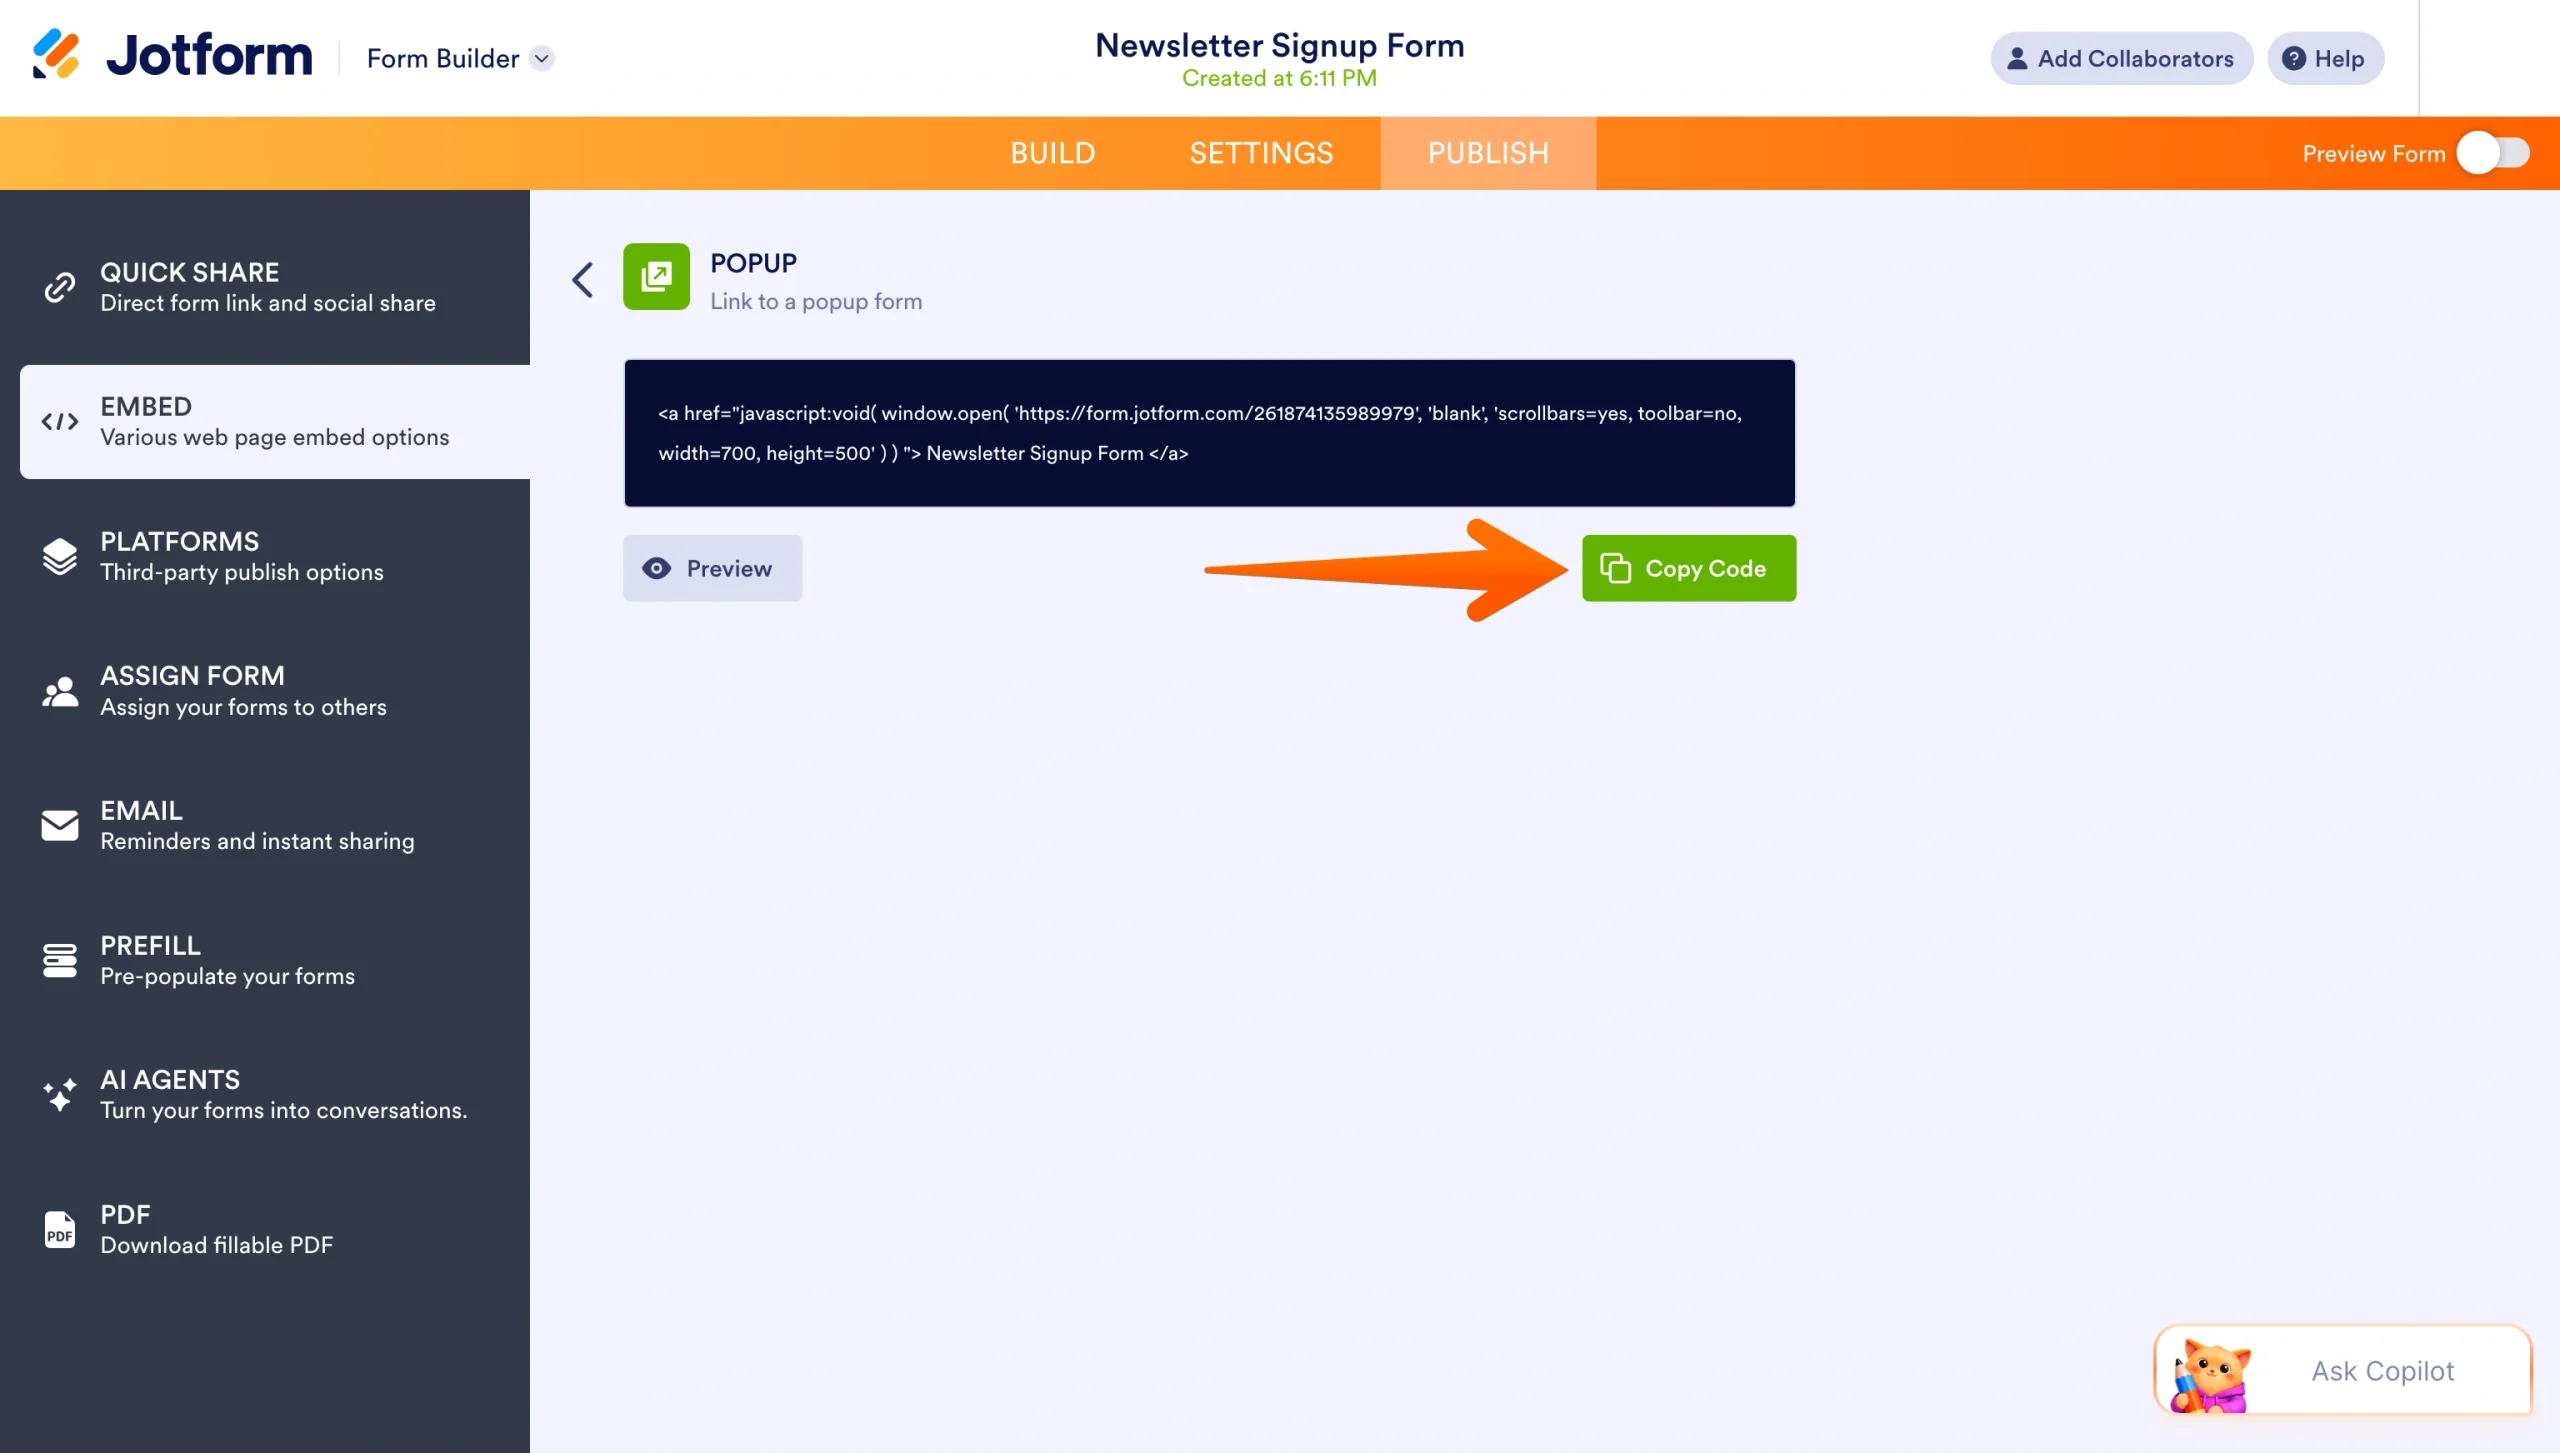
- Jotform will generate the code for you. Click the green Copy Code button or hit Preview first to see how the popup behaves.
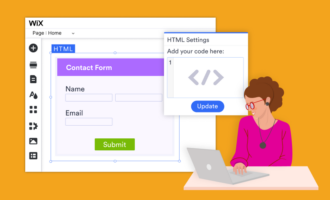
- In the Wix Editor, add an Embed Code element (from Add Elements, choose Embed & Social, then Embed Code). Then paste your Jotform code into the HTML Box and publish your site. Keep in mind that the script-based popup link doesn’t always run on builders that strip out custom scripts, so check it on your live site and use the Lightbox Embed if the popup doesn’t appear.
If you’d rather skip the Form Builder, Jotform’s Popup Maker generates a popup form from a single page. Either way, you end up with a more polished, flexible popup than Wix’s basic native setup.
Build a better popup form with Jotform
Wix popup forms work well for simple signup or contact forms, but when you want full control over the design, the form, and how the form behaves, Jotform offers more flexibility. You get a no-code builder, conditional logic, polished templates, and multiple ways to embed forms, so the popup matches the experience you have in mind rather than being limited by a single tool. The result is a popup that feels like it’s part of your site, not an add-on.
Browse Jotform’s Wix forms as a starting point, or sign up with Jotform for free to have a live popup in minutes.
This article is for Wix website owners, small business operators, marketers, bloggers, and anyone who wants to create a popup form that captures more newsletter signups, contact inquiries, and leads while exploring more flexible form and popup options with Jotform.




















Send Comment: