
You’ve built a Wix site for your wedding, party, class, or upcoming event, and now you need a simple way for guests to let you know if they’re coming. Replies scattered across texts and emails are easy to lose track of, while an RSVP form on your website keeps responses in one place.
Wix can handle RSVPs in two ways: Wix Events creates a dedicated events page where guests can register, while Wix Forms lets you add a basic RSVP form to an existing page on your site.
This guide explores both native Wix RSVP form methods. We’ll also compare them with Jotform, which may offer a more polished, flexible Wix invitation RSVP form experience.


How to create an RSVP form in Wix using Wix Events
One way to build a Wix RSVP form is through Wix Events, which handles the entire flow, from event registration forms to guest lists, on a dedicated event page.
Here’s how to create an RSVP form in Wix when Wix Events is already installed:
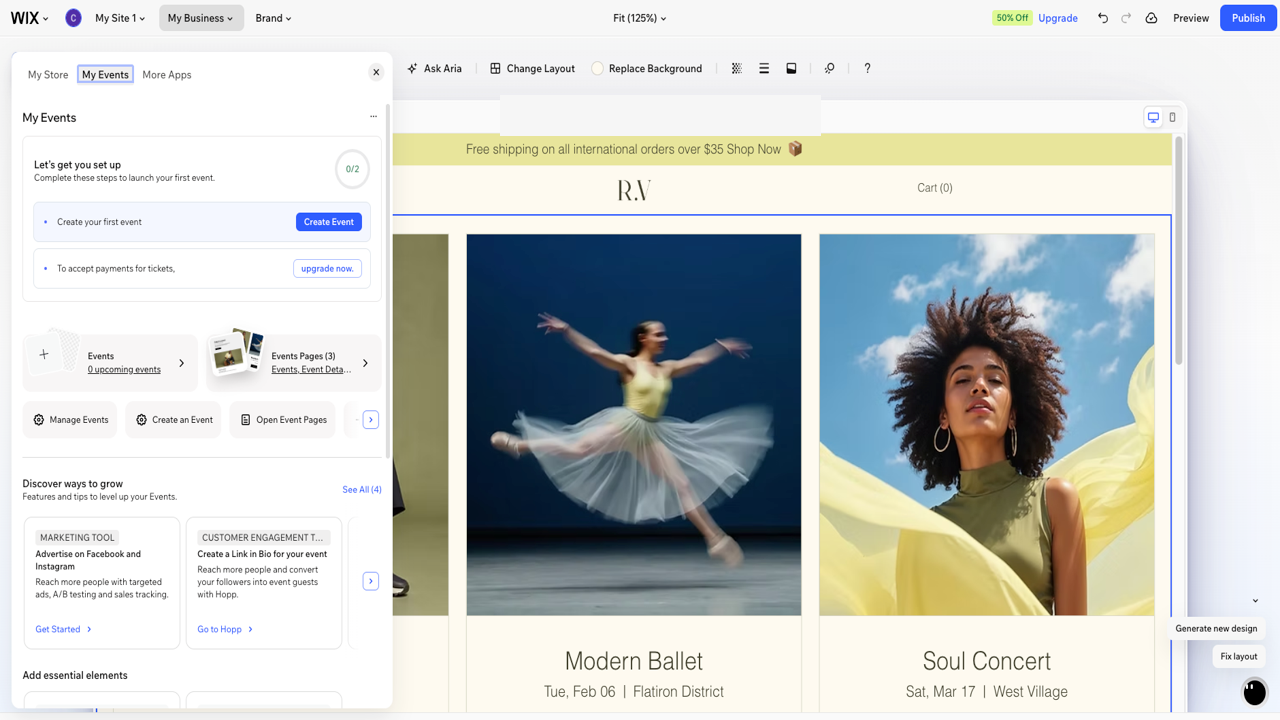
- Go to your site’s dashboard and click My Business in the top-left corner, then click My Events at the top. This is where you create and manage every event on your site.
- Click Create an Event, then select RSVP event as the type. Keep in mind you can’t switch an event between RSVP and ticketed later, so choose RSVP here if you’re collecting responses rather than selling tickets.
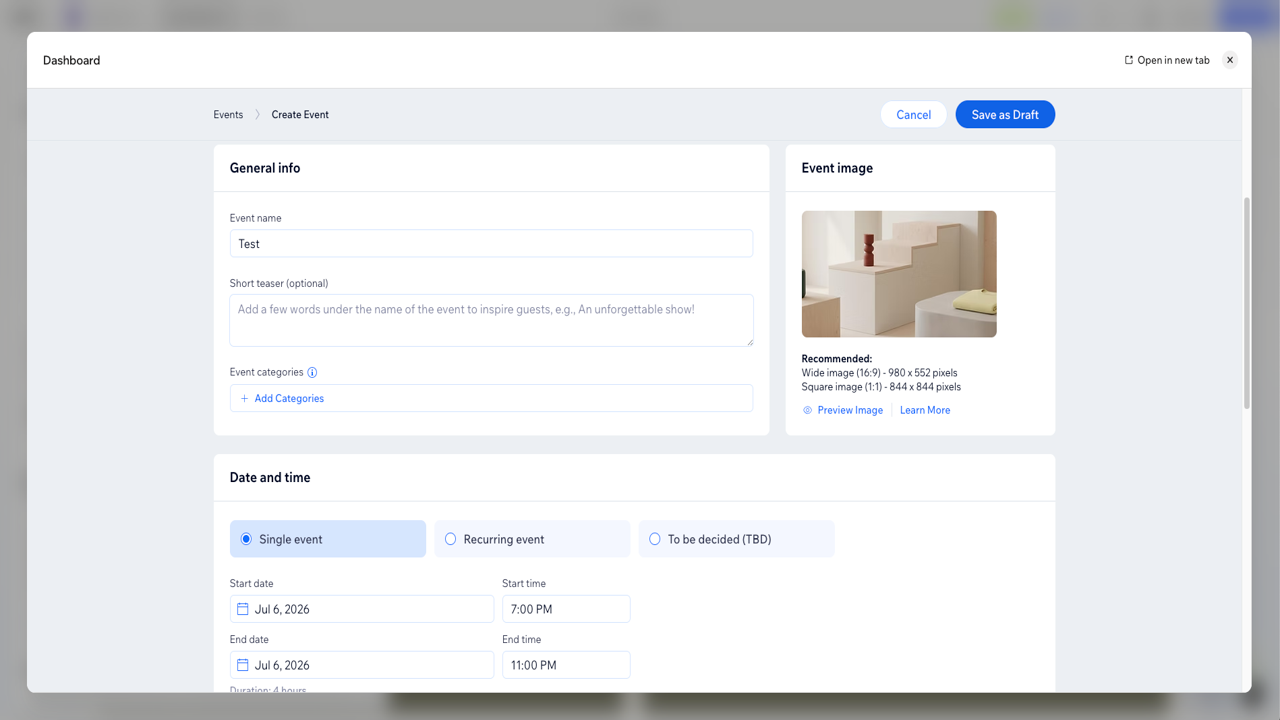
- Enter the event name, a short teaser, the date, time, and an image. These details will automatically populate the Event Details page that guests see before they register. Click Save as Draft to save.
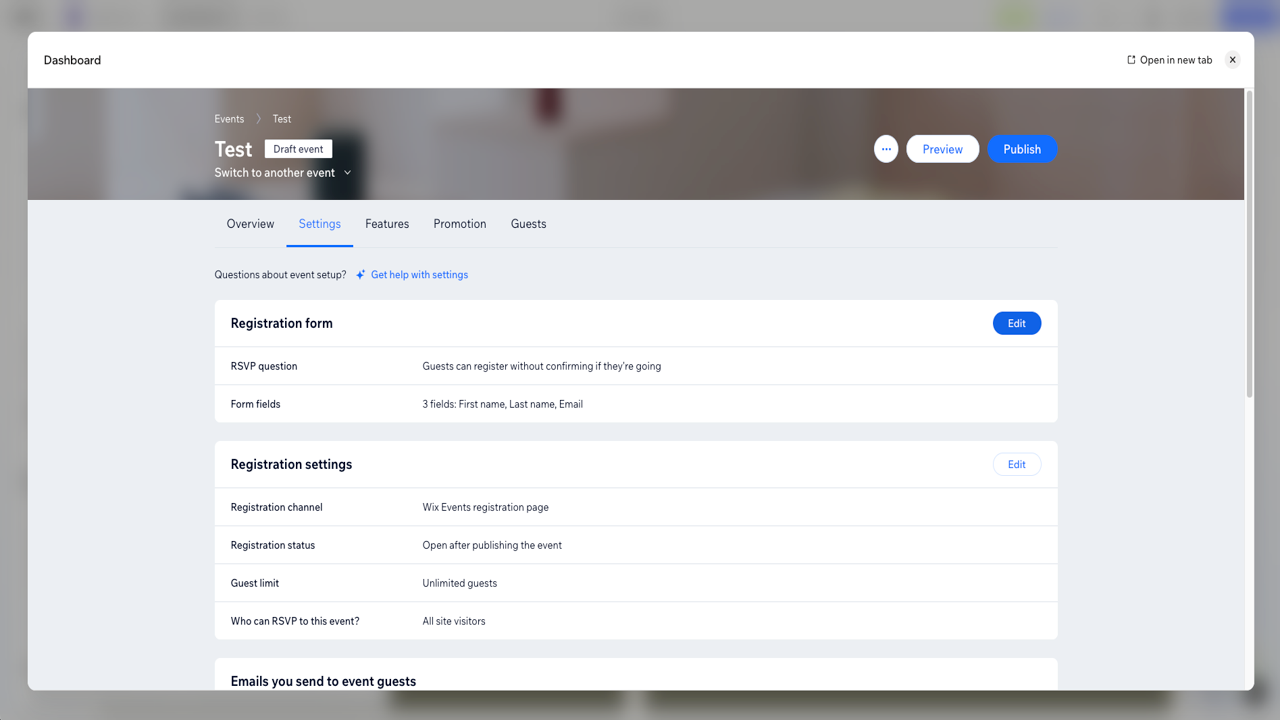
- In the Settings tab, click Edit next to Registration form. Here you can select whether to Ask guests to RSVP or Do not ask guests to RSVP and edit your form.
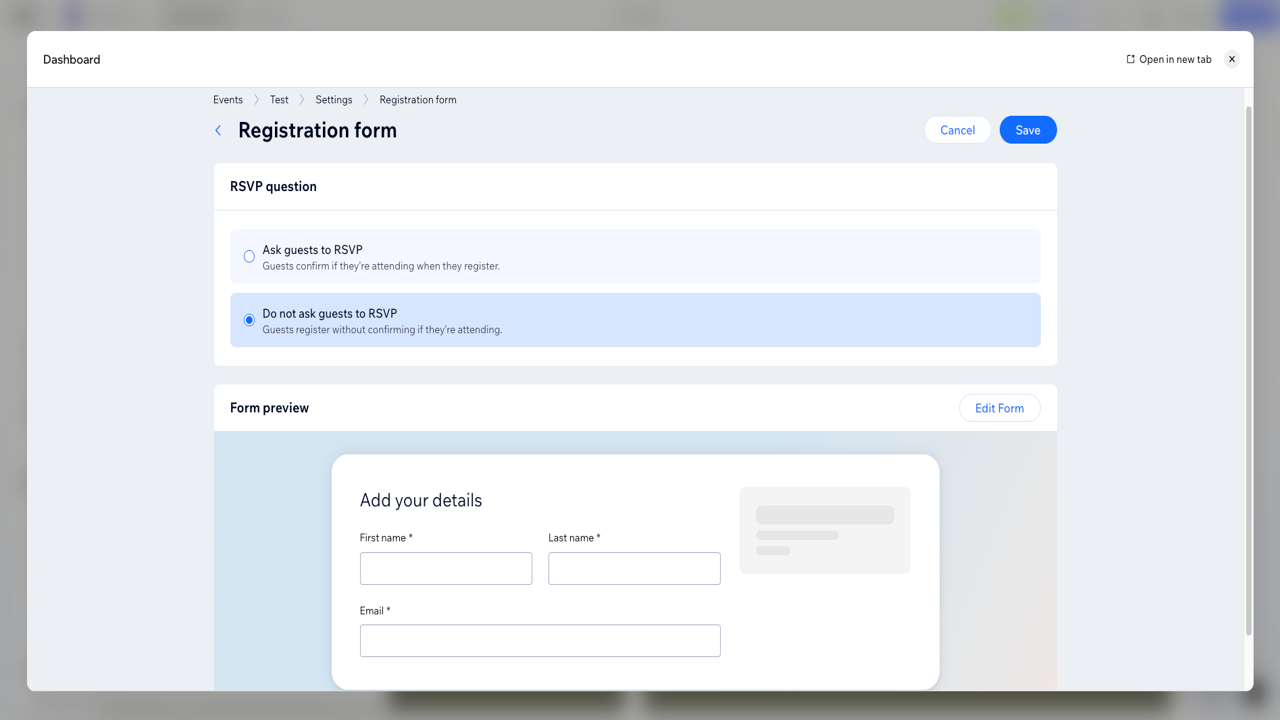
- Click Edit Form next to Form Preview to add form fields. Note that First name, last name, and email are required fields and cannot be removed.
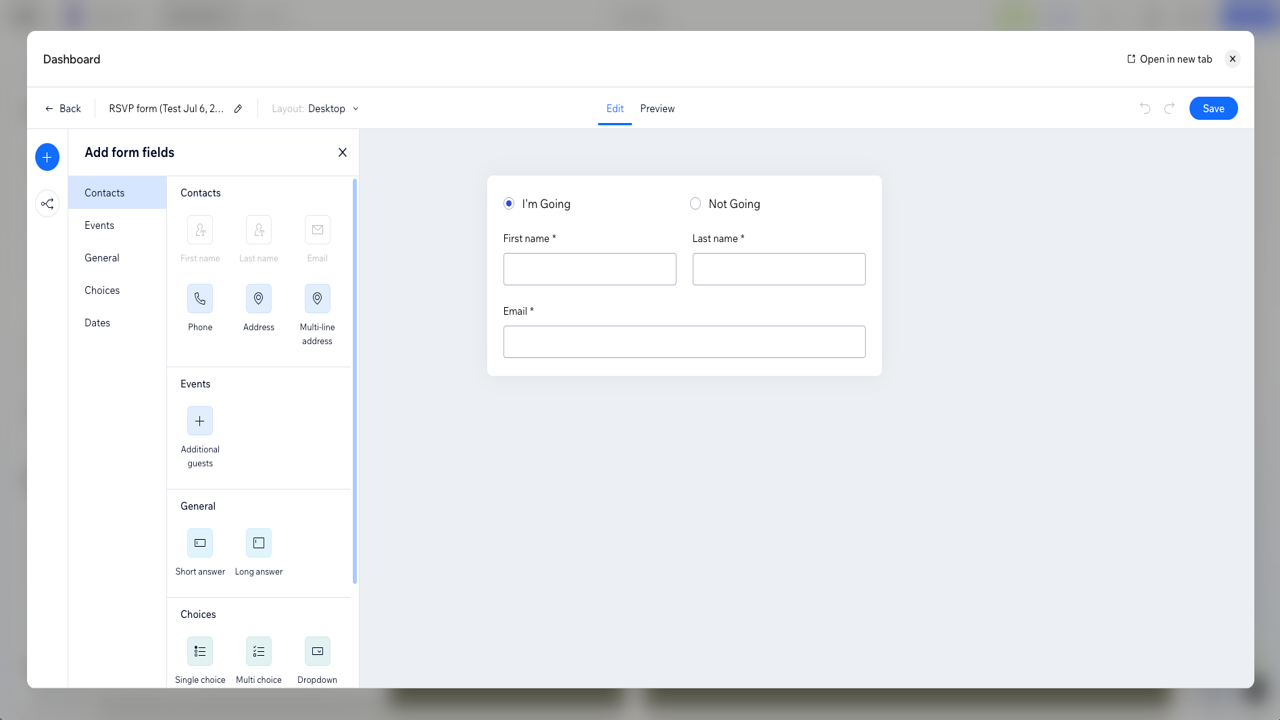
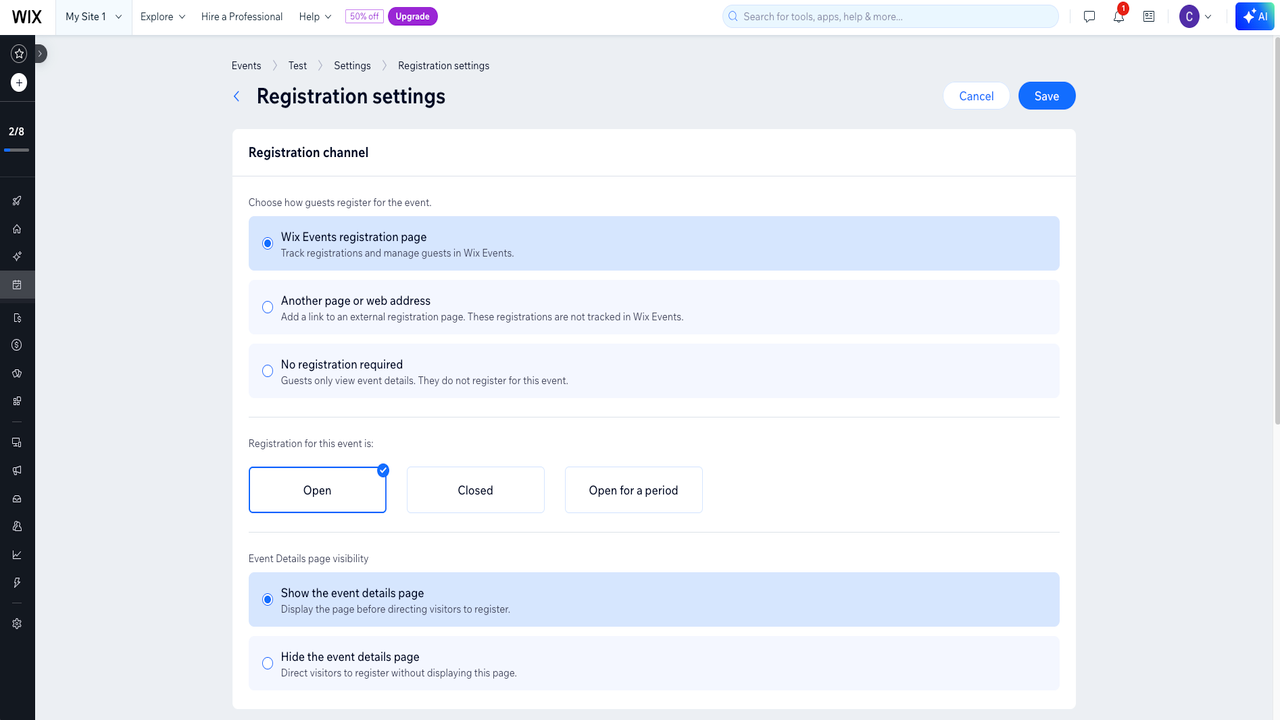
- Under Settings, click Edit next to Registration settings to configure additional options, such as Registration channel or Guest limit.
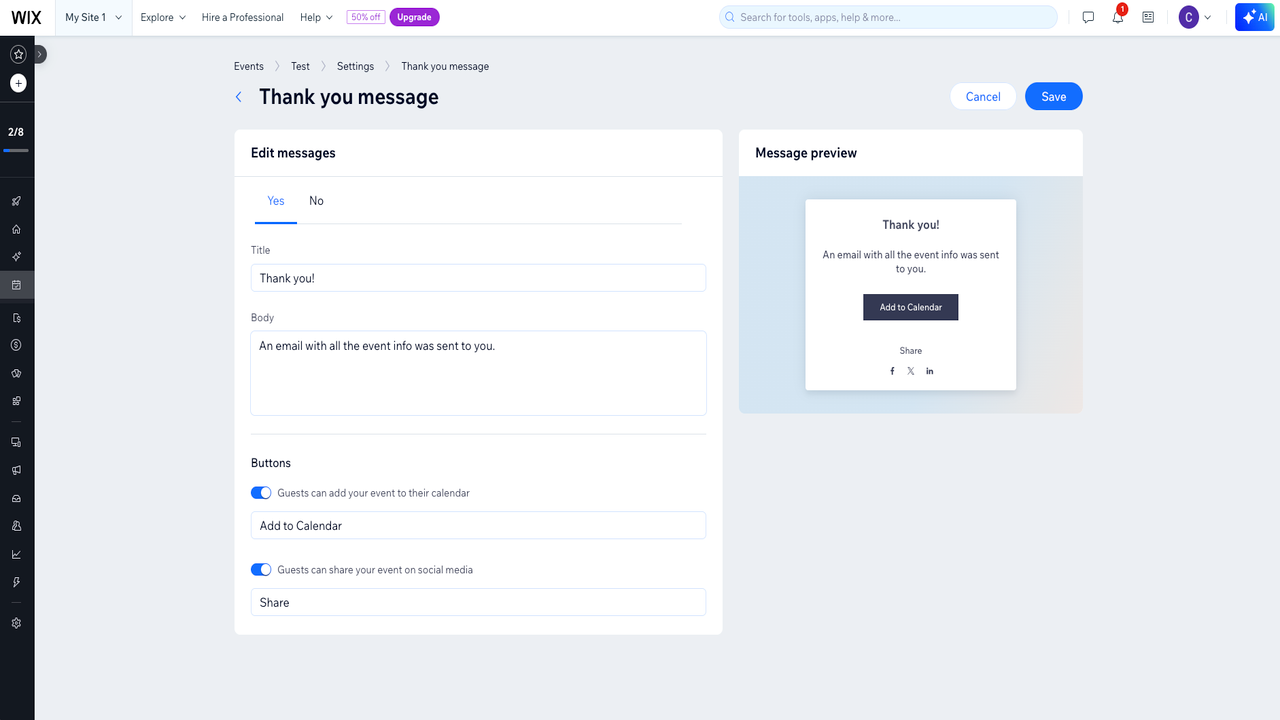
- (Optional) In the Settings tab, scroll down and click Edit next to the Thank you message to customize what guests see after they submit their response.
- Click Publish at the top right. Once published, open the event on your live site and submit a test RSVP to confirm the form and message work exactly as you intended.
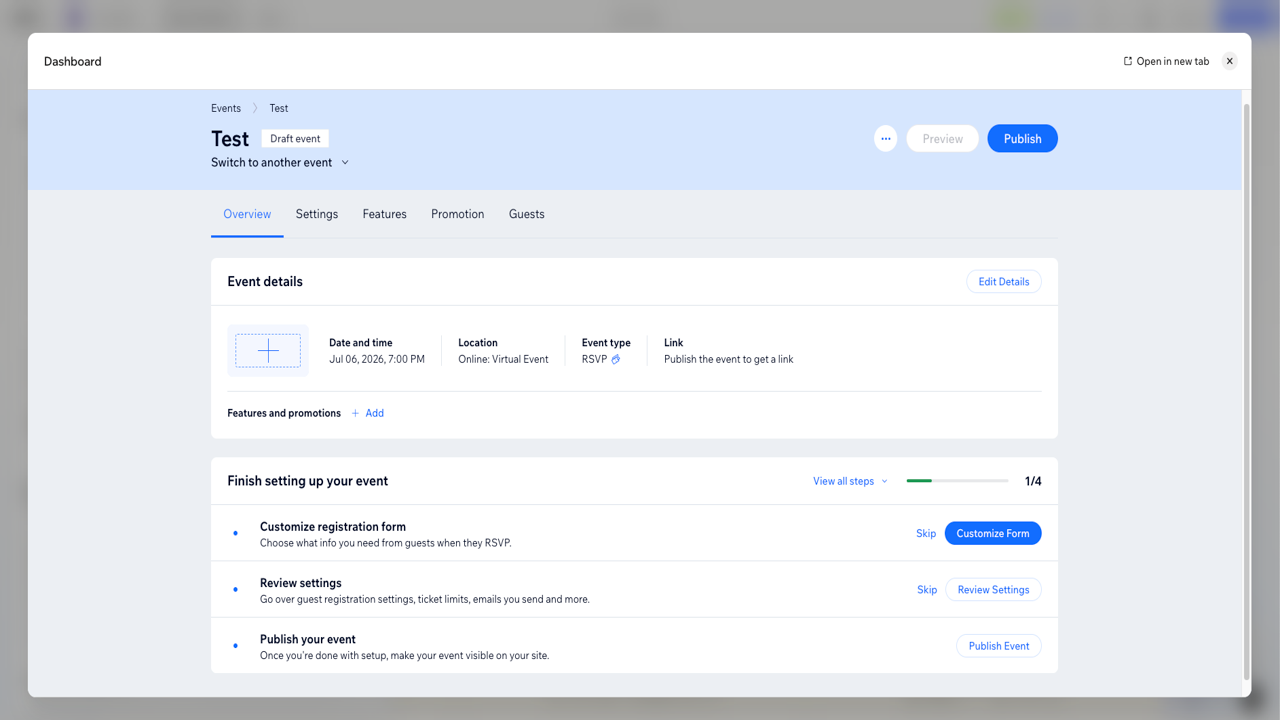
Once it’s live, your Wix event response form collects responses straight into the event’s guest list, where you can track who’s coming.
How to create a standalone RSVP form in Wix using Wix Forms
Not every event needs its own page. If you just want guests to reply from a page you already have, a standalone Wix event RSVP form built with Wix Forms is the simpler route.
- Open your site in the Wix Editor and go to the page where you want the RSVP form to appear.
- To add a form element, click + Add and select Elements on the top left, then click Contact & Forms. From here, you can place a form on the page.
- Choose a premade form to adjust or create a new form from scratch. A premade form gives you a head start on layout; a blank one lets you decide every field yourself.
- To add your RSVP fields, click the form, then Edit Form to open the form builder and add the fields your event needs, such as attendance, guest count, meal choice, a plus-one, or a comments box. Drag fields to reorder them and mark the essential ones as required.
- In the form builder’s settings, edit the message guests see after they submit. To control who’s alerted to each response, go to Forms & Submissions in your dashboard, where notifications are managed through Wix Automations.
- Publish the page, then submit a test entry on your live site to confirm that the fields, notification, and thank-you message all work.
Wix Forms is a solid choice for a simple Wix event registration form collection. But it isn’t built around events the way Wix Events is, so you won’t get event-specific extras like a guest list, attendance tracking, or a dedicated event page.
5 limitations of using Wix for RSVP forms
Wix covers the basics of RSVP collection well, whether you use Wix Events or a standalone Wix online RSVP form. If you’re planning something more detailed, though, it helps to know where the native tools start to feel constrained.
There are a few limits you may confront when building your Wix party RSVP form:
- Design flexibility is limited: You can adjust colors, fonts, and layout, but you’re working within Wix’s templates and design system. For a Wix wedding RSVP form or milestone event where you want the form to match a specific look, that structure can feel restrictive.
- Conditional logic is basic: Wix Forms supports simple rules that show or hide fields based on a response. Once you want a more involved flow, like routing guests down different paths based on several answers, the logic options run shallow.
- The guest experience can feel generic: The forms work, but they tend to look like standard Wix forms. For weddings and special events, where the details set the tone, that generic feel can undercut the experience you’re trying to create.
- Payment collection isn’t ideal: If your RSVP involves paid add-ons, such as meal upgrades or a plus-one fee, collecting that money cleanly through a native RSVP form is awkward and often needs a workaround.
- Response management is functional but rigid: You can view and export responses, but organizing them for more complex planning, like tracking multiple guest categories or detailed dietary needs, isn’t especially flexible.
For simple events, Wix gets the job done. But if you want your RSVP form to feel more polished and do more behind-the-scenes work, there’s a better option.
How to add a Jotform RSVP form to your Wix site
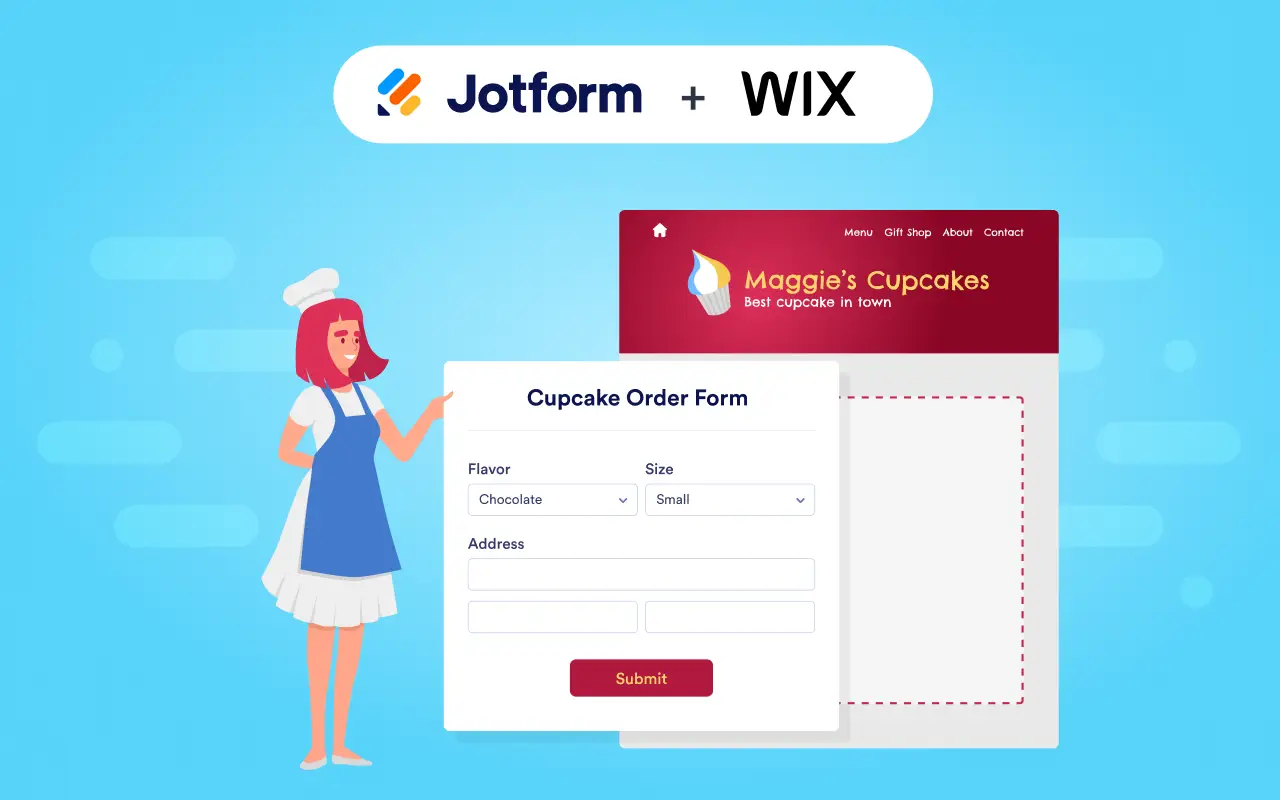
If you want a Wix RSVP form that truly fits the occasion, add Jotform to Wix. Jotform integrates with Wix, so you can build a form and embed it on your site without leaving either tool behind. Building your form in Jotform gives you event-ready templates, better visual customization, more robust logic, and an easier way to match the form to your event’s tone.
- Choose one of Jotform’s RSVP form templates or start from scratch. Templates open in the drag-and-drop Form Builder with common RSVP fields already in place, so you’re not starting from zero.
- Customize it by adjusting the colors, fonts, background, and layout, and adding your own image or logo. This is where a wedding form can look like your dream invitation rather than a generic web form. Jotform even offers a dedicated wedding RSVP tool if that’s your occasion.
- Include extra fields for meal choice, guest count, or a plus-one, then use conditional logic to show or hide questions based on a guest’s answers. The form can reveal a meal selection only after someone confirms they’re attending, which keeps it short for everyone else.
- To generate the embed code, open the Publish tab, select Embed, and copy the code Jotform creates for you.
- In the Wix Editor, click Add Elements, choose Embed Code, and select Embed a Widget. Paste your Jotform code, position the form, and publish.
For weddings, parties, school events, or small business gatherings, Jotform offers more polished RSVP templates, stronger conditional logic, better branding control, payment collection when your RSVP includes paid add-ons, and easier response management as your guest list grows.
Create your RSVP faster with Jotform
For a small, casual event, a Wix RSVP form is reliable and easy to set up. But when the details matter, whether it’s a wedding, a class, or a company event, Jotform gets you to a polished form faster. You start with a template built for the occasion, adjust it to match your branding, add the logic your event needs, and embed it on your Wix site in a few steps, creating an RSVP form that feels like part of the event, with responses organized and ready to manage. Browse Jotform’s 20,000+ free form templates and 150+ integrations, or sign up for free to start building.
FAQ about Wix RSVP forms
Open the Wix Editor, click Add Elements, then select Contact & Forms. Choose a premade form to adjust or create a new one from scratch, then click Edit Form to open the form builder. From there, add the fields you need, mark the important ones as required, and set your notifications and thank-you message. Publish the page, then submit a test entry on your live site to confirm everything works.
Build your form in Jotform, then open the Publish tab, select Embed, and copy the code. In the Wix Editor, click Add Elements, choose Embed Code, and select Embed a Widget. Paste your Jotform code into the box, position the form on your page, and publish. Jotform’s Wix embedding guide covers each step if you’d like to follow along.
This article is for Wix users planning weddings, parties, school events, classes, or business gatherings who need a simple way to collect and manage RSVPs from their website.





















Send Comment: