If you’ve just created a Wix website and are ready to collect registrant data — perhaps for events, classes, or memberships — you need to add a registration form to it before you hit publish.
Wix has a straightforward native form builder that enables you to add basic forms to your website. However, this approach also comes with several limitations that may get in the way of your registration goals.


In this article, we’ll show you how to create a registration form in Wix using its native form builder as well as another option: Jotform. You’ll see why using a third-party form builder like Jotform is a better choice when you want to add a sophisticated form to your website for registrations, payments, and more — all without writing a single line of code.
How to create a registration form in Wix using the native form builder
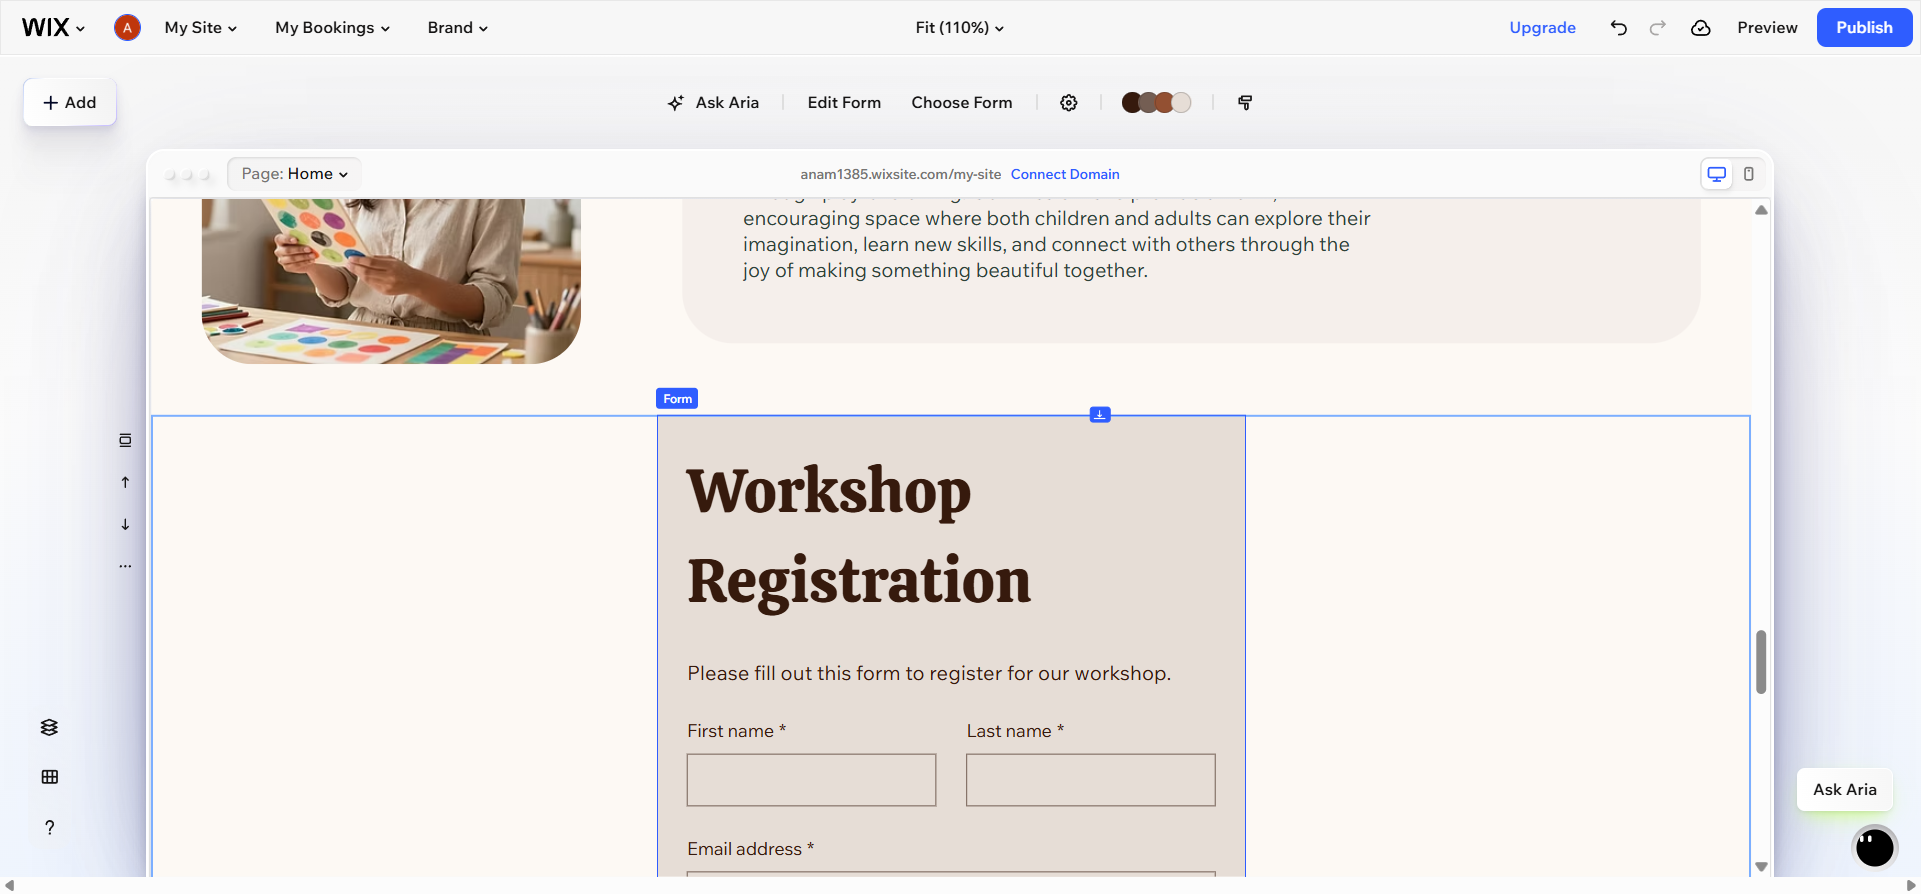
Using Wix to create a registration form with the native form builder is a fairly simple process. Follow these steps:
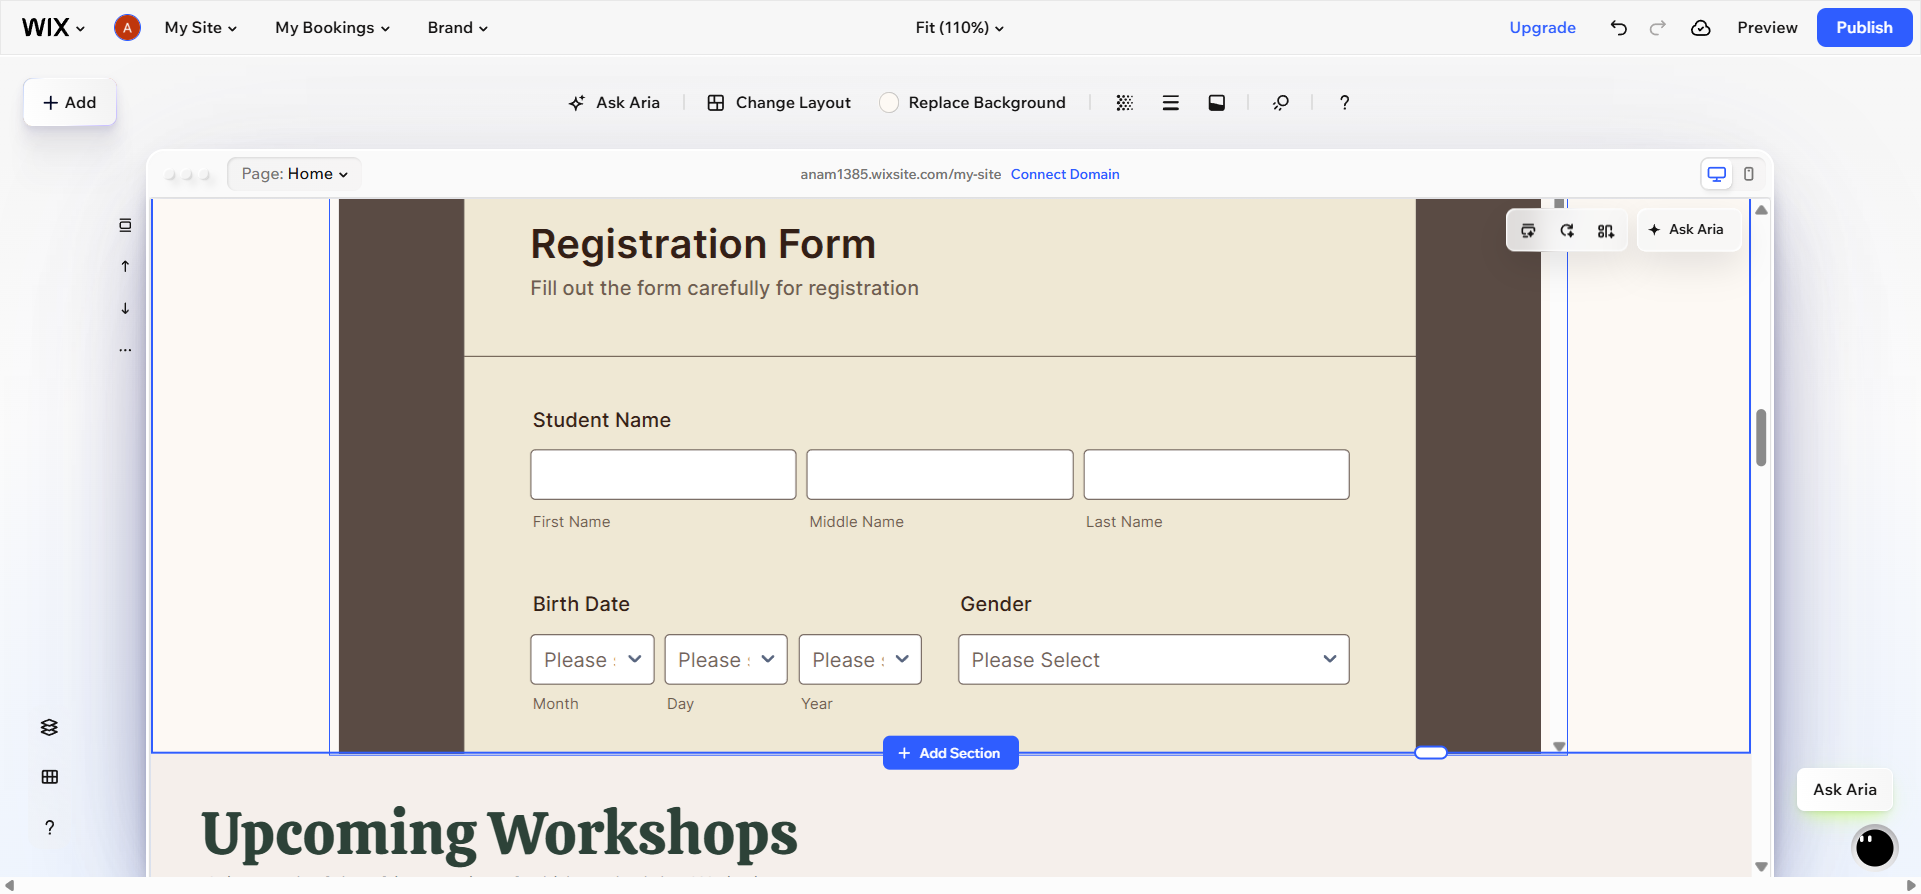
- Open the Wix Editor for your website. Click the + Add button on the left to access the Add Elements panel, and then click Elements to open the panel.

- Search for and select the registration form template. Note that Wix offers different types of forms, such as a Wix Contact Form or a Wix Signup Form. Add the form to your website by clicking on it.
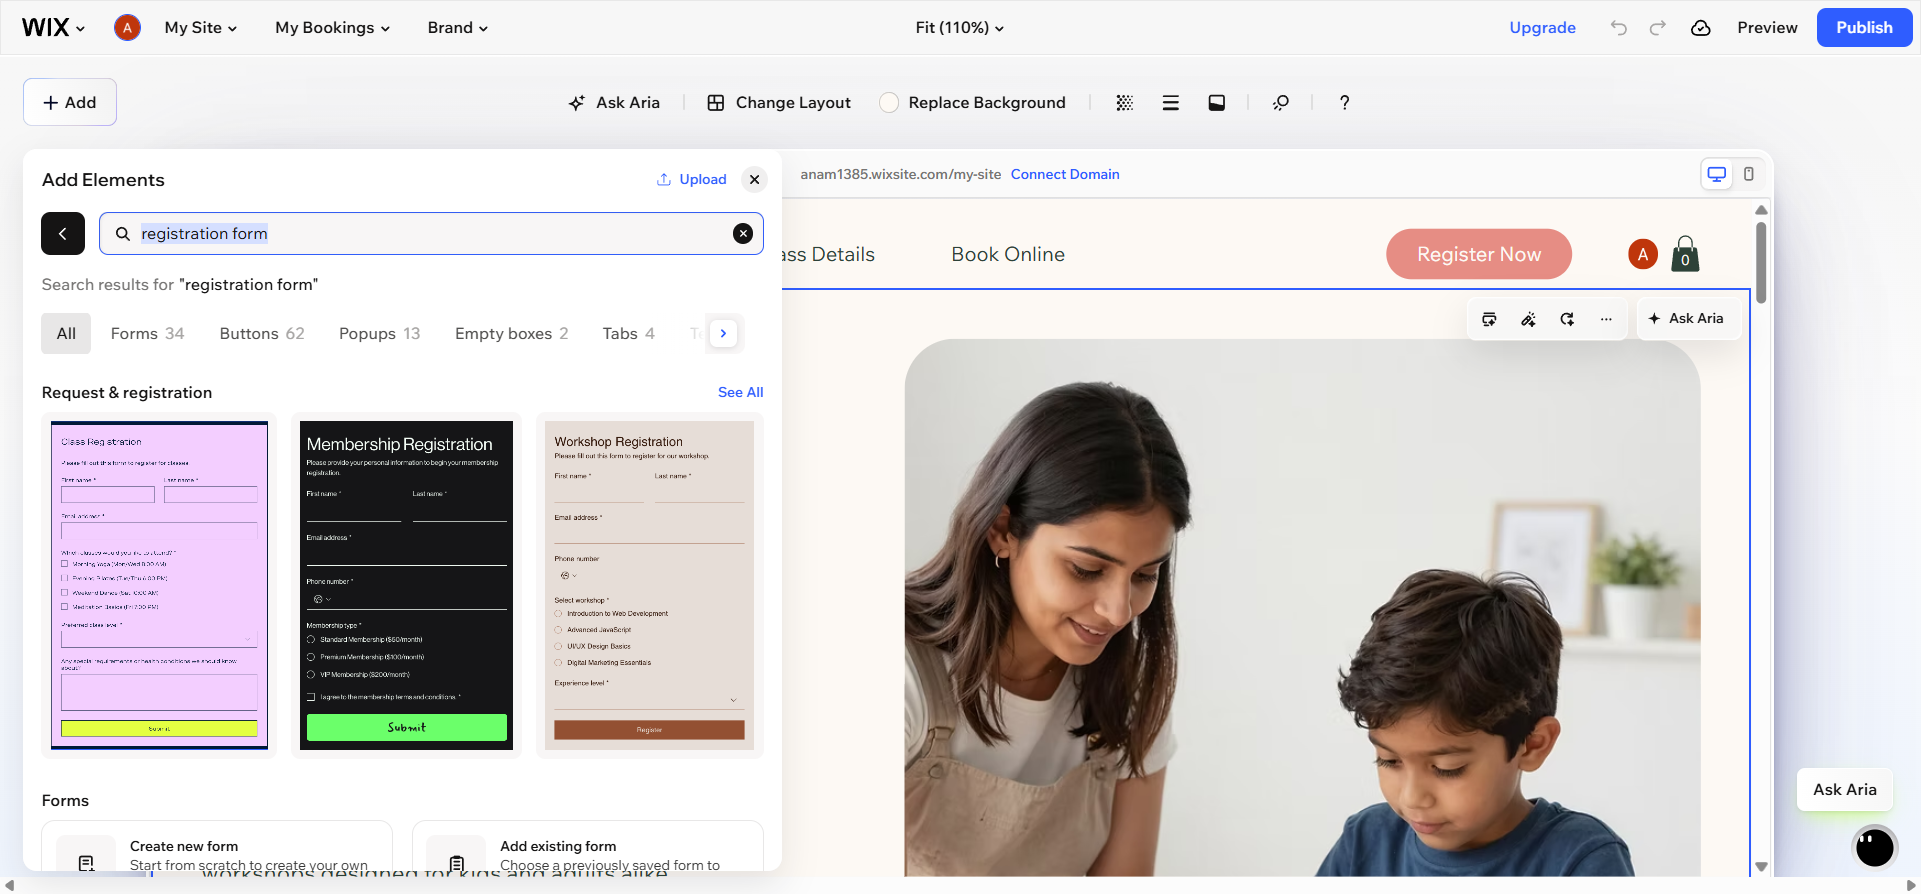
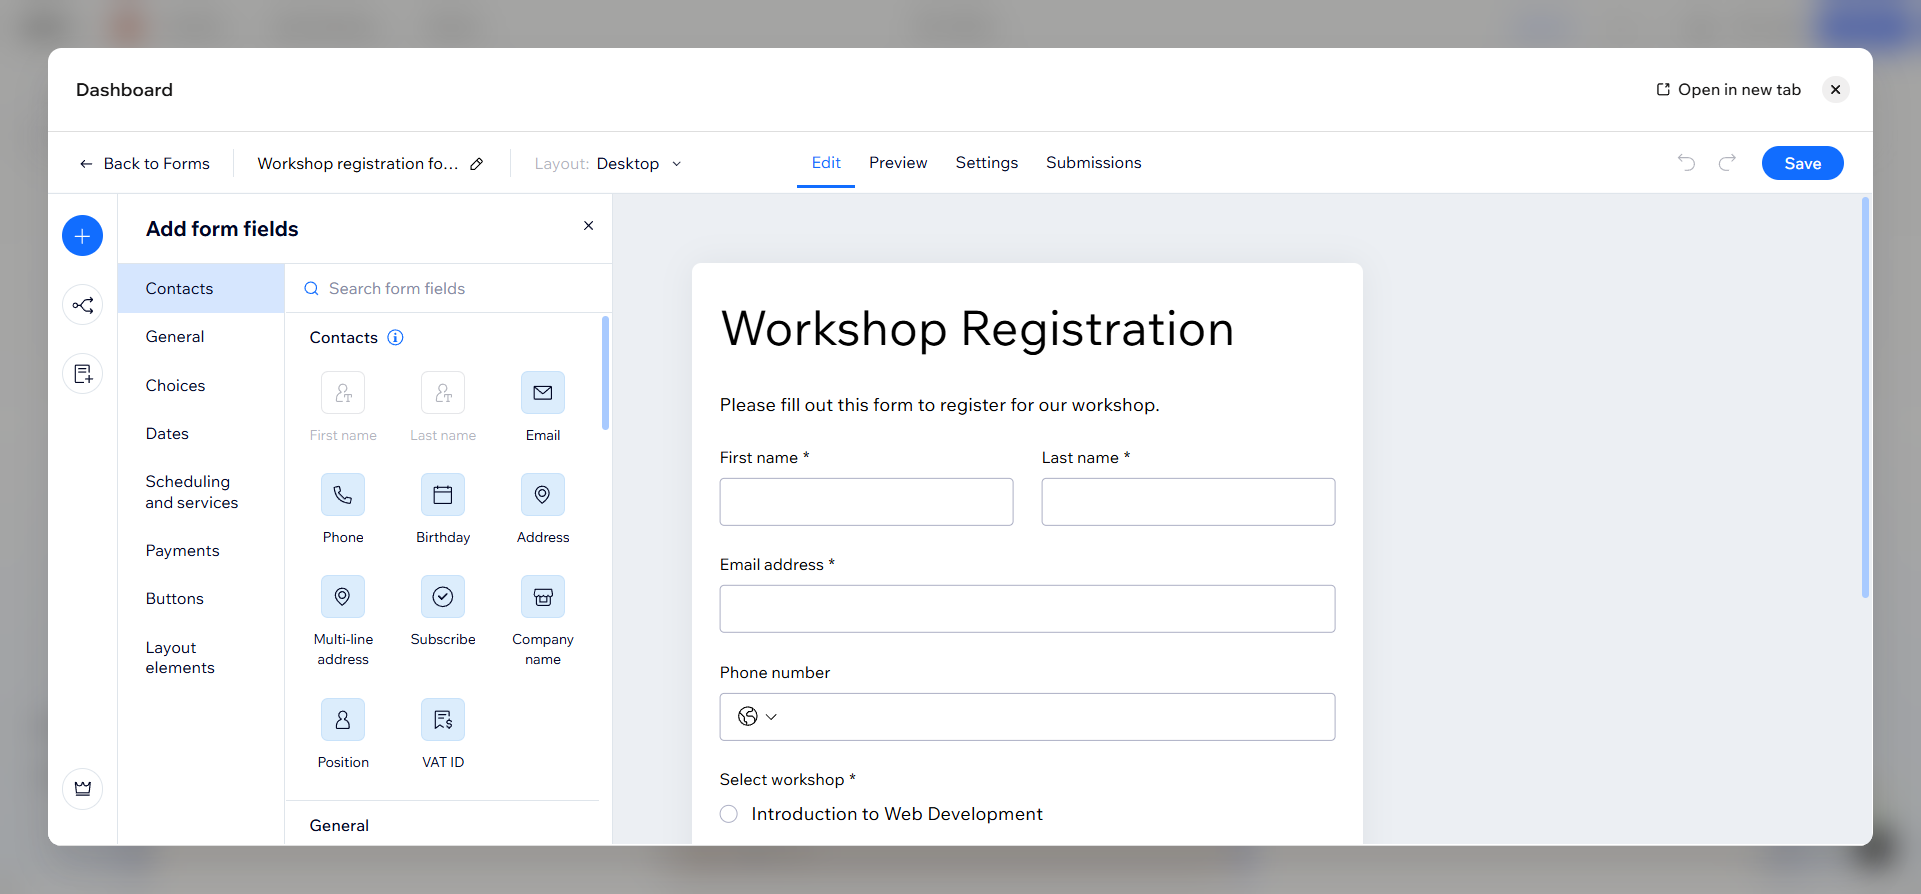
- Double-click on the form, and then click on the fields you want to edit and tailor them to your needs.
- Click on the Settings tab and scroll down to Notifications & automations. Select the settings you need for this form. You can also configure payment details at this stage and add a fixed or custom price.

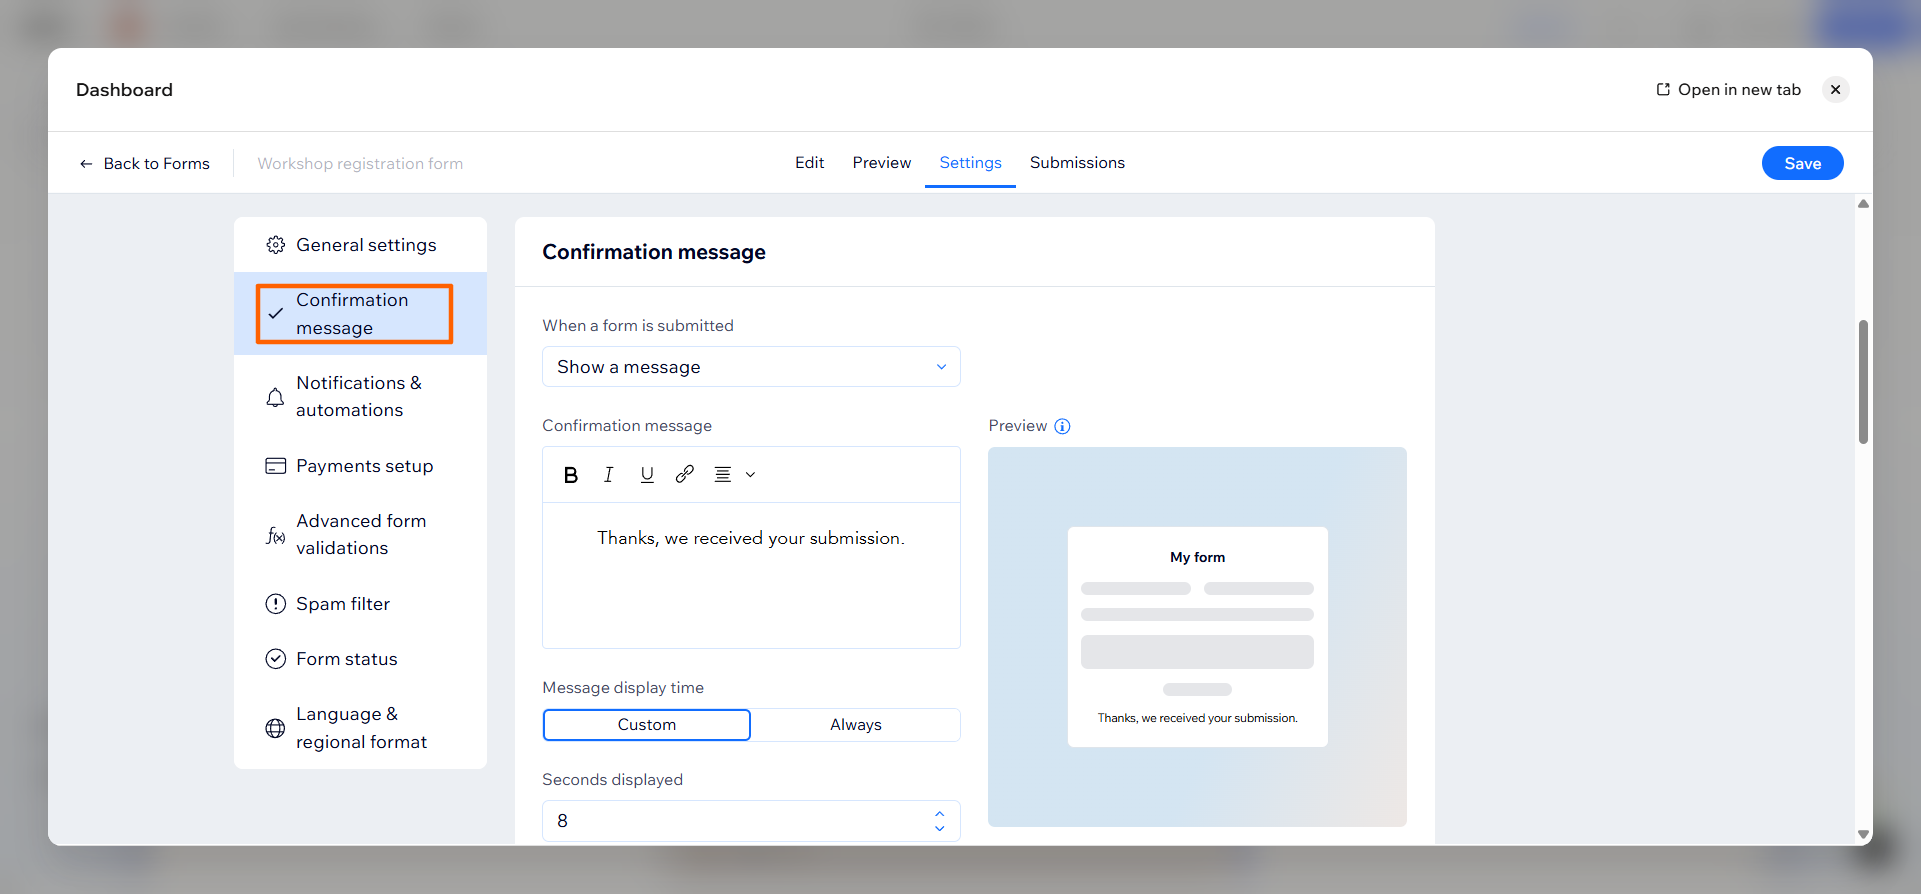
- Also in Settings, click Confirmation message and edit the message you want respondents to see after they submit the form.
- Click Save. Complete the rest of your website as needed.
4 noteworthy limitations of the native Wix form builder
Wix’s native form builder is a good option if you need something simple — you don’t need to do any coding or have experience with form building to use it. But the simplicity of this form builder is also its downfall. If you want any advanced functionality — like more payment options or adaptable questions, for example — you’ll quickly recognize some key limitations with Wix:
- Restrictive payment choices: While you can collect payments through Wix Payments in its forms, other form builders like Jotform offer more flexibility with extensive payment capabilities within forms and form-based workflows, in addition to 40-plus payment integrations.
- Conditional logic is simplistic: Wix has the ability to add basic “if, then” rules to your forms, which can come in handy when you want to make your forms more relevant to your respondents. If you’re looking for more granular conditional logic, however, turn to a sophisticated form builder like Jotform.
- Built-in e-signature support is limited: You can add a basic signature field to your Wix online form, but you can’t create workflows with signatures and approvals or collect electronic signatures via mobile. For this, you’ll need Jotform, which offers multiple ways to incorporate signatures into your forms.
- Submission management is lackluster: In Wix, you can view and manage your submissions in a simple table. With a tool like Jotform, though, you can track, filter, and organize your submission data in a collaborative workspace (Jotform Tables).
If you want to create a free registration form in Wix, the built-in tool works well. But if you need anything more complex — such as being able to choose your payment processor, adding advanced conditional logic, or tracking submissions in a powerful workspace — try Jotform instead.
How to add a Jotform registration form to your Wix site
Jotform is one of the best online form builders out there, and an excellent choice for creating registration forms in Wix.
The platform comes with more than 20,000 free form templates (including many free registration form templates and forms for your Wix website), so you can easily find and customize a registration form that meets your needs. Plus, Jotform has over 150 form integrations, so it works seamlessly with other tools in your business tech stack, like Wix.
Here’s how to create a registration form with Jotform and add it to your Wix website.
1. Create a registration form in Jotform
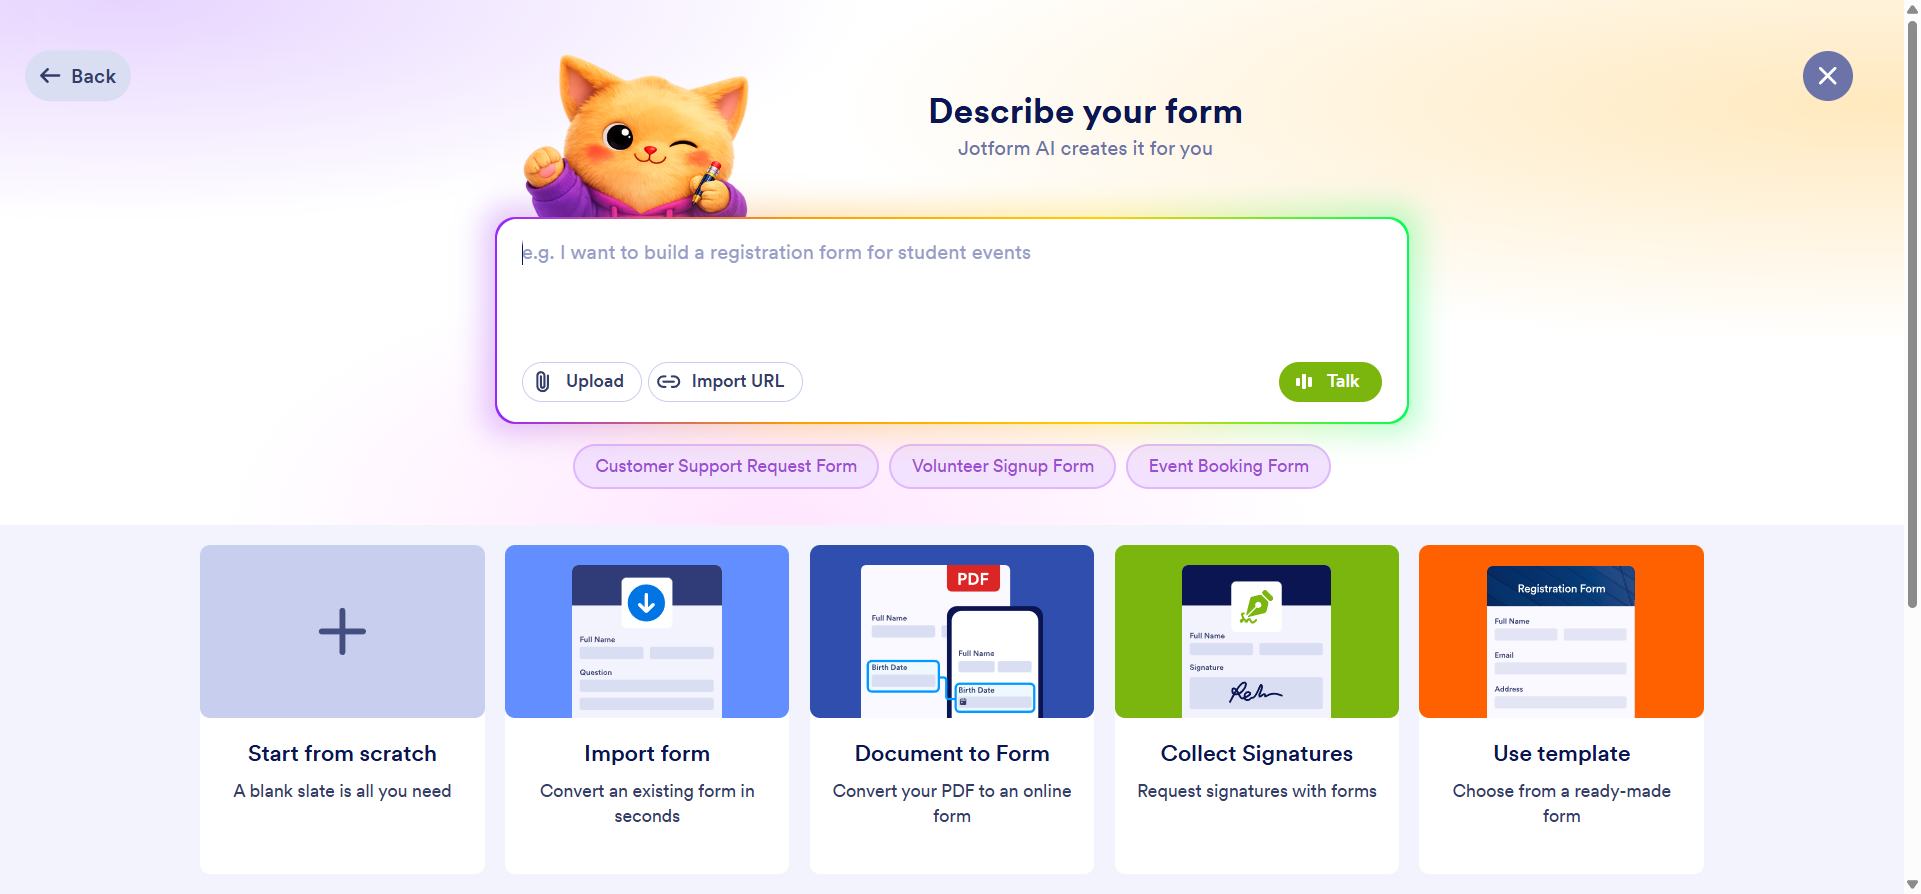
From the main Jotform form builder menu, click + Create and select Form. You can start from scratch, import a form, or choose from one of the many registration form templates available. You can also use Jotform AI to create your registration form with a simple prompt.
2. Customize the form to match your Wix site branding
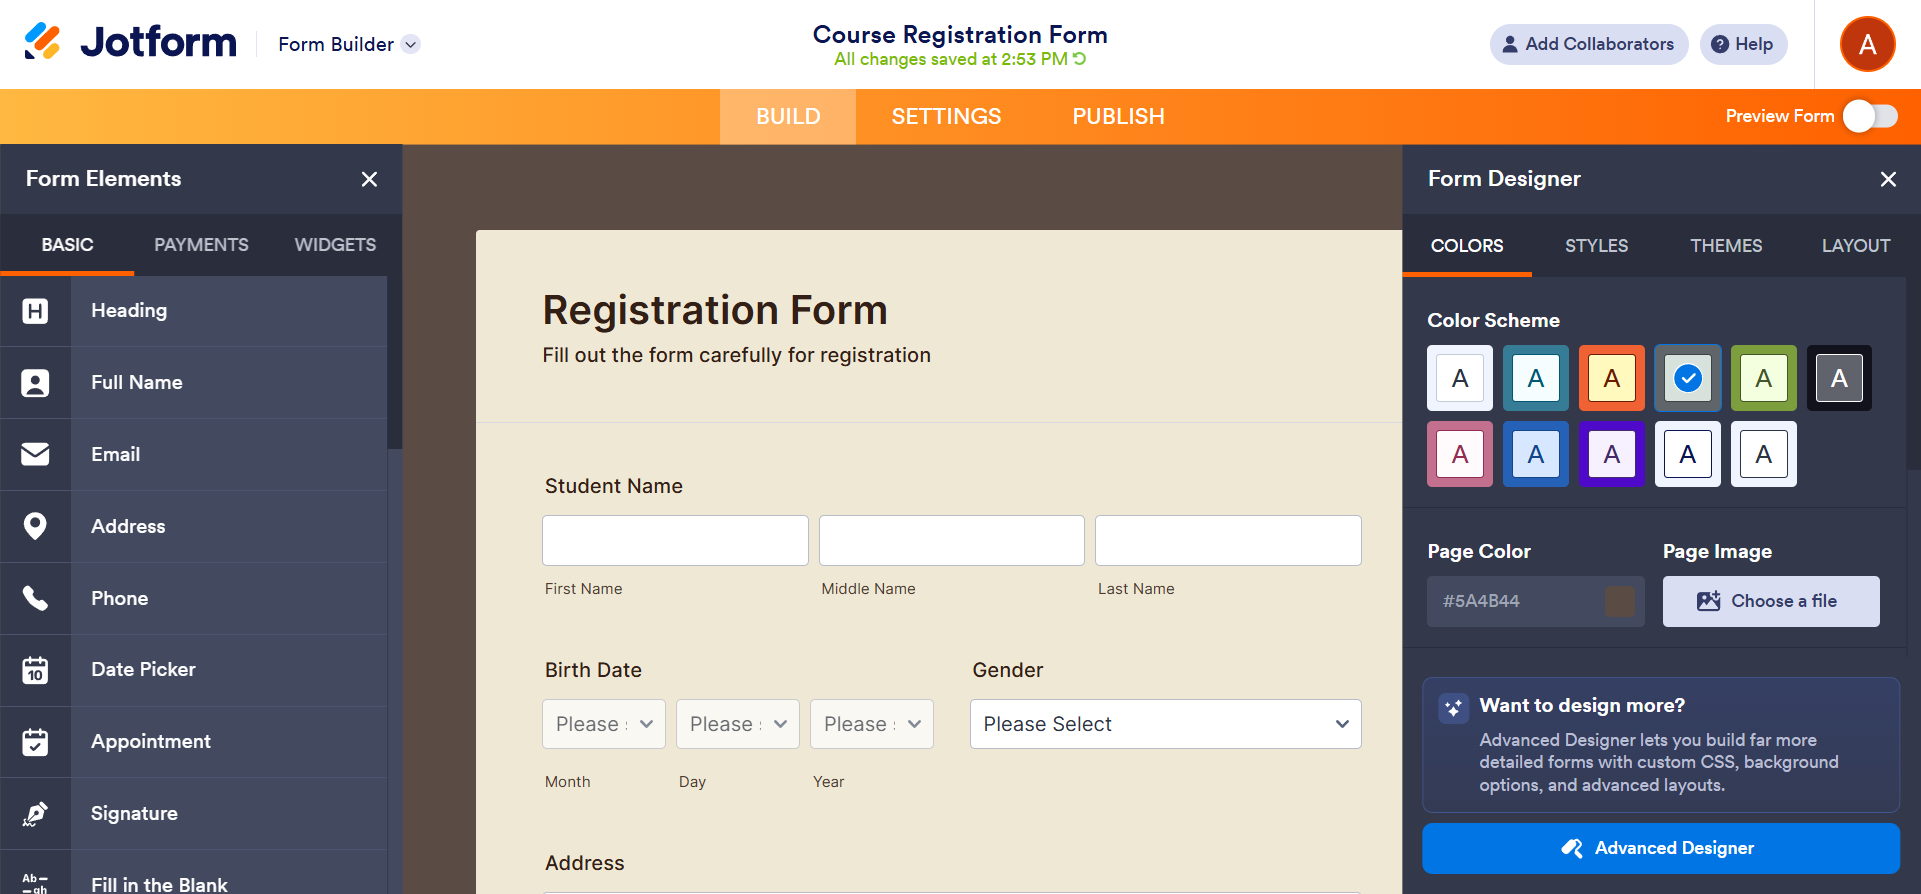
Use the Form Elements and Form Designer menus in Jotform to edit the form. You can customize the colors, images, text, and structure to meet your specific needs, ensuring the form aligns perfectly with your Wix website. From here, you can also add conditional logic, electronic signatures, and payment details.
3. Generate the embed code from Jotform’s Publish panel
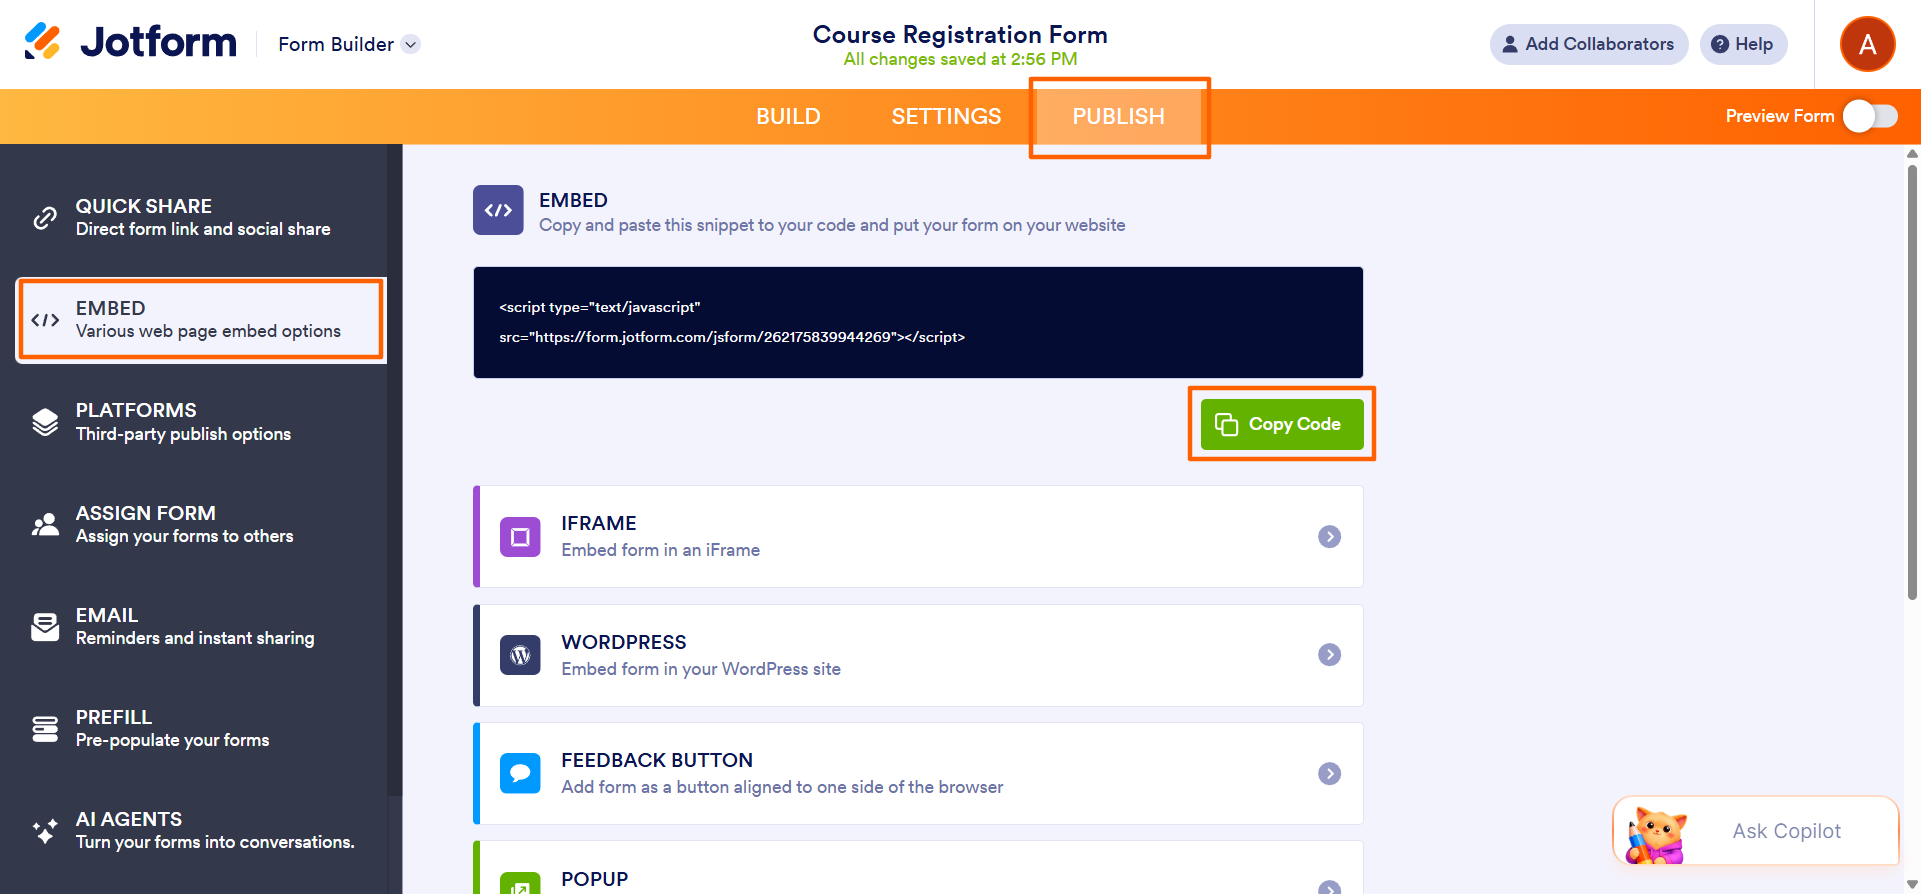
Click Publish from the top panel, then click Embed. Click Copy Code.
4. Add the HTML code to your Wix website
Go back to the Wix Editor and click Embed from the Elements panel. Paste the code into the Embed box and click Apply. Your Jotform form will now appear on your Wix website.
Creating your registration form in Jotform and adding it to your Wix website is simple. It only takes a couple of minutes and doesn’t require any coding.
As well as having thousands of form templates and advanced customization features, Jotform also offers flexible payment workflows, granular conditional logic, e-signatures, and so much more. And, when the responses start rolling in, you can track, organize, and act on them from Jotform Tables, a powerful collaborative database.
Jotform vs Wix Forms — which is right for you?
Jotform and Wix can both handle simple registration forms. But what happens after the form is submitted, and how much control do you have over the form-filling experience? Take a look at Wix and Jotform side by side below.
 Wix forms |  Jotform | |
|---|---|---|
| Form templates | Limited selection | Over 20,000 ready-made templates, including hundreds of registration form templates |
| Payment integrations | Yes (Wix Payments) | Extensive payment collection capabilities with over 40 gateways, including Stripe, PayPal, Square, and more |
| Conditional logic | Basic (“if, then” logic) | Advanced (show/hide fields, branching) |
| App integrations | Limited | More than 150 (Google Drive, Mailchimp, Dropbox, etc.) |
| E-signatures | Yes (basic e-signature field) | Yes (advanced features via Jotform Sign) |
| Submission management | Basic (Wix Contacts) | Jotform Tables — filter, sort, collaborate |
| Multistep forms | ||
| File uploads | Limited | |
| Custom branding | Limited | Full control (colors, fonts, logo) |
| Mobile responsiveness | ||
| Free plan | Yes (limited) | Yes (up to five forms and 100 monthly submissions) |
| Embed on Wix | Native | Yes, via HTML embed — no coding required |
| Learn more | Try now! |
Whether you choose Wix or Jotform, you’ll be able to gather data from your registrants. But if you want more control over your registration form and the data that comes out of it, then Jotform is the right choice.
Jotform offers a free plan, so you can take advantage of its features today. Sign up for Jotform, create your registration form, and see how easy it is to embed it into Wix.
FAQs about Wix registration forms
Yes, Jotform has a free plan which allows you to create up to five forms and receive up to 100 submissions each month. You can create an account in Jotform, build your registration form using a Jotform registration template, and then embed it into Wix — all for free.
Yes, Wix registration forms can collect payments through Wix Payments. However, if you’re looking for extensive payment capabilities in forms and form-based workflows, go with a tool like Jotform, which supports more than 40 payment processors, one-time and recurring payments, donations, purchase orders, and more.
If you’ve built a form in another form builder and want to embed it in Wix, you’ll need to copy the embed code for that form. Then, in the Wix Editor, search for and click on the Embed function. You can then paste the embed code and apply it to your website. This will embed the form into Wix.
This article is for Wix beginners and non-technical users who want to collect registrations on their Wix site — event organizers, small business owners, educators, and community managers who need a working form without touching a single line of code.























Send Comment: