Update
Stock management is now possible in our payment integrations. Please check out our user guide on How to Enable and Manage Product Stock in Payment Fields for more details.
When setting up Payment Forms, there are occasions when you would want to offer products with limited stocks. Yes, we have a variety of widgets that allow you to achieve that, but linking those widgets with an actual Payment Field to process payments is a bit tricky. And that’s the main topic of this guide.

We’ll be covering two scenarios:
- Bulk Purchases – users can select a product with limited stock and they can buy as many as they want while supplies last. For example, users can buy one, 10, or even 50 pieces of Product A with only 1000 limited stocks.
- Single Purchases – users can pick one product (and only one product alone) with limited stocks. For example, a user wants to buy Product B with a limited supply of 50 pieces.
Note
This guide is a fairly advanced topic, so familiarity with the features below (doing calculations, using widgets, and payment gateways) would surely help.
To make it work, we’ll be using the following features:
Payment Processors
Here’s a complete list of all payment processors we integrate. We recommend reading through our article on which payment processor is the best for your business if you’re unsure which one will work for you.
Form Widgets
- Inventory Widget – used for bulk purchases.
- Ticket Purchases Widget – used for single purchases.
- Form Calculation Widget – used for calculating the total.
Let’s get started!
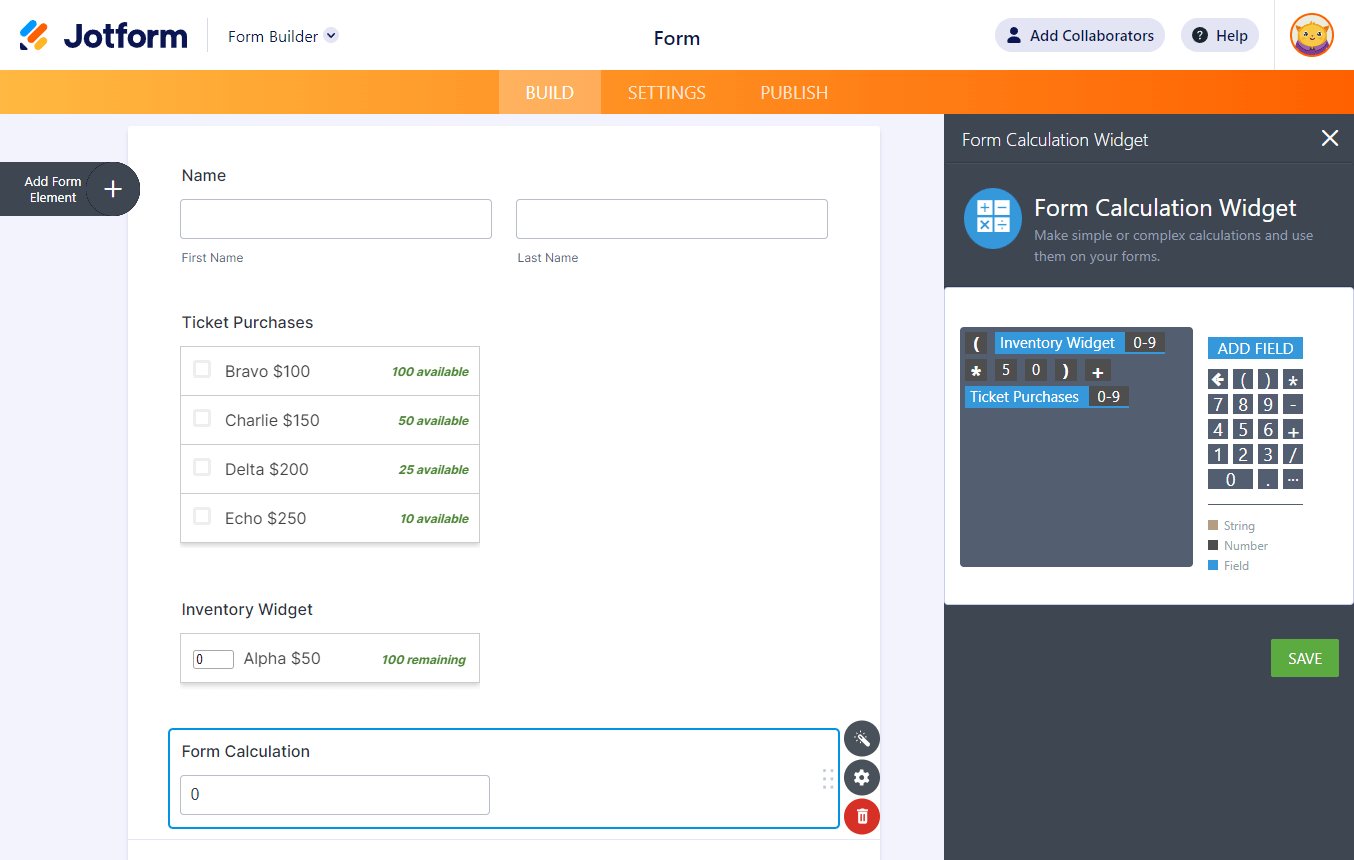
Setting up the Inventory Widget
For bulk purchases, add the Inventory Widget to your form. Here’s how you can do that:
- In the Form Builder, click the Add Form Element button.
- Go to the Widgets tab.
- Search and click the Inventory widget. You can also drag and drop it to add.

- The widget settings would generally open once you add the widget. Set it up accordingly. The most important options are the following:
- Description – this is where you should put the product name and its price.
- Available Quantity – this is where you should put the available stock of the item.
- Submit Value With Label – you must keep this to No since you will use this widget in the calculation.

One key ingredient to making this widget user-friendly is ensuring users know how much the product will be. So naming your product to something like Alpha $50 will do two things at once – you’ll let your users know the name of the product and the price.
Adding the price is important because this widget will list your product description as opposed to traditionally having those details right on the Payment Field.
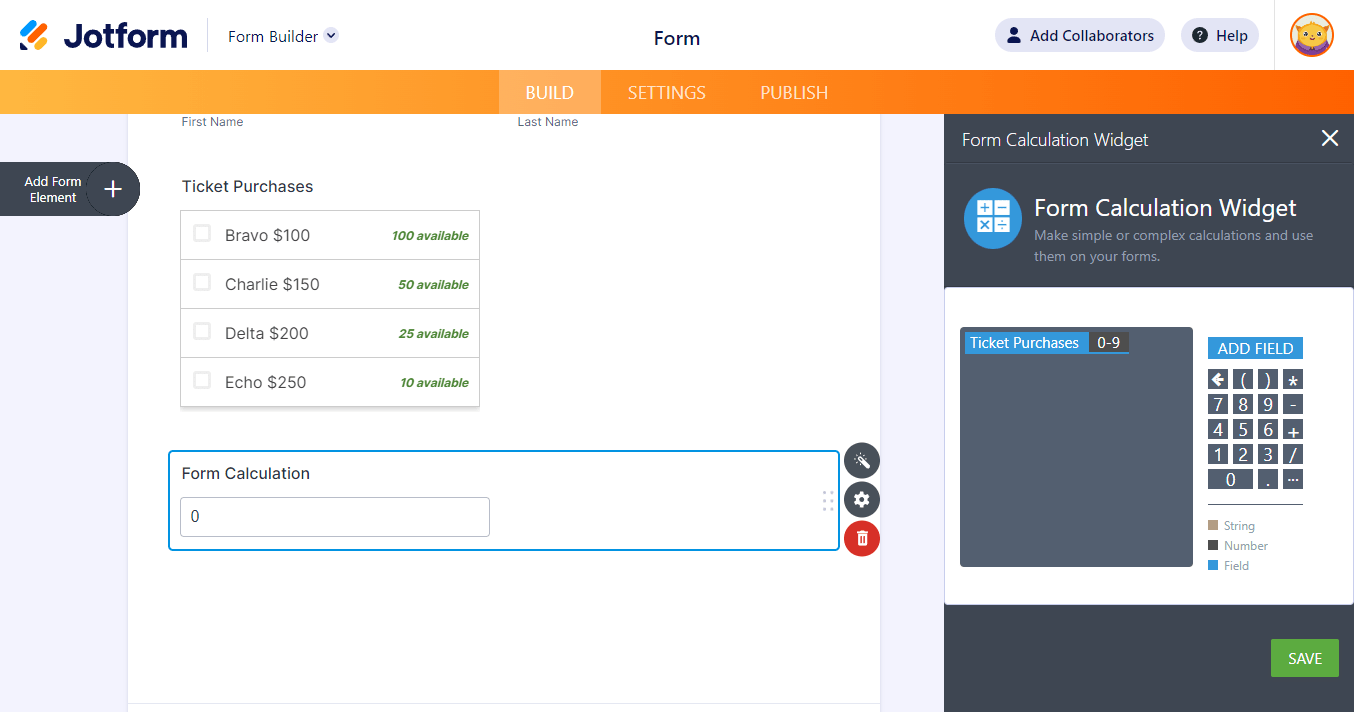
Setting up the Ticket Purchases Widget
For a single purchase, use the Ticket Purchases widget in the form. The steps are similar to the inventory widget:
- Click the Add Form Element button in the Form Builder.
- Go to the Widgets tab.
- Search and click Ticket Purchases. You can also drag/drop it to add.
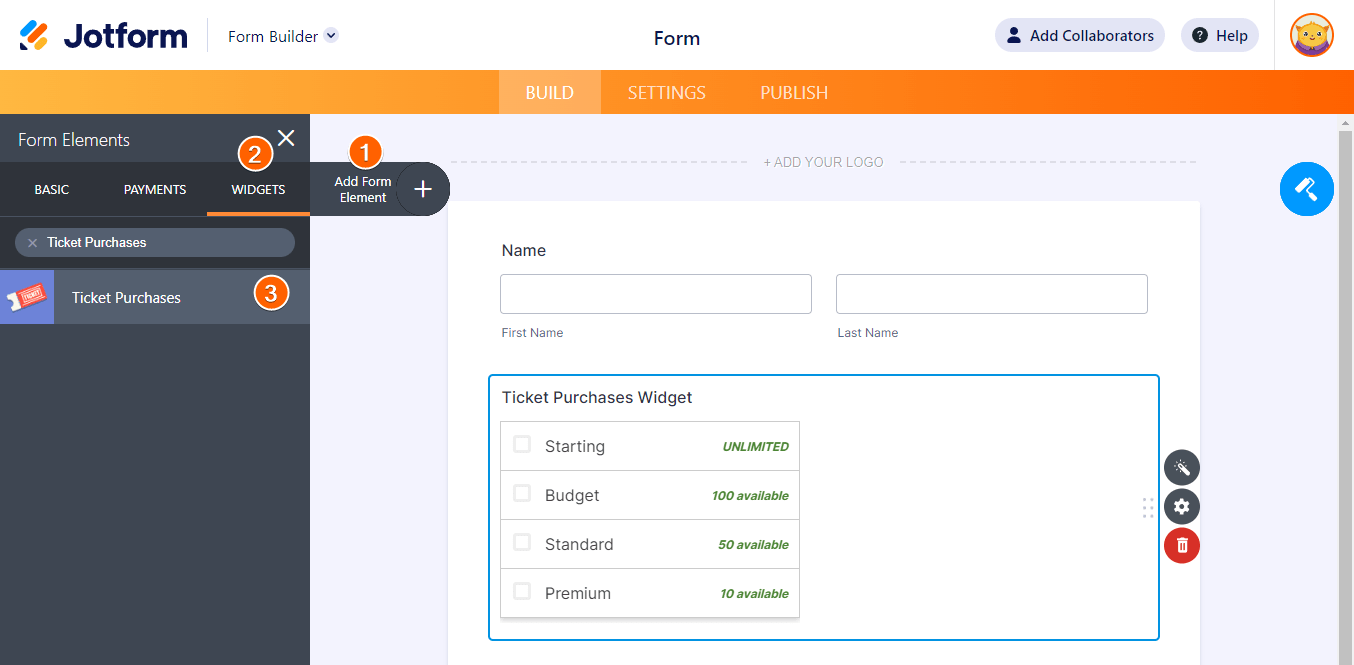
- Set up the widget settings. The most important options are the following:
- Ticket types – like the Inventory Widget, ensure you will name your products, show the prices, and don’t forget to assign the number of stocks left per product.
- Min Selection – set this to one.
- Max Selection – also set this to one.
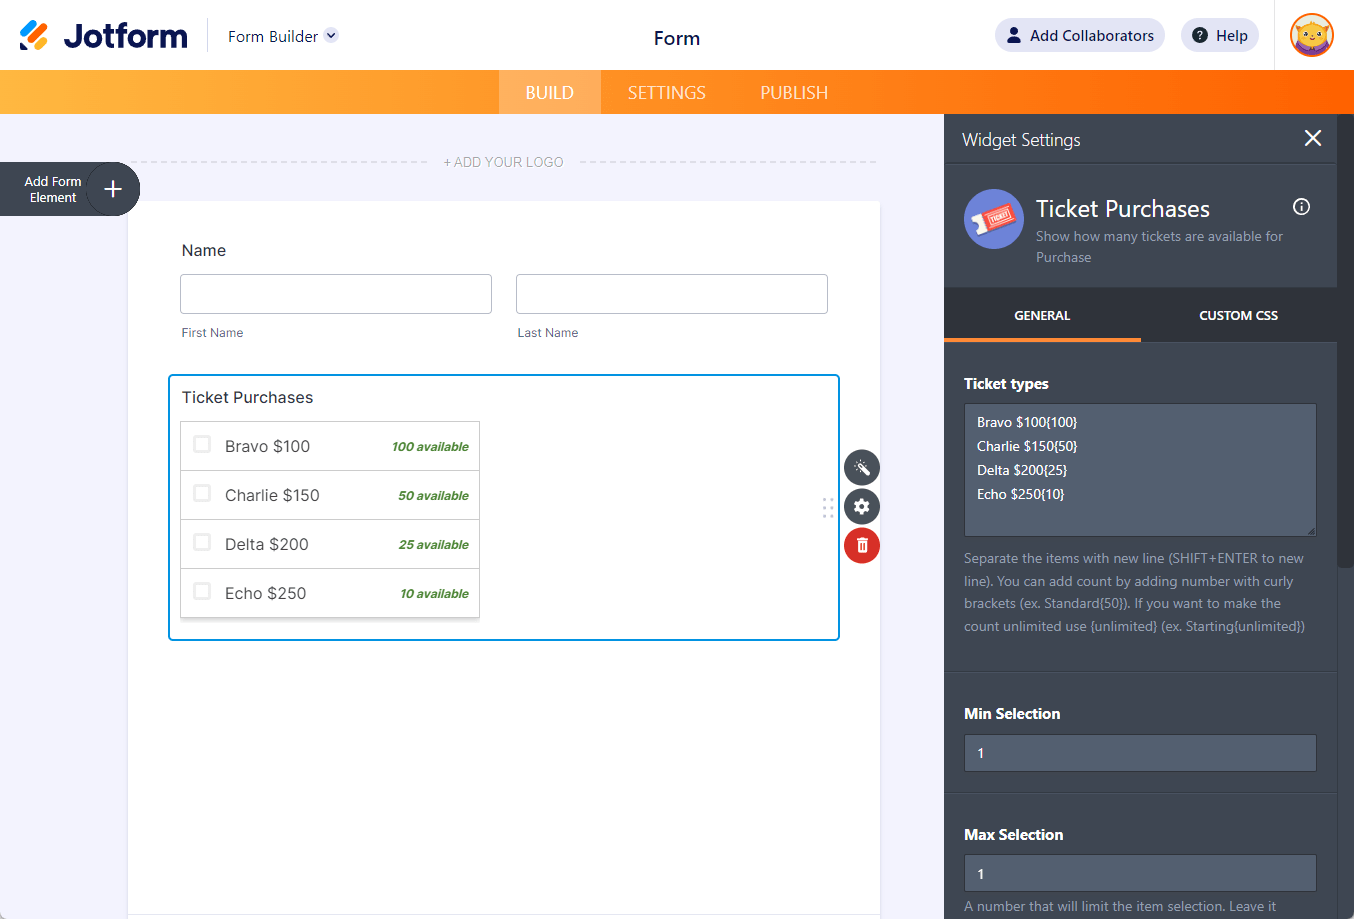
The setup above basically means that the product Bravo costs $100 each and has 100 stocks left – product Charlie is at $150 each with 50 stocks left, and so on. Read and follow the help description right below that section to better understand your options.
Setting both Min and Max selections to one would mean users should pick at least one item and can only pick one product from the widget.
Setting up the Calculation Widget
This part is relatively straightforward. For the Inventory widget, you will only need to calculate it by its price. For example:
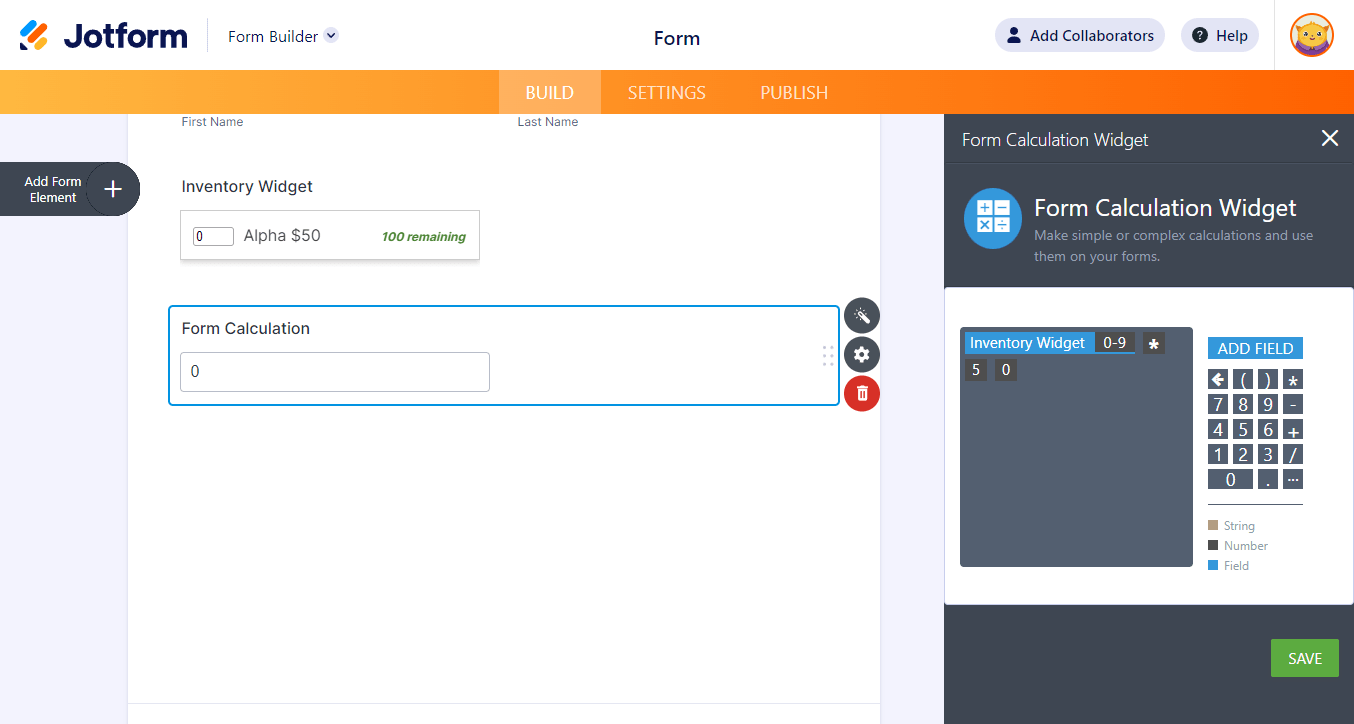
For the Ticket Purchases widget, you’ll only need to add it to the equation.
Now, you do not need to use multiple calculation widgets to get the total of the two widgets. Just combine them in one equation. For example:
As you can see, you will only need to follow the correct calculation pattern. The first one, which is the inventory widget, is enclosed with parenthesis.
Related Guide:
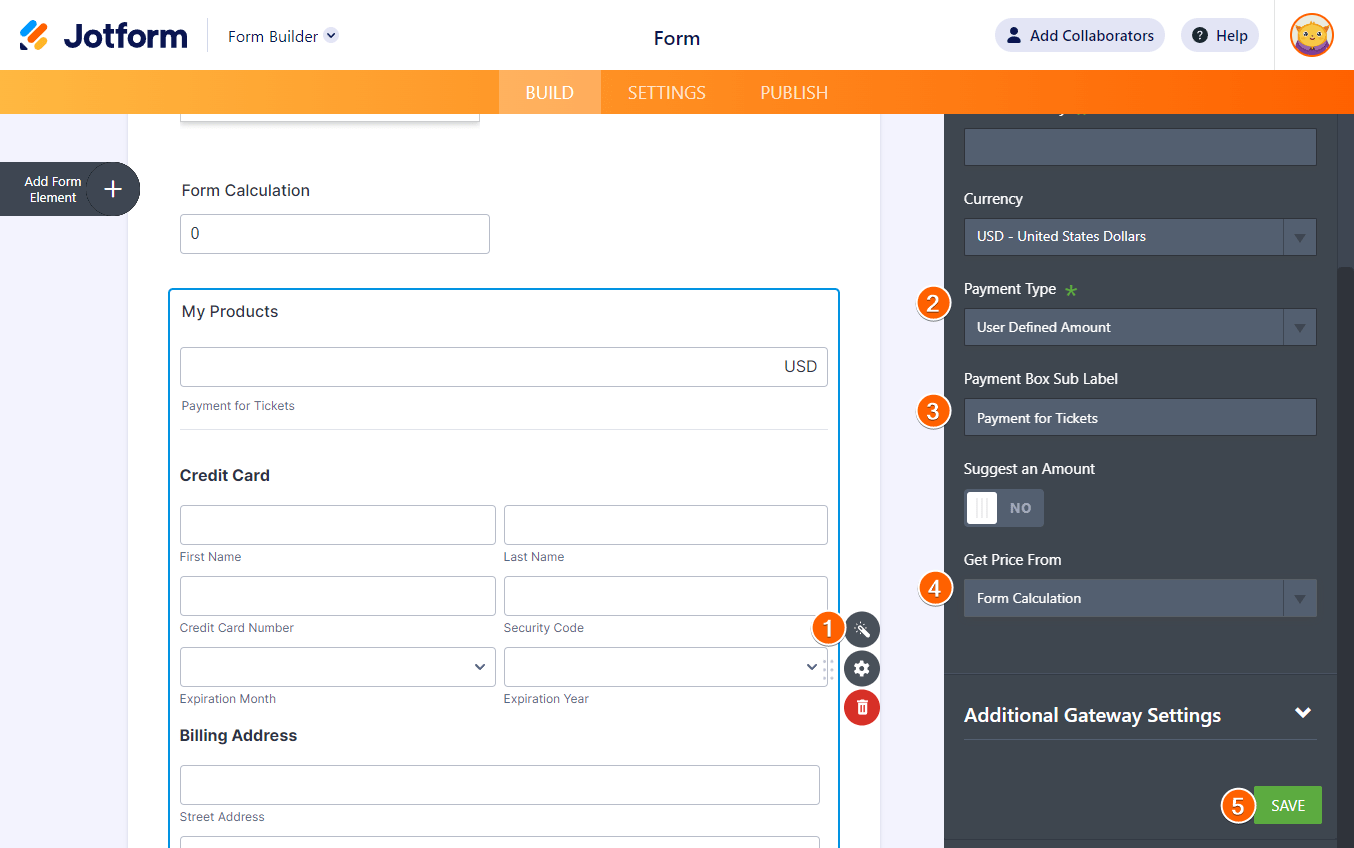
Passing the Calculated Total to the Payment Field
The last part of this guide is to pass the calculated total to the payment field of your form. Choose your payment gateway, and set it up this way:
- Click the payment element.
- Open its Payment Settings by clicking the wand icon.
- Select User Defined Amount from the Payment Type.
- Enter your Payment Box Sub Label.
- Choose the Calculation widget from the Get Price From – this is very important.
- Finally, click the Save button to save your changes.
Related Guide:
You can view and test these settings through the following demo form.

Send Comment: