If you use Jotform for order forms and want to automate the creation of invoices in QuickBooks, then keep on reading because this is the guide for you.
There are a couple things to keep in mind before you create an invoice and integrate Jotform with QuickBooks:
- Product or service items should be created at QuickBooks by the user with the exactly same names listed on the users’ Jotform forms.
- If your form is already connected to a payment gateway, and your form filler uses it to pay for a product or service, you will need to manually mark it as paid in QuickBooks.
- If your based outside the U.S., make sure to define taxes, such as VAT, Tax, and GST rates before you create an invoice and integrate with QuickBooks.
- Define Sales VAT in the United Kingdom
- Define GST in Australia
- Define Sales Tax Rate in Canada
- Define Sales Tax Rate in India
Now, let’s check out how to successfully integrate Jotform and QuickBooks:
- In the QuickBooks integration screen, click Create Invoice. Then click Next.
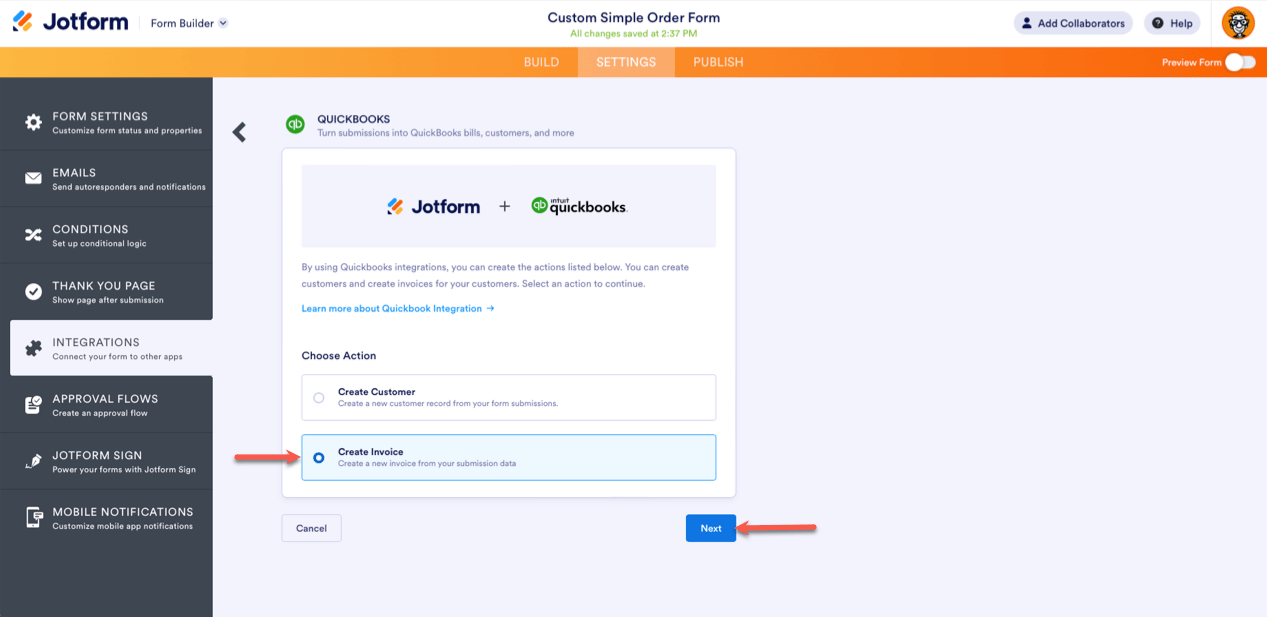
If you’re integrating with QuickBooks for the first time, you’ll be taken to QuickBooks’ authentication page to log into your account.
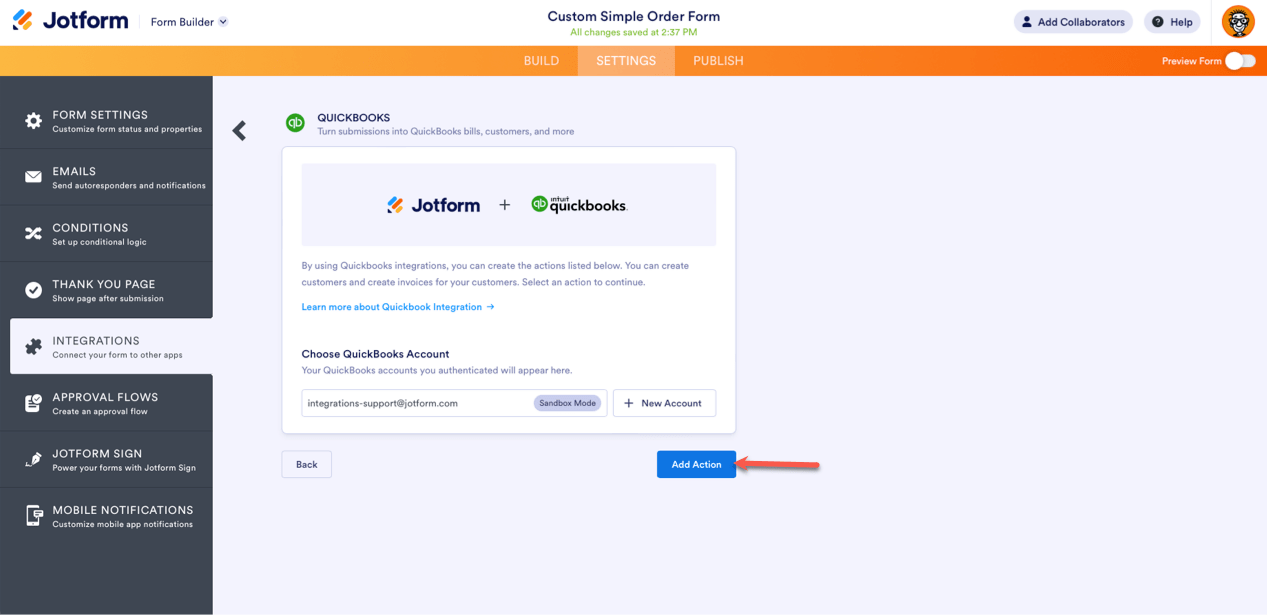
- If you’re already logged in, click Add Action.
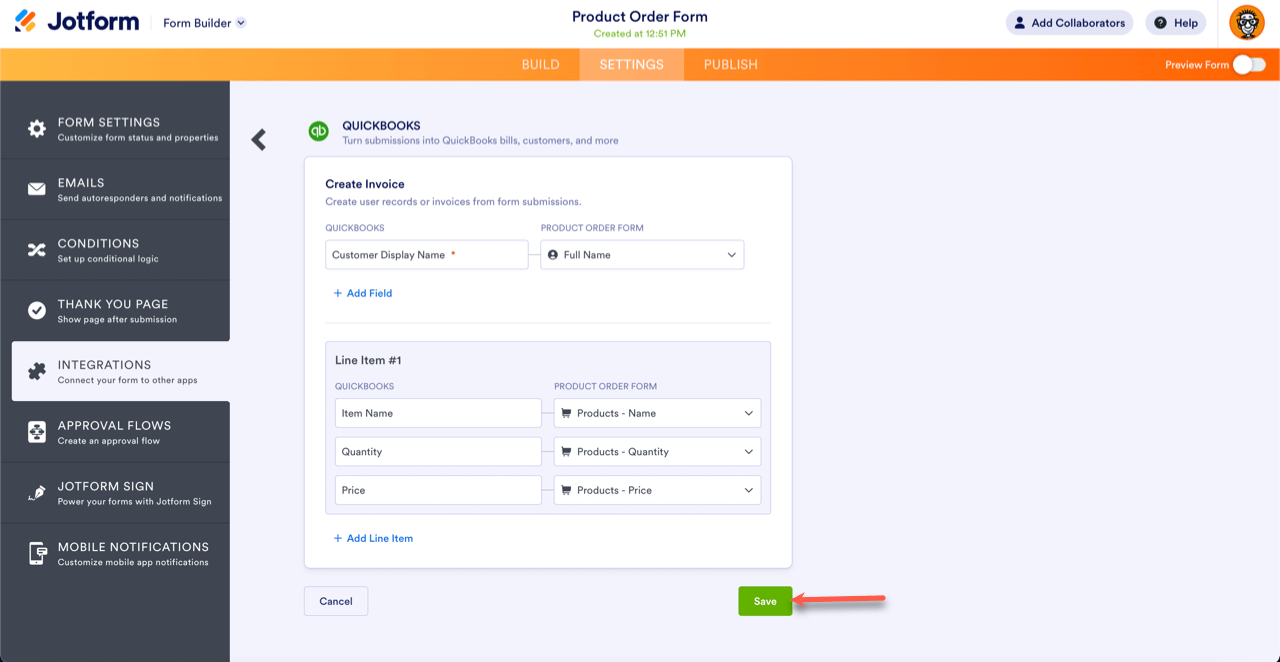
- If you’re using the My Products element, match your items to the QuickBooks items and click Save.
If you’re creating an invoice for a repeat customer, make sure the Customer Display Name in QuickBooks matches the Full name in Jotform, or else QuickBooks will automatically create a new customer.
If you listed your products using the Single Choice, Dropdown, or Multiple Choice elements, the inventory creation process is going to be a little different.
Single Choice, Dropdown, or Multiple Choice Elements
You can use a single choice, dropdown or multiple choice element to integrate your inventory with QuickBooks invoice program. Just like the product list element, you have to use the line item mapper to match the products with QuickBooks.
But they’re going to be a little different than the Product List element:
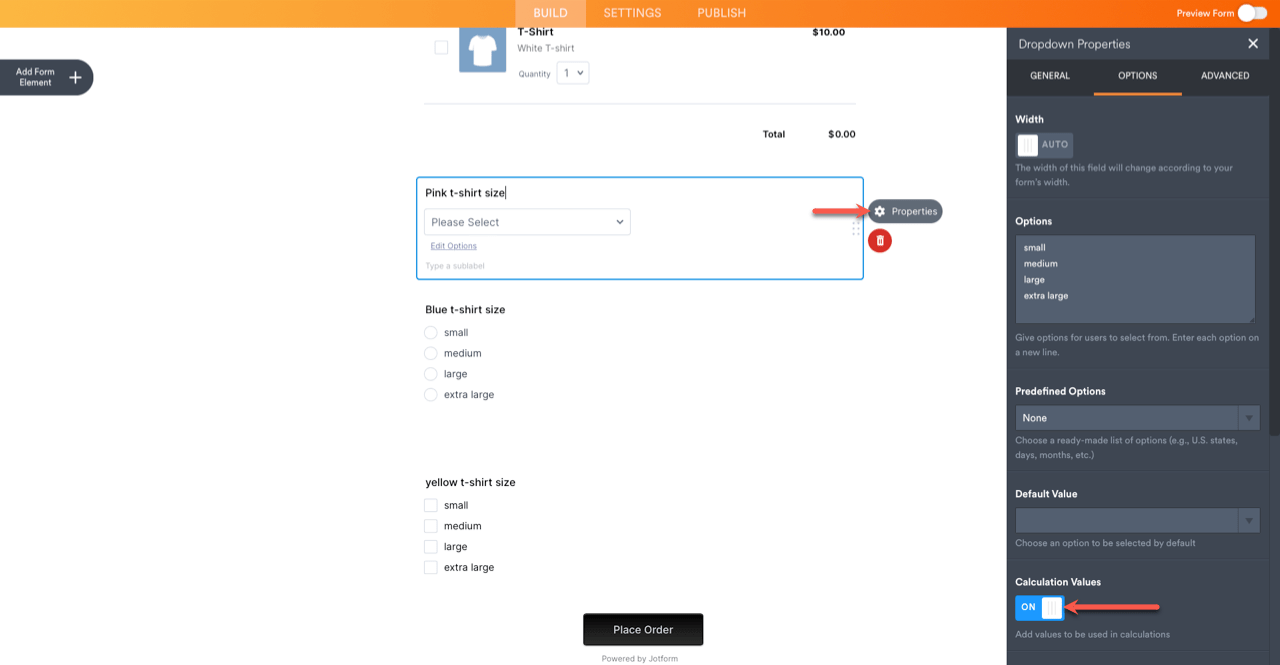
- Before you start the integration, open the Element Properties menu, go to the Options tab, and turn on Calculation Values. Don’t forget to add prices for each value.
- Match the fields in your form to the fields in QuickBooks. Click Save.
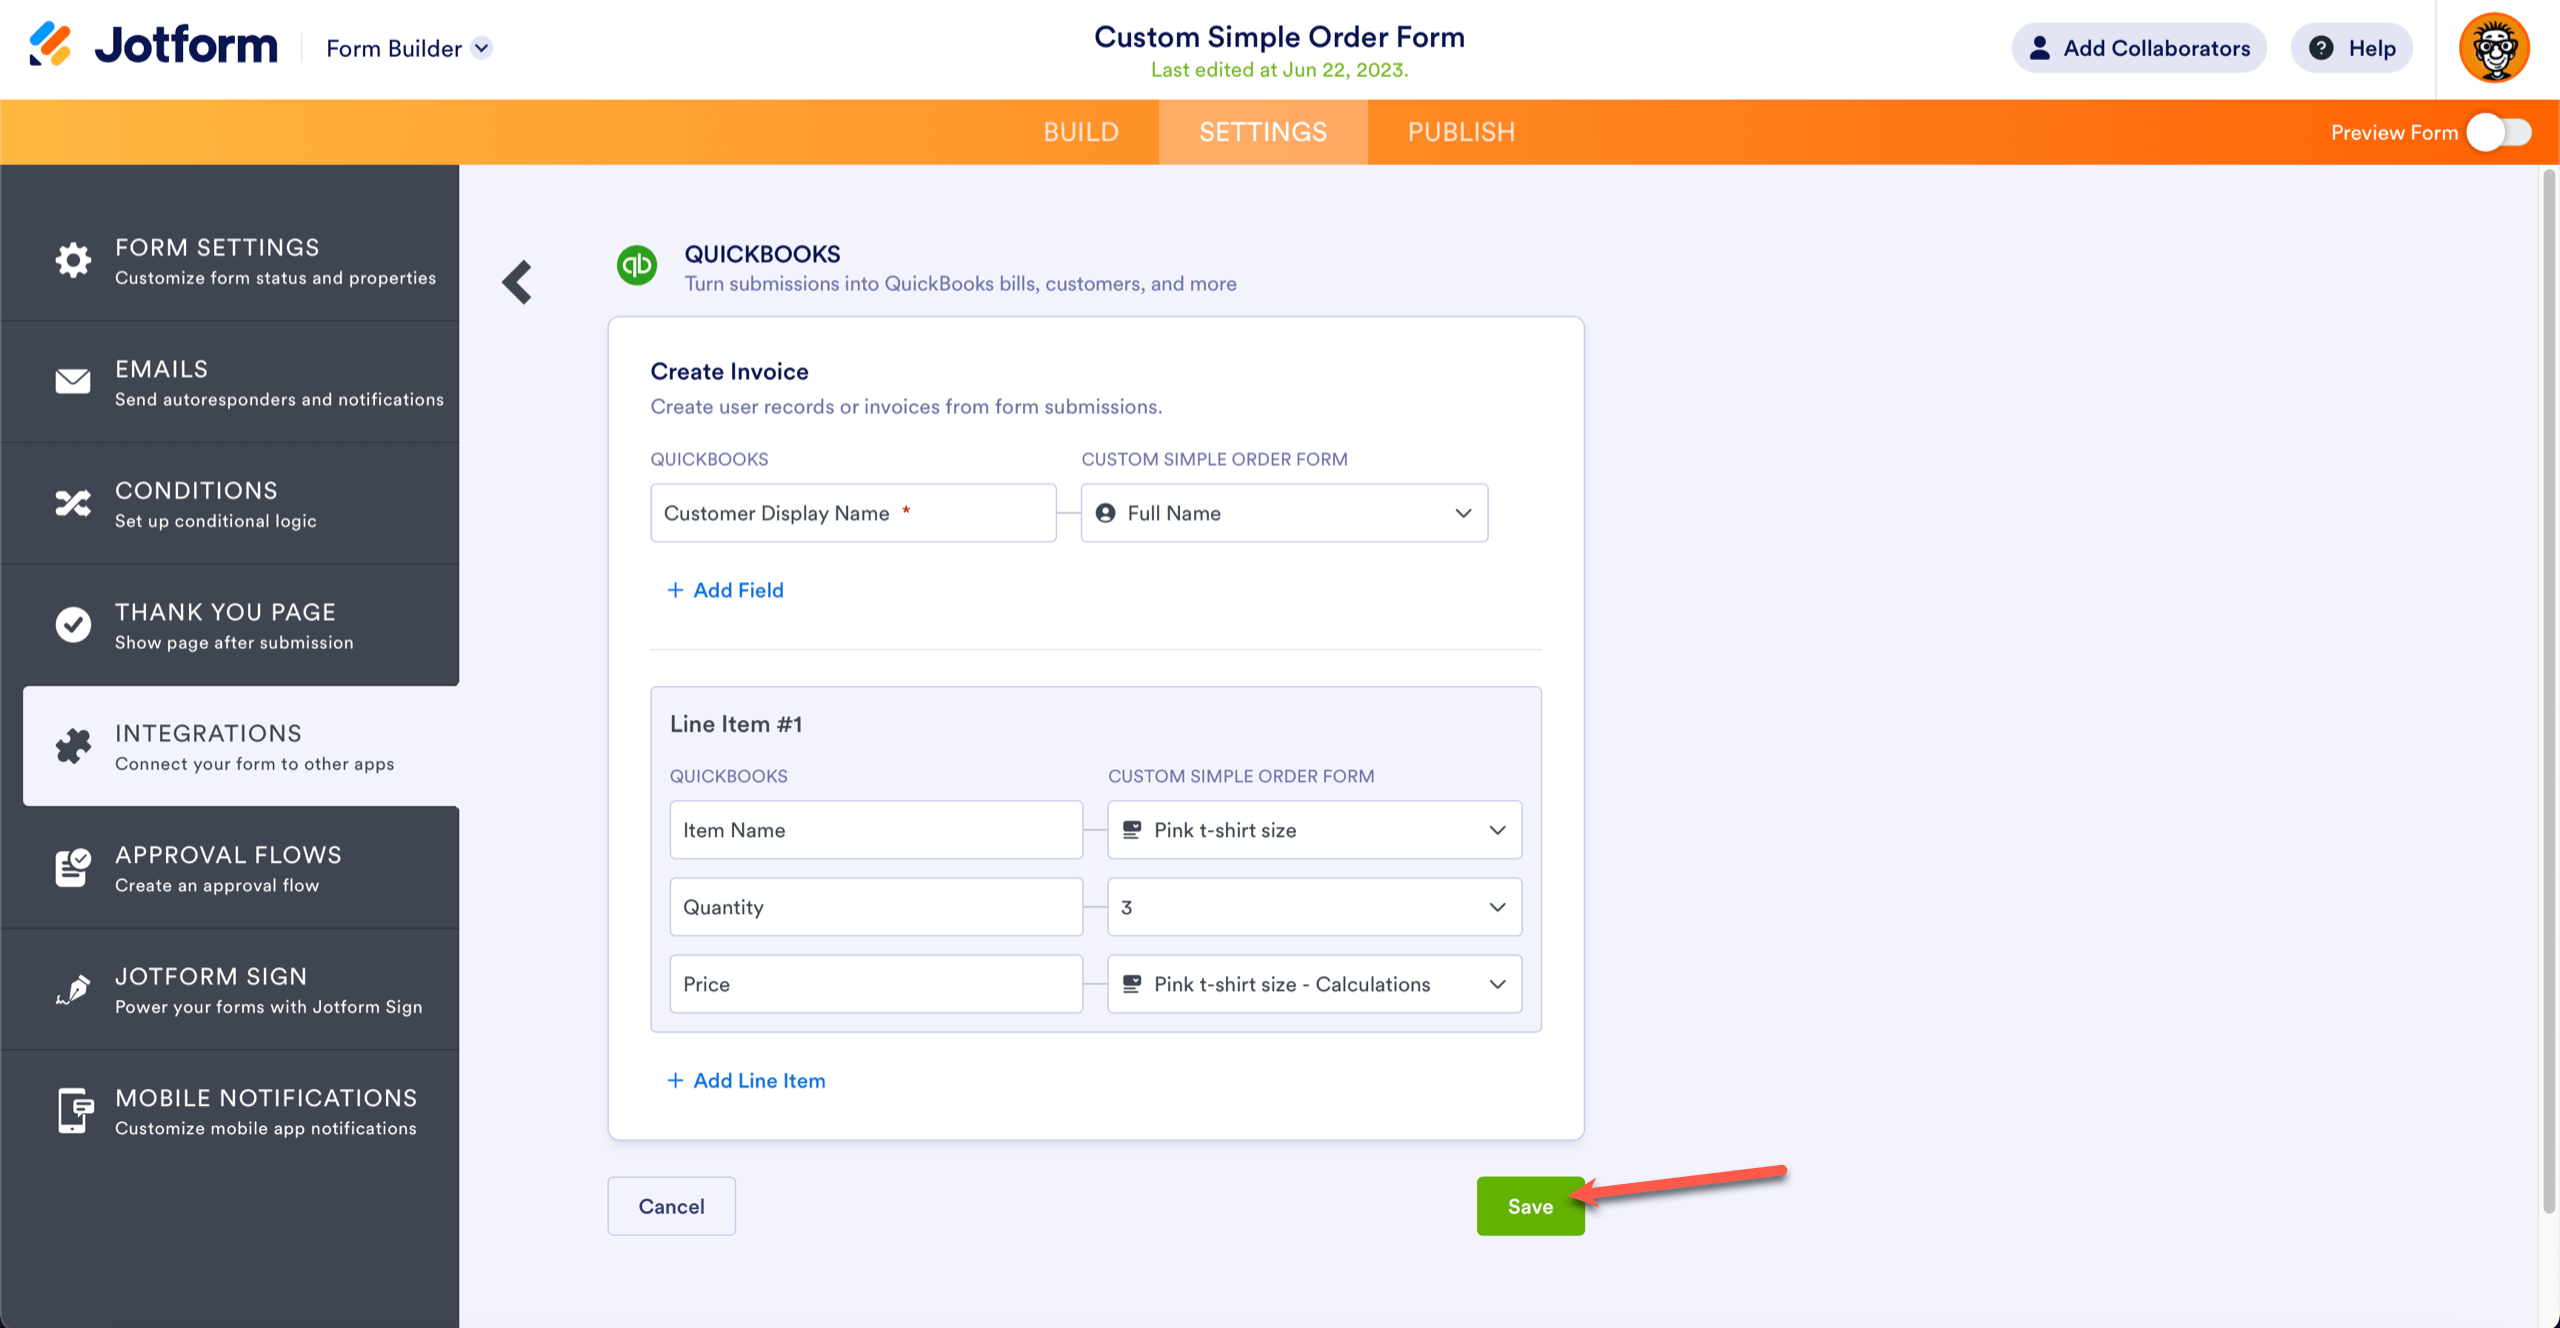
Note: You can only use one quantity per line item if you’re using single choice, multiple choice or dropdown elements. Alternatively, you can add an extra field to specify the quantity and map to that when you’re integrating.


Send Comment:
15 Comments:
32 days ago
I would LOVE the ability for employees to use jotforms to log expenses and have that info synced over to QB for easy logging and tracking!
65 days ago
would love a feature to add a check to the print check queue!!
72 days ago
What if I have one user sign in for QBs but multiple companies? How do I distinguish which company the form integration should use?
90 days ago
Would be great to have this create an importable file that could be used in Desktop Quickbooks.
194 days ago
Would be great to have this create an importable file that could be used in Desktop Quickbooks. I think there's a bigger installed base of desktop than online for Quickbooks.
245 days ago
Thanks for the integration, but why can't we just use the same data from the form and import to QuickBooks like we do when transferring data from one field to another. I do to many calculations and the calculation widget is critical for my forms build. So when can you make that happen?
277 days ago
How do you change the payment options once the Quickbooks integration is completed? I do not see an option to pay through Quickbooks and I am not able to change the PayPal payment option.
320 days ago
Mention being able to manage the synced invoices fully within QuickBooks Online!!!
346 days ago
I was very excited to see this added as an integration, but I noticed in the video that the created invoice is not assigned an invoice number. Testing the integration in my production environment, I had the same outcome.
How can we have invoice numbers associated with invoices that are created through the integration?
364 days ago
I'm struggling with how to make sure my form is connecting and creating an invoice. Supposedly I'm in Sandbox mode... I'm not a developer and don't know how to do this. Yes, I have a Sandbox account but it appears to me that JF is only connected to my real QBO account.
I'd love to be able to create forms inside JF that would create an invoice.
365 days ago
is there a way to have the form create a invoice number. can you have the unique ID widget be the invoice number for quickbooks please. without this feature the integration is unless as any order generated will get lost in the system
365 days ago
Need a way to send Quickbooks an invoice number (provided by jform). Otherwise, invoice number is blank.
More than a year ago
Y'all should make this available to create bills!!!
More than a year ago
Is this for QB online only or will it work with desktop?
More than a year ago
I would love to be able to create a Quickbooks Contractor/Vendor through Jotform as well!