In Jotform Tables, it’s possible to respond directly to form submitters. You can also forward submissions to your colleagues. It is helpful if you want to stop getting email alerts and prefer sending messages directly from your Jotform account.

There are three ways to pull up the Reply and Forward options:
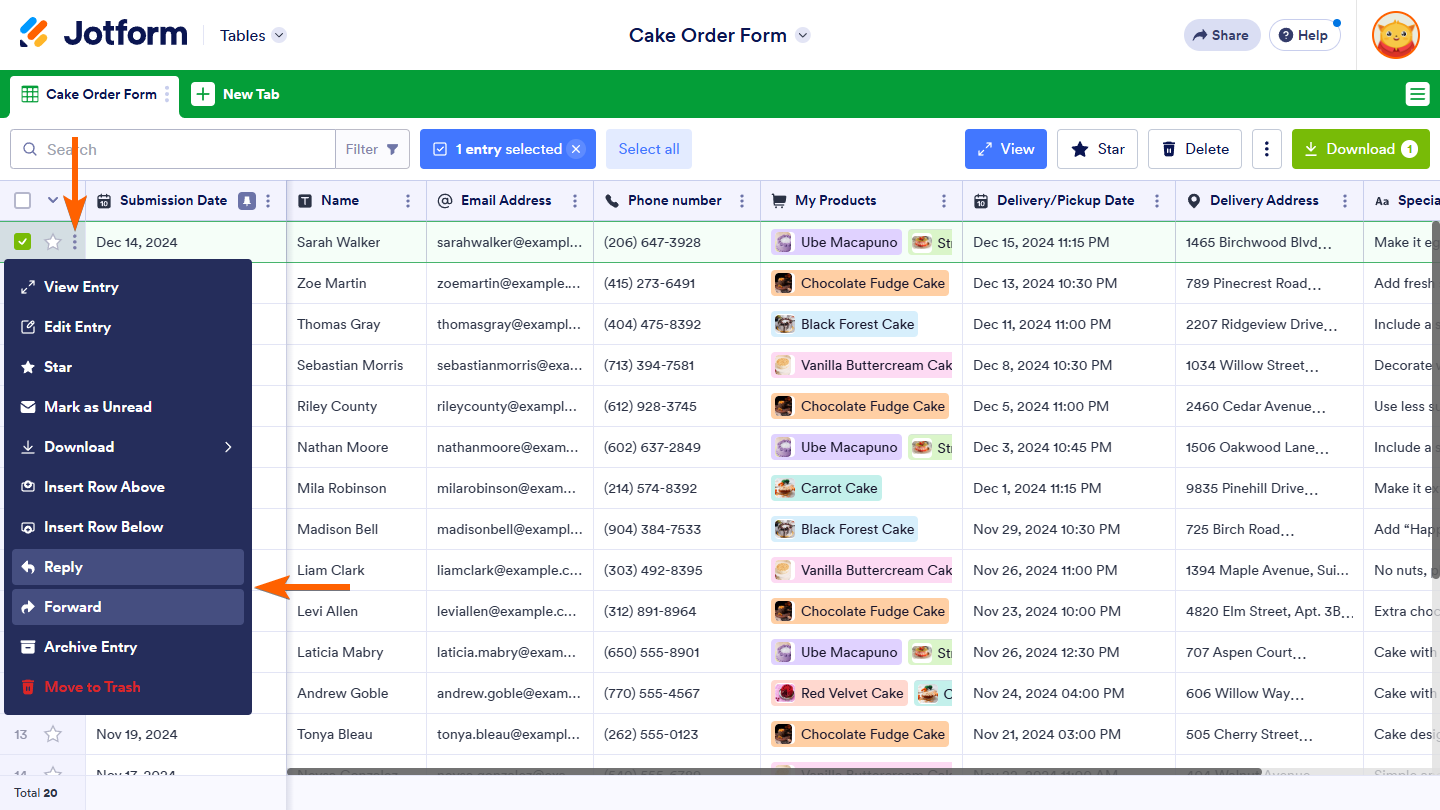
Inline Submission Menu
You can pull up the Inline Submission Menu by doing the steps below:
- Select the submission in Jotform Tables.
- Click the Kebab or Three Vertical Dots icon near the Select box and the Star icon of the selected submission. Alternatively, Right-Click the submission to open the Inline Submission Menu.
- Click the Reply or Forward option.
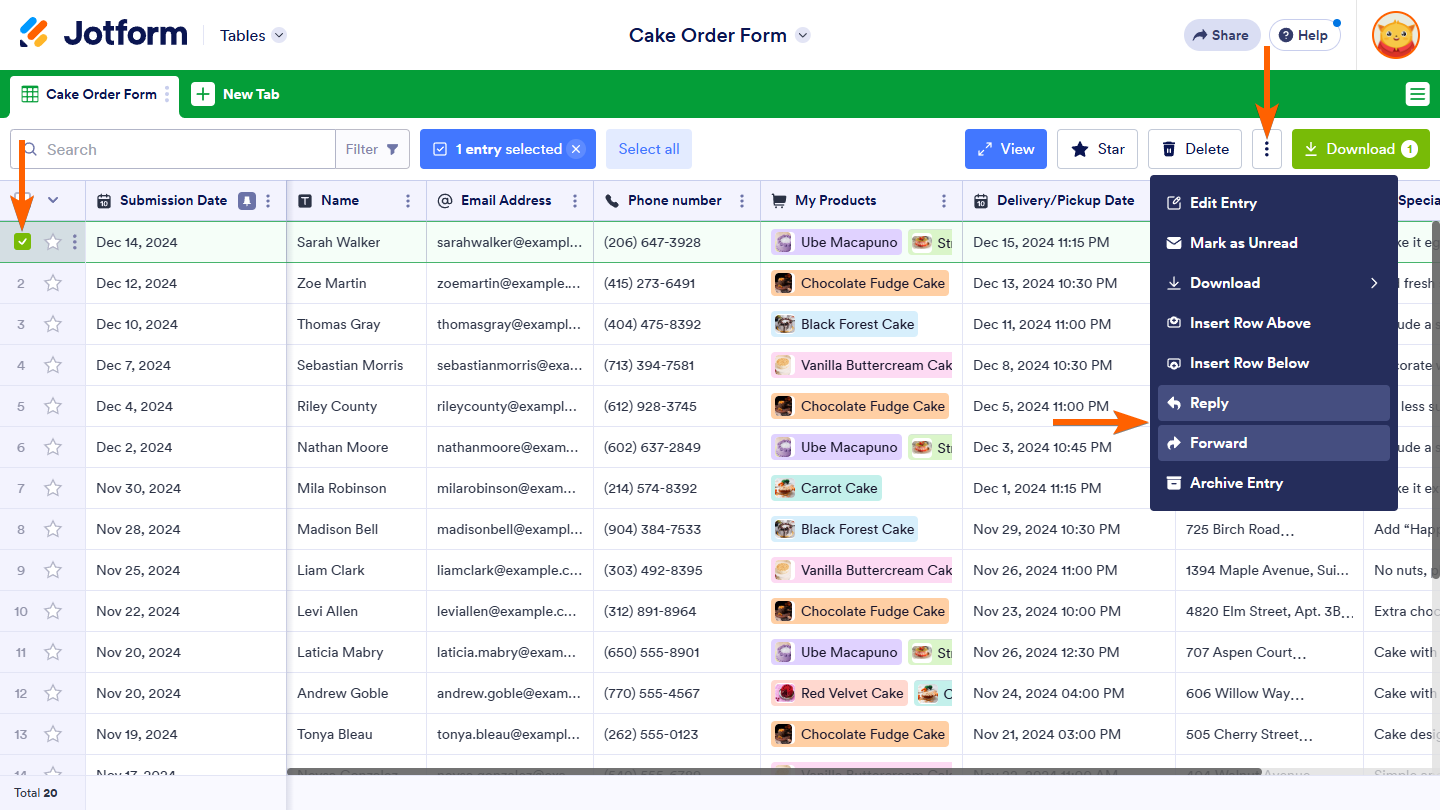
Top Submission Menu
You can open the Top Submission Menu by doing the following:
- Select the submission from Jotform Tables.
- Click the Kebab or Three Vertical Dots icon at the upper right corner of the page. It’s between the Delete and Download buttons.
- Click the Reply or Forward option.
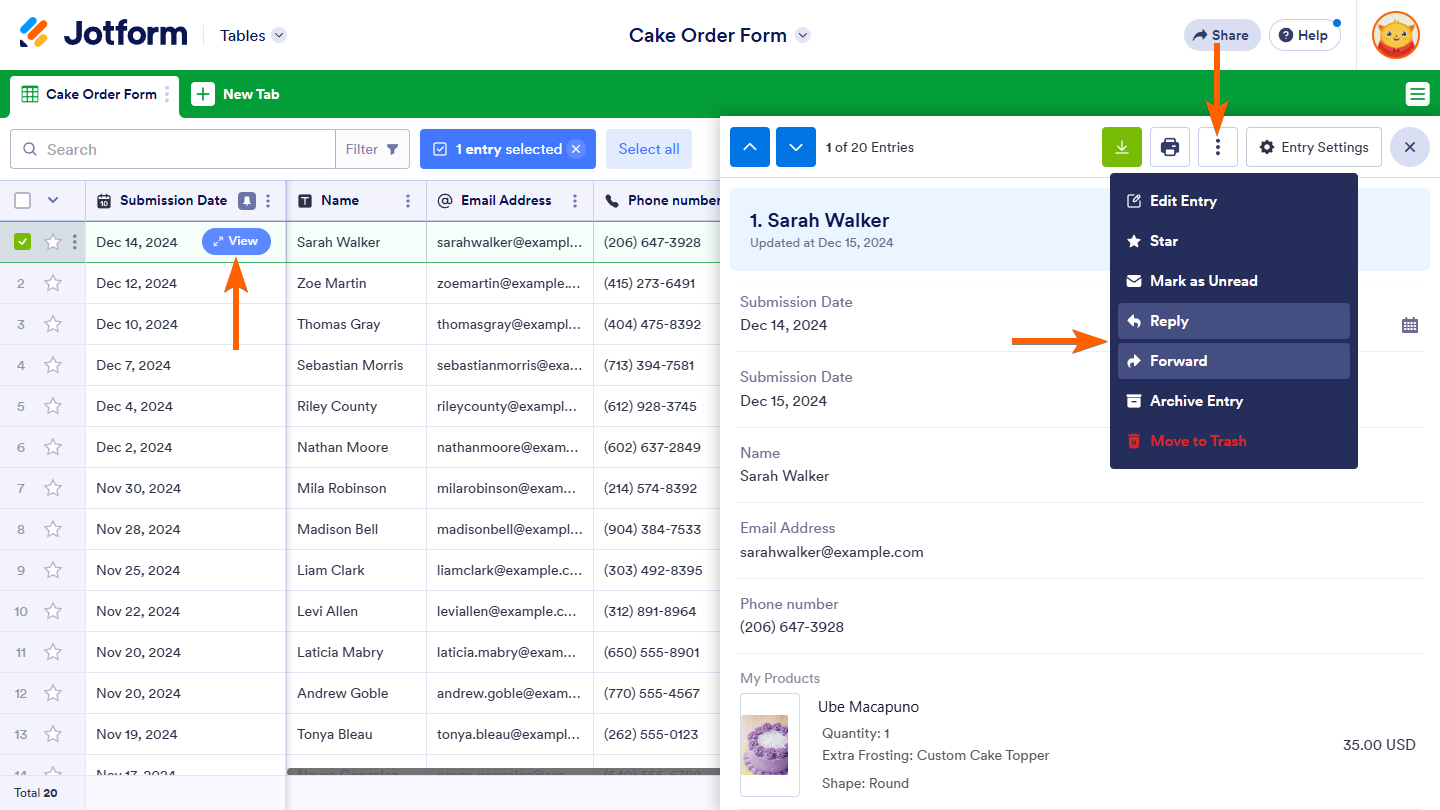
Single Submission Viewer
To open the single submission viewer
- While hovering your mouse over the submission, click the View button.
- In the single submission view, click the Kebab or Three Vertical Dots icon at the upper right corner of the page.
- Click the Reply or Forward option.
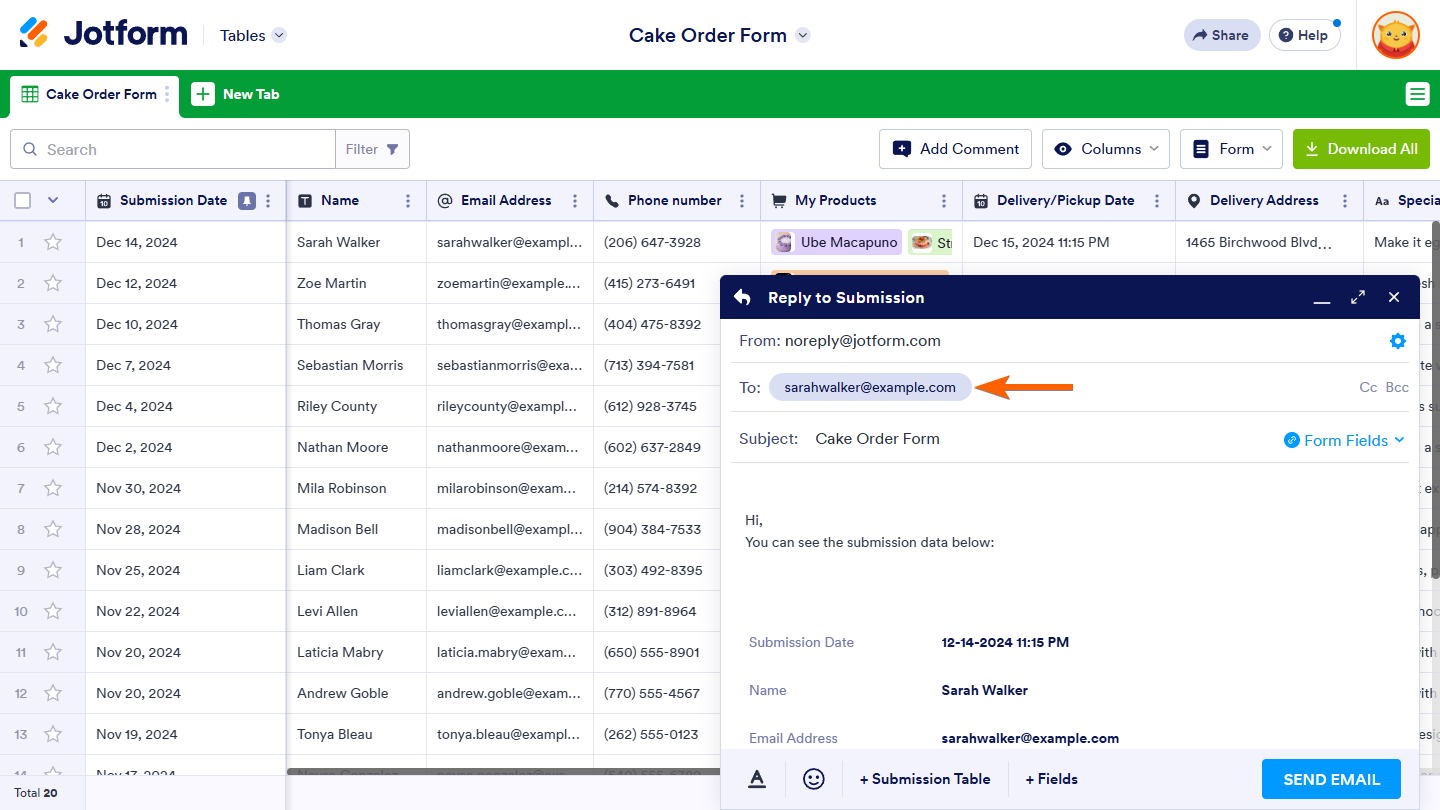
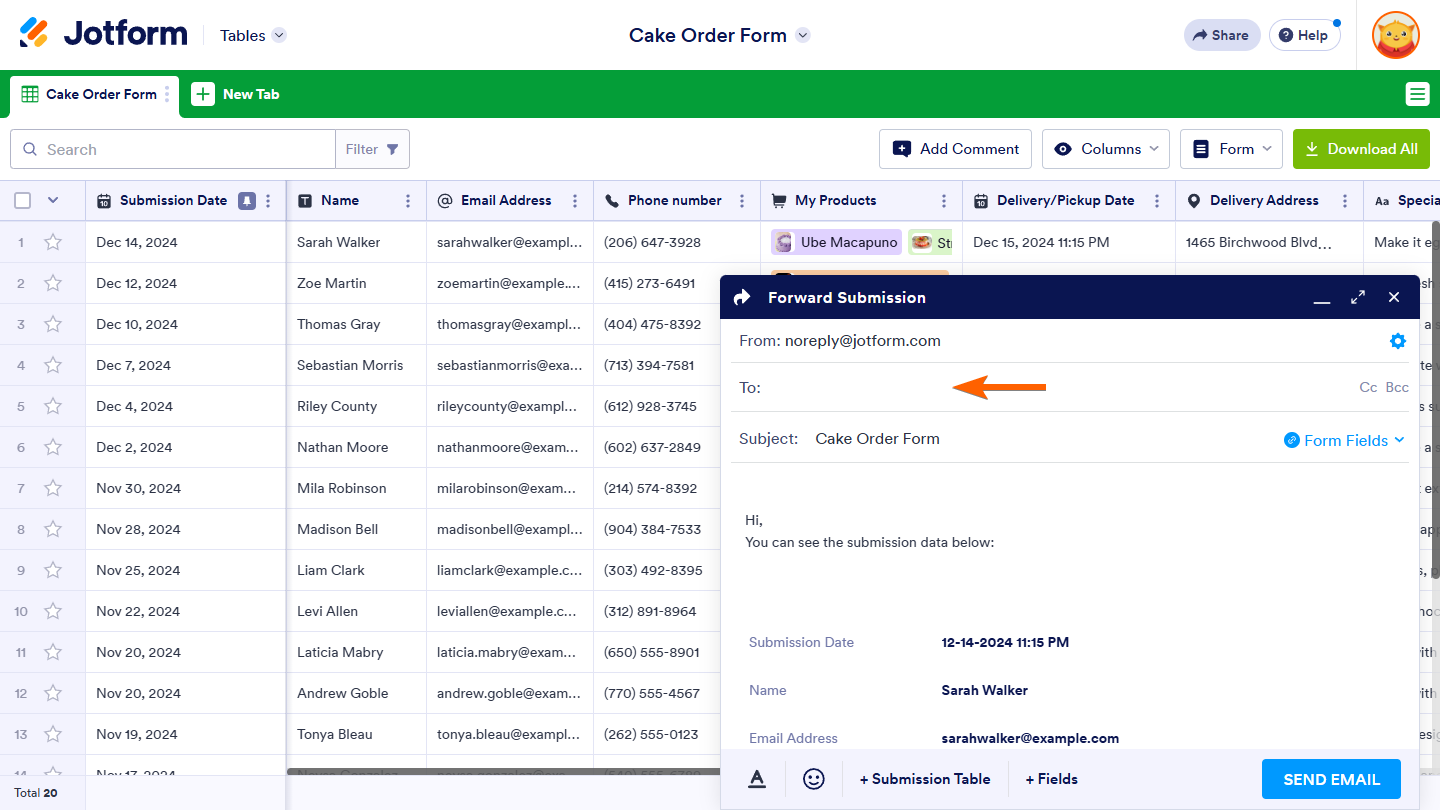
The only difference between the Reply and Forward options is the To box. When Replying to a submission, the To box is automatically populated with the submitter’s email address, while the Forward option is empty, and you must input an email address.
The other options are the following:
Email Settings
You can change the Reply-to Email and select the Sender Email on the email settings page. You can pull this up by clicking the From box or the gear icon on the far right.
See also:
CC & BCC
When responding to or forwarding a submission, you can add a CC (carbon copy) and BCC (blind carbon copy). Click these options on the right side of the To box to add the CC/BCC recipients.
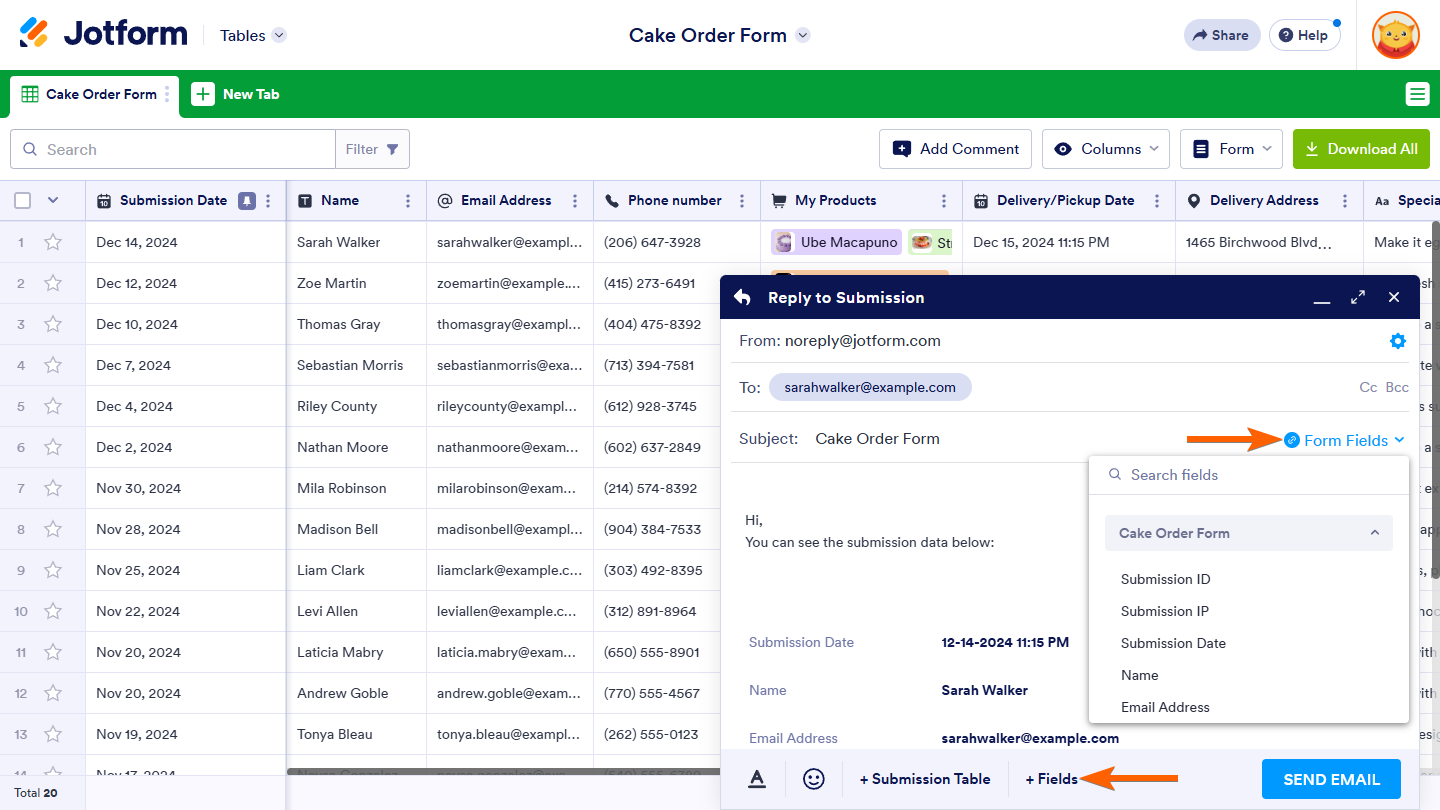
Form Fields
You can find the Form Fields option on the right side of the Subject box and at the bottom of the email content. The first Form Fields option lets you personalize the email’s subject line, while the same option at the bottom allows you to add form field answers to the email content.
Submission Table
The submission table option allows you to exclude form fields in your reply or the forwarded submission. Click the option and uncheck the fields from the window. Please don’t forget to click the Apply button to save the changes.

With all the above, don’t forget to click the Send Email button to send your reply or forward the submission.

Send Comment:
12 Comments:
January 23, 2025
Why can I not add an attachment to a reply from the submission data table
August 20, 2024
What about anonymous submissions? I don't ask for the emails in my survey. However, I will send the survey to a list of emails that I already have. Are there options to send reminders to fill in the form to those who haven't responded?
April 26, 2023
Would be a lot more useful if you could sent to multiple submitters :(
April 20, 2023
Hello,
I wanted to know if there is a way to forward certain information that has been completed by the client on the form to a third party.
For example, the client completes a booking form for a holiday rental. I wish to have all the information pertinent to their arrival and departure sent to my housekeeper, dates, number of people, arrival time, flight number, departing time from the property etc. but want to make sure the housekeeper does not receive personal information from the form, such as passport number, email,etc. Any suggestions?
Thank you.
September 28, 2021
I want to send a comment for peer review research proposal.
July 16, 2021
Is it possible to remove the Jotform logo at the top of this email and the Jotform address at the bottom of the email?
March 21, 2021
Looks like the "reply" ability is not available if I sent all submissions (so can send same email to all submitters). Is there a way to do so... that is, within Jotform? I know I could integrate with something like Constant Contact.
March 14, 2021
Where do we find all the replies we send? If we need to track who we replied to, go back and see what we relied, where is that located? And can it be added somewhere easier to locate. I need to be able to go back and see who I replied to.
March 5, 2021
Is it possible to auto forward jotform tables to an e-mail adress as it looks a lot better than the e-mail notifications (it even includes the product pictures)?
February 22, 2021
When you "reply to submission" can you change the set response to a new set response for all reply's?
February 8, 2021
Come posso personalizzare le email inviate da tables?
January 7, 2021
I want the people who complete the Personal Introduction form to receive a copy of their completed form. This is my 2nd request for help. I have changed the settings as instructed the first time in Advance, but the new submission is still not being sent to the person. I tested it with myself and did not get a completed form, just a blank form. Can you help please? Thank you, Donna