Egnyte provides software for enterprise file synchronization and sharing. The technology can store files in a company’s existing data center and cloud computing storage.


If you’re already using Egnyte and want to incorporate Jotform into your existing workflow, then you’re in the right place. So, what are the common use cases for this integration?
- Save the files uploaded through your form into separate folders and the other user’s data on your Egnyte account.
- Utilize it to save a backup copy of your submissions in PDF format.
- Consolidate all your submissions and files to access and manage them easily.
Setting up the Egnyte Integration
To set up the Egnyte Integration
- In the Form Builder, go to the Settings tab.
- Select Integrations on the left panel.
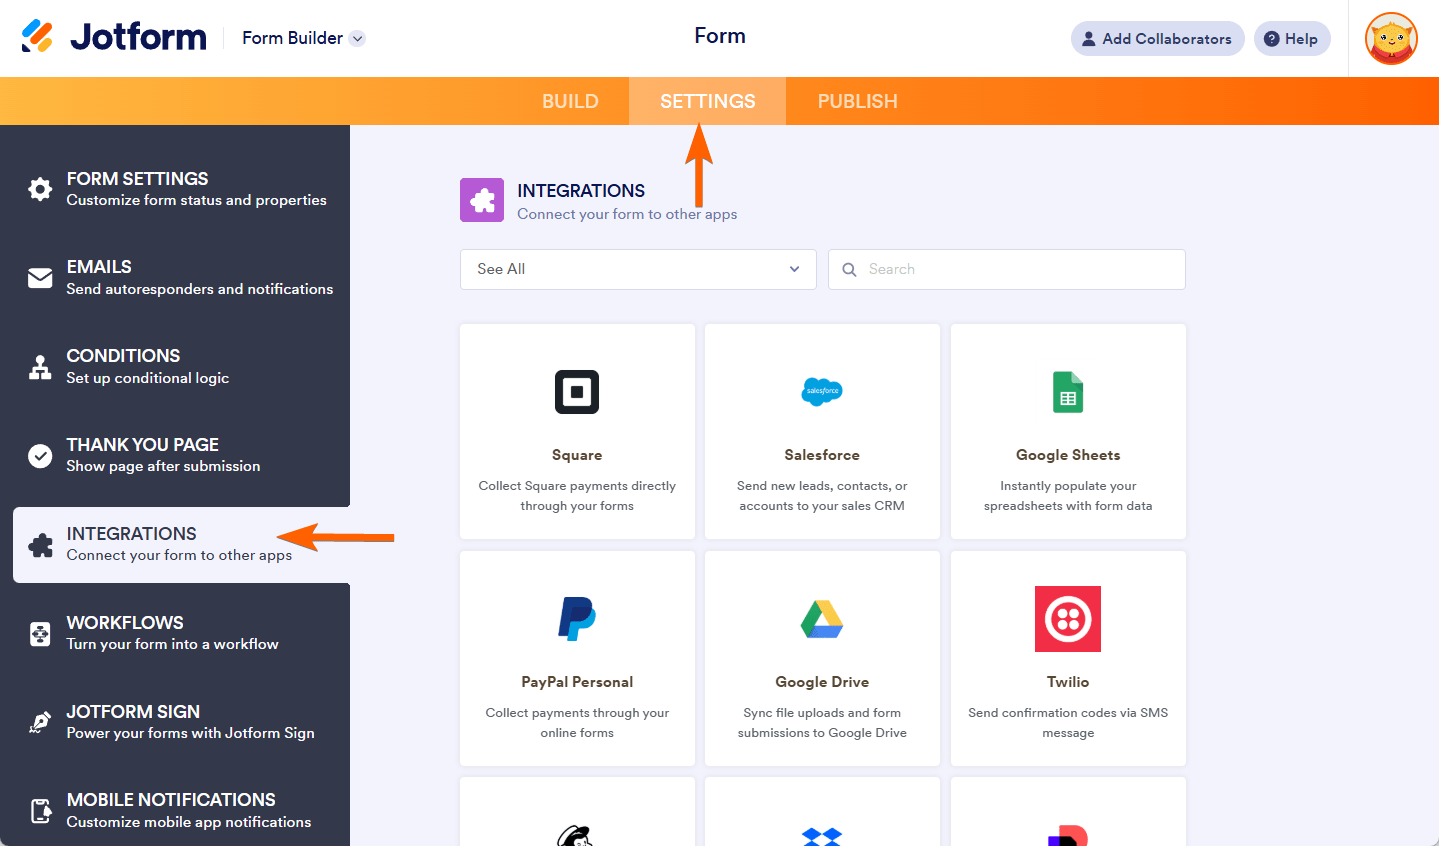
- Search for Egnyte and click it.

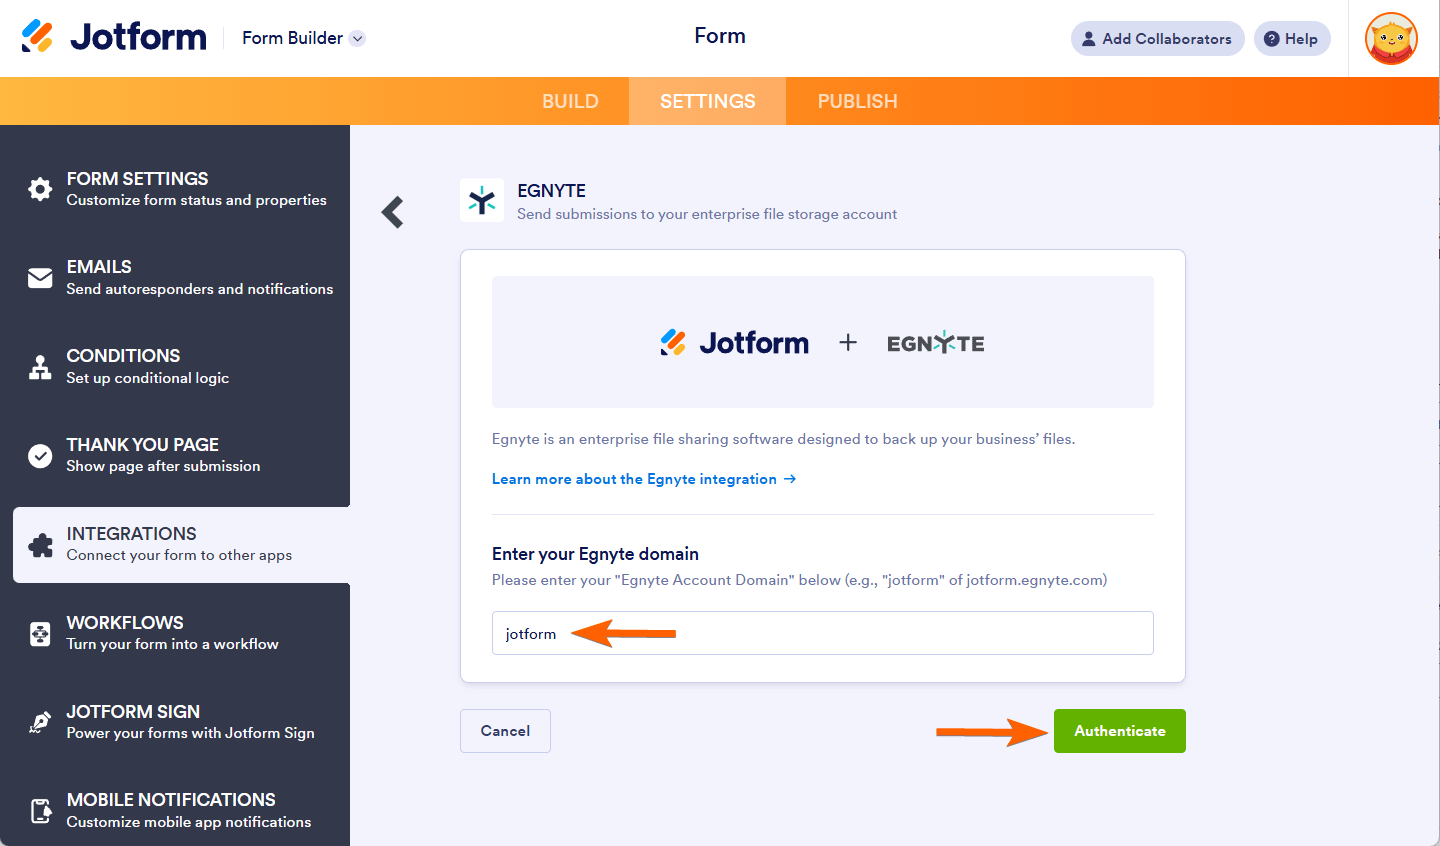
- To authenticate, you would need to provide your registered Egnyte domain. If your Egnyte URL is jotform.egnyte.com, the domain is jotform.
- Click the Authenticate button, and ensure you grant access to Jotform.
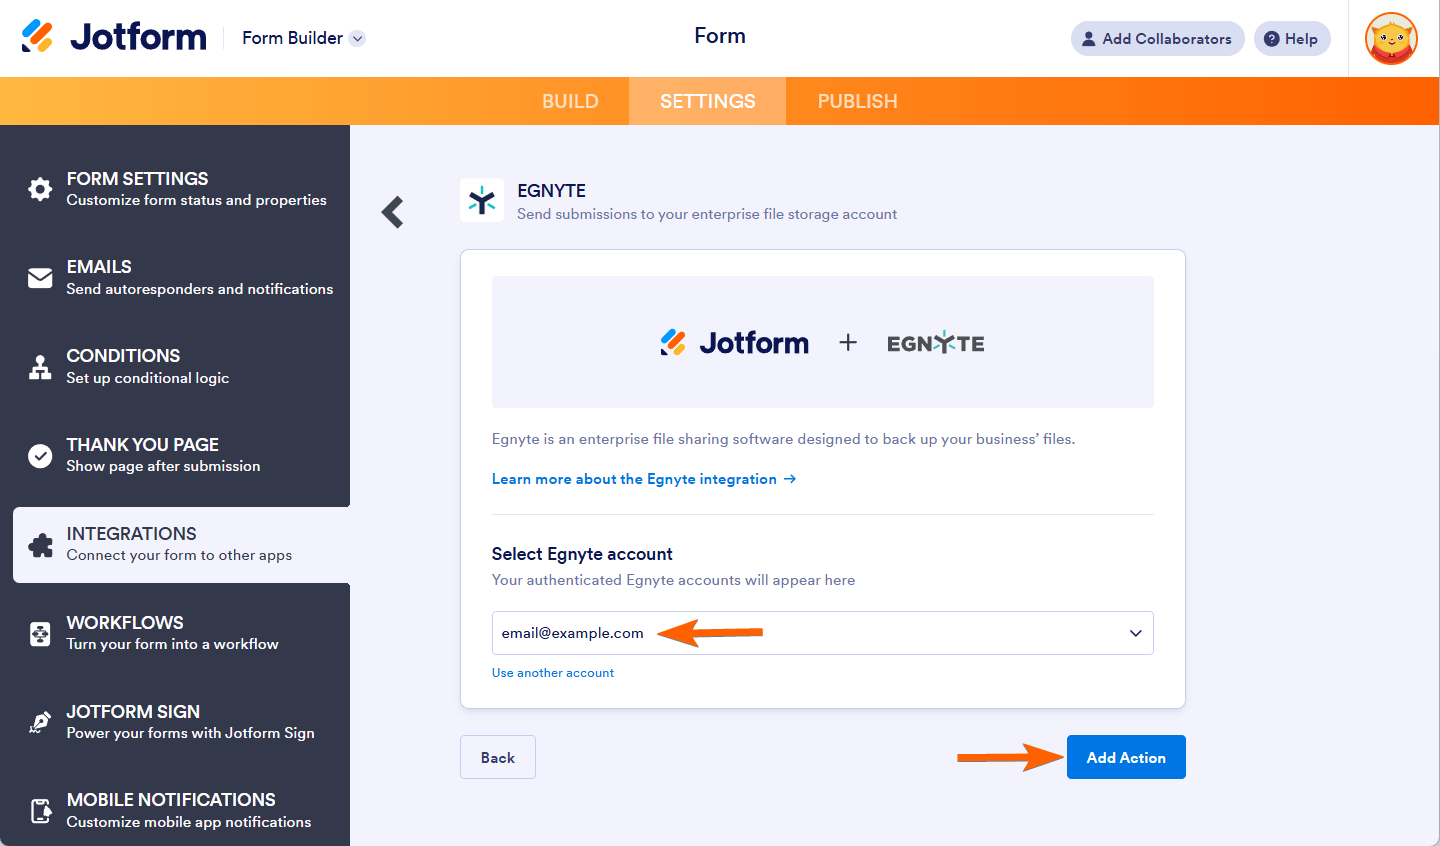
If you have connected your Egnyte account previously, choose it from the dropdown and click the Add Action button.
- At this step, you would need to set up the following:
- Select folder destination — Select where your form’s submission folder will be created. You can choose the main Shared folder from Egnyte or a custom folder you created.
- Enter folder name — This is where your form submissions are stored.
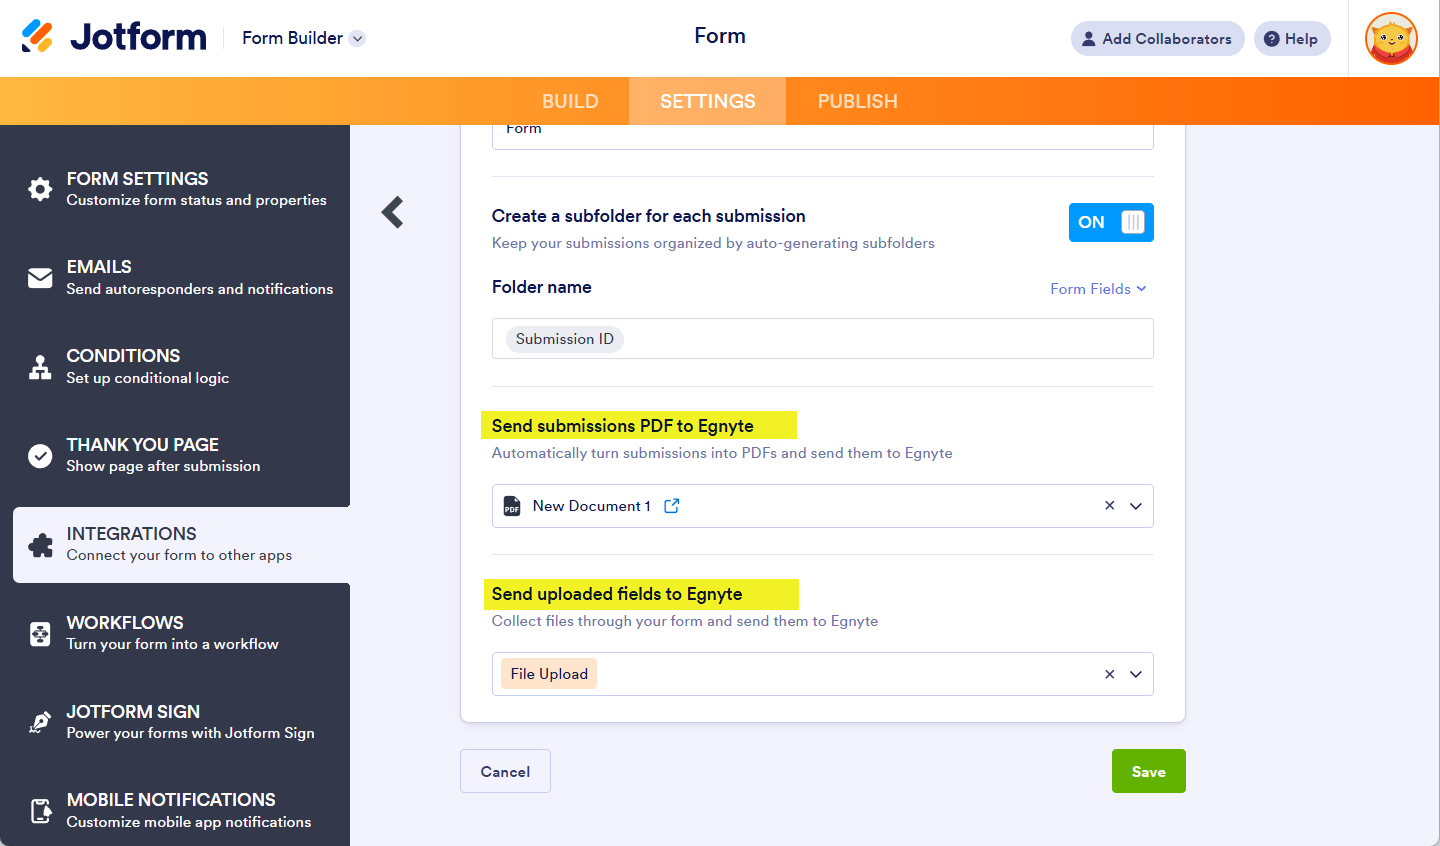
- Create a subfolder for each submission — If you wish to organize your submissions, create a subfolder based on unique data from the form. Click the Form Fields, as pointed out in the screenshot below, to select the fields.

- Next, set up the other properties:
- Send submissions PDF to Egnyte — Select which PDF document to send to Egnyte. You’ll see Default if you haven’t created a PDF document yet.
- Send uploaded fields to Egnyte — Select from which file upload to send to Egnyte. You can select multiple file upload fields here.
- Finally, click the Save button to complete and finish the integration.
Managing Egnyte Integration Actions
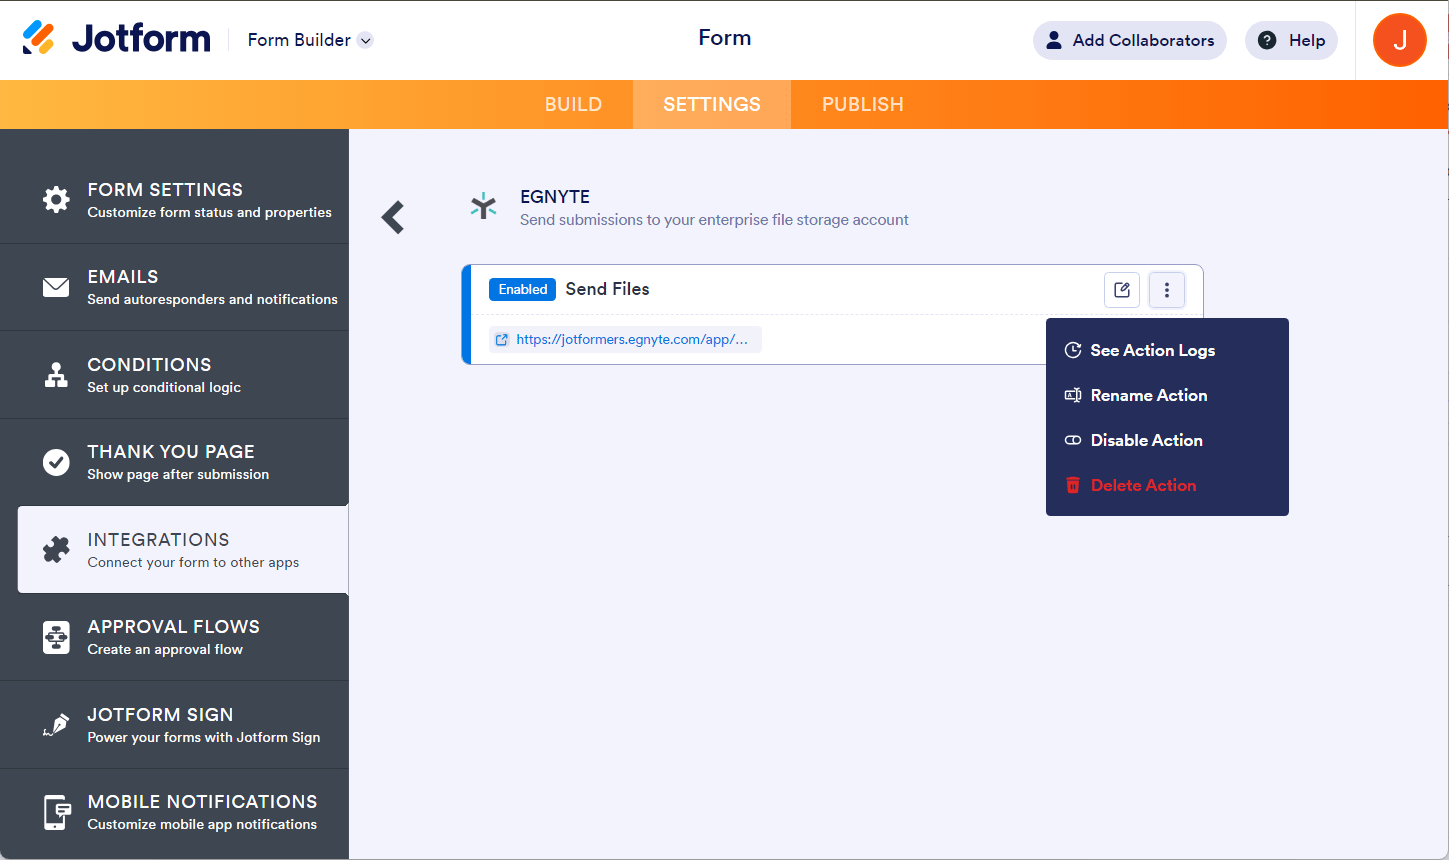
Once it’s finished, you can see and click the link to open the main folder. If you hover your mouse over the created action, you’ll see the Edit Action (pencil icon) and the More (thee-dotted vertical icon) options to the right. The More option includes the following:
- See Action Logs — This section will display the successful and failed runs of your Egnyte integration. It’s useful when troubleshooting issues.
- Rename Action — If you want to personalize the action’s title.
- Disable Action — This option is useful to temporarily stop the integration from sending files.
- Delete Action — If you want to remove the integration from your form.
See also:

Send Comment: