
Say you want some feedback on a presentation you gave, or maybe you’re looking to get a few RSVPs for your housewarming party. Creating an online form is a great way to gather responses.
But what if you need to share those responses easily with others?
If the form is business-related, you may need to share results with multiple departments. If it’s for personal use, you may have a few friends who need to be kept in the loop — if they’re helping you organize a gathering, for example.
Fortunately, Jotform is a communication tool built for teams, and it makes it easy to set up a group notification for form submissions.
Enhance your form-building process with the power of AI. Explore Jotform’s AI Form Generator.
Getting started
Before you can get started setting up notifications, you’ll need a form. But you’ll also need a paid Jotform account. This is one of the few Jotform features that isn’t included with the free Starter plan.
If you aren’t ready to commit to Jotform, that’s OK. You can still set up one-off form submission notifications to yourself for free, which you can forward to a group of people. It’s an extra step, but it’s not too bad. If you need to send group notifications automatically, the paid plans start at $34 per month, billed monthly.
Creating the email
Once you’ve created your account and set up your form, navigate to the Settings tab in the Form Builder. Then select Emails from the menu on the left.

Now click Add an email. Then select Notification Email.
You can now customize your notification email. Jotform gives you a full WYSIWYG text editor. And the email will be autopopulated with the data from your form. You can also customize which data is displayed.
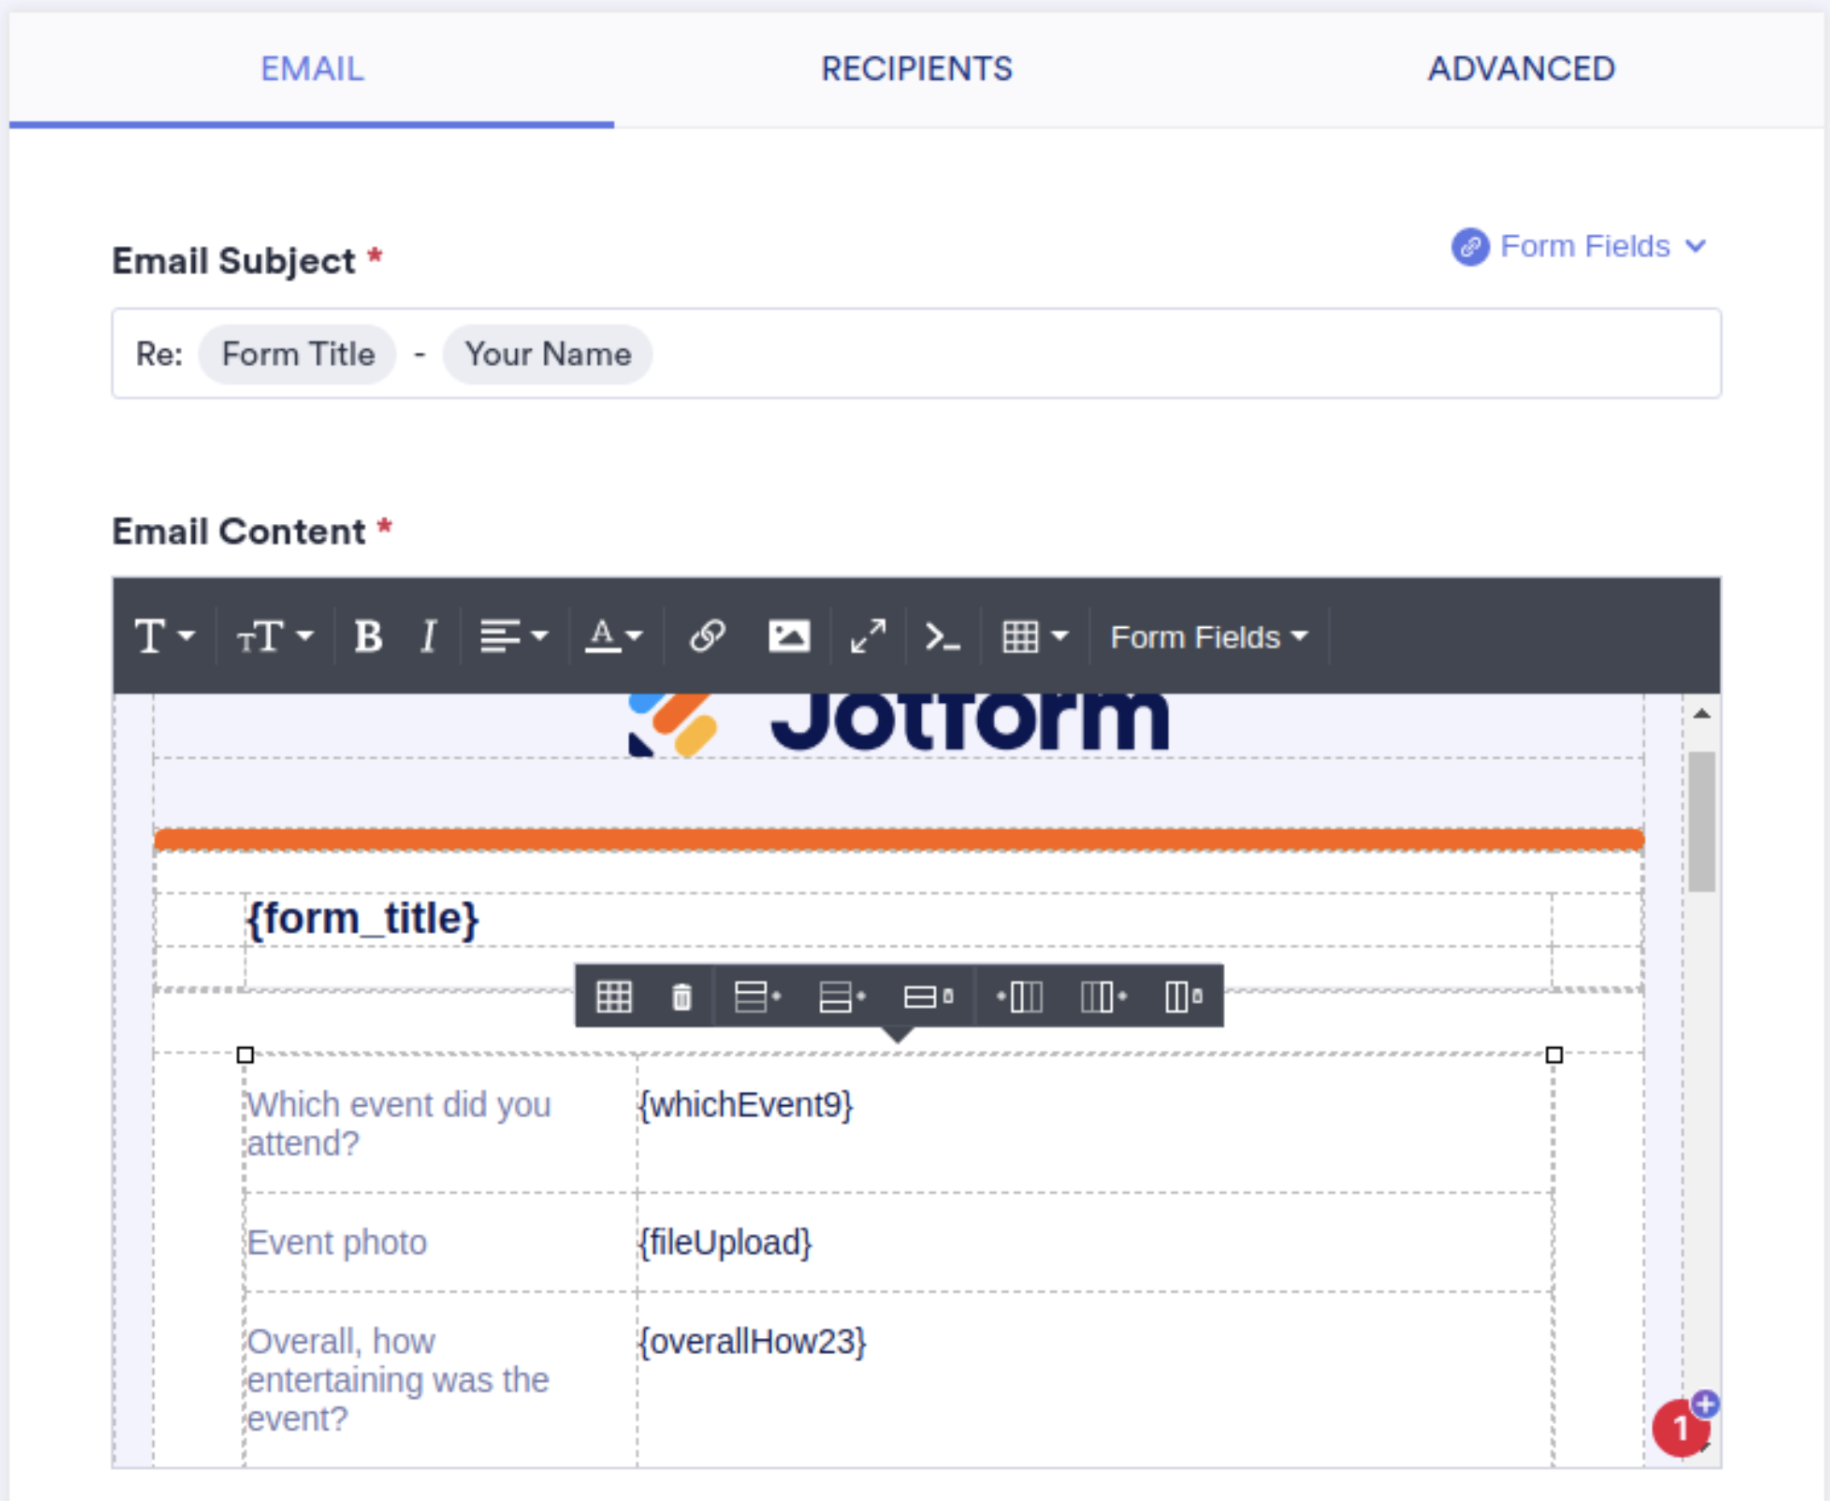
In the subject line, you can edit text as you normally would, but you can also include form field data. In the example above, the Form Title and Your Name fields in the subject line represent dynamic form data.
You can remove those fields by hovering over them and clicking the X. You can also add other field data by clicking the Form Fields dropdown above and to the right of the subject field.
Below that, we have the email content WYSIWYG editor. This text area gives you all the options you’d expect, like the ability to bold text, add links, and select other styling. If you’ve used an inline text editor before, this interface should be familiar.
One nice feature about this text editor is the table tool. As you can see, the table tool helps you arrange and organize the form submission content. It shows the form fields and their data in easy-to-read columns. You can add columns or rows to any existing table or create a new one.
To the right of the table icon in the text editor menu, there’s a dropdown for Form Fields. That works just like the one for the subject line, but you’ll see the fields are enclosed in curly brackets.
Now that you have a rough idea of how to design an email, let’s move on to the Recipients tab.
Adding recipients
The Recipients tab is pretty self-explanatory, but there are a couple of important things to note here.
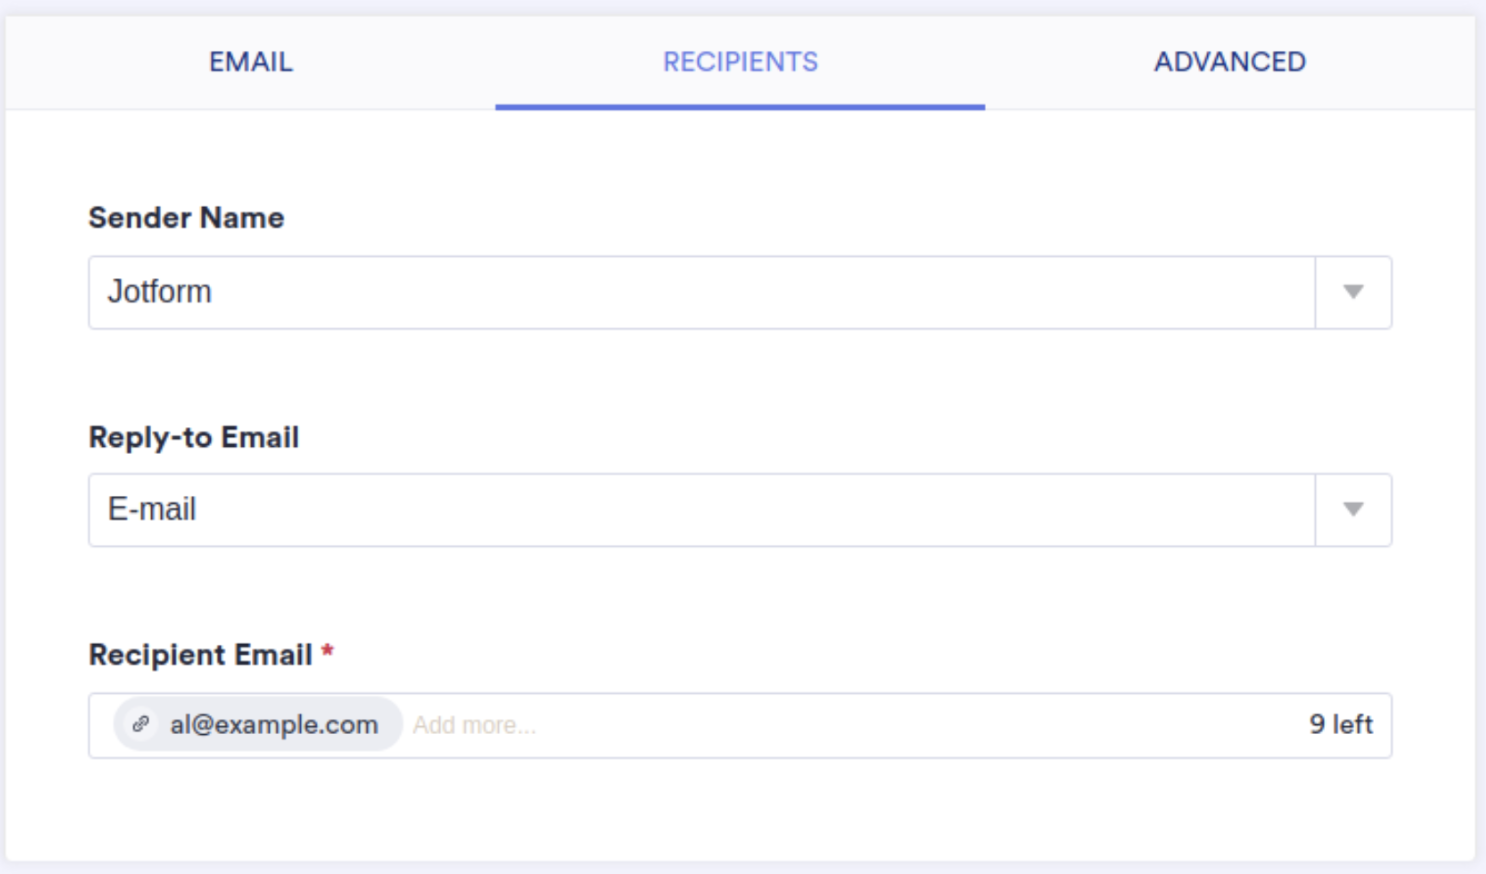
As you can see, you can only send the email to 10 or fewer people at a time. Letting people send lots of emails is a feature that spammers can easily abuse, so Jotform requires you to break up your notifications into groups of no more than 10.
In fact, if you need to send notifications to a lot of people, you should probably consider organizing them into groups anyway. So, rather than sending one generic email to everyone, you can send out several emails to a number of groups. This way, you can show only the form info that’s relevantant to each group and include custom messages.
Before you send notifications, first send yourself a test email to make sure everything looks right. There are also a number of advanced settings under the Advanced tab, like changing the sender email address, that you can explore.
Leveraging even more teamwork tools
As mentioned in the beginning, Jotform is built for teams. There are some prime examples of this focus right there in the Settings menu.
You can use our integrations to connect Jotform to the tools your team prefers, like Google Drive and Slack. Approval flows let you automate approval processes and route form submissions to specific team members.
Jotform Tables let you organize and manage form data in one place. And you can even create apps to let your whole team use your forms and other tools.
Get instant team alerts with Jotform Form Notifications
Group notification emails can work, but they still depend on inbox checks, plus you may need a paid plan for automated group sending and you’re capped at sending to smaller recipient batches. With Jotform Form Notifications, you can skip the email bottleneck and deliver instant submission alerts to the channels your team actually watches, like Slack, and if your slack notifications not working, Jotform gives you a more reliable way to keep new entries visible the moment they arrive.
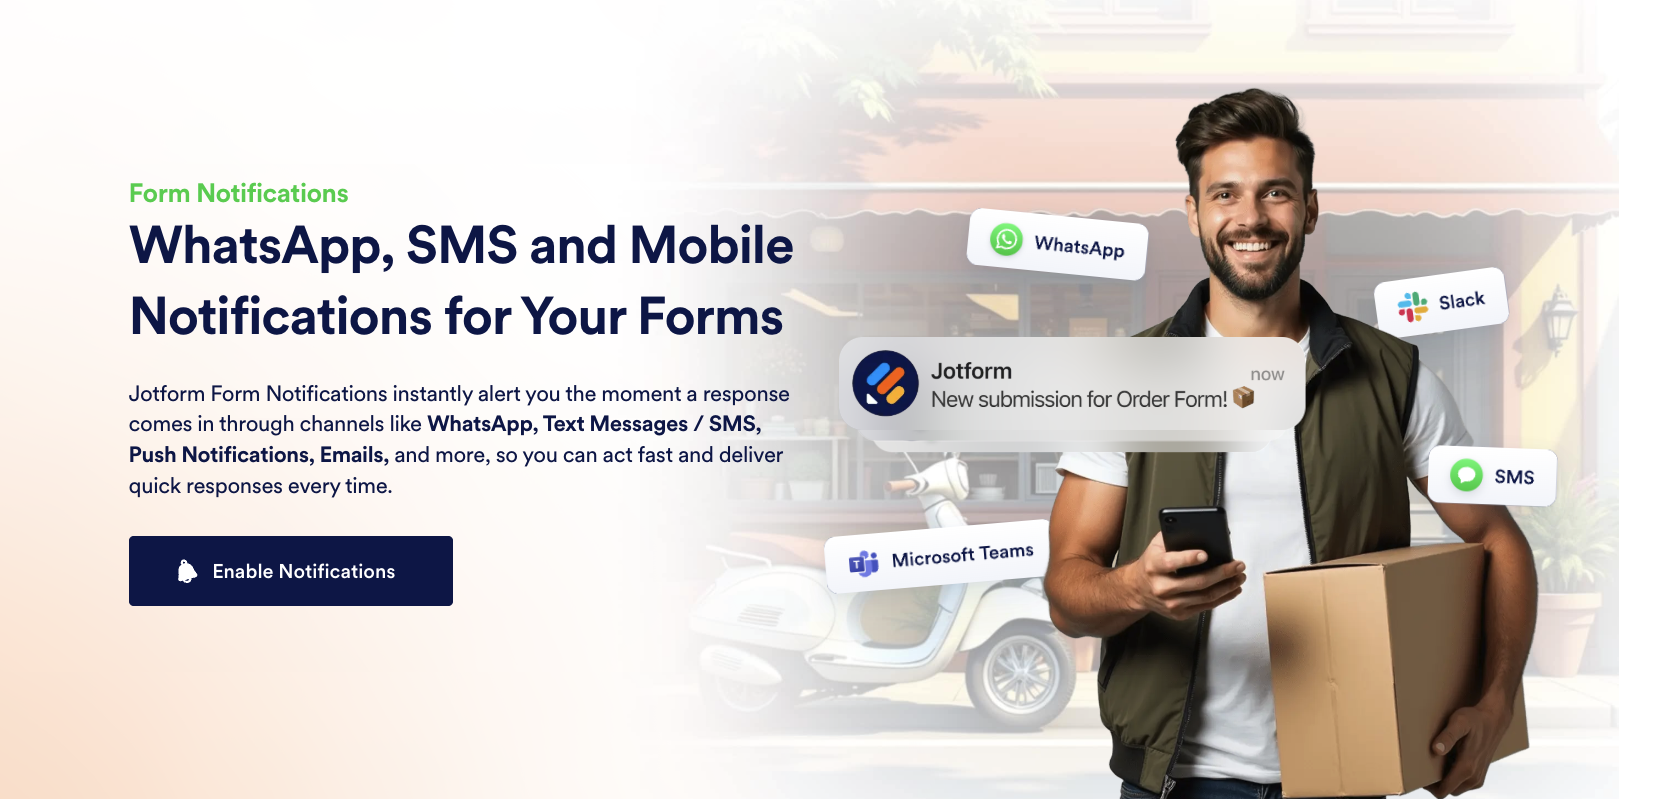
Because everything is managed in a unified notifications experience, you can also mix in SMS, WhatsApp, or mobile push for key stakeholders who need on-the-go alerts, and customize what details show up in the notification so the message is immediately actionable.


Send Comment: