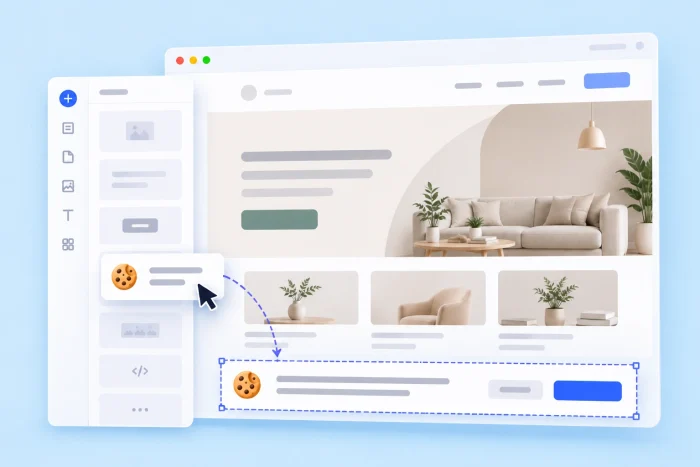
What’s your favorite part of running a business? The legalese, right?
I doubt that’s true. Most of us would rather spend the day on the work we actually care about and push a few exciting updates to our website. But that preference does not make us immune to the legalese: the GDPR, the California Consumer Privacy Act, and global e-privacy rules.
Compliance with those rules starts with a cookie consent banner. It shows website visitors that you take their privacy seriously. So how do you set one up without wrecking your design or losing a day to the task?
On Wix, you have three options: the consent banner Wix offers through its own dashboard, a paid consent management app, and a free embedded widget you configure once and drop into your site. This article outlines what each one actually gets you and how to set them up.
Option 1: Use the native Wix Compliance, Privacy & Cookies banner
If you built your website on Wix, the fastest route to add a cookie consent notification is the consent banner Wix offers on its dashboard. Wix has partnered with Usercentrics to create this banner, and the basic version is free.
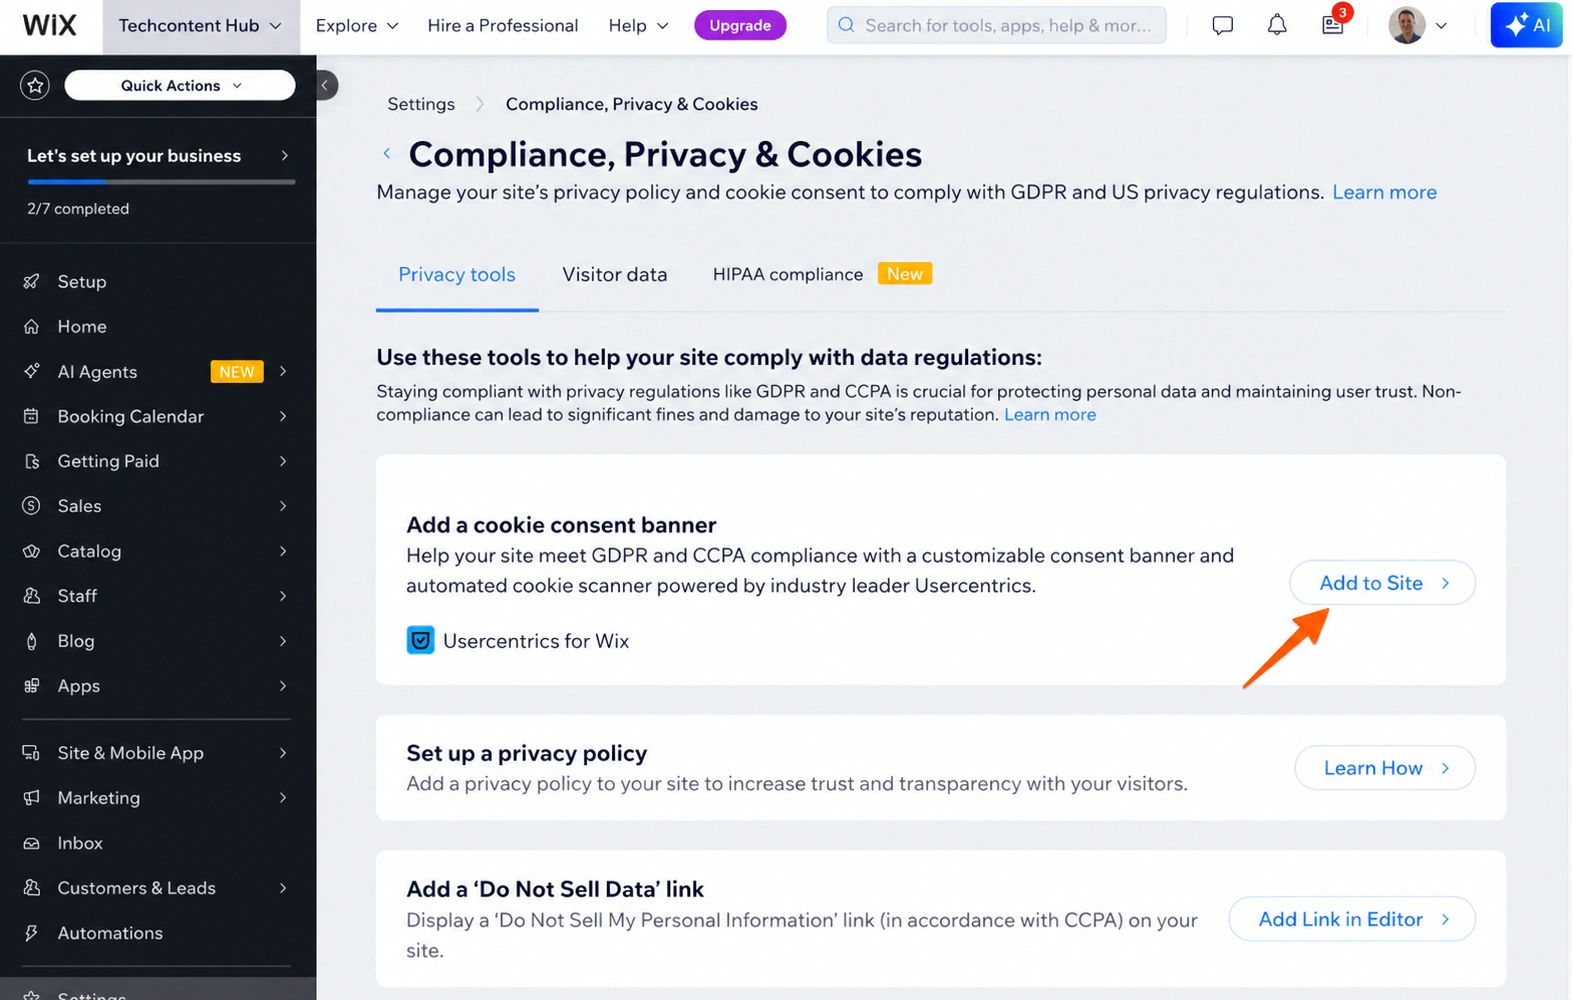
Step 1: Go to Compliance, Privacy & Cookies under Settings on your site’s dashboard, and click Add to Site next to Add a Cookie Consent Banner. Review the Usercentrics information, and click Agree & Add.
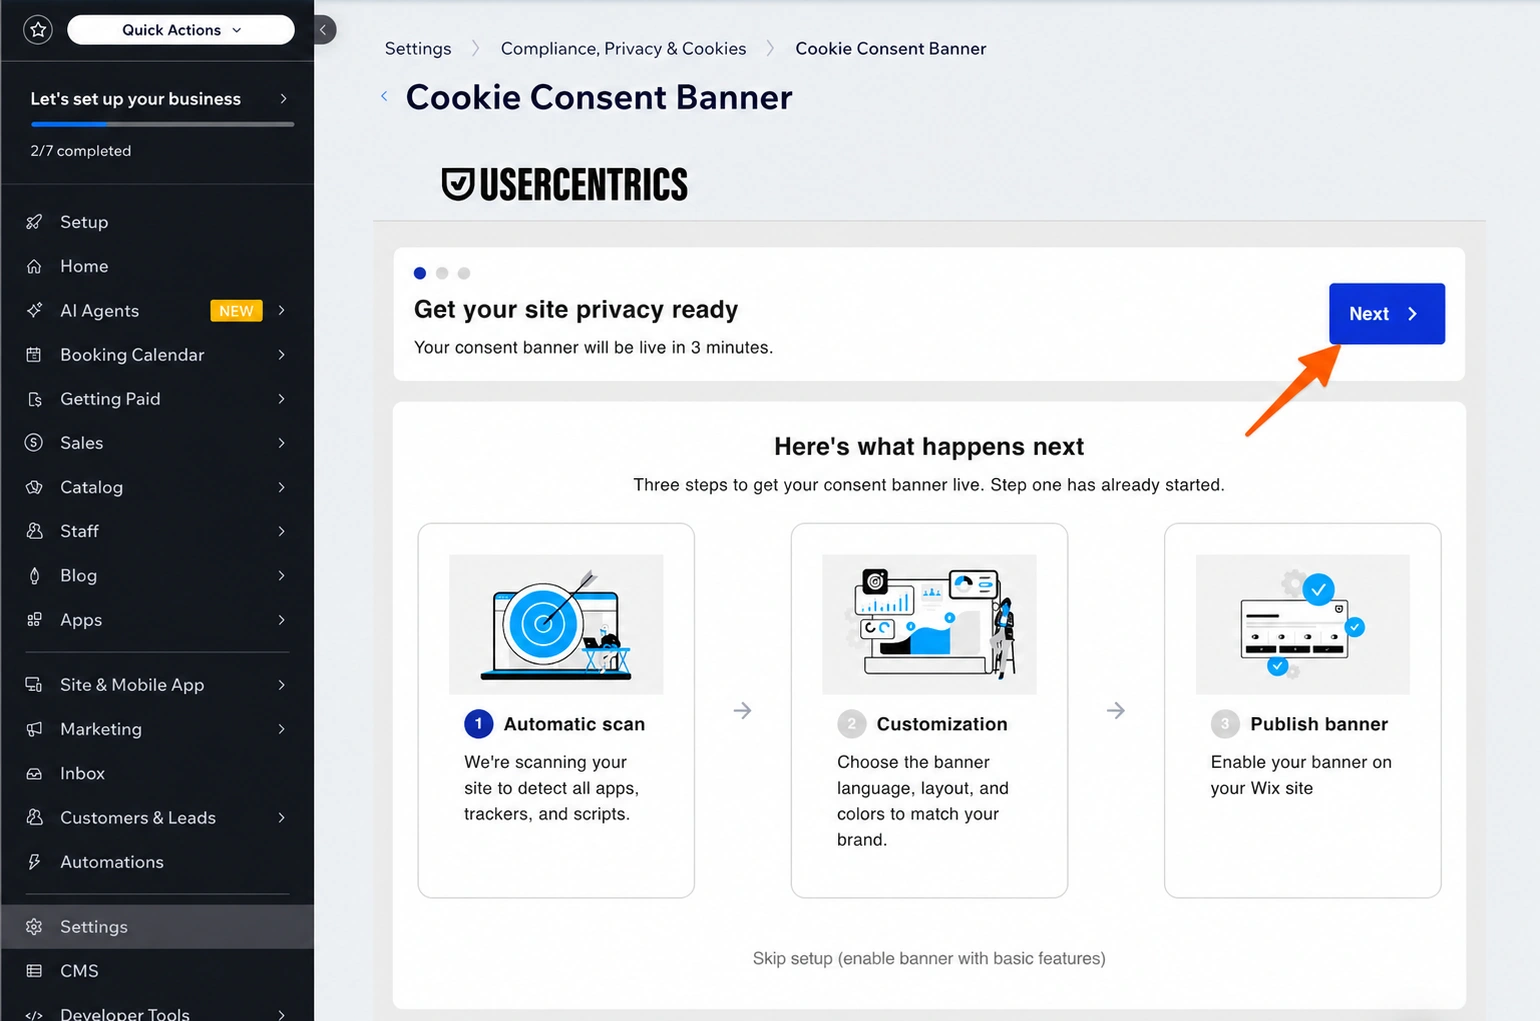
Step 2: Run a website scan. The scan lists the Wix and third-party components on your site and the cookie type each one uses so you know what you are actually asking visitors to consent to. You can run this scan monthly.
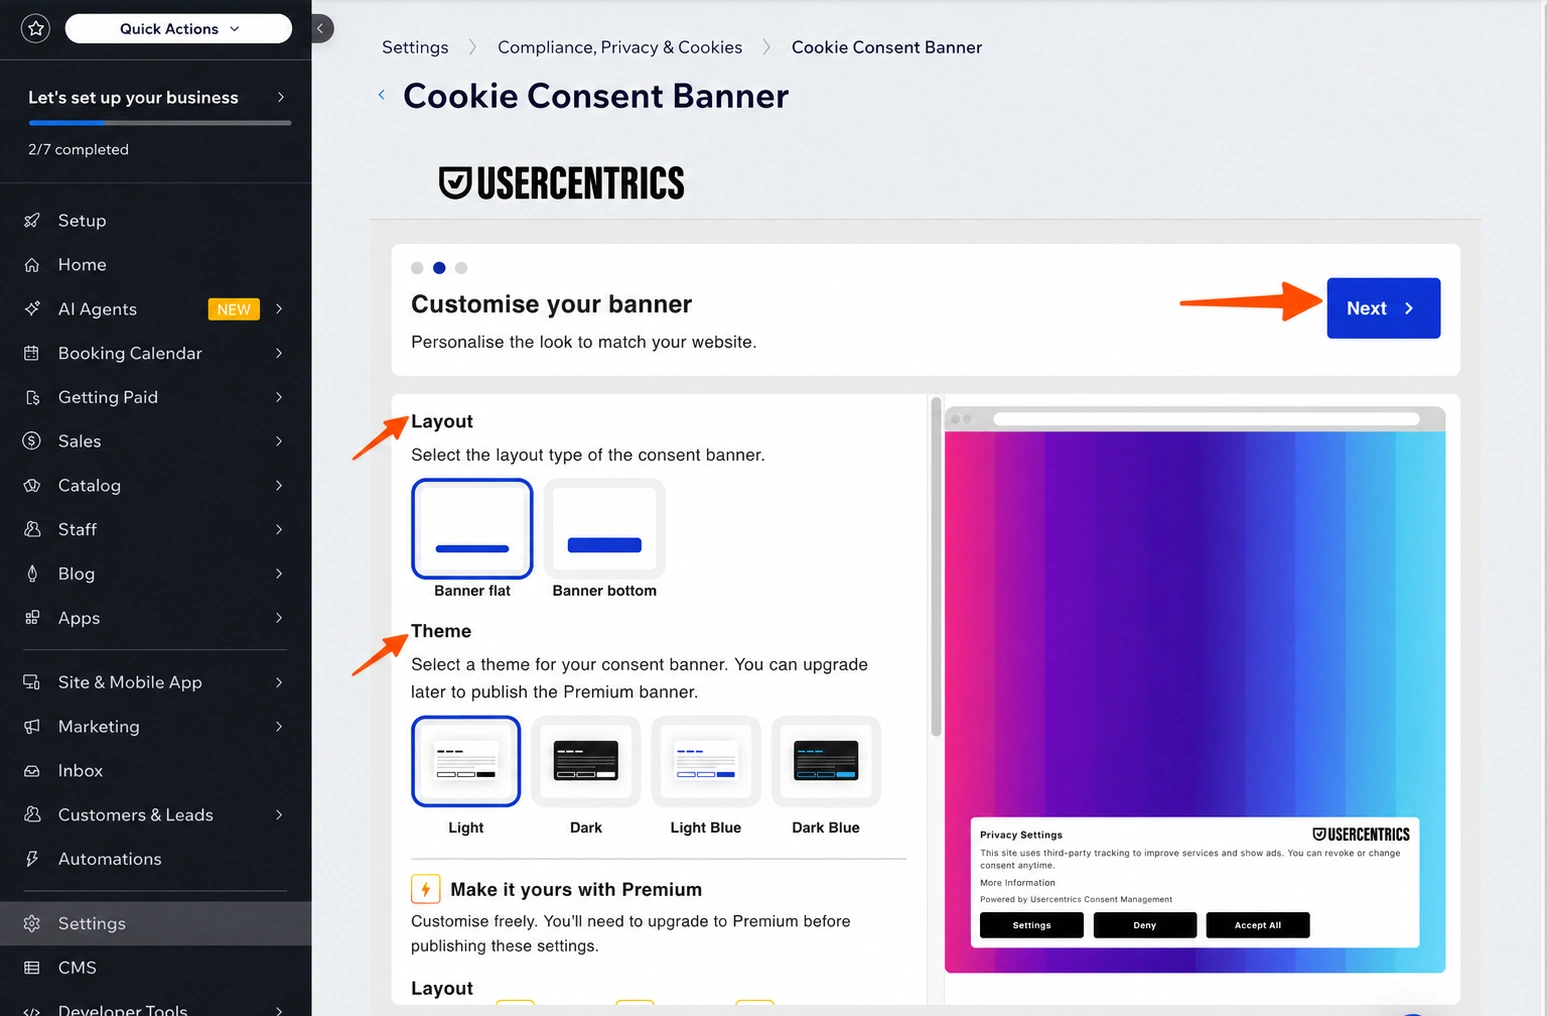
Step 3: Customize the banner’s appearance and text, and link it to your privacy policy.
Step 4: Flip the Show Banner toggle to make it live. From there, your Consent Log records what visitors chose. You can export that data.
Drawbacks: This option has two limitations. The first is the free tier: The basic banner works, but customizable text, translations, privacy trigger placement, and legal document linking are available only on a paid Usercentrics plan. If you want the banner to reflect your brand appearance and voice, you’ll need those features.
The second is coverage. The banner holds nonessential cookies and scripts until a visitor consents. But Wix states plainly that it cannot control third-party apps from the Wix App Market and that custom code is handled correctly only if you categorize it yourself. So the tracking most likely to need consent (App Market apps and custom code) is the part you have to categorize and verify yourself.
Option 2: Install a premium Wix App Market privacy app
When the free banner runs out of room, the usual next step is a dedicated consent management platform from the Wix App Market. These track more than the built-in banner.
Step 1: Open the Wix App Market and click Design Elements. Then select Privacy & Security. Or just search “cookie consent.” You’ll likely see options like CookieYes and Usercentrics in the list.
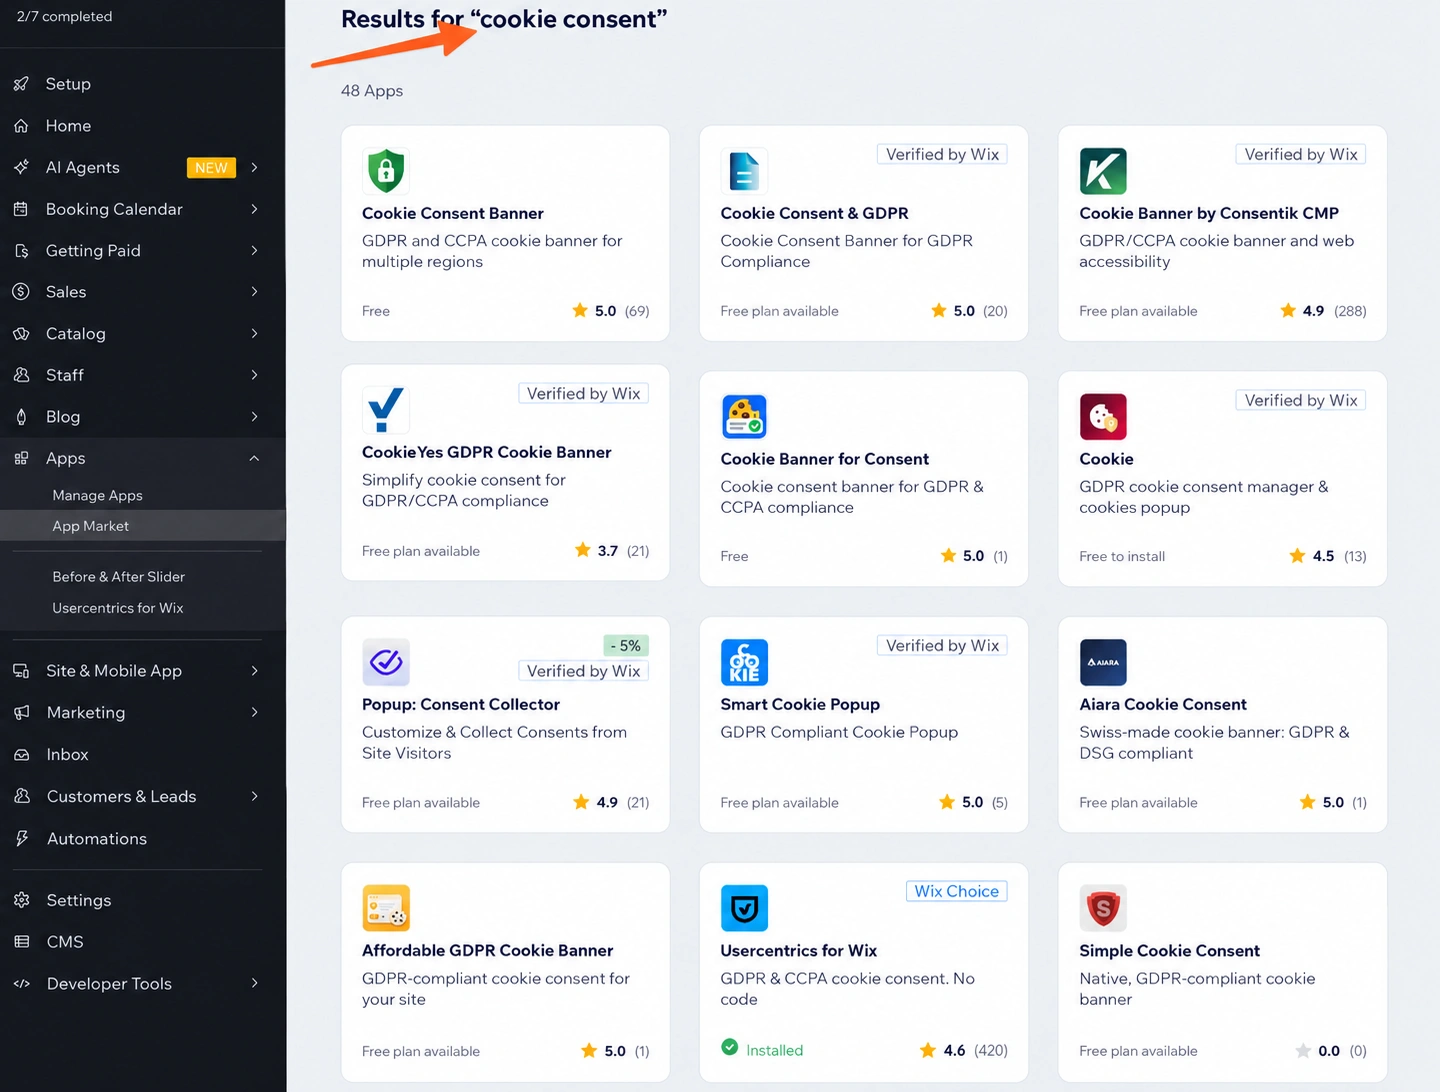
Step 2: Install the app and run its scan. It catalogs the cookies on your site and sorts them into categories so you can decide what needs consent.
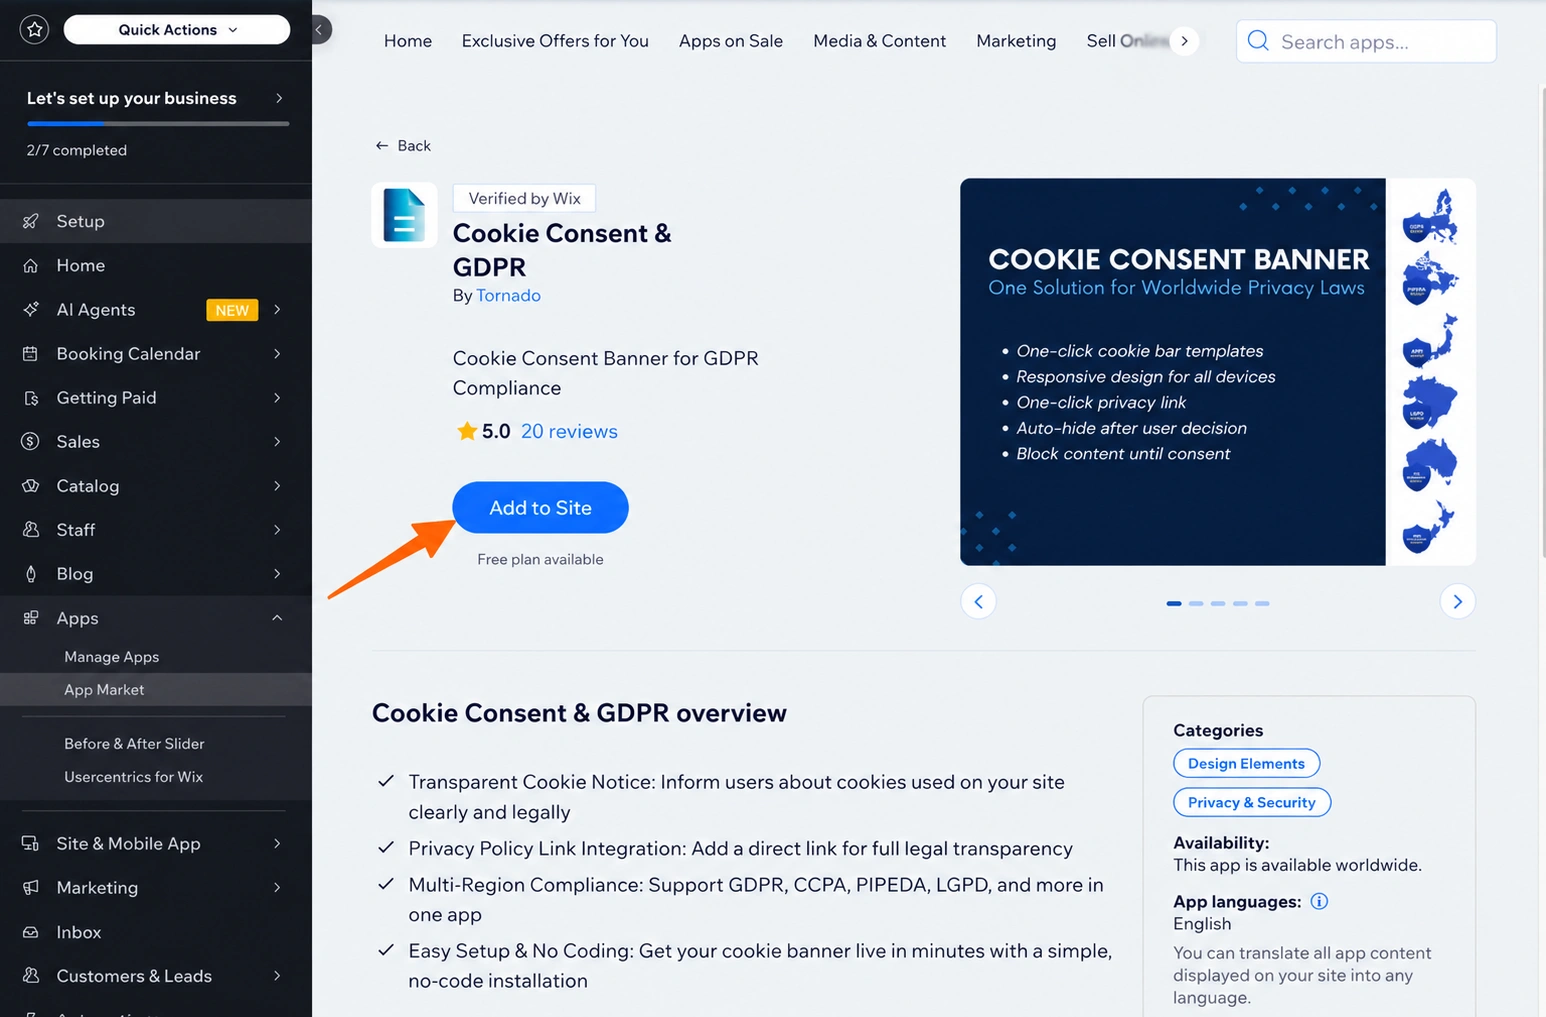
Step 3: Style the banner in the app’s dashboard, publish it, and check your live site.
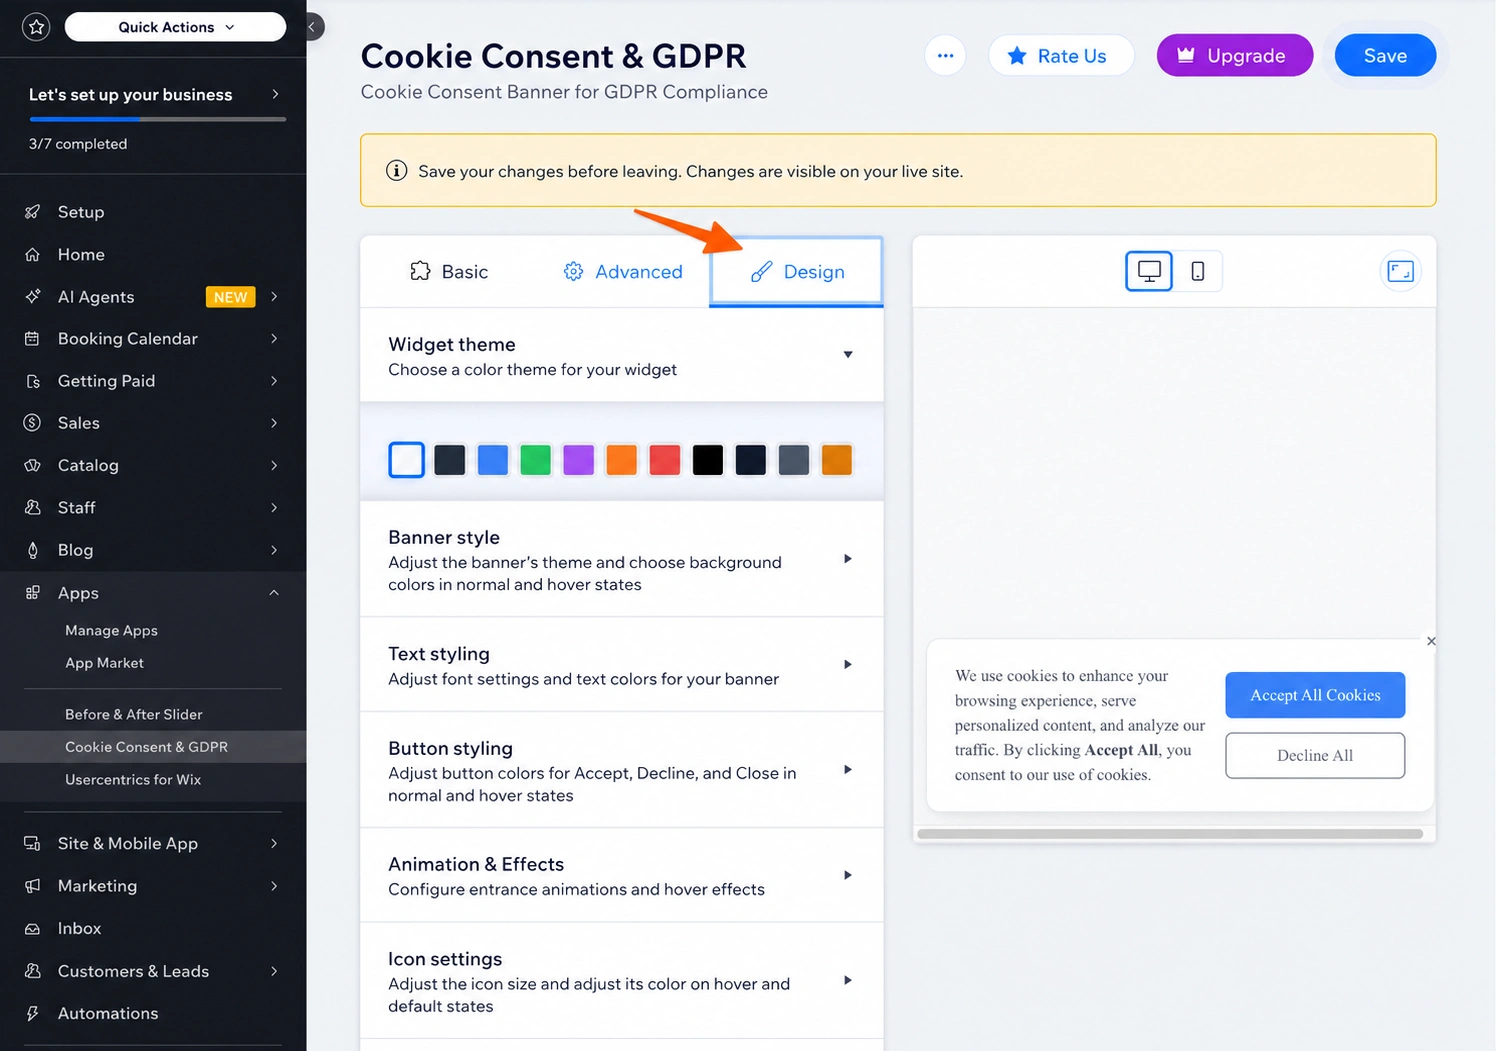
Drawbacks: Price could be a limitation of this option, and the free tiers don’t offer as much as they appear to. CookieYes caps its free plan at 5,000 page views a month and 100 pages per scan; its paid plans run from $10 to $55 a month per domain. CookieYes branding remains on your banner unless you subscribe to the top tier.
Option 3: Add a free, customizable cookie consent widget (recommended)
If you want a banner that matches your brand and does not come with a monthly bill, the Jotform Cookie Consent widget is the best option. You build it in a visually pleasing tool, copy one embed code, and paste it into Wix. Customization is not gated behind a tier, and it is free with a Jotform account.
Step 1: Open the Cookie Consent Widget, and choose which categories visitors can manage: Necessary, Analytics, Marketing, or Preferences. Nonessential categories stay off until a visitor opts in.
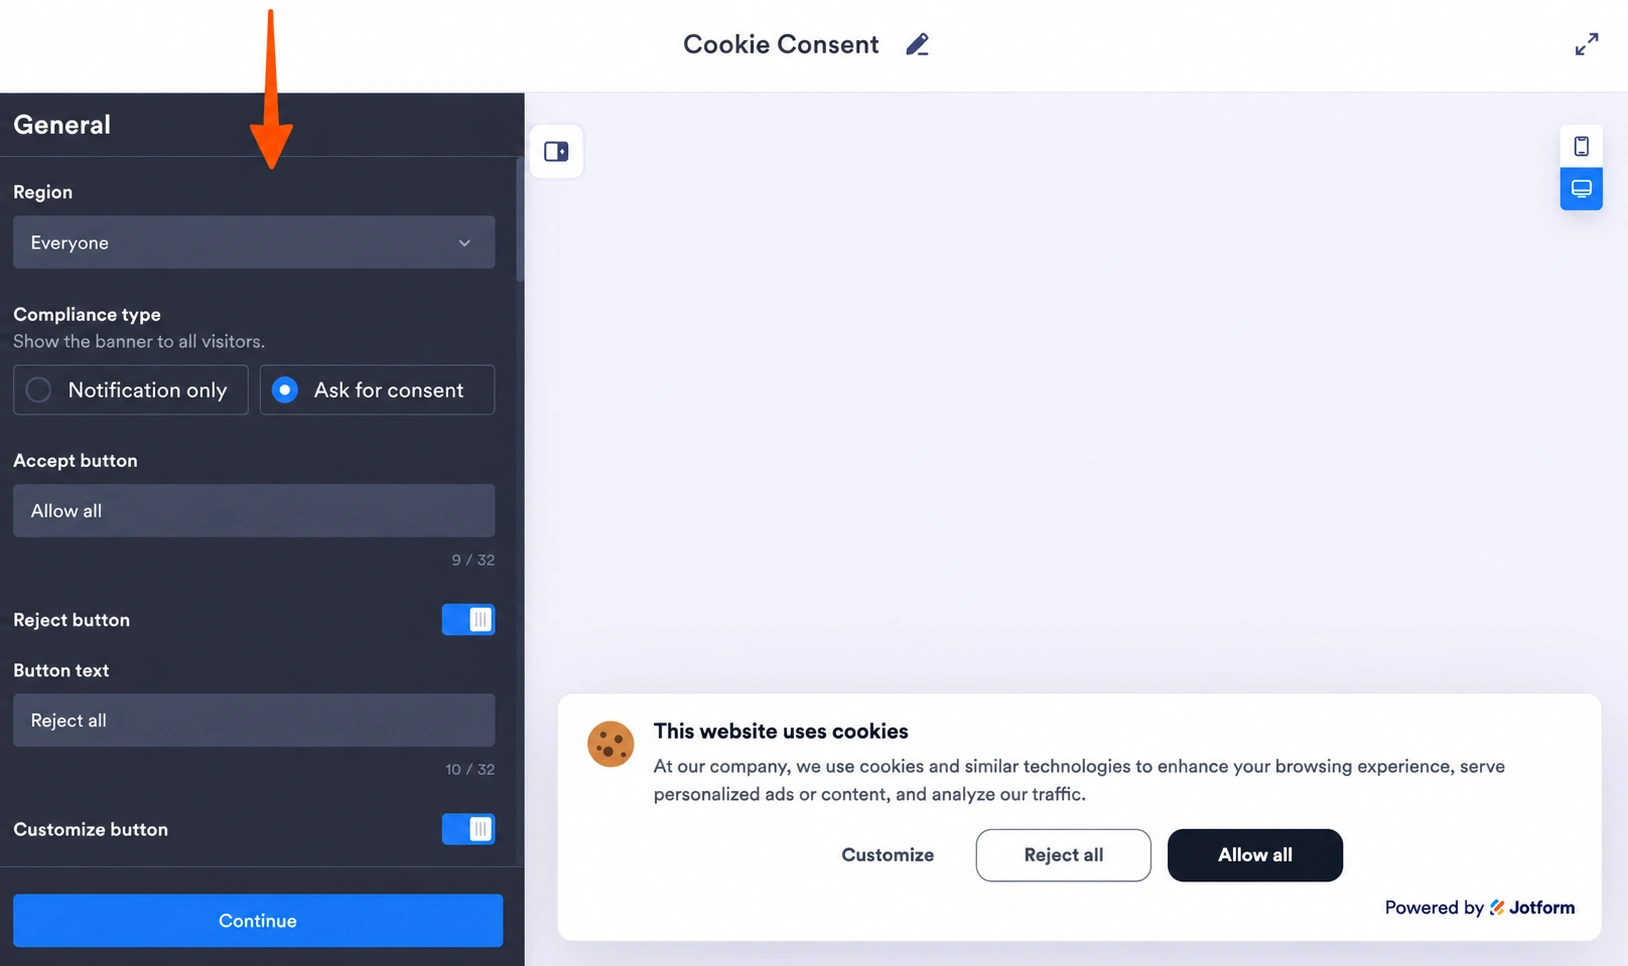
Step 2: Customize the message, colors, position, and layout to match your site. The other two options mentioned in this article will charge for customization.
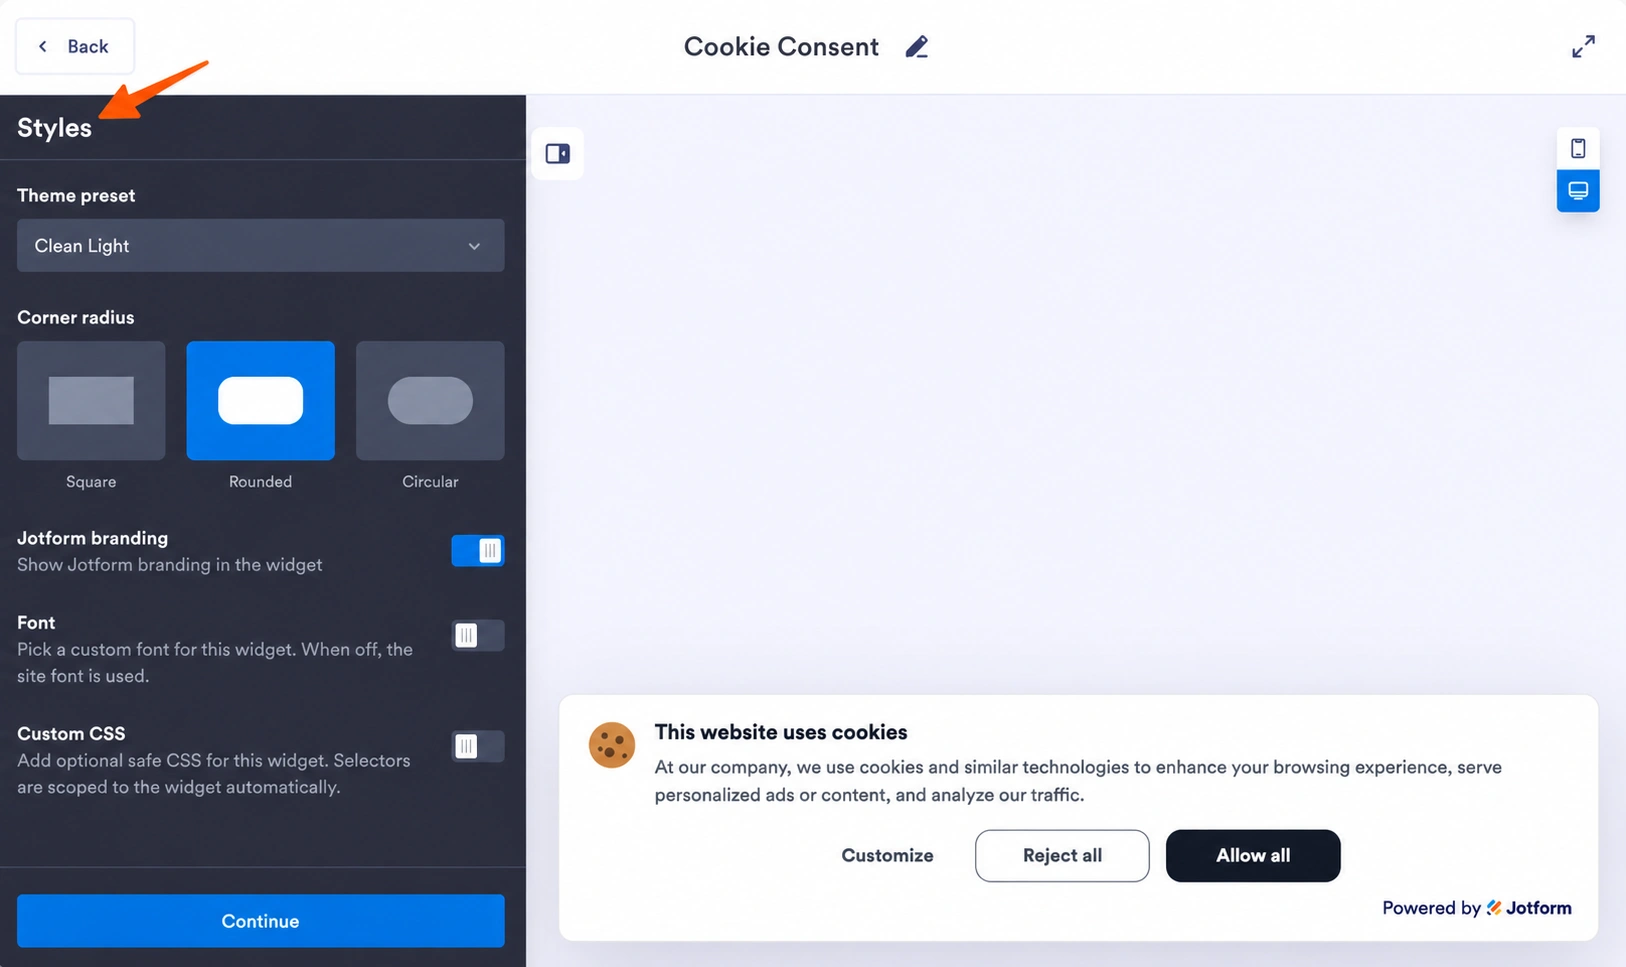
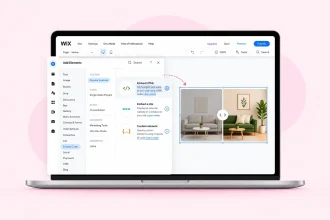
Step 3: Copy the generated embed code. In Wix, go to Settings, select Custom Code under Development & Integrations, and add the banner to all pages so it shows across the site.
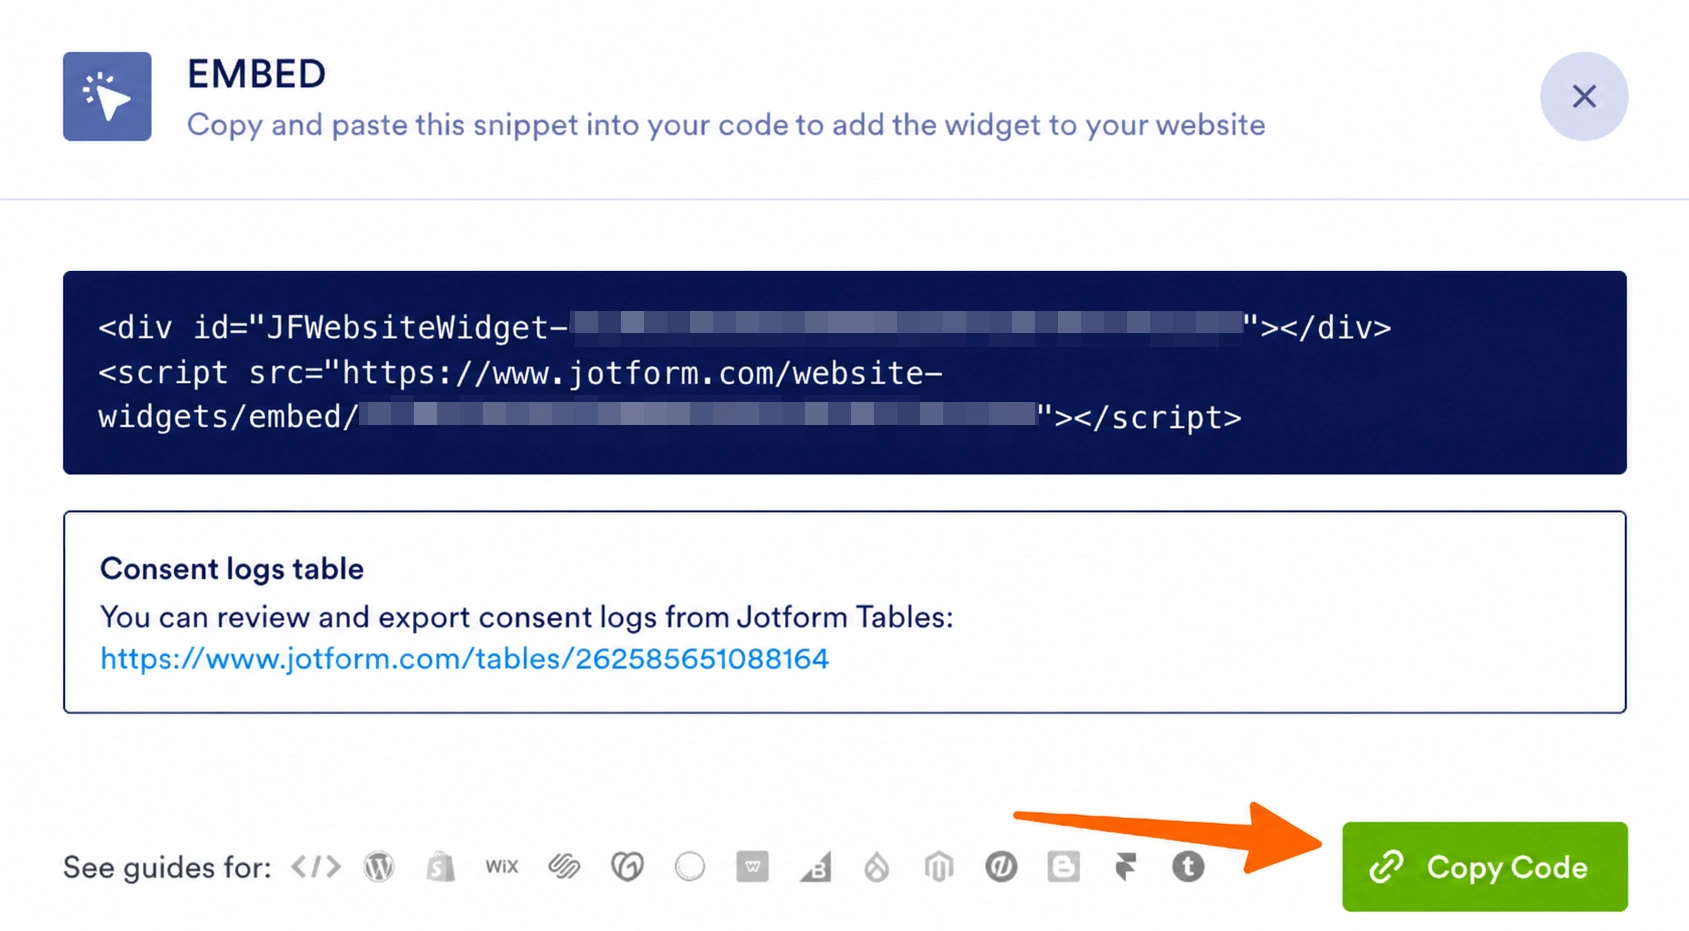
Note: Wix requires a published site with a connected domain to use Custom Code, and to connect a domain, you’ll need a paid Wix plan.
What the cookie consent banner covers: Scripts you add under the widget’s categories run only when a visitor allows that category. Consent gets recorded with time stamps and category selections, and you can review or export those using Jotform Tables. The widget loads asynchronously and does not rely on jQuery, so the effect on page speed is minimal.
Analytics and marketing tags connected through Wix’s own marketing integrations, and its App Market apps, run under Wix’s consent settings rather than the widget’s. If your Google Analytics is wired through Wix rather than pasted into the widget, keep that categorization in place.
Supercharge your Wix site with smart, serverless widgets
A cookie banner is one of several small features website creators often overlook. Jotform’s Widget Directory makes sure you’re covered, and every widget works the same way I’ve outlined here: Build it, copy the embed code, and drop it into Wix.
Here are a few more Jotform widgets that solve familiar Wix problems:
- The Age Verification widget walls off age-restricted content with a branded prompt that remembers returning visitors. It’s useful if you sell alcohol, supplements, or anything else that is government regulated.
- The Accessibility widget lets visitors adjust contrast, text size, spacing, and motion. These factors matter to the same people who notice whether you take their privacy seriously.
- The Back to Top widget gives long Wix pages a smooth jump button. We walked through how to add one in this guide.
Your budget belongs in marketing and operations, not in a monthly subscription for a banner. With Jotform, you can build your cookie consent banner once, embed it, and get back to the work you love.
This article is for Wix site owners, online stores, agencies, and bloggers who need to comply with global privacy laws (like GDPR and CCPA) without paying recurring App Market fees or dealing with rigid native banners.


















Send Comment: