When you want visitors to get to one of your locations, help them answer a simple question: How do I get there?
If you run a store, list properties, or host events, your website should answer that question before visitors have to ask. A clear map on your “Contact Us” or “Locations” page reduces friction and shows people where you actually are. The catch is getting a map that works on desktop and mobile without looking like a generic template.
Wix site owners have three main paths: the native Wix map element, a map app from the Wix App Market, or a free embeddable widget. Here is how each one works, and where each one falls short.
Option 1: Use the native Wix Map element or HTML embed box
Wix has a built-in Google Maps element. You drag it onto the page, enter your address, and Wix adds a pin. Some site owners skip it and paste a raw embed code from Google Maps into an Embed HTML box instead.
To add the native map (per the Wix Help Center):
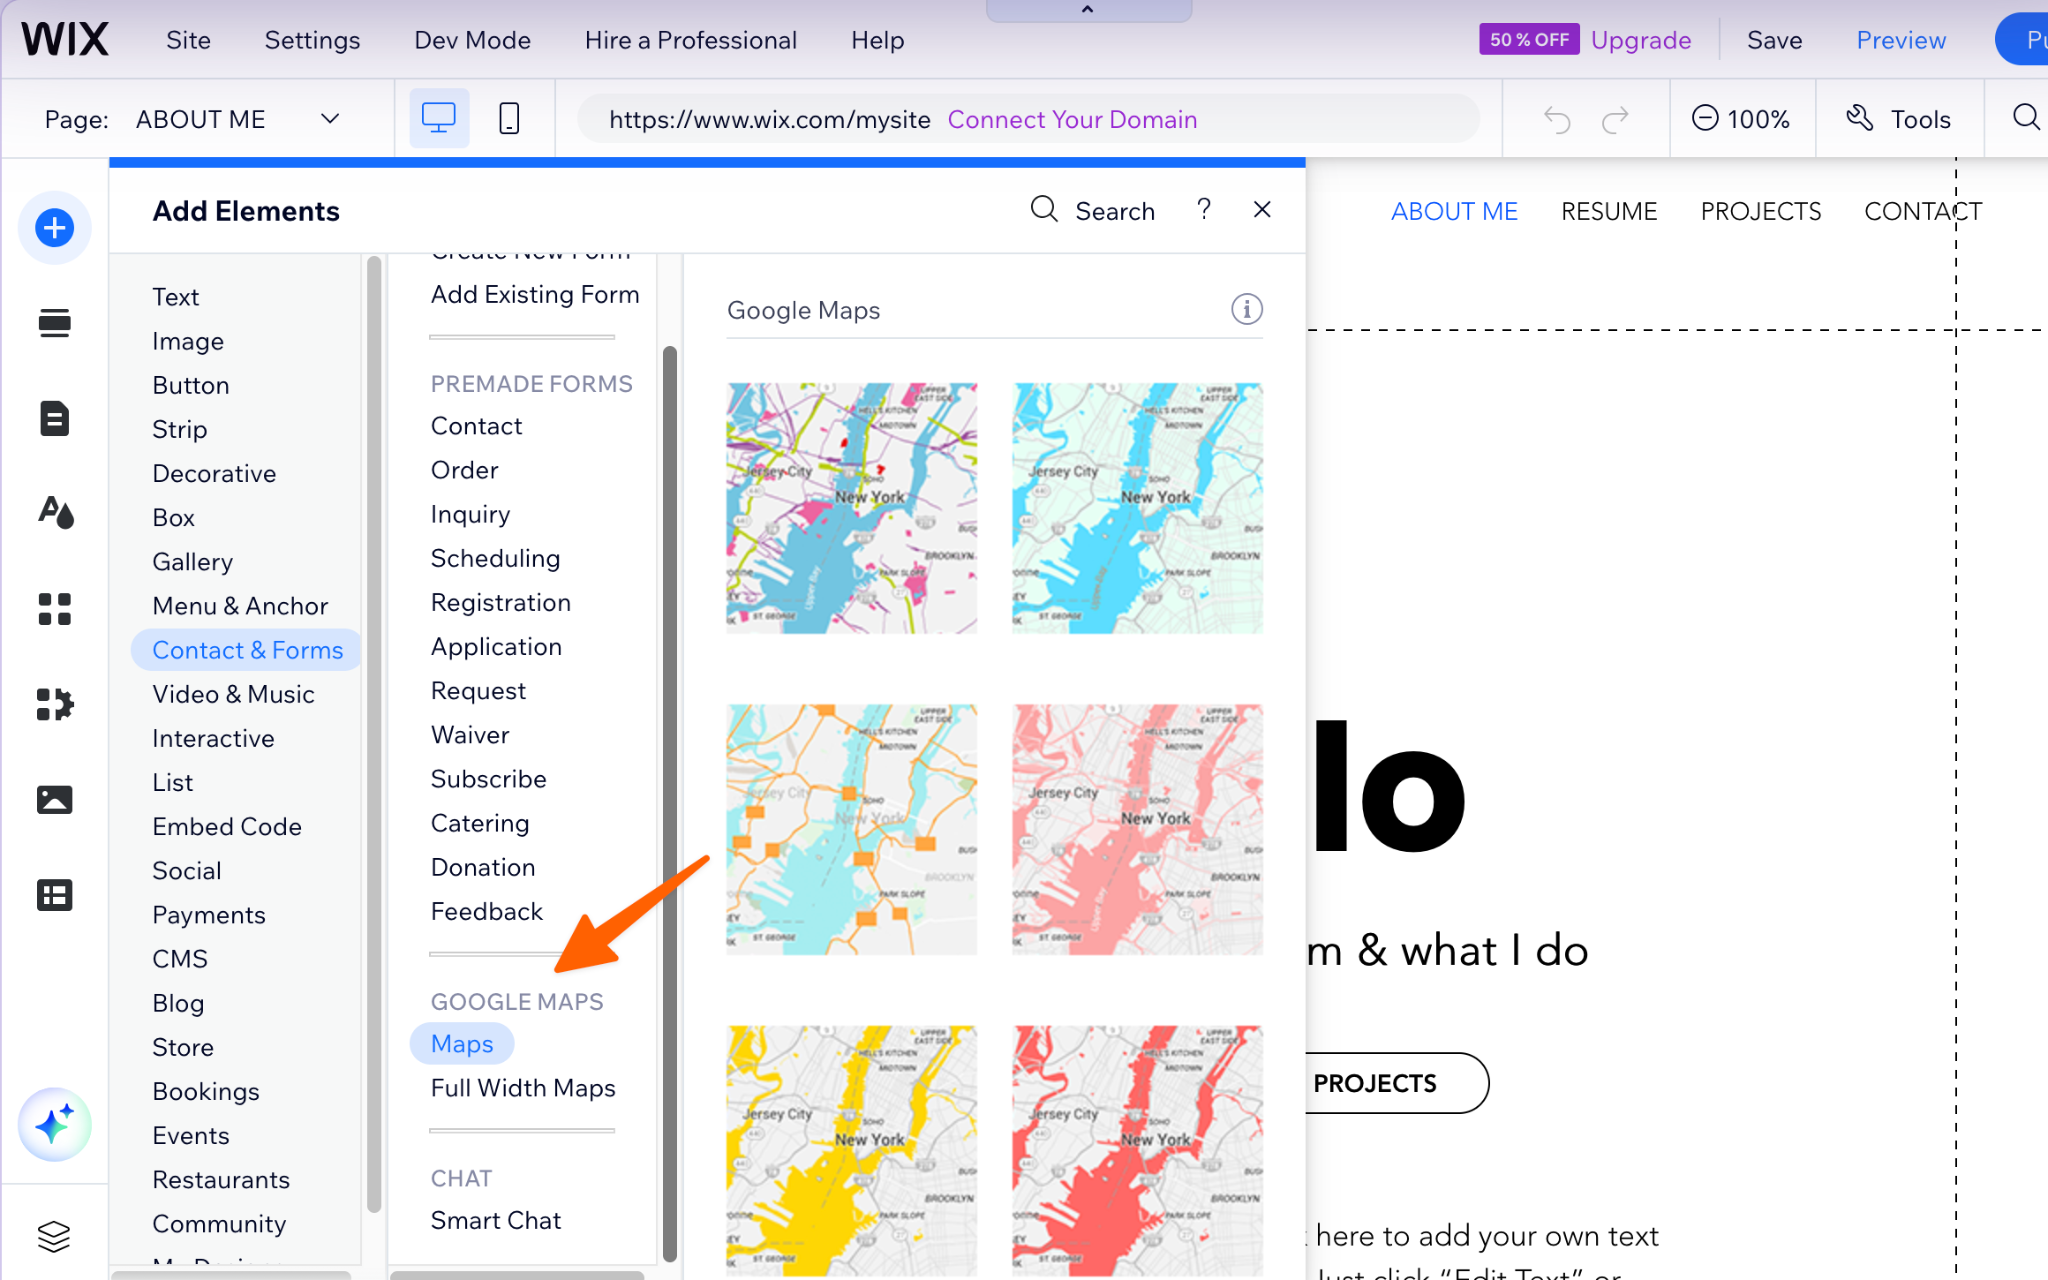
- In the Wix Editor, click Add Elements, then Contact & Forms, then Maps or Full Width Maps. Drag the map onto your page.
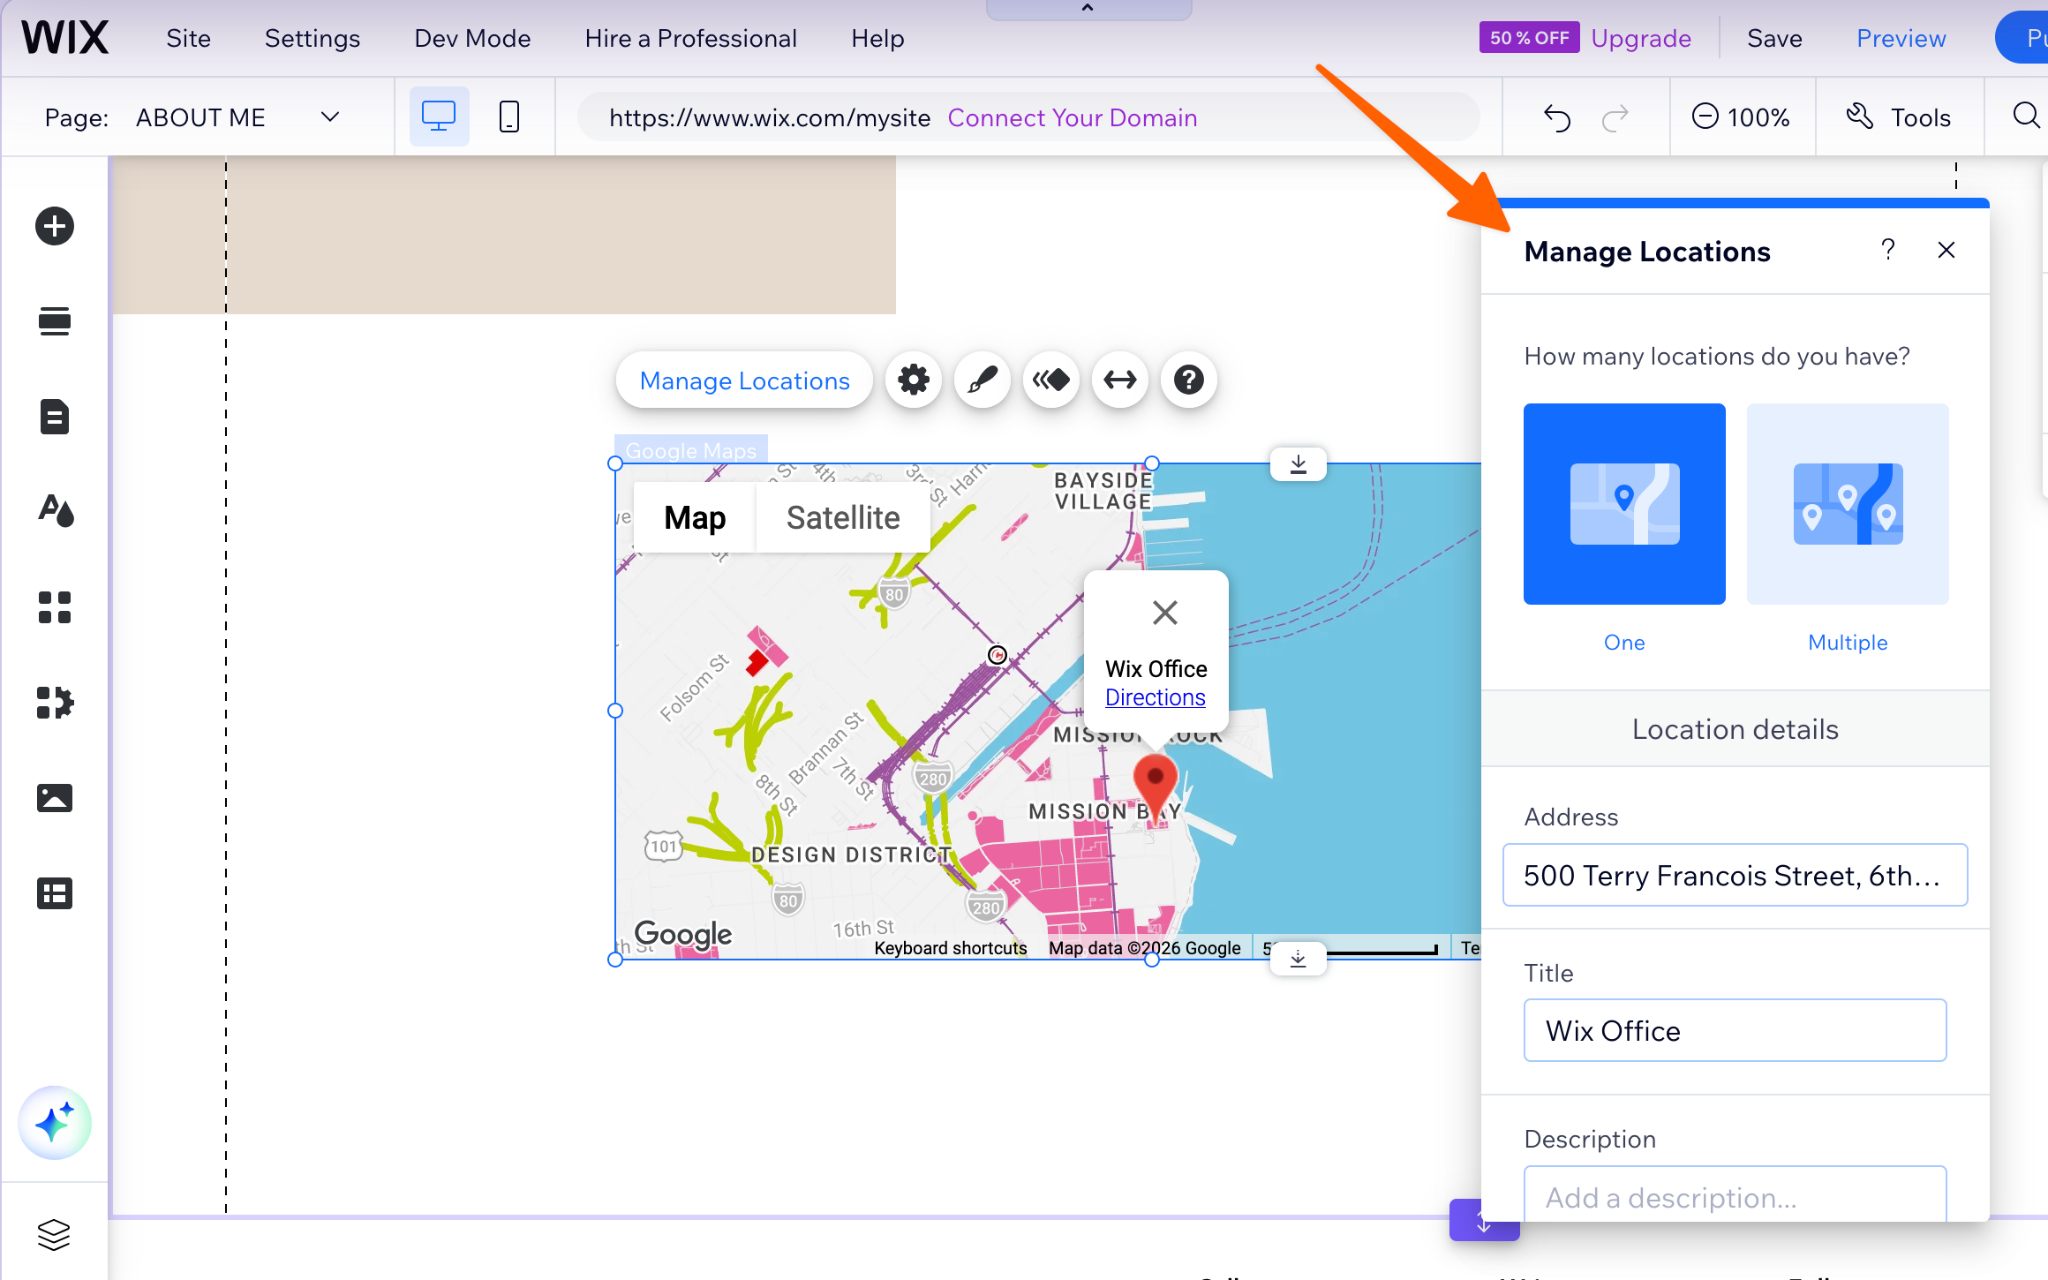
- Click Manage Locations, choose One or Multiple, and enter the address, title, and a short description.
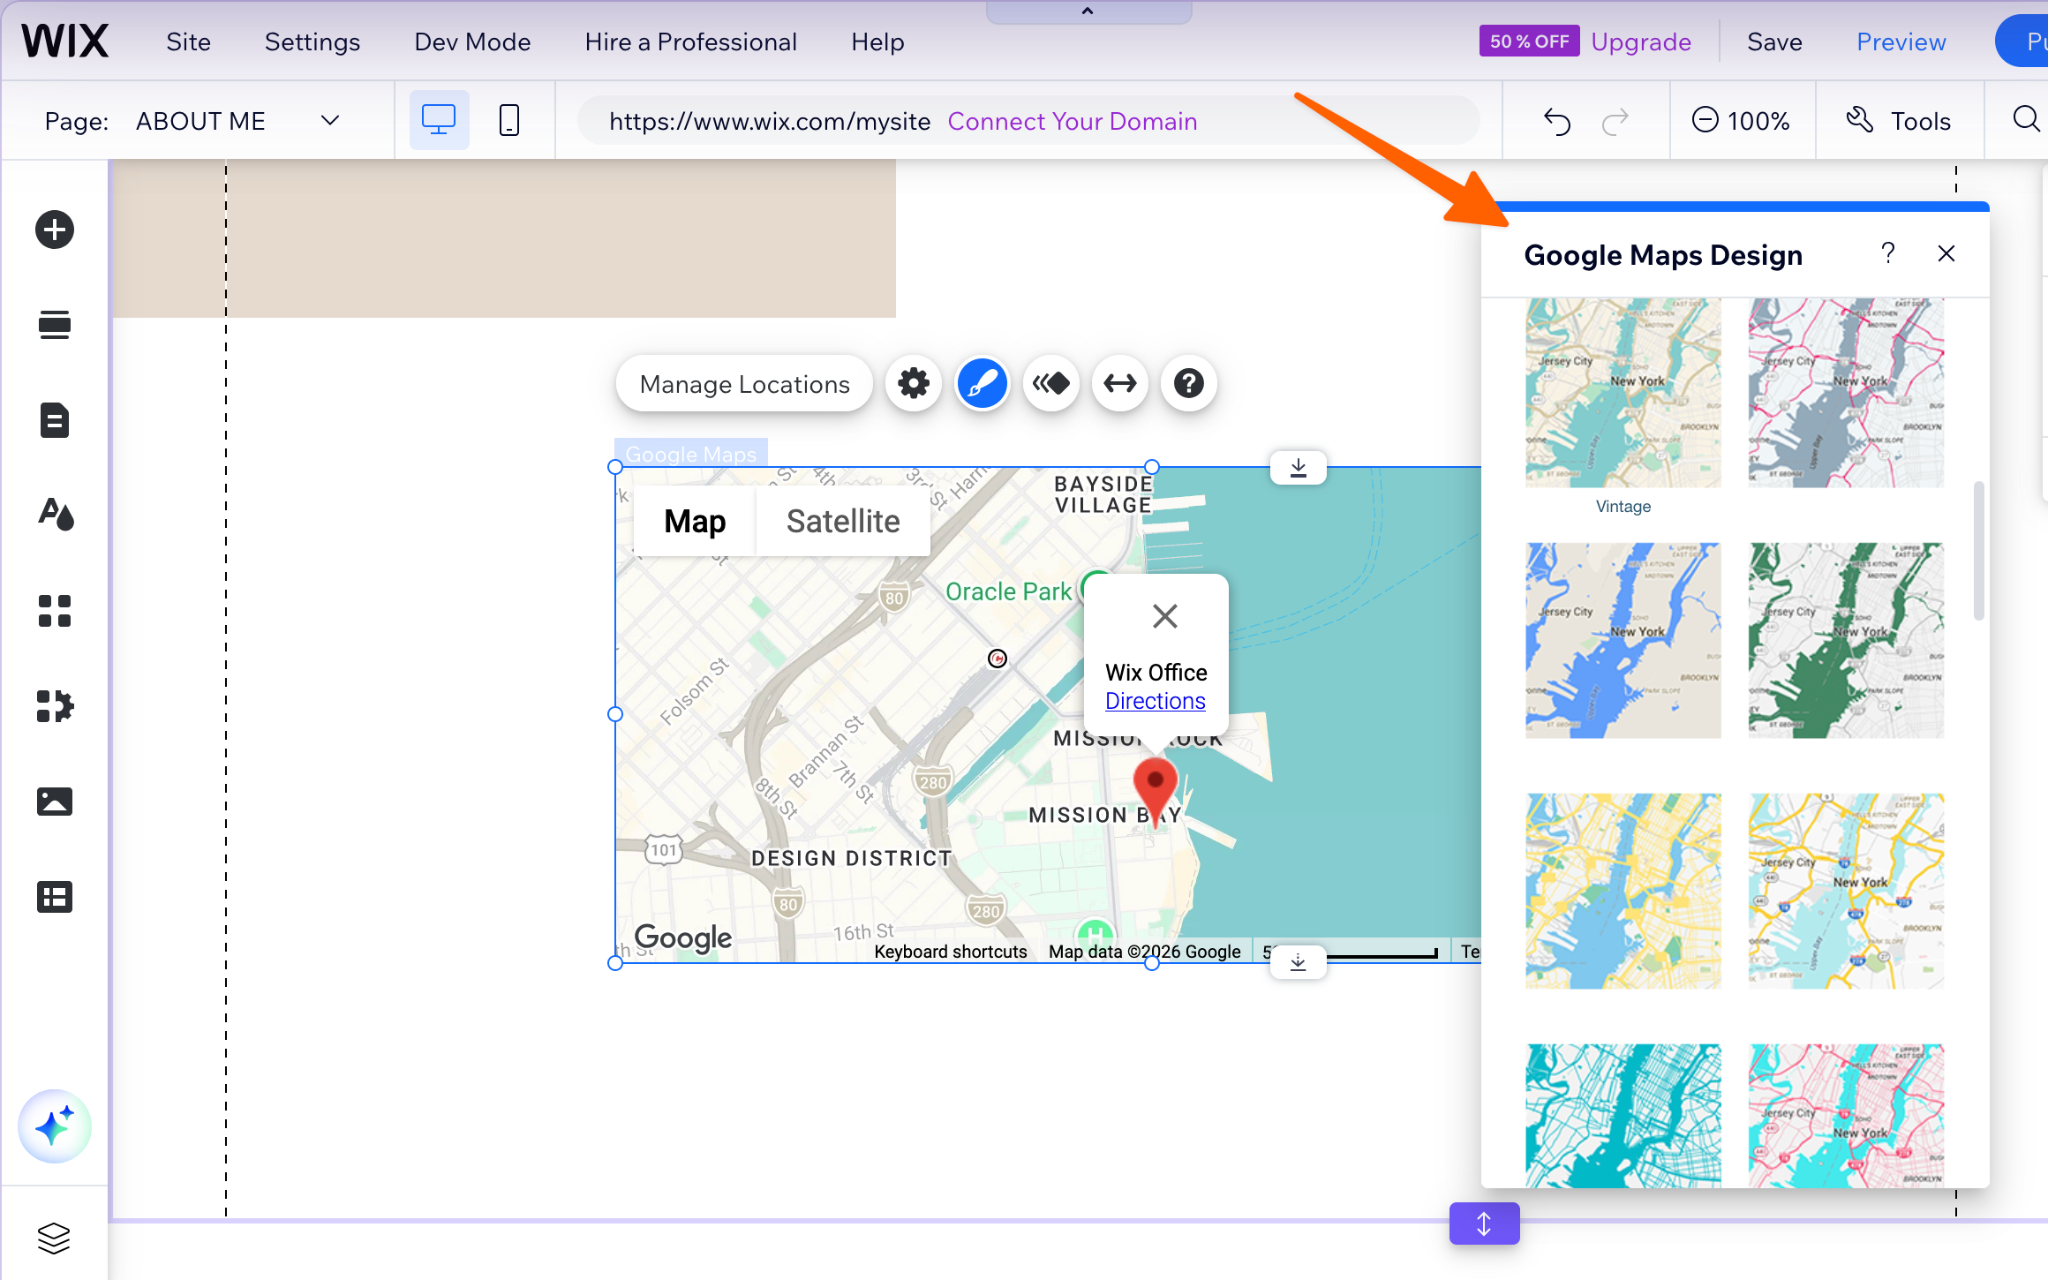
- Click the Design icon to pick a color theme and a pin style, or upload your own pin.
The drawbacks:
- Thin location details. Each pin carries a title, a short description, and one link. There is no search box, category filter, business hours, or photo per location.
- Presets only. You can change the color theme and pin, but only within Wix’s options.
- Embeds are not responsive. If you paste a Google iframe into Wix’s Embed HTML element, Wix notes that embedded code won’t be responsive, even if it was originally. You will need to resize it and check how it looks on mobile.
Option 2: Install a premium Wix App Market map app
When the native element can’t handle a polished or multi-location layout, the usual workaround is a third-party app from the Wix App Market, such as a store locator.
To install a map app:
- Open the Wix App Market and search for “store locator” or “Google Maps.”
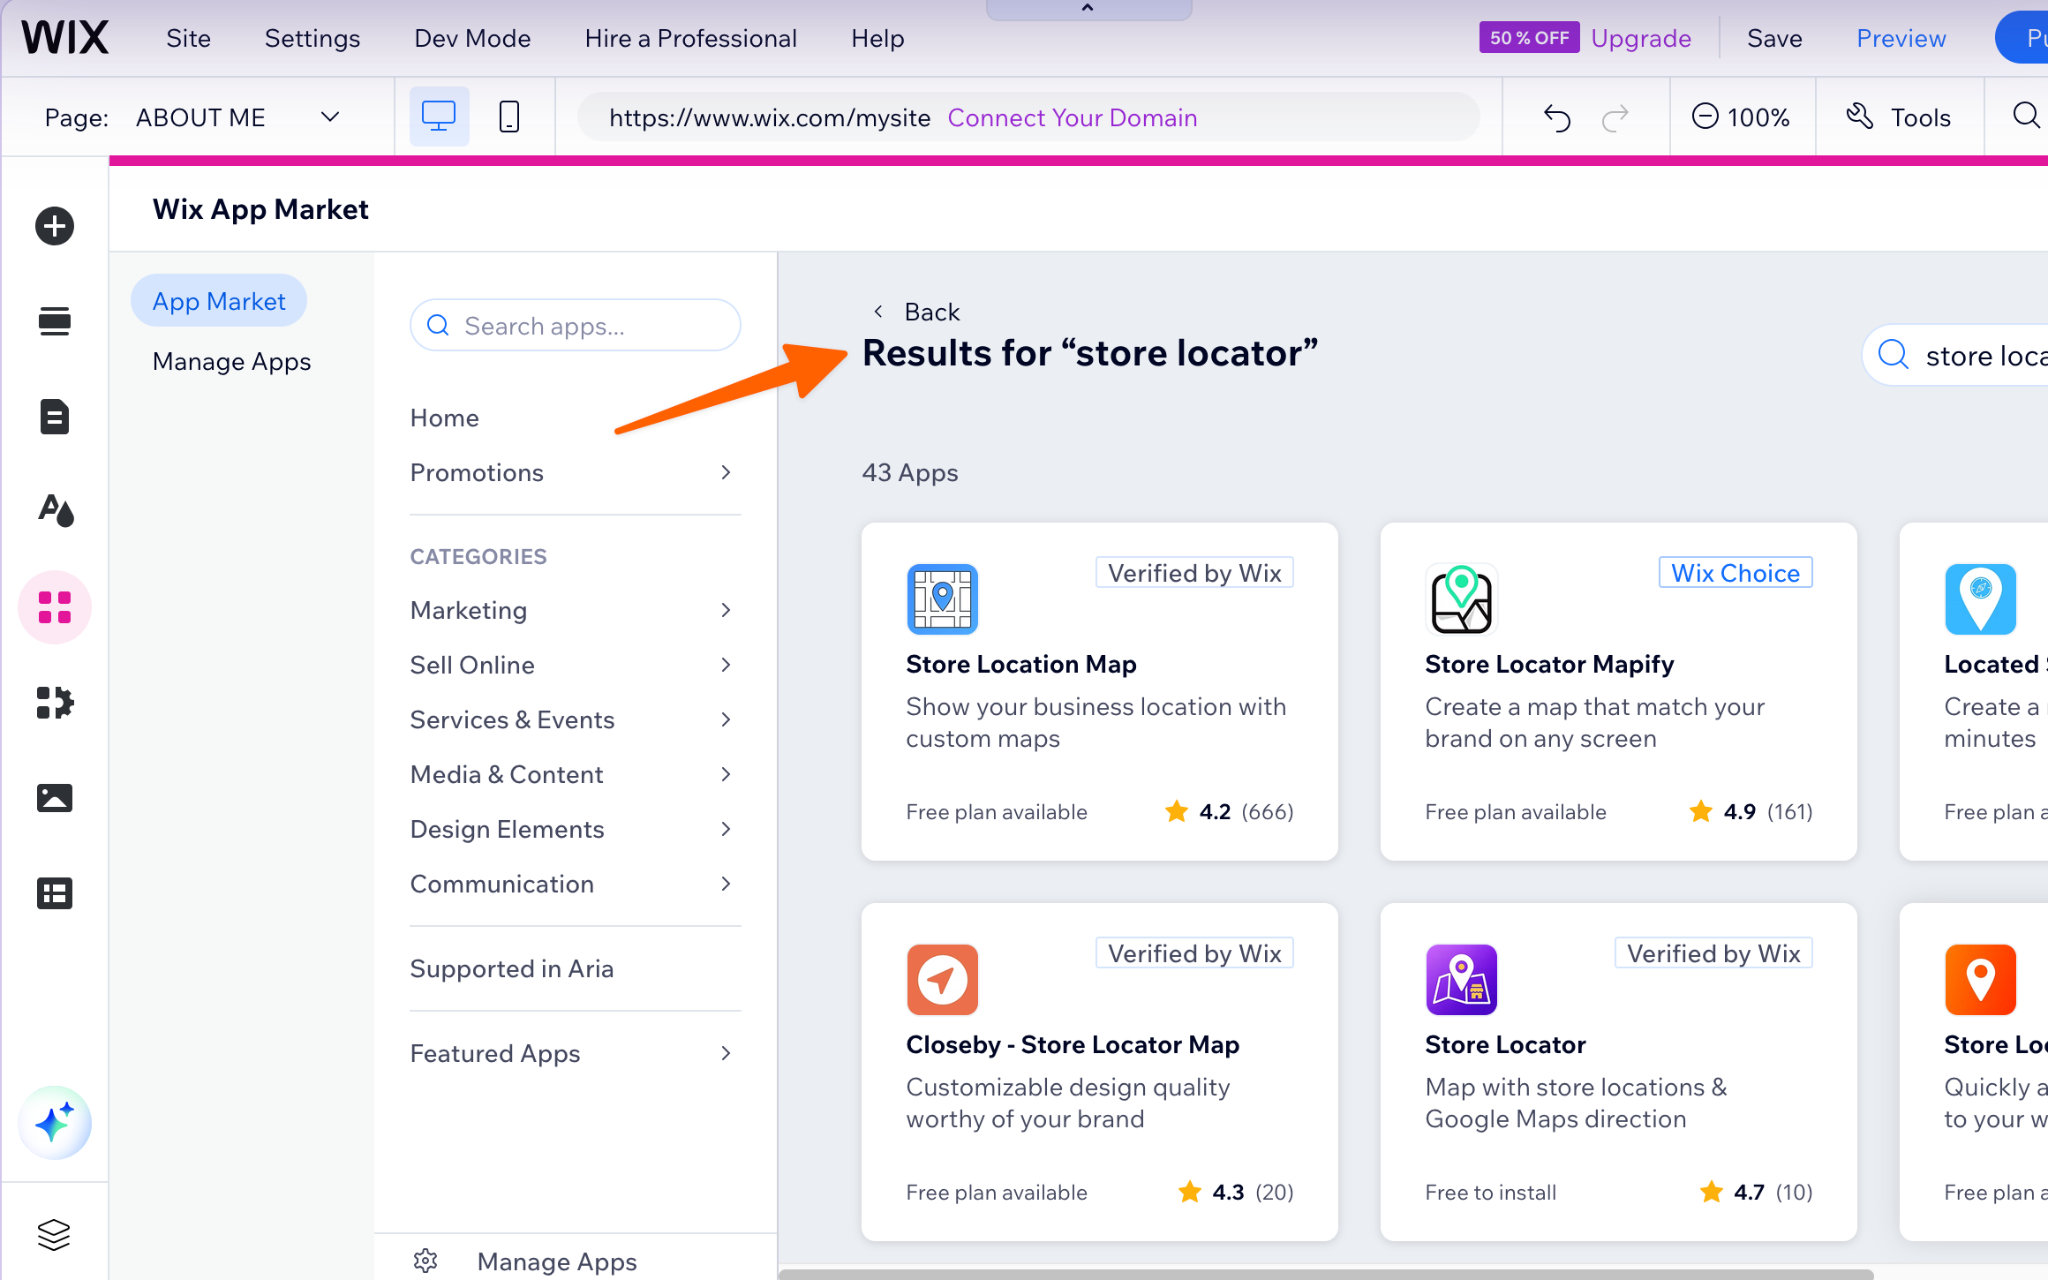
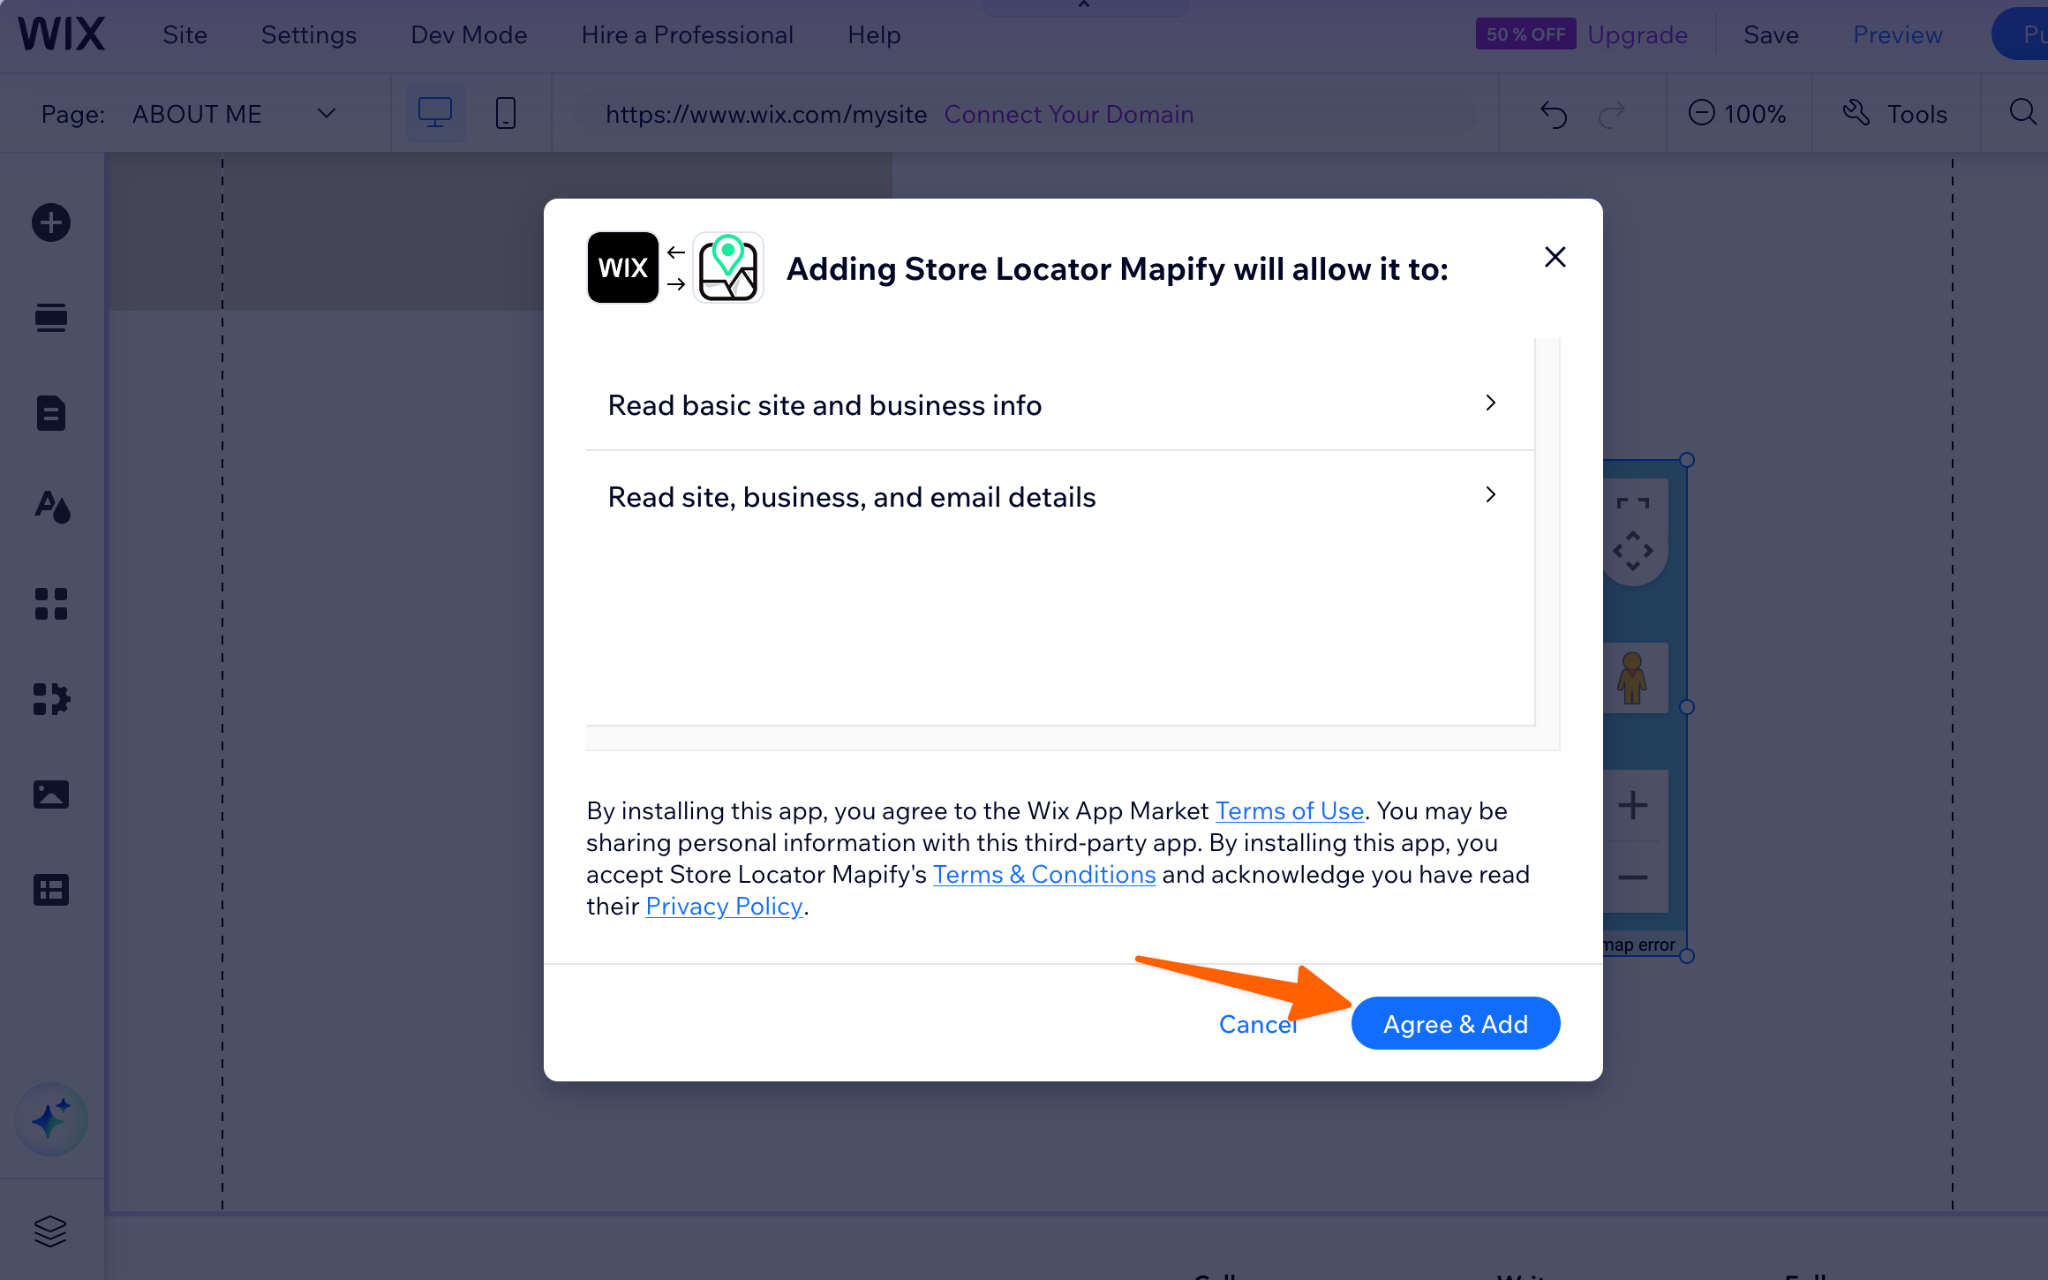
- Click Add to Site on the app you pick and approve the permissions.
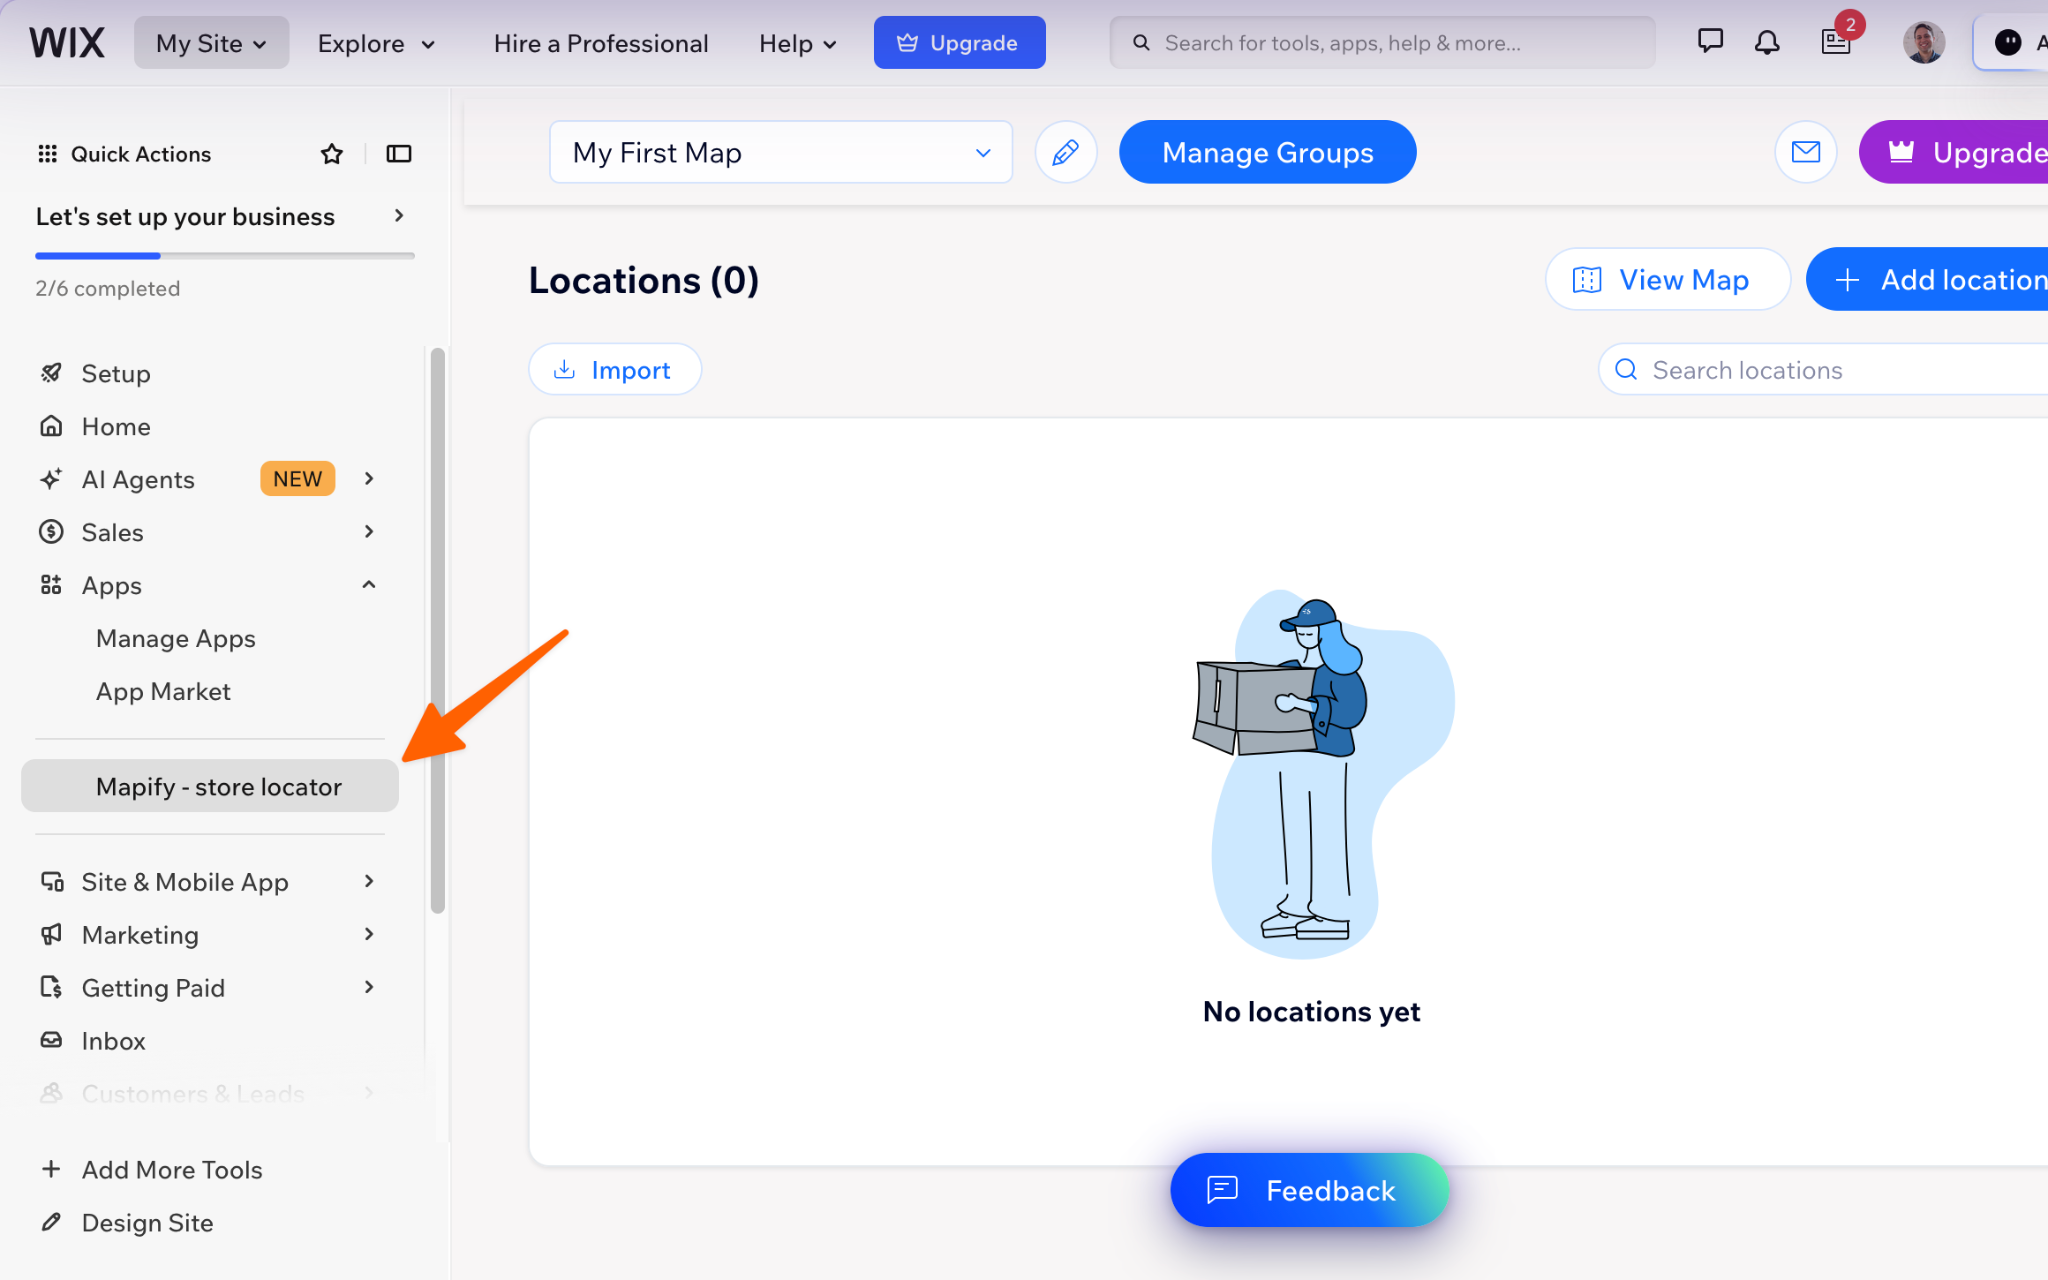
- Open the app’s dashboard, add your locations, and customize the map’s look.
The drawbacks: Free tiers tend to be limited, and pricing varies by app. These examples come from live App Market listings and may change:
- Map & Store Locator lists a free plan limited to one location and up to 100 map views, with a watermark. Paid plans start at $2 per month.
- Store Locator uses usage-based pricing that starts at $7.50 per month after a 3-day trial.
- Google Map by MakkPress offers a 7-day free trial, with unlimited monthly page views on its paid Grow plan.
If you have one address and a modest budget, a small monthly fee may be fine. Just check the view caps and watermark rules before you commit.
Option 3: Add a free, customizable Google Maps widget (recommended)
If you want custom styling, multiple locations, and no monthly app fee, the Jotform Google Maps Widget is worth a look. You set up your locations visually, copy the embed code, and paste it into a standard Embed HTML element in Wix.
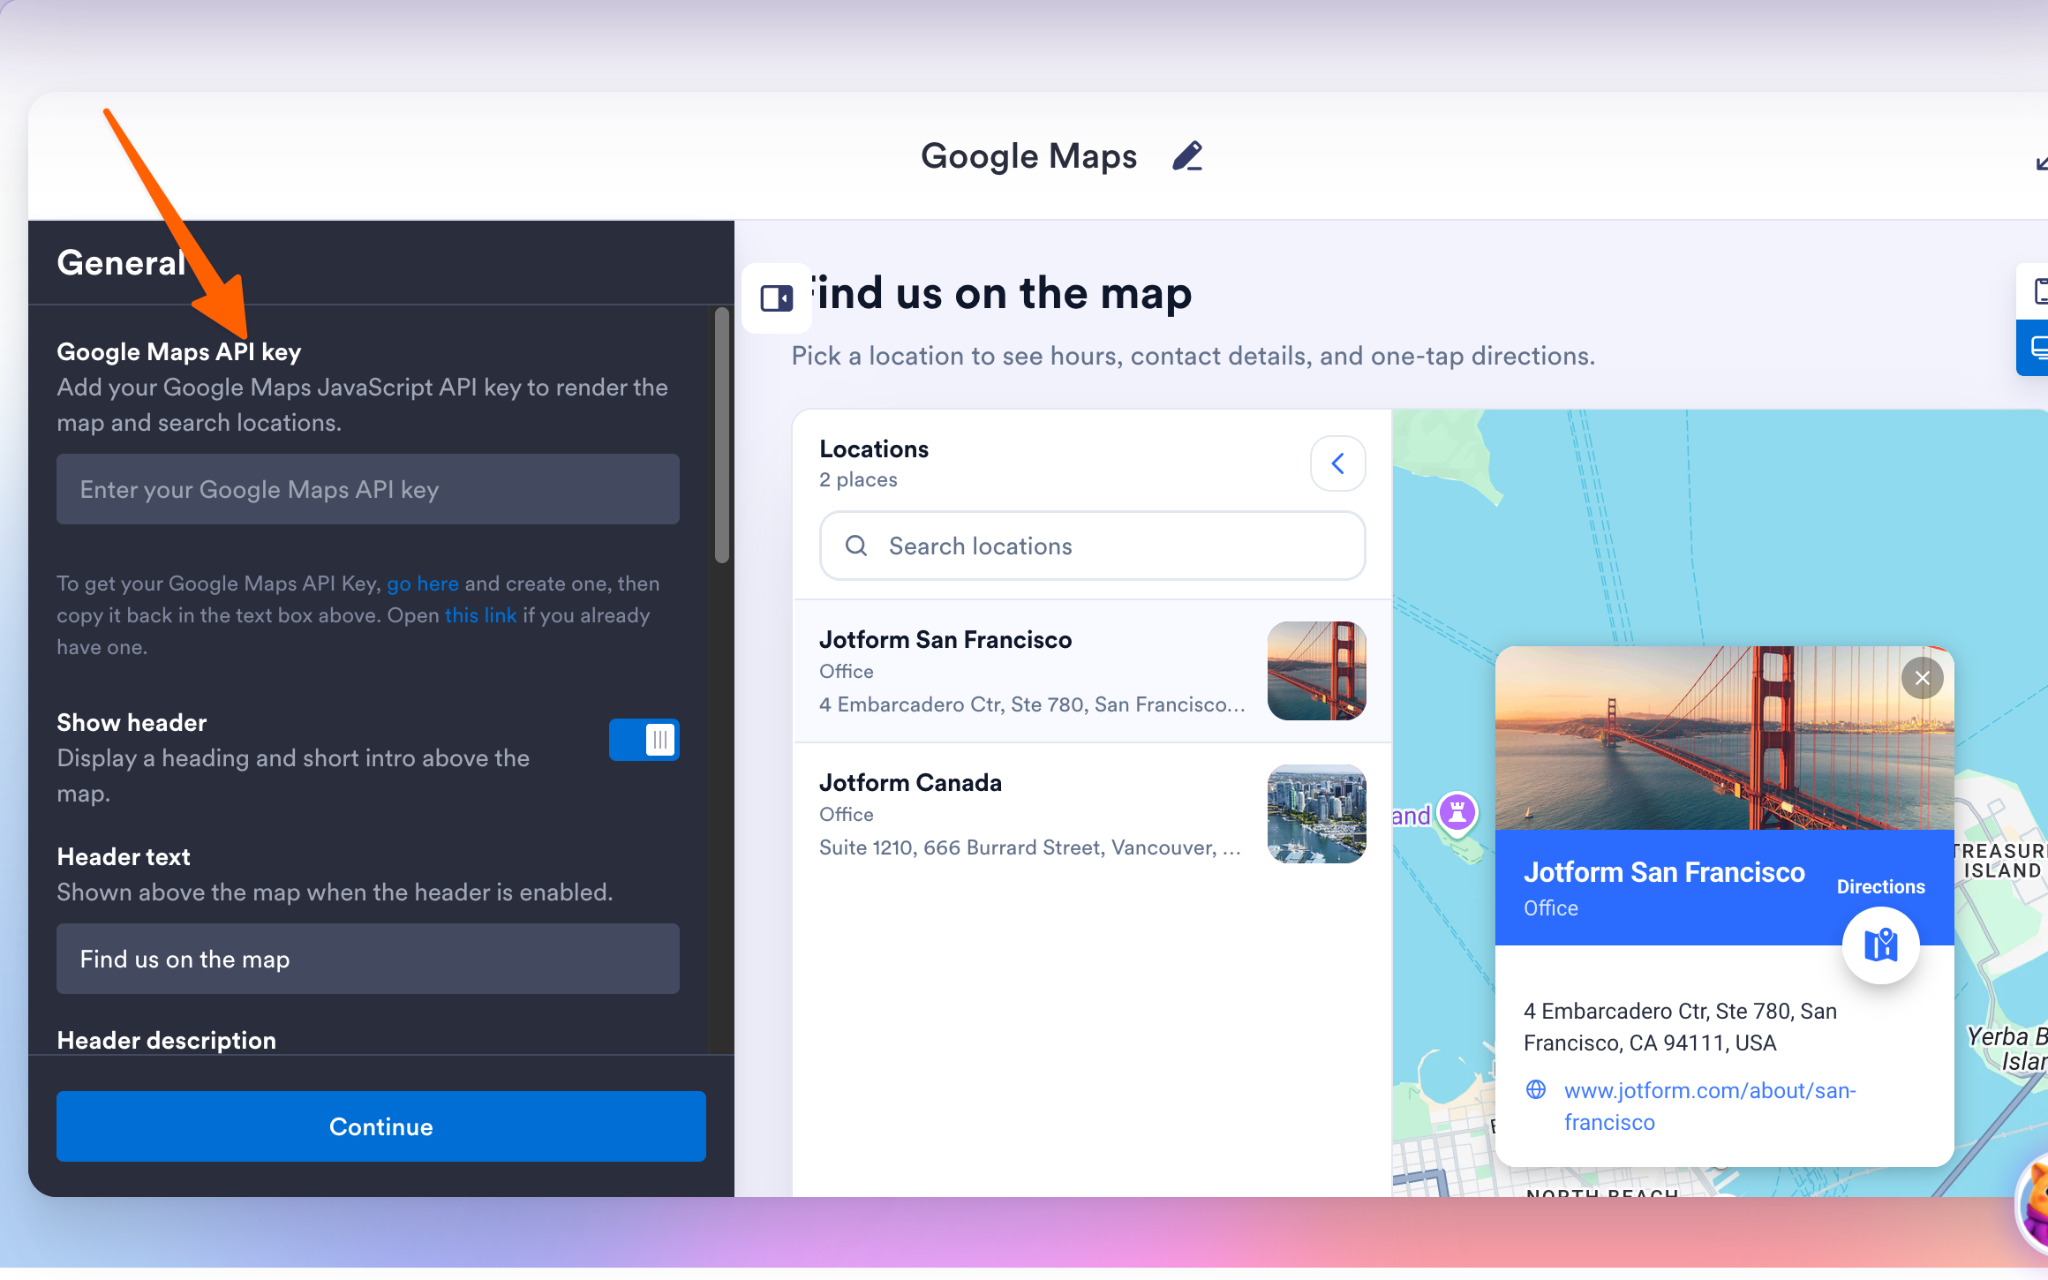
One requirement up front: the widget needs your own Google Maps API key. Jotform’s setup guide walks through where to enter it, and Google explains how to get an API key. Google Maps Platform pricing is usage-based, so review its current terms based on your expected traffic.
To add the widget:
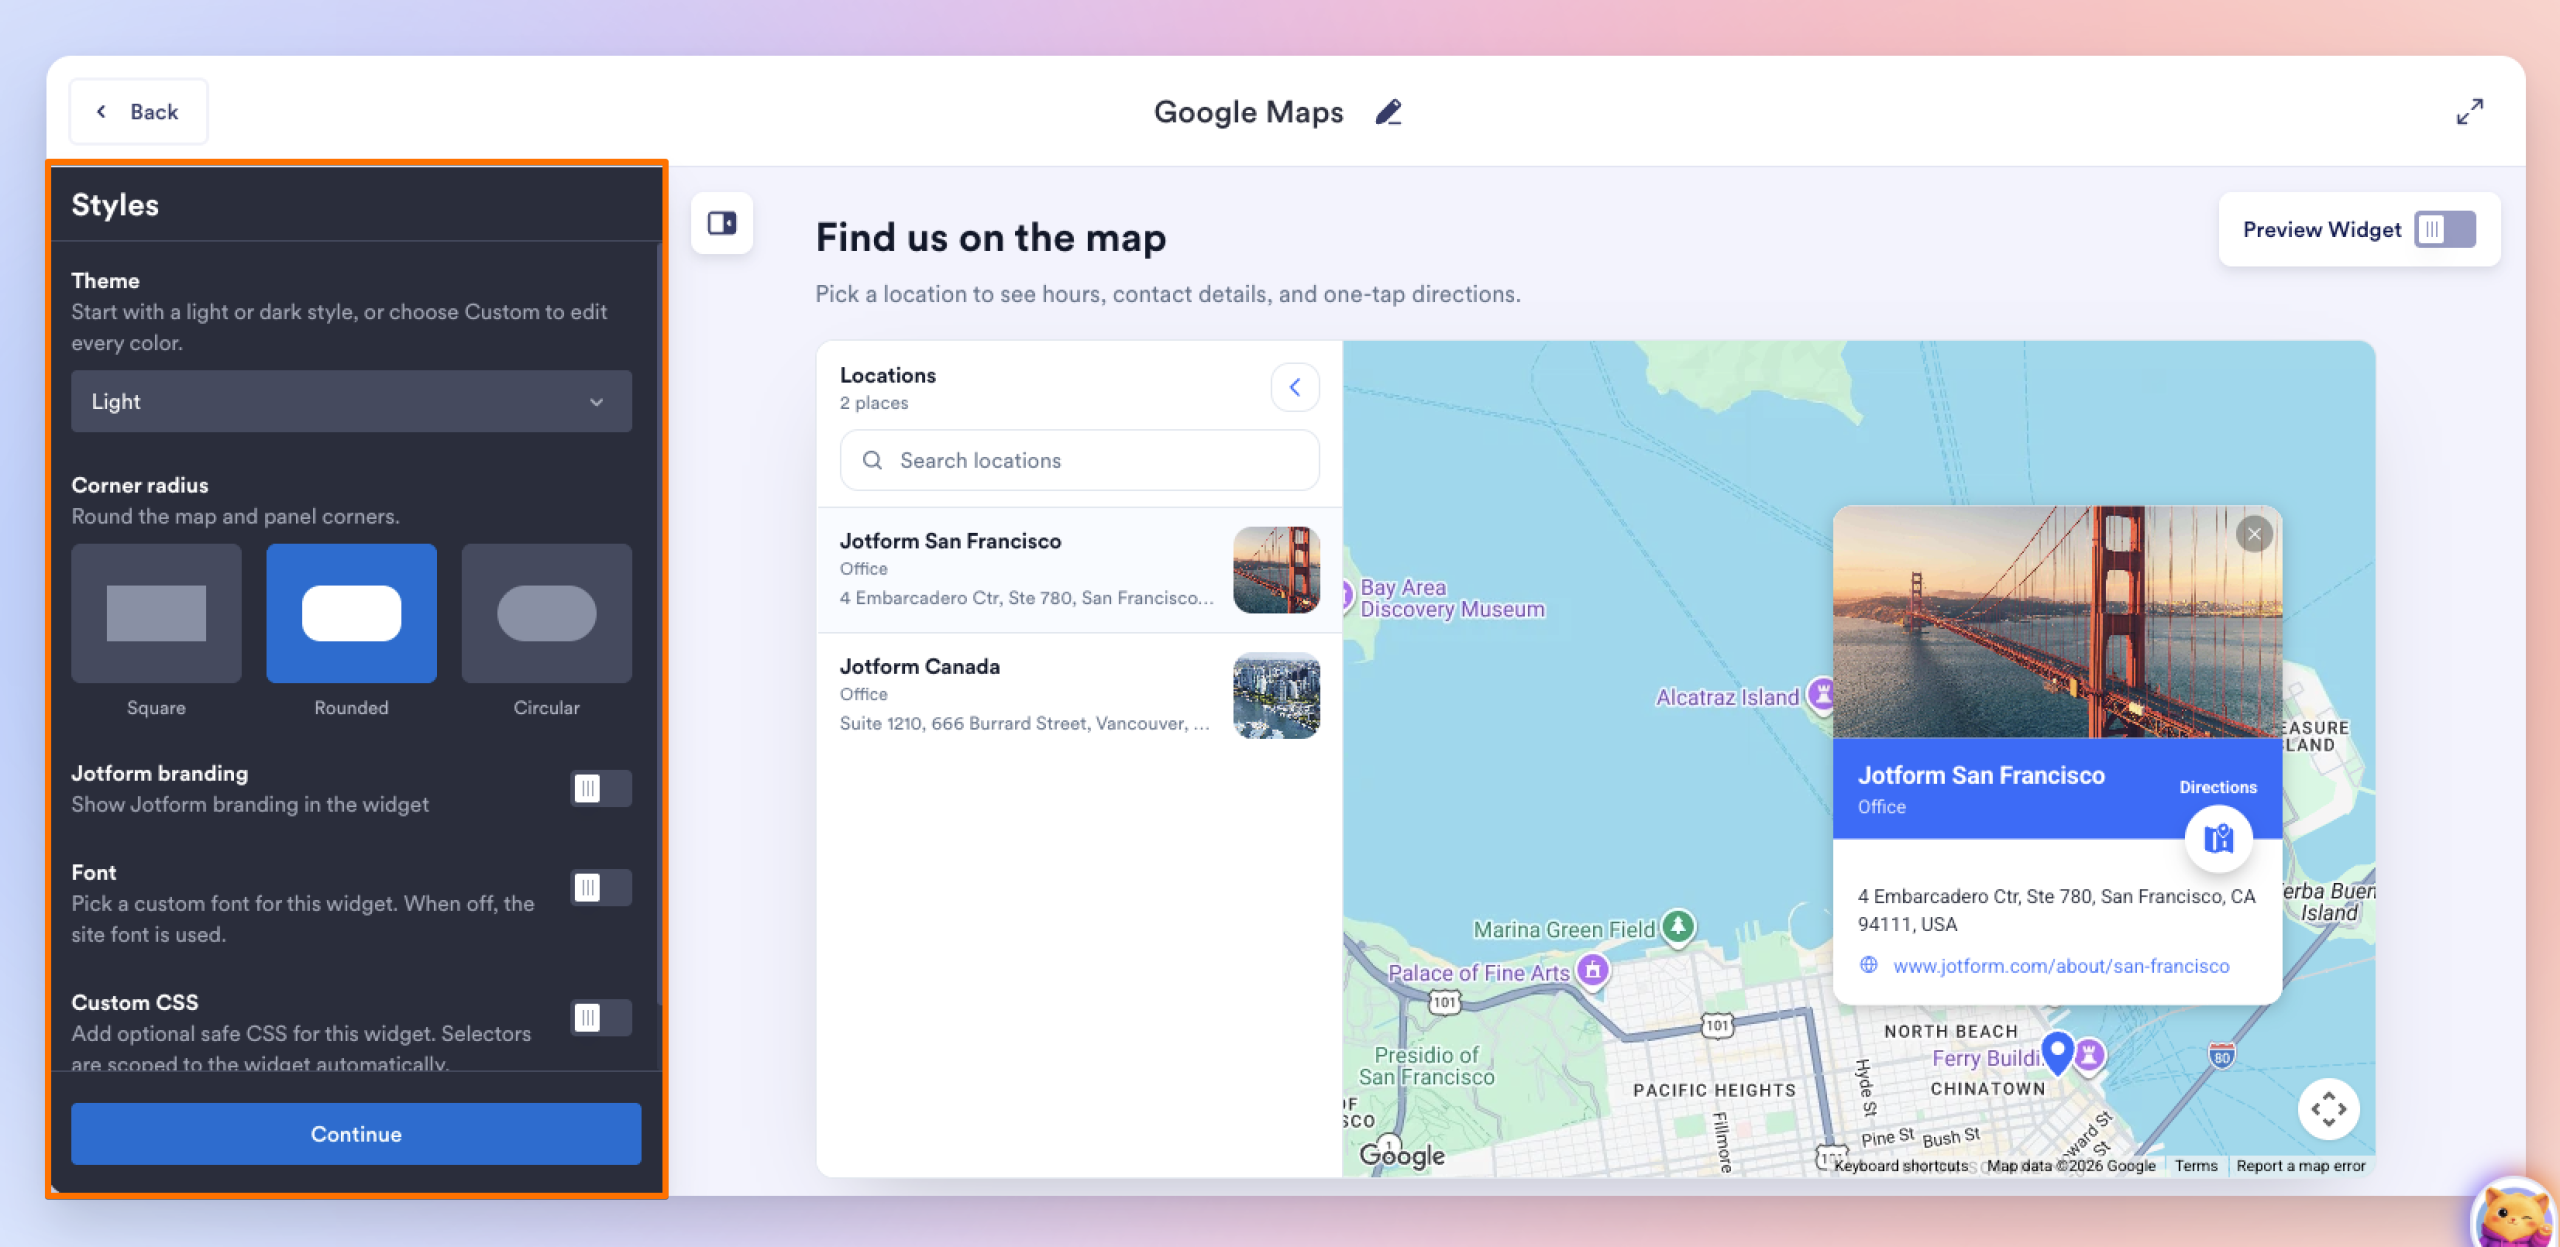
- Go to the Jotform Google Maps Widget page and scroll to the Google Maps widget editor. In the Widget Properties panel, paste your Google Maps API key and add your locations.
- Style the map (theme, layout, zoom level, search box, category filter, directions button), then click Publish and copy the embed code.
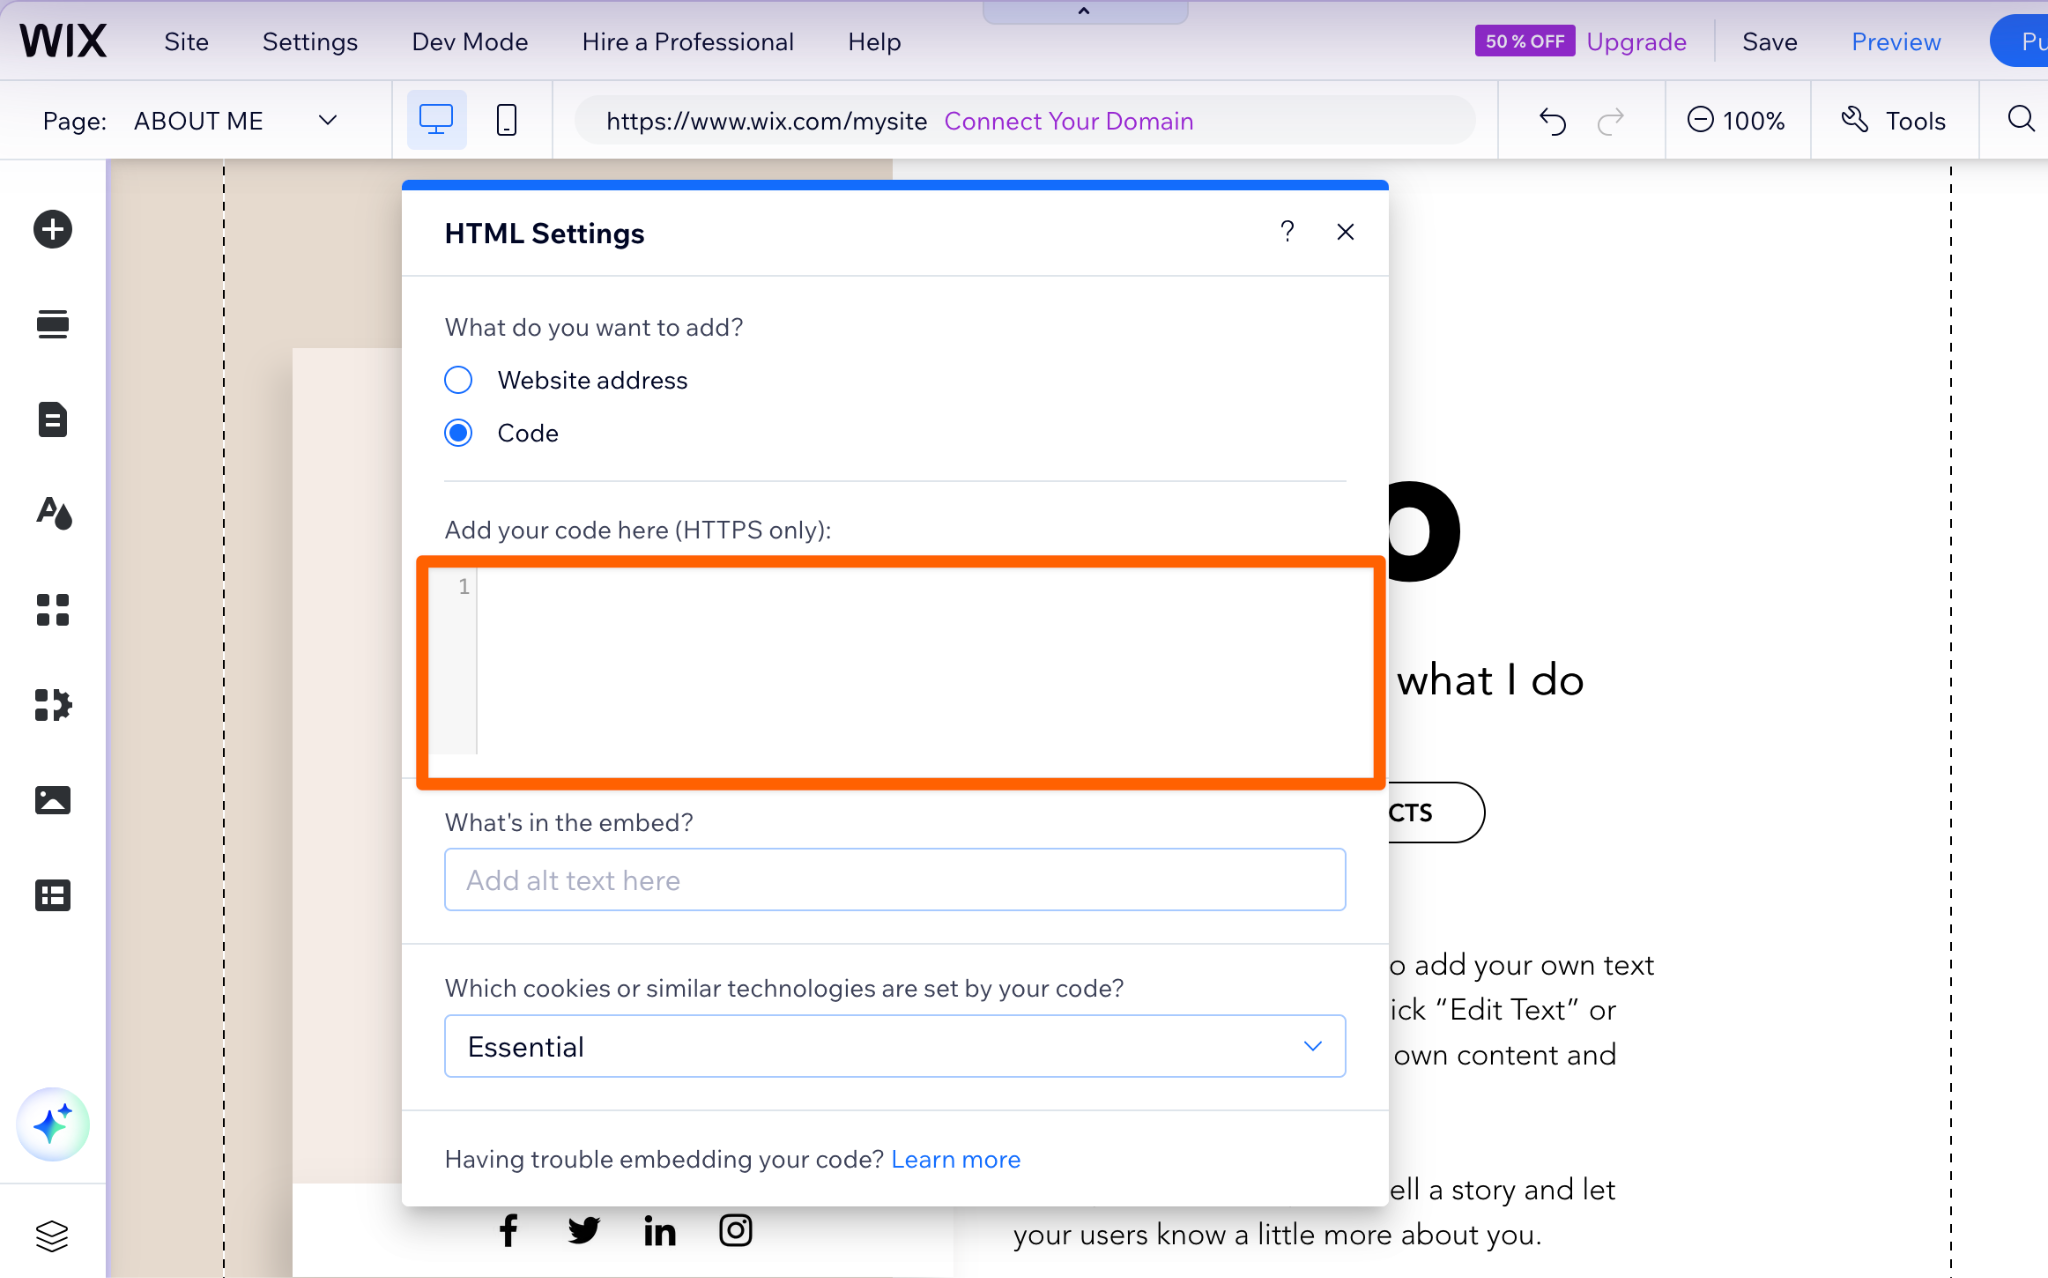
- In the Wix Editor, click Add Elements, then Embed Code, then Embed HTML. Click Enter Code, paste your code, and click Apply. Publish your site.
Why it works well for Wix sites:
- Real estate agents can map several listings on one page and let visitors filter by category.
- Event planners can pin the venue, the parking lot, and the registration desk, each with its own details.
- Local businesses with several branches can show hours, phone numbers, and a “Get directions” link for each one, which Wix’s native map doesn’t offer.
Because the widget still lives inside Wix’s Embed HTML element, give it a quick check on mobile. Wix explains how to adjust embeds in the mobile editor. You can also turn the widget on or off for desktop and mobile separately.
For more on the platform itself, see Jotform’s Wix website builder guide and its Jotform Wix integration. If you also manage a WordPress site, the same widget is covered in how to embed Google Maps in WordPress.
Supercharge your Wix site with smart, serverless widgets
Helping visitors reach you is just one piece of a site that converts. The free website widgets directory covers other common Wix gaps, using the same copy-and-paste embed:
- Contact Us widget: collect messages and callback requests beside your map.
- Google Reviews widget: show customer feedback next to your location.
- Event Calendar widget: list upcoming events with registration links.
- Appointment Booking widget: let visitors book once they find you.
Your budget is better spent growing your business than on monthly fees for an interactive map. Start with the Jotform Google Maps Widget, and add more widgets as your site grows.
This article is for Wix site owners, local businesses, real estate agents, and event planners who want to add an interactive, mobile-responsive map without wrestling with rigid native styles, sandbox iframe errors, or paying recurring App Market fees.




















Send Comment: