
With more people using AI to generate their websites, so many sites are starting to look the same. Whether or not you use AI in your marketing, how can you make sure your site stands out in a sea of lookalike content?
I recommend adding a timeline, a visual that lays out the chronology of something, perhaps your founding story, an event schedule, a project road map, or a step-by-step service process. Each milestone in the timeline creates an open loop, which keeps people scrolling until the end.
If your site runs on Wix, there’s a catch. The Wix website builder doesn’t have a native timeline element. Building one manually is a hassle: You can add lines, images, and text boxes, but they won’t line up nicely on mobile.
Not to worry, though. I’ll show you two code-free ways to get around that problem.
Did you know?
If you know JavaScript, you can build a custom timeline with Velo, Wix’s development platform. If you don’t, try the following code-free solutions.
Option 1: Install a Wix App Market extension
The Wix App Market has hundreds of apps you can install on your site to add functions. Here’s how to start with a timeline app.
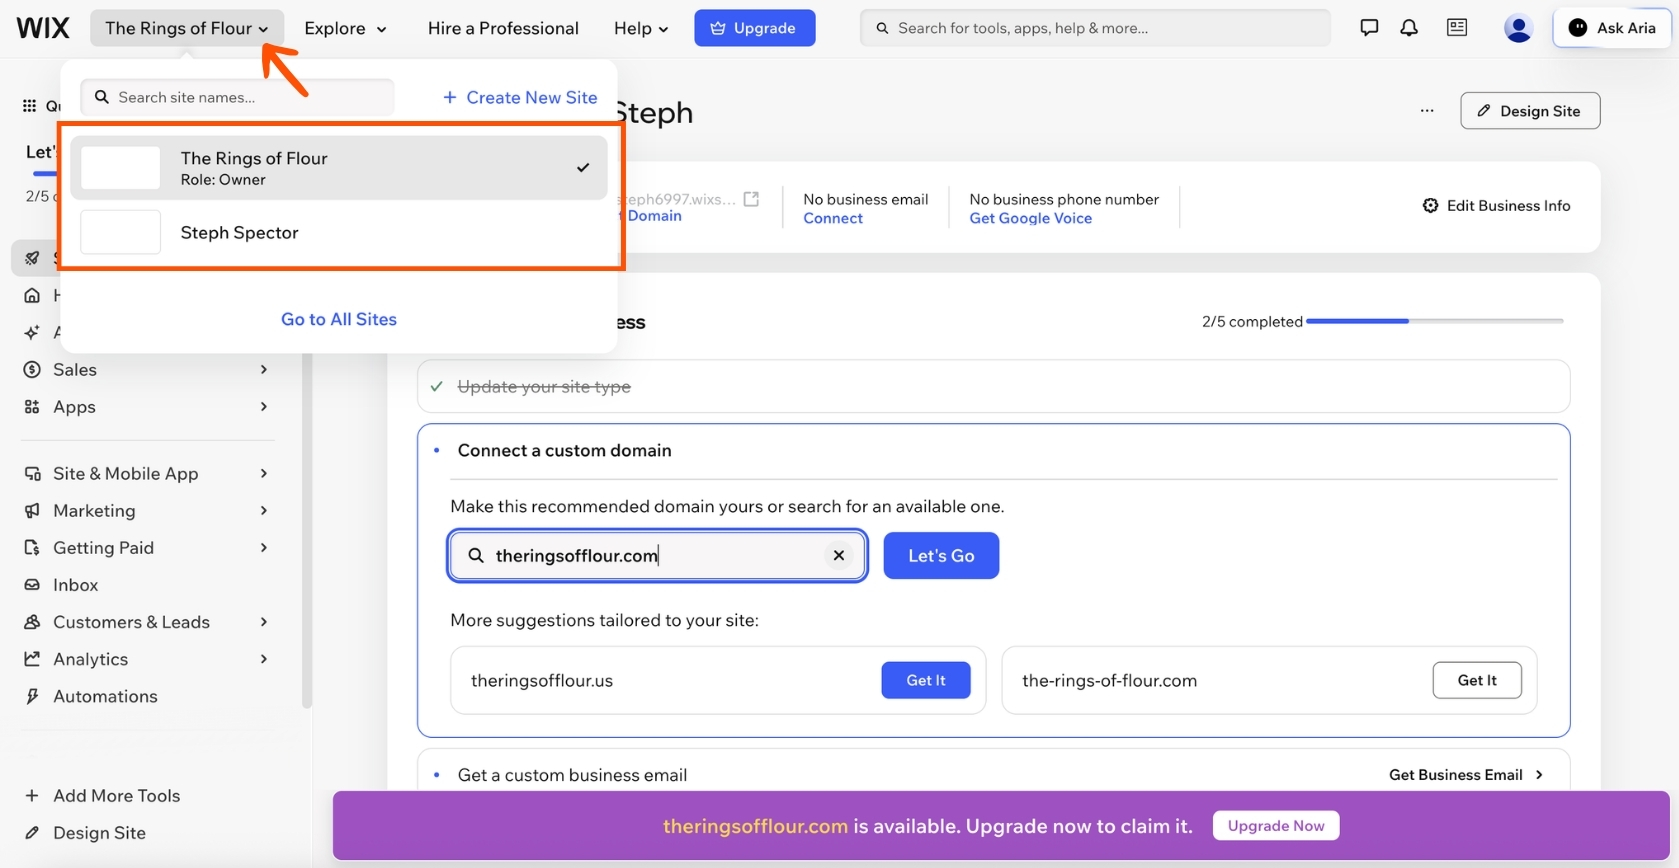
- Log in to Wix and go to your site dashboard. Have multiple sites? Click on your site name in the top-left corner, then select the site you want to add a timeline to.
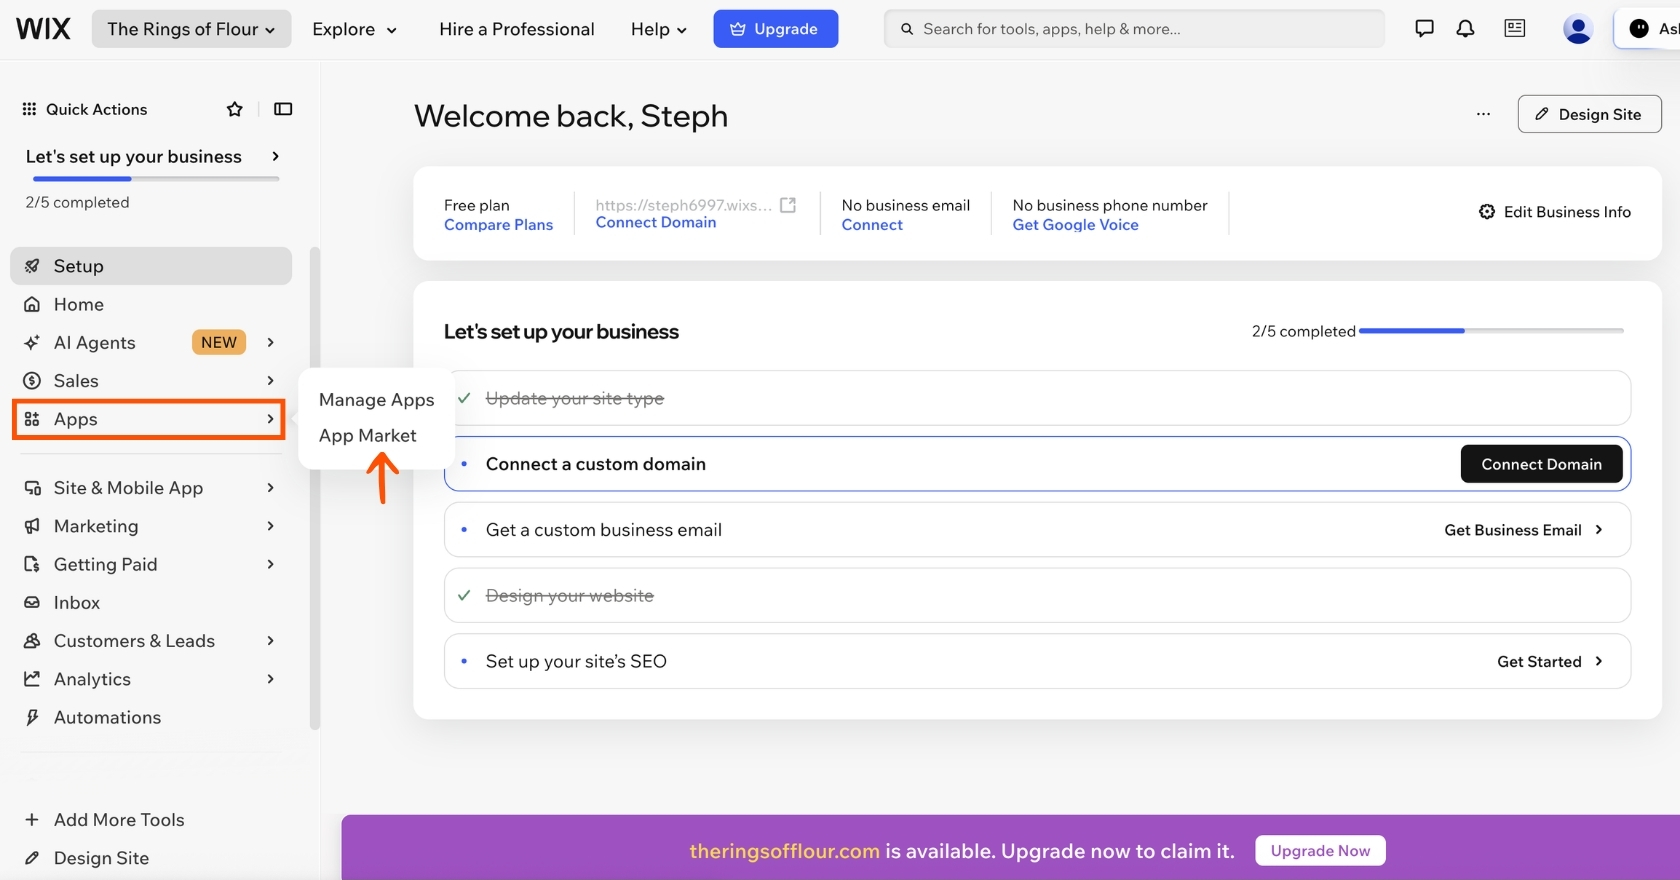
- In the left toolbar, click Apps, then App Market.
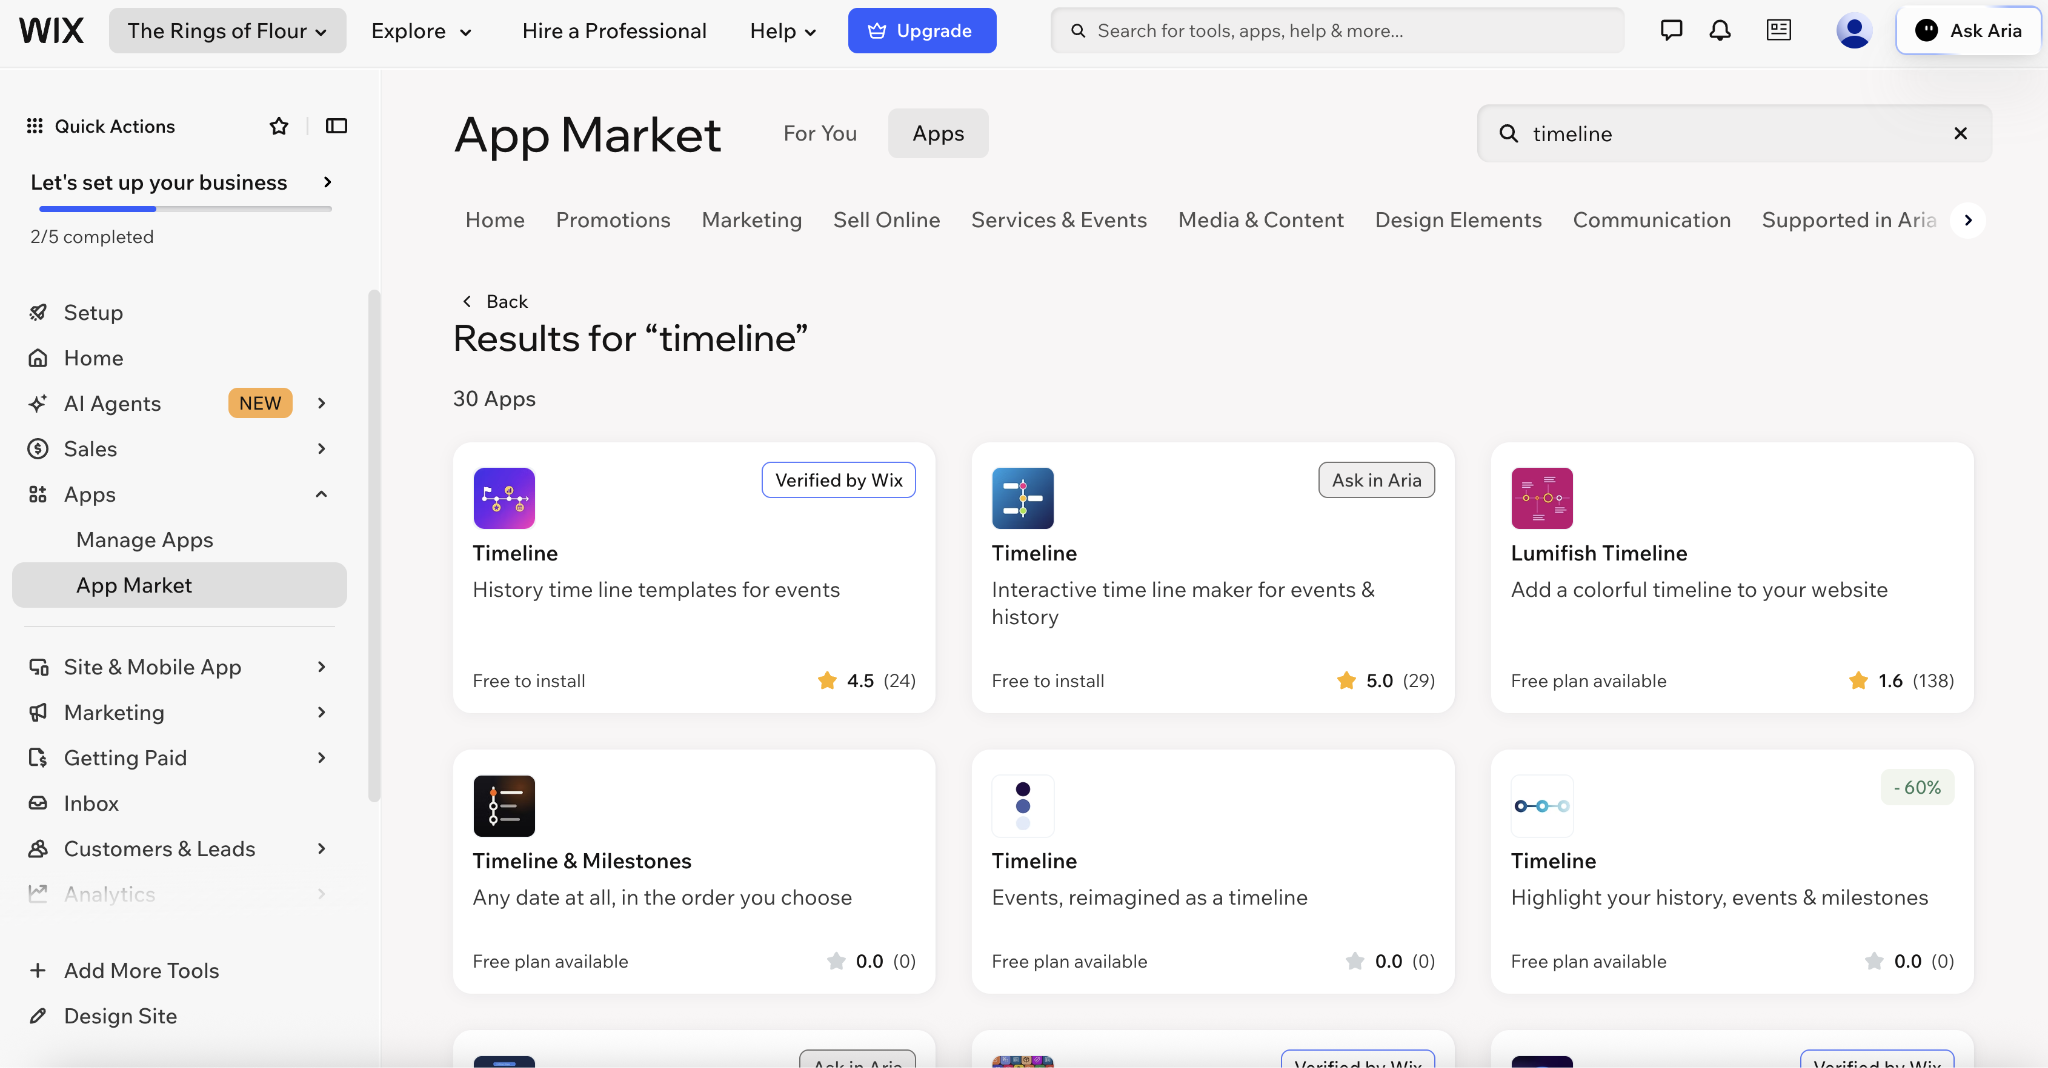
- Type “timeline” into the search bar. Wix will show you a handful of apps. As of the day I wrote this, only six of them actually add timelines to your site.
Take some time to evaluate the options. Some apps might have a tag showing they meet Wix’s quality standards. Some might say “free to install” but begin charging you after a trial period. Others gate more advanced branding options (like watermark removal or extra milestones) behind paid plans.
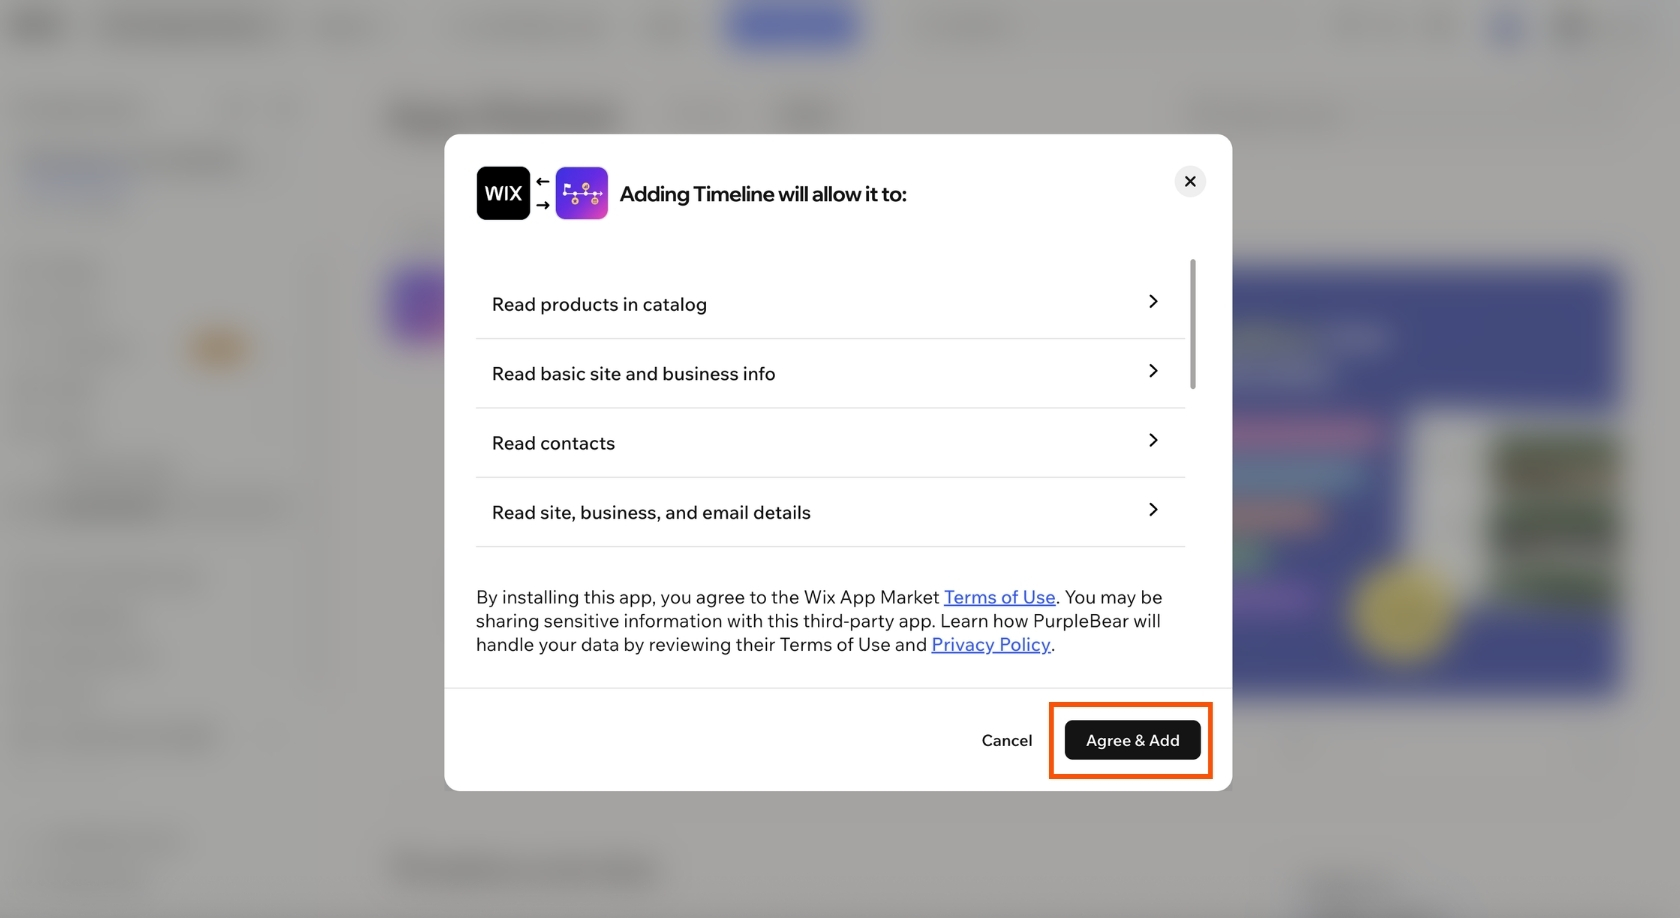
- Pick an app to test. I’ll choose Timeline, the first option that’s verified by Wix, which comes with a three-day trial. Click anywhere on the tile, then click Agree & Add to install it.
Pro Tip
Before you grant an app access, make sure you’re OK with the data you’re letting it see. To minimize security and privacy risks, choose a well-reviewed app or one verified by Wix.
- If necessary, activate the app. I had to activate mine by submitting my credit card information and a phone number first.
- Now build your timeline. In this app, I could start from seven templates, then customize the text and appearance, either by prompting AI or using a visual builder.
I started with AI. After just one prompt, though, I ran out of AI credits. I didn’t love my template’s structure, but switching templates meant starting over from scratch, so I just saved the widget as it was.
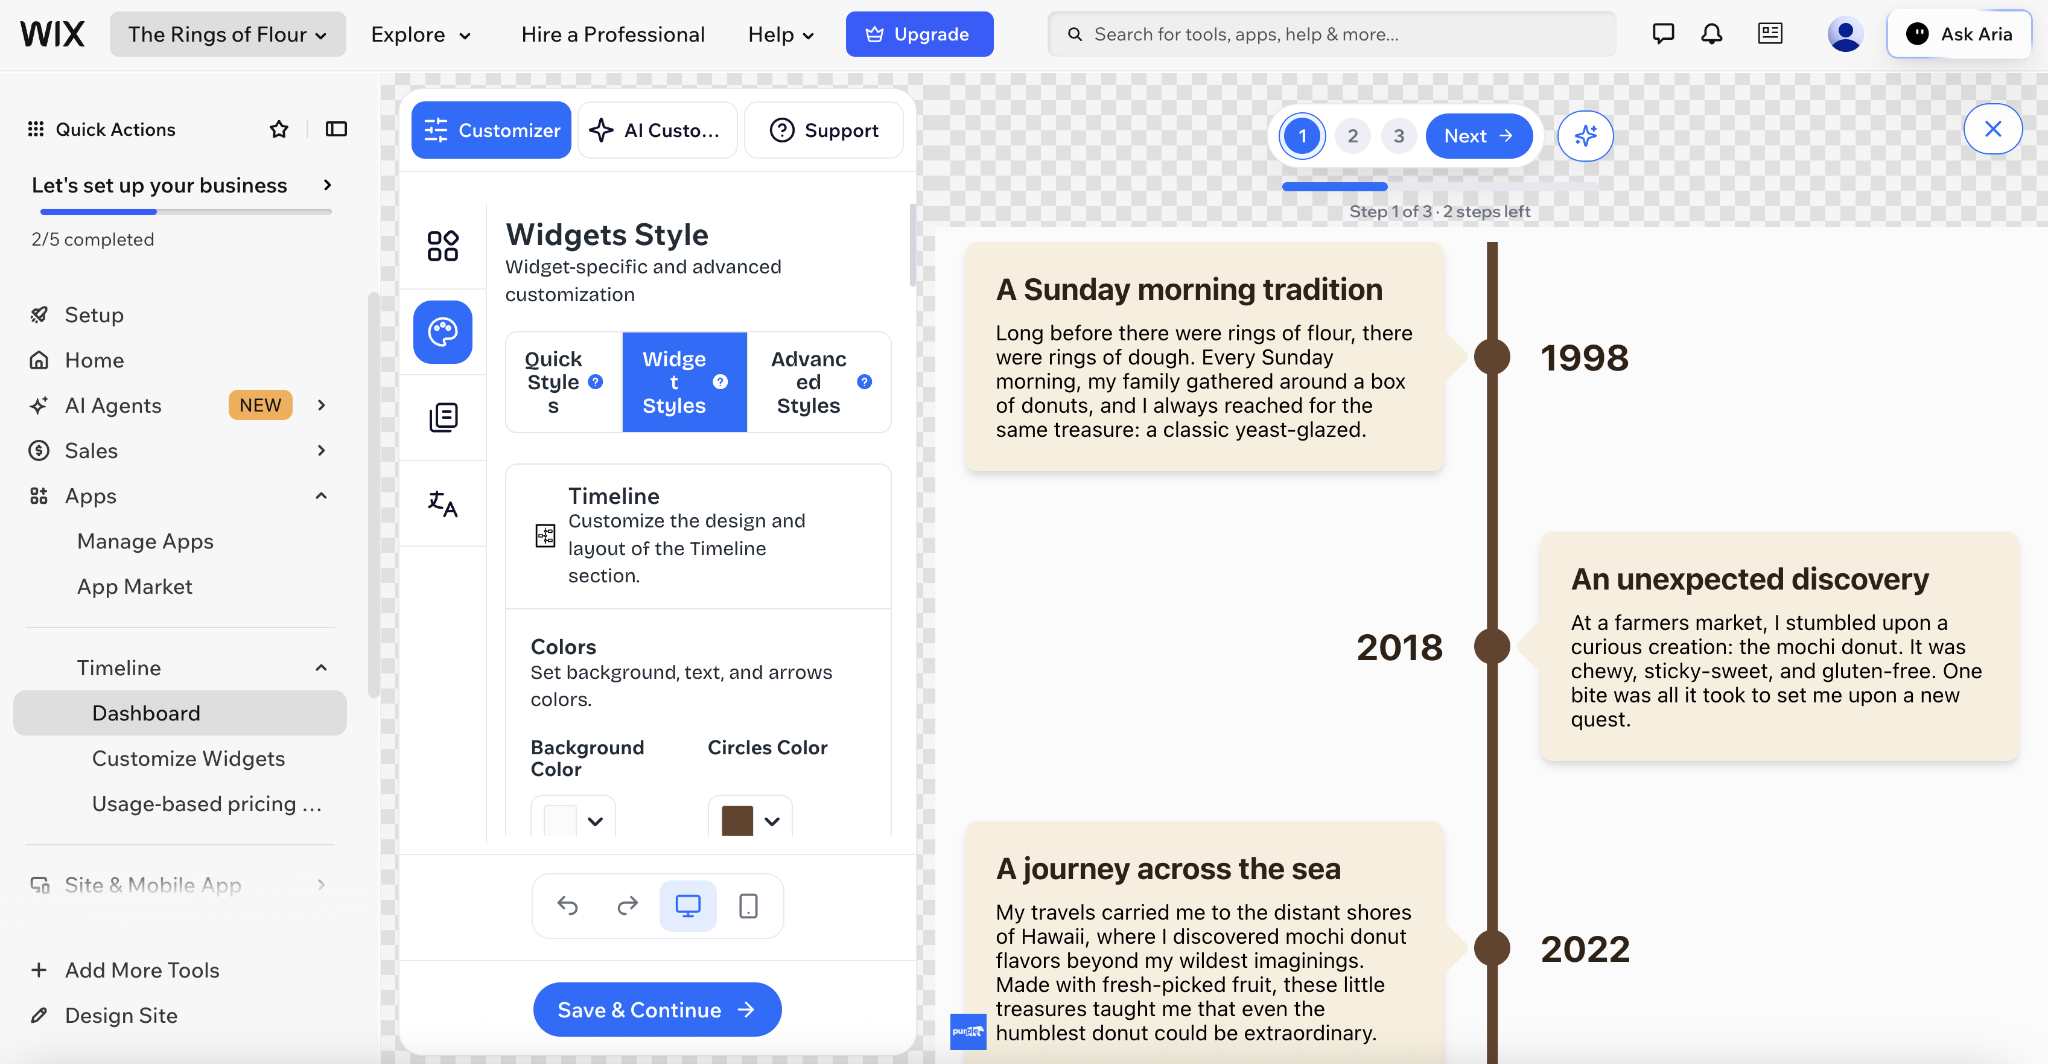
- Now add the timeline to your site. Follow the placement instructions for installation, which you should see during setup.
Here’s what it looks like for me:
- If you’re not happy with the result, repeat this test with a different timeline app.
Option 2: Add a free, customizable timeline widget (recommended)
I found the apps on Wix frustrating and clunky. I prefer building a timeline with Jotform’s free timeline widget for Wix. It’s unbranded, easy to read on any device, and serverless, meaning Jotform hosts and maintains it for you and there are no apps to install.
Here’s how to set it up:
- Go to the Jotform Timeline Widget page and click Create Now. You’ll land straight in the editor.
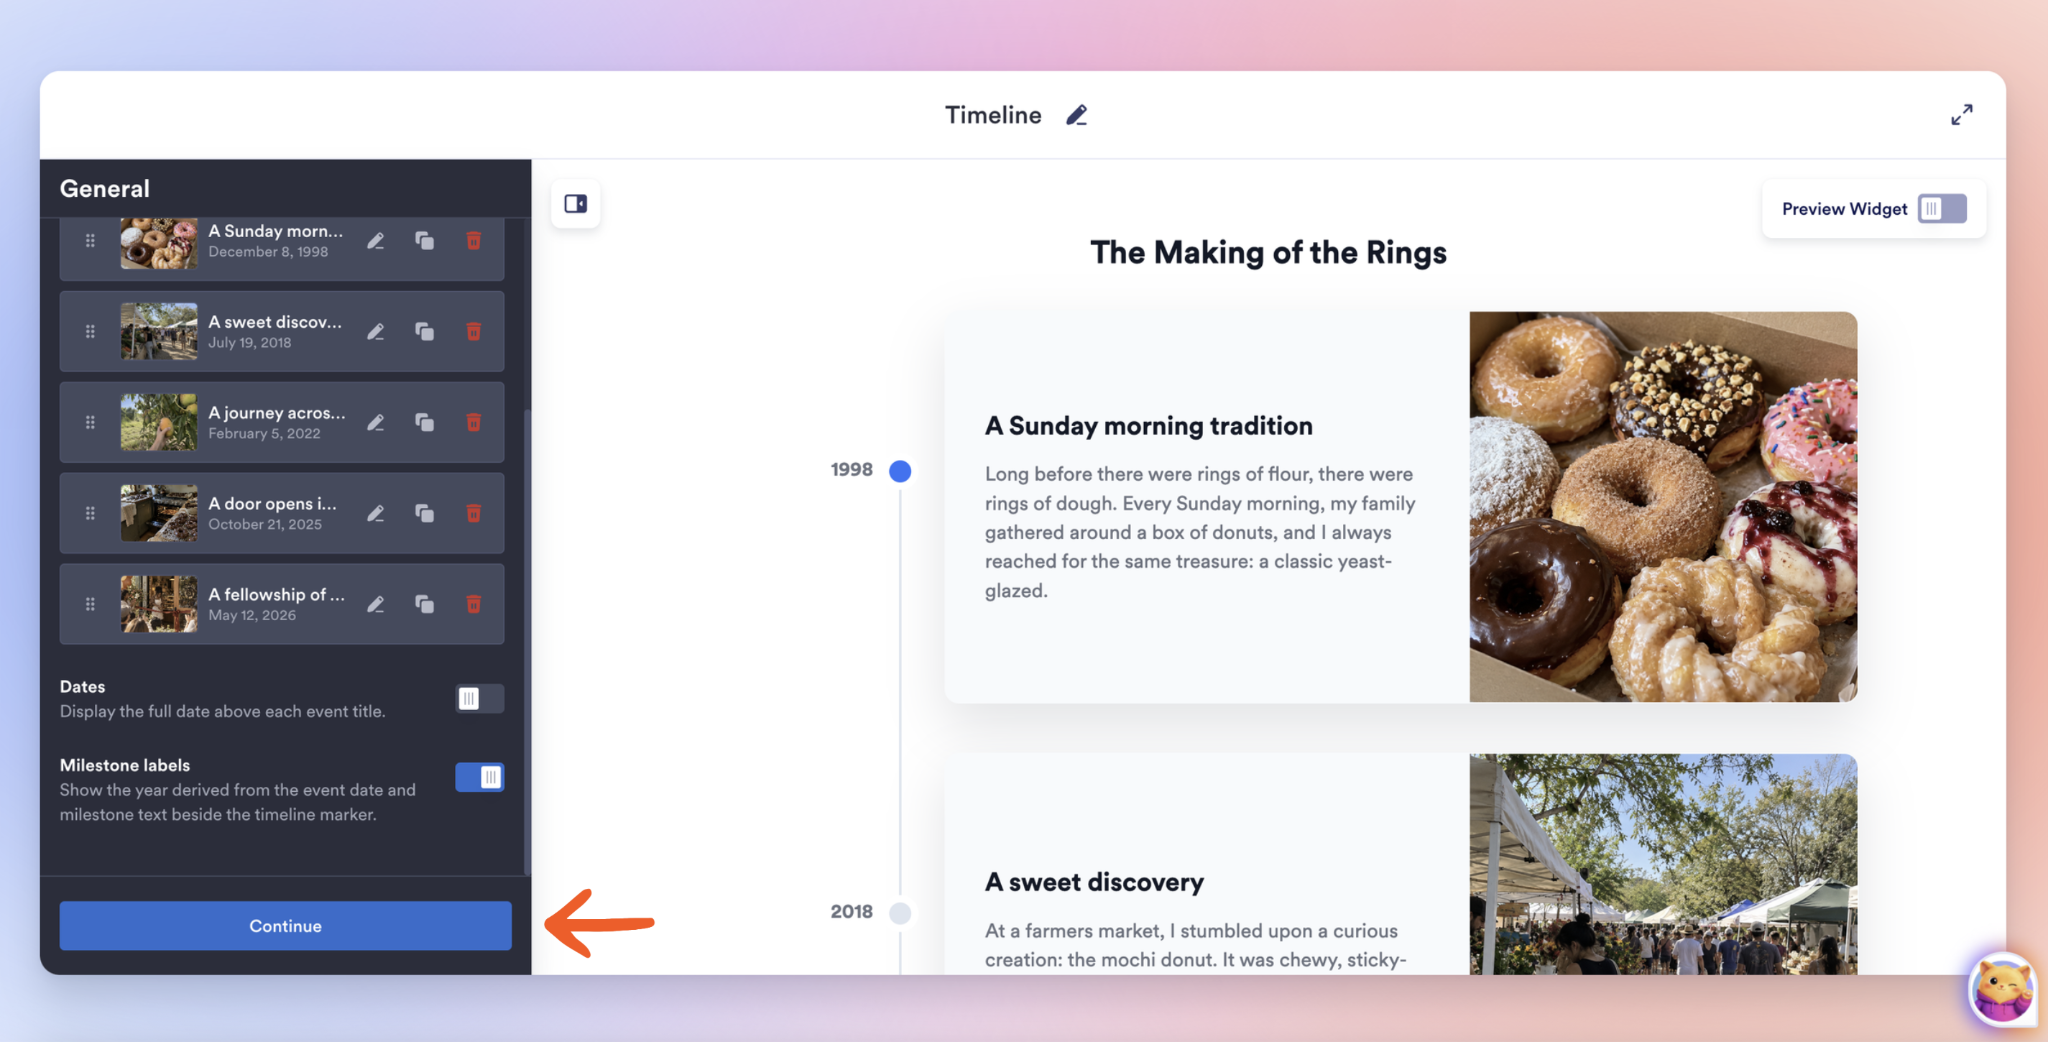
- Add your milestones. There’s no need to create an account, submit your credit card information, or enter your contact details at this point. Just populate your event cards with photos, text, and titles. When you’re finished, click Continue.
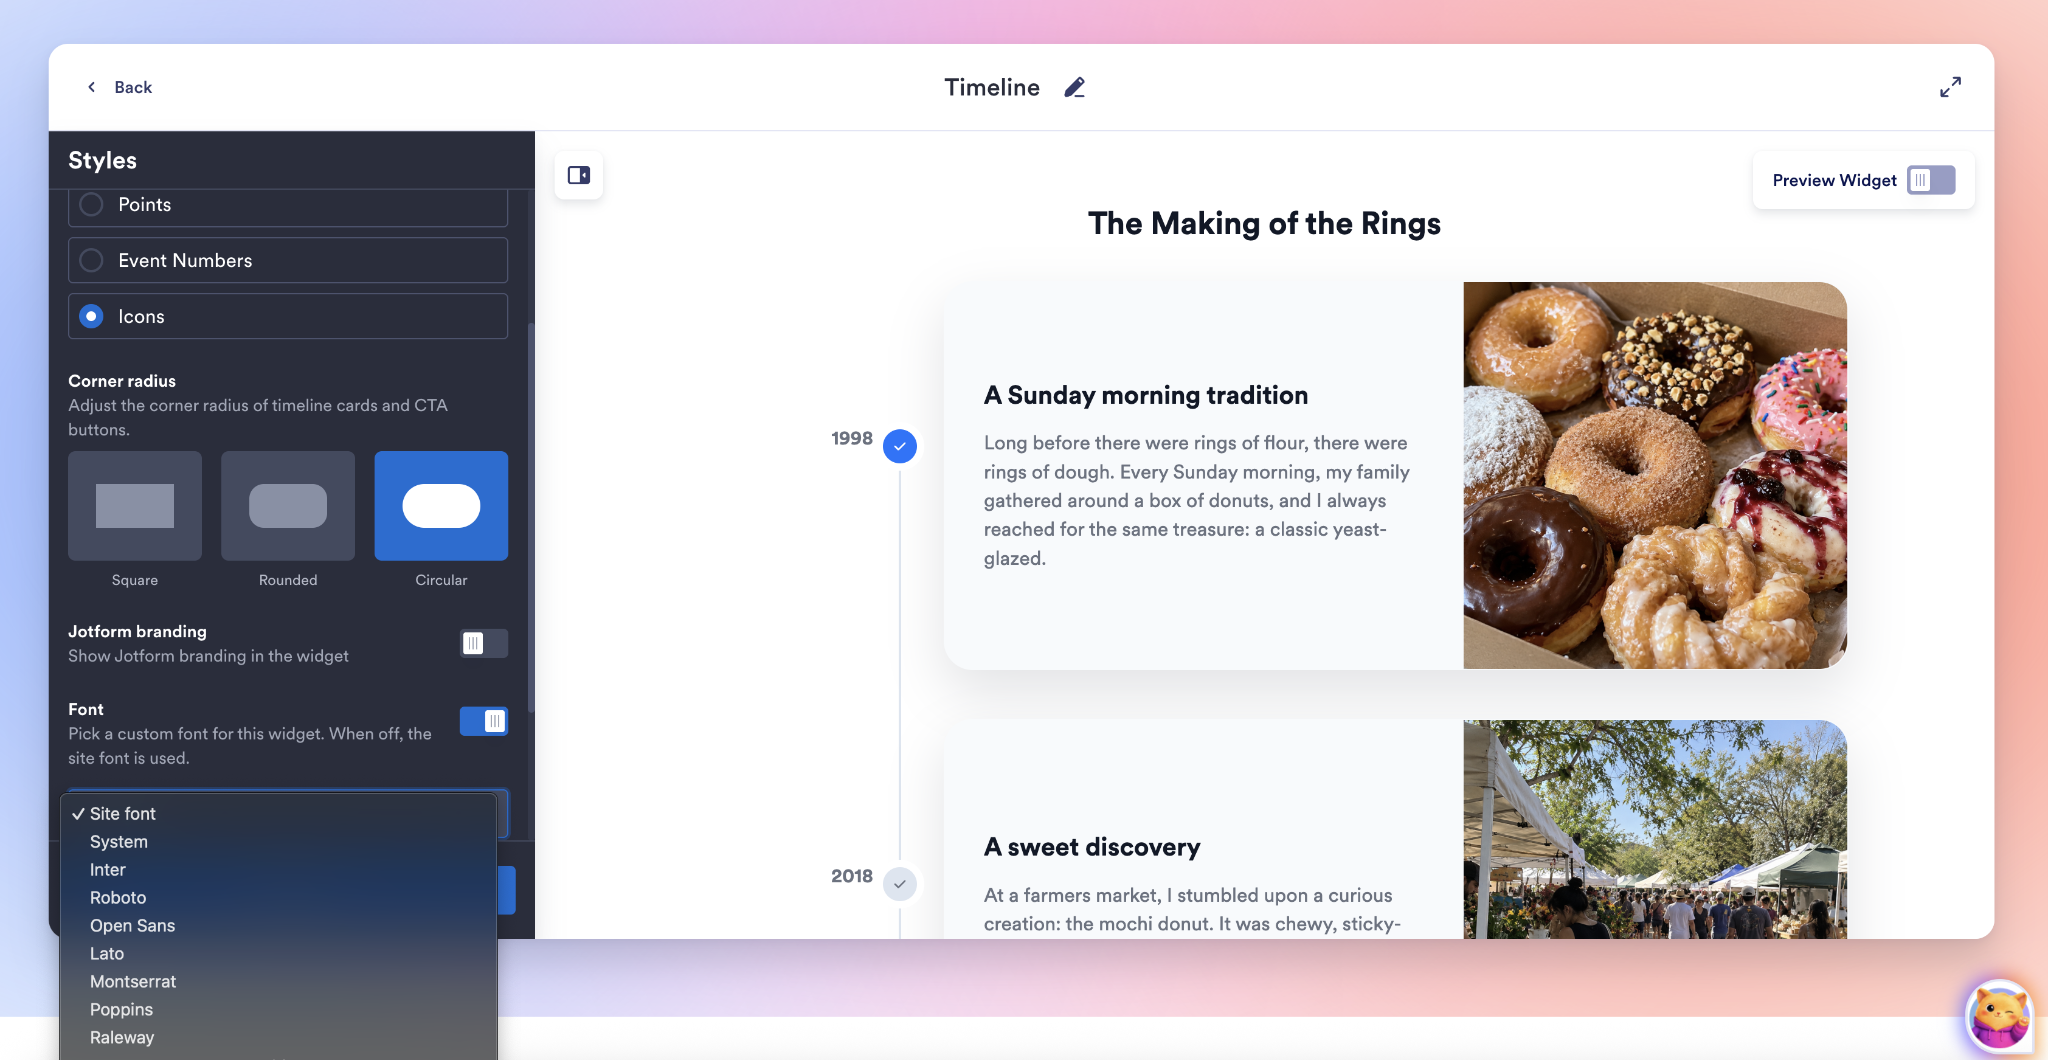
- On the next screen, style your timeline. Choose a light, dark, or custom theme. (Custom lets you select hex color codes for fonts and cards.) You can also select marker and corner radius styles, add custom CSS, and remove Jotform branding for free. Click Continue.
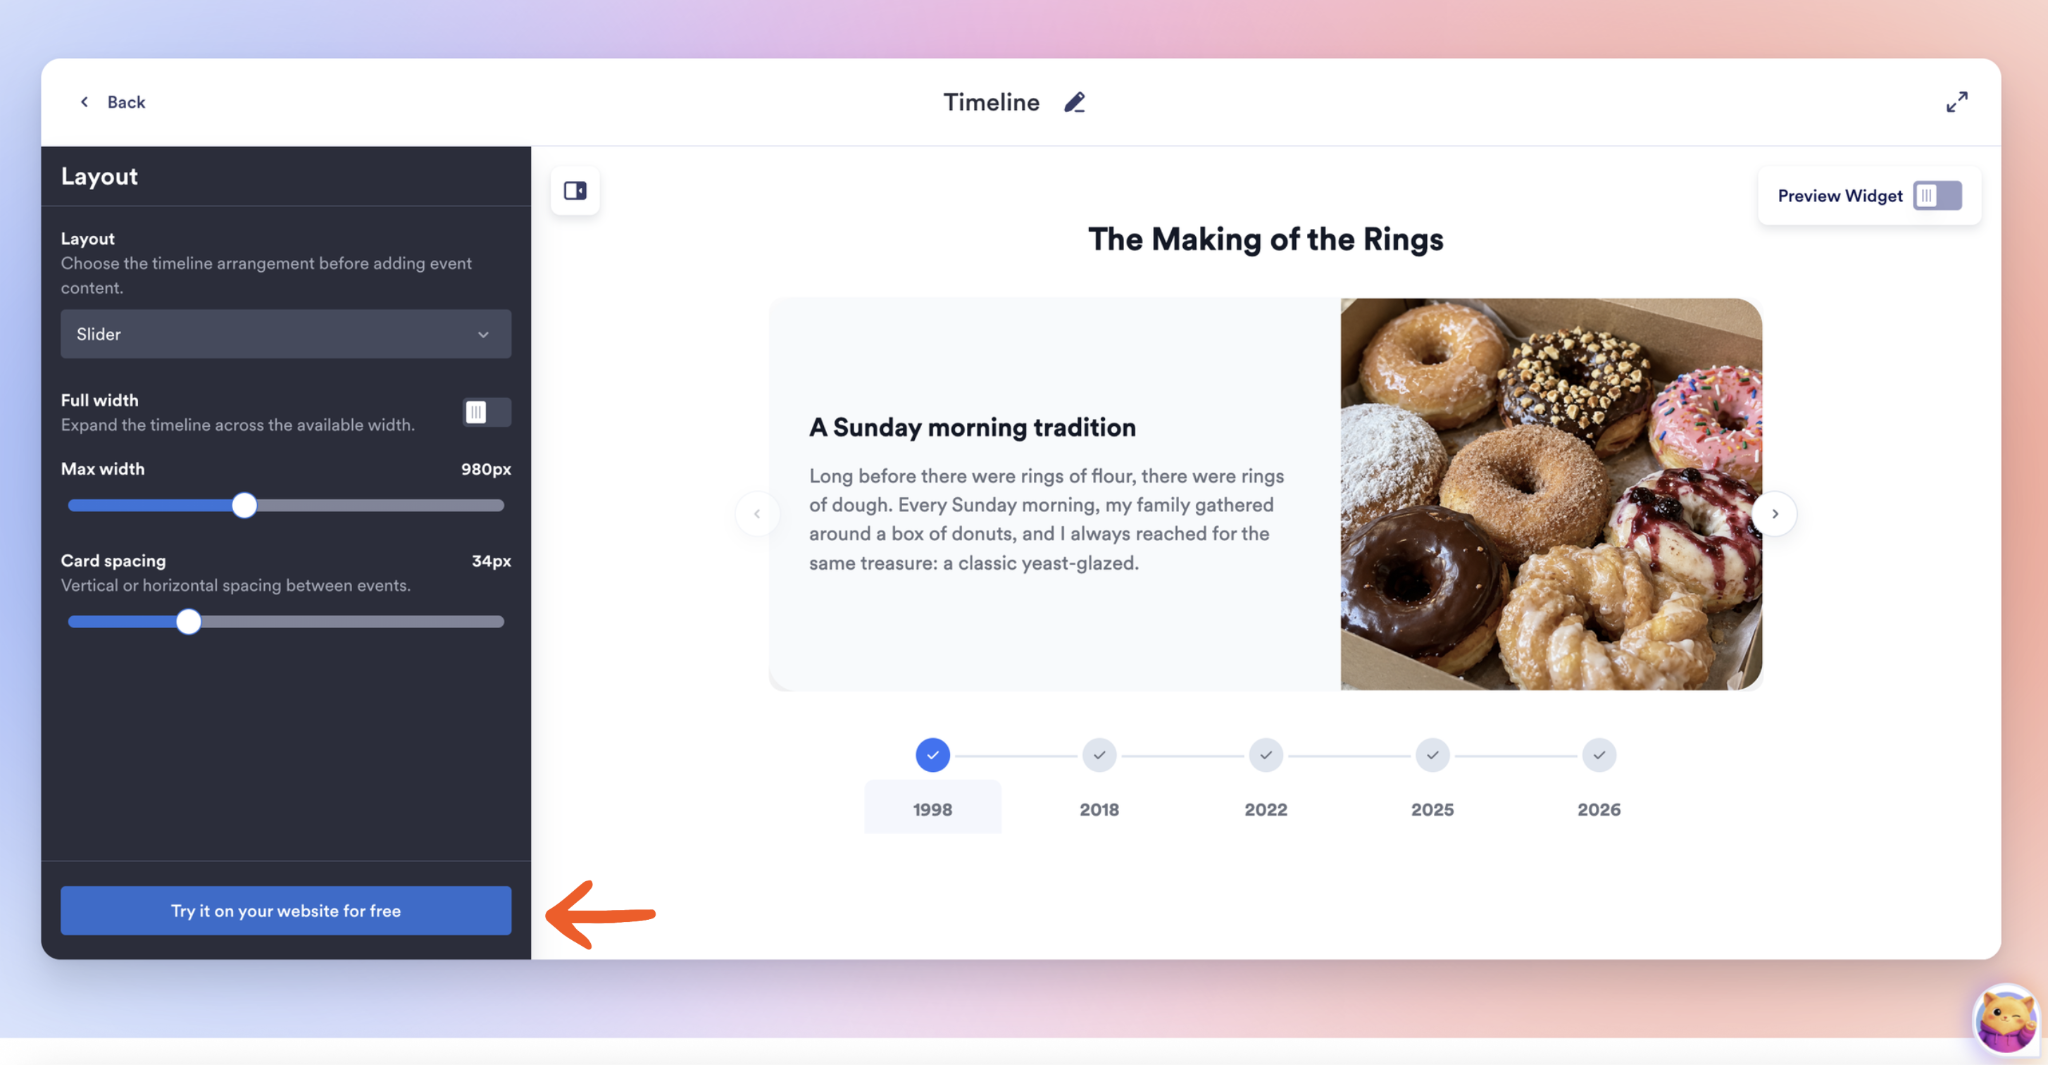
- On the final screen, choose your layout. You can pick from seven timeline arrangements, and you can set the width and card spacing. When you’re done, click Try it on your website for free.
- Log in or create a Jotform account. You’ll need one to publish this. Having an account and using the timeline are both free.
- A popup window will appear with a few lines of code you can copy and paste into Wix.
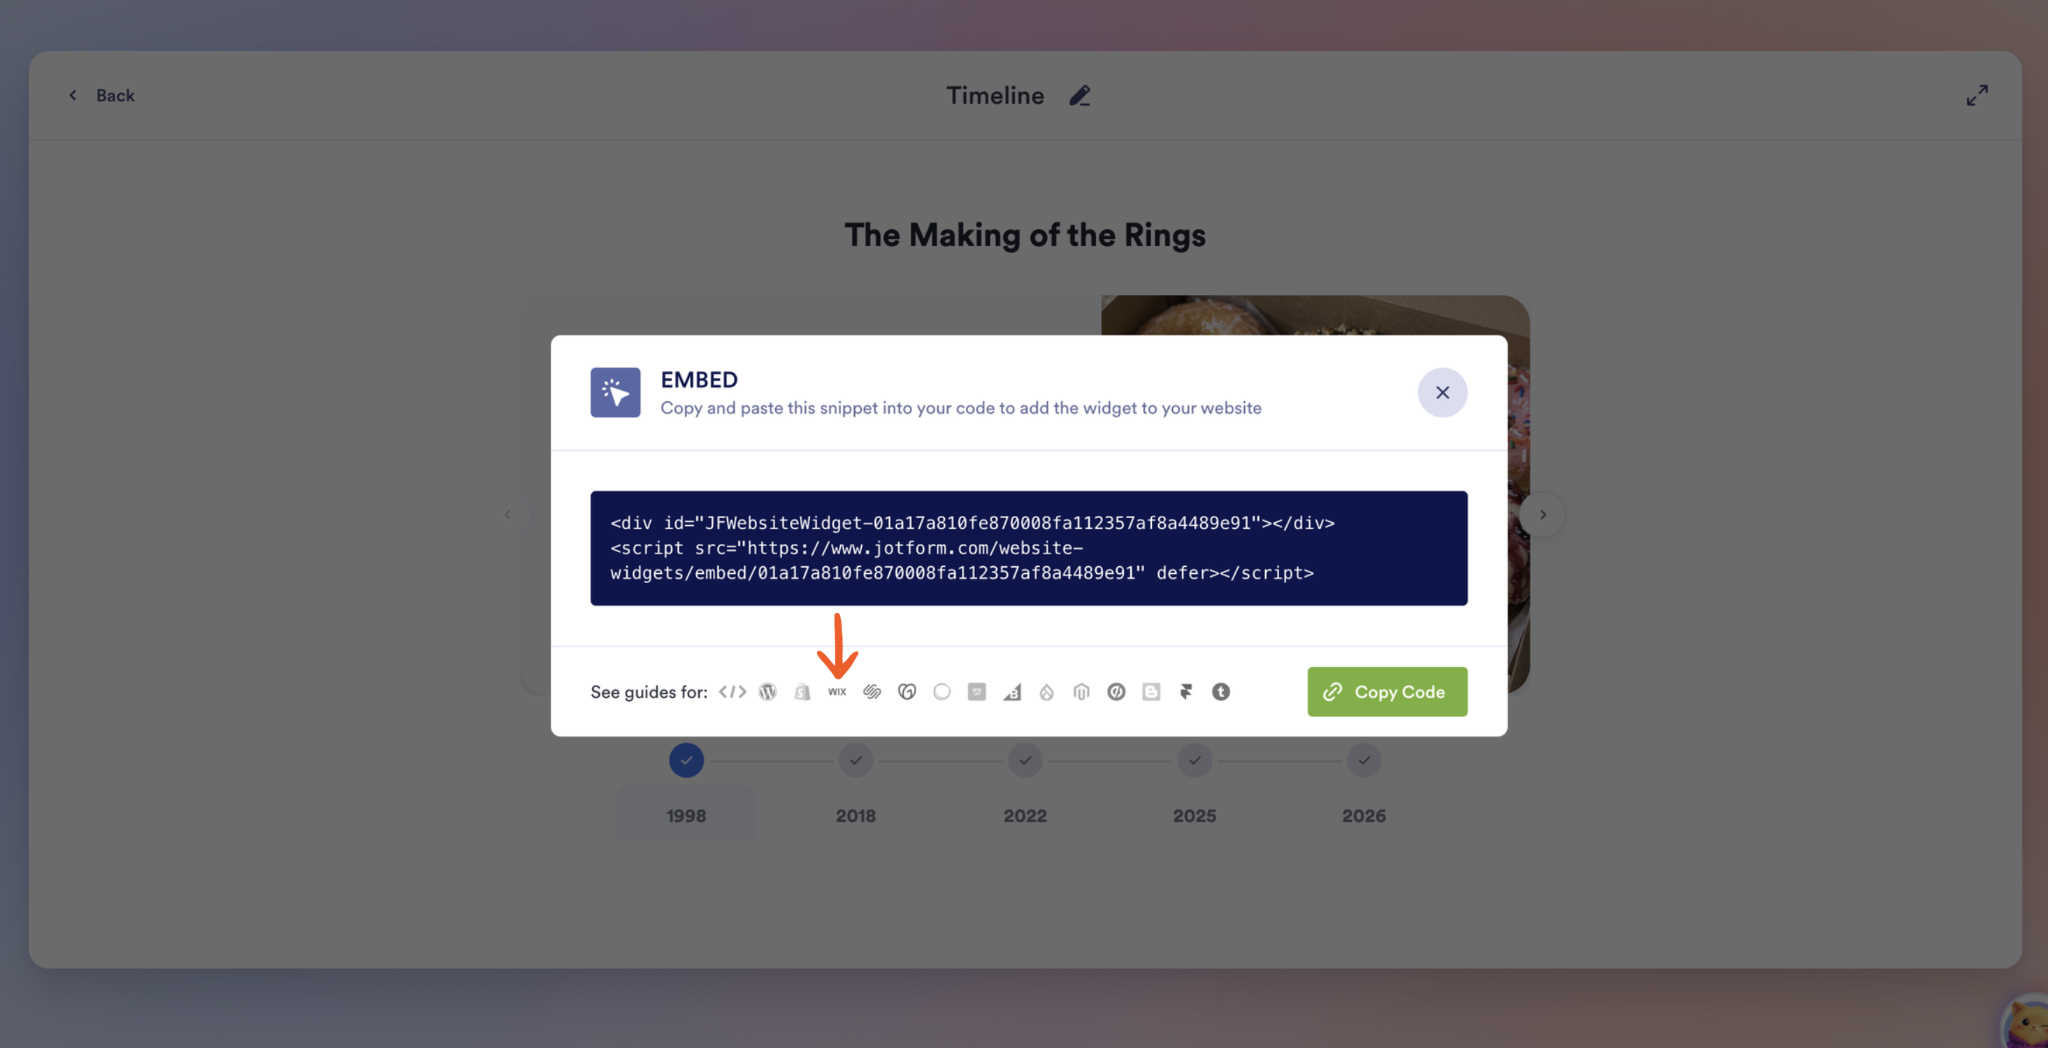
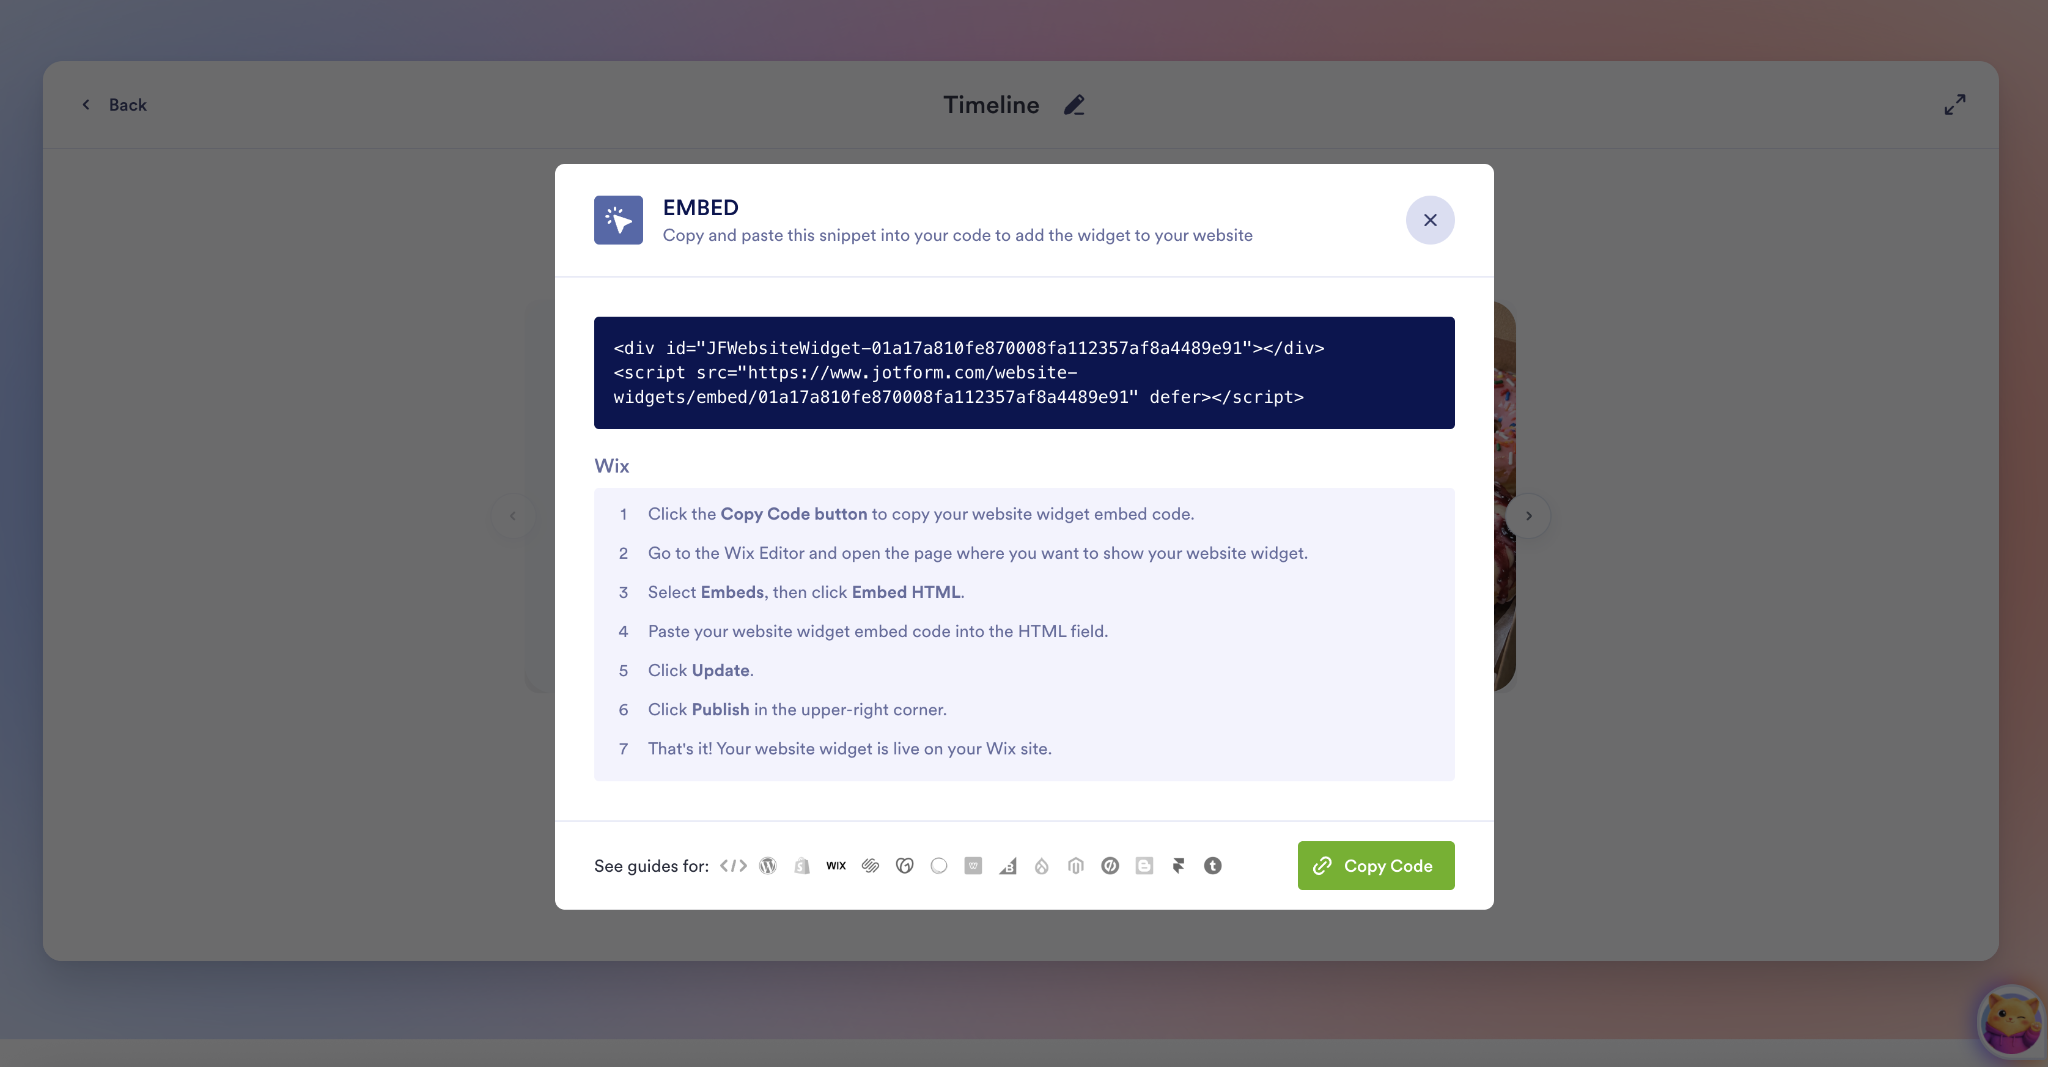
- Click the Wix icon to reveal step-by-step instructions on how to do this.
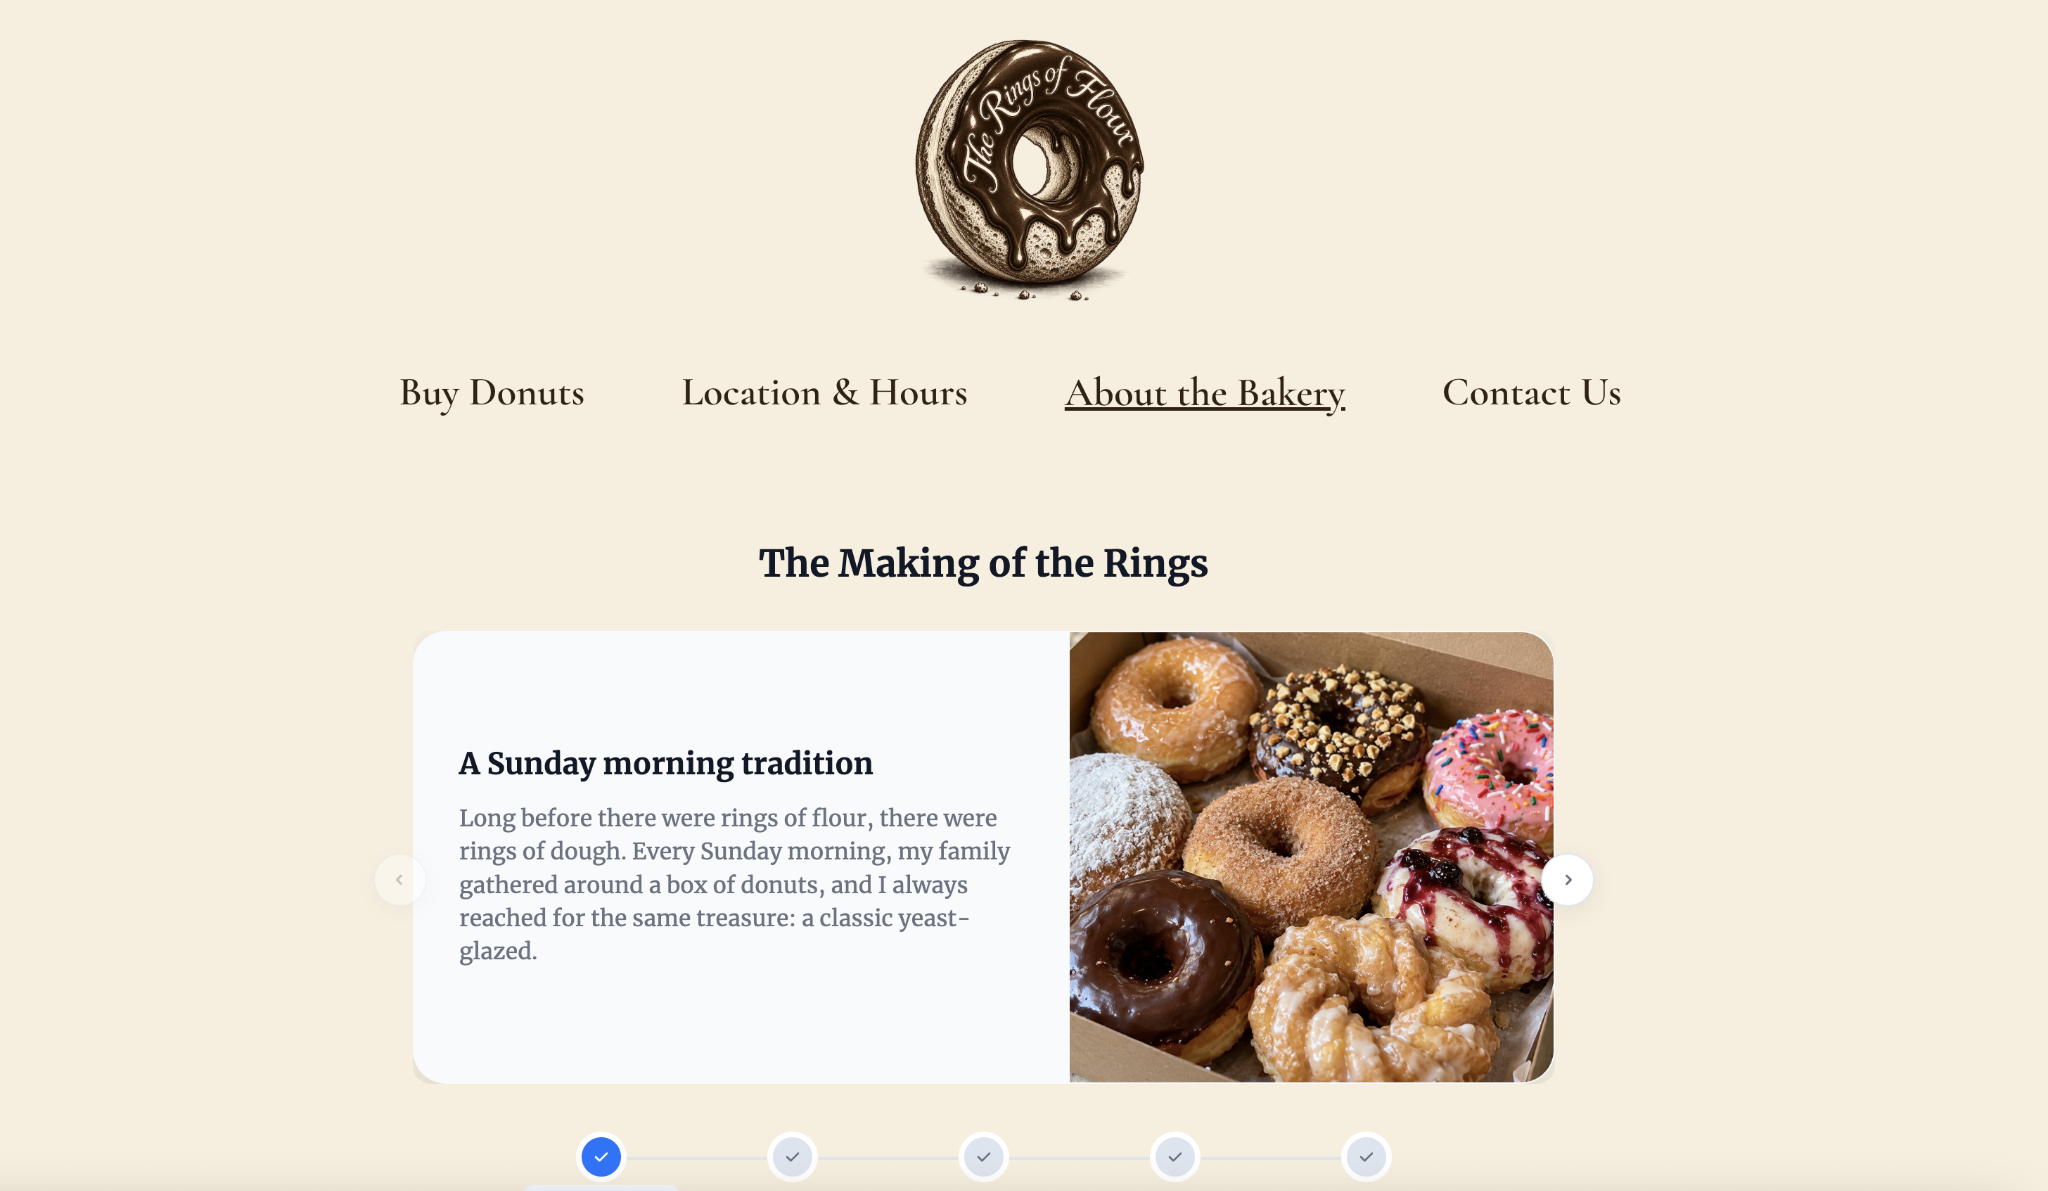
Here’s what the embed looks like on my Wix site:
Supercharge your Wix site with smart, serverless widgets
Jotform’s Timeline widget isn’t the only element you can add. Jotform offers more than 150 free website widgets that you can install. For example, you can pull in a Google Reviews widget that automatically updates as new reviews come in, or a Social Feed widget that displays new posts automatically.
Jotform can do much more, too. With the Jotform and Wix integration, you can build powerful, code-free forms that are as intuitive to set up as this widget. And they come with custom branding, conditional logic, and payment collection.
My Wix site is for a fake mochi doughnut business I’d love to start someday. If that dream ever materializes, I hope I’ll be spending most of my time in the kitchen slinging dough, not grimacing at my computer, yelling at my timeline widget to work. Your budget should go toward growing your business, not toward monthly fees just to tell a story on your site. Let Jotform handle that for free.
This article is for Wix site owners, local businesses, and freelancers who want to display company history, event schedules, or project roadmaps without paying monthly App Market fees or struggling with manual drag-and-drop alignment.




























Send Comment:
1 Comment:
November 16, 2026
Great guide! Timelines are useful for presenting project milestones, business history, and development schedules. I particularly like the customizable widget approach because it makes website content more engaging without complicated coding. For planning project durations and tracking time intervals, an online time calculator can also be a handy resource.