Afterpay is a buy now, pay later (BNPL) payment solution that allows customers to split their purchases into manageable installments without interest or fees for their customers. Afterpay is available in Australia, Canada, New Zealand, the United States, and the UK. In the United Kingdom, Afterpay is known as Clearpay.
You can integrate Afterpay with Jotform using the Square Payment Gateway.
Adding and Setting up Afterpay
Create a new or edit an existing form and follow the steps below to integrate Afterpay on your form:
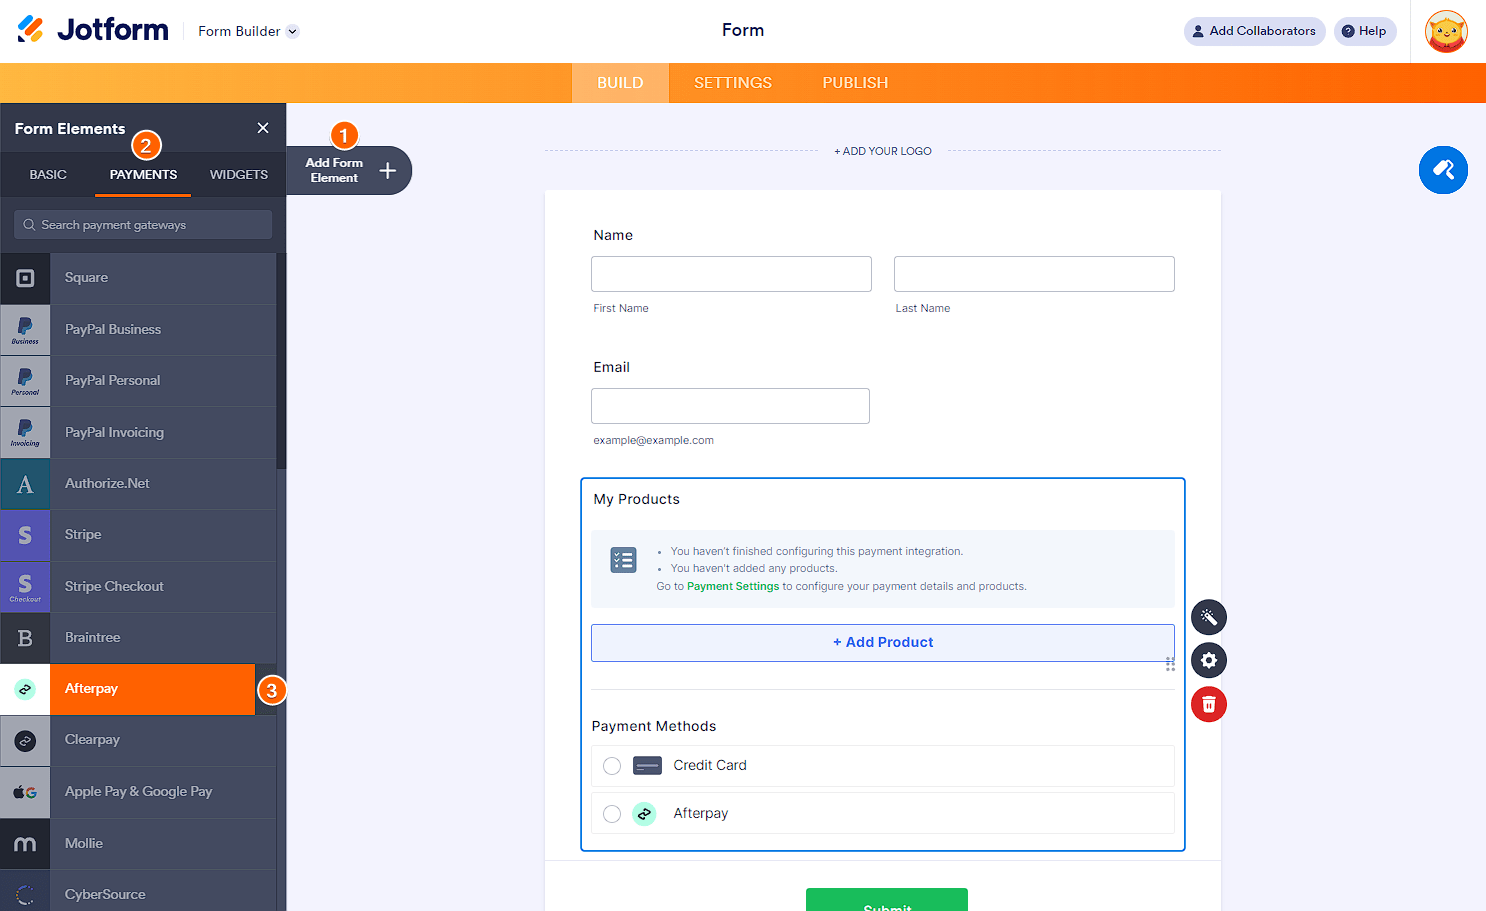
- In the Form Builder, click the Add Form Element button at the upper-left side of the page.
- Go to the Payments tab.
- Search for and click Afterpay from the list. You can also drag and drop it to add.

- In the Payment Settings window, select the Mode first. This determines the type of Square account you’re connecting. Live Mode requires your registered Square account, and Test Mode requires your Sandbox Square account.
- Click the blue Connect via Square button, and log in with your Square account. If successfully connected, the button will change its color to green and display text that says Connected via Square.
- Set the other options accordingly:
- Business Location — If you have multiple businesses registered with Square, you must select one on this dropdown.
- Currency — The currency is locked based on your Square account settings.
- Payment Type — With Afterpay, you can sell products, collect donations, and accept user-defined amounts.

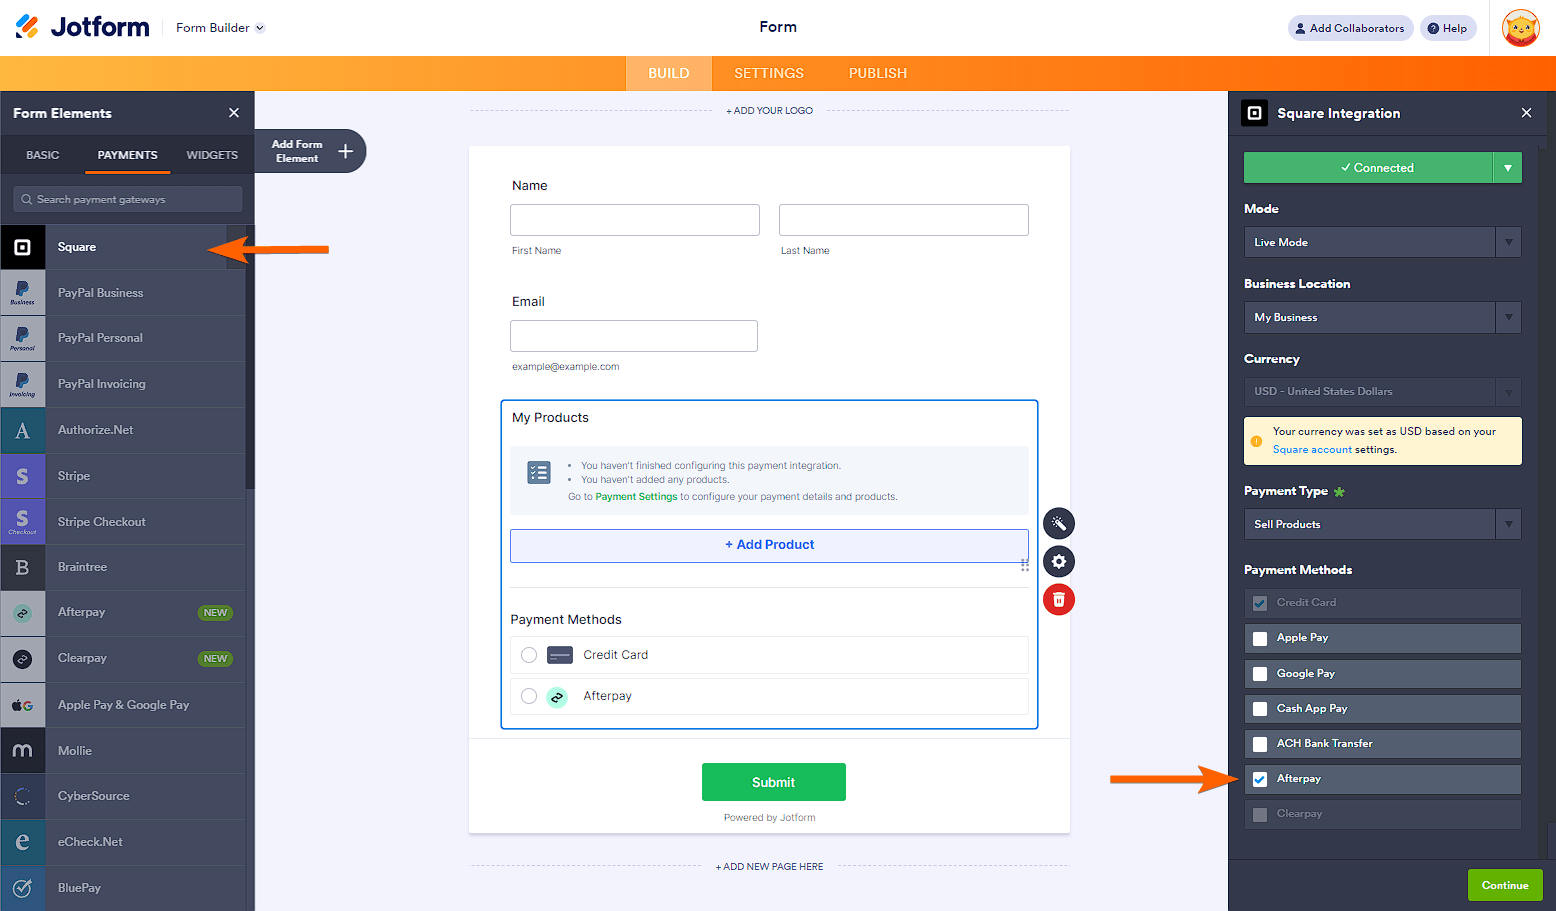
You can also select Afterpay with the Square gateway. Add Square, and choose Afterpay as the Payment Method as shown below:

- If you’ve chosen to sell products, click the Continue button to add your product items. If you’ve set it up to accept user-defined amounts or donations, click the Save button to complete the integration.
See also:
- Setting Up Your First Order Form
- How to Add Options to Payment Forms
- How to Add a Coupon Code to Payment Forms
- How to Add Tax to Your Payment Form
- How to Add Shipping Costs to Payment Forms
- How to Generate an Invoice for Your Payment Form
Making Payment with Afterpay
Afterpay payment flow is very simple.
- Customers select products in your form.
- Choose Afterpay as the payment method.
- Click the Submit button on the form.
- Click the Buy Now with Afterpay button on the modal.
- Login with their Afterpay account, and click the Continue button.
- Click the Confirm button, and wait for the thank you message on the form, which indicates a successful payment.


Send Comment: