
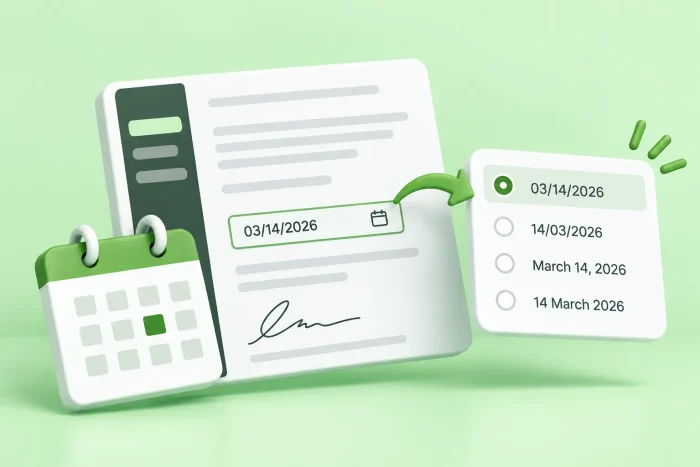
Changing your Docusign date format: Overview
- You can adjust the date format for a single envelope by using a work-around: Swap the Date Signed field for a text field with custom field validation.
- To change the date format globally across all future envelopes, the account administrator must change the Document Formatting settings, located in the Admin panel.
- You can skip the complicated work-arounds and administrative hoops by using Jotform Sign, which lets you customize date formats directly in the form builder.
When you’re minutes away from sending a Docusign contract, the last thing you want is to delay the process because of a small edit like a date format change.
Unfortunately, this popular e-signature platform’s rigid settings don’t make it easy to switch from MM/DD/YYYY (the US format) to DD/MM/YYYY (the format used almost everywhere else). You’re not the first person to google the answer. Rest assured, your search ends here.
In this article, we’ll give you step-by-step instructions to change the date format in Docusign for an individual document and your entire account. (Not sure how Docusign works? Read our tutorial on how to sign in Docusign.)
How to change the date format for a specific document
In Docusign, you can’t actually change the date format in one document or envelope, but there is a work-around. You can swap the Date Signed field for a text field with custom field validation.
Be aware: If you use this method, the date won’t autopopulate from the server time stamp the way it does with a real Date Signed field. The user will have to type the date in. Here’s how to employ this work-around:
- Start a new envelope.
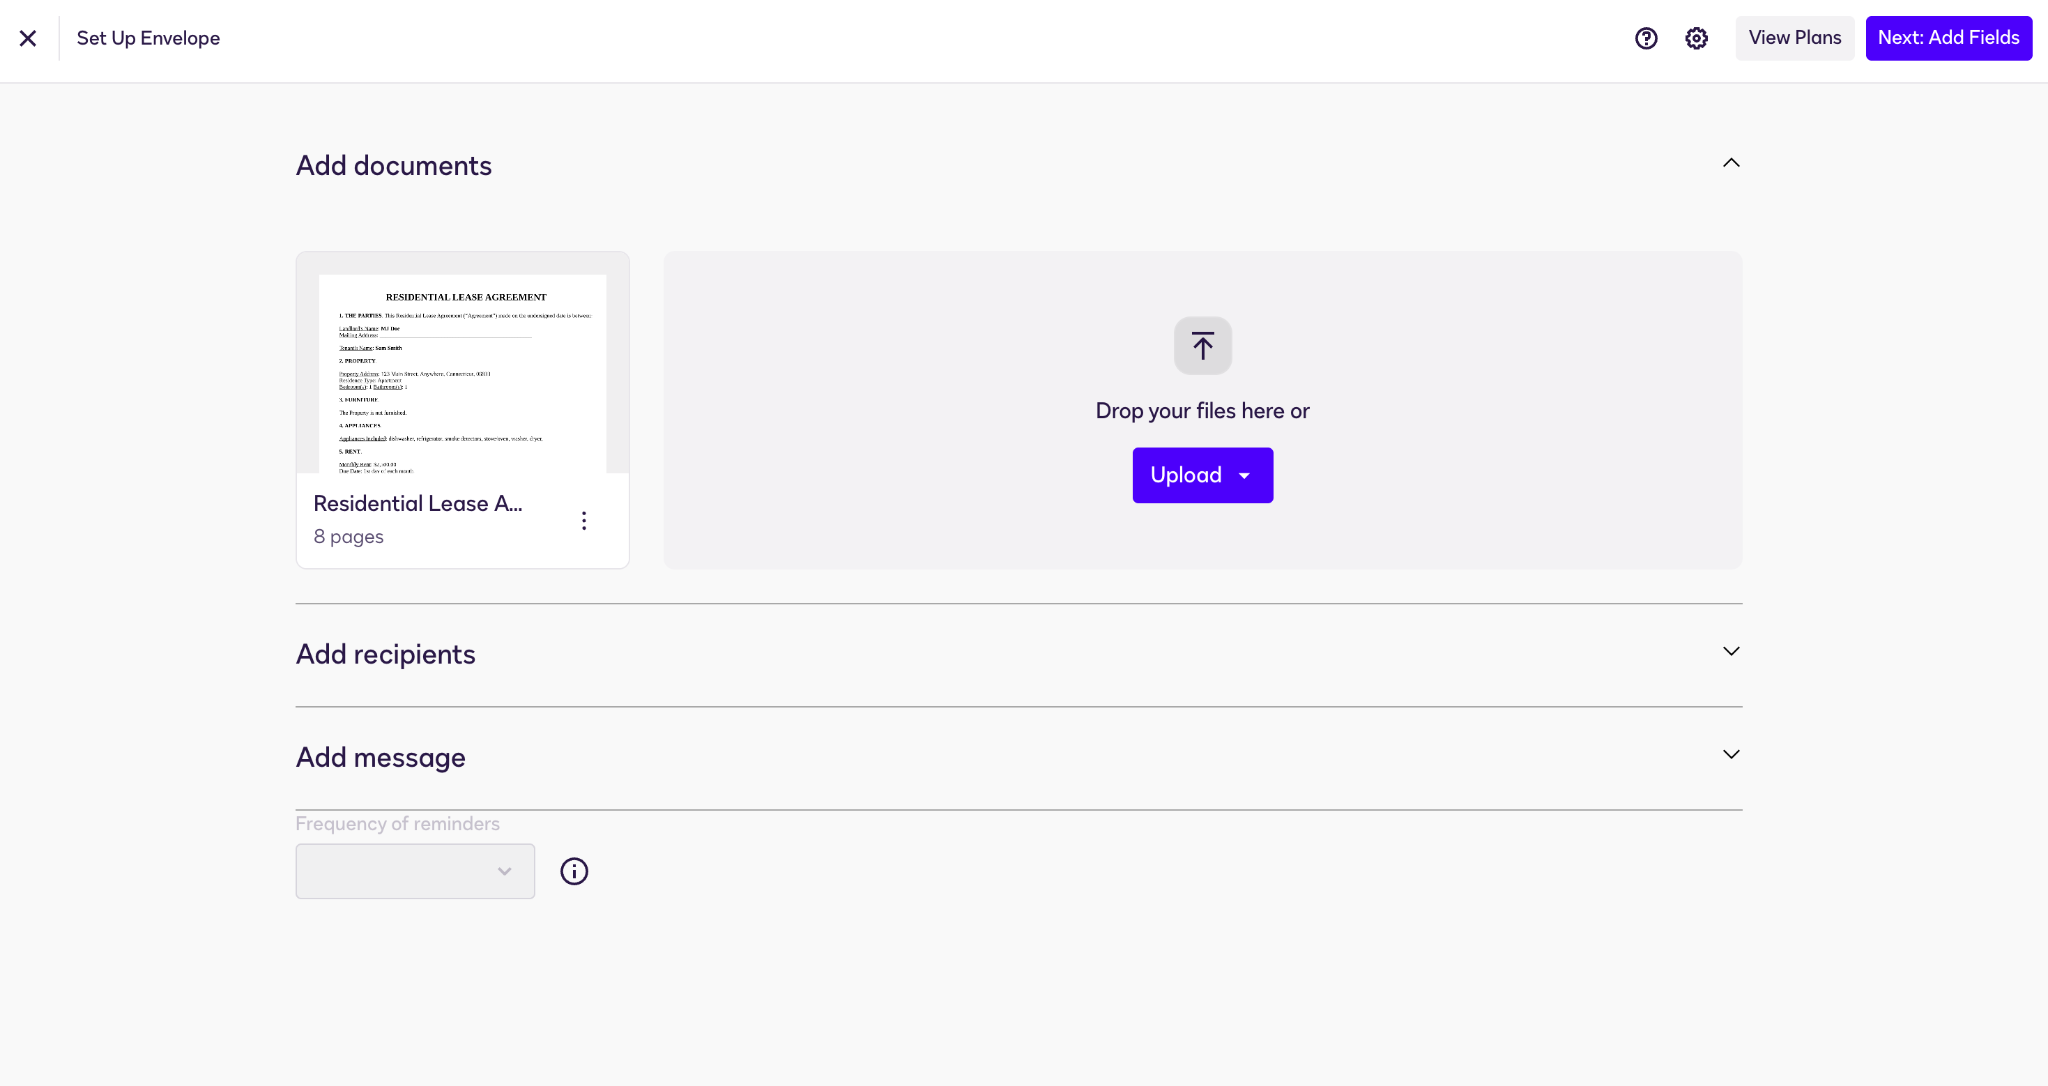
- Upload the agreement, or choose a template and click Customize Template. (Here’s more on how to use Docusign templates.)
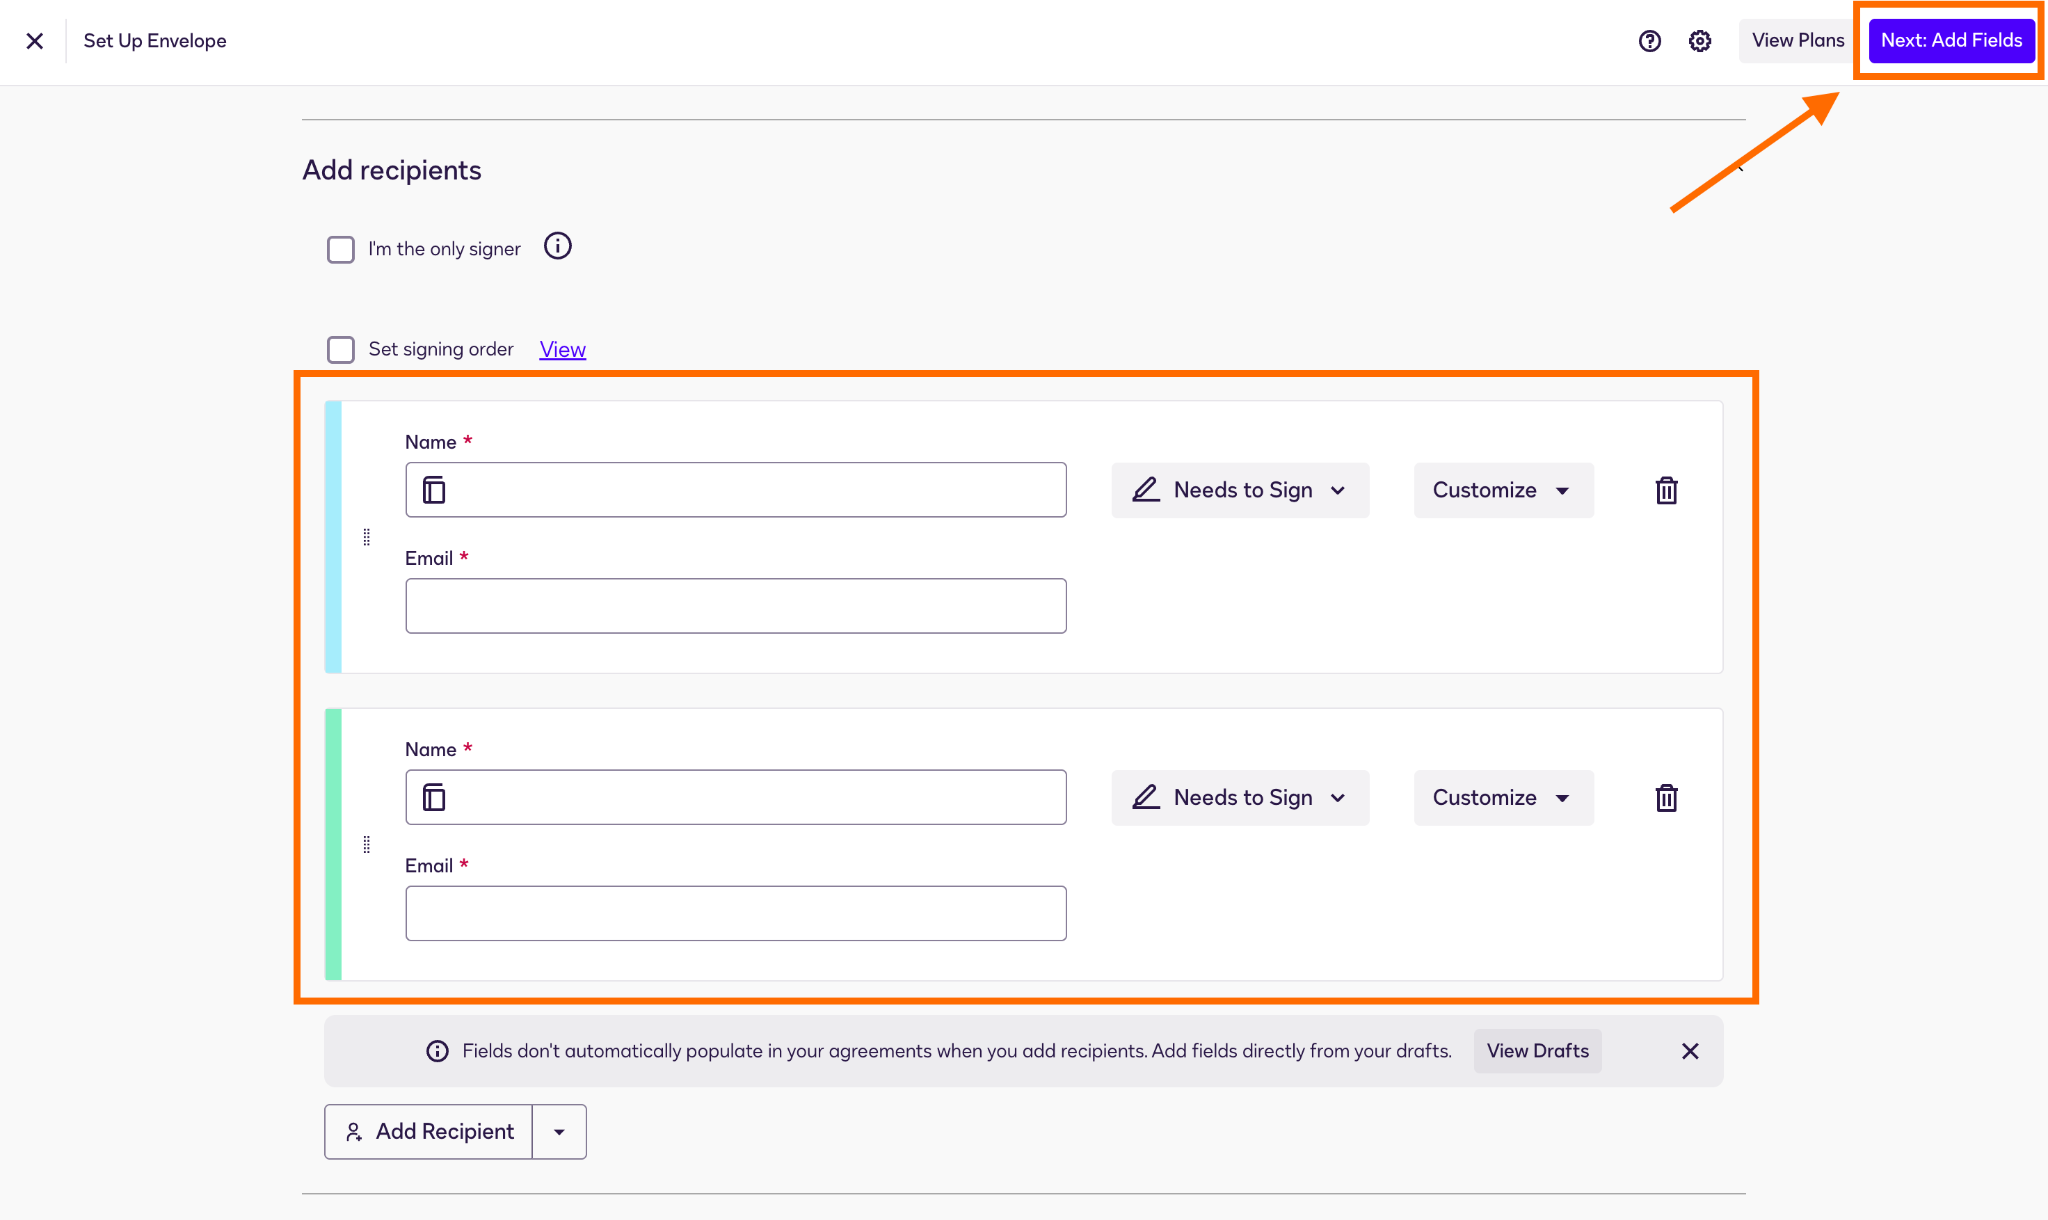
- Add recipients. Then click Next: Add Fields at the top.
- Locate the Text field from the left menu, and drag it to the Date line on your agreement. Assign it to the correct signer in the recipient dropdown menu, and toggle the Required button as needed.
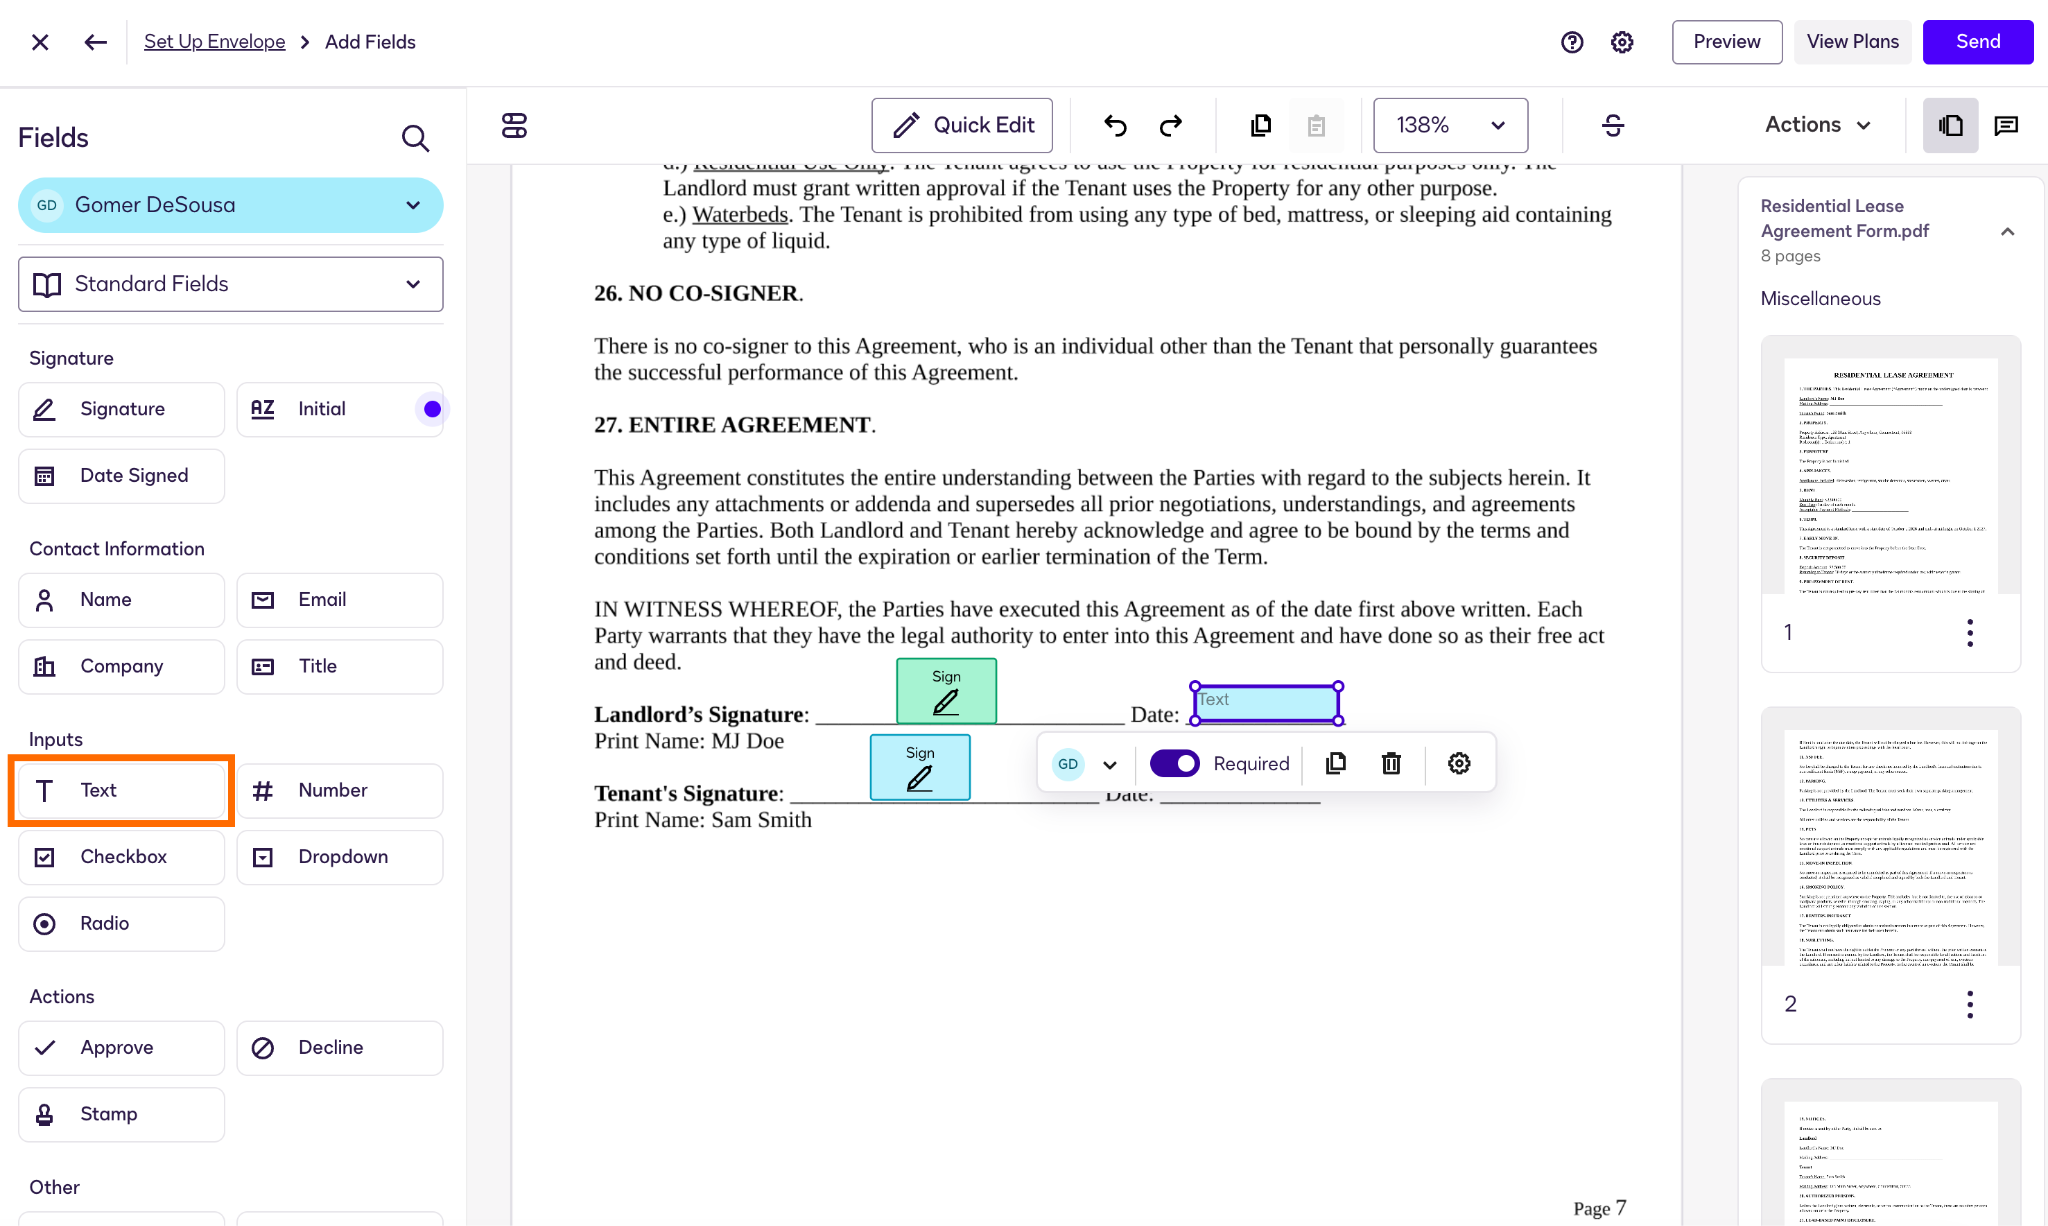
- Click the Settings wheel under the text box. In the new Text menu that opens on the left, scroll down to Validation and click to expand.
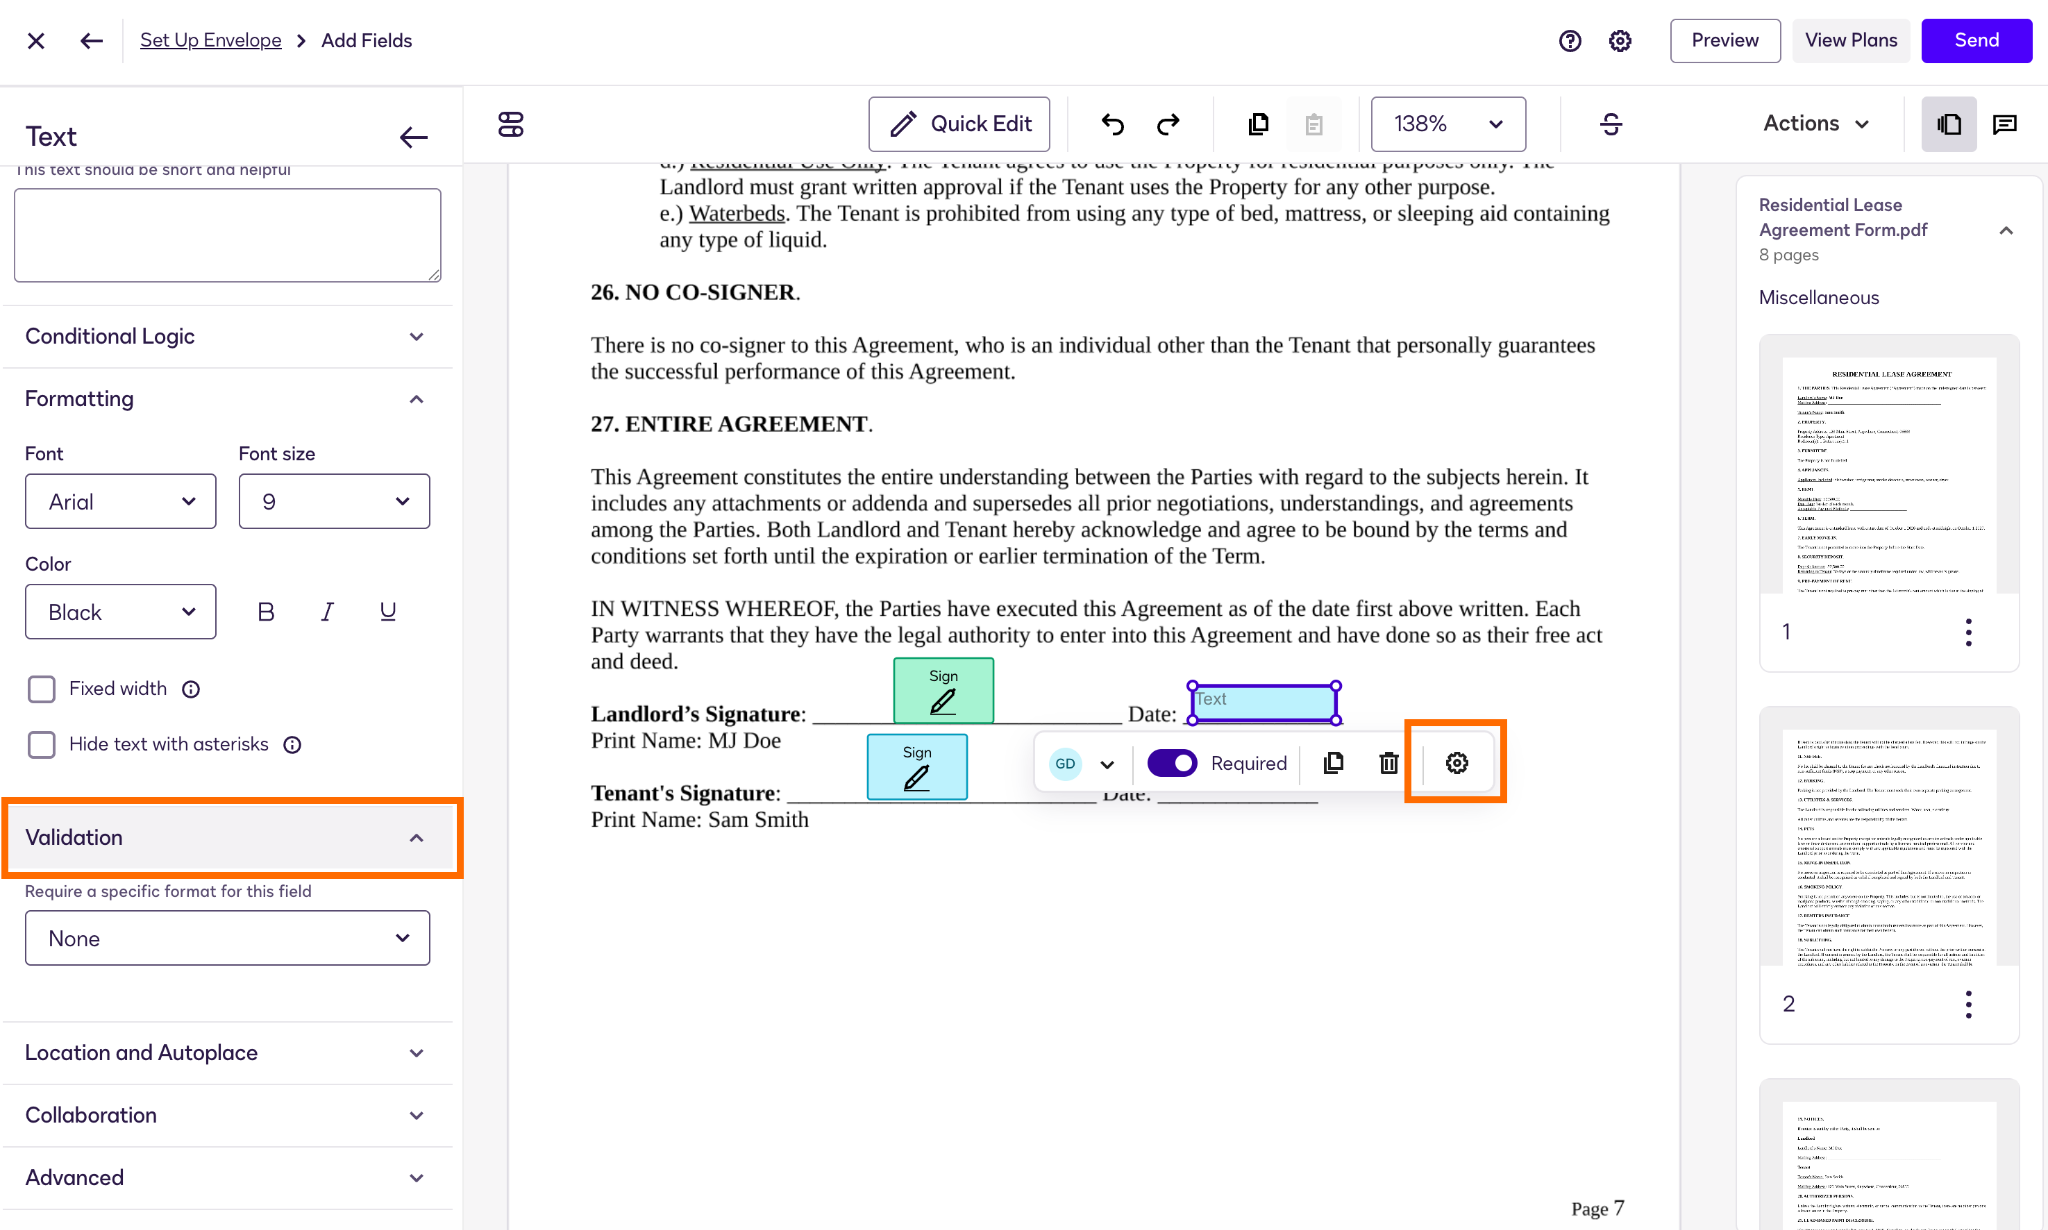
- In the dropdown menu, choose Custom. Enter the following text in the Custom Pattern box:
^\d{2}\s(?:Jan|Feb|Mar|Apr|May|Jun|Jul|Aug|Sep|Oct|Nov|Dec)\s\d{4}$
In the Error Message box, type:
Please enter the date as DD/MM/YYYY, for example, 02/09/2026.
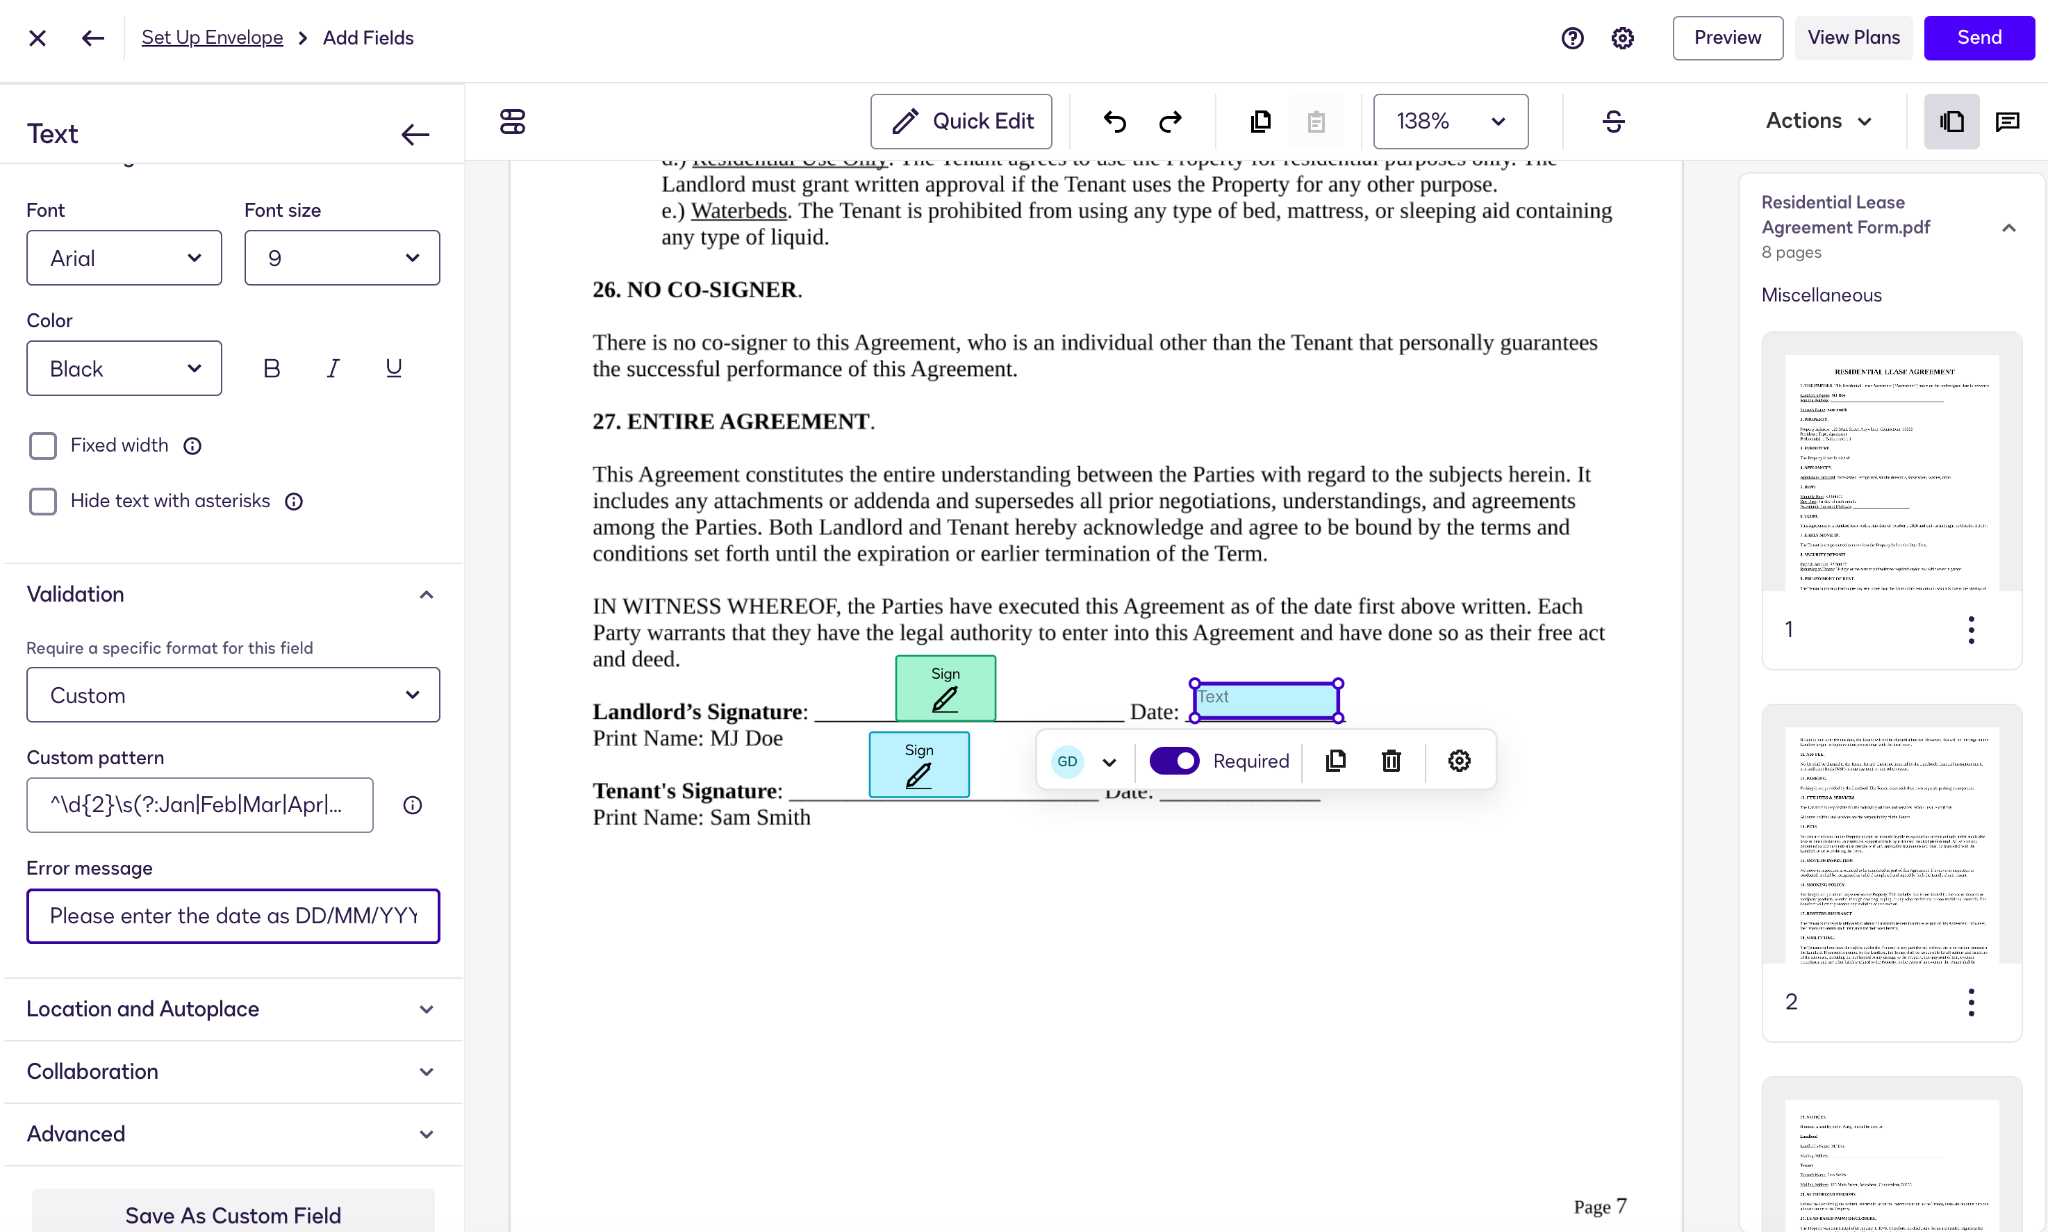
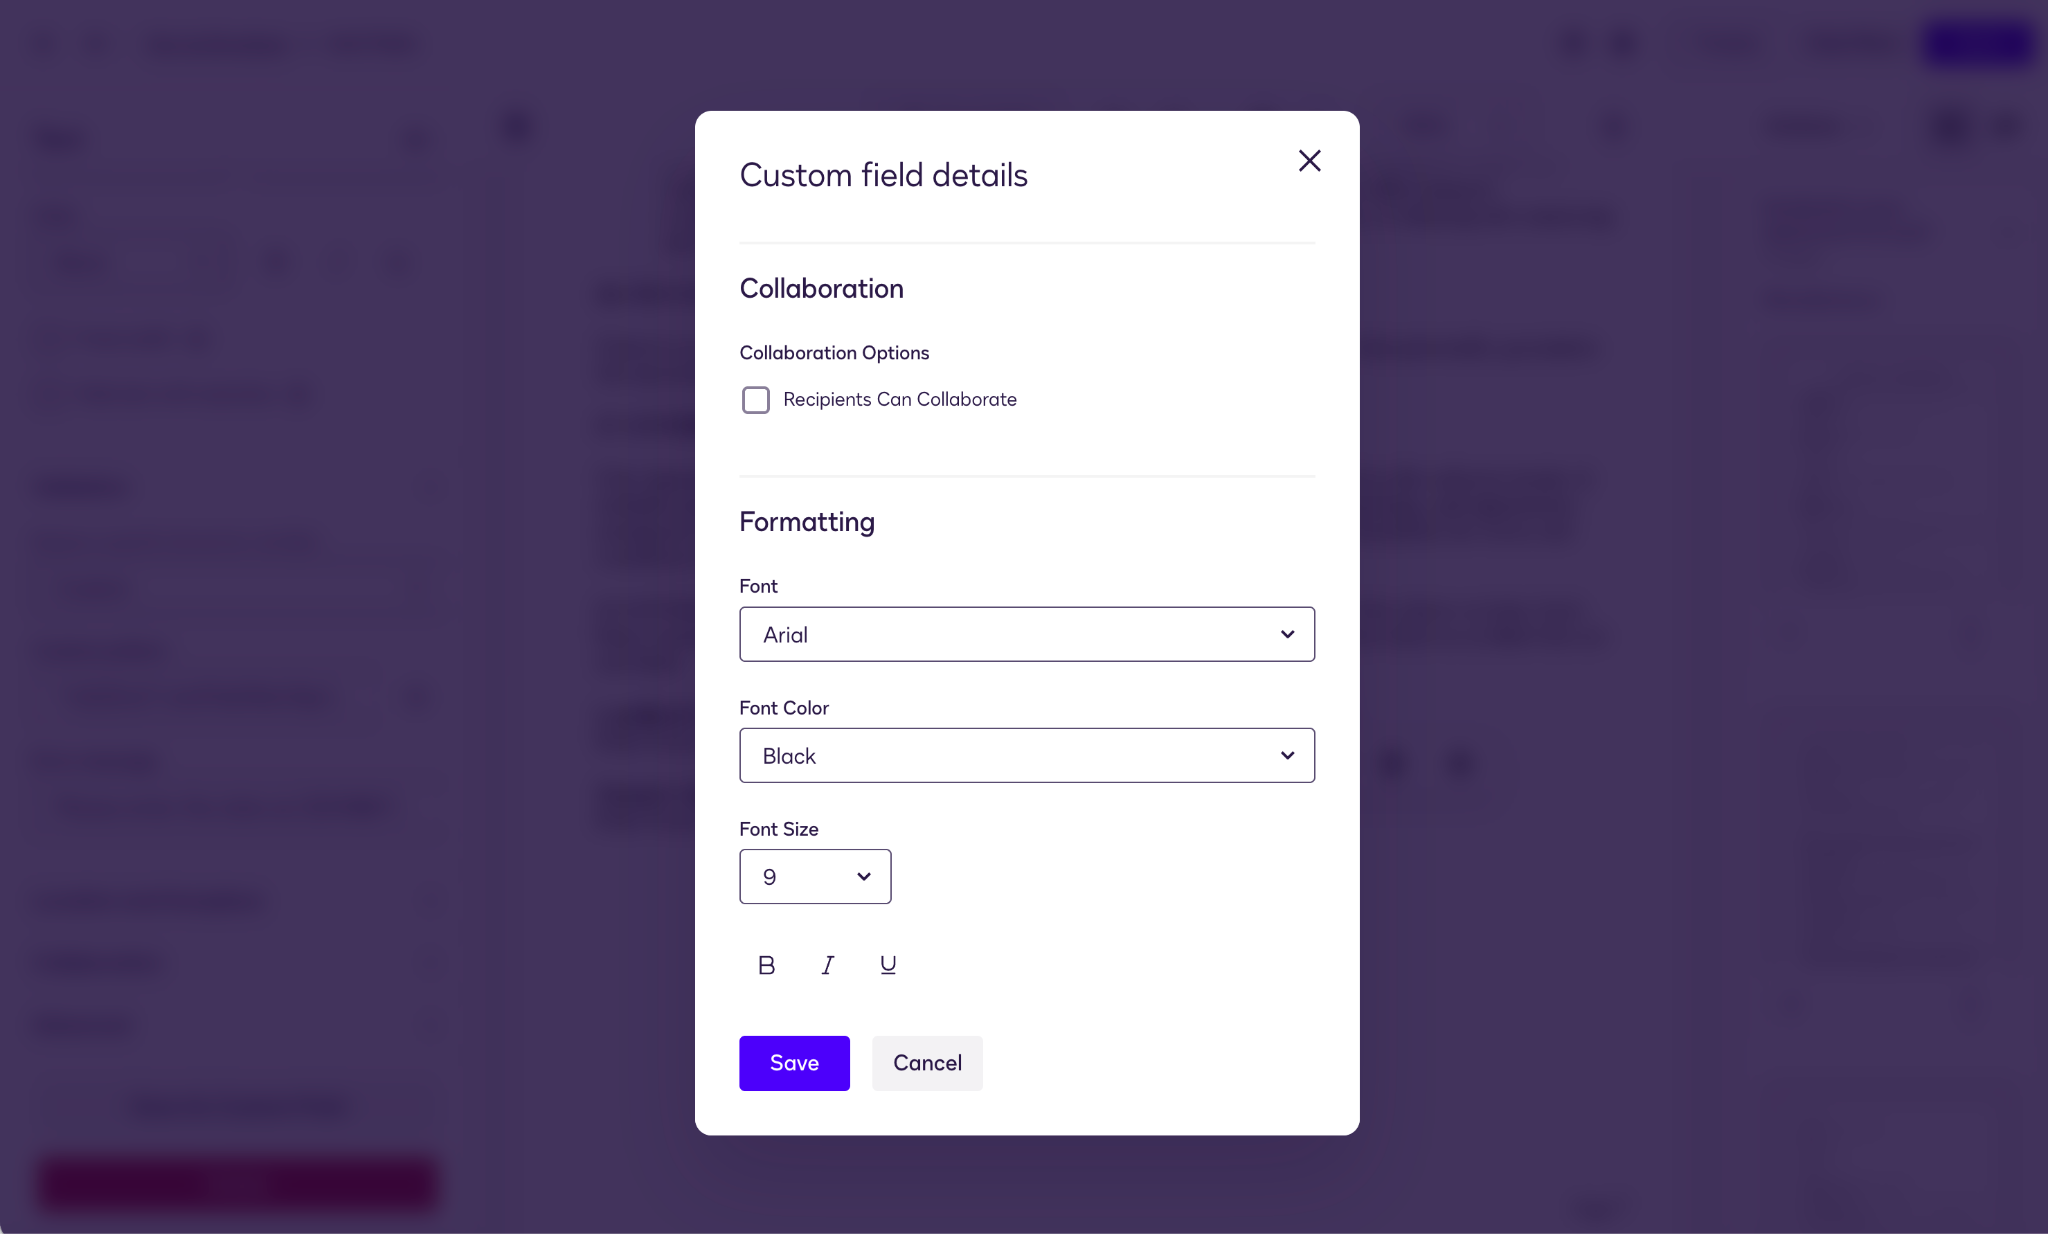
- Click Save As Custom Field at the bottom, and make any necessary changes to the size and appearance of the box.
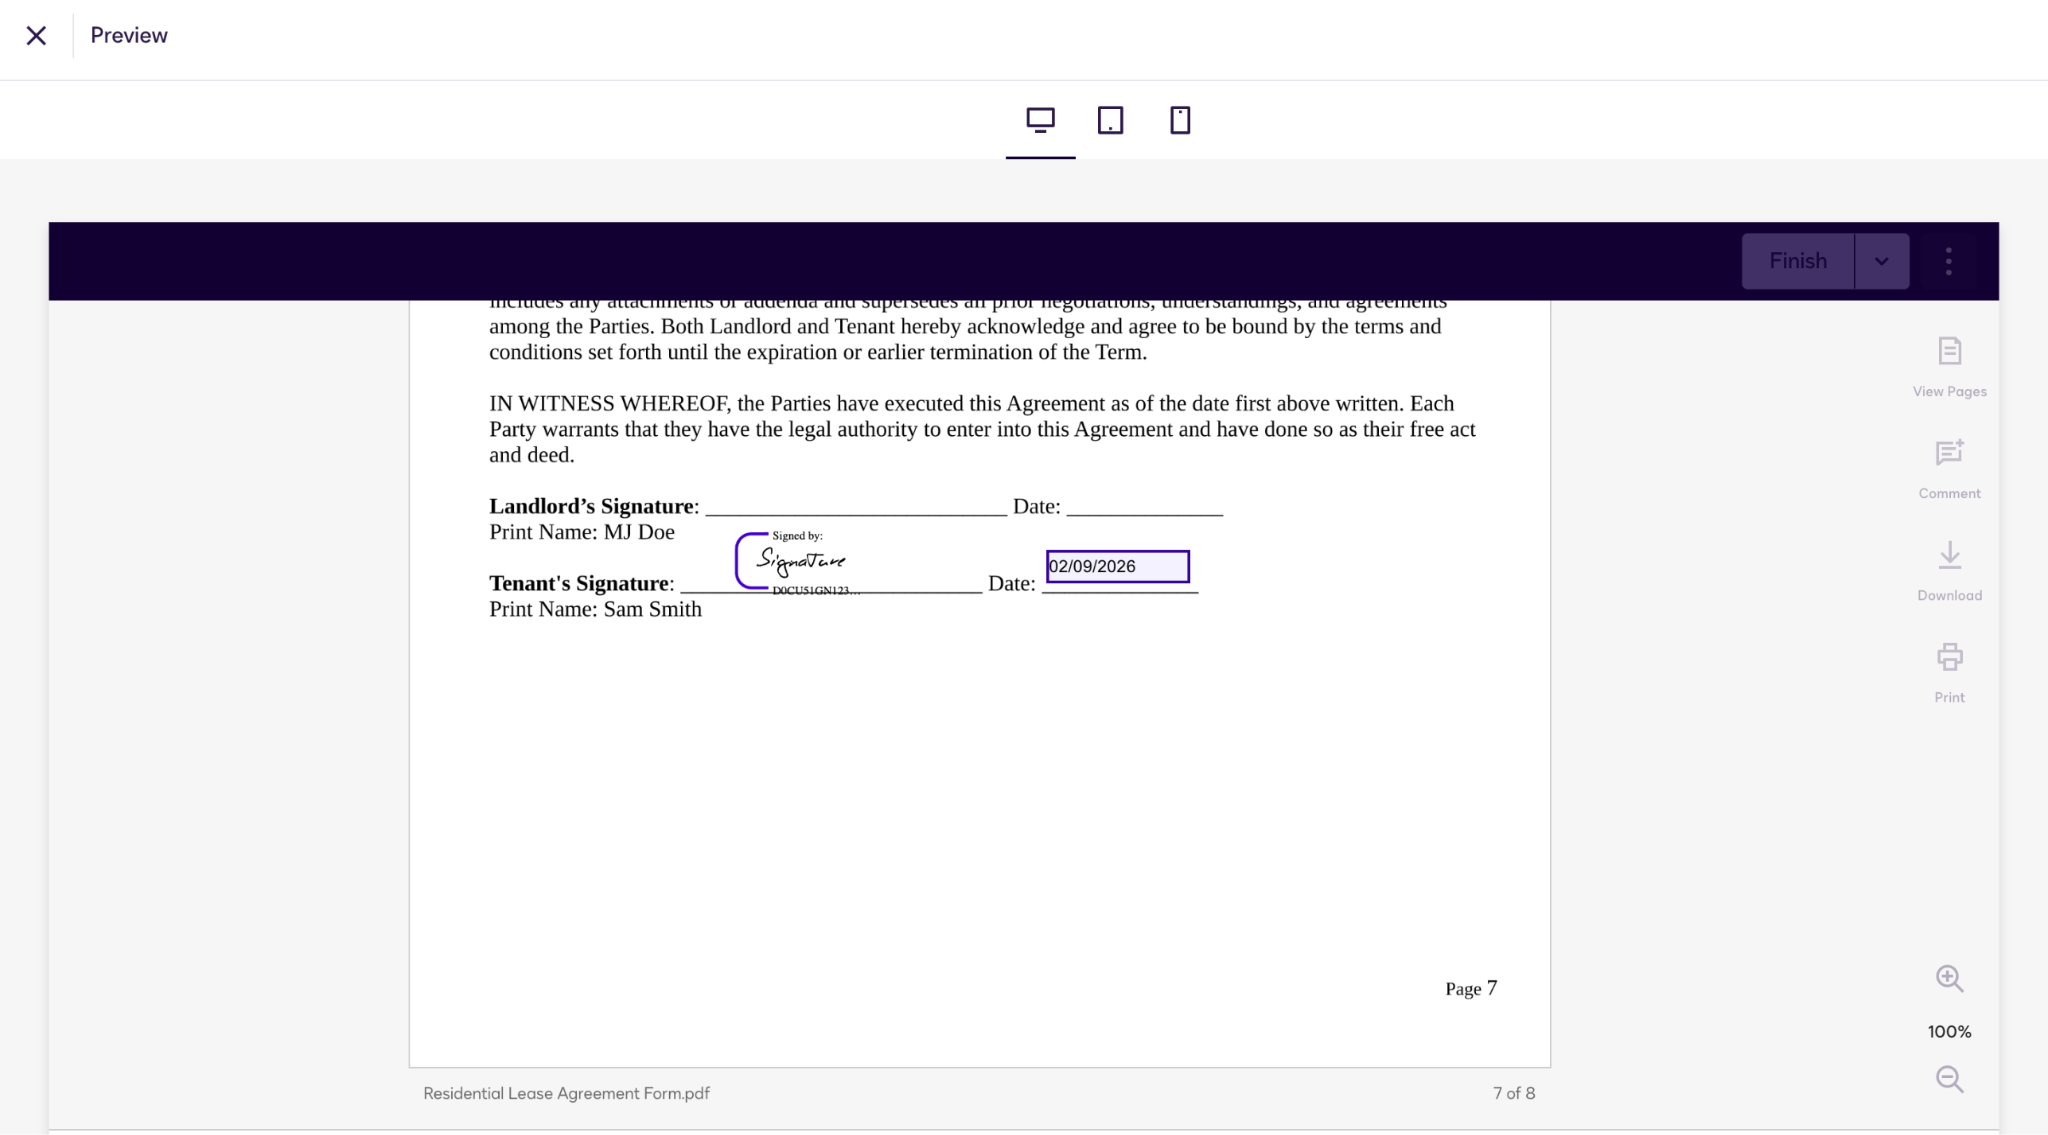
- Click Preview at the top right to test the Date field. Try entering the date in your desired format to make sure it’s accepted, and confirm that the wrong date format will be rejected. (Docusign will keep indicating that the field needs to be completed.)
- Finish editing your agreement and send.
How to change the default date format for your Docusign account
If you do business exclusively with international parties, the simplest solution is to change the default date format in your Docusign settings. The platform will apply this change across all your future envelopes. Note: Only the account administrator can carry out these instructions.
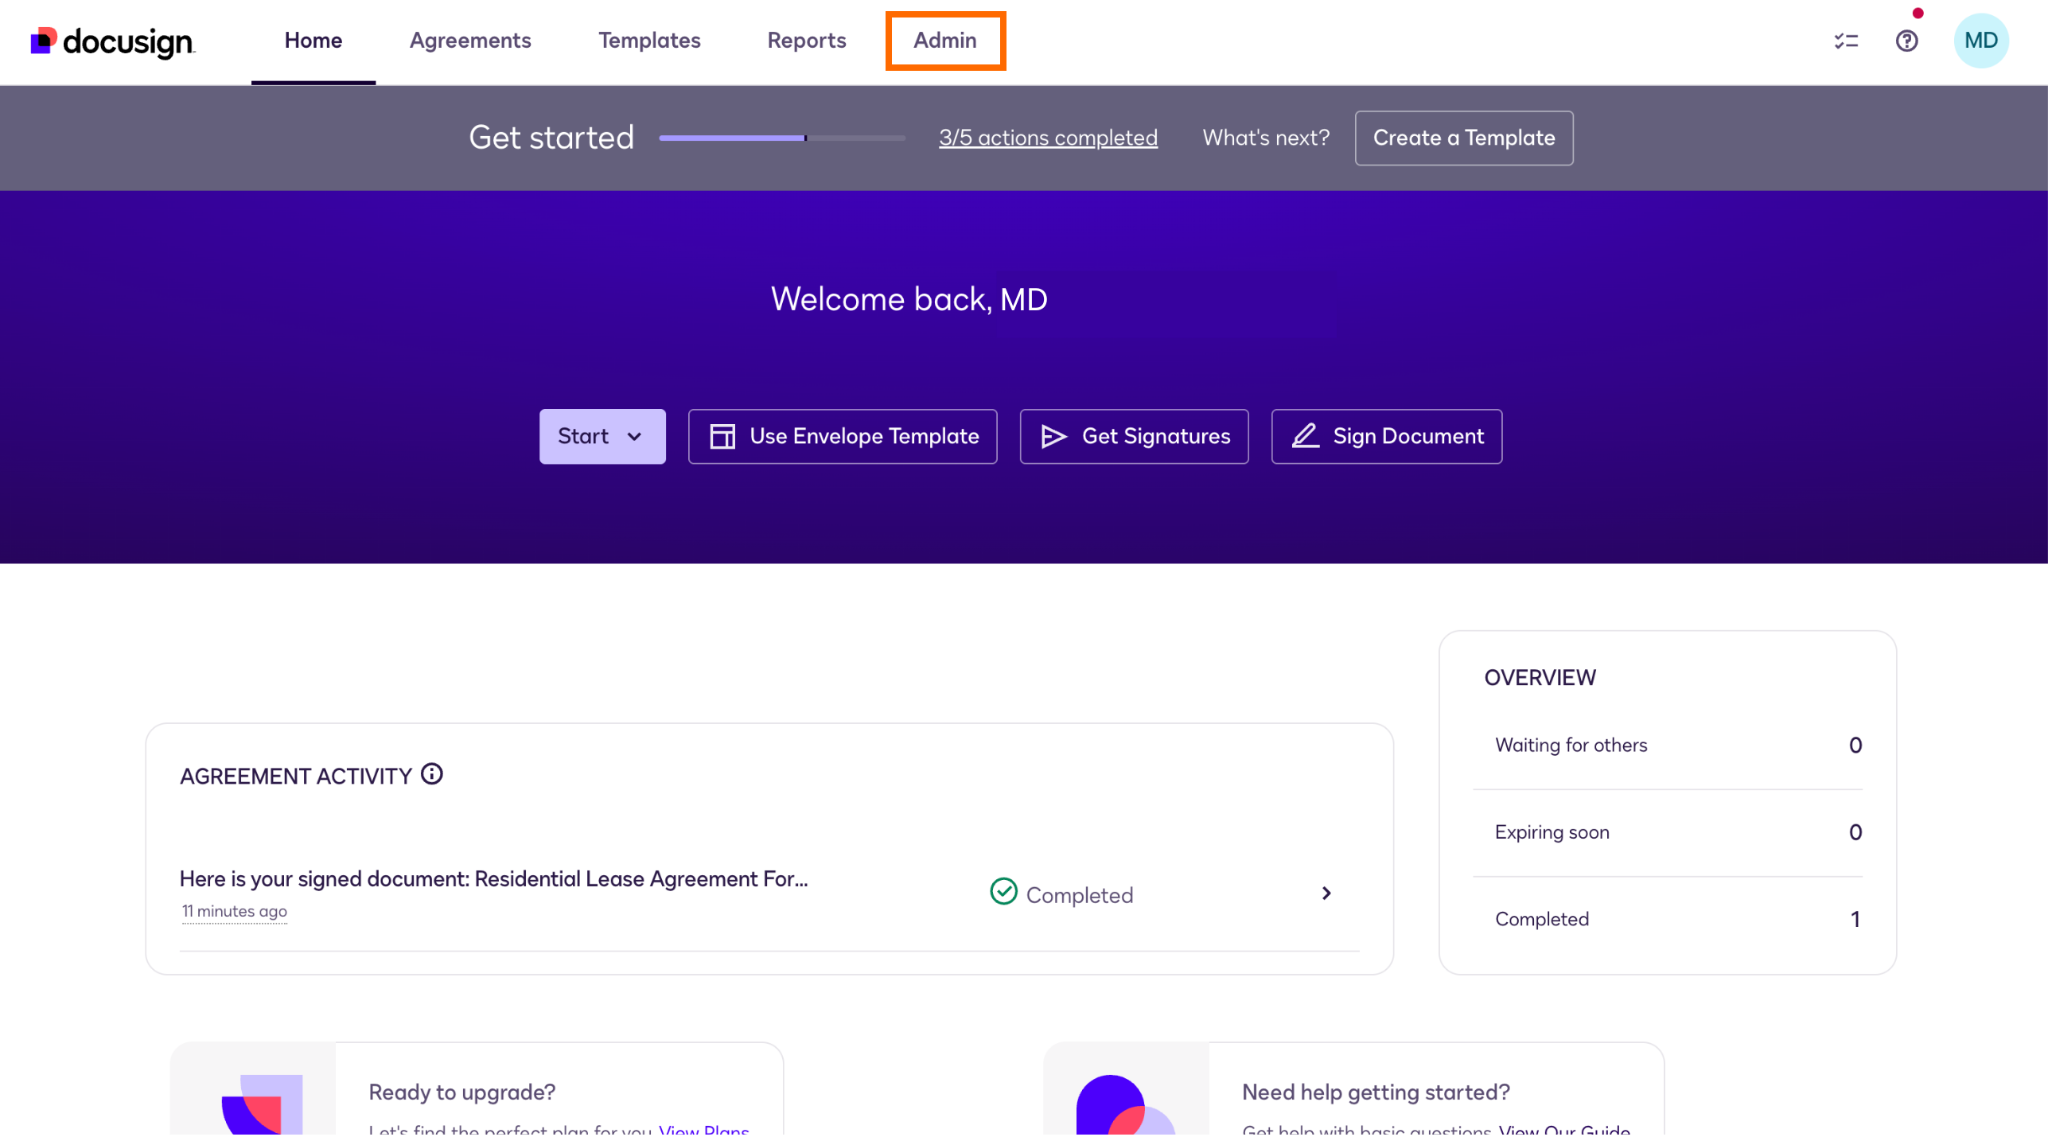
- On your Docusign account homepage, click Admin in the top navigation bar.
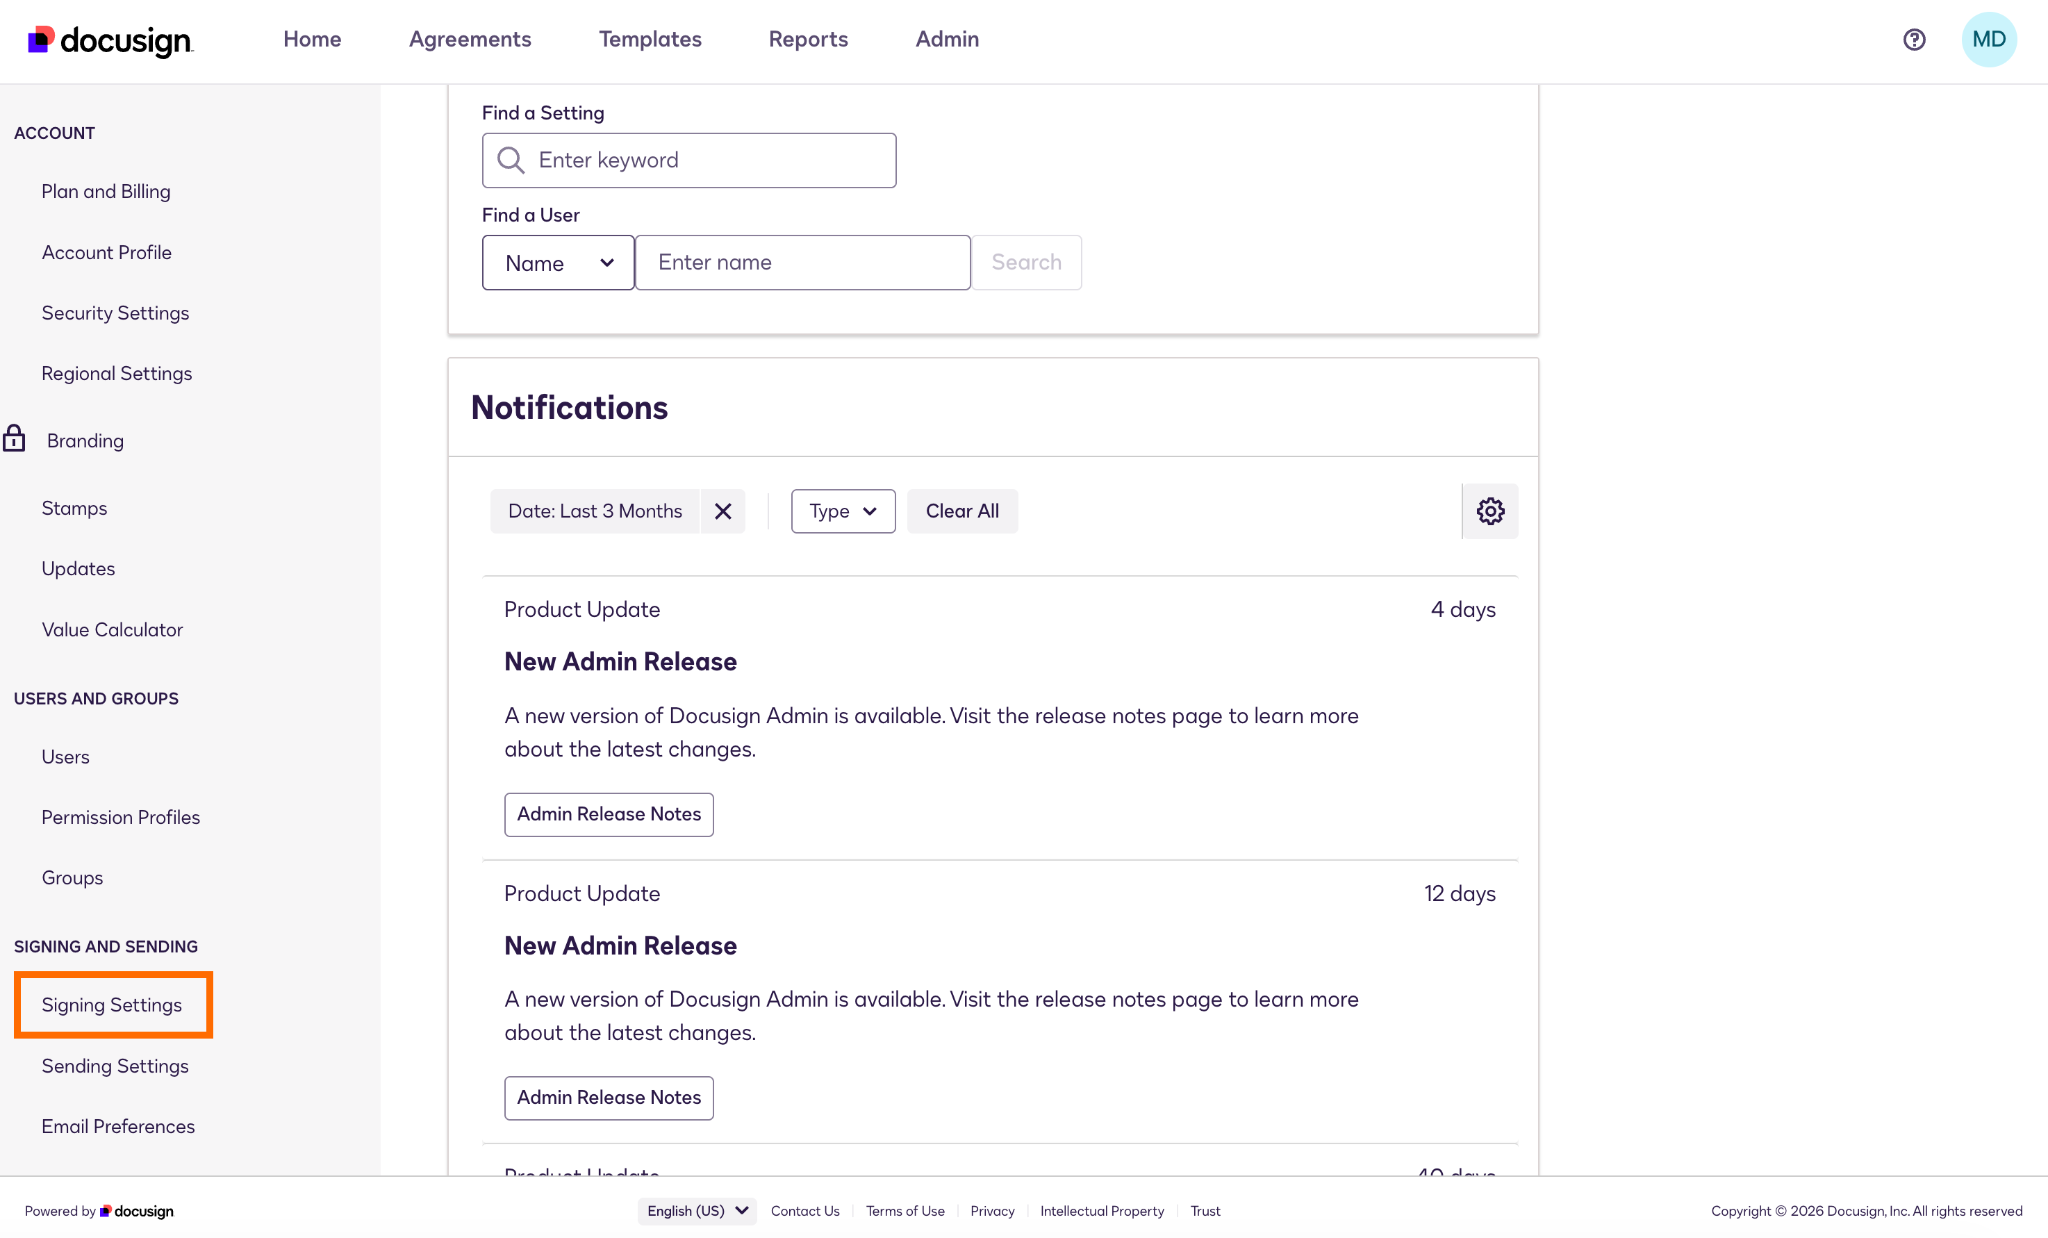
- Scroll down until you see Signing and Sending in the left menu. Click Signing Settings.
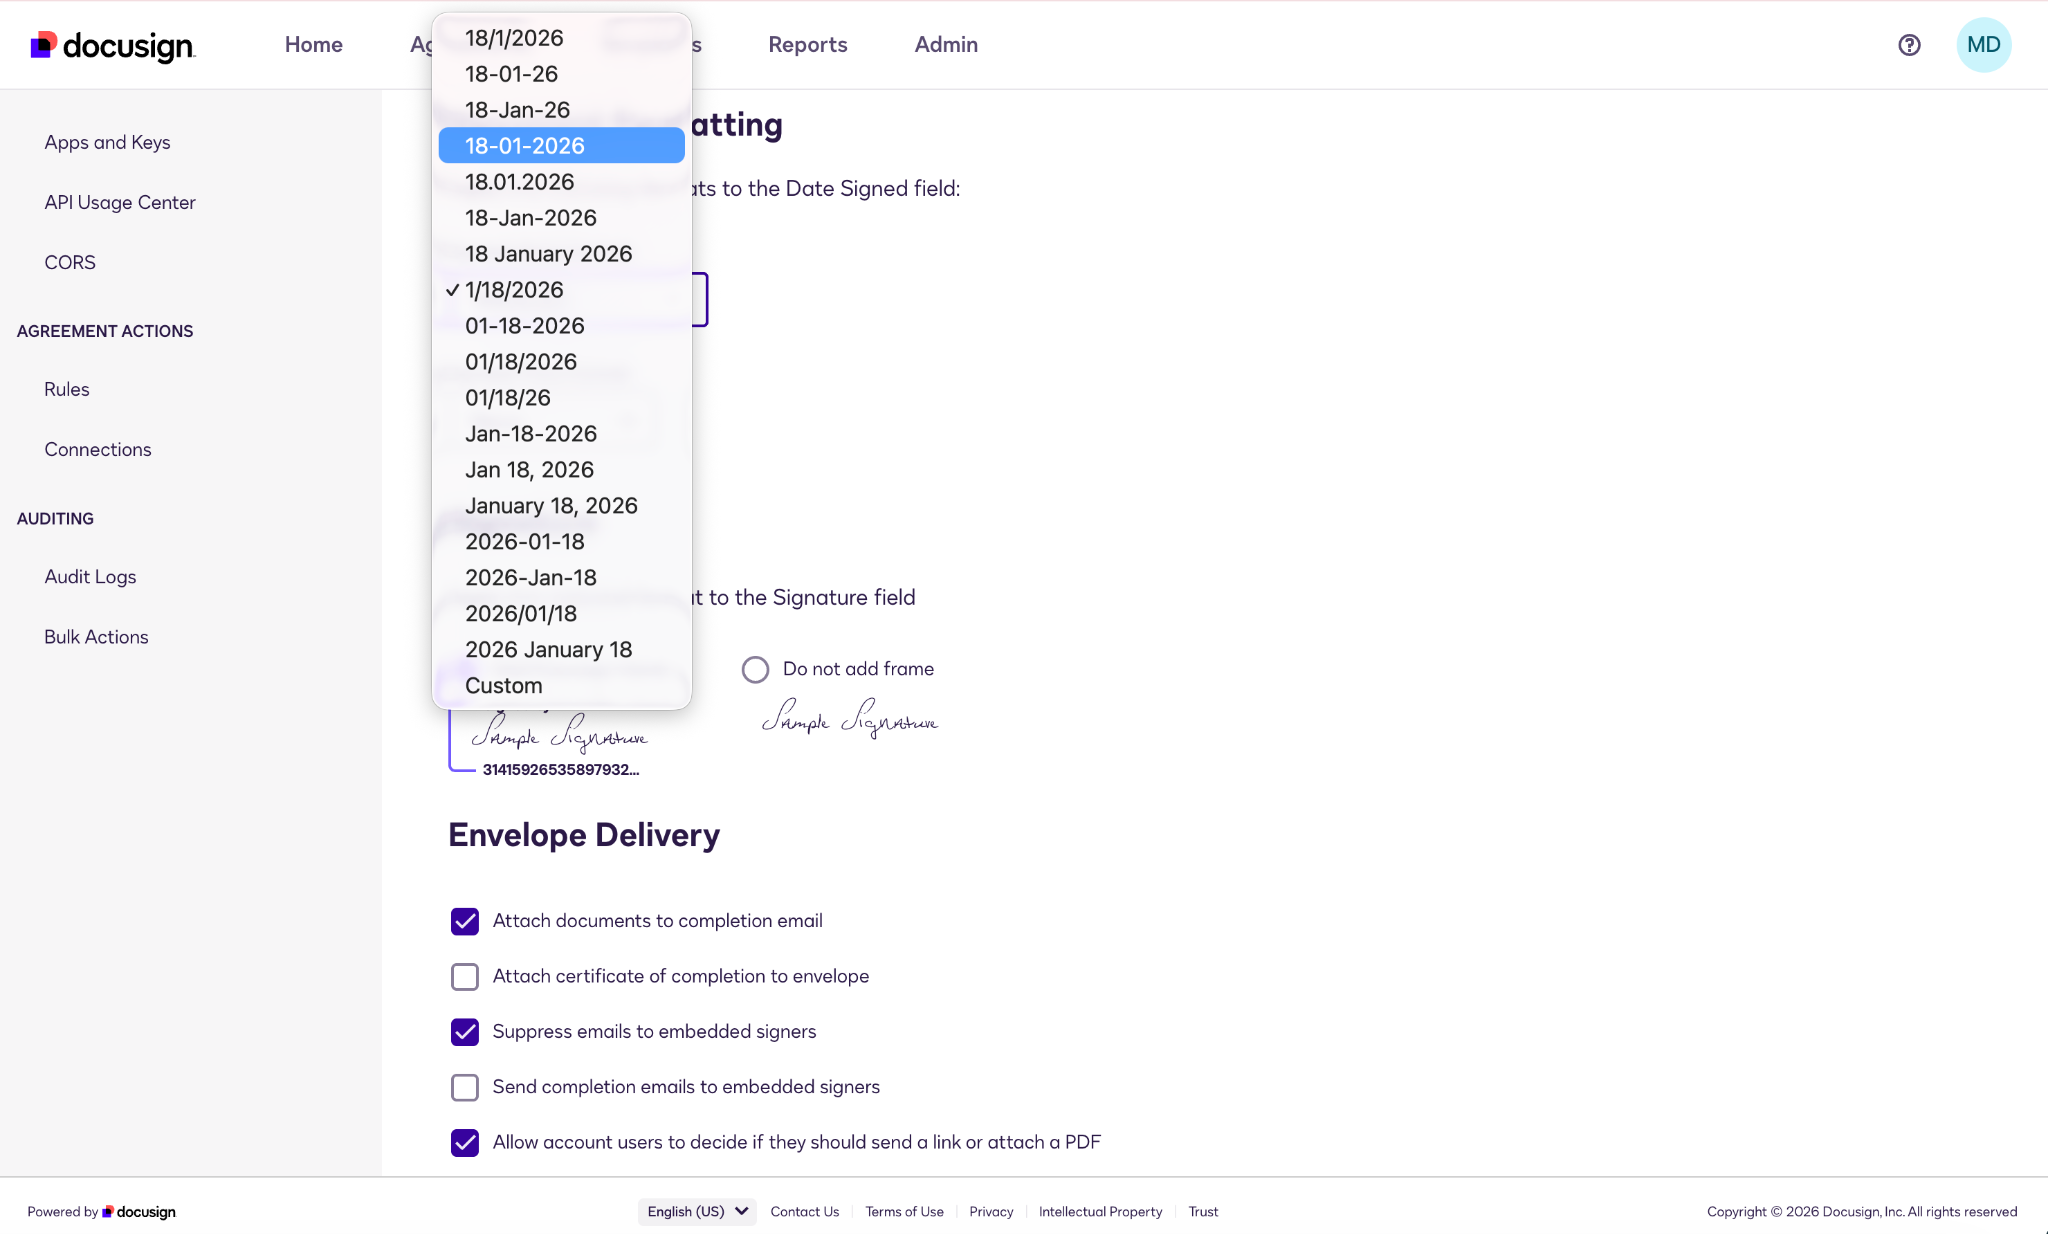
- Scroll down to Document Formatting. Under Apply the Following Formats to the Date Signed Field, choose your preferred Date Signed format from the dropdown menu.
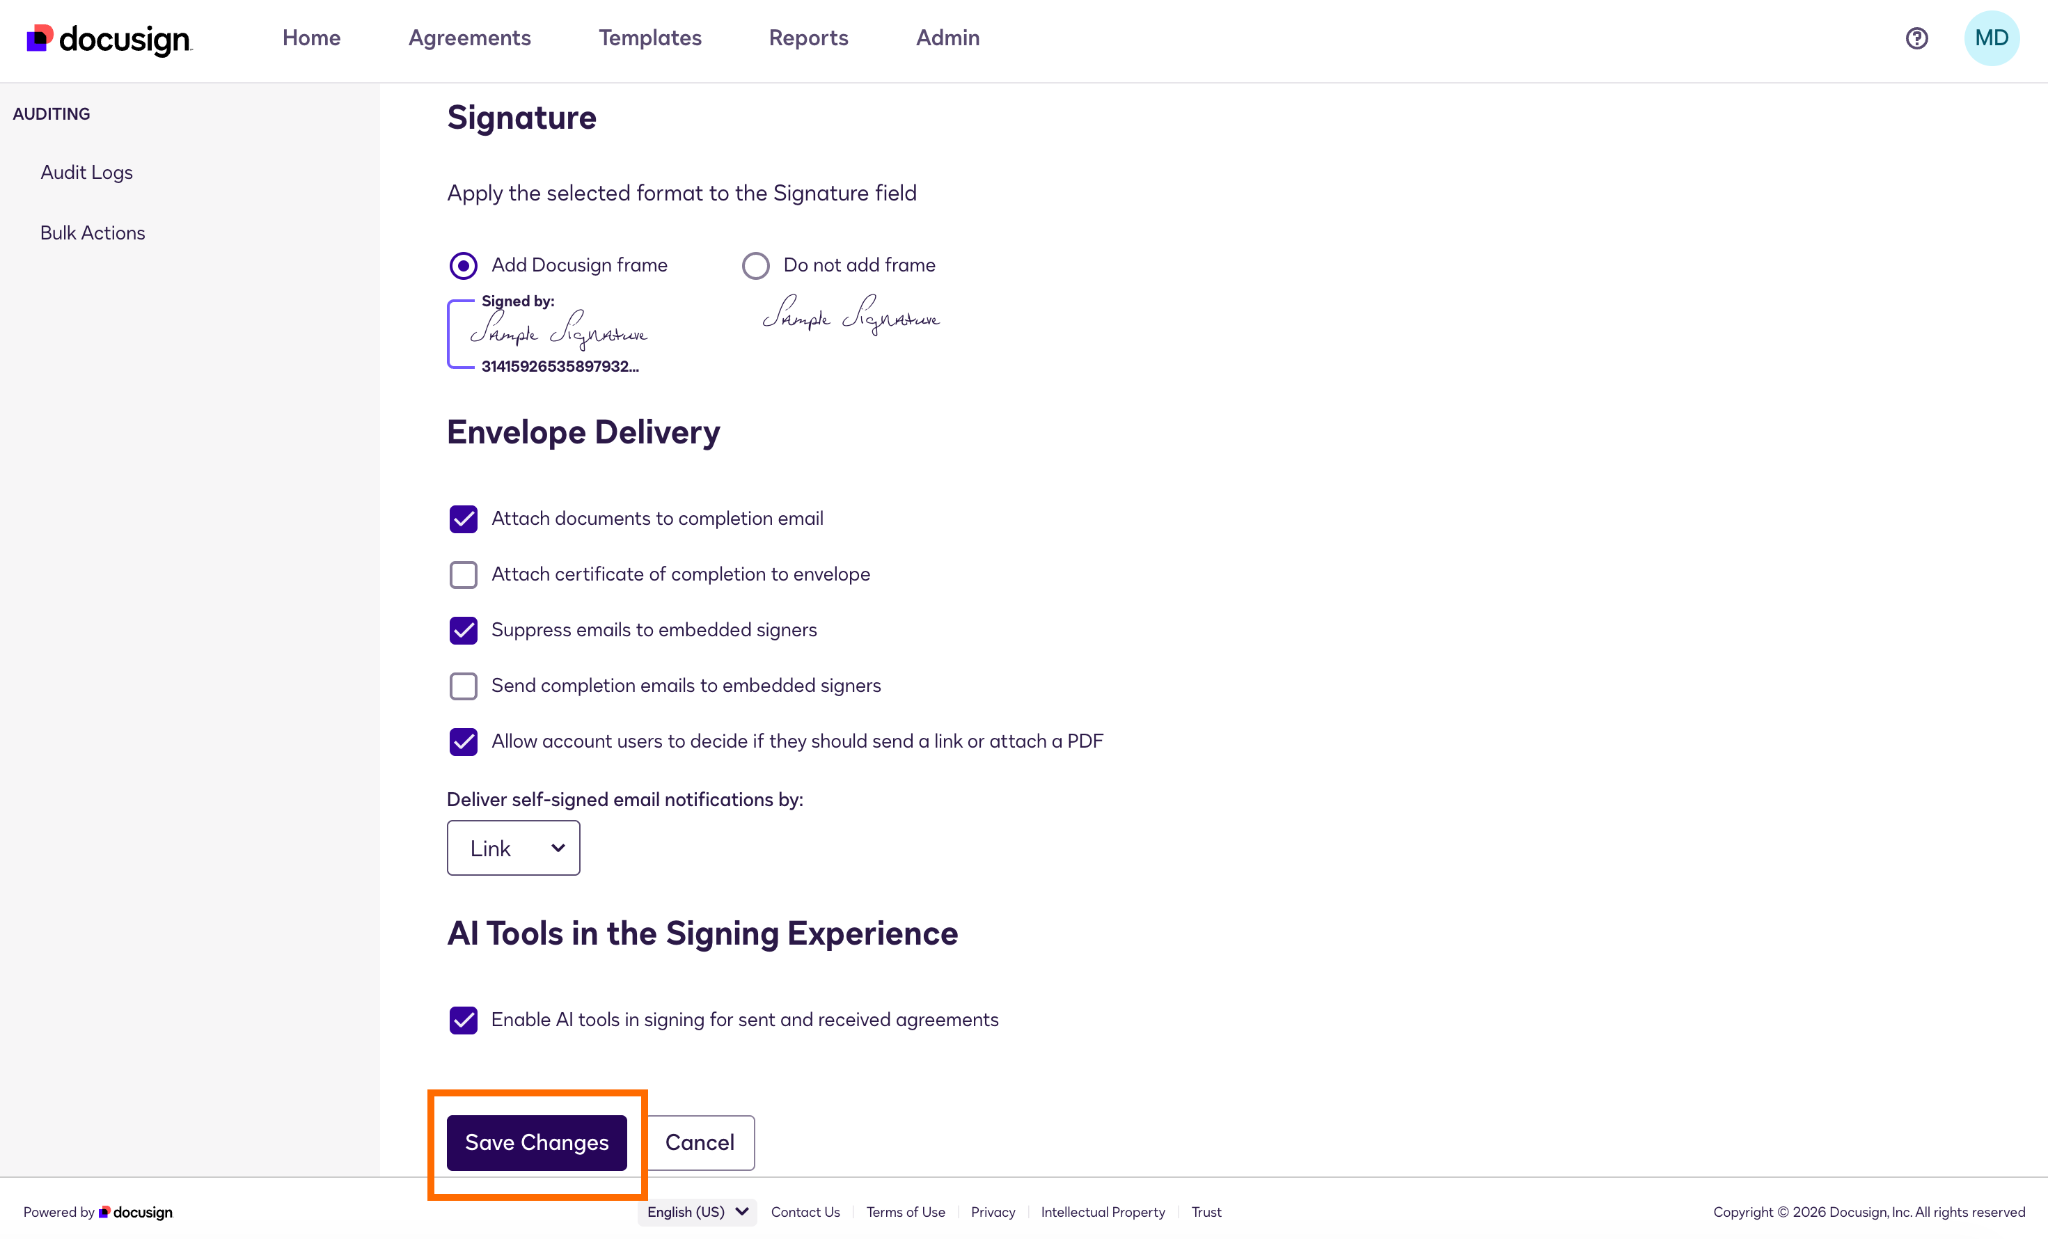
- Scroll to the bottom of the page, and click Save Changes.
Pro Tip
Want to save time, reduce errors, and make your e-signature workflows more efficient? Start using Docusign’s automation tool (and learn about a free alternative that works just as well) in our article on how to automate forms.
Try a smarter, frictionless alternative: Jotform Sign
If you need to change a date format on one or two documents, you shouldn’t have to change the settings for your entire account. Docusign treats even simple customizations, such as date changes, as an afterthought, which leads to overly complex processes and frustration.
But Docusign isn’t your only choice. Jotform Sign is one of the most highly rated Docusign alternatives on the software reviewer site G2, thanks to its intuitive interface and advanced workflow capabilities. Jotform Sign also makes formatting individual documents a breeze.
Here’s why users prefer Jotform Sign over Docusign:
- Simple customizations: Change options are readily available. Plus, you can alter many field formats, fonts, and colors directly in the form builder, with just a single click.
- Global flexibility: You can easily cater to international clients by adjusting formats on a per-form basis.
- Signable PDFs: You can turn a static PDF into a dynamic, signable document in minutes and have parties sign immediately, all without installing any software or buying a subscription.
- Abundant templates: Jotform Sign offers more than 1,200 free e-sign templates for every industry and nearly every use case, including nondisclosure agreements, lease agreements, letters of authorization, bills of sale, and waivers. In every case, you can customize the document, including the date format.
- Workflow tool suite: Jotform Sign works seamlessly with Jotform Tables and Jotform Report Builder, allowing you to visually manage signing processes and create seamless workflows. You can use Jotform Sign Mobile to access the e-signature tool from anywhere.
The bottom line: Compared with Docusign, Jotform is easier to set up, easier to use, and more customizable. The next section shows how simple it is to make an in-document date formatting change.
How to set up date fields in Jotform Sign
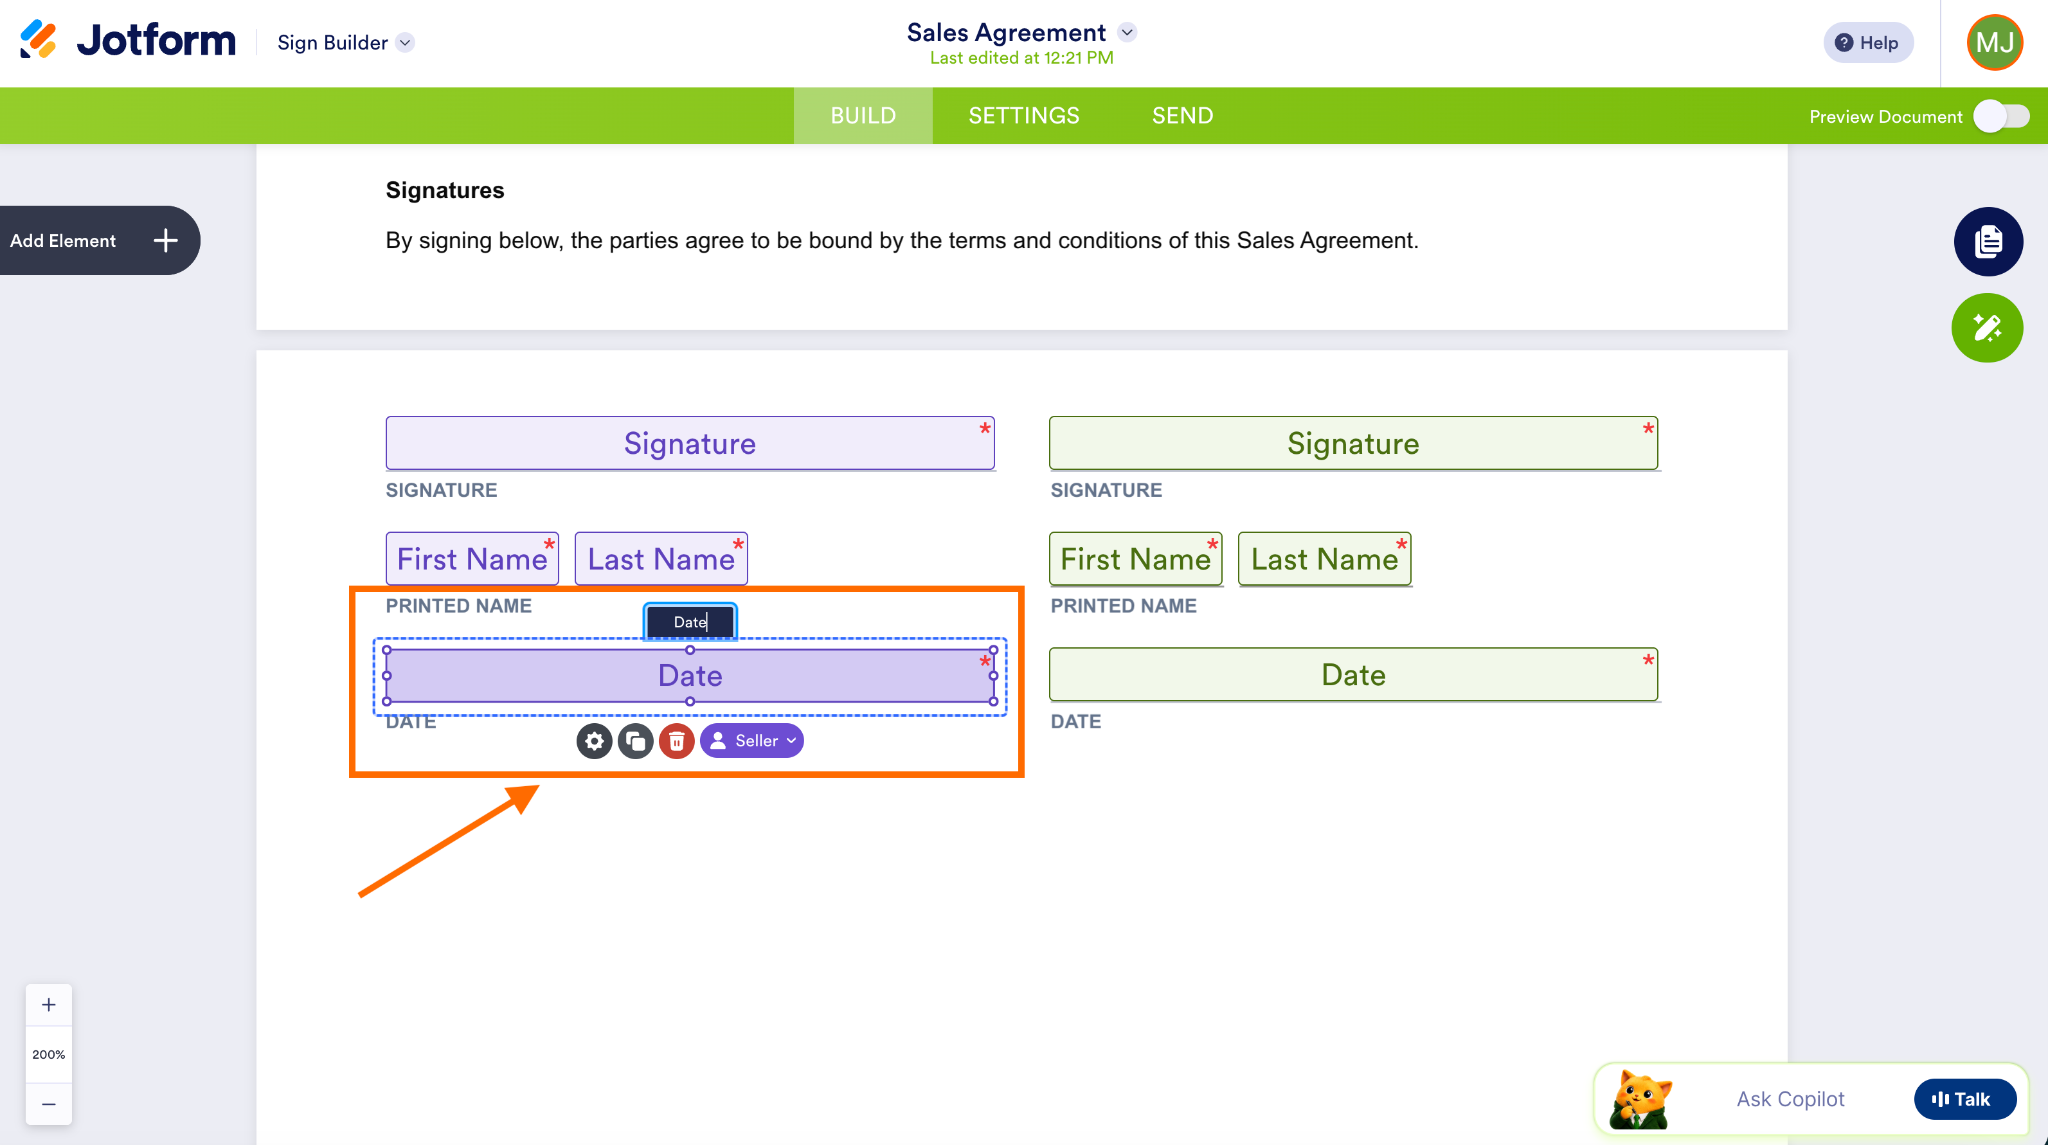
- Open your document in the Jotform Form Builder, and scroll to the date(s) for which you want to change the format. Click the Date box and then click the Settings wheel.
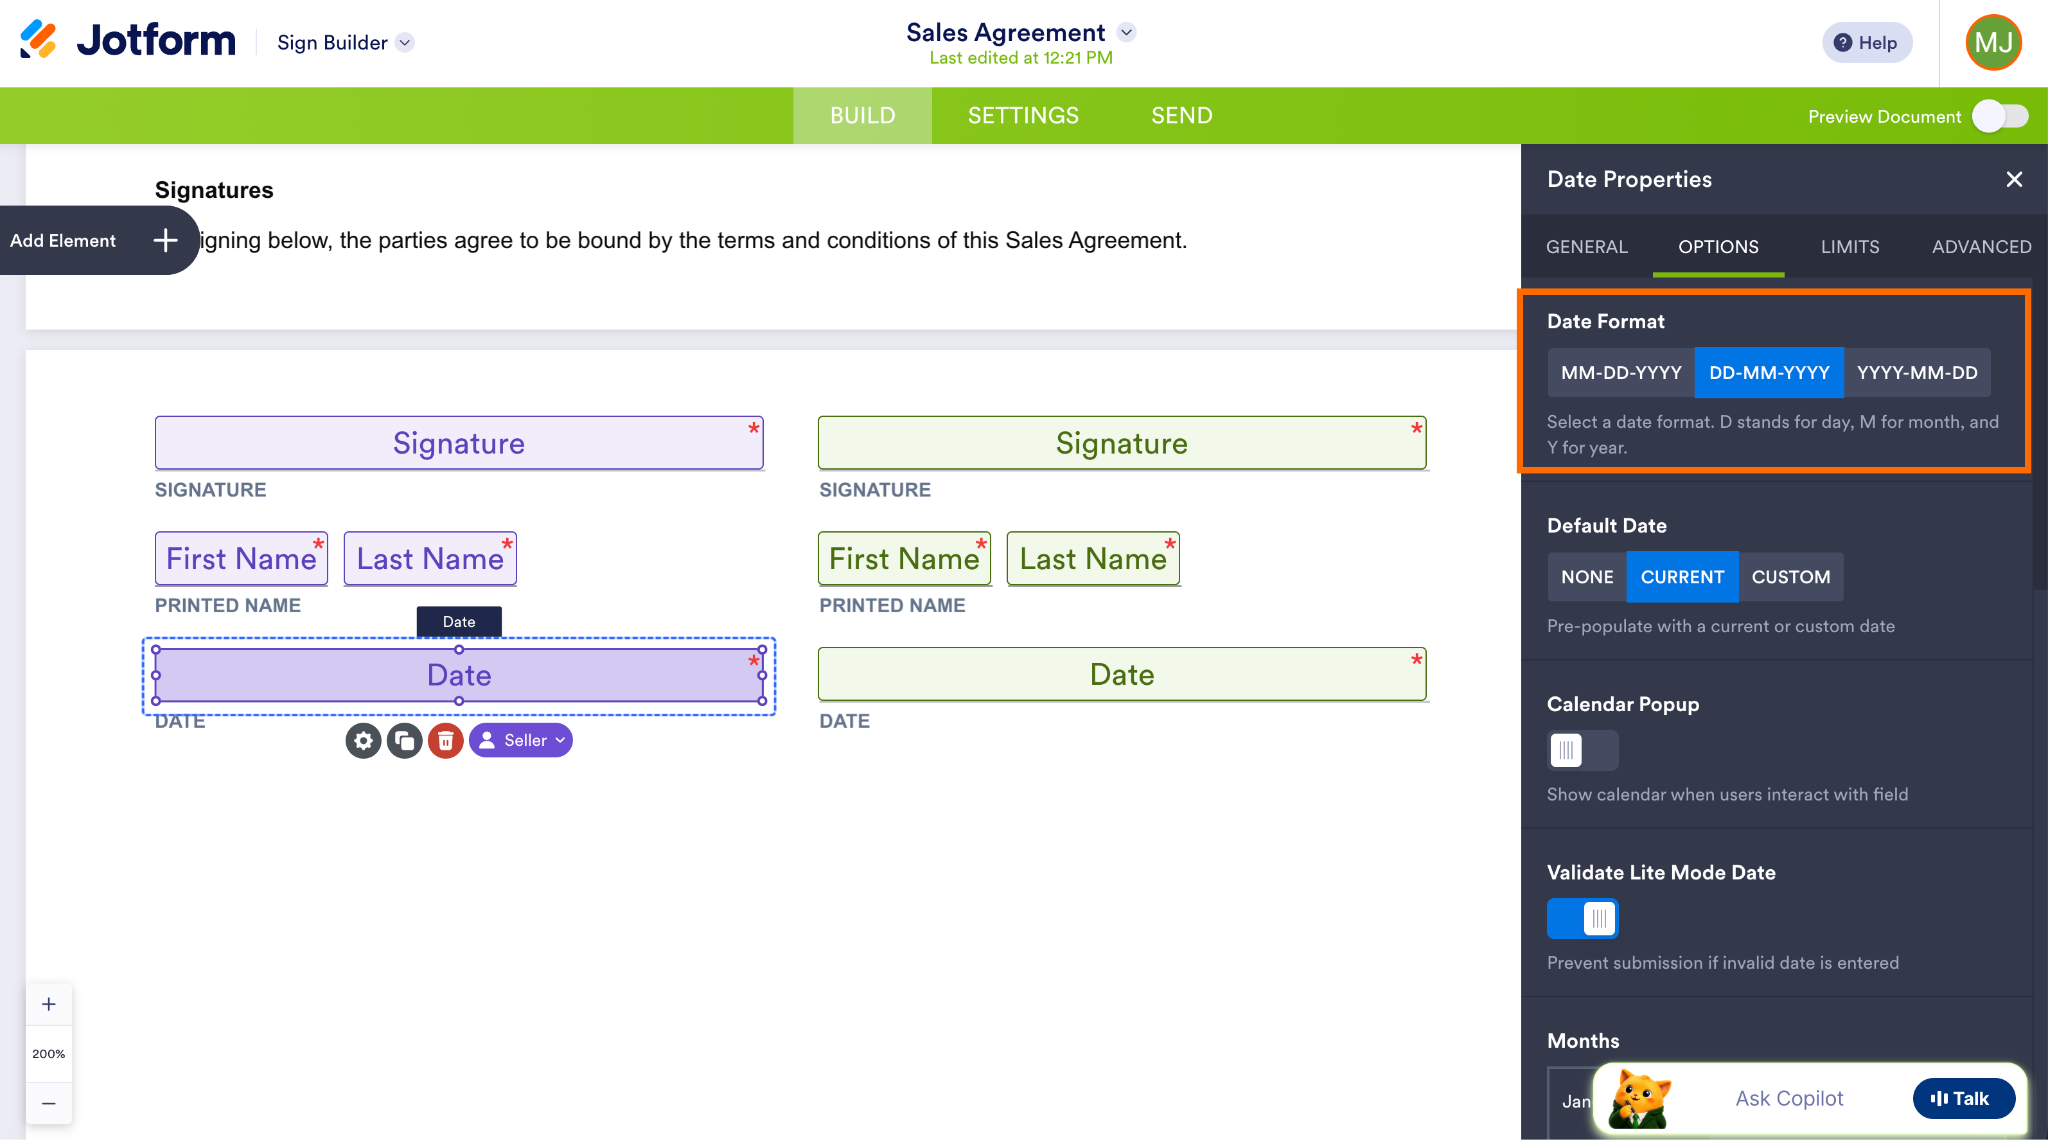
- In the Settings box on the right, click Options, and select the new date format you’d like to use. Do the same for any additional date boxes you’d like to change.
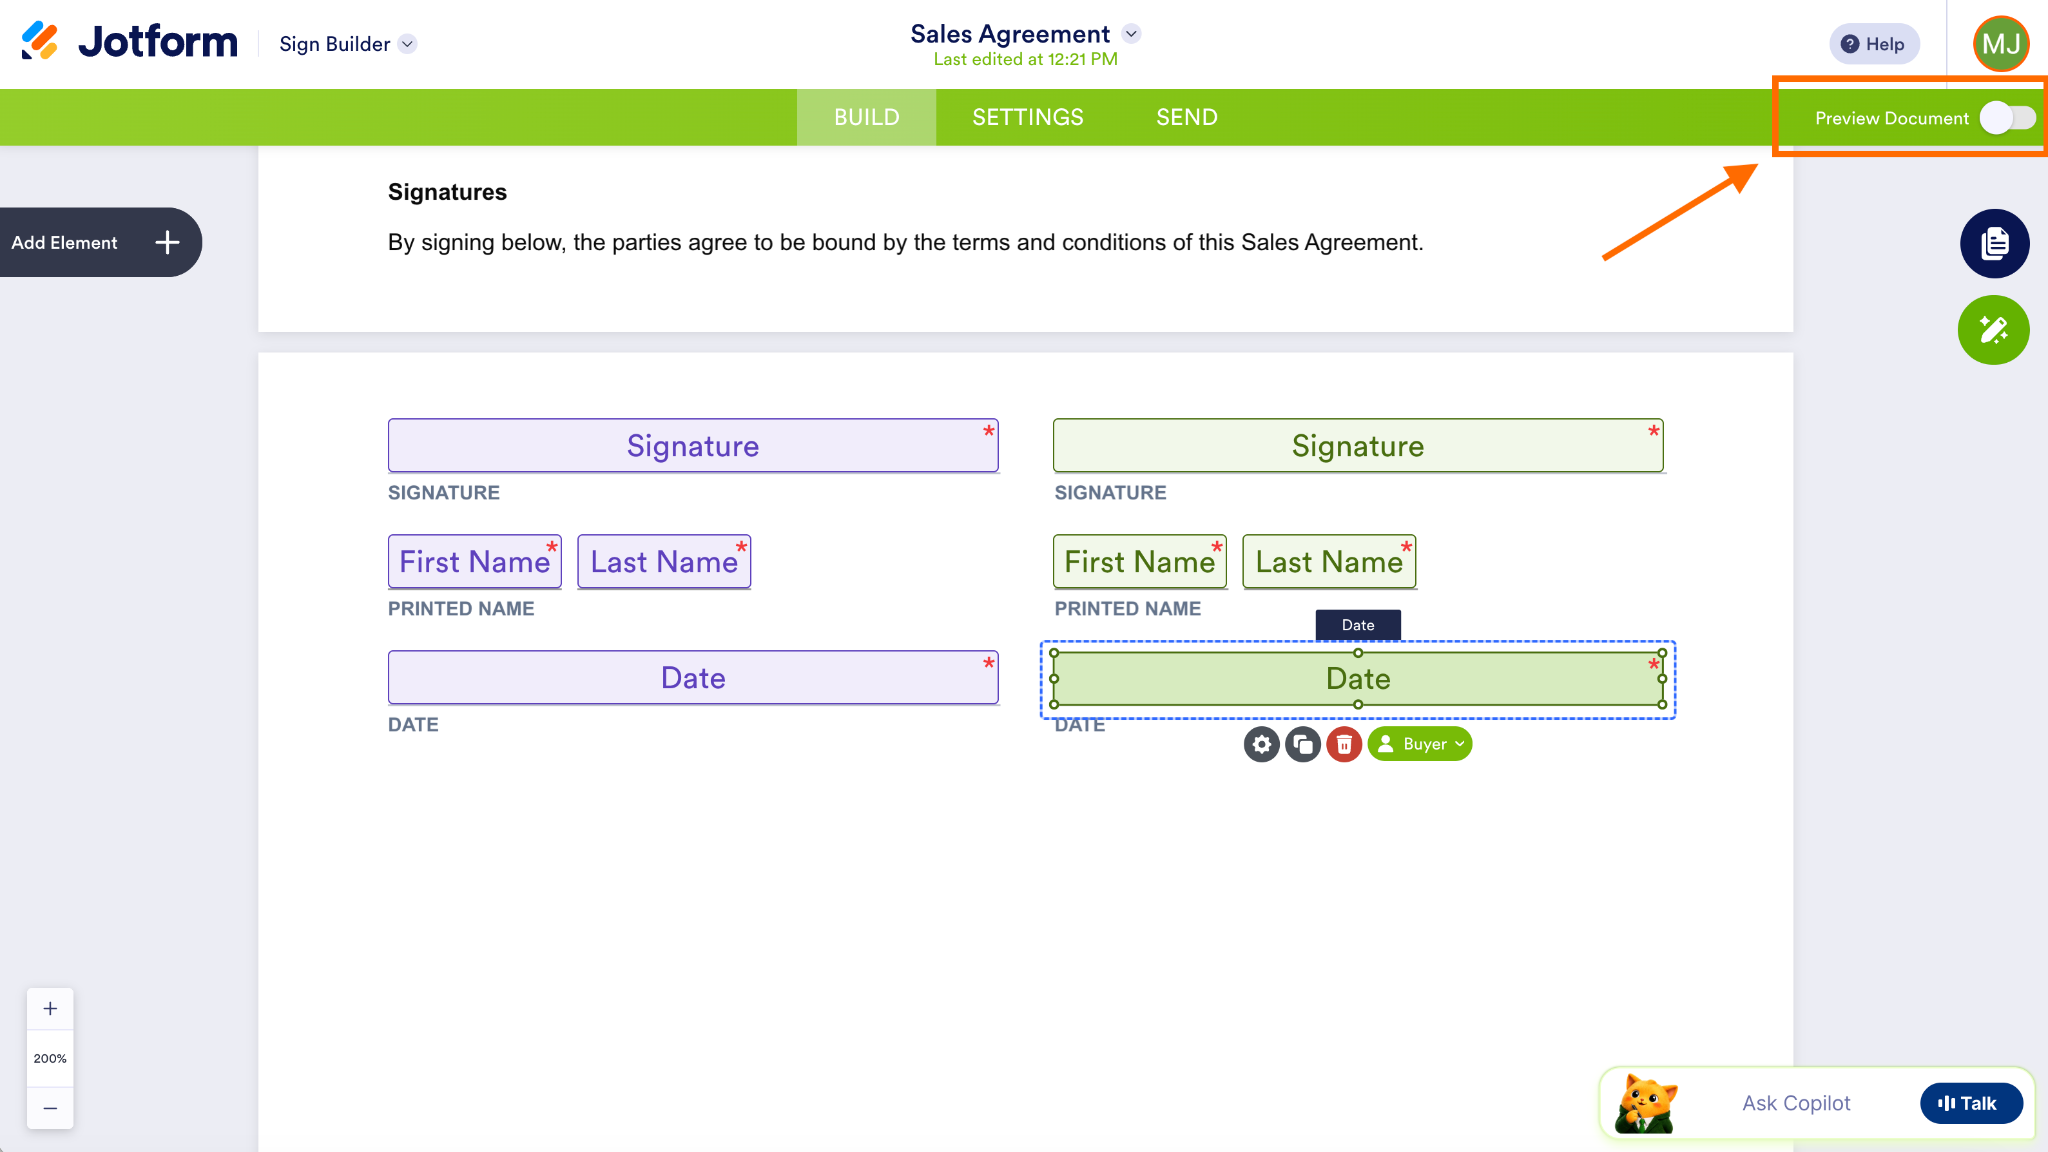
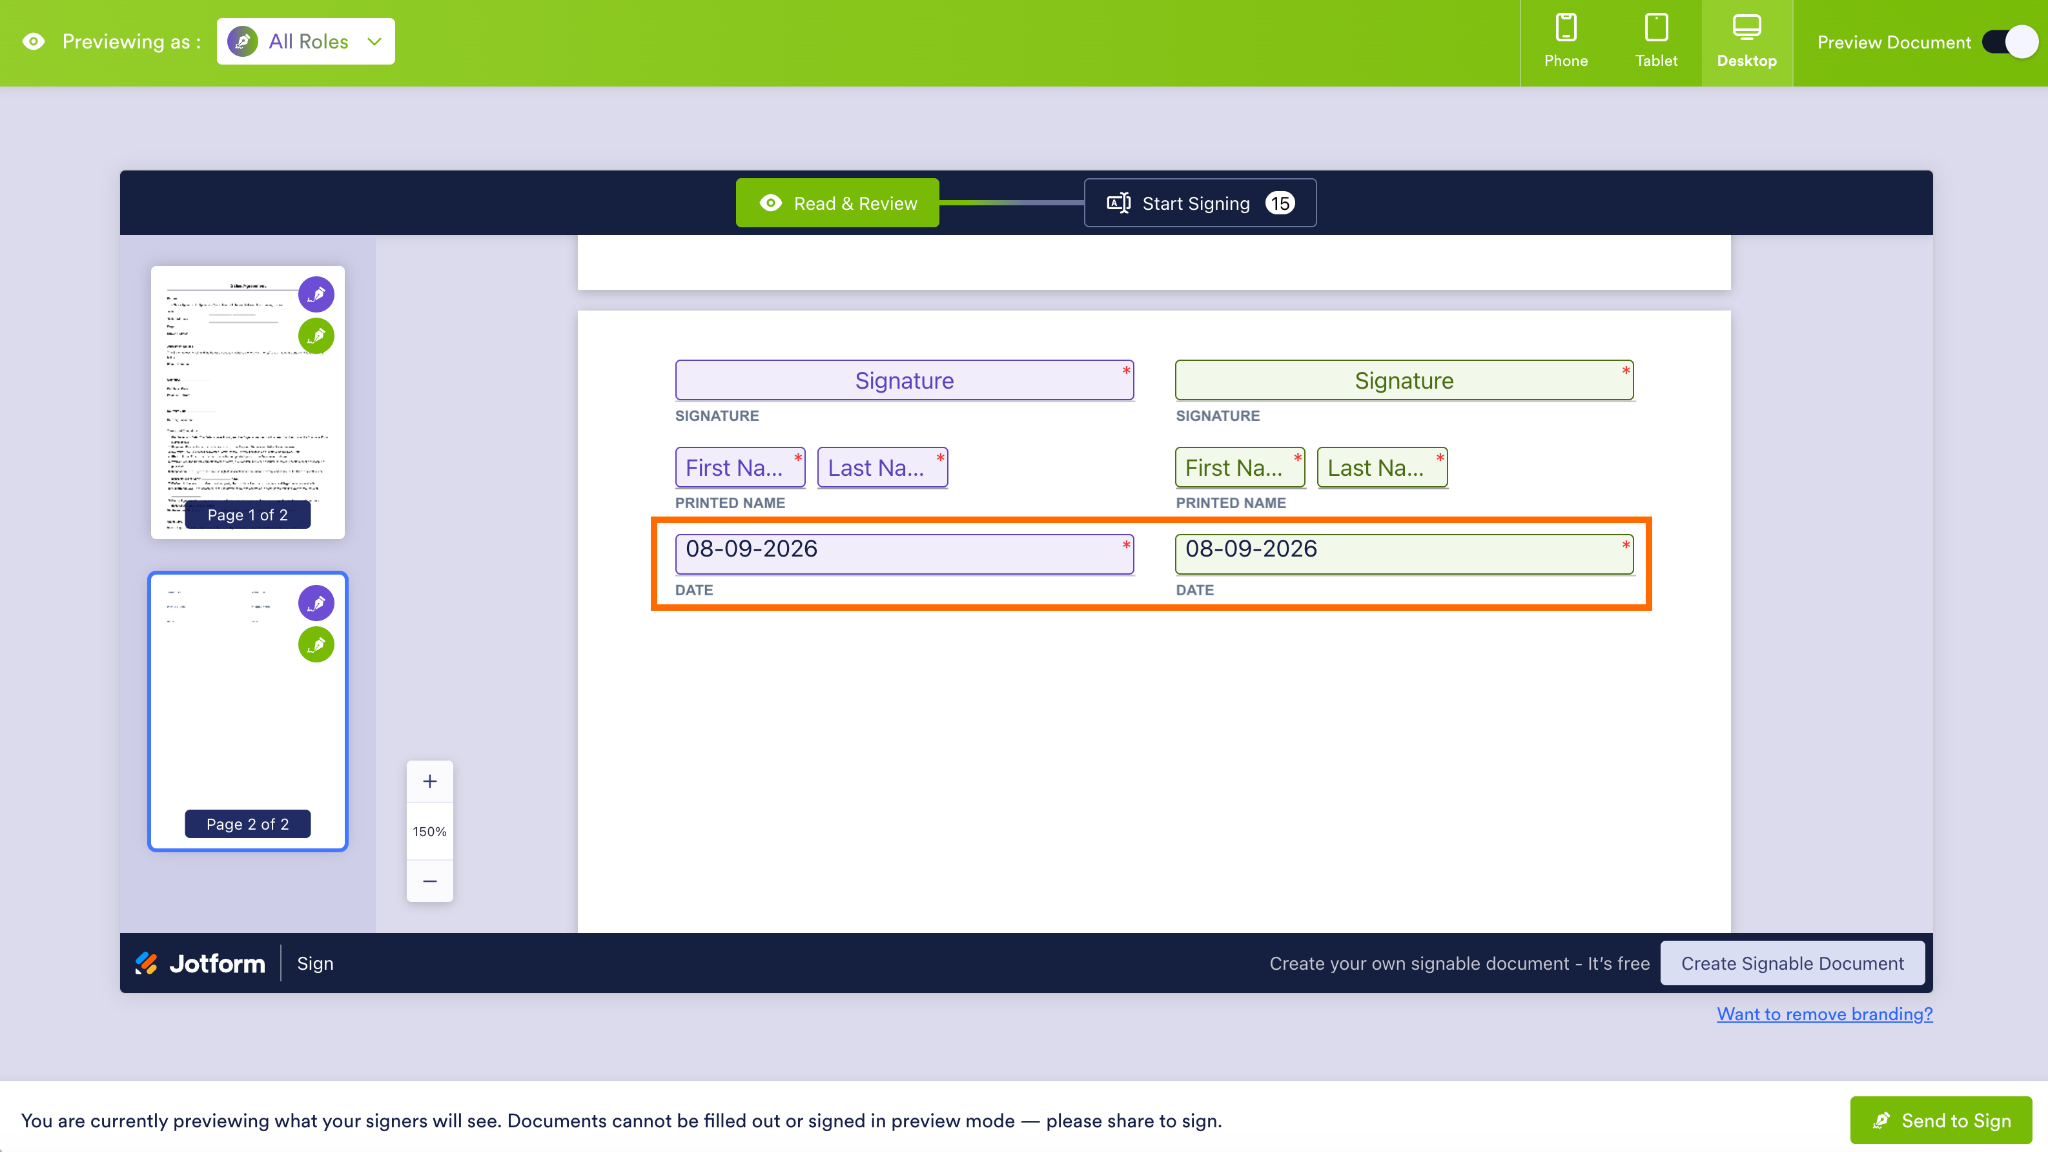
- Close the Date Properties box by clicking the X at the top right. Then click Preview Document to check that the format has been correctly changed.
- Make any other changes as needed and send.
When it comes to e-signatures, there’s simply no better alternative than Jotform Sign. It offers a host of features: You can generate documents, gather signatures, and automate agreement-related tasks to support faster, smoother signing processes.
Eliminate the frustration that comes with other tools by switching to Jotform Sign today. Start now for free!
FAQs about Docusign date formats
When you edit the date format globally in your Docusign settings, the change will affect only future envelopes. It does not change the date in envelopes for current or past documents.
Yes. Docusign offers many date formatting options in its Document Formatting menu, including YYYY-MM-DD, DD/MM/YYYY, and DD MONTH YEAR. To change the format, go to the Document Formatting section, located in the Signing and Sending settings in the Admin panel. For additional information about how to use Docusign, read “What is Docusign and how does it work?”
Not officially, but you can use a work-around: Swap the Date Signed field for a text field with custom validation. If you use this method, the date won’t autopopulate from the server time stamp, as it would with a real Date Signed field. The user will have to type the date in.
This article is for professionals, HR teams, and international business owners who are frustrated by Docusign’s rigid formatting and want an easier way to customize their contracts and documents.
AS ALWAYS, CONSULT AN ATTORNEY BEFORE RELYING ON ANY INFORMATION ON THIS PAGE. THE CONTENT ABOVE IS FOR INFORMATIONAL PURPOSES ONLY. JOTFORM IS NOT PROVIDING LEGAL, FINANCIAL OR OTHER ADVICE.





































Send Comment: