
Let’s say you’ve recently added Pipedrive to your marketing tech stack. Now you’re trying to figure out how to connect Google Forms to it. It’s a must-have workflow for your team because you use Google Forms to collect new client information. Manually transferring names and emails isn’t realistic when you’re getting hundreds of weekly inquiries. So what are your options?
There are a few potential solutions. You could automate the workflow using a third-party app, or you could switch to another form builder that integrates directly with Pipedrive.
In this guide, we’ll explore both approaches and give you step-by-step instructions on how to use each one.
How to connect Google Forms & Pipedrive
Here’s the bad news: Google Forms doesn’t integrate directly with Pipedrive. There isn’t a built-in setting or feature that lets you connect the two platforms.
However, you’re not completely out of luck. You can still connect them using a third-party automation tool such as Zapier or Make. These tools allow you to send information from Google Forms to Pipedrive through their platforms.
How to connect Google Forms to Pipedrive via Zapier
If you already use Zapier to automate other workflows, connecting Google Forms with Pipedrive is relatively straightforward. Here’s how to get started.
1. Log in to your Zapier account
Navigate to Zapier and log in to your account.
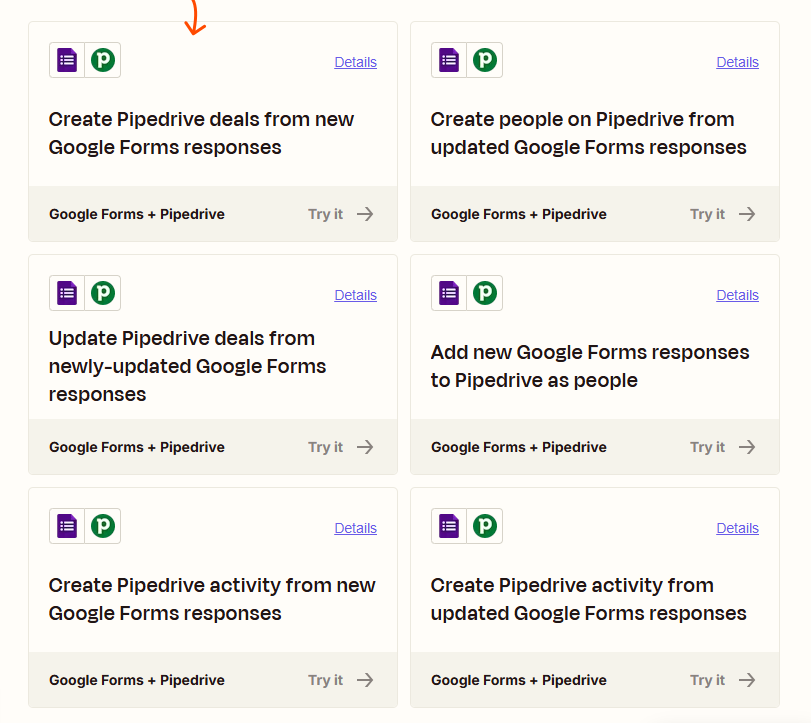
2. View the available Pipedrive Google Forms workflows
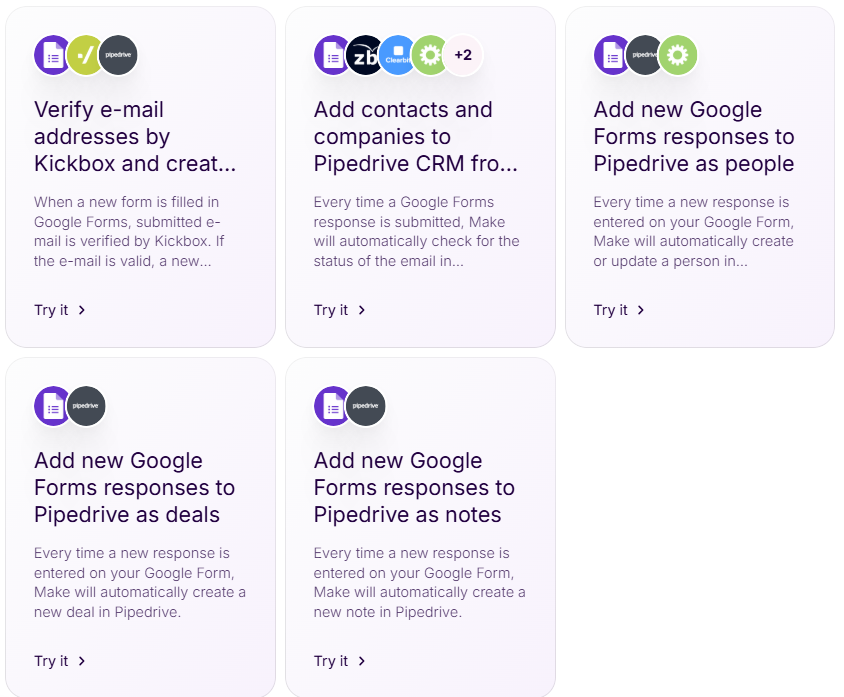
Visit the Google Forms and Pipedrive integration page to view the available templates. If a template already matches your use case, you can simply click Try it to begin setup.
3. Optional: Set up your own workflow
Zapier’s templates fit most use cases, but you may have a scenario that requires a unique setup. If that’s the case, you can create your own workflow.
Start by defining a trigger for Google Forms and an action for Pipedrive. The trigger tells Zapier when to start the workflow, and the action tells Zapier what to do with the data in Pipedrive.
You can view available triggers and actions in Zapier. To begin, click Try it for a Google Forms trigger, then choose an action from the available options.
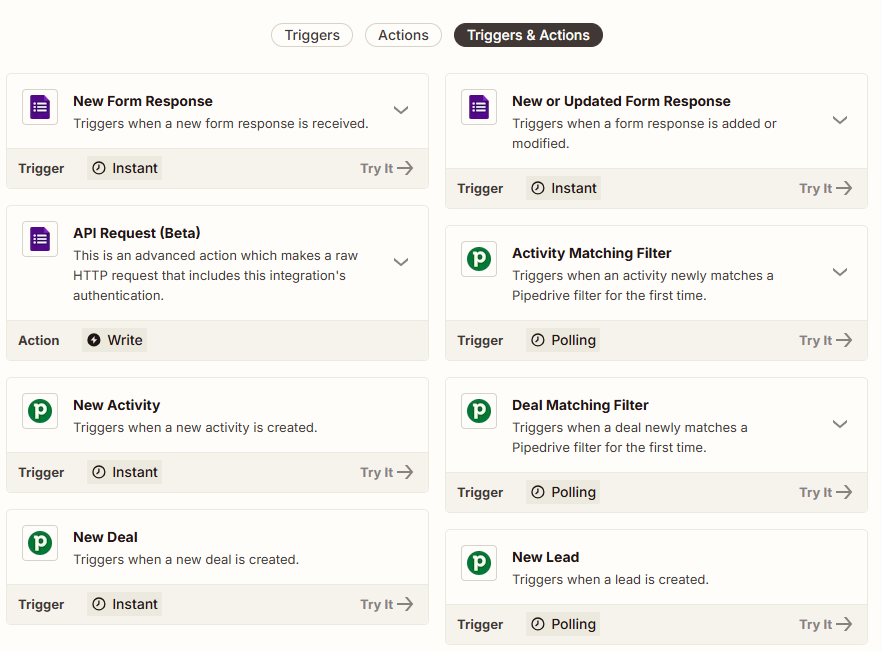
Zapier will then prompt you to log in to your Google Forms and Pipedrive accounts to complete the connection.
4. Test your workflow
Update one of your organization’s Google Forms to trigger your new workflow. Zapier should automatically transfer the data to Pipedrive according to your setup. If it doesn’t, review the workflow and make any necessary adjustments.
How to connect Google Forms & Pipedrive via Make
Make works similarly to Zapier. It lets you connect platforms using automations without writing code.
Follow these steps to connect Google Forms and Pipedrive with Make.
1. Log in to your Make account
Navigate to Make and log in. If you don’t have an account, create one.
2. Choose a Pipedrive and Google Forms workflow
Navigate to Make’s Pipedrive and Google Forms integration page, where you’ll find several prebuilt workflows that automatically transfer Google Forms data to Pipedrive. If one suits your needs, click Try it to begin.
3. Optional: Set up your own workflow
Make lets you create your own workflows using drag-and-drop editing. If no template meets your requirements, you can create your own workflow.
To start, navigate to the dashboard. Click Scenarios > Create a New Scenario. Then click the + icon on your screen and select Google Forms.
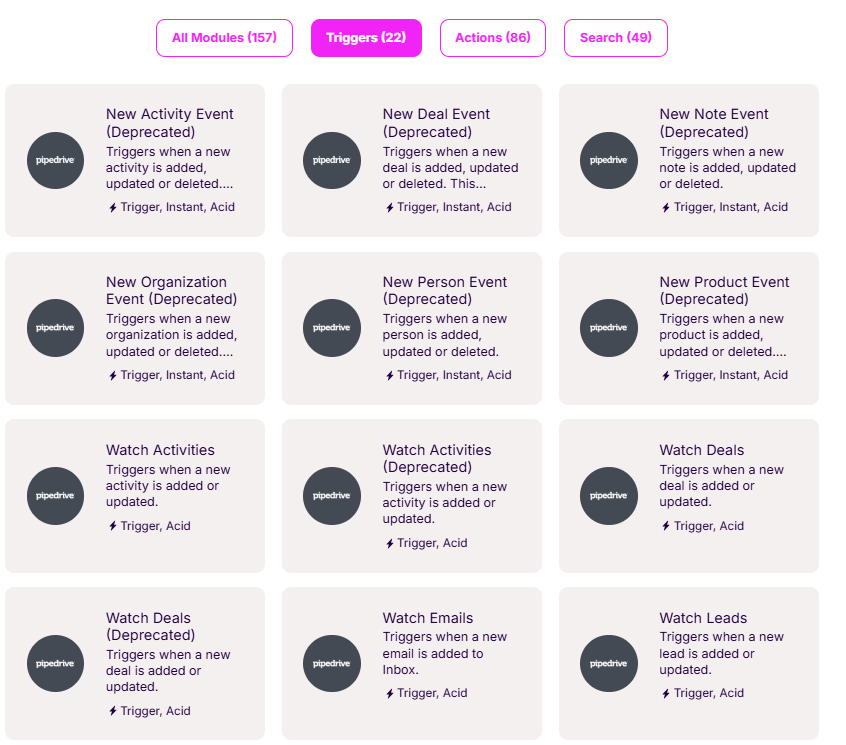
Next, choose a trigger from the list of options that determines when Make transfers information from Google Forms to Pipedrive. For best results, avoid deprecated triggers, as a deprecated trigger may not work properly.
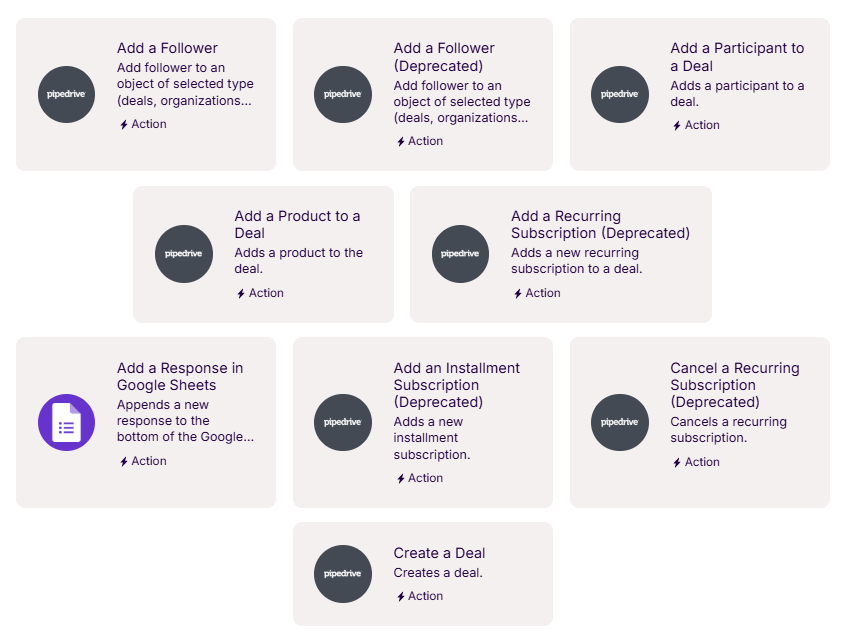
Then, click the + icon that appears below the trigger and choose Pipedrive. Select the action you want Make to perform with your Google Forms data.
Make will prompt you to authenticate the connection by logging in to both your Google Forms and Pipedrive accounts before saving the new workflow.
4. Test the new workflow
Verify that the workflow transfers your data to Pipedrive by completing one of your Google Forms. If you need to make adjustments, revisit the trigger or action steps.
Use Jotform to send form submissions to Pipedrive seamlessly
While tools such as Make or Zapier allow you to connect Google Forms with Pipedrive, relying on third-party automation can create extra headaches. What if the template stops working, or you can’t nail down the exact steps for a custom workflow? That’s where Jotform can help.

Looking for the best alternative to Google Forms?
Jotform’s full-featured form-building solution is mobile-friendly and has the most integrations in the industry. Use it to collect payments, automate workflows, gather leads, and more.
Jotform integrates directly with Pipedrive. Instead of using Google Forms, you’ll build forms in Jotform and connect them to your Pipedrive account. Here’s how to integrate Pipedrive with Jotform.
1. Create your first form
Navigate to My Workspace in Jotform. Click Create > Form. Choose Use template to access over 20,000 ready-made forms, or click Start from Scratch to build your own.
2. Follow the prompts to create your form
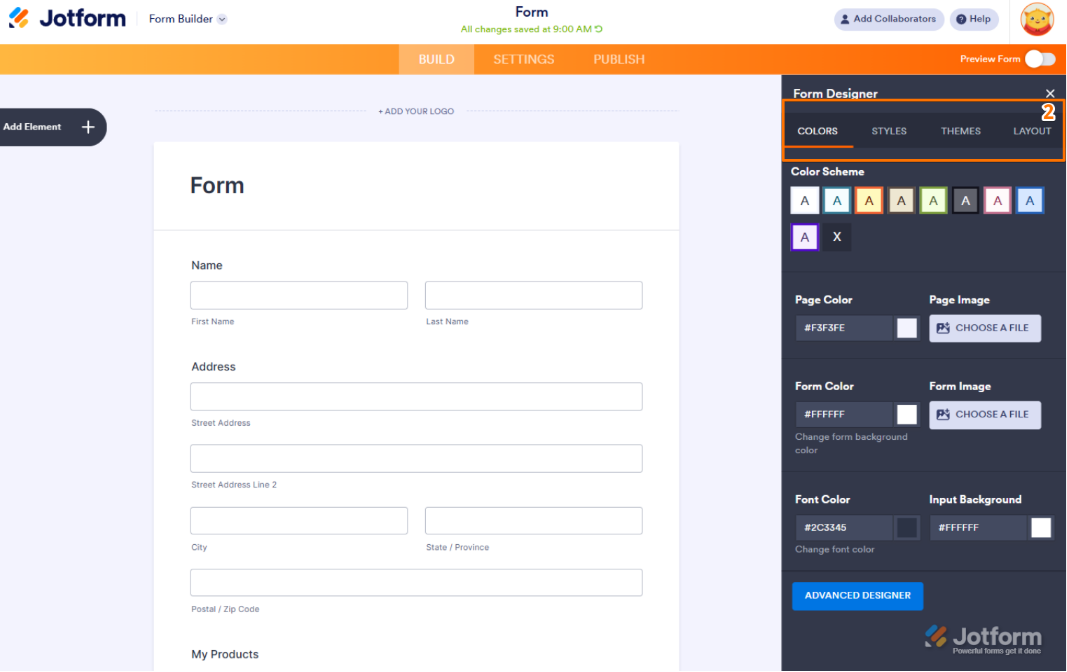
Use the drag-and-drop Form Builder to add fields to your form. When you’re finished, click the Paint Roller icon to adjust fonts, colors, layout, and theme.
3. Integrate the form with Pipedrive
In the open Form Builder, click Settings > Integrations and select Pipedrive.
Click Authenticate to connect your Pipedrive account with Jotform.

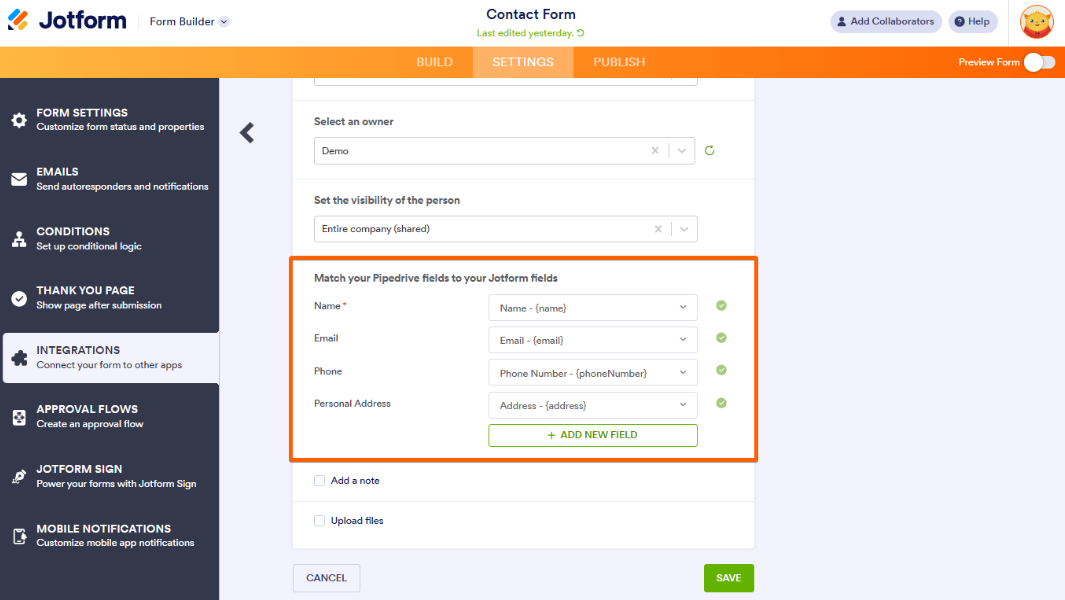
4. Select a Pipedrive action and map your form
Choose the action you want Jotform to take in Pipedrive when someone submits your Pipedrive web forms. Options include
- Add a deal
- Add a person
- Add an activity
Click Save. Then, match the Pipedrive fields with the fields you used in Jotform.
5. Finish the integration
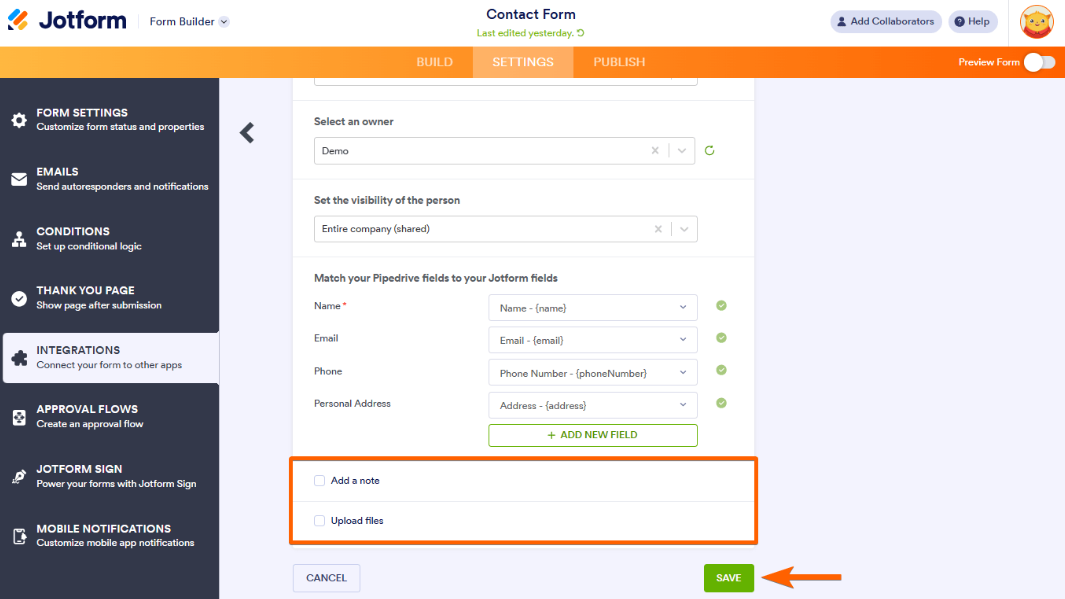
If you want Jotform to add notes or upload files to Pipedrive (such as a copy of the completed form), check the appropriate box. Click Save to complete the workflow.
Bonus: You can also prefill forms using data from Pipedrive, which allows the connect to work both ways and saves your team (and customers) time.
Why use Jotform to send form submissions to Pipedrive?
If you’re struggling to connect form data with your CRM using third-party integrations, it’s time to look for Google Forms alternatives. Jotform offers a wealth of valuable features and products that support your business.
With Jotform, you get access to over 20,000 pre-made templates, including contact forms, surveys, signup forms, onboarding forms, and more. You can customize each template to match your branding and data requirements, or create your own using our drag-and-drop builder.
Among our most popular form categories is lead generation. We offer over 1,200 lead generation templates to support your sales needs and collect contact details. You can connect each form with your Pipedrive CRM system, no workaround required.
For teams that manage form data in a spreadsheet format, Jotform Tables syncs data in one place from your preferred data sources, including forms, Excel, and CSV spreadsheets. Your team can view and manage Jotform Tables using shared links.
Jotform integrates with more than 250 tools without requiring third-party integration apps. These integrations include popular CRM systems such as HubSpot, Salesforce, and Zoho CRM, as well as payment processors such as Square, Stripe, and PayPal. Want to add new contacts from your intake forms to your mailing list? Jotform handles that automatically through marketing email integrations with Mailchimp, Constant Contact, and others.
For organizations looking to streamline their sales and marketing processes, Jotform is the go-to solution. Check out Jotform’s products and features today.
This article is for sales and marketing teams, CRM administrators, operations managers, and anyone who wants to automate lead capture from online forms into Pipedrive without wasting time on manual data entry.


")


")

: Which form builder is better for you?")


")


: Which is better for you?")


")


")


Send Comment: