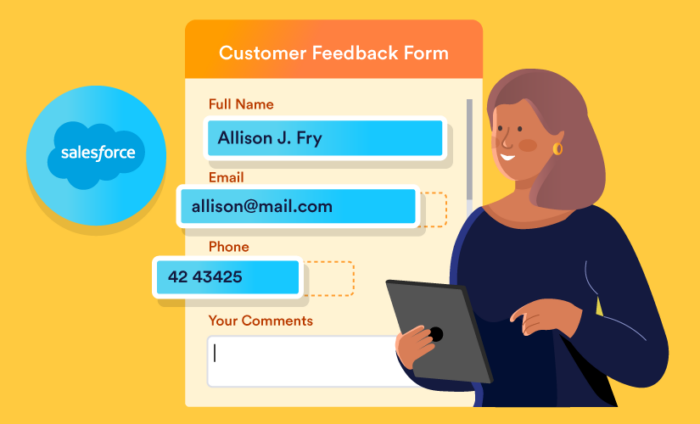
Whether you’re communicating with prospective customers or existing customers, what’s important is making their experience and interactions with your organization as valuable as possible. That’s why so many companies house their customer details in their Salesforce account.
Founded in 1999, Salesforce is perhaps the most well-regarded customer relationship management (CRM) solution in the industry, and we’re excited to announce our new Salesforce Prefill feature.
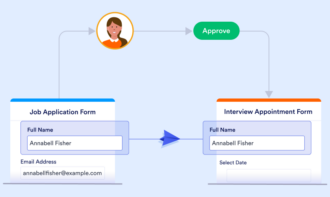
With Salesforce Prefill, you can now connect your forms in Jotform with your Salesforce contact and lead lists. Not only will your end users see their information pre-populated when you send them forms (creating a better customer experience and enabling higher form conversion), but any updated information they send back will automatically be piped into your Salesforce contact/lead list, eliminating manual work on your end.
For the first time, Jotform will be a centralized hub through which your data can flow back and forth, speeding up your projects and creating a much more efficient workflow.
Ready to start prefilling your forms? Let’s dive in.


Pro Tip
Try Jotform Salesforce Agent, an AI chatbot that connects to Salesforce, retrieves and updates any standard or custom object in real time, and records every interaction in integration logs.
How to prefill your form using your Salesforce account
Log into your Jotform account and open the form you’d like to prefill.
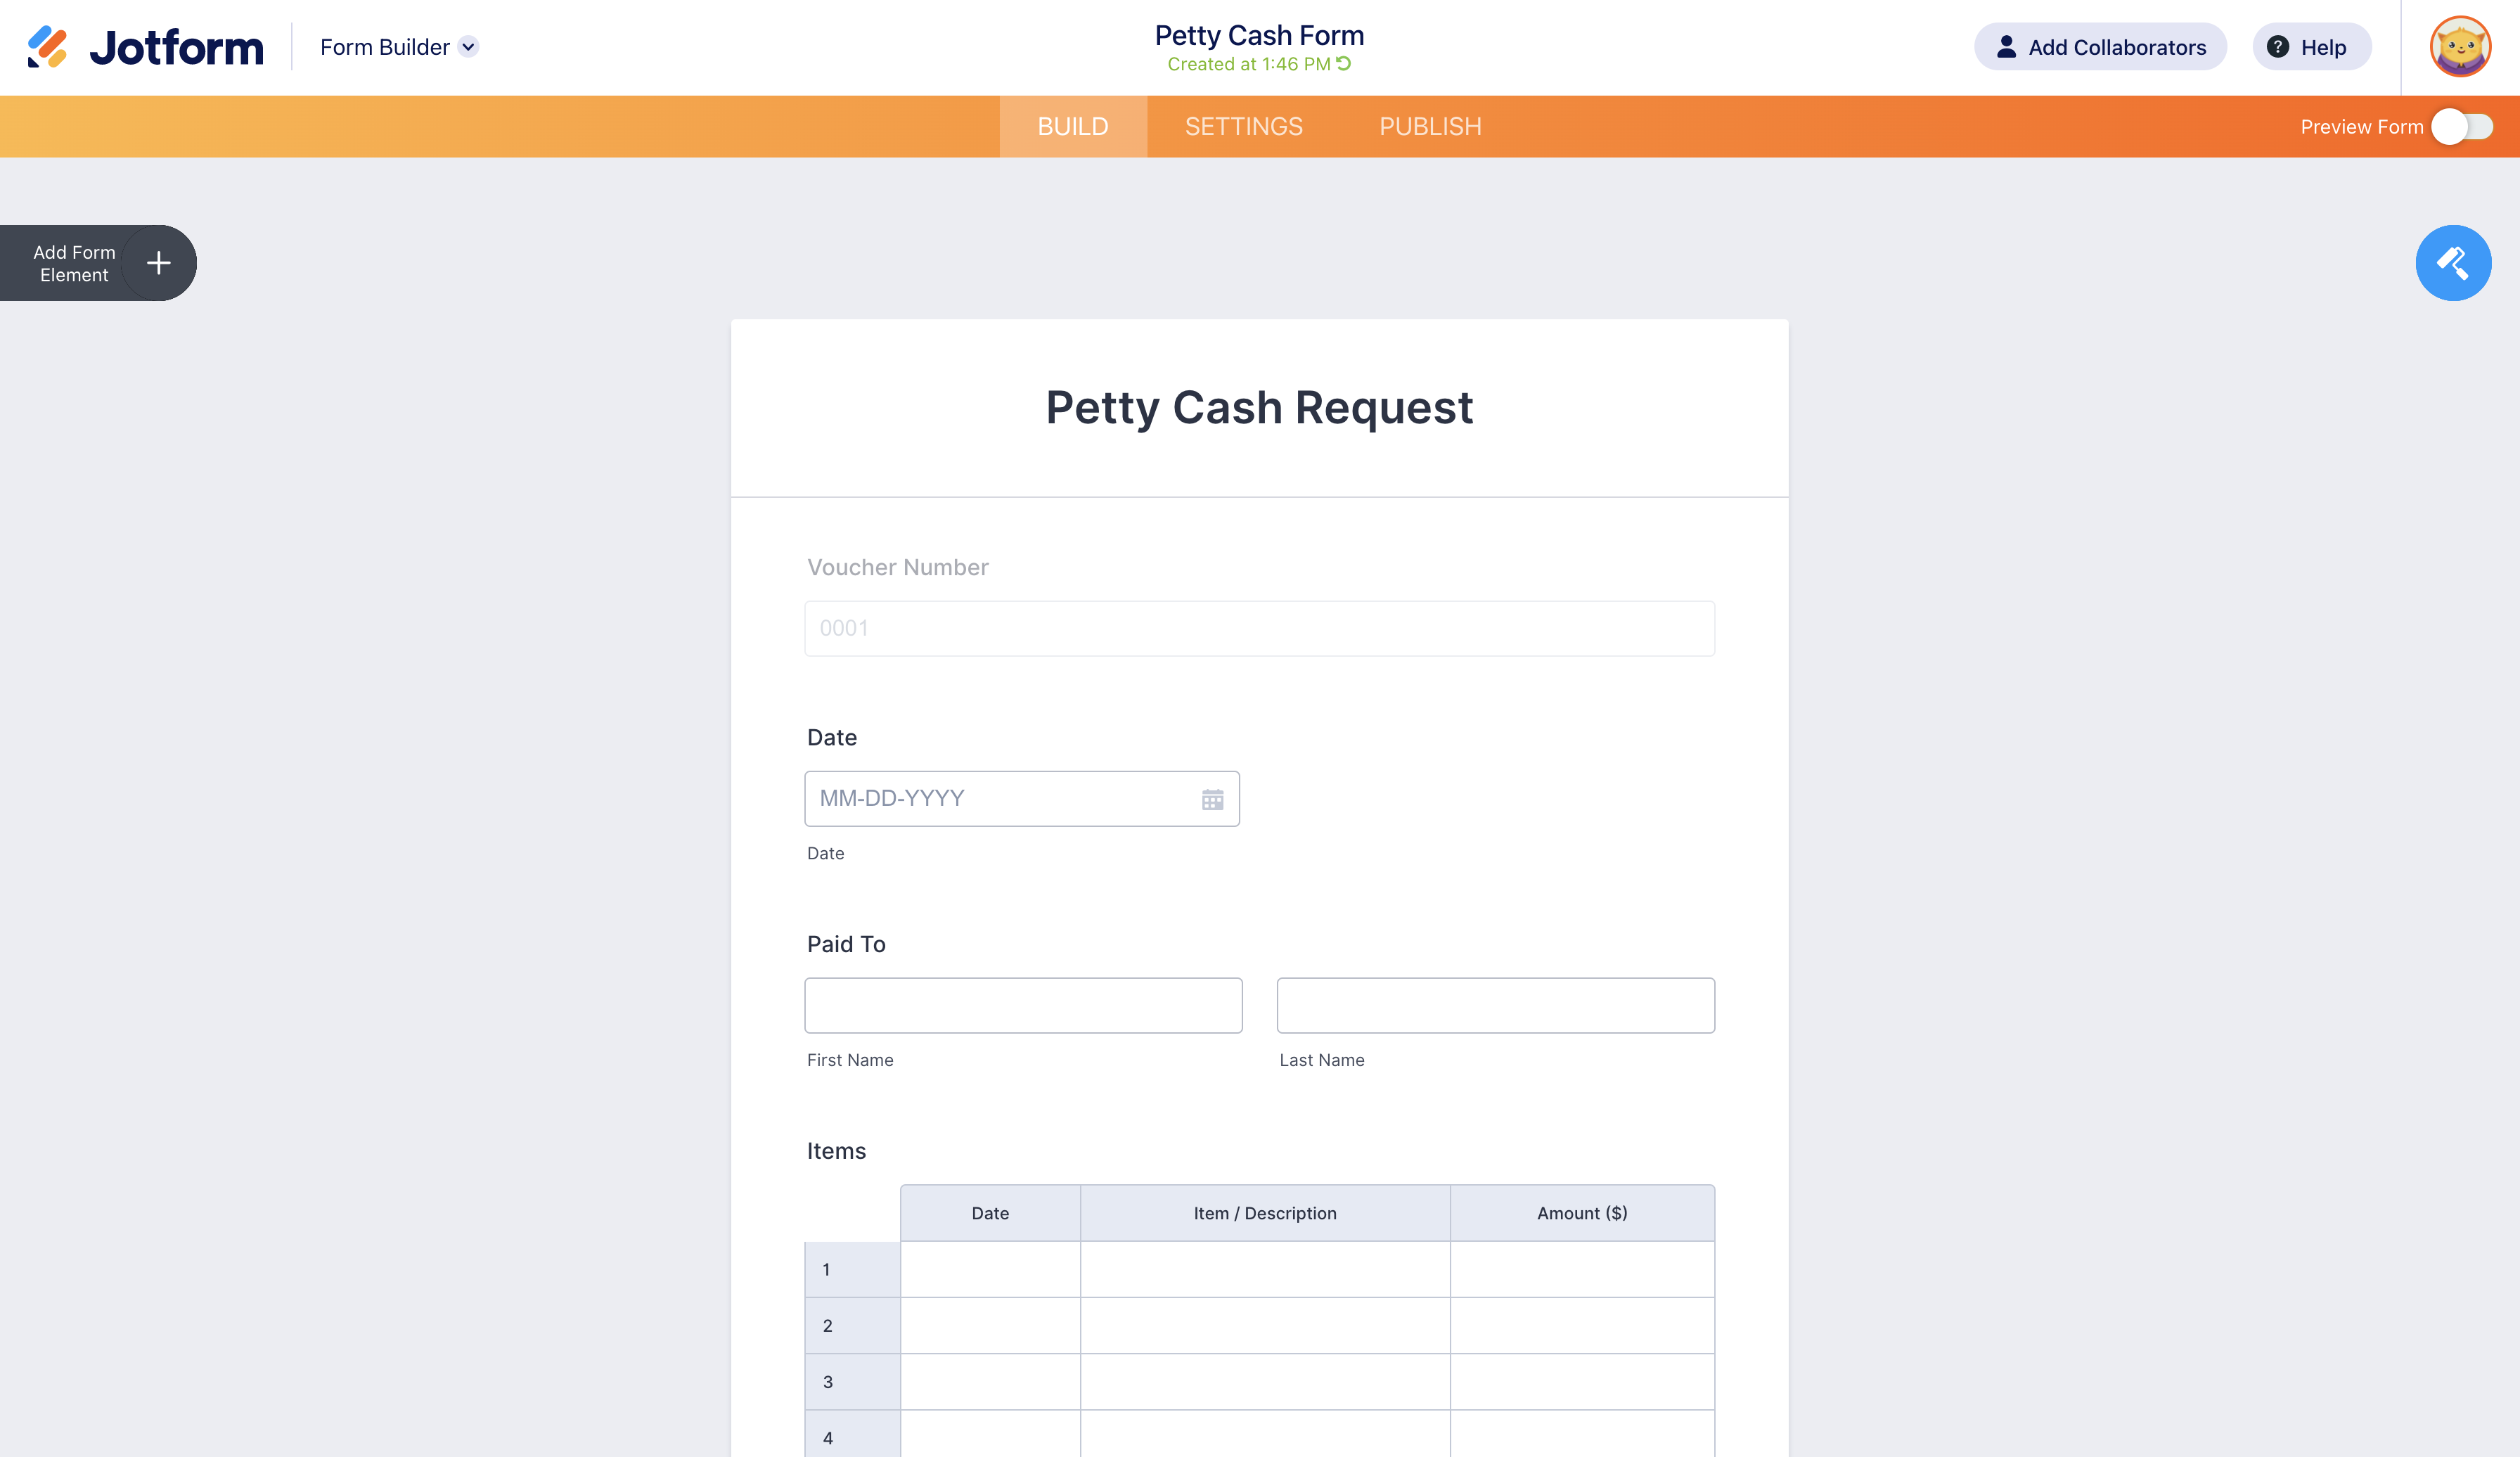
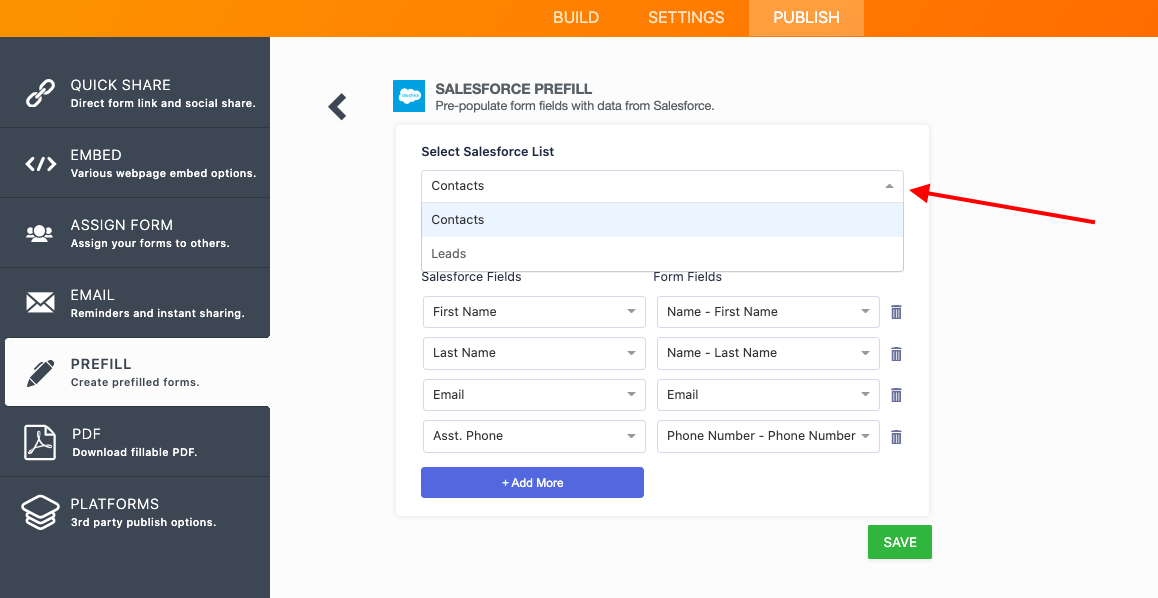
When your form is ready, head over to the Prefill section under the Publish tab.
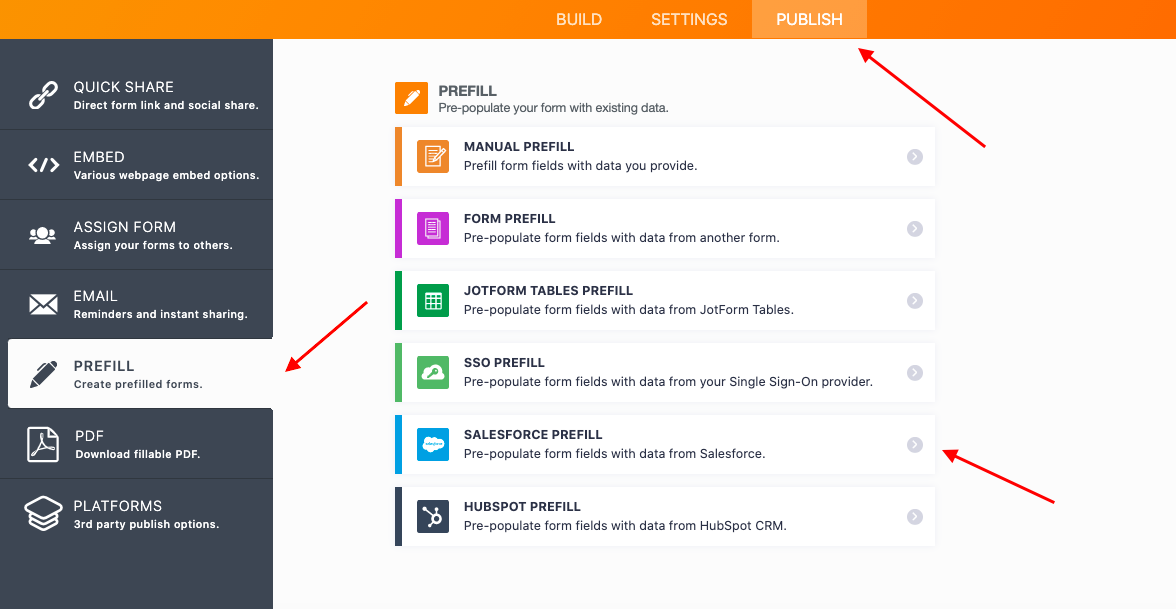
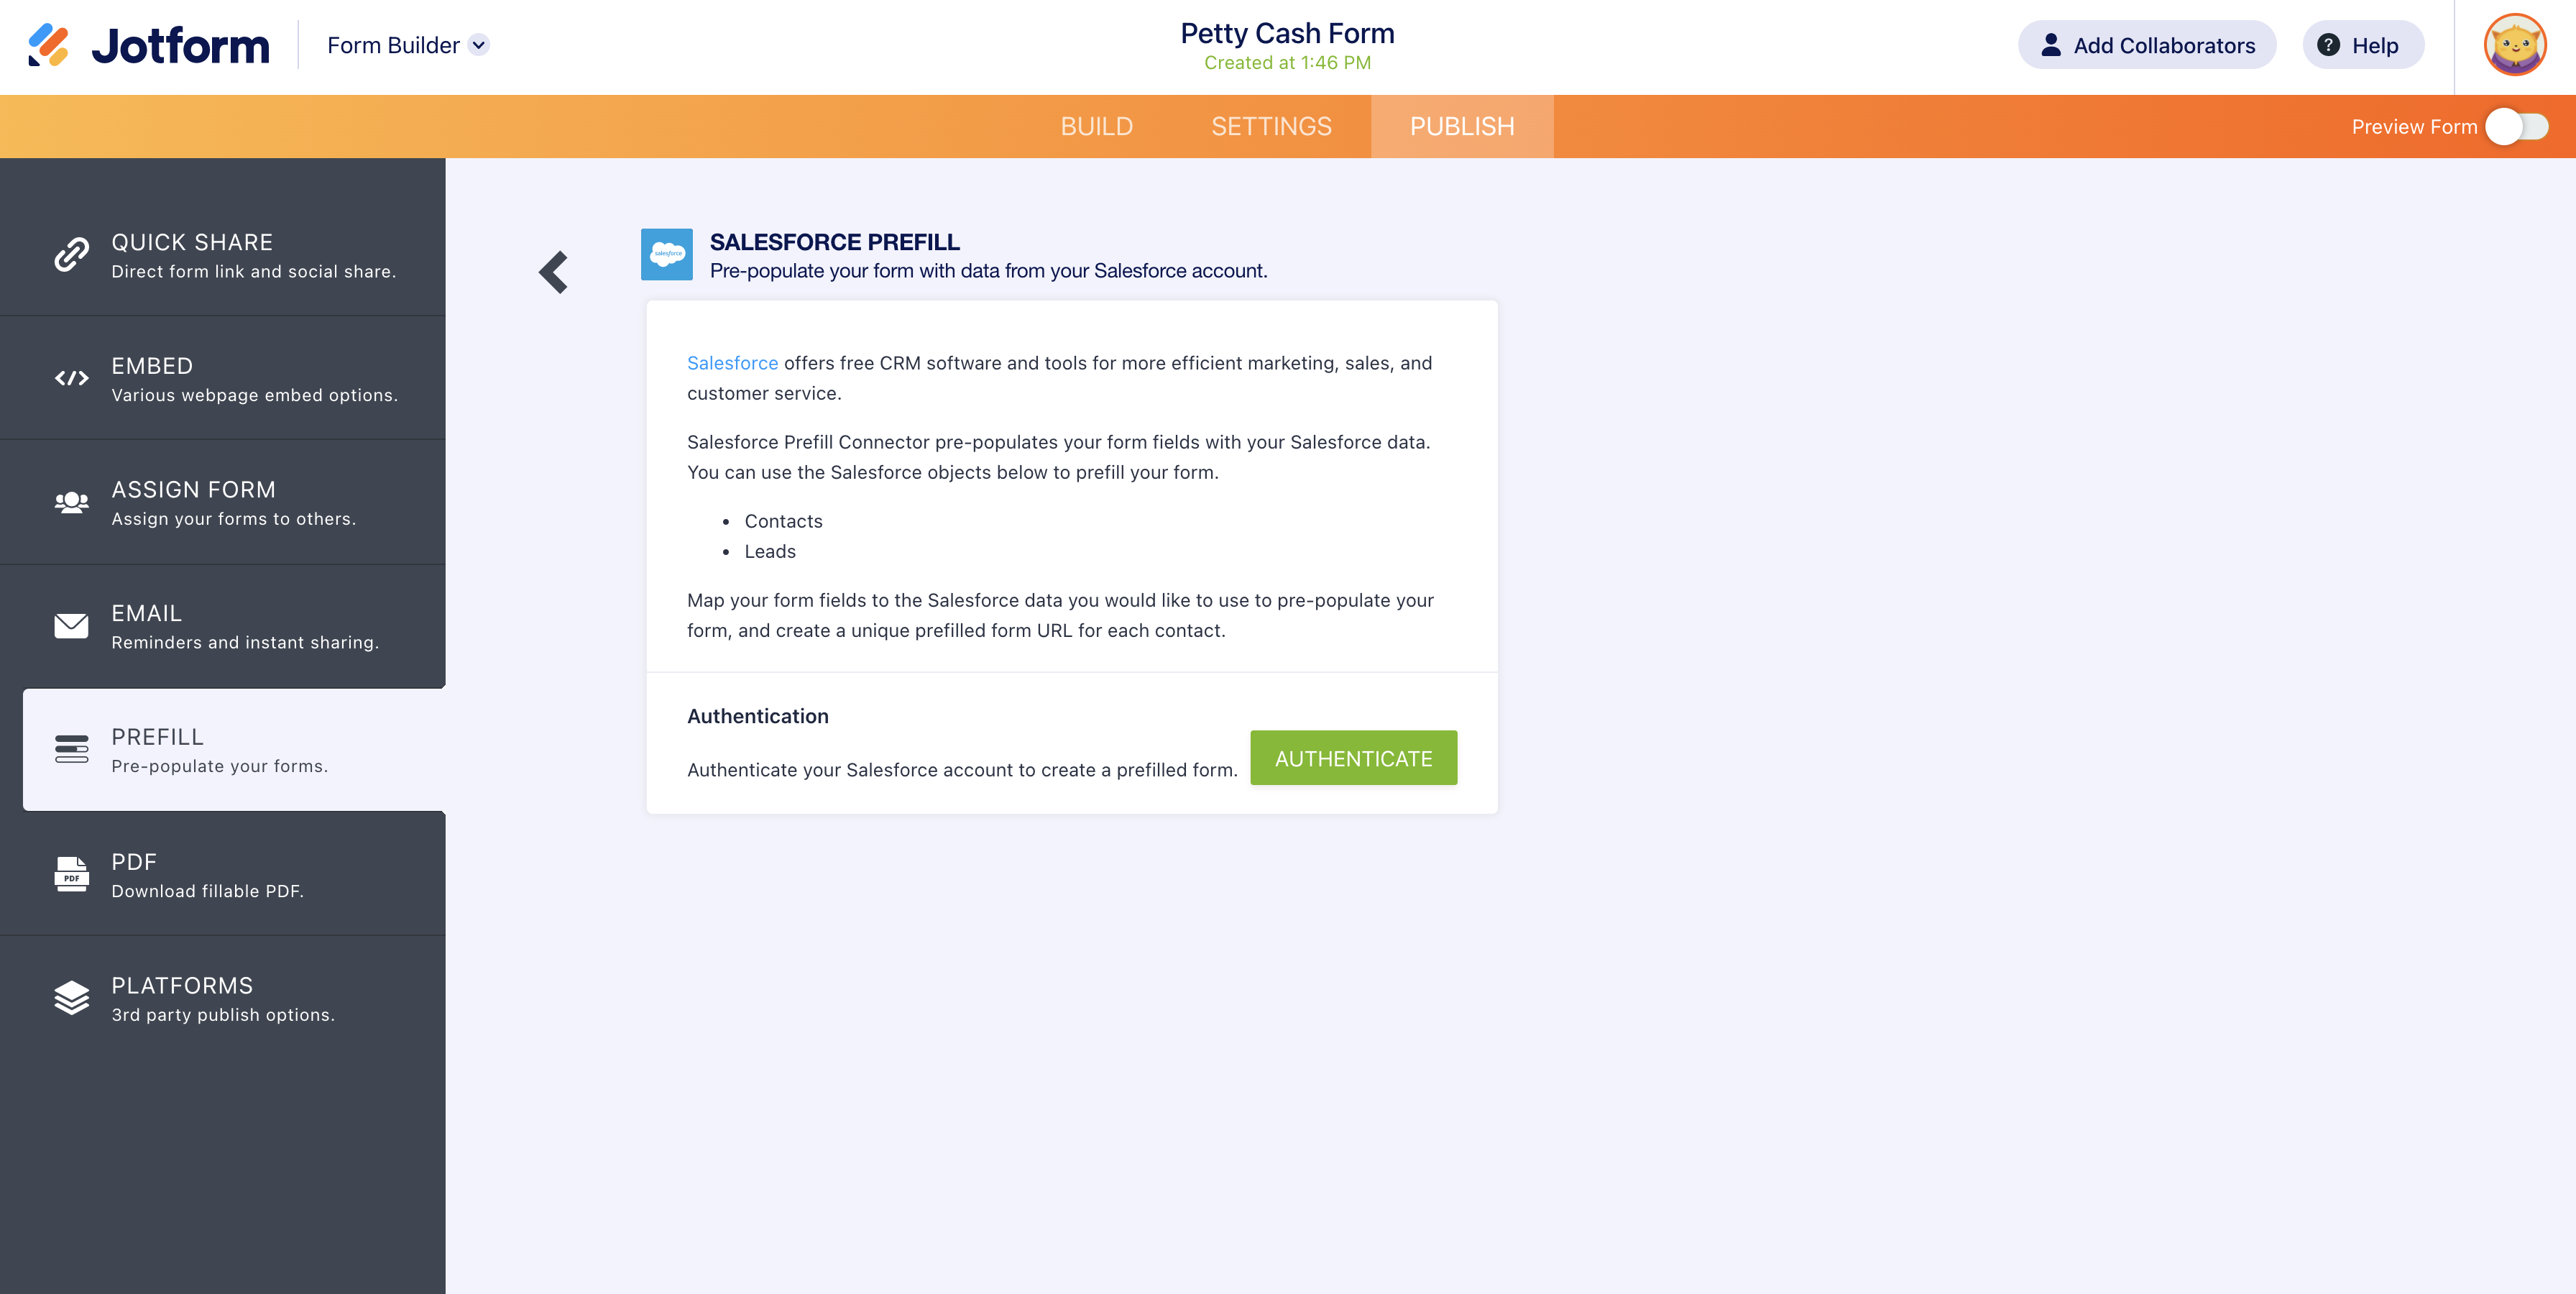
When you click on the Salesforce Prefill option, you’ll be prompted to authenticate your account, essentially linking your Salesforce contacts and leads to your form. In addition to logging in, you’ll also need to enter the separate 2FA (two factor authentication) code sent to your email for additional security.
Once your account is authenticated, select either Contacts or Leads in the dropdown menu. After you make your selection, your Salesforce contact/lead fields and form fields will be synced automatically.
If you’d like to match more fields, click on the Add More button and match them manually. You can delete fields by clicking the trash can icon to the right of each one. When you’ve set up the fields you want, click Save.
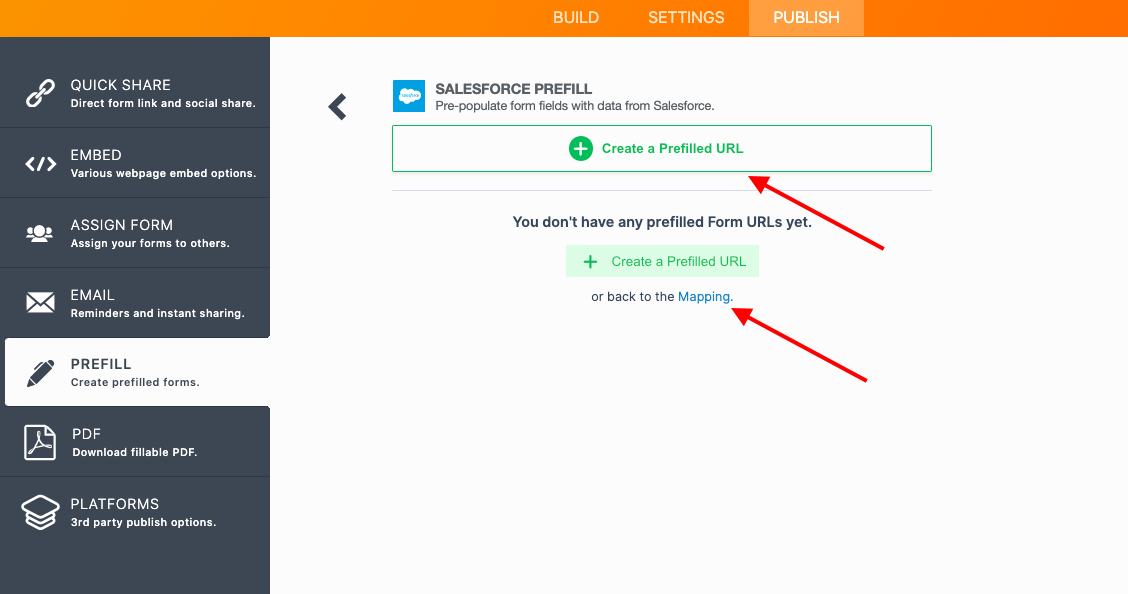
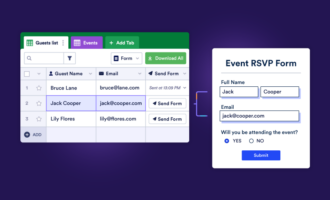
Click Create a Prefilled URL to generate a prefilled form link for each record in the Salesforce list, or click the Mapping link to go back to your Salesforce and form field settings.
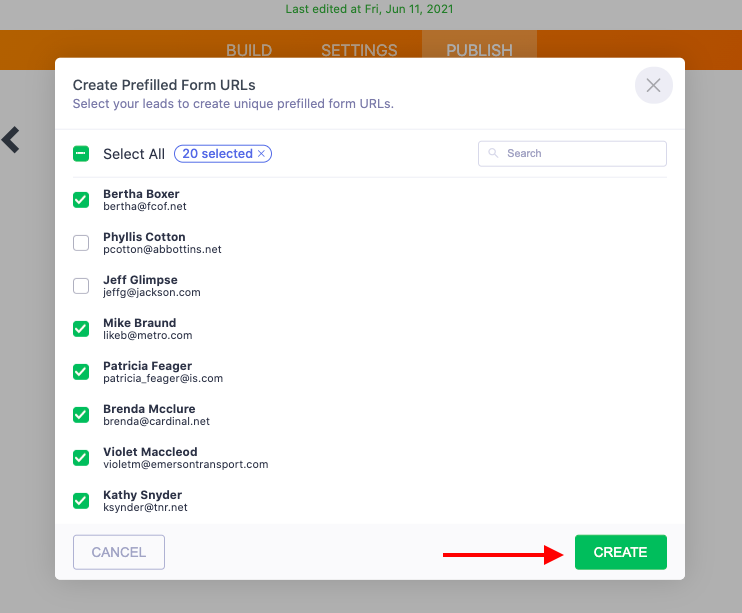
Next, a popup view of the contact or lead records will appear. You can select individual or multiple records (currently, you can select a maximum of 20 records). After making your selections, click the Create button. Prefilled URLs will be generated for each contact record.
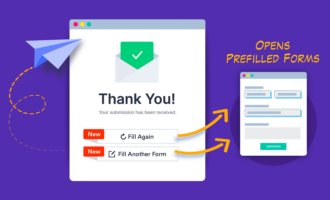
One of the benefits of having a two-way data flow between Jotform and Salesforce is clearing the way for your contacts and leads to automatically update their information in Salesforce — through forms — so you don’t have to.
We’ve set the default to allow your recipient to edit prefilled form fields. You can select read-only mode to prevent editing of prefilled fields. If read-only is selected, end users cannot change the prefilled information.
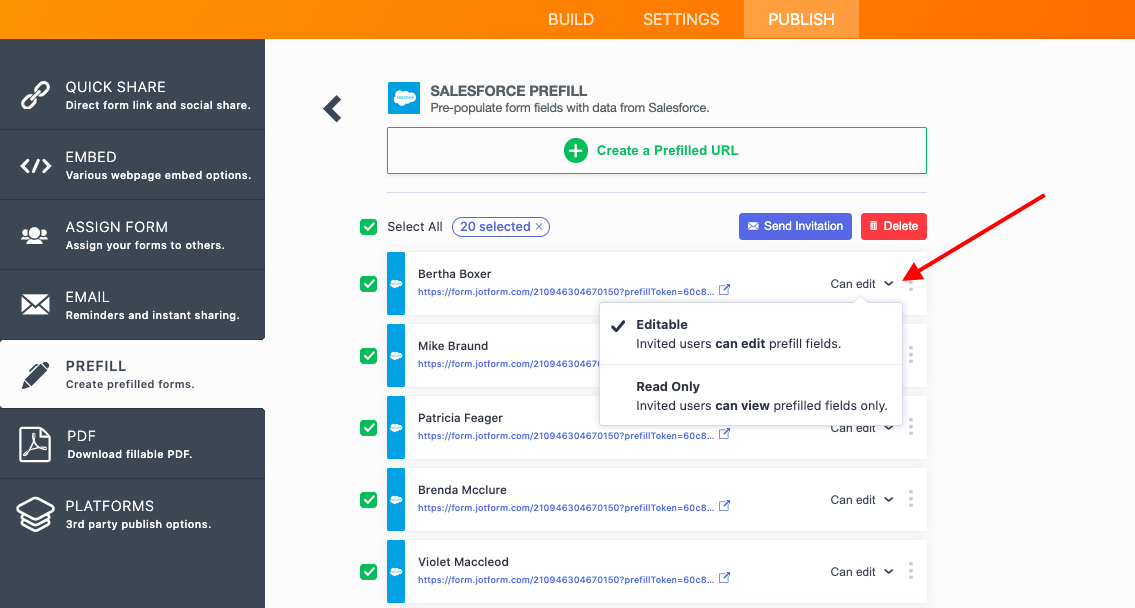
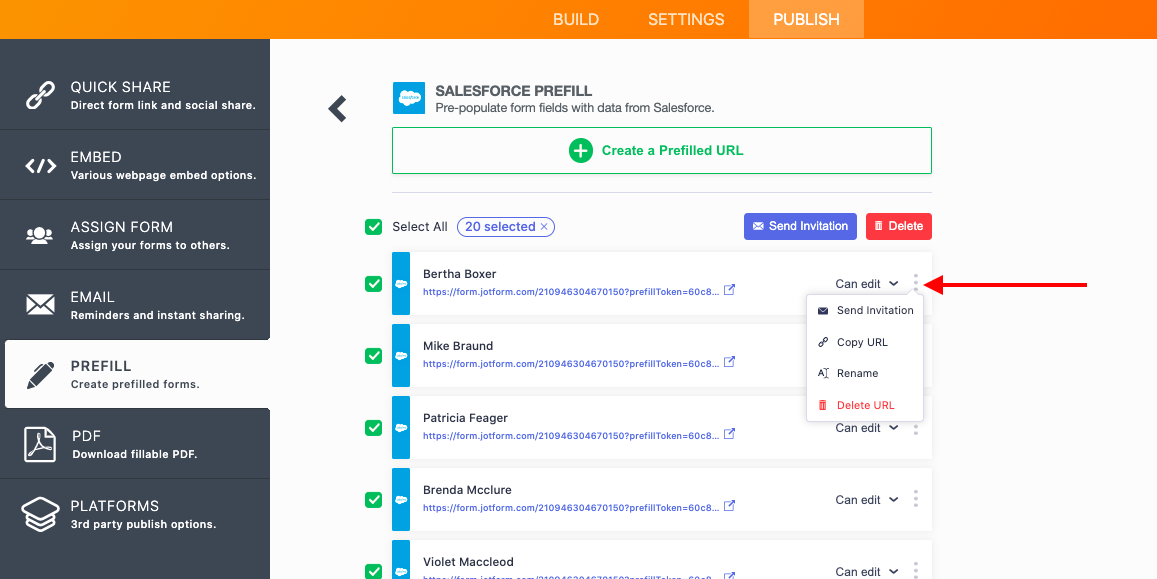
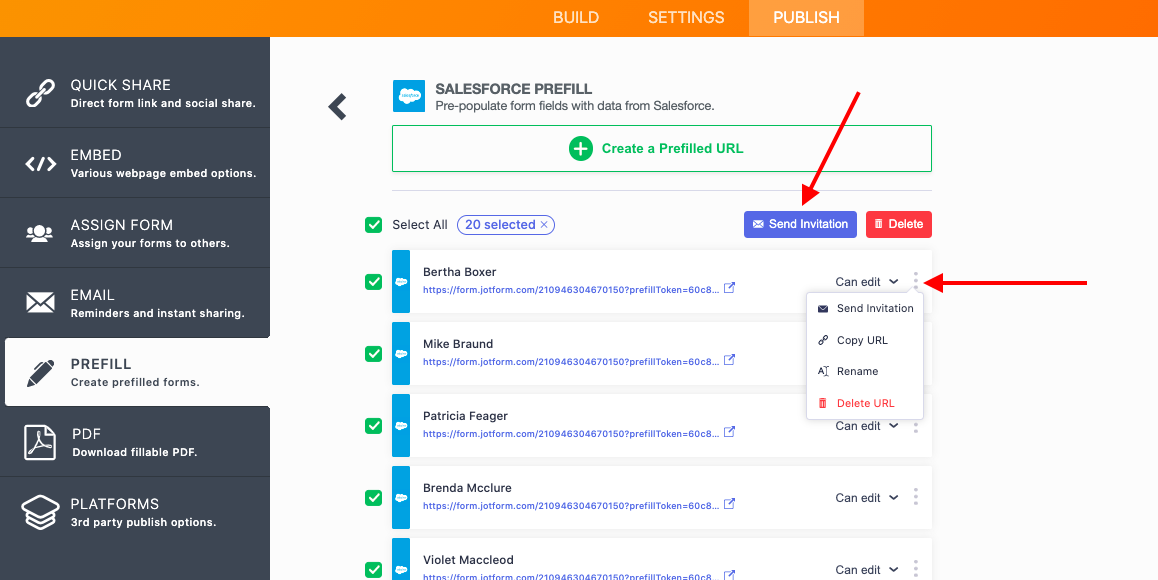
Also, by clicking the vertical ellipsis on the right, you can copy the URL, rename your recipient, or delete the URL.
You can preview the prefilled form by clicking the URL under the form user’s name.

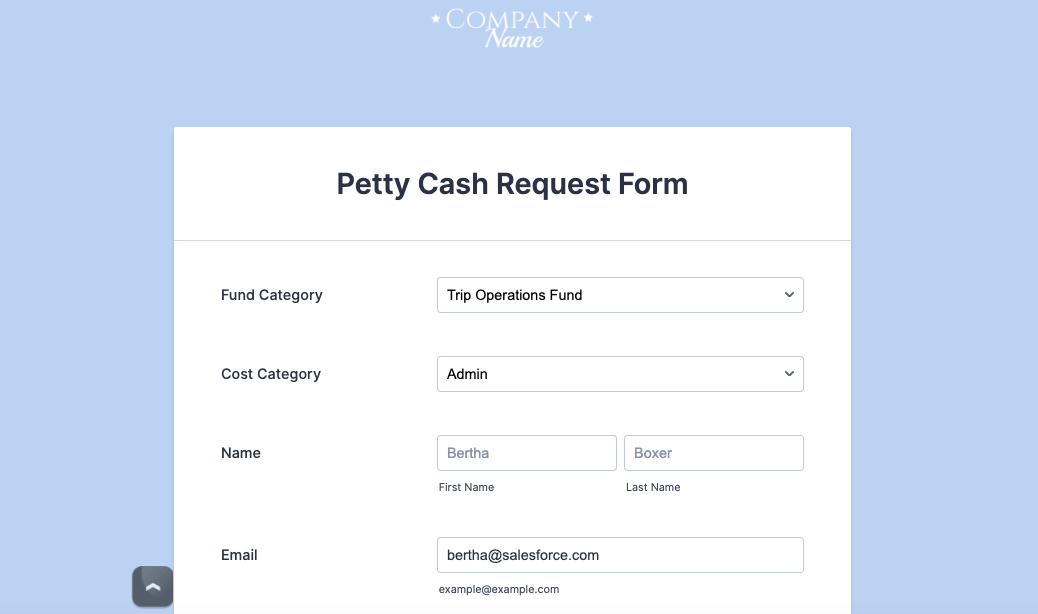
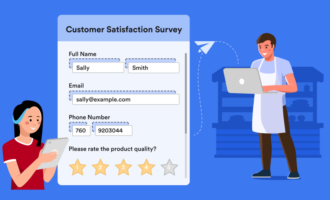
When your end user receives your form, the associated data from your prefilled matches will appear in the contact details.
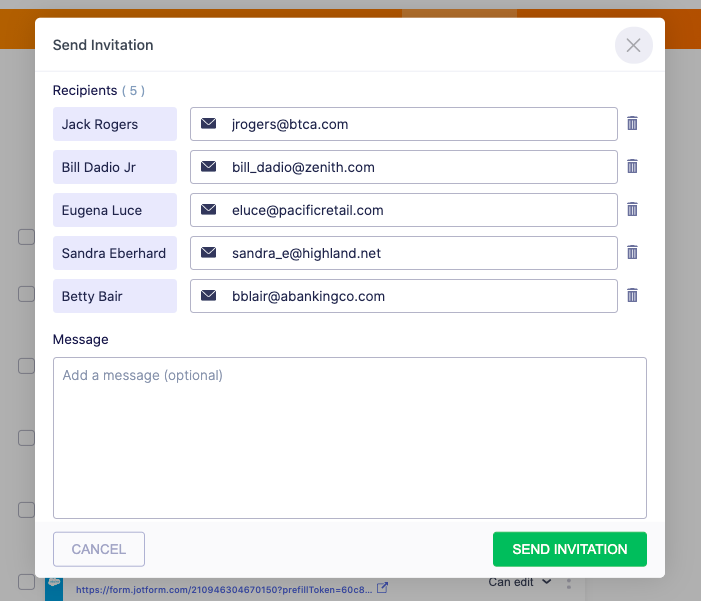
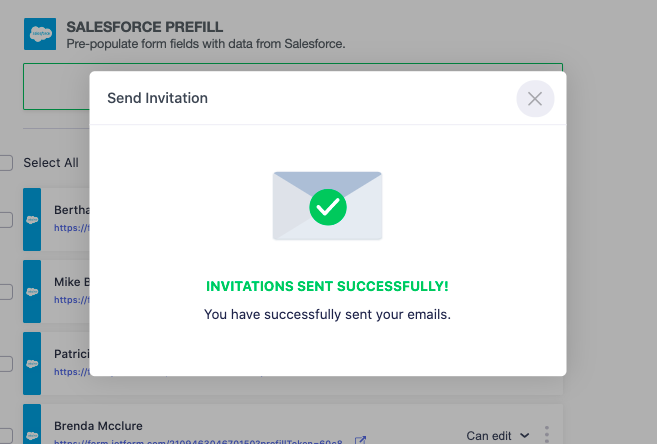
You can send the prefilled forms to your recipient(s) in two ways. Either select the checkbox next to a row and click the blue Send Invitation button above, or click the vertical ellipsis on the right and click the Send Invitation button on the menu.
You can then send the prefilled form email directly to the email address from the form or change the recipient’s address manually.
If you want to delete the generated prefilled URLs from your list after sending them, click the checkbox next to the URL you want to delete (or click Select All) and then click the Delete button. All selected URLs will be cleared.
Once the form is submitted, you’ll have access to the new and/or updated recipient data in your Jotform account, and it will be piped into your Salesforce database where you can take action based on your CRM logic.
7 benefits of Jotform’s Salesforce Prefill feature
The prefill feature extends the functionality of your Salesforce Integration with Jotform, helping you work more efficiently during contact updates and lead engagements.
Here are seven ways you can use the Jotform prefill feature for Salesforce to boost your team’s productivity and maintain data integrity:
- Automatically update Salesforce contacts or company details
- Securely send prefilled data to users by using token-generated URLs
- Establish viable sales leads by using existing Salesforce contact or lead lists
- Prevent duplicate data records by having sources update their own records
- Increase form conversion rates for event registrations, webinars, and other gatherings
- Troubleshoot customer and contact issues quickly and more efficiently
- More easily leverage AI innovations like Einstein, Salesforce’s comprehensive AI for CRM, that helps sales convert more prospects to buyers
Some popular use cases for Salesforce Prefill
Here are just two of the scenarios where Salesforce Prefill and the two-way data flow it enables can solve your nuanced data-collection needs.
Scenario 1
Your nonprofit uses Salesforce to manage relationships with employees, volunteers, and donors, helping you mobilize people around your cause through communication. When you need to raise money, or when an emergency strikes, sending prefilled forms to your contacts saves everyone precious time. It also captures the updated data of the folks you depend upon so everyone has accurate details in a pinch.
Scenario 2
You’re a direct-to-consumer retail furniture company with a database of clients whose contacts and purchasing history are your bread and butter. By pulling their pre-confirmed details and product preferences from Salesforce into your form, you make it easy for your customers to update their information — including which product options they’re likely to engage with — in the Salesforce platform. This lead info is then assigned to the appropriate owner for follow up.
Try Jotform’s Salesforce Prefill feature today.


Send Comment: