
Slack is built for quick communication, but channels can get cluttered fast when every update, request, and reminder has to be handled manually. Once you understand the basics of how to use Slack, workflows can help you automate routine tasks directly inside your channels.
What is a workflow in a Slack channel?
A Slack workflow lets you automate repeatable tasks inside a channel, such as welcoming new members and sending reminders. Instead of assigning someone to remember these routine tasks, an automated workflow keeps the process moving.
For example, you could create a workflow that does the following:
- Sends a welcome message when someone joins a project channel
- Collects support requests from teammates
- Posts daily or weekly reminders
- Routes approval requests to the right person
- Shares form responses in a specific channel
- Starts an onboarding checklist for new employees
Workflows are especially useful in busy channels because they keep information organized and consistent.
How to add a workflow to a Slack channel
Slack workflows are created in Workflow Builder. The options you see vary according to your workspace permissions and Slack plan, but the process is the same.
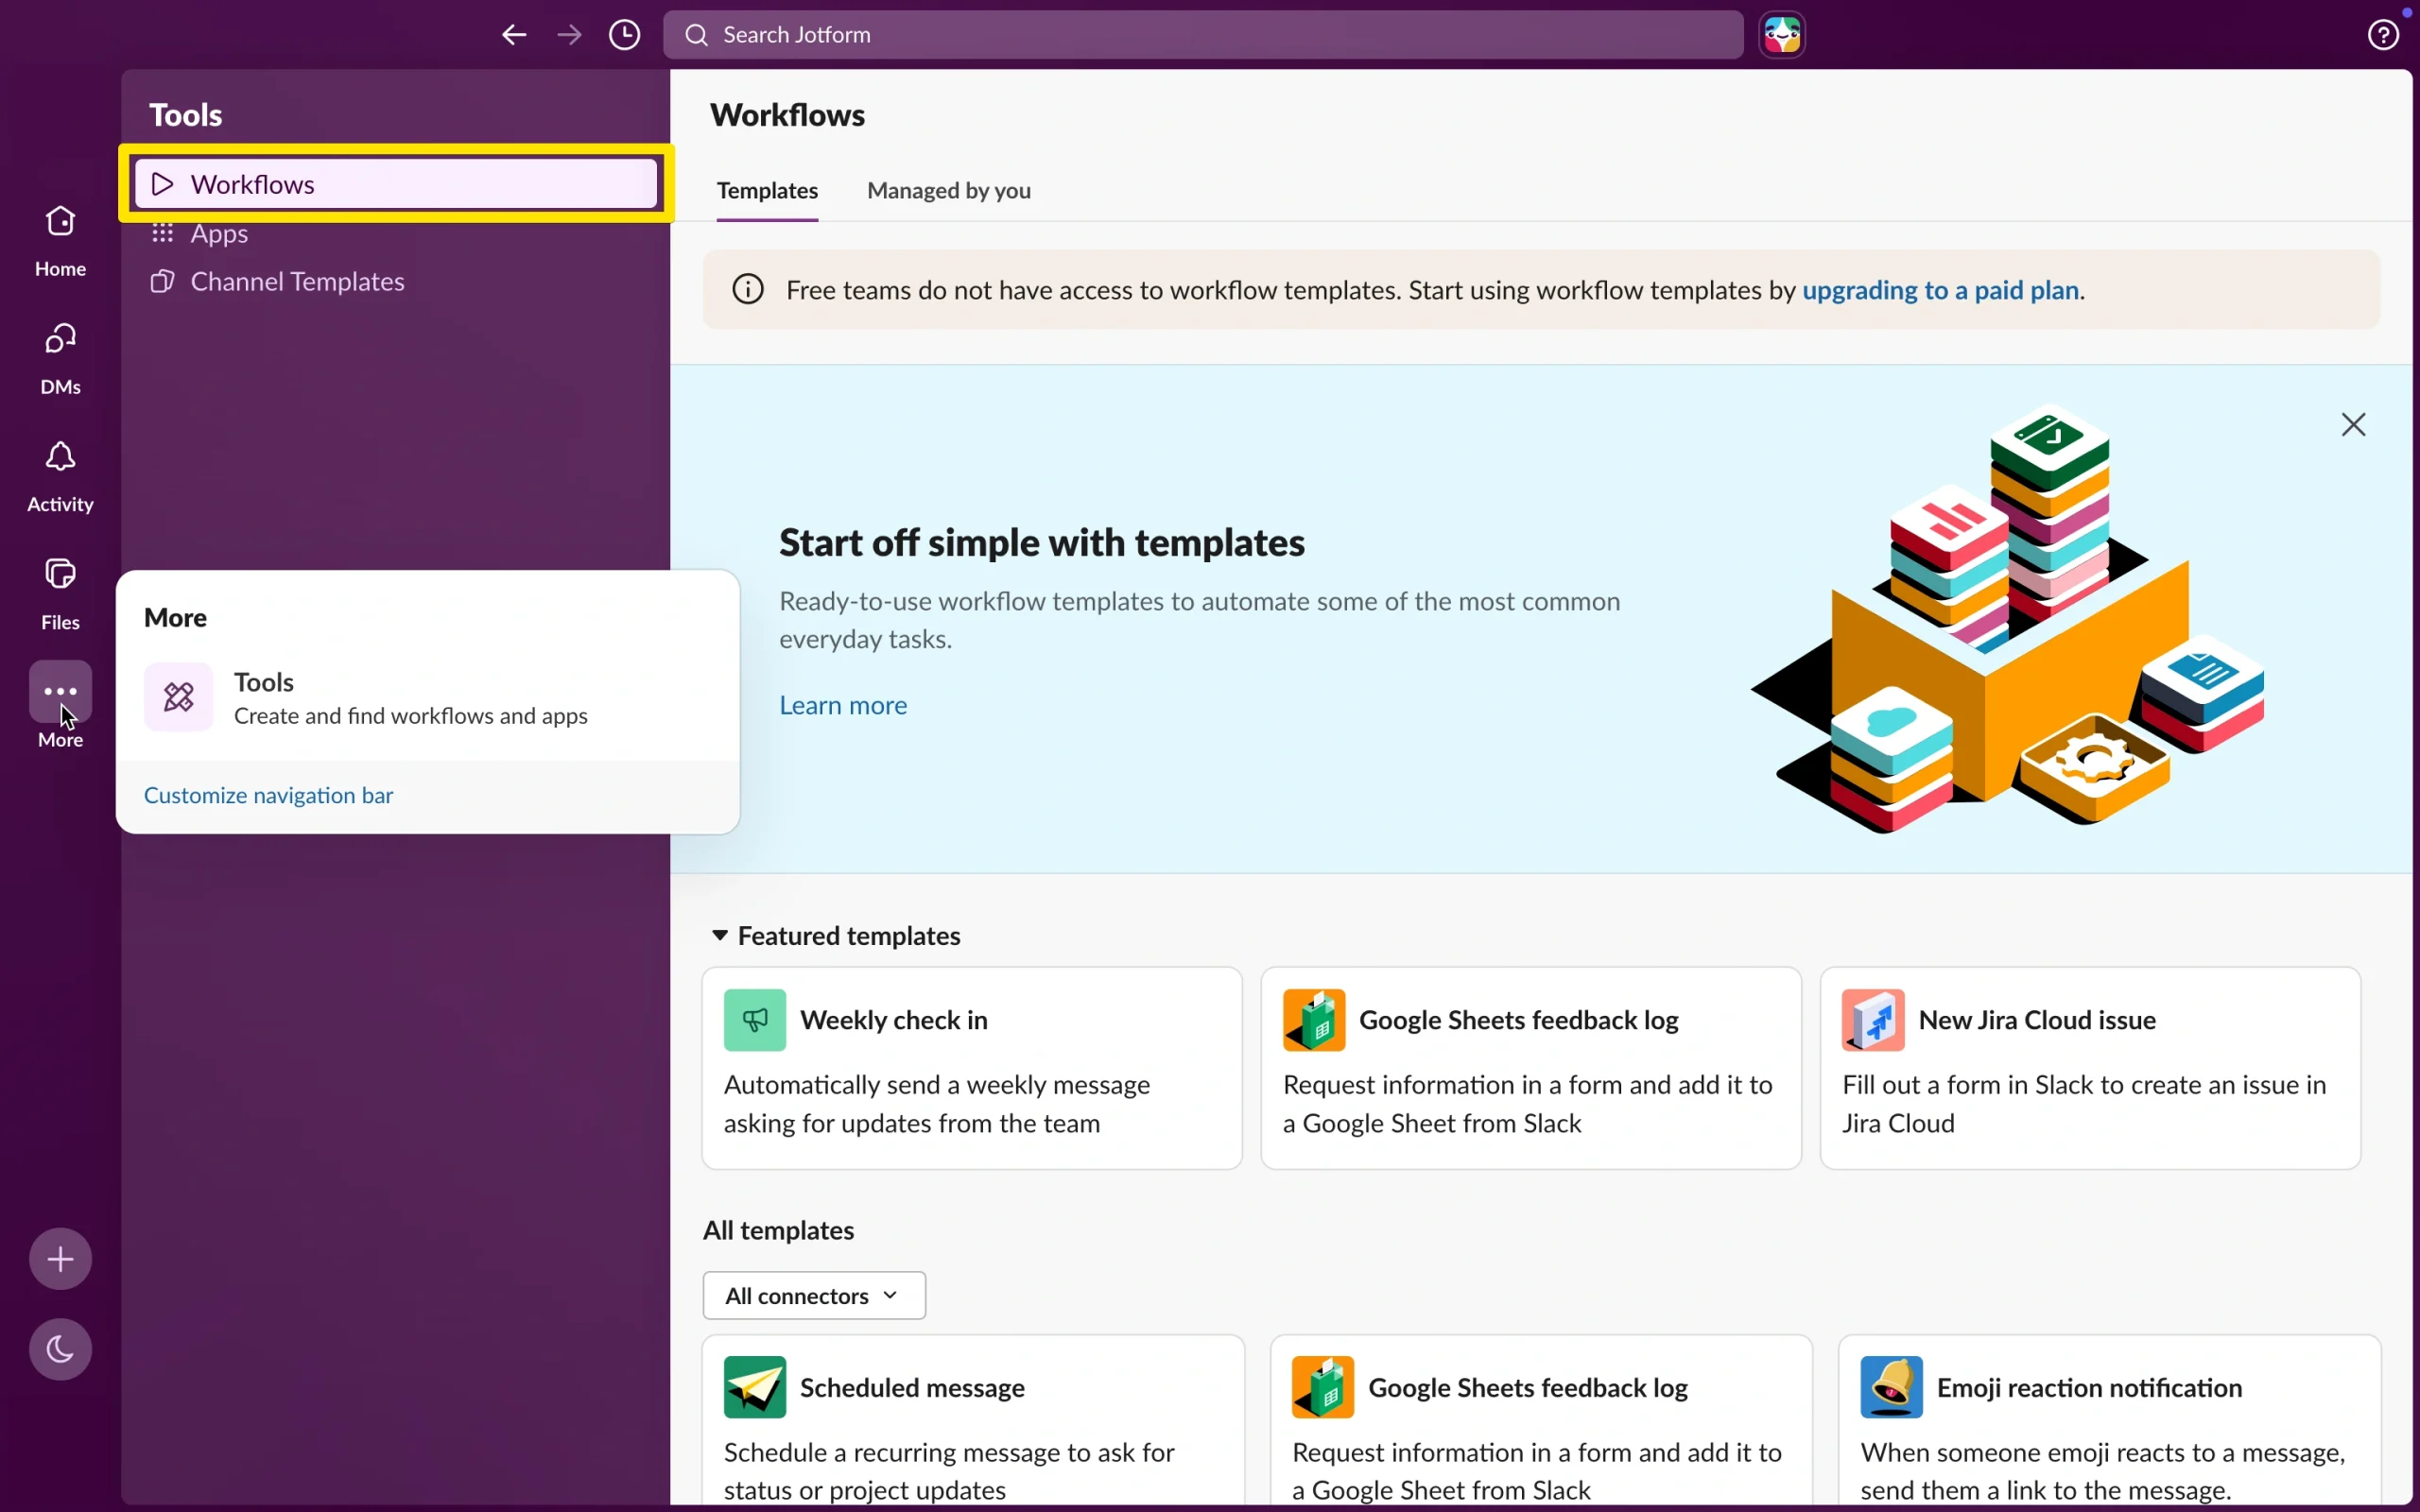
Step 1: Open Workflow Builder
From your Slack desktop app, click Tools in the sidebar. If you don’t see it, click More first. Then select Workflows.
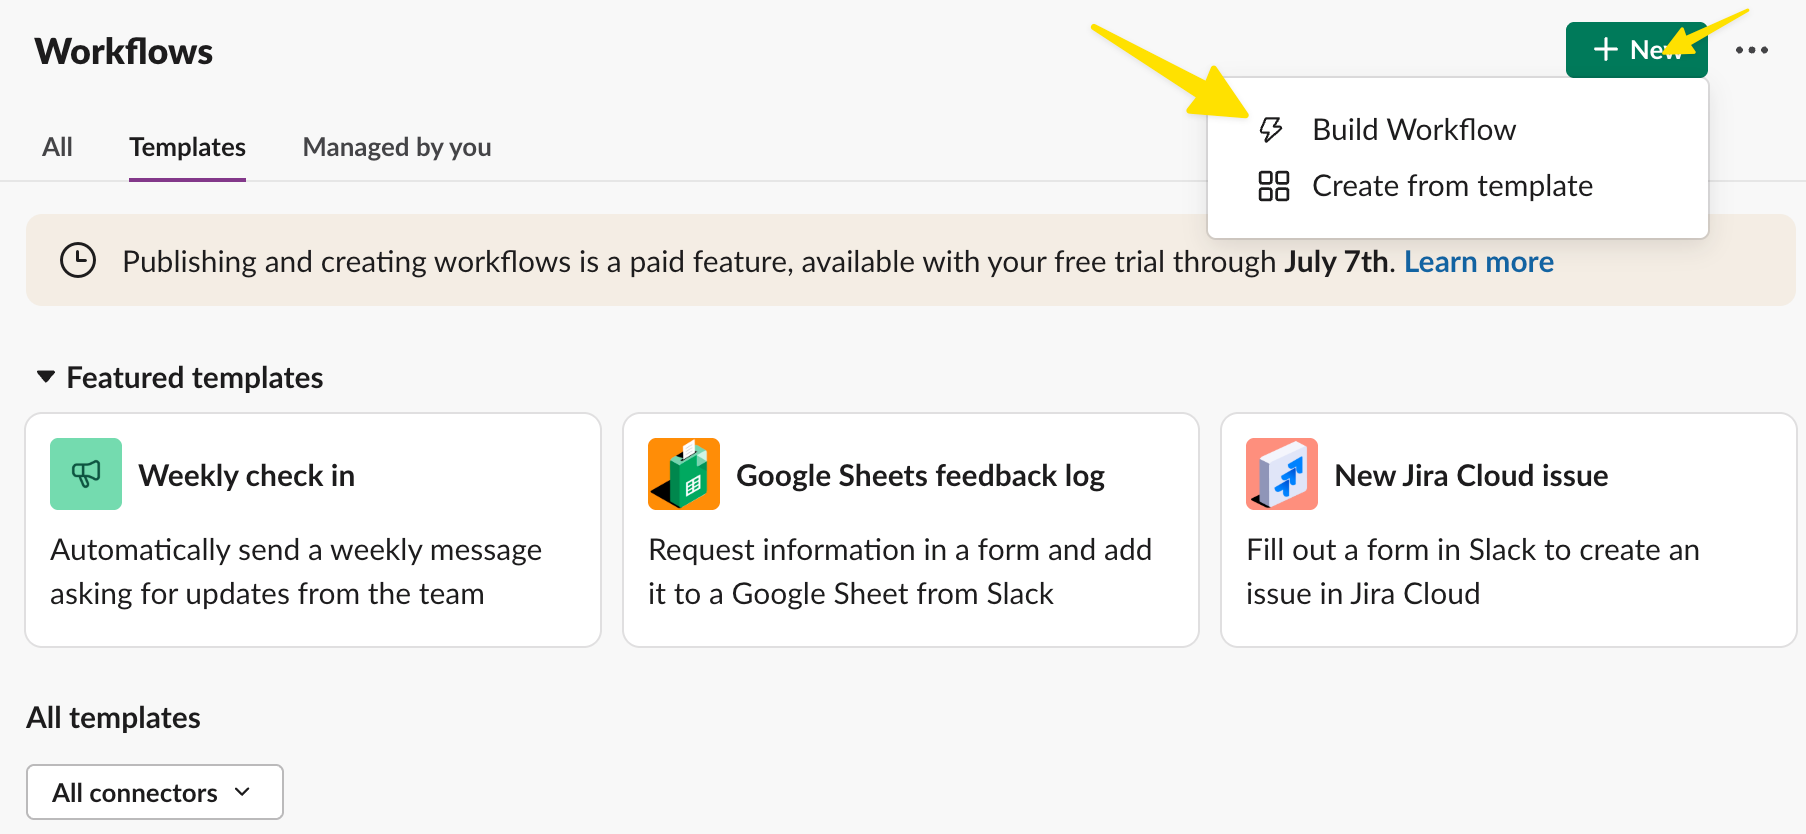
From there, click New, then click Build Workflow or Create from Template to start building a new automation.
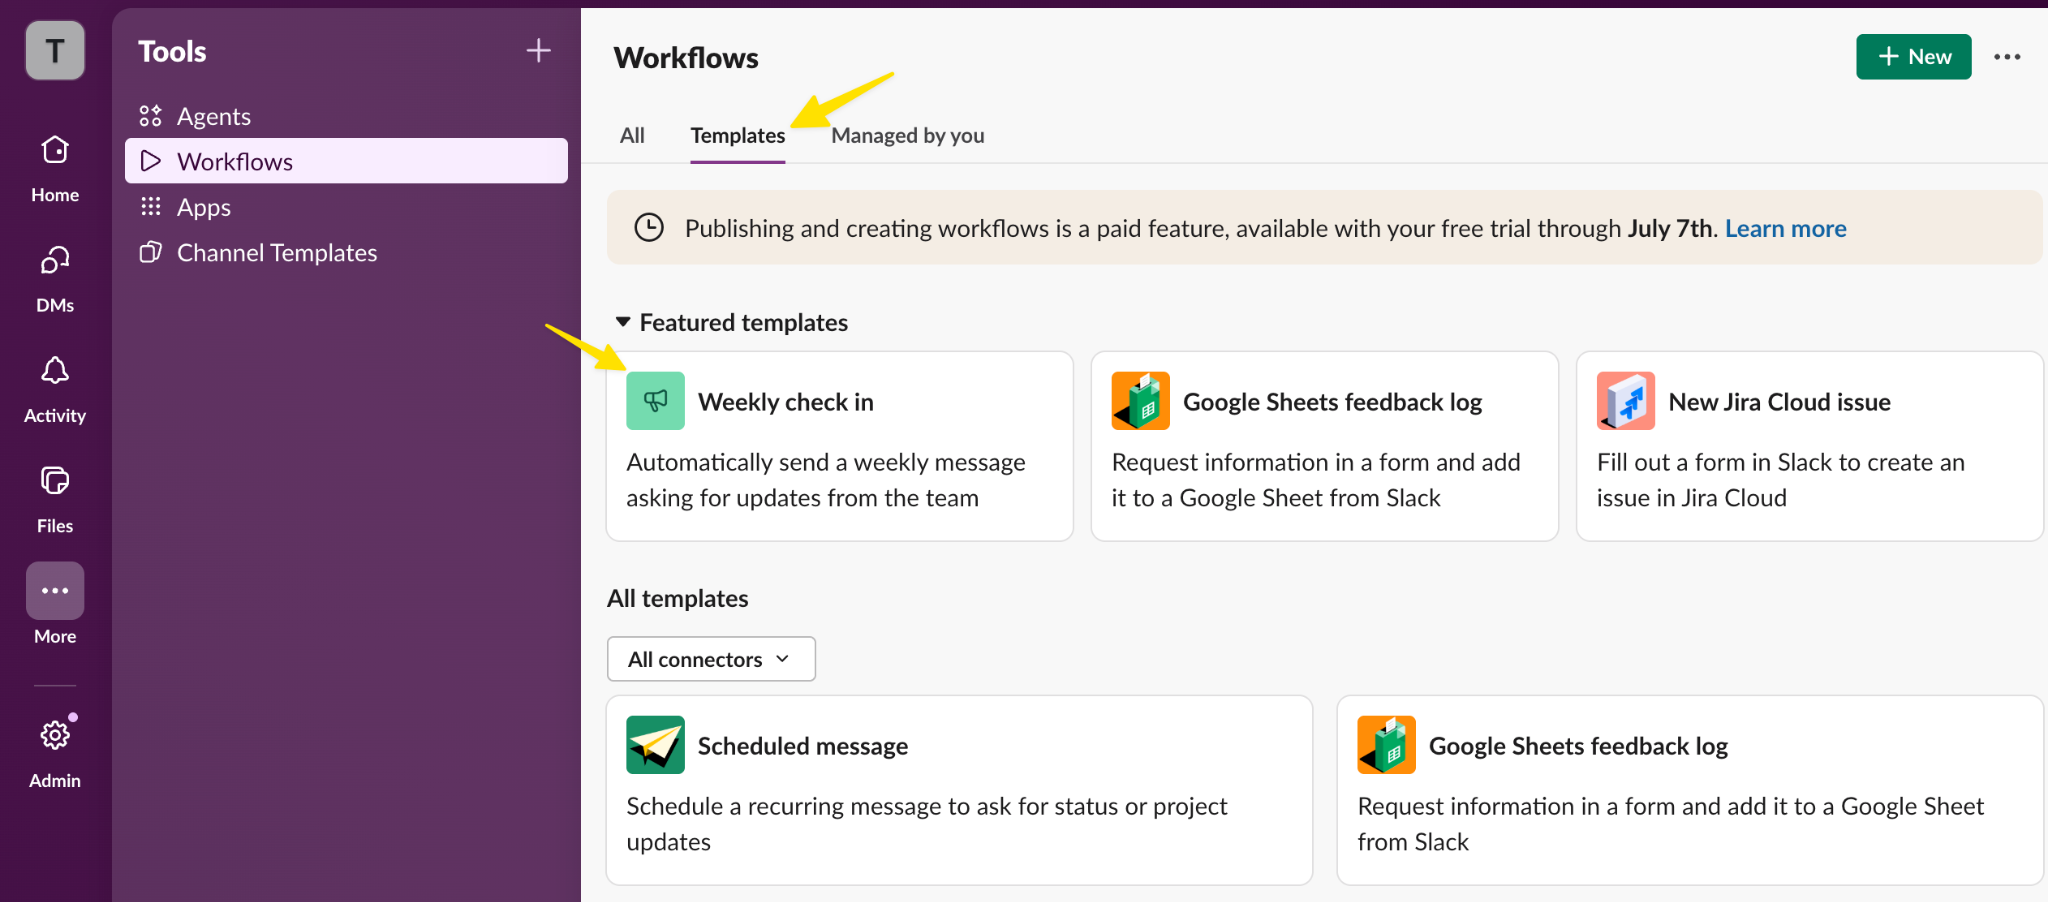
Step 2: Choose how you want to build the workflow
Slack gives you a few ways to start. You can build from scratch, use a template, or use AI-assisted workflow creation if it’s available in your workspace.
If you’re new to Slack workflows, templates are often the easiest option. They give you a prebuilt structure for common use cases, such as sending a weekly check-in.
For a more customized workflow, choose New and select Build Workflow.
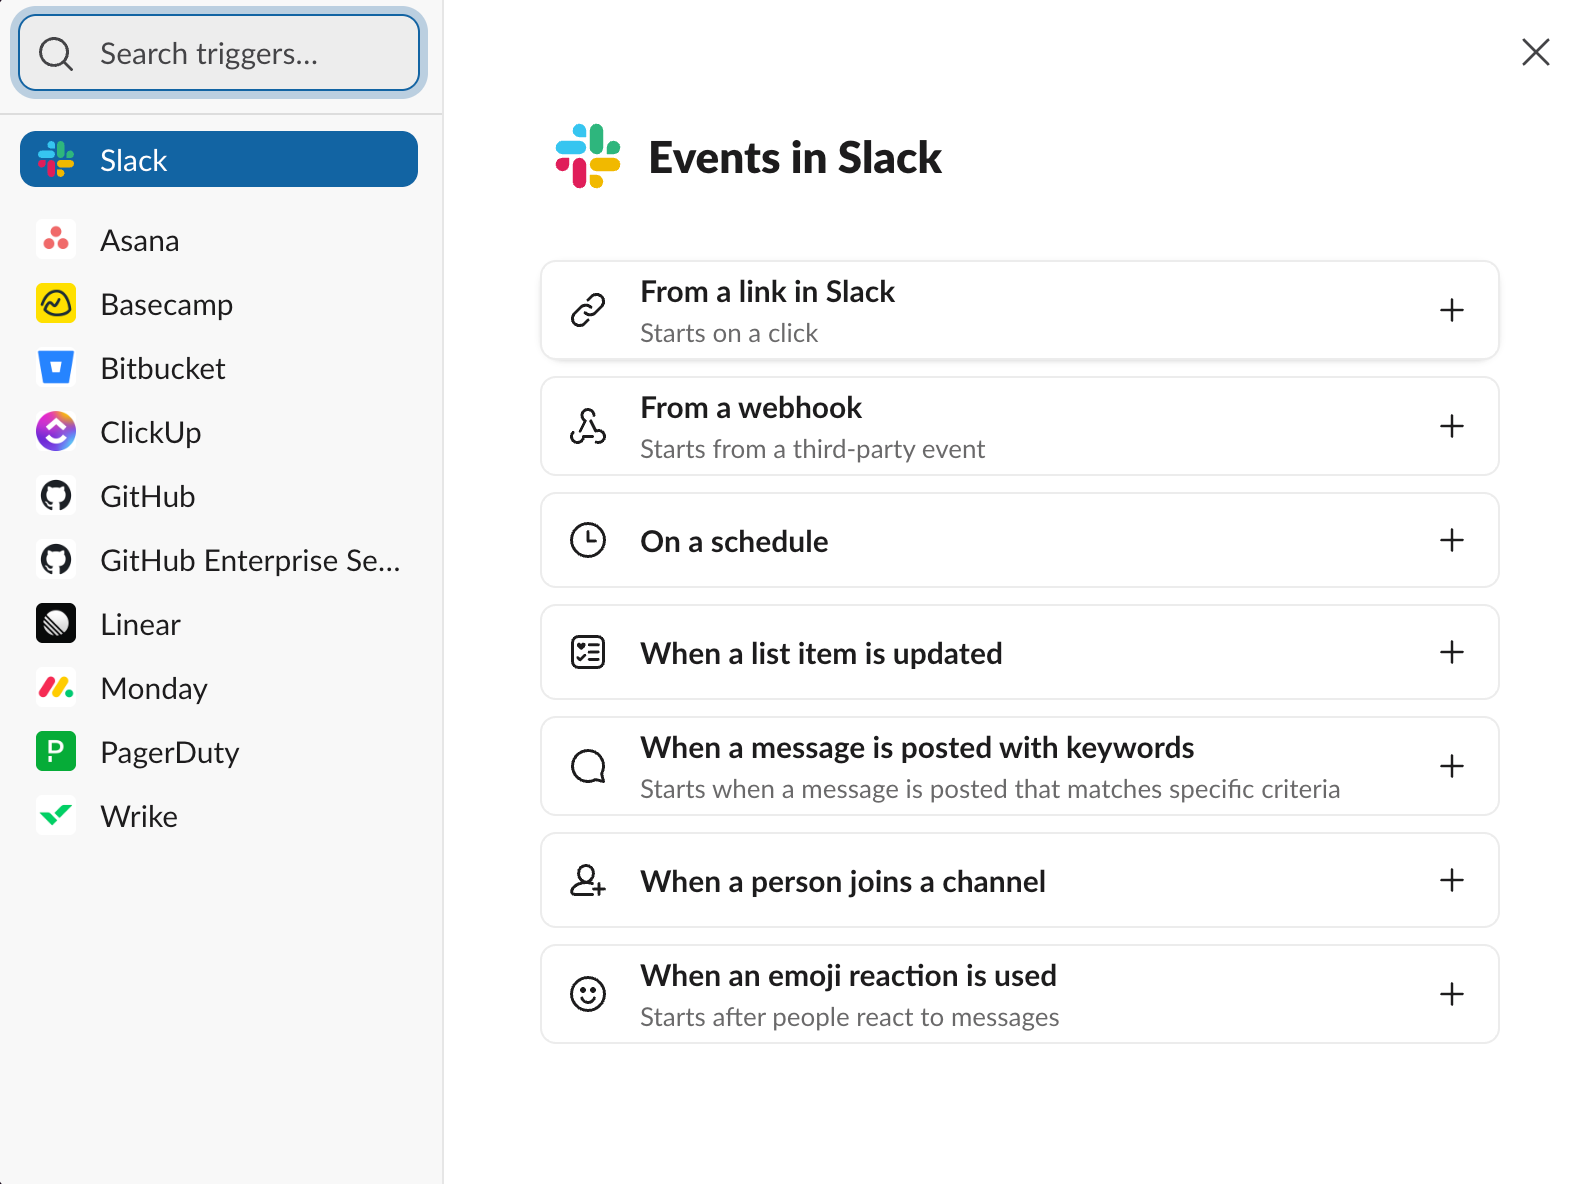
Step 3: Select the workflow trigger
Next, choose how the workflow should start. The trigger (event) is the action that launches the workflow.
Common Slack workflow events include the following:
- A person joins a channel.
- Someone clicks a workflow link.
- A scheduled date or time arrives.
- A webhook or connected app sends information to Slack.
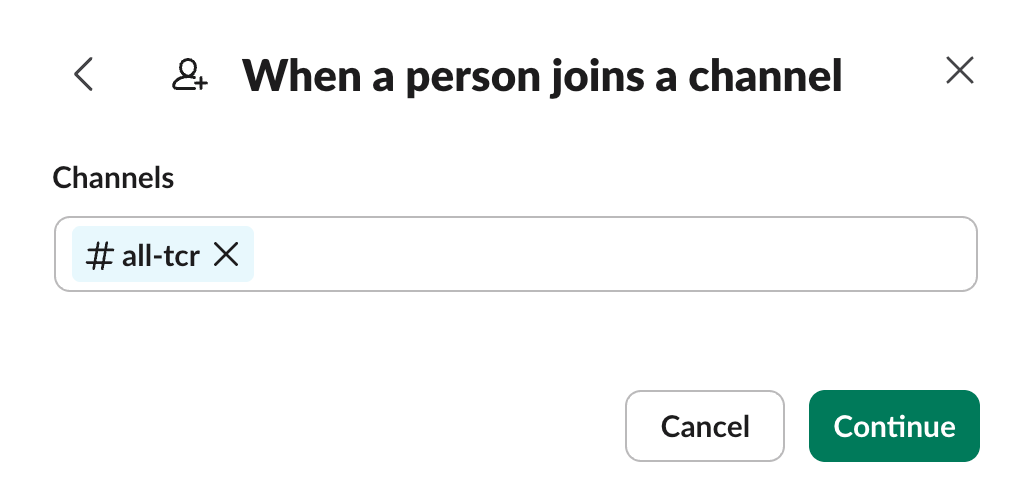
For a channel-specific workflow, choose an event that makes sense for the channel. For example, if you’re creating an onboarding workflow, you might start the workflow when someone joins the channel.
Step 4: Choose the Slack channel
After choosing the trigger, select the channel where the workflow should run or post updates.
This is the step that connects your workflow to a specific Slack channel. For example, you might choose one of these:
- #support for customer or internal support requests
- #hr for time-off or policy questions
- #marketing for content requests
Choose the channel where the workflow output will be most useful. If the workflow posts updates in the wrong place, your team may miss important information or the notification might create unnecessary noise.
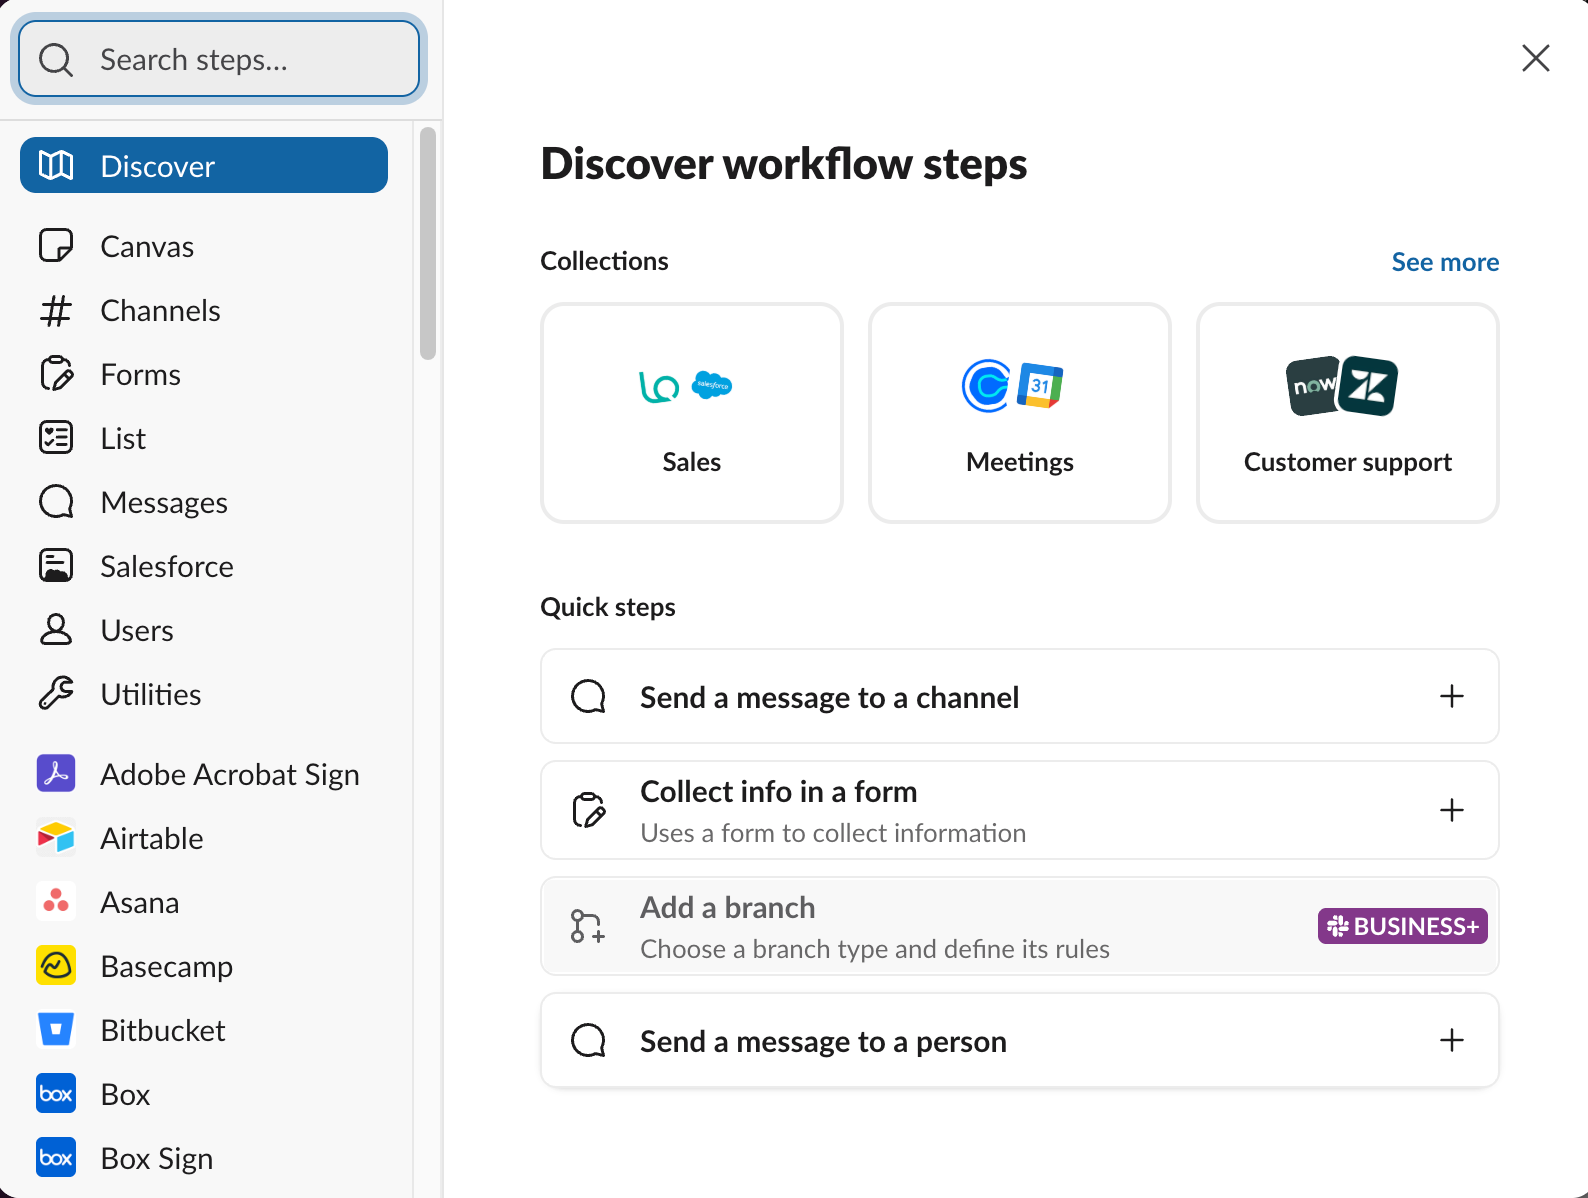
Step 5: Add steps to the workflow
Once the trigger and channel are set, add the steps (actions) you want the workflow to perform.
For example, a simple request workflow might include these steps:
- Ask the user to fill out a short form.
- Post the form response in a specific channel.
- Tag the person responsible for reviewing it.
- Send a confirmation message to the requester.
Pro Tip
Keep your first workflow simple. Start with the most important steps, then add more complexity once you know the workflow is helping your team.
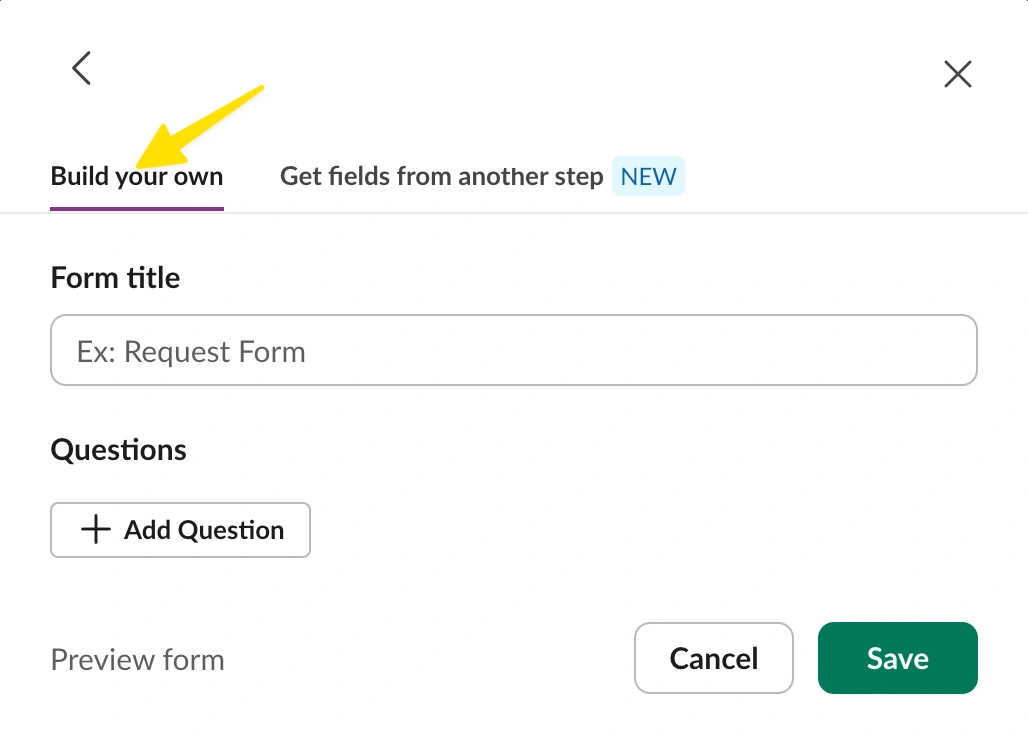
Step 6: Customize the messages and fields
Next, edit the workflow content so it matches your team’s process.
If the workflow includes a form, you’ll be prompted to create the form after adding the step. It’s also possible to gather fields from other steps by choosing the corresponding tab.
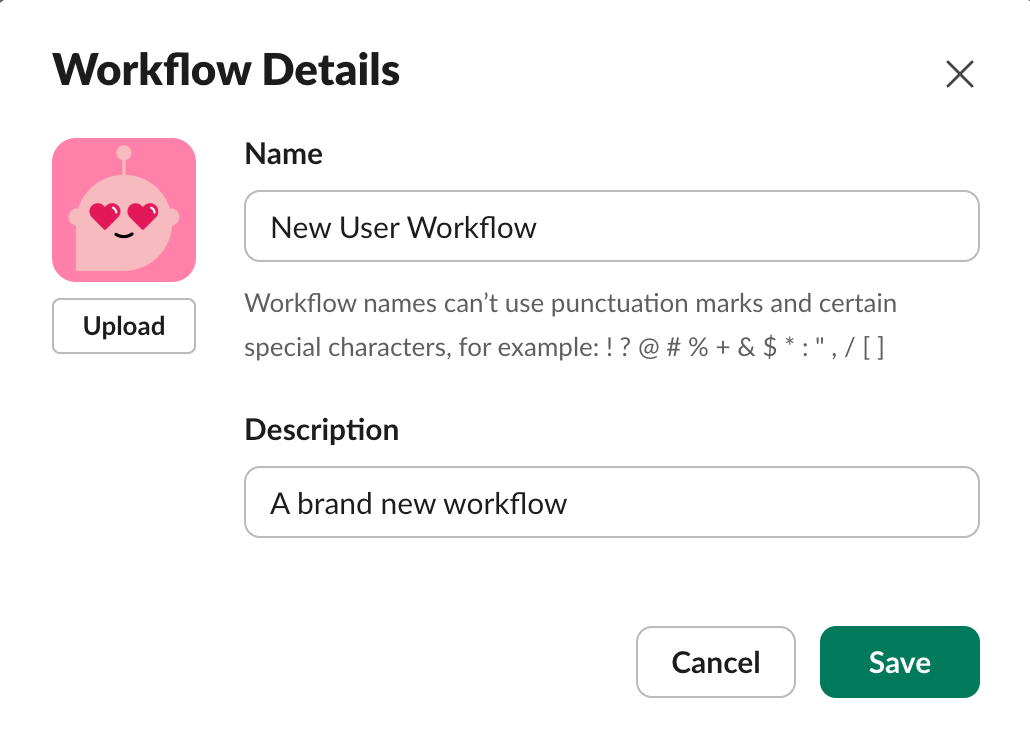
Step 7: Review permissions and workflow details
Before publishing, review the workflow name, description, permissions, and channel settings.
Give the workflow a clear name, such as “Submit a marketing request” or “New channel member welcome.” This makes it easier for teammates and admins to understand what the workflow does.
You should also confirm who can use, edit, or manage the workflow. Depending on your Slack workspace settings, some workflow options may be controlled by workspace owners or admins.
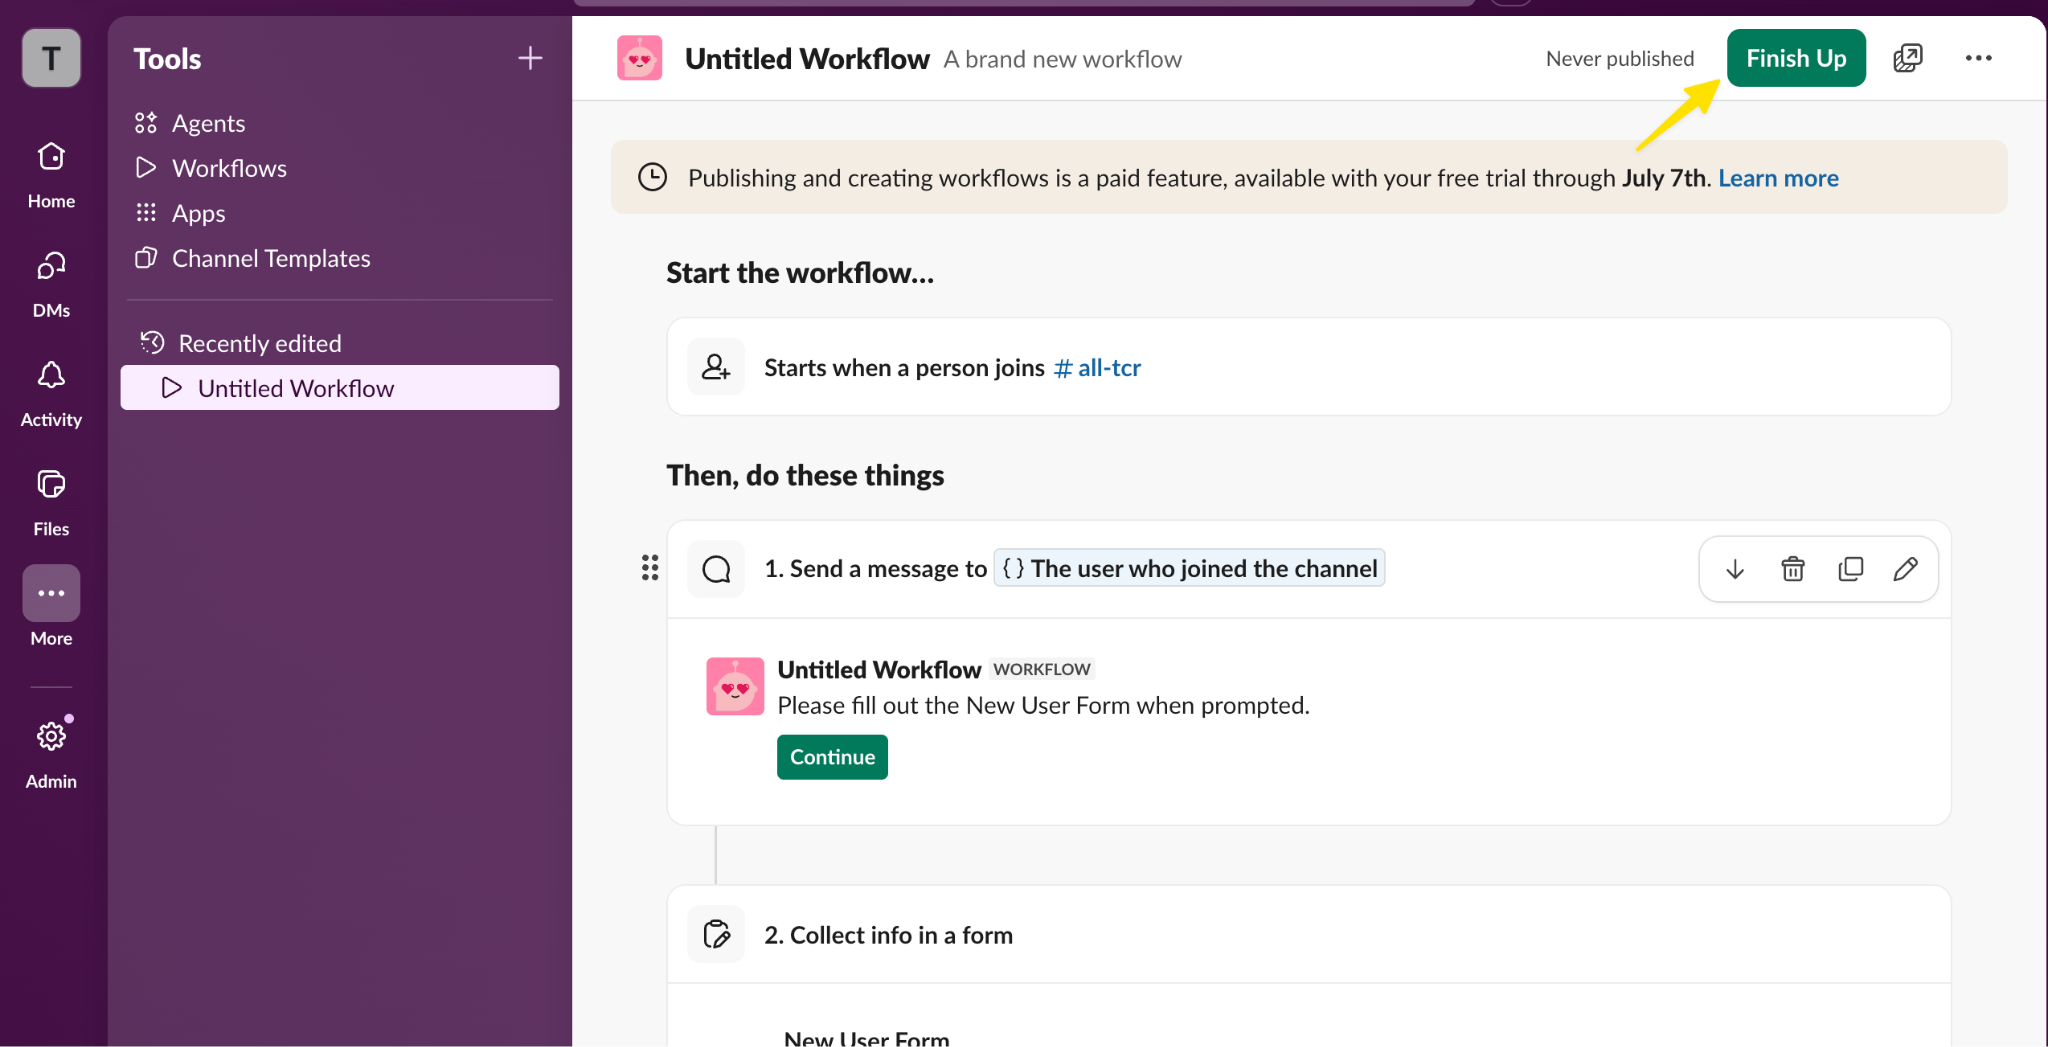
Step 8: Publish the workflow
When everything looks right, click Finish Up to publish.
If something is missing, you can return to Workflow Builder to edit the workflow, add steps, change permissions, or unpublish it.
Benefits of using workflows in Slack channels
Adding workflows to Slack channels can help teams move faster without adding extra meetings, manual follow-ups, or messages with poor context. You can use workflows to
- Reduce repetitive work: If your team regularly posts the same reminders, asks the same intake questions, or routes the same kinds of requests, a workflow can handle those steps automatically.
- Keep channel updates consistent: Workflows help standardize how information is collected and shared. Instead of getting incomplete requests in different formats, teams collect the same details every time.
- Improve response times: When requests are posted directly in the correct Slack channel, the right groups can see and respond faster.
- Make processes easier to follow: A workflow gives teammates a clear path to completing a task. They can follow the workflow instead of asking, “Who do I send this to?” or “What information do you need?”
- Support workflow automation across tools: Slack workflows are useful on their own, but they’re even more helpful when connected with other tools. For example, teams can use Slack with forms, calendars, project management tools, and approval systems to automate daily work.
How to integrate Jotform with Slack
If your team uses forms to collect requests, registrations, feedback, or approvals, Jotform’s Slack integration can automatically send form submissions to your channels.
For example, you can use the integration to do the following:
- Send new form submissions to a public Slack channel
- Send submissions to a private channel
- Send form responses as direct Slack messages
- Notify a specific team when a request, lead, order, or application comes in
Here’s how to connect Jotform with Slack:
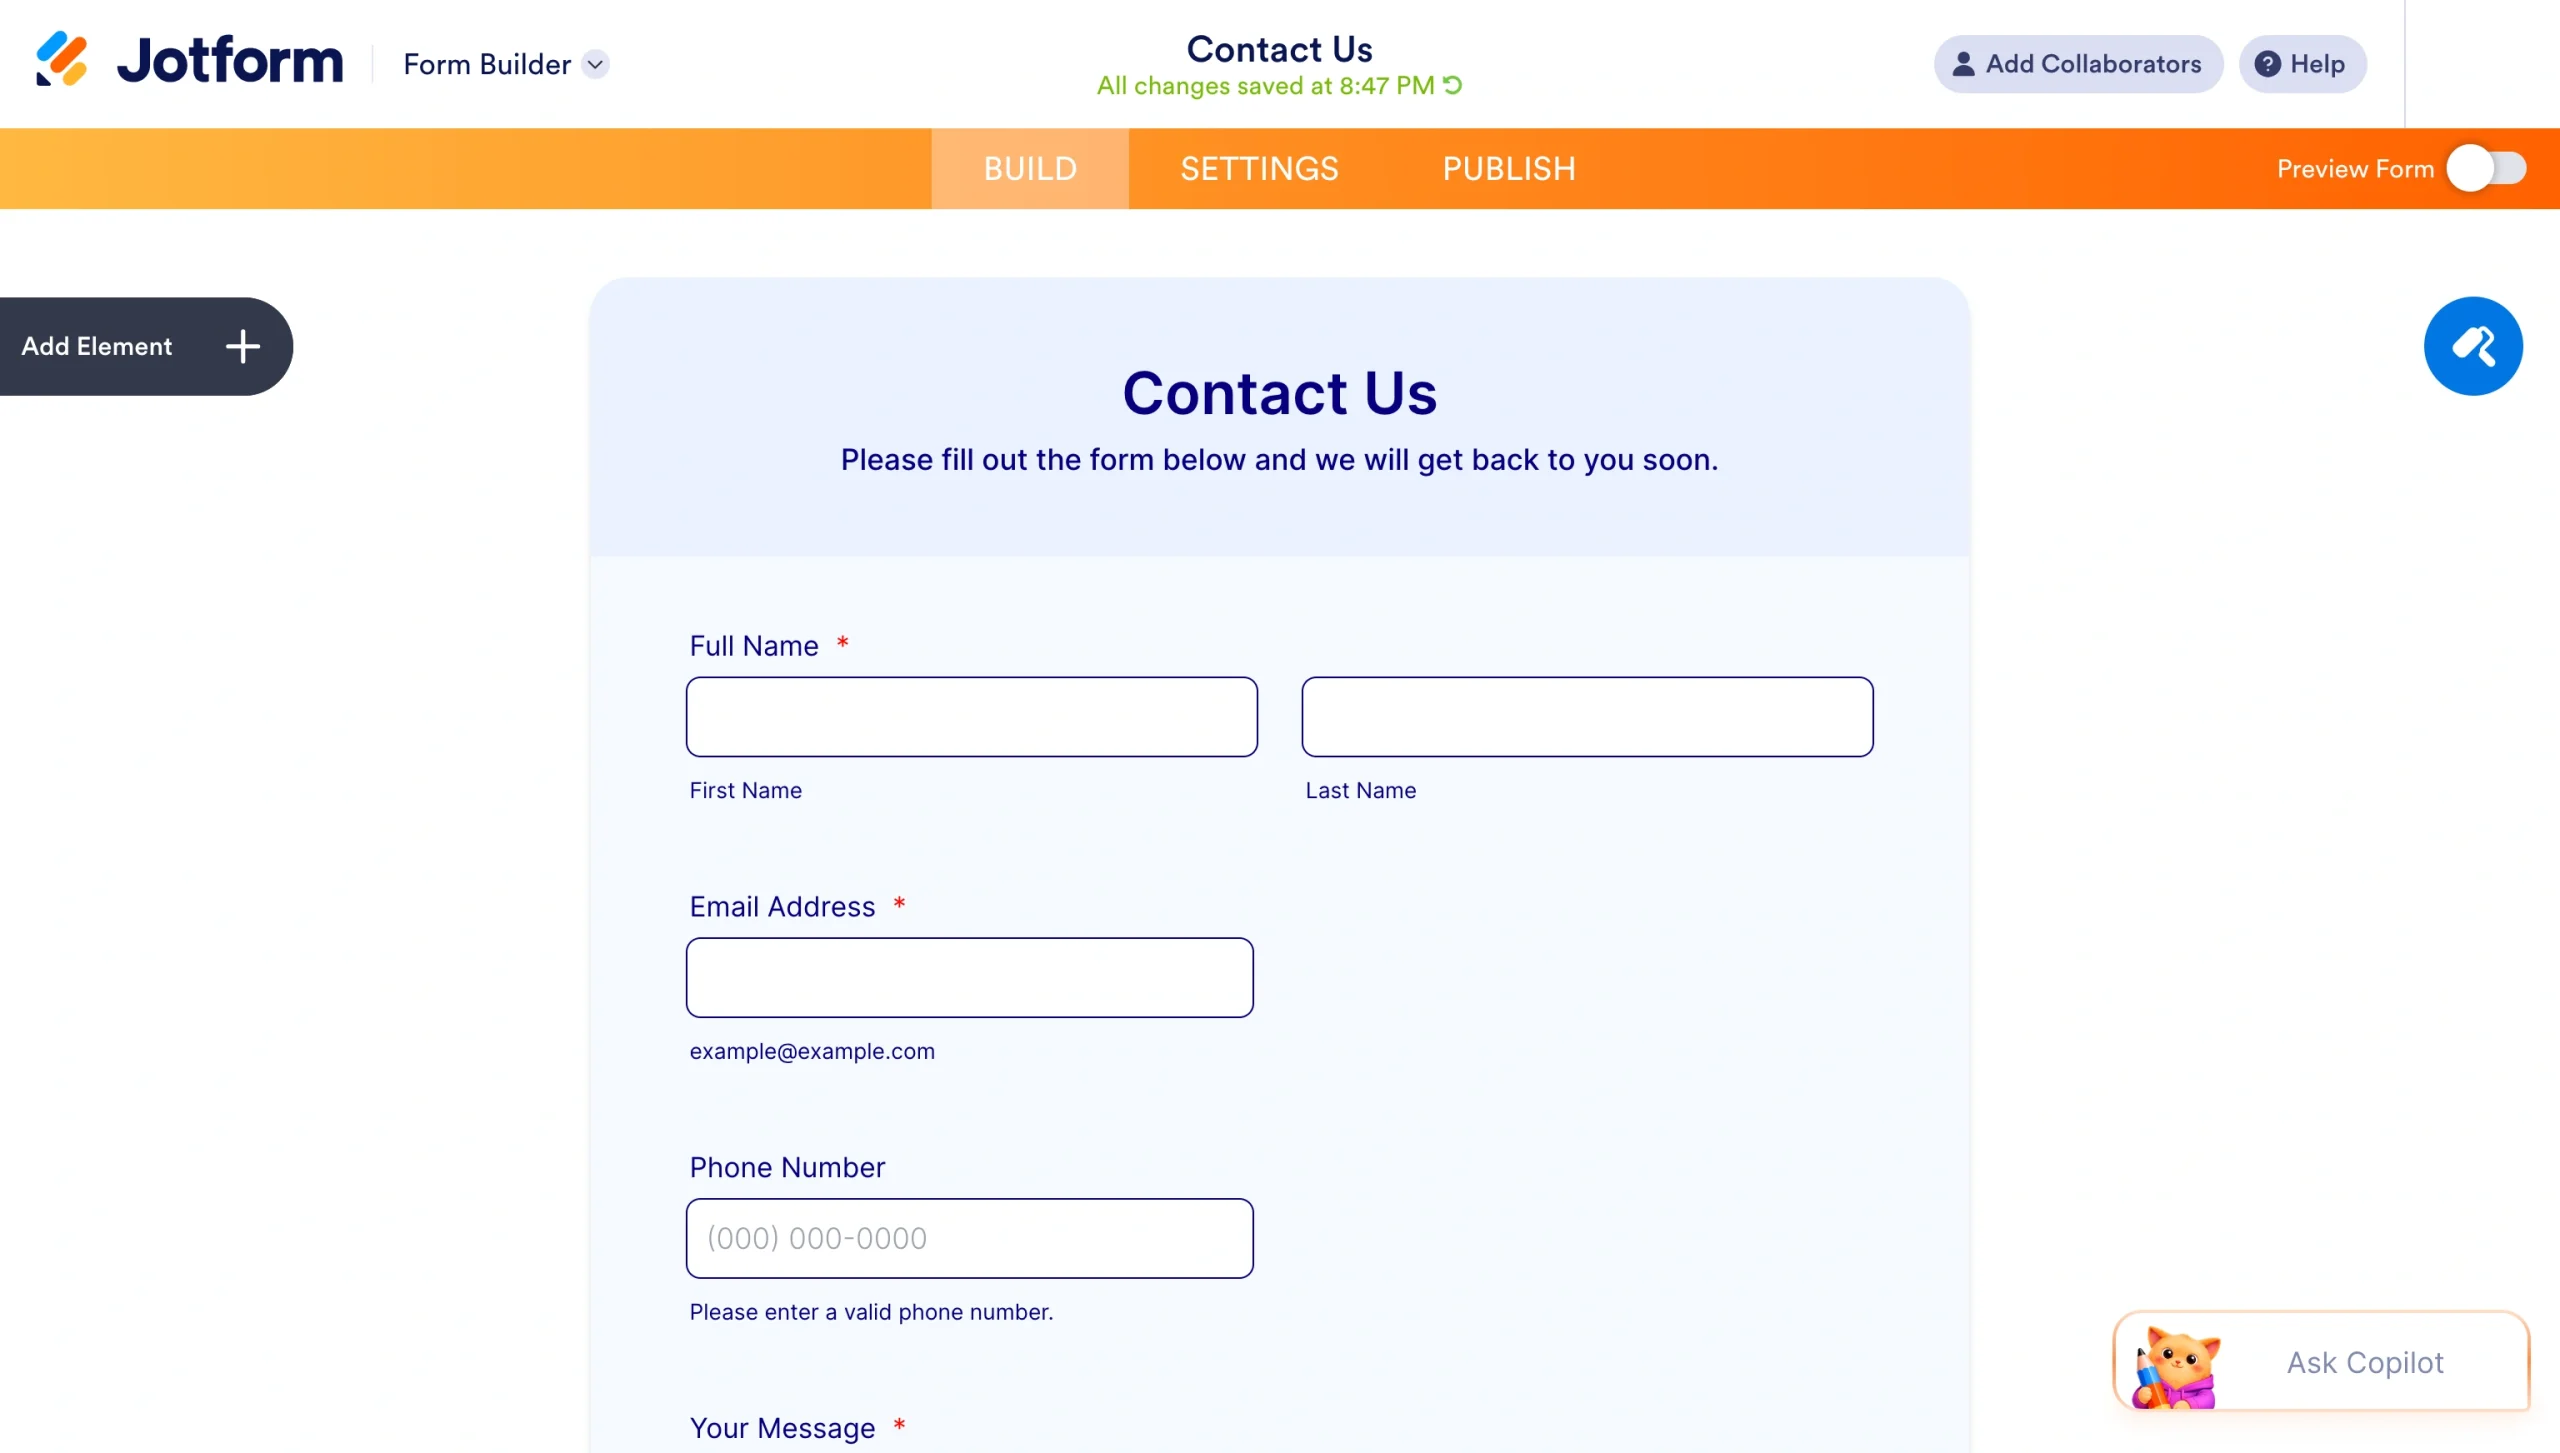
Step 1: Open your form in Jotform
Log in to your Jotform account and open the form you want to connect to Slack. You can also create a new form if you’re starting from scratch.
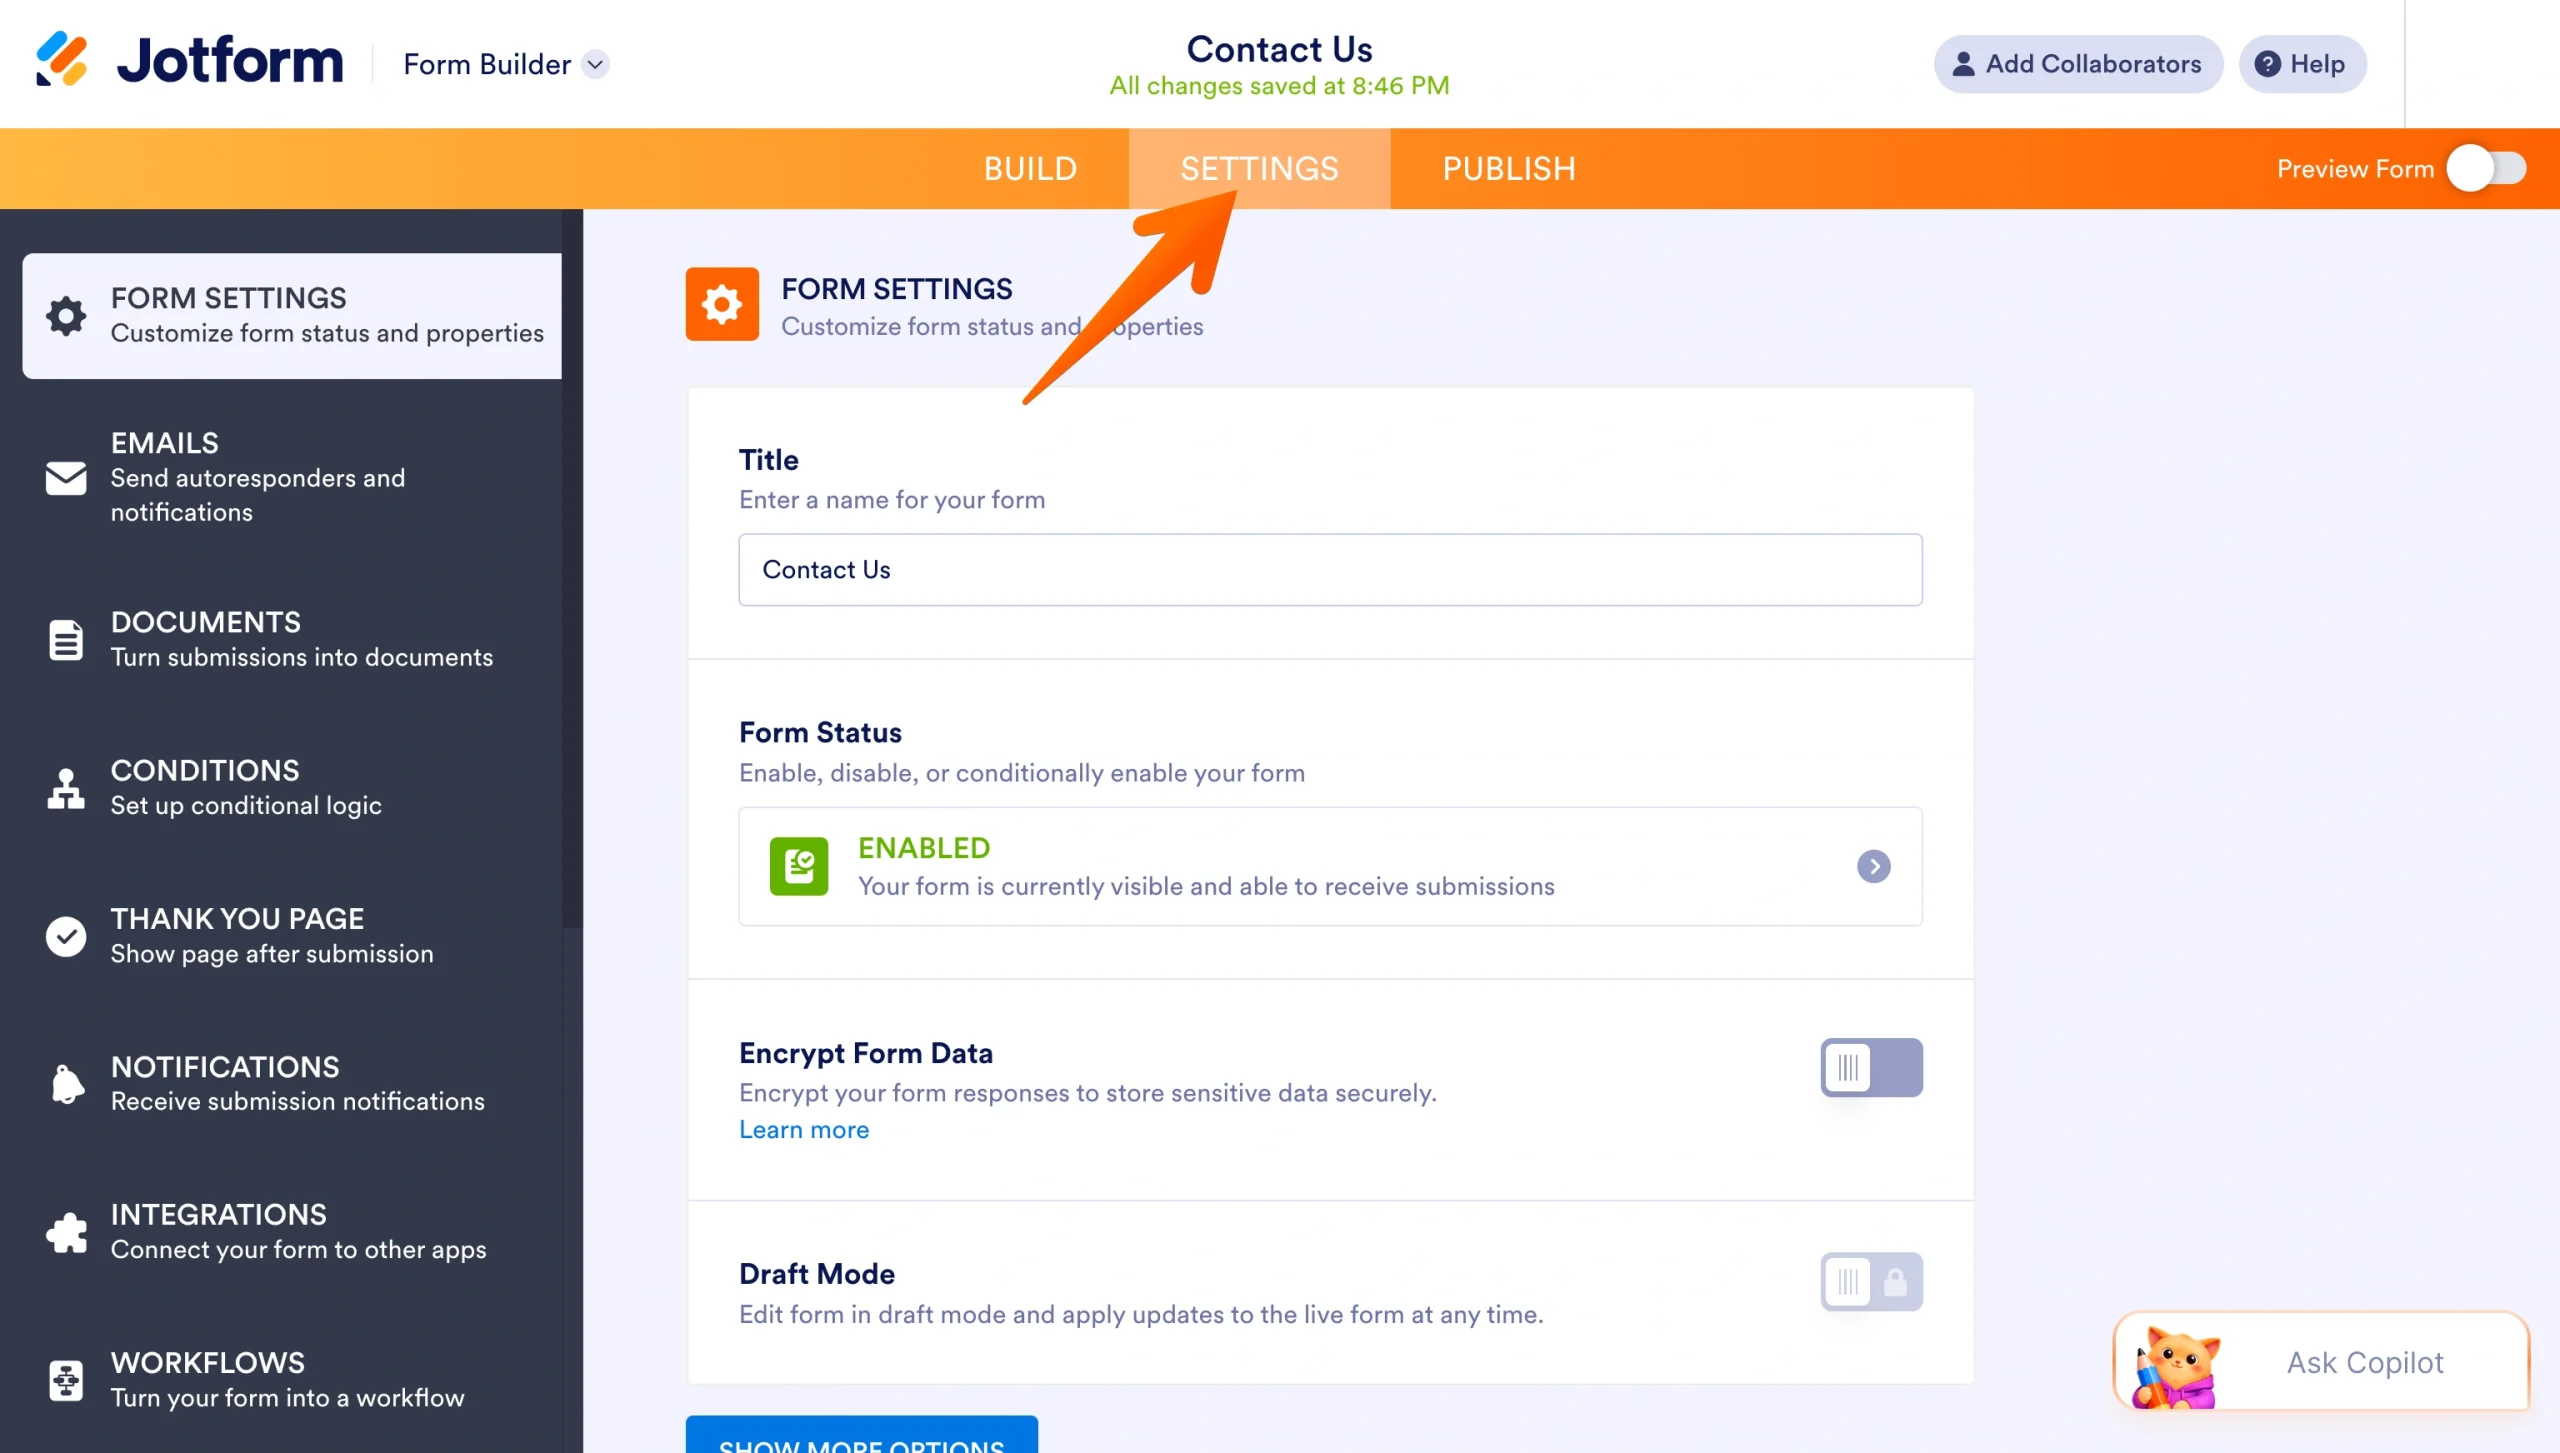
Step 2: Go to Settings
In the Form Builder, click Settings in the top navigation bar.
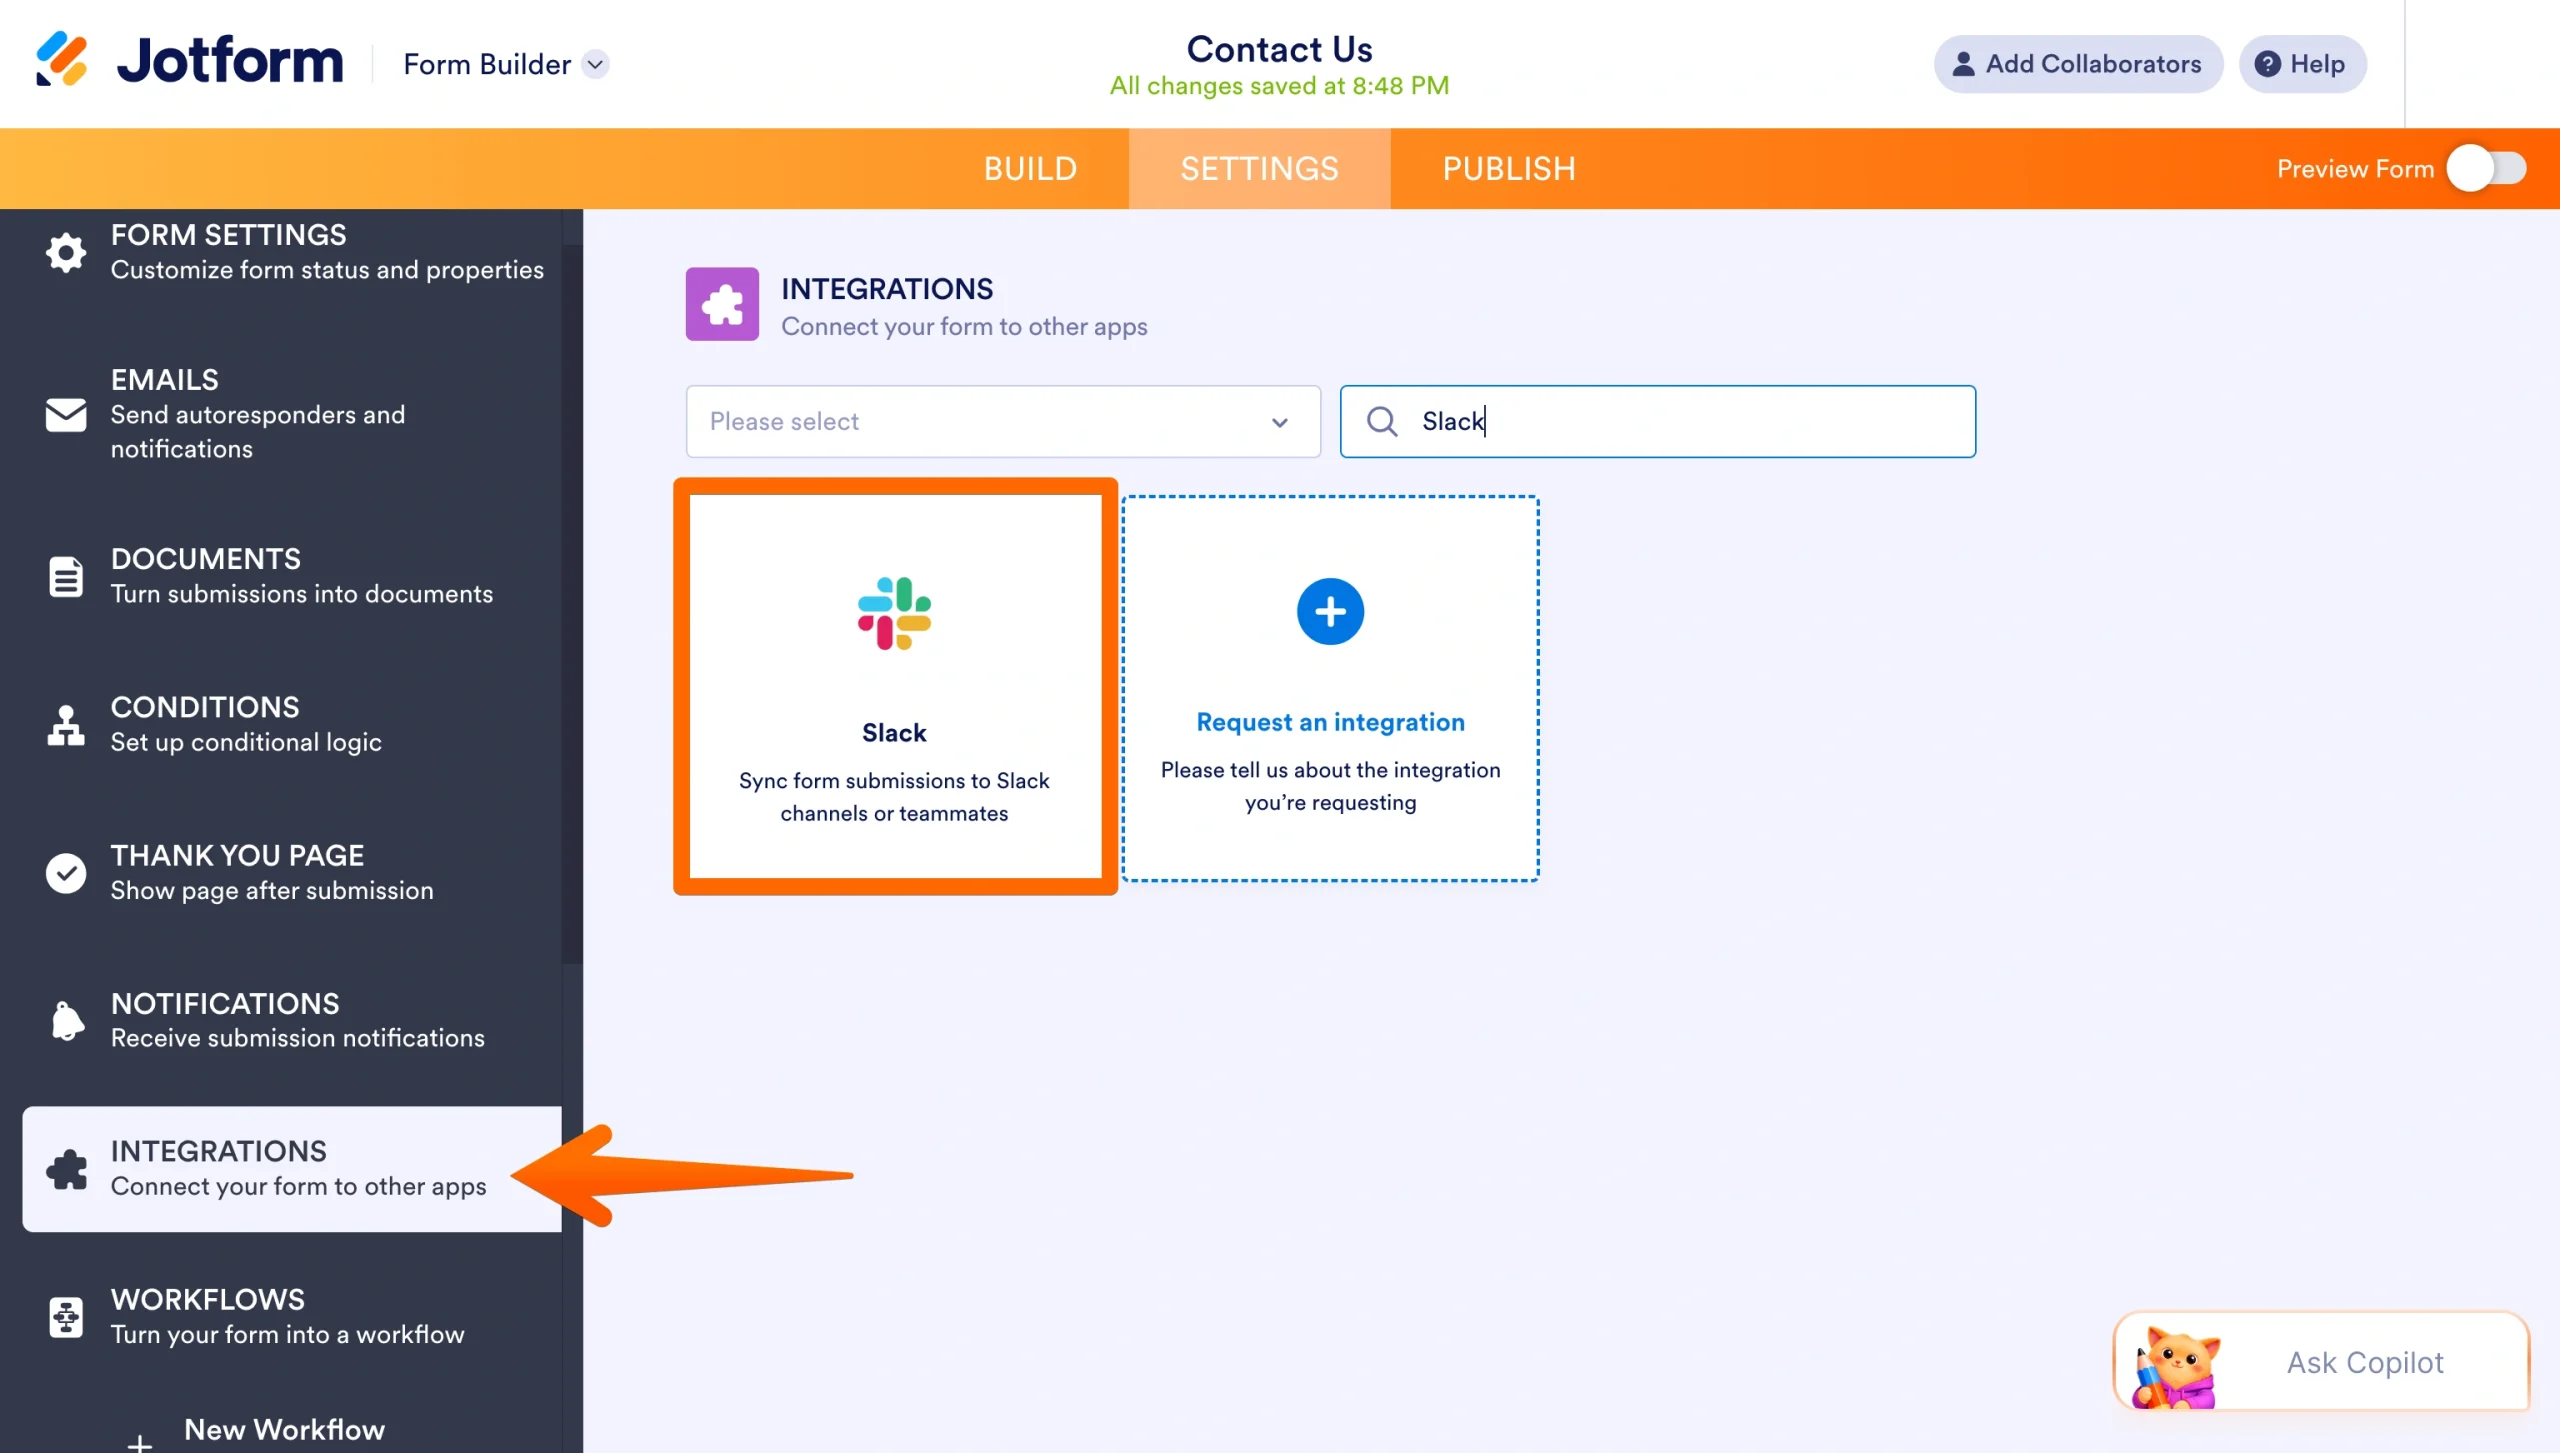
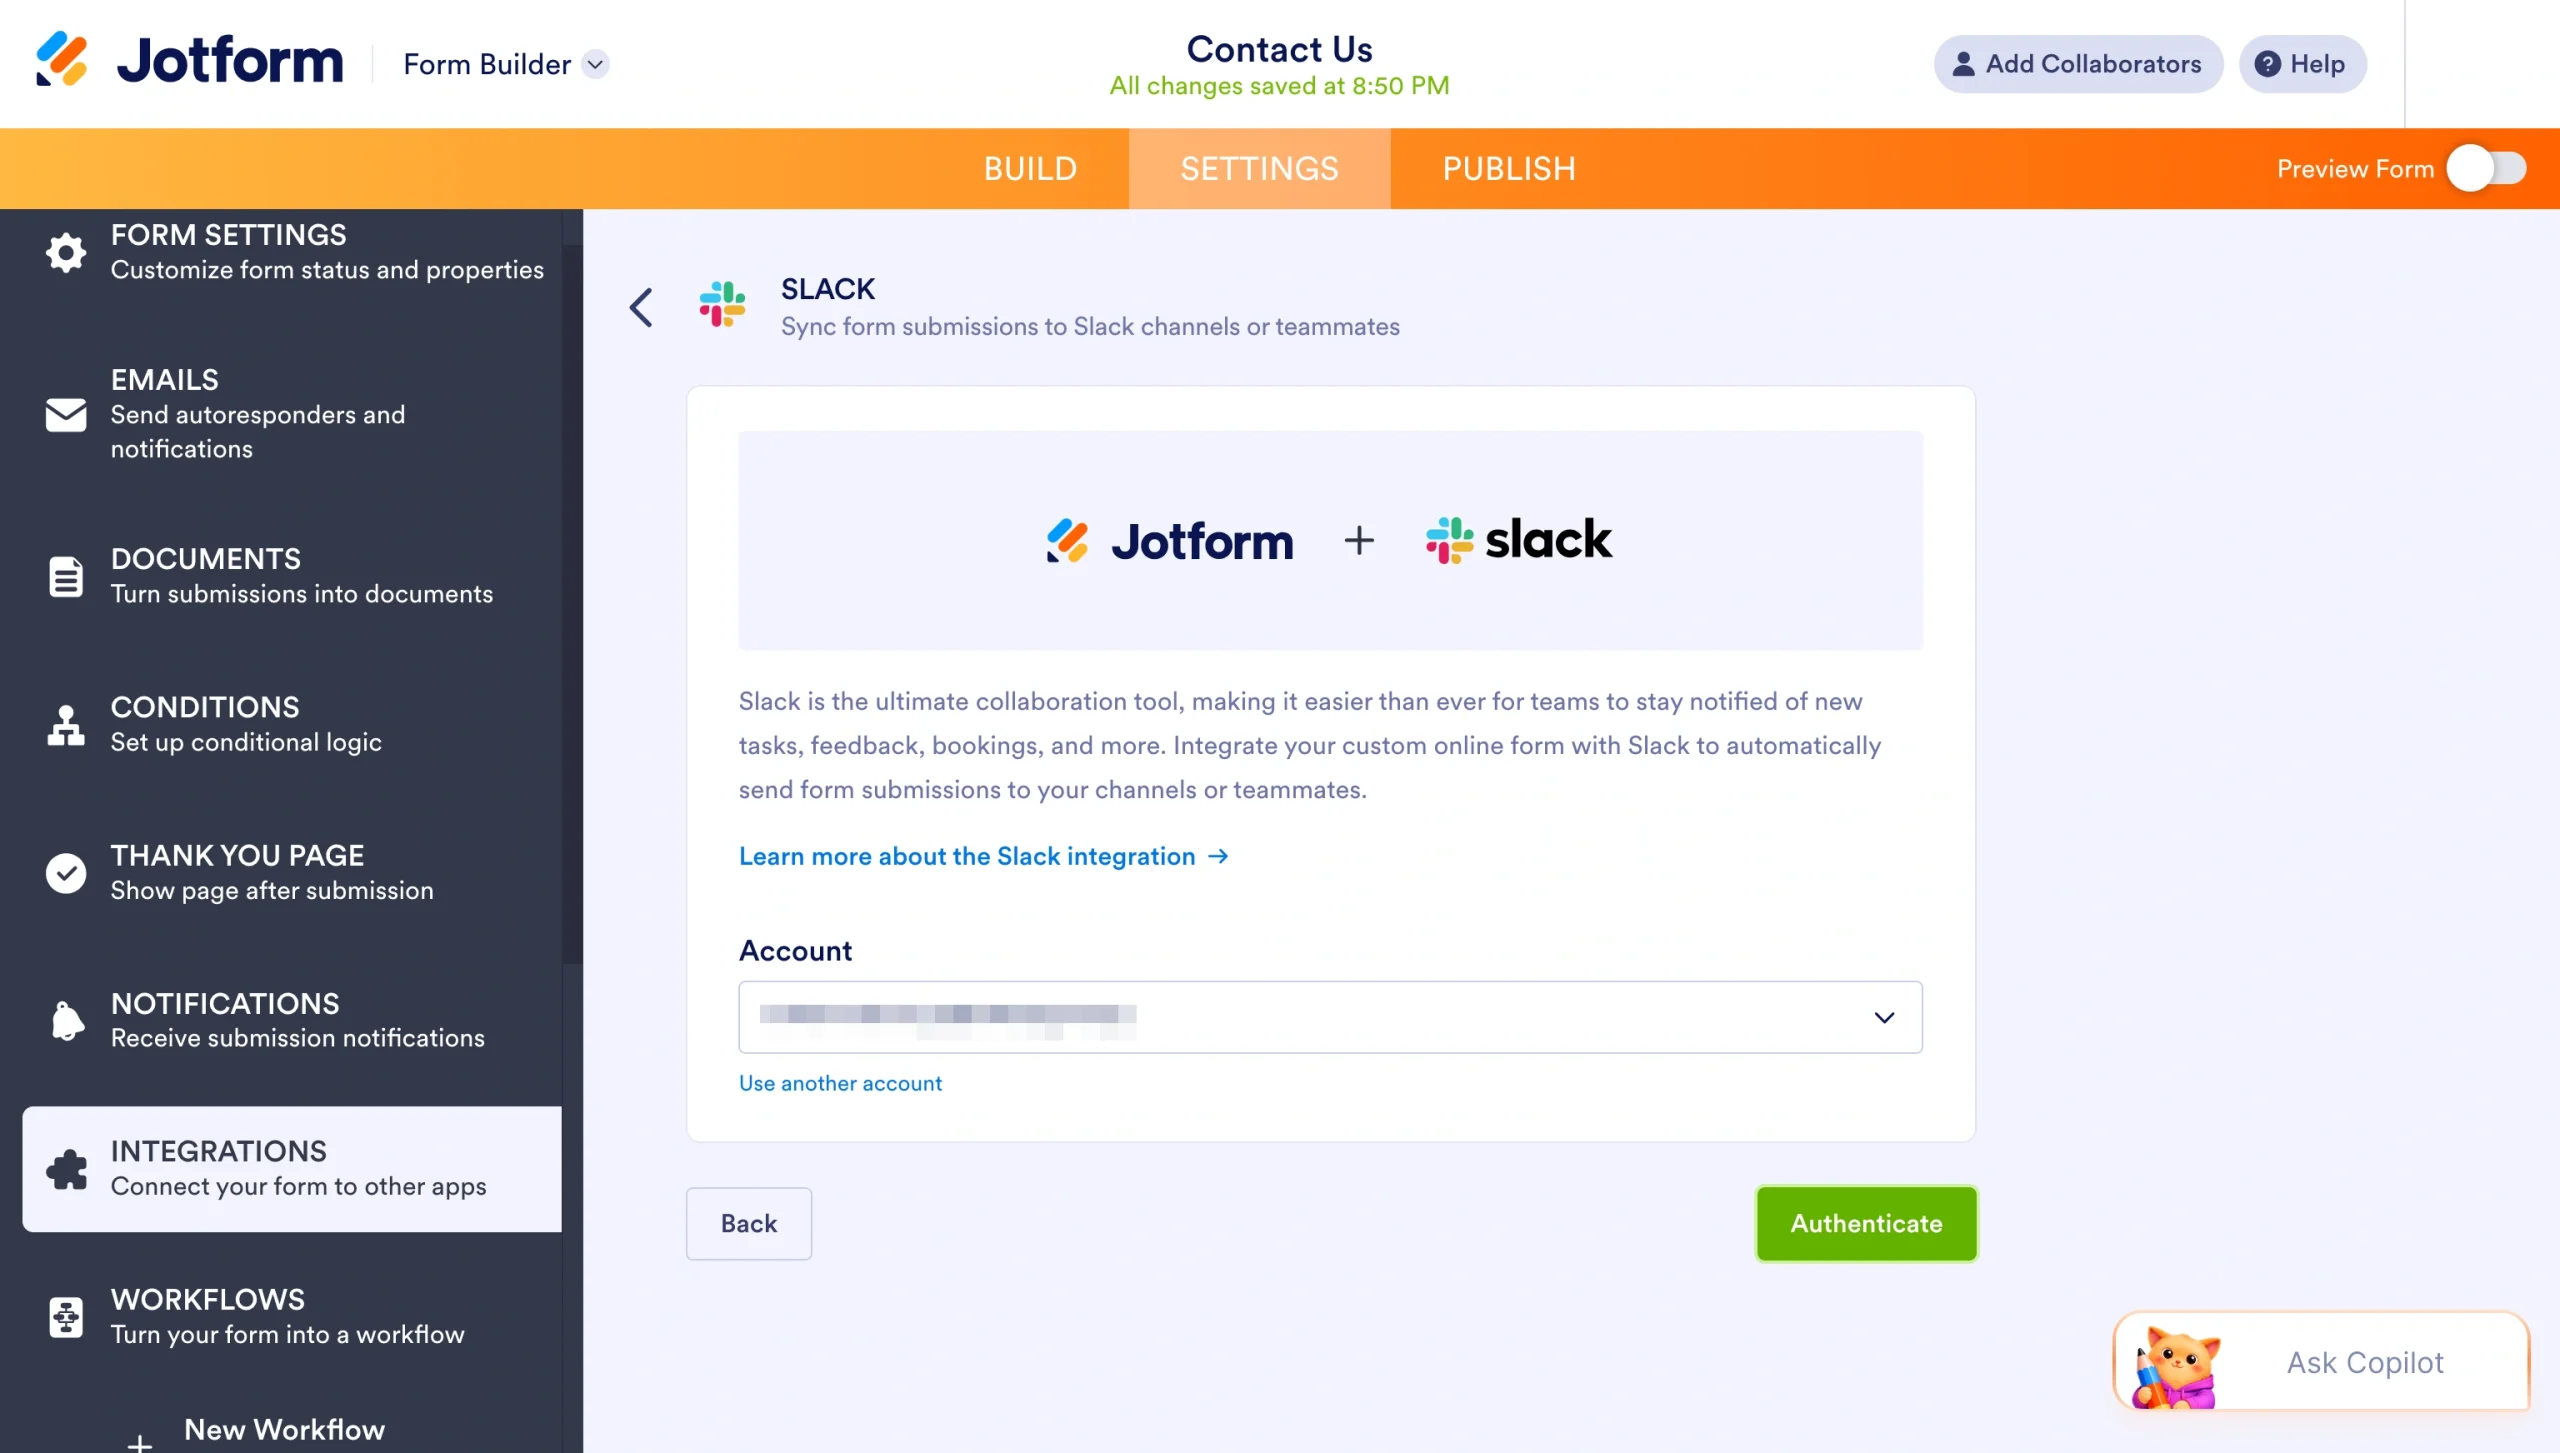
Step 3: Open Integrations
From the left-side menu, select Integrations. Search for Slack, then click the Slack integration.
Step 4: Choose the Slack action
Select what you want Jotform to do when someone submits the form. For example, you can send the submission to a Slack channel or as a direct message.

Step 5: Connect your Slack account
Follow the prompts to authenticate Slack and connect your workspace.
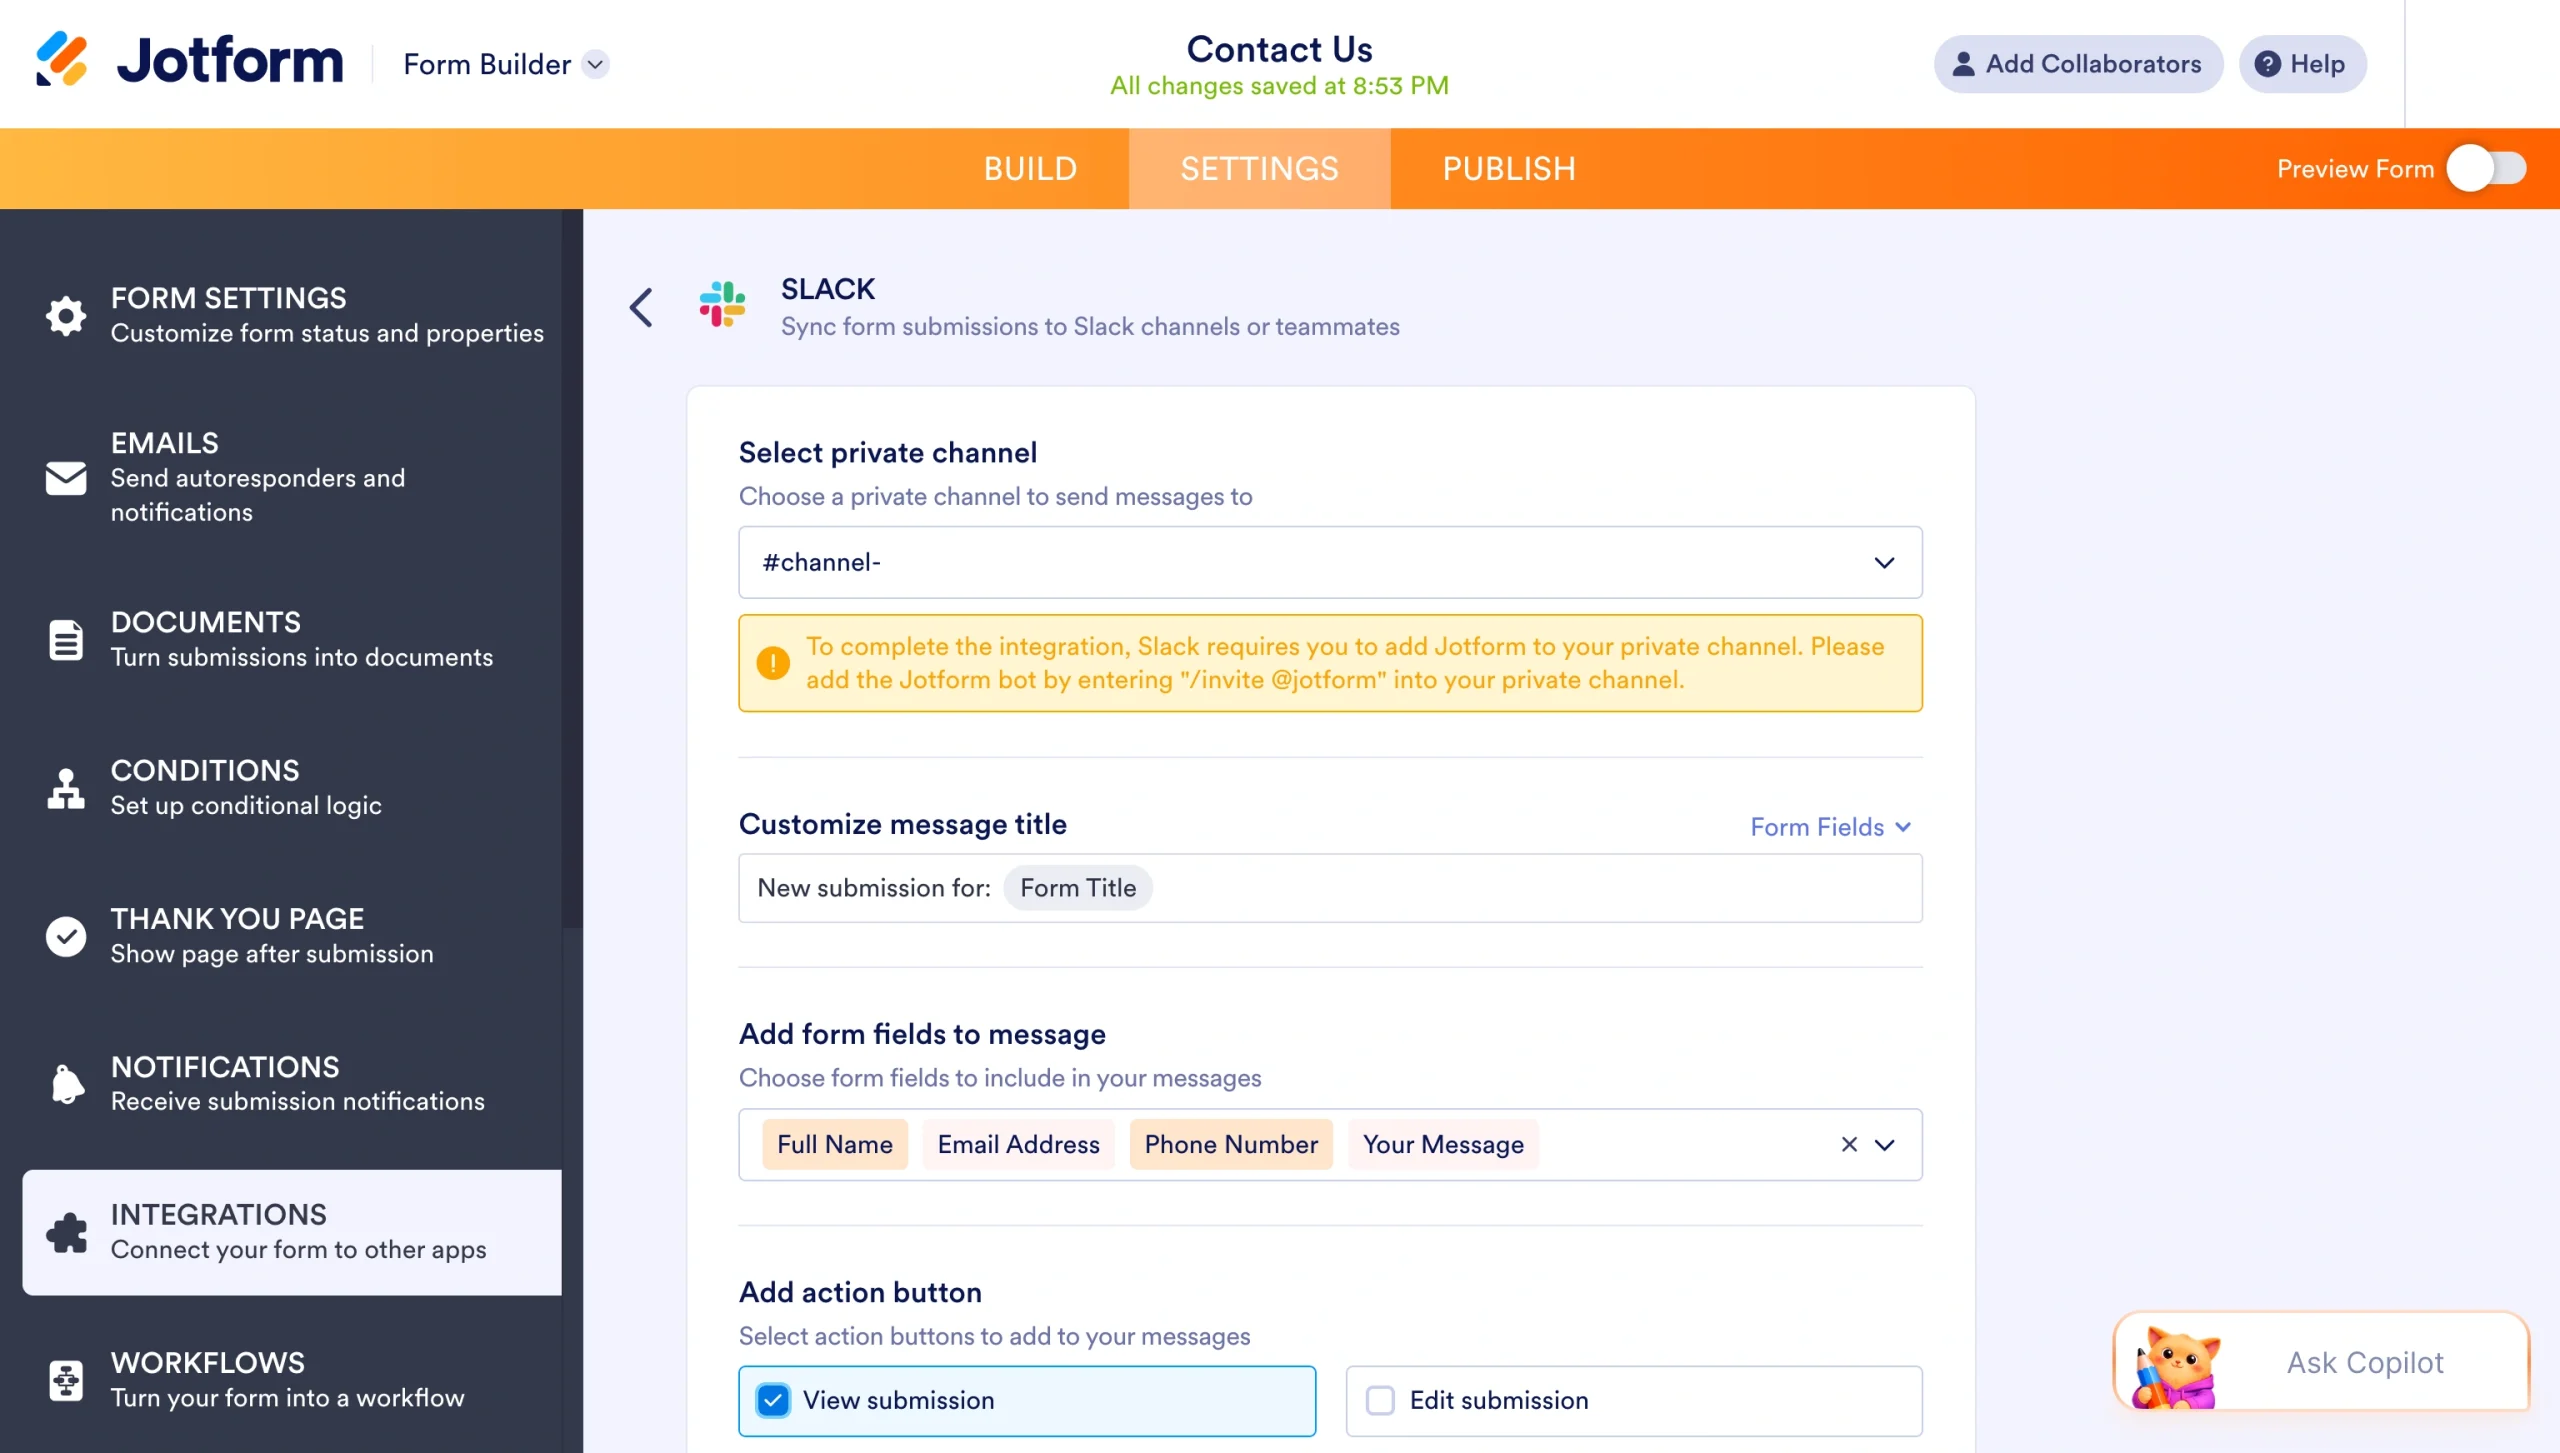
Step 6: Customize your action
Customize what you want channel members to see. For example, decide which channel you want the submission to appear in, the message title, and which form fields to include in the message.
Step 7: Finish and test the integration
Once the integration is set up, submit a test form response. Then check Slack to make sure the message appears in the correct channel with the right submission details.
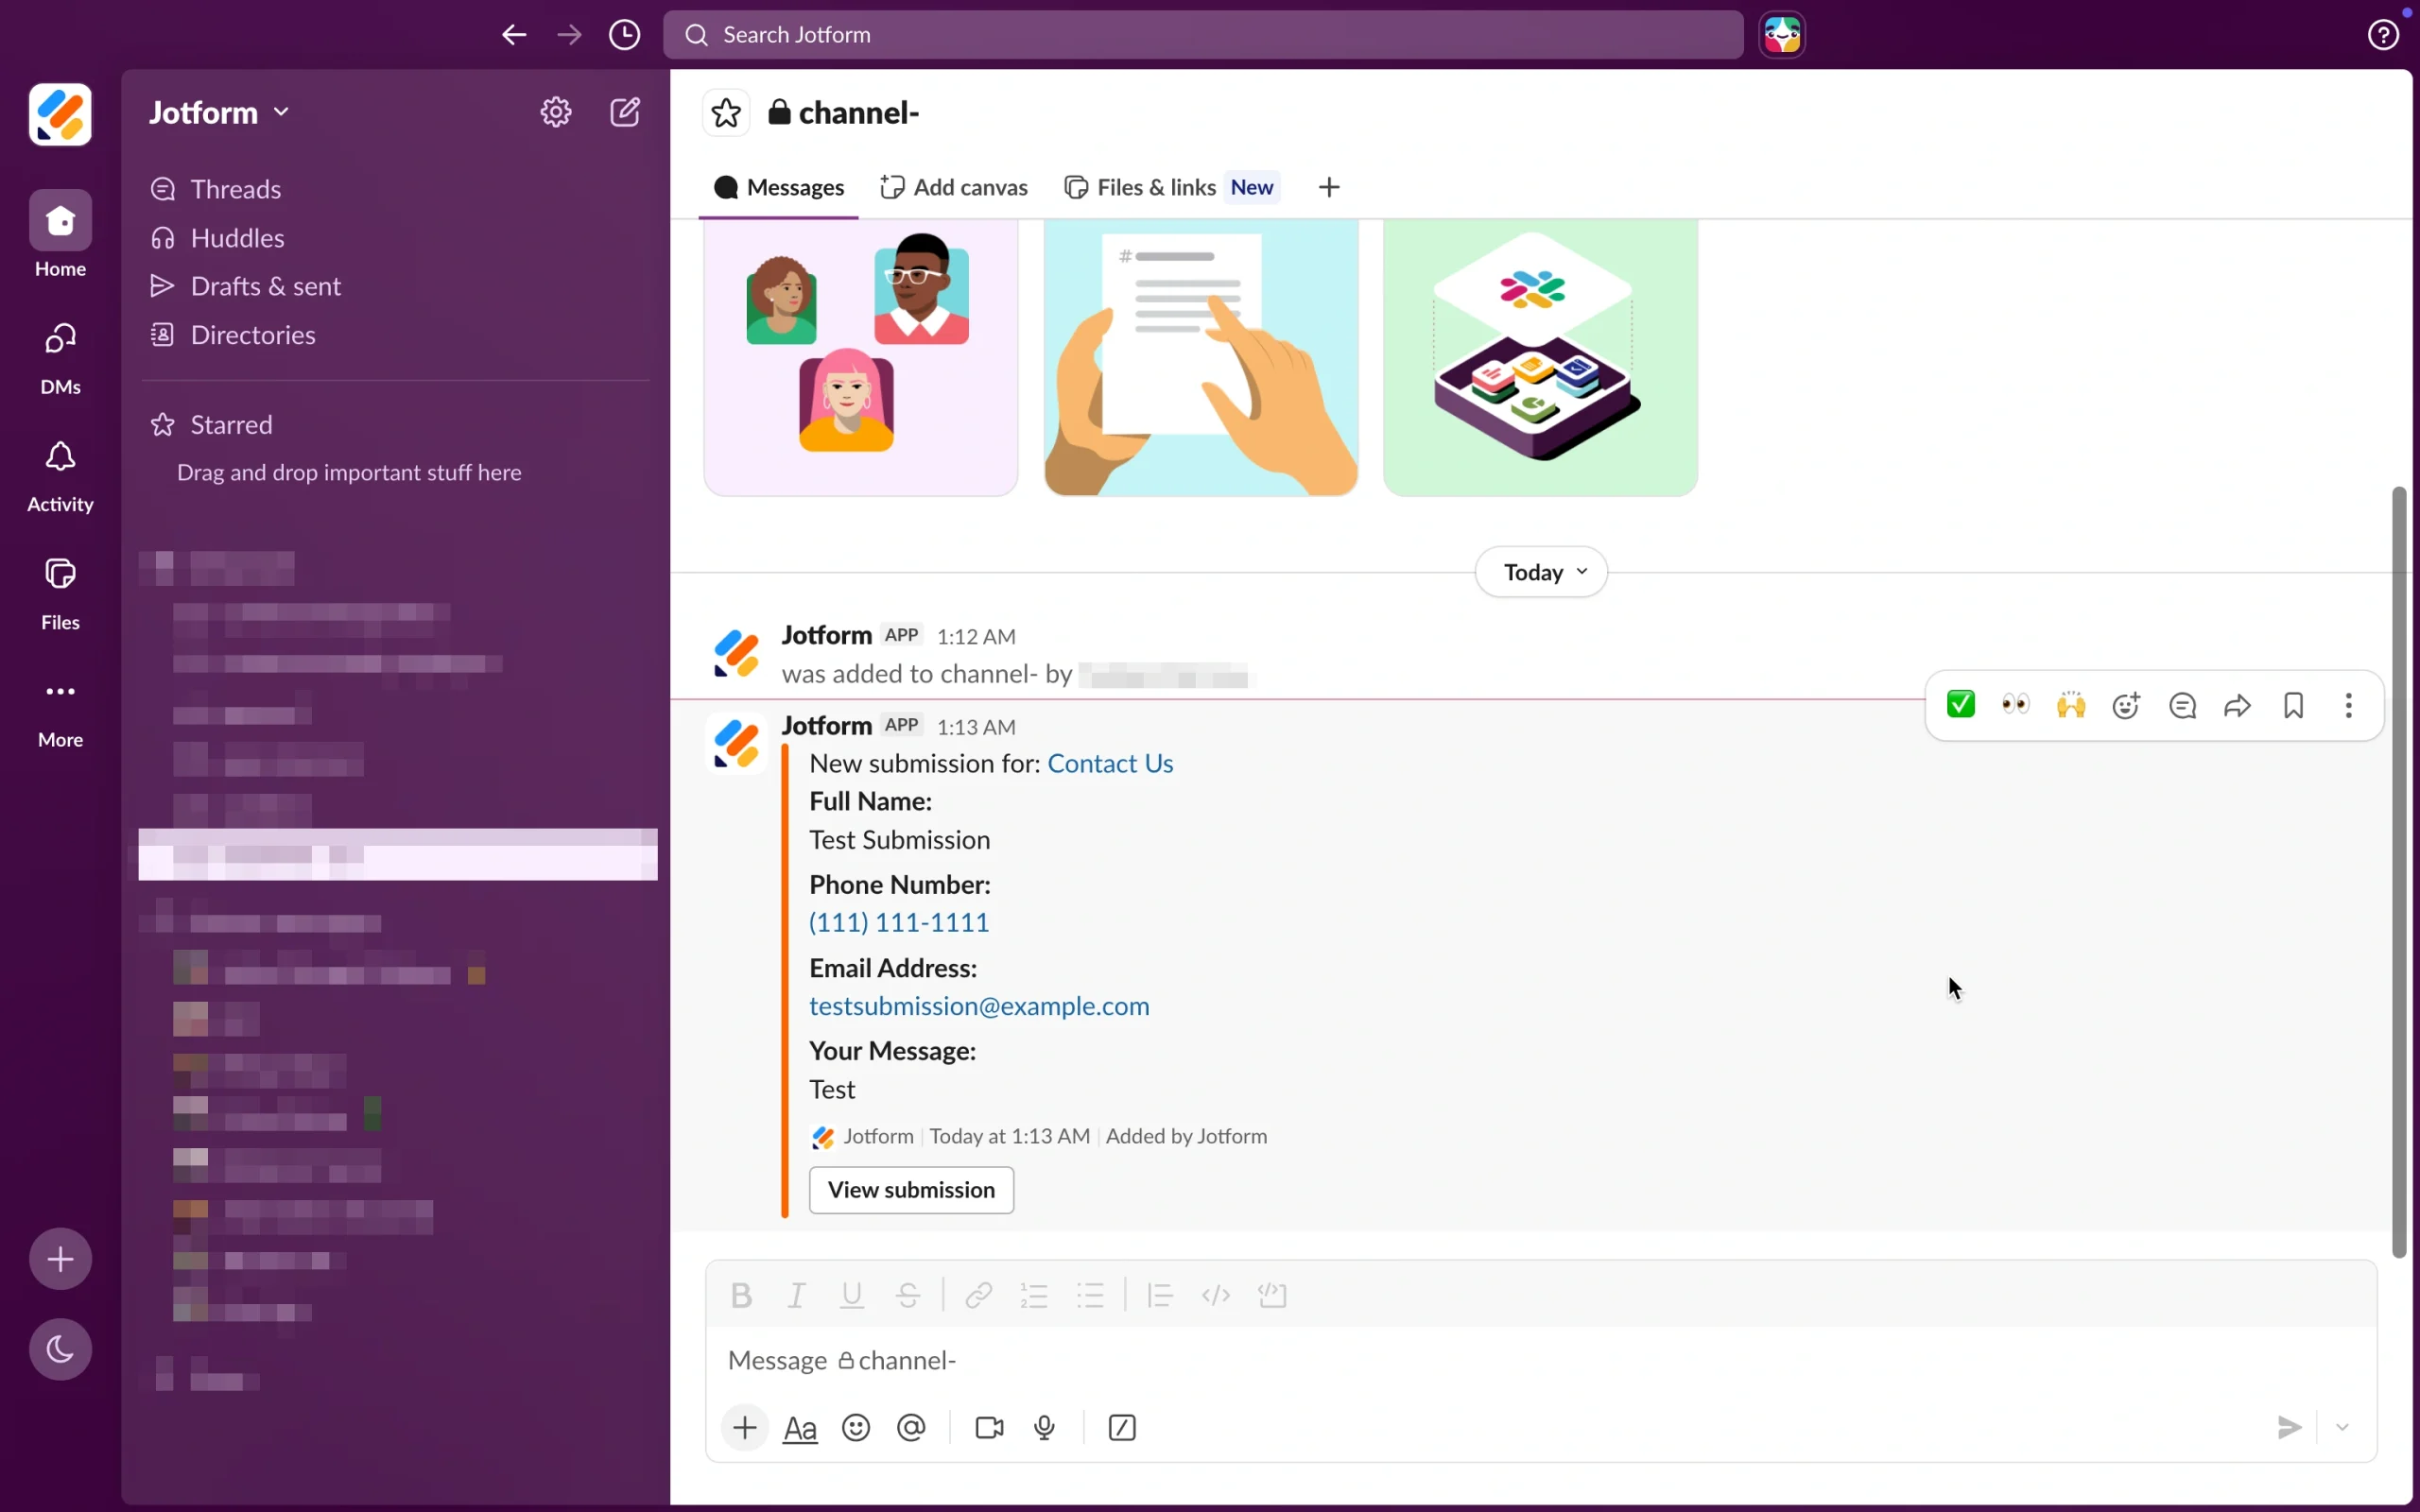
That’s it! You’ve now set up your first automation between Jotform and Slack.
Manage more complex workflows with Jotform Workflows
Slack workflows are great for automating channel-based tasks, but some processes need more structure. That’s where Jotform Workflows can help.
Jotform Workflows helps users build multistep approval flows, assign approvers, automate handoffs, and track request progress in real time. Teams can use it for many processes, including the following:
- Purchase approvals
- Time-off requests
- HR forms
- Client intake
- Escalation support
- Internal reviews
When paired with Slack, Jotform helps teams collect information through forms, manage approvals through Jotform Workflows, and keep everyone updated with automatic Slack notifications.
Streamline your Slack channels with automation
Slack channels work best when information flows to the right people at the right time, without anyone having to chase updates manually. Adding a workflow to a Slack channel takes just a few minutes, and it can save your team hours of repetitive work each week, whether you’re welcoming new members, routing requests, or posting recurring reminders.
But automation doesn’t have to stop inside Slack. By connecting Jotform with Slack, you can turn every form submission, from support tickets to job applications, into an instant channel notification so your team never misses a request. And when your processes call for more structure, Jotform Workflows lets you build multistep approval flows that keep everything moving.
Start small: Pick one repetitive task your team handles every week, build a simple workflow around it, and expand from there. Once you see how much smoother your channels run, you’ll wonder how your team ever worked without it.
Ready to bring your forms into the conversation? Try Jotform’s Slack integration today and turn submissions into action — automatically.
This article is for team leaders, operations managers, Slack workspace admins, content managers, HR teams, support teams, and anyone who wants to automate routine channel tasks, route requests more efficiently, and connect Slack with Jotform to streamline workplace workflows.


Send Comment: