Airtable gives teams a flexible way to organize and manage data, combining the familiarity of a spreadsheet with the power of a database. It’s an excellent tool for tracking projects, managing workflows, and keeping everything in one customizable, visual workspace.
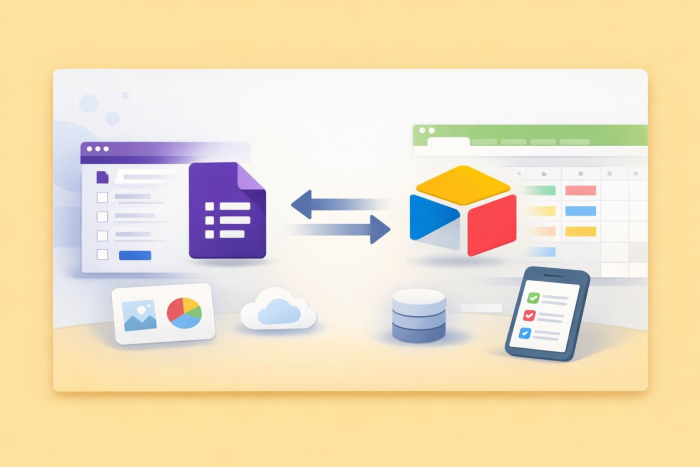
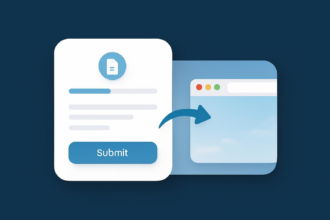
By connecting Google Forms to Airtable, you can turn form submissions into structured database records automatically. But connecting these two tools isn’t easy. You’ll have to jump through some hoops to get the job done, like routing responses through Google Sheets or using third-party tools to complete the connection.
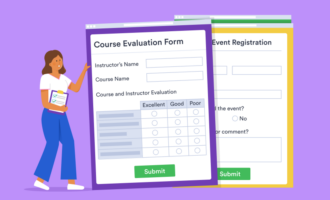
In this article, I’ll show you two different methods for connecting Google Forms to Airtable and provide step-by-step instructions for both. I’ll also introduce you to an alternative to Google Forms that is way simpler to connect: Jotform. By the end, you’ll clearly see why Jotform stands out as a powerful alternative that works effortlessly with Airtable. Imagine collecting submissions through a polished form and watching them instantly organize themselves inside Airtable, no extra steps required — just a simple, seamless workflow from start to finish.

Looking for the best alternative to Google Forms?
Jotform’s full-featured form-building solution is mobile-friendly and has the most integrations in the industry. Use it to collect payments, automate workflows, gather leads, and more.
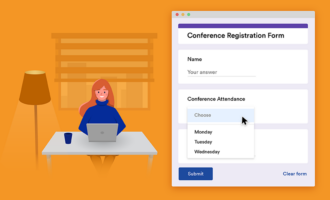
How to connect Google Forms with Airtable
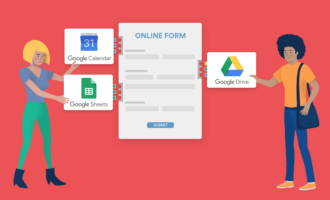
Unfortunately, there isn’t a direct integration between Google Forms and Airtable. However, it is possible (though not necessarily easy) to connect the two using Airtable Automations. Another option is to use third-party tools to integrate Google Forms and Airtable.
Using Airtable Automations
Airtable has automation features that allow you to connect Google Forms to Airtable without using a third-party tool. Though a bit complicated, this method is doable. Follow these steps to use Airtable Automations with Google Forms:
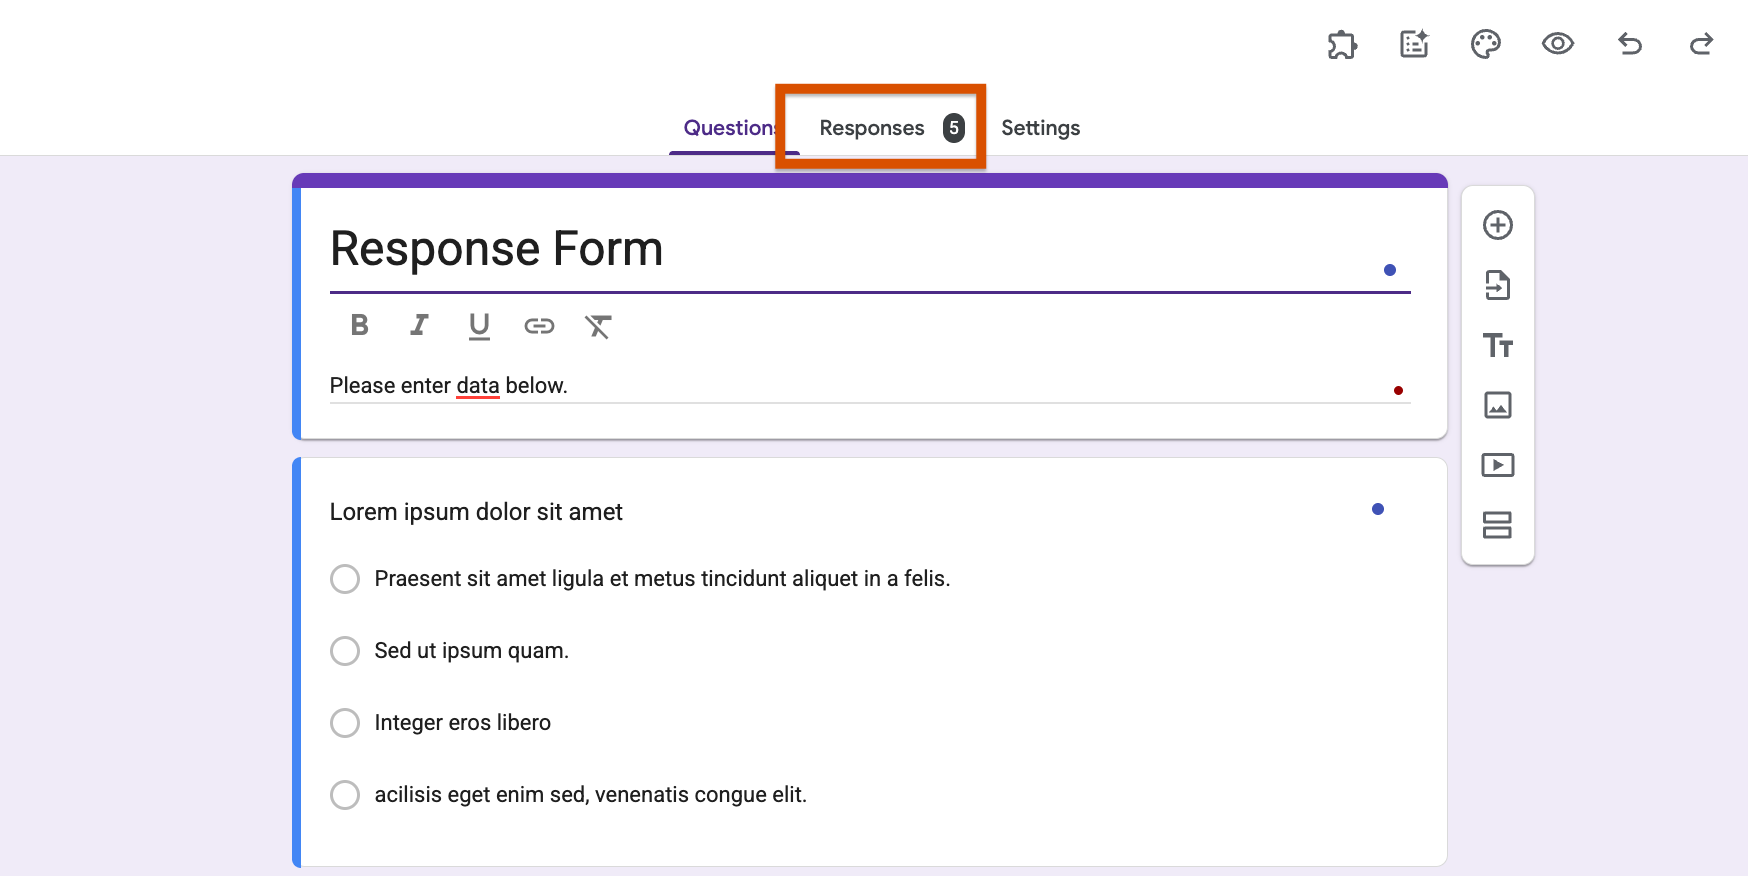
- Open the Google Form you want to connect to Airtable. Click on the Responses tab at the top.
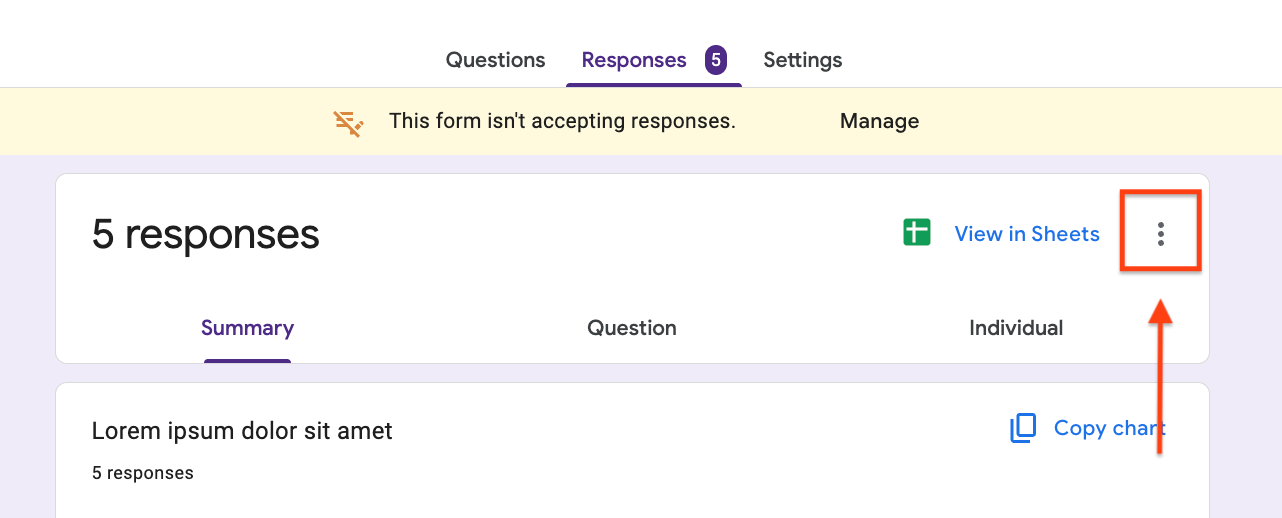
- In the Responses tab, click on the three dots at the top right to access the settings for your form.
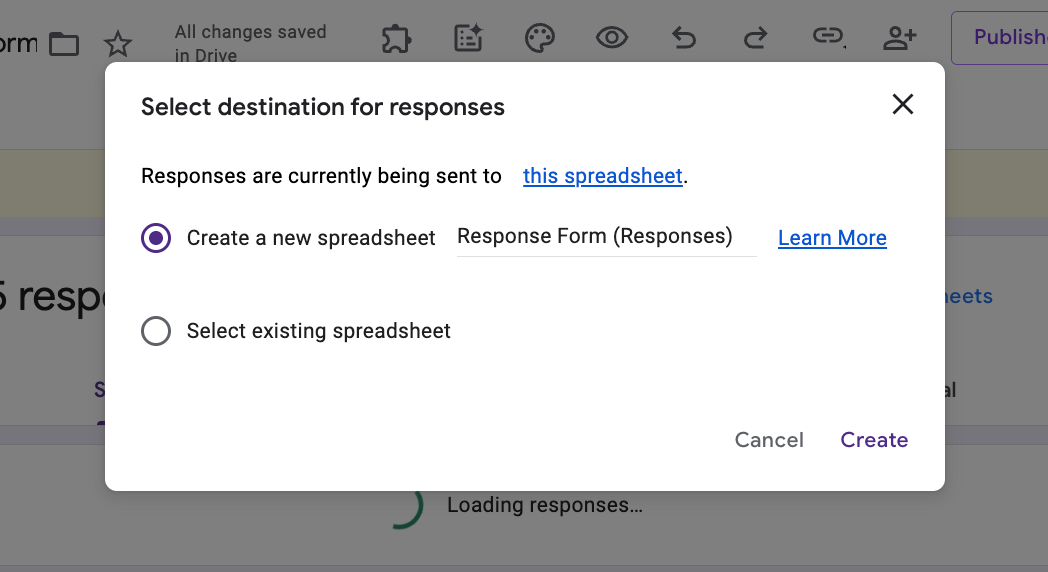
- Click on Select destination for responses.
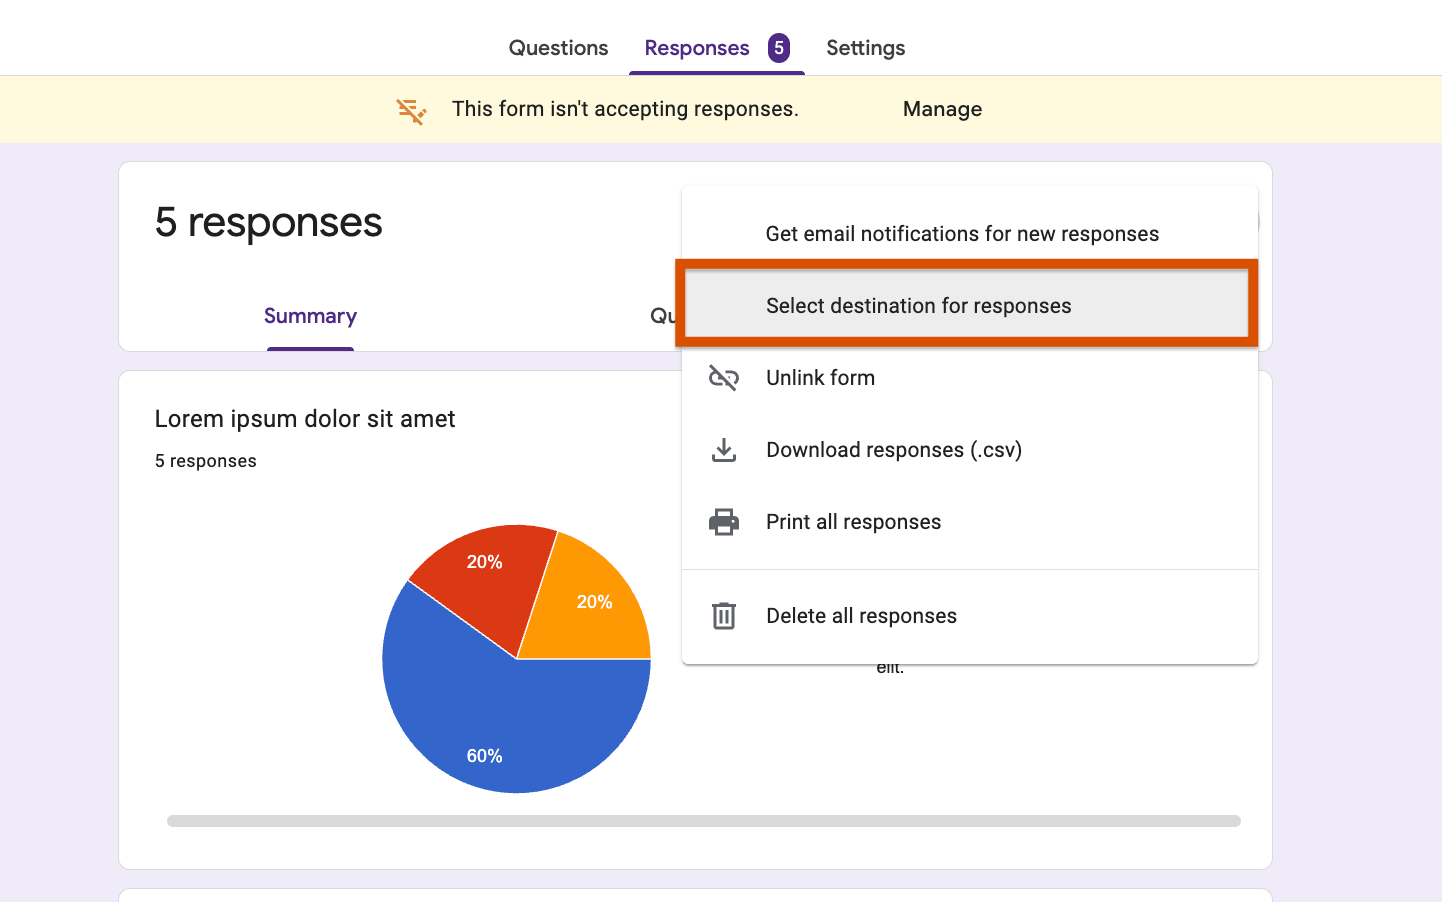
- Select the destination for responses and click Create to send the responses to a Google Sheet. You can either create a new spreadsheet or select an existing one.
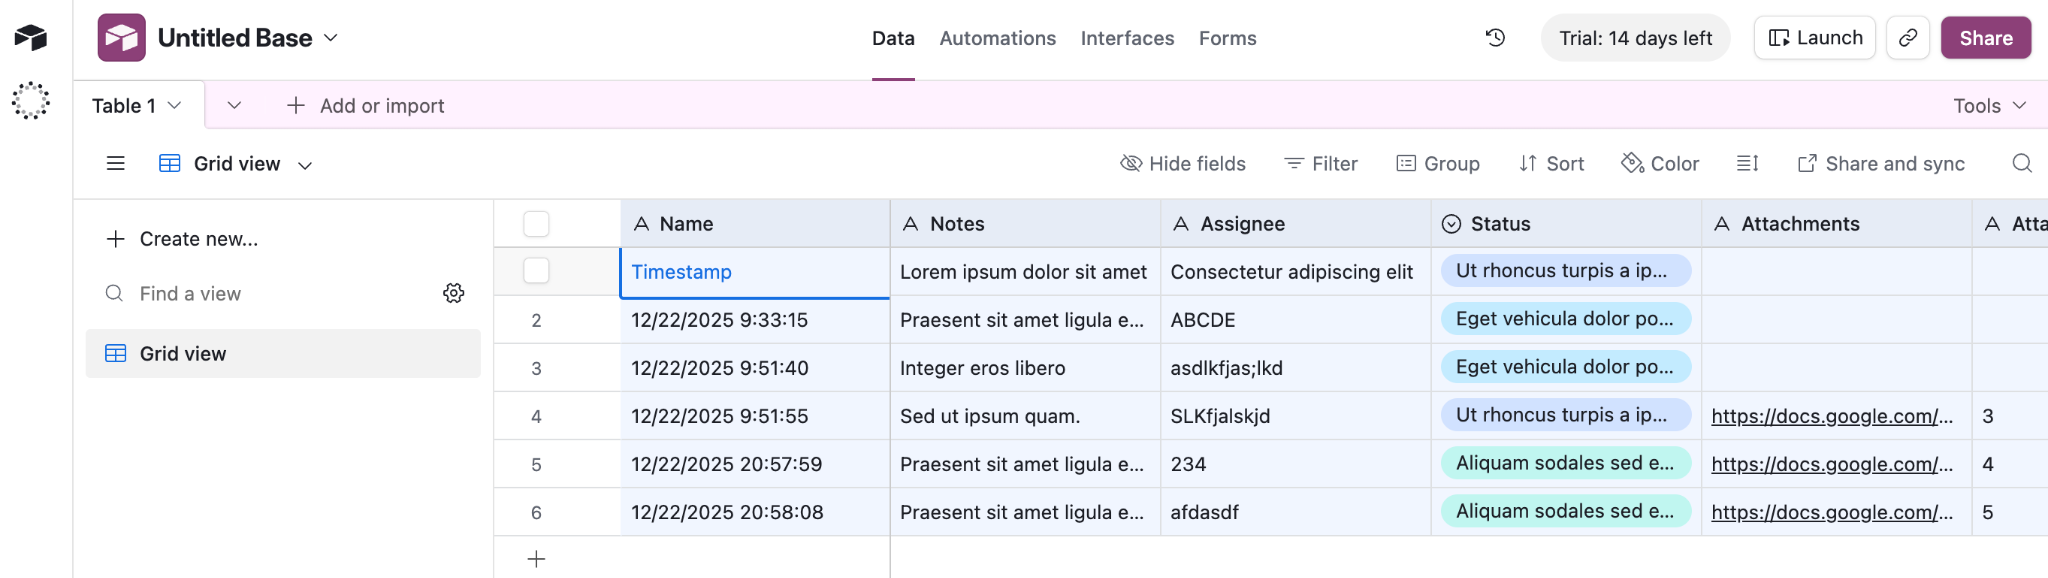
- In your new Airtable base, create the same fields as in your Google Sheet. Make sure all Airtable fields are text fields.
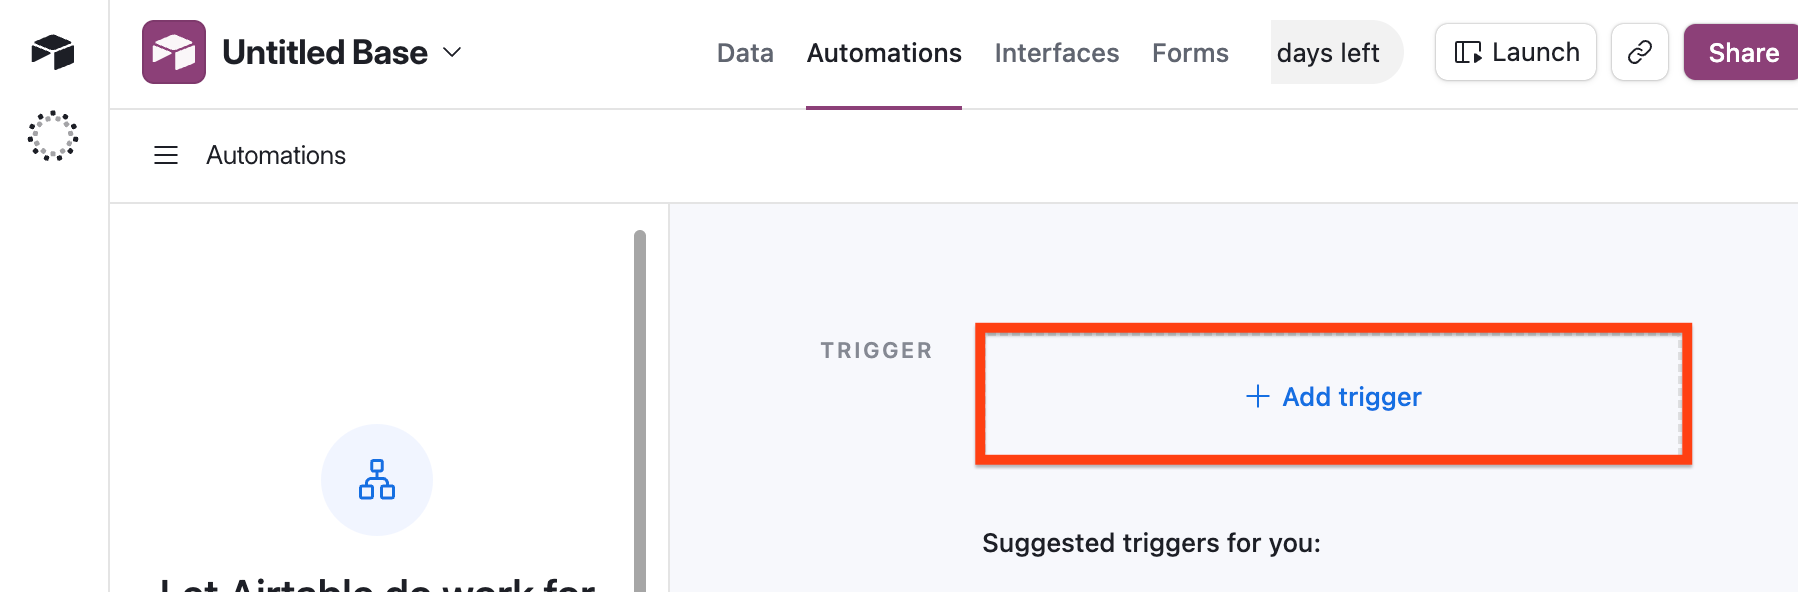
- Click the Automations tab at the top. This is how you connect third-party tools, like Google Forms, to Airtable and create automations for your base.
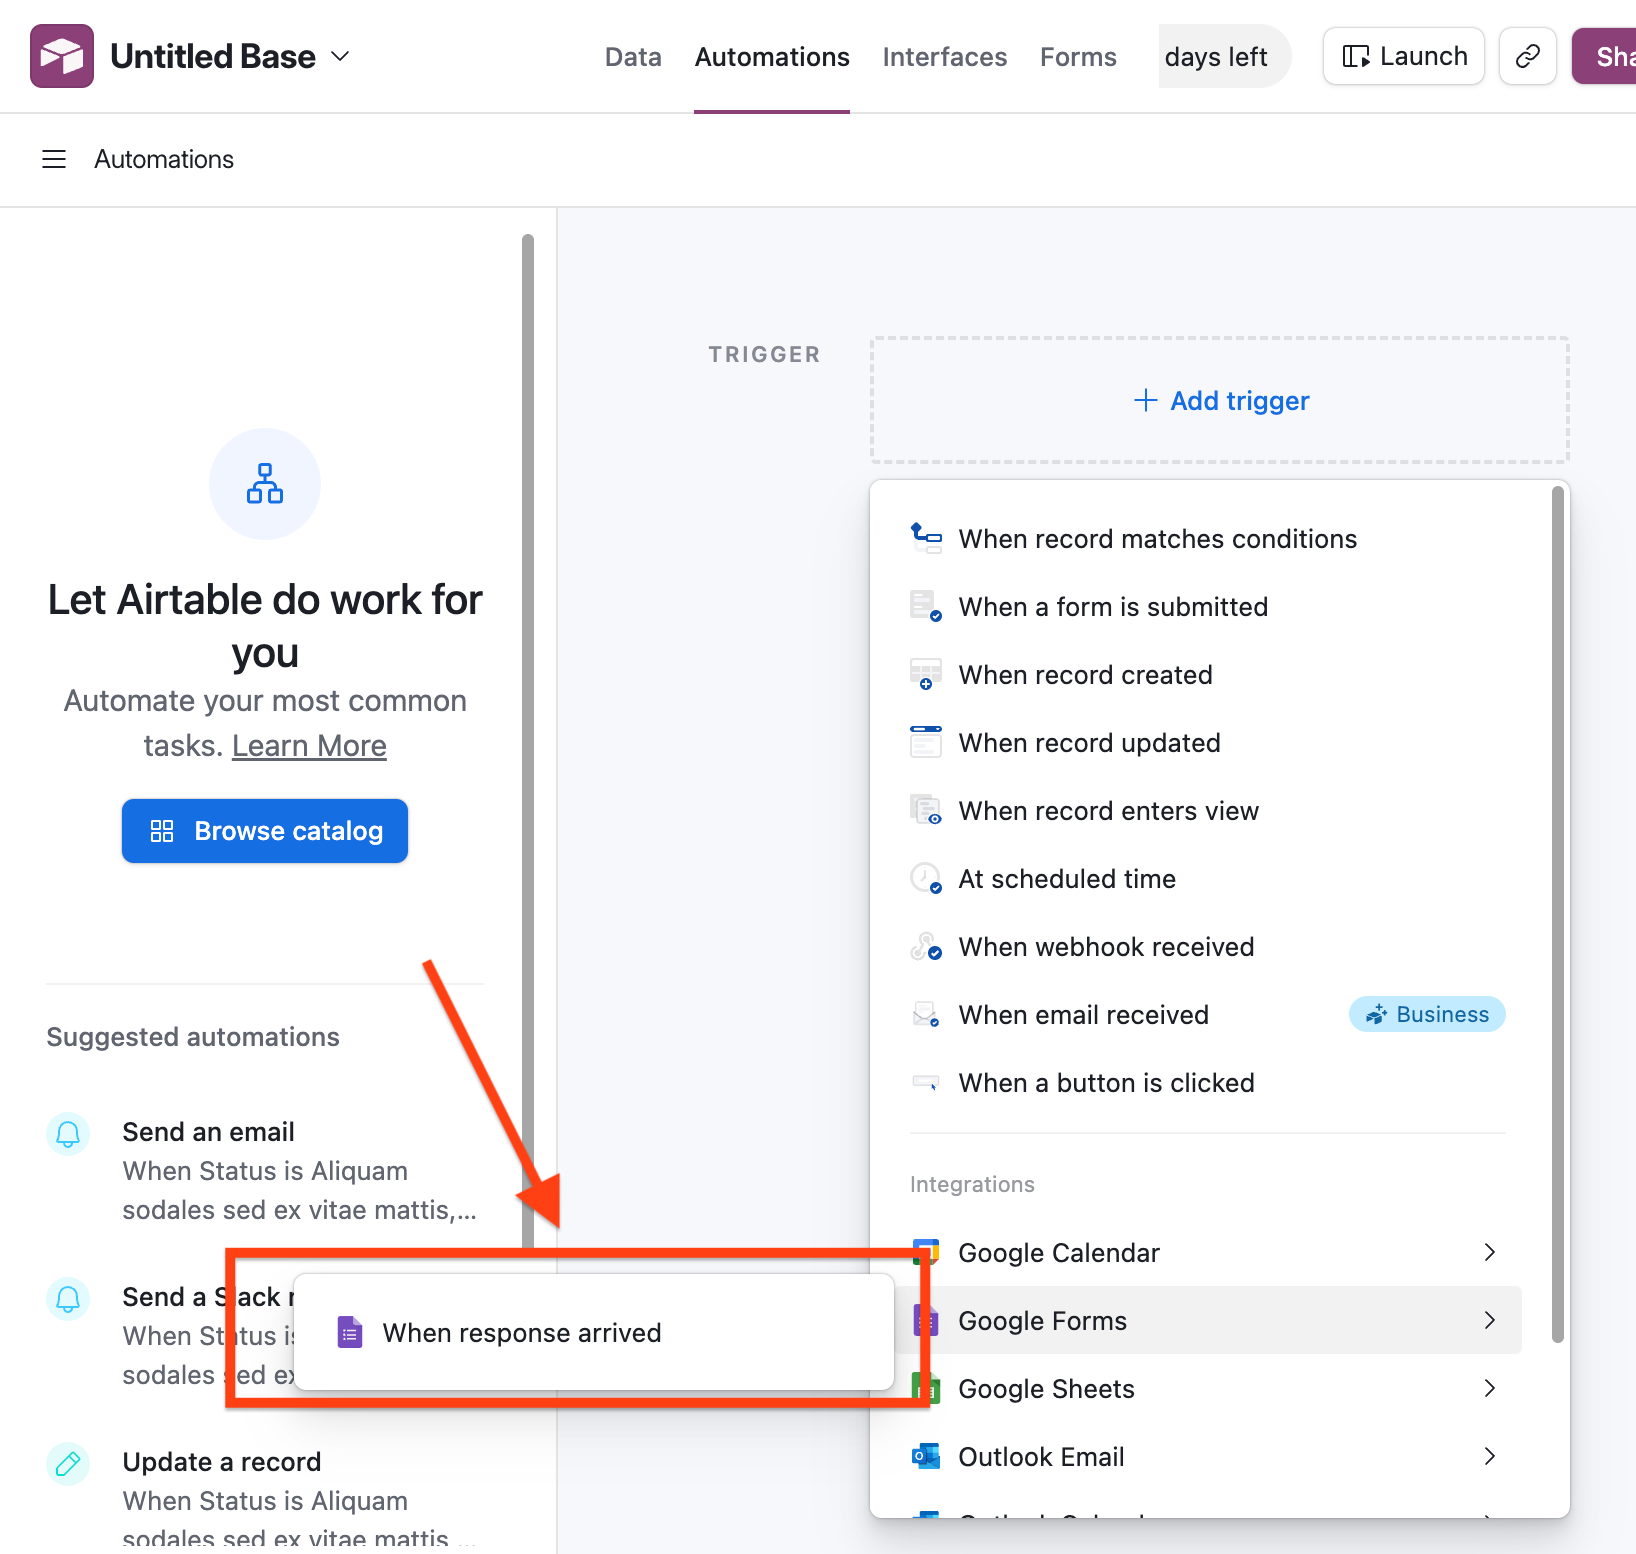
- Click the + Add trigger button.
- Under Google Forms, select When response arrived. This ensures every response is automatically forwarded to Airtable.
- Select your Google Forms account from the dropdown in the Configuration box. If you already have a connected Google Account, select it. If not, connect it now.
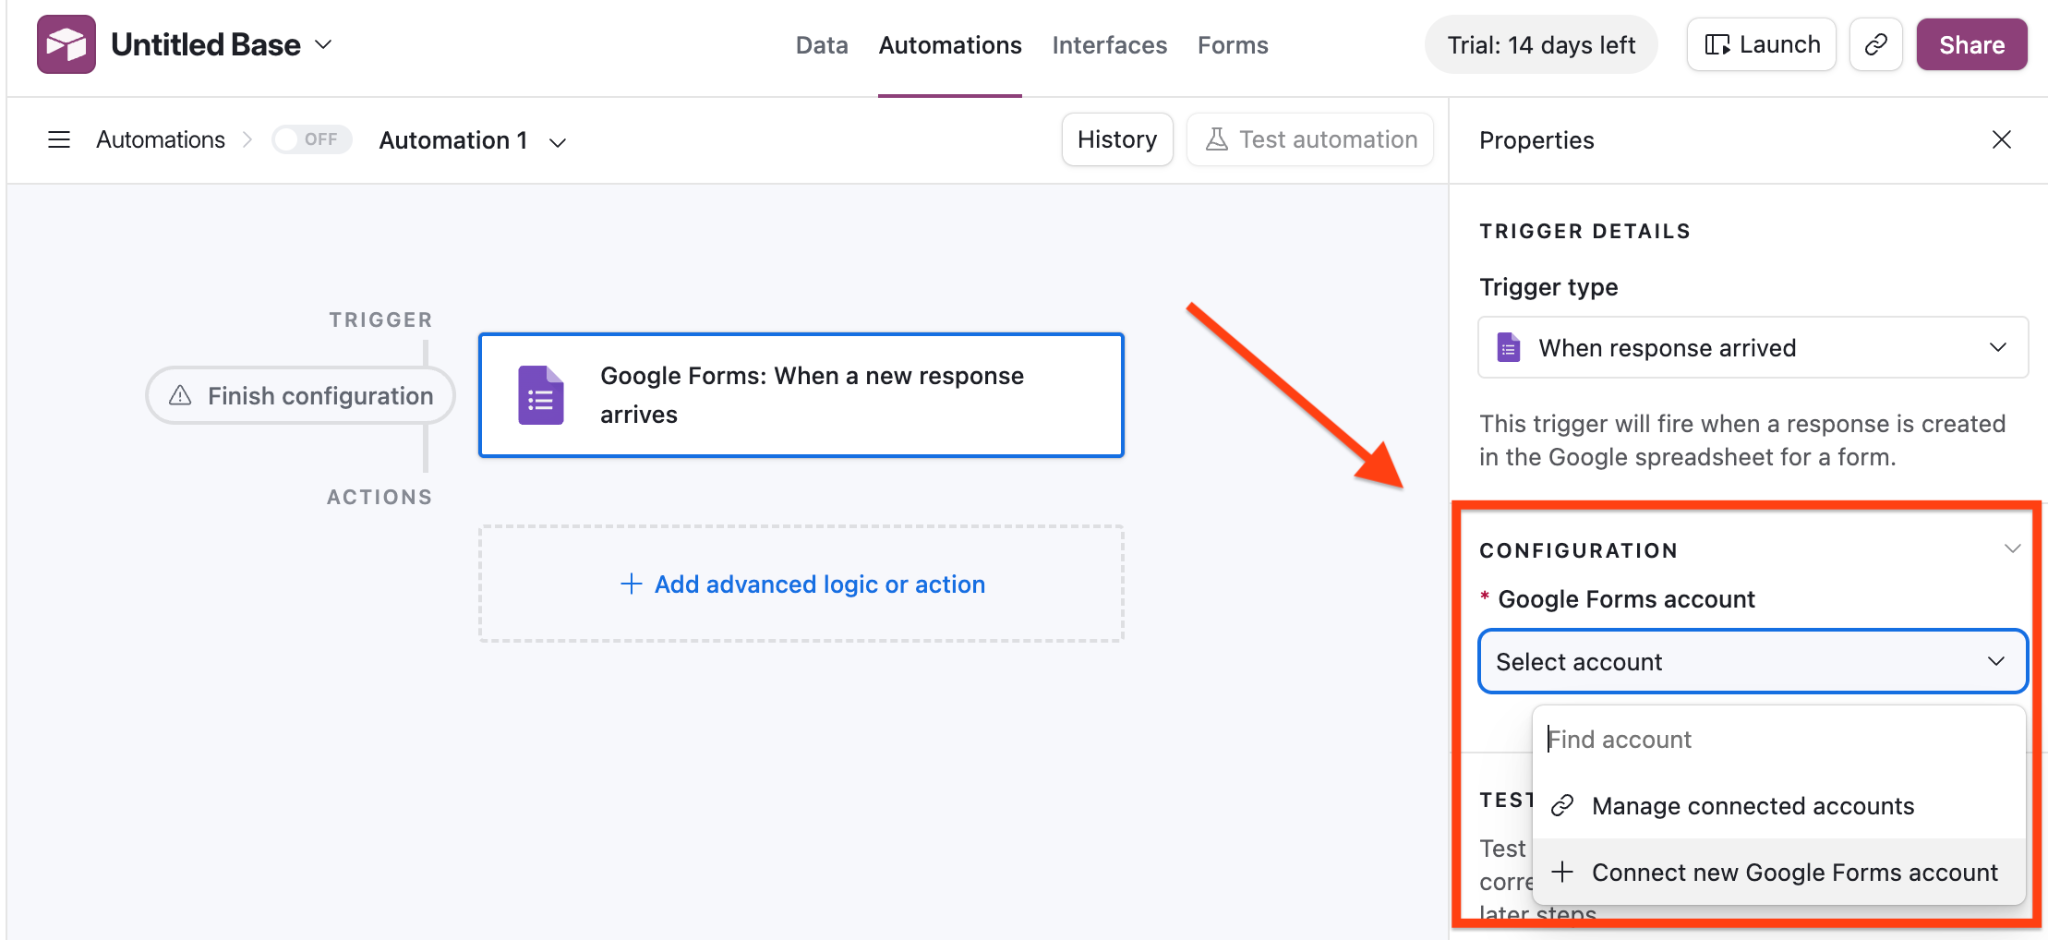
- Select Connect new Google account to connect to existing documents in your Google Workspace. Select the Google account you want to connect to Airtable.
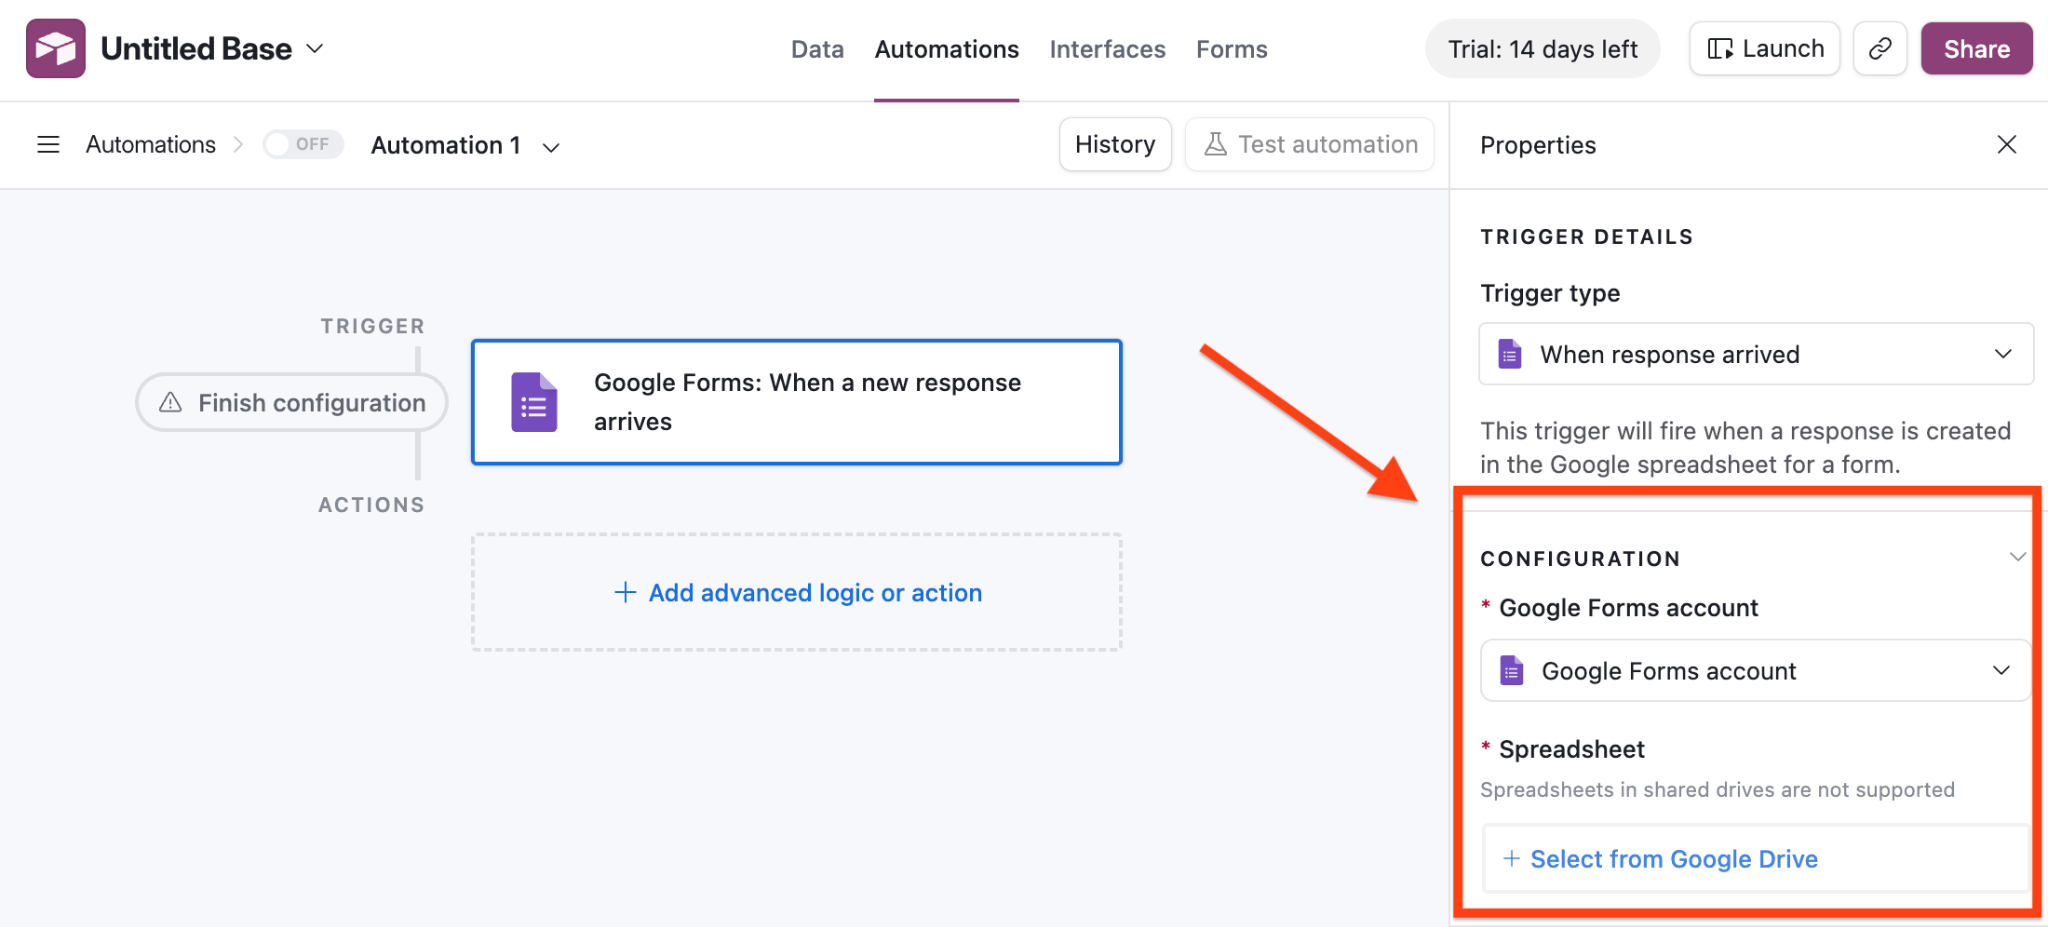
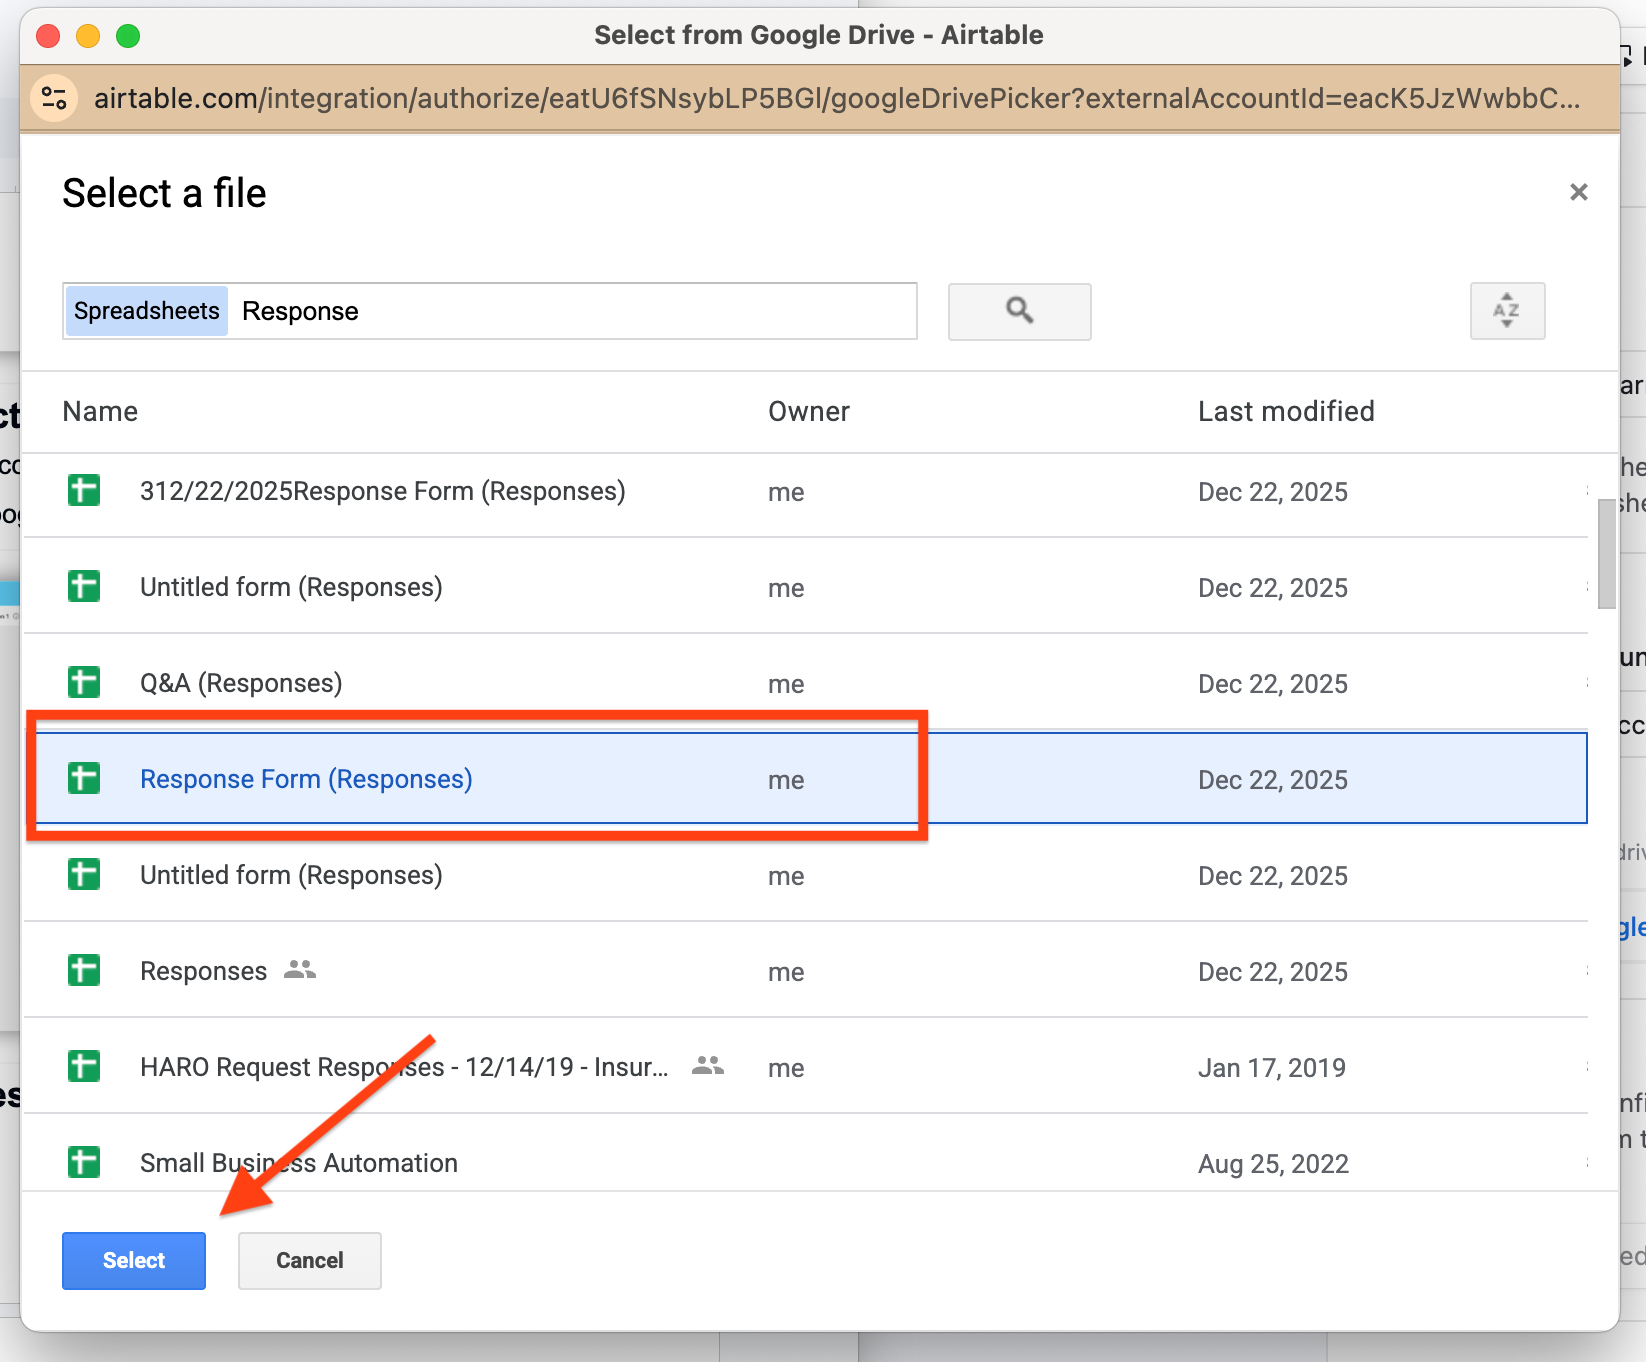
- To connect a specific spreadsheet, click on Select from Google Drive. Because your Google account is connected with Airtable, you can select files from your Google Drive.
- Click on the desired file and then Select.
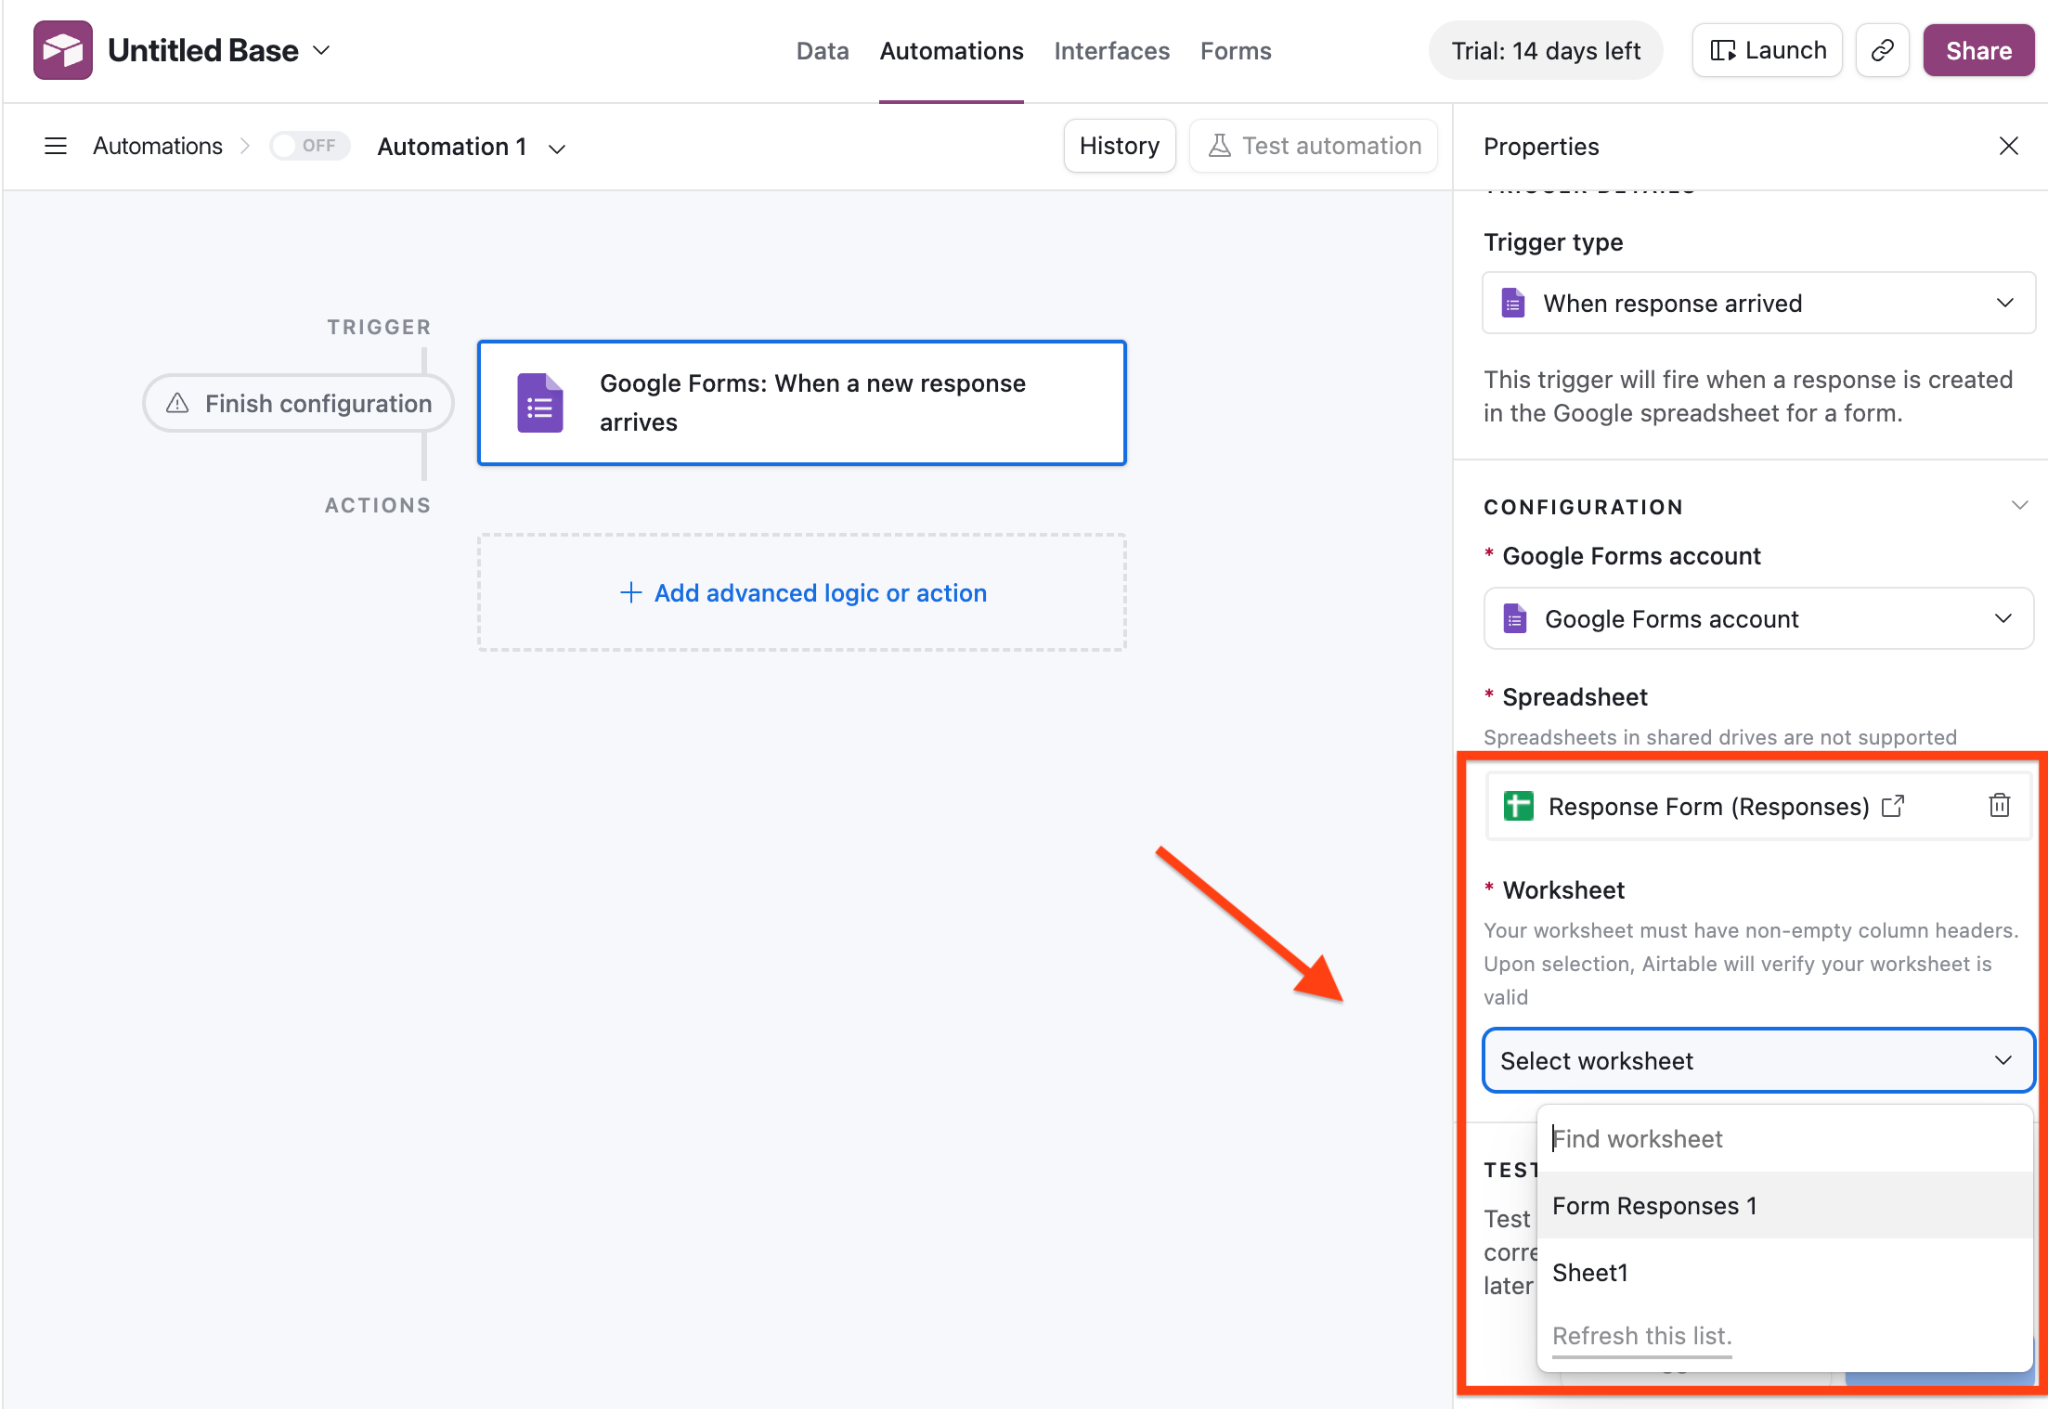
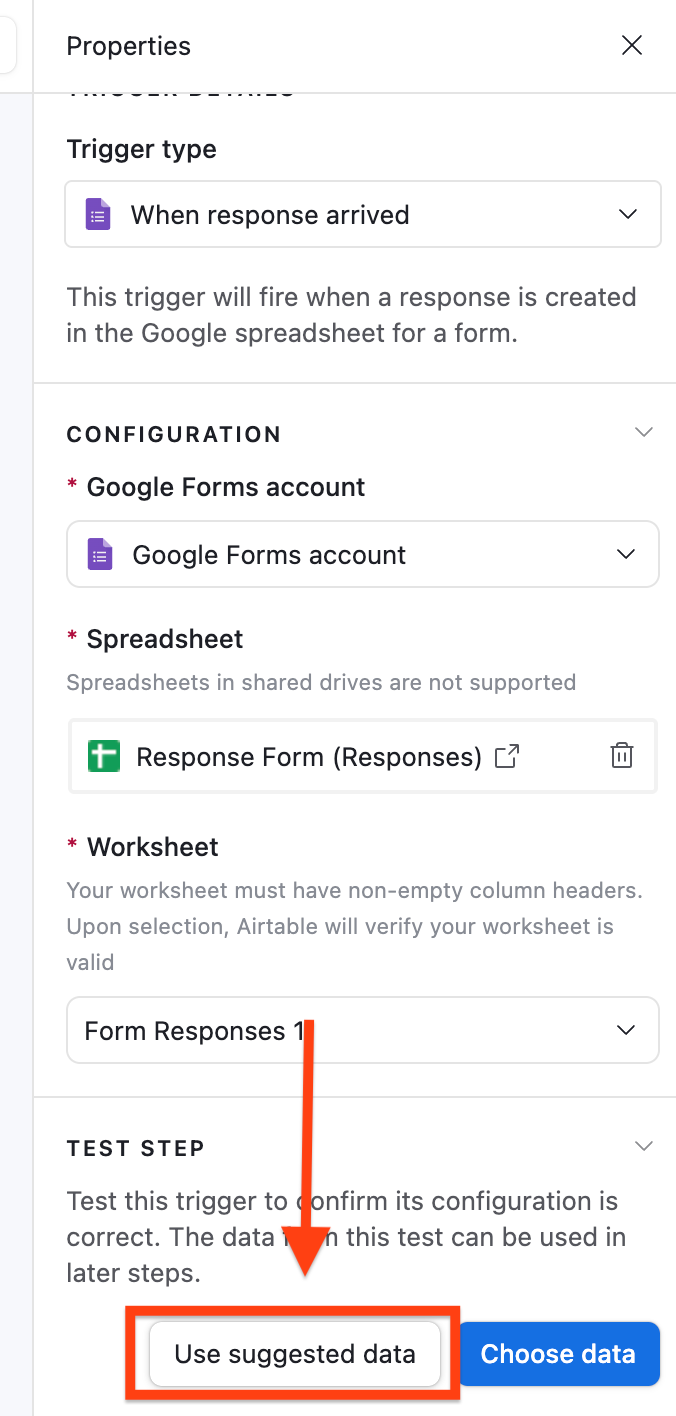
- In the same Configuration box, select the worksheet (Google Sheet) where the responses to your form are displayed.
- Click Use suggested data. In order for this to work, there should be at least one set of responses already submitted for your Google Form.
- Click Add advanced logic or action.
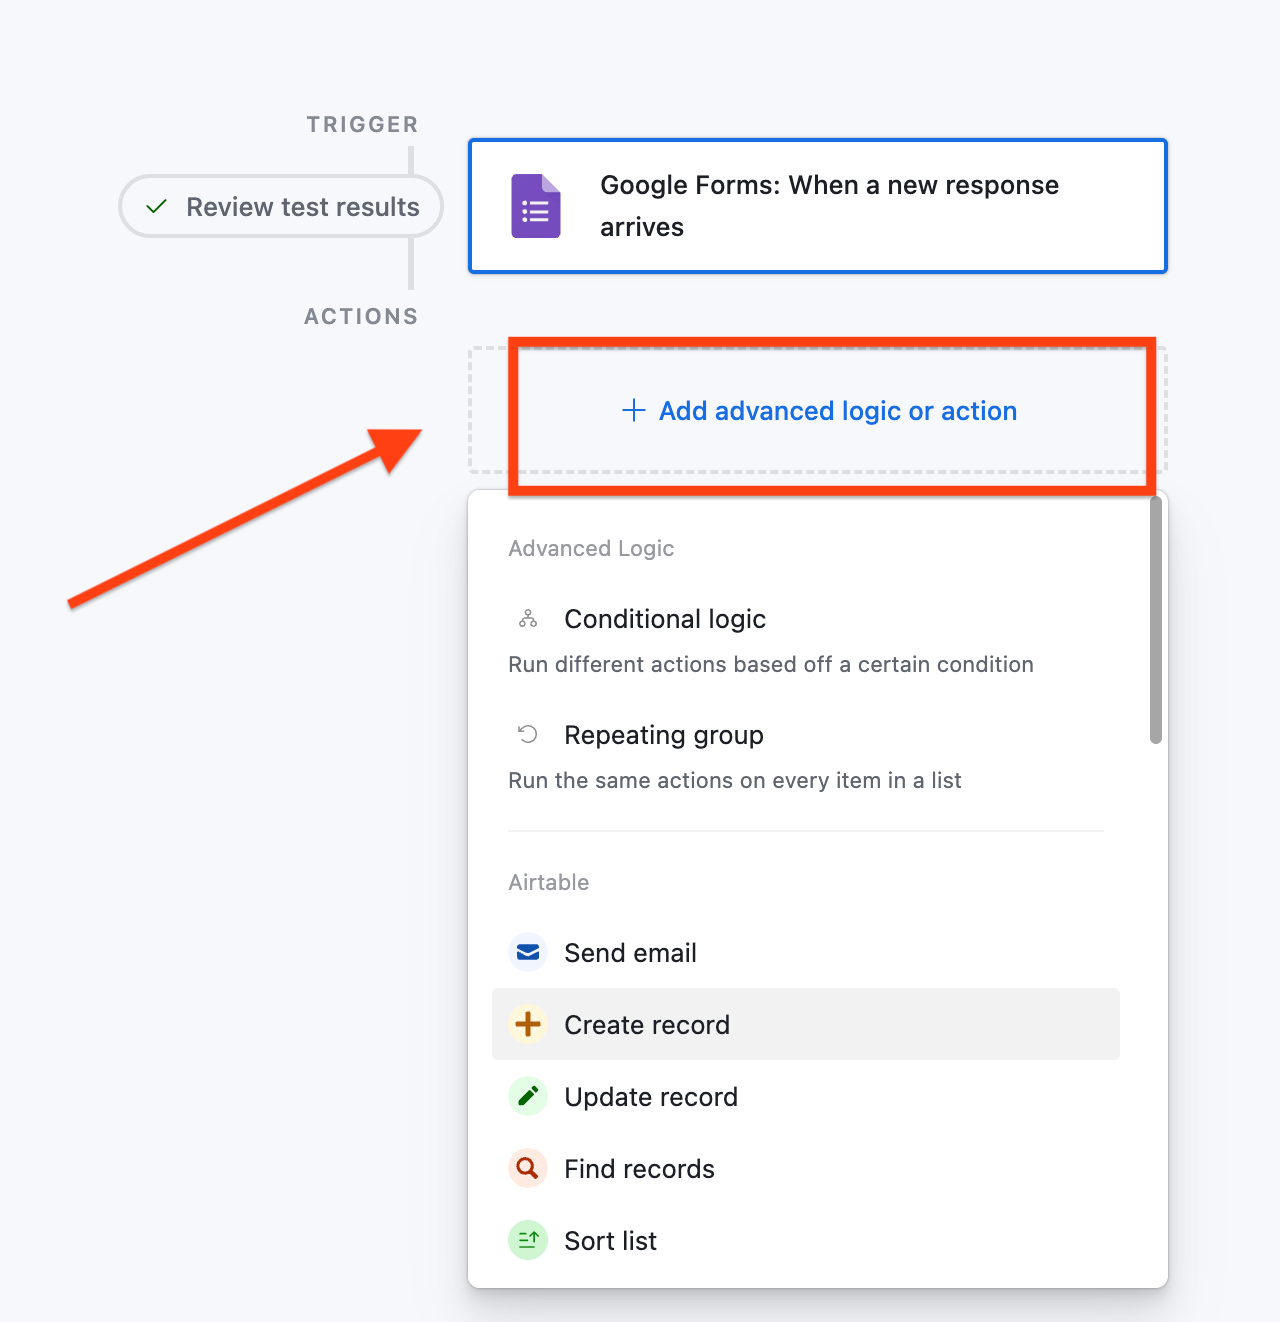
- Select Create record to create the logic that will ensure every response is added to your Airtable.

- Under Configuration, select the table you created that is associated with the form.
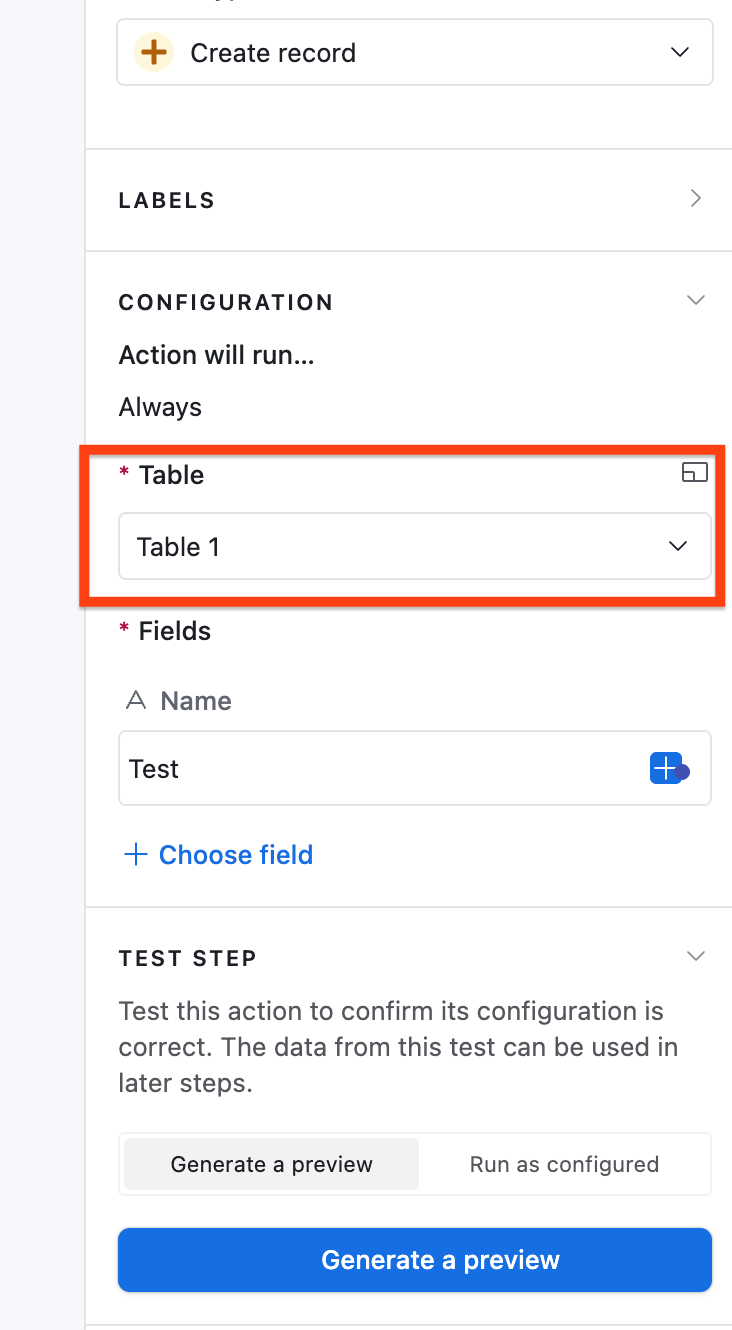
- Click on Choose field to ensure Airtable fields match their Google Form, so the data ends up in the right place. Click on the first field in the list and Select the first field displayed in the list.
Because we configured our Airtable base earlier to match our Google Sheet, the values will be the same. Repeat the same process of matching Airtable and Google Sheets fields until they’re all done.
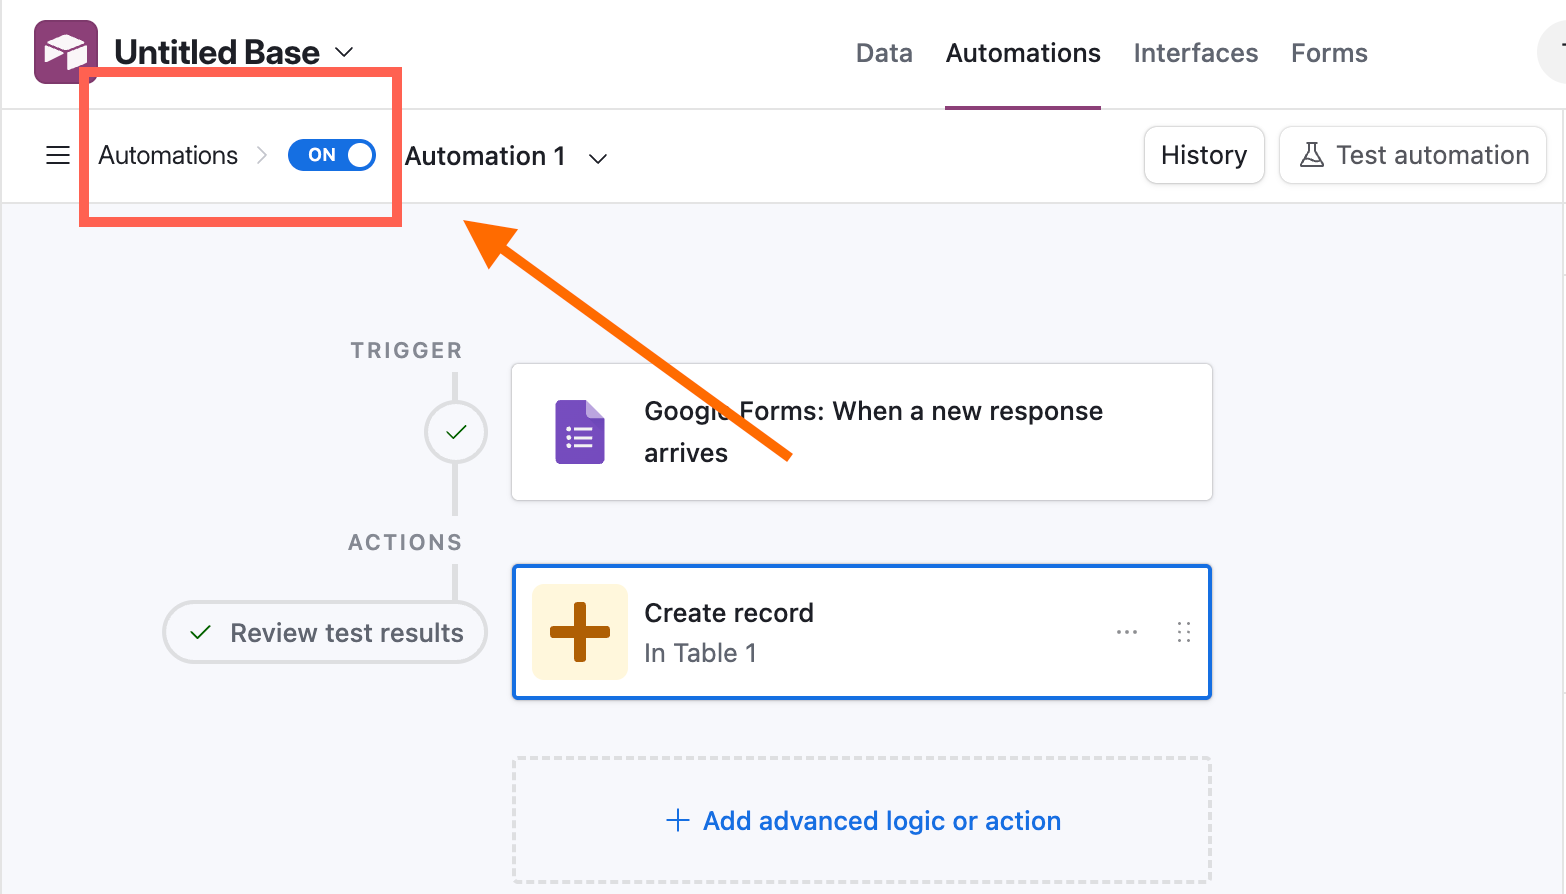
- Click on Generate a preview and publish it.

- Toggle “on” your automation at the top left to make it live. All incoming Google Form responses will now be automatically forwarded to your Airtable base.
Pros and cons
First, the pros: Google Forms is free to use and easy to set up. If you’re familiar with the Google ecosystem, it’ll feel seamless. You can also connect it to Airtable, but it does require an extra step.
That brings us to the considerations: First and foremost, it’s not a direct integration. This is the biggest drawback because you’re more likely to have points of failure, delays, and things to maintain. What’s more, there’s limited form logic and customization, issues with data formatting, and no built-in business features.
The bottom line? If your form is simple and you don’t mind using other third-party apps, it’s an OK step. However, if you want automation before data reaches Airtable, if you need clean structured data, or if you’re building a repeatable process workflow, this isn’t your best option.
Using third-party tools
For more flexibility, third-party integrations can help bridge the gap. Tools like Zapier or Unito let you connect Google Forms with Airtable while adding more control, automation, and structure to your workflow.
Below are the steps for both Zapier and Unito.
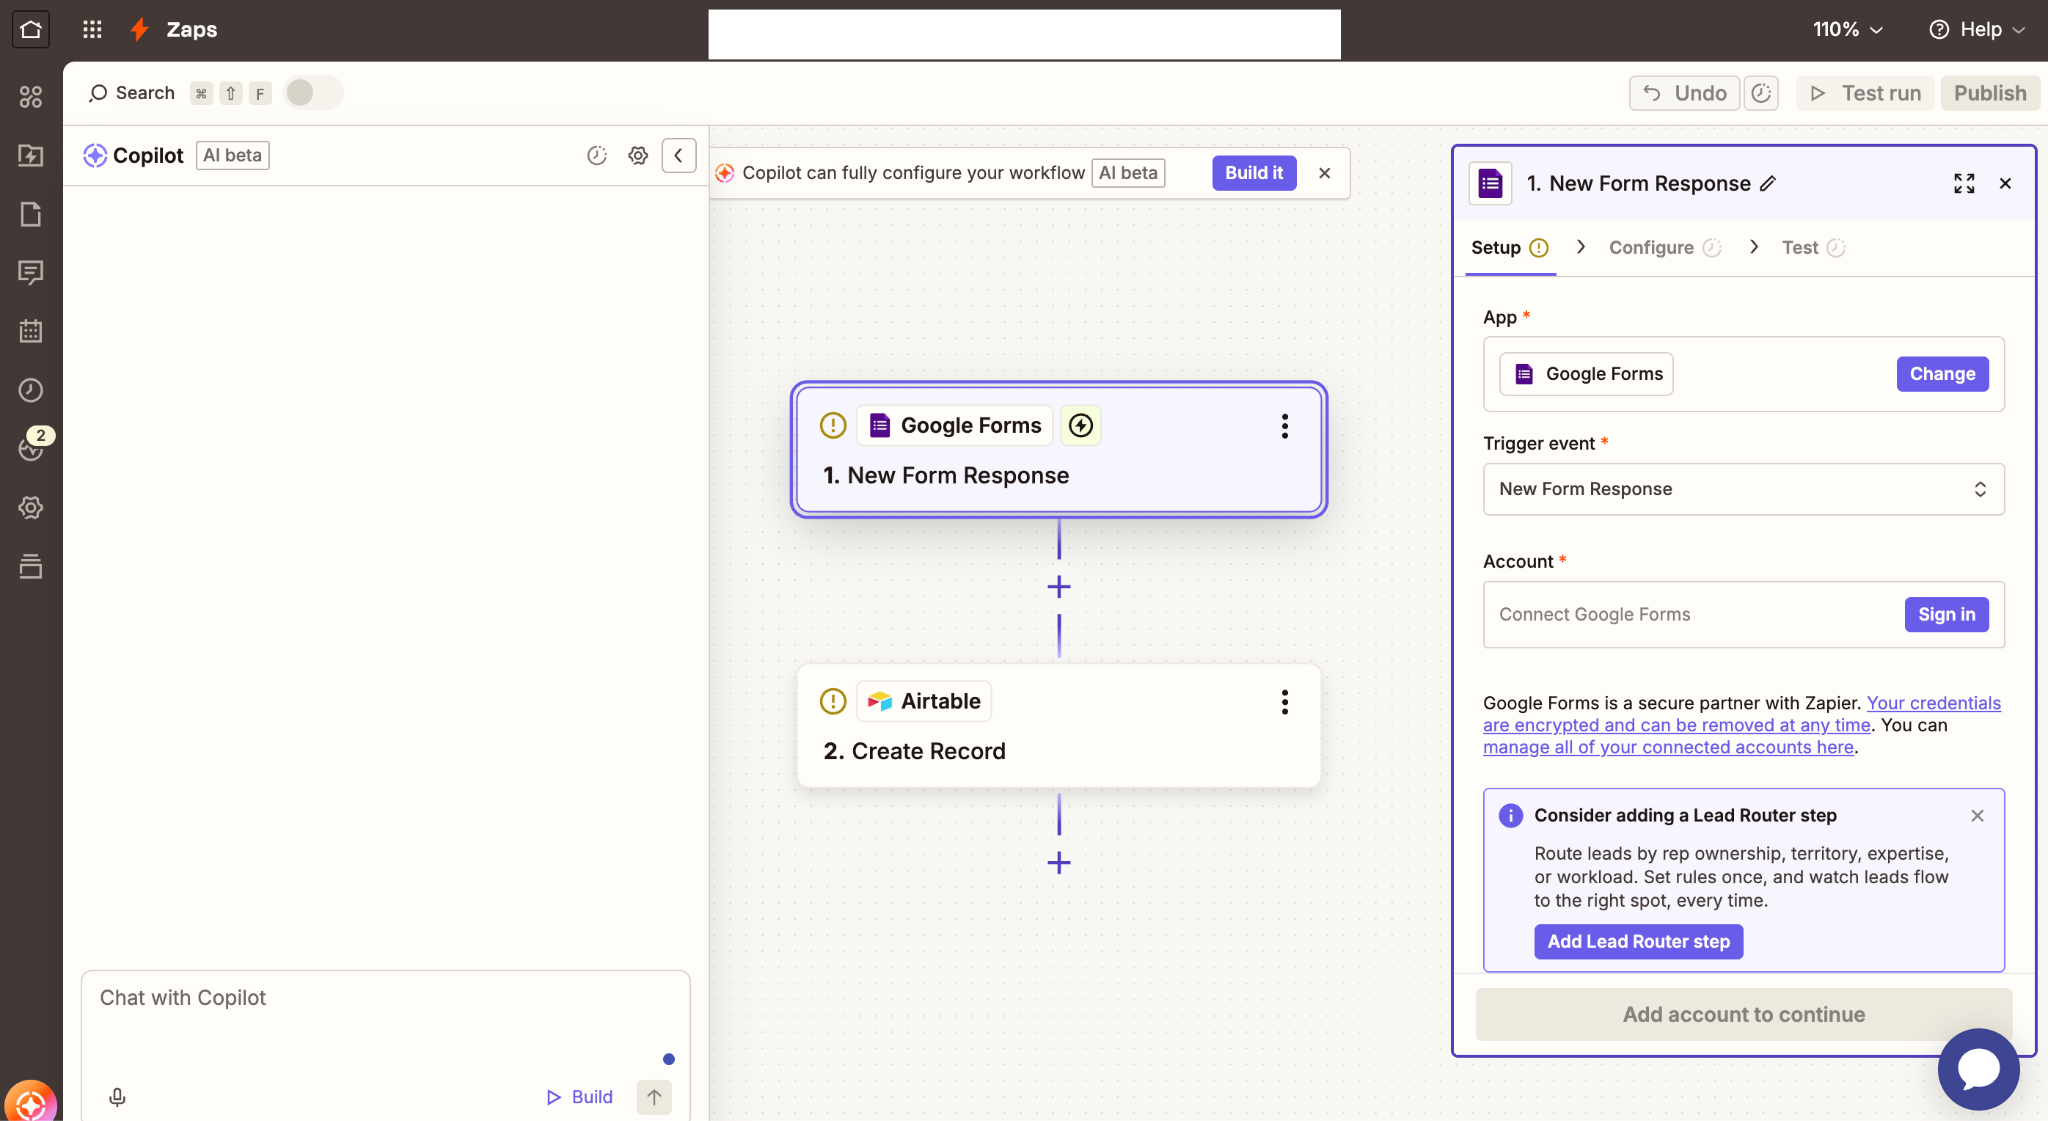
How to connect Google Forms to Airtable using Zapier
Connecting Google Forms to Airtable using Zapier is considerably easier than using the Airtable automation, and it takes less time — you’re set up in just one minute. Once you’ve got a Zapier account, here’s how to make the connection:
- Open Zapier and connect your Google Forms account. The screen you open in Zapier should prompt this.
- Allow Zapier to access your Google account by selecting your account and clicking Continue.

- In Zapier, select New Form Response from the Trigger event dropdown and click Continue.
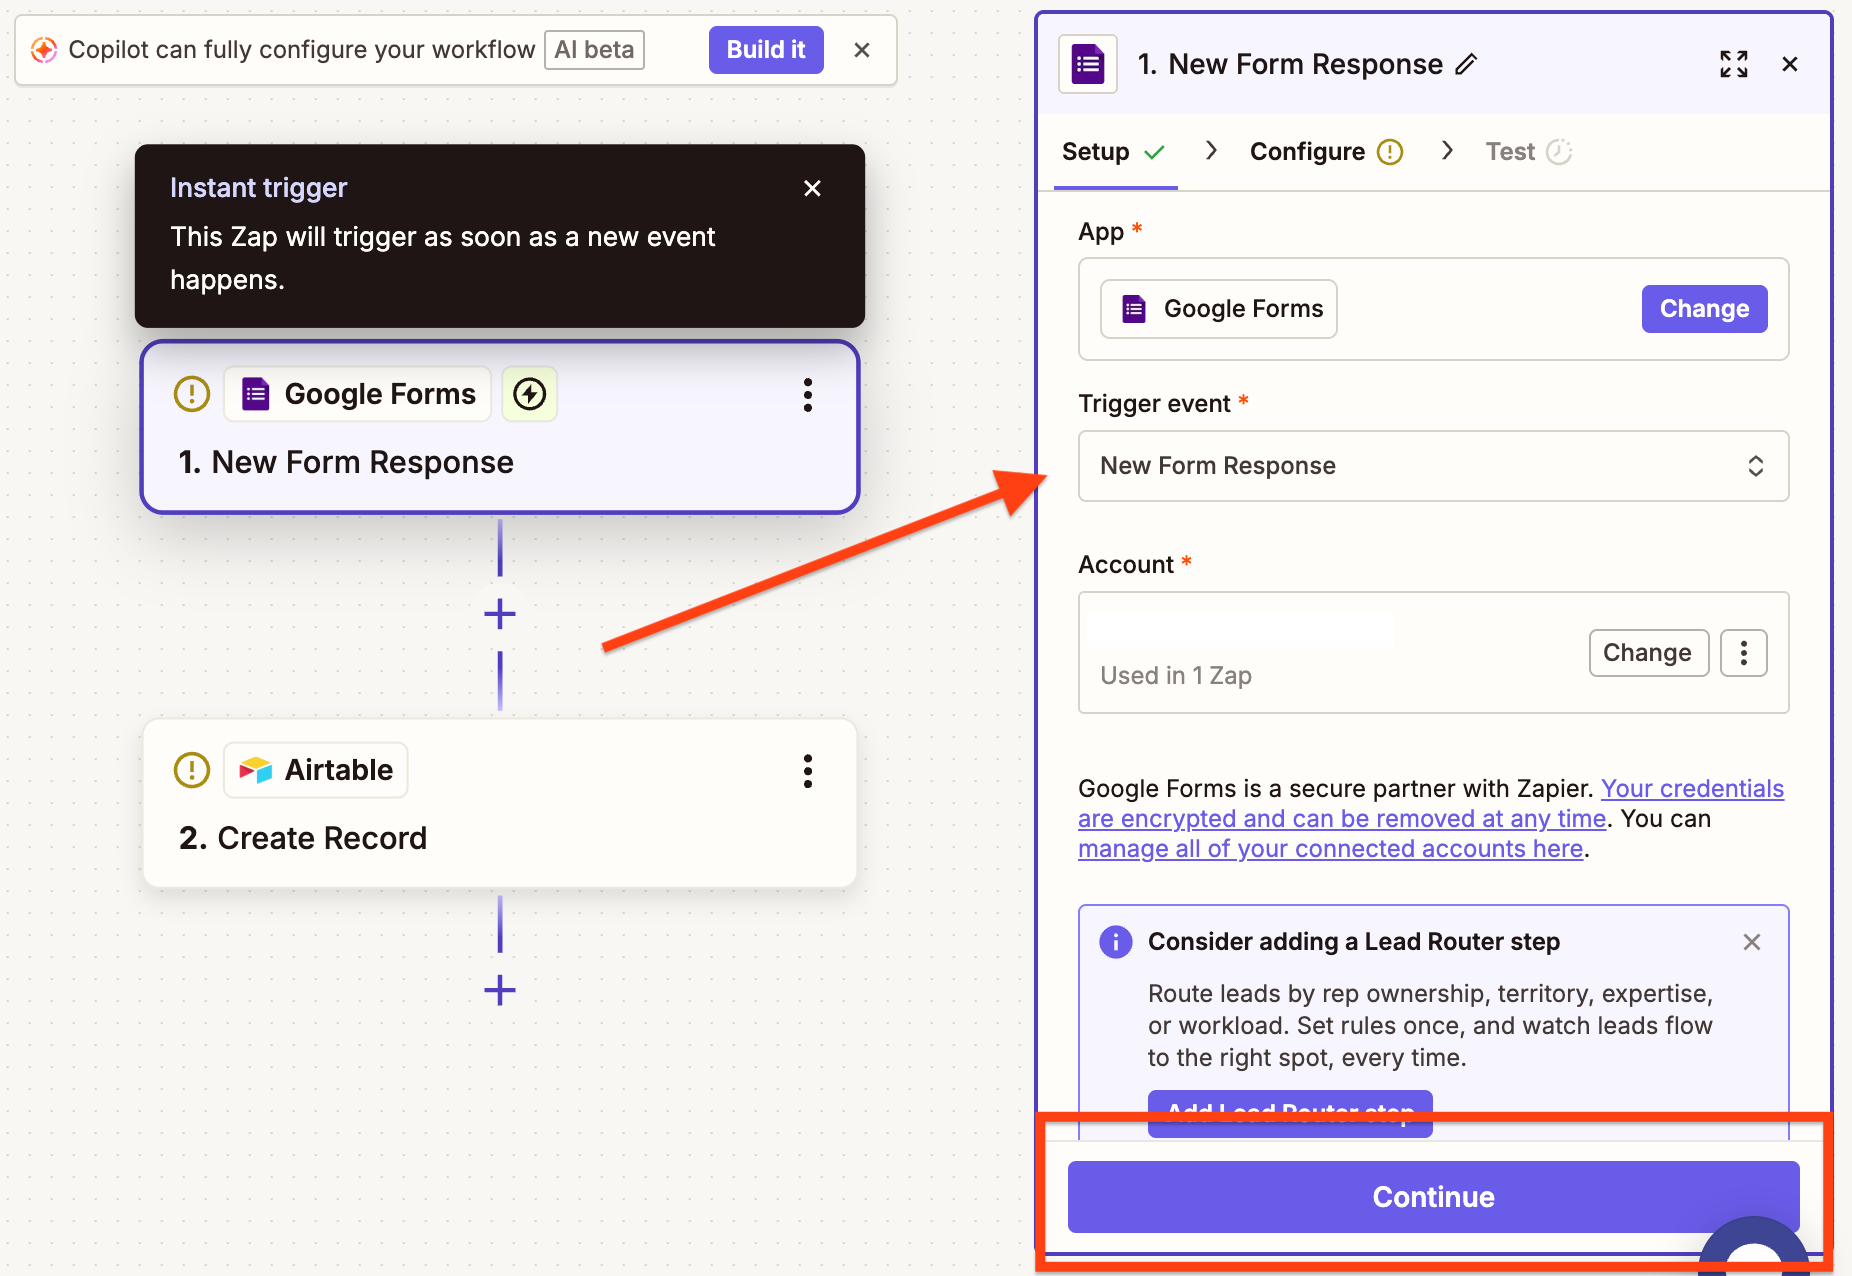
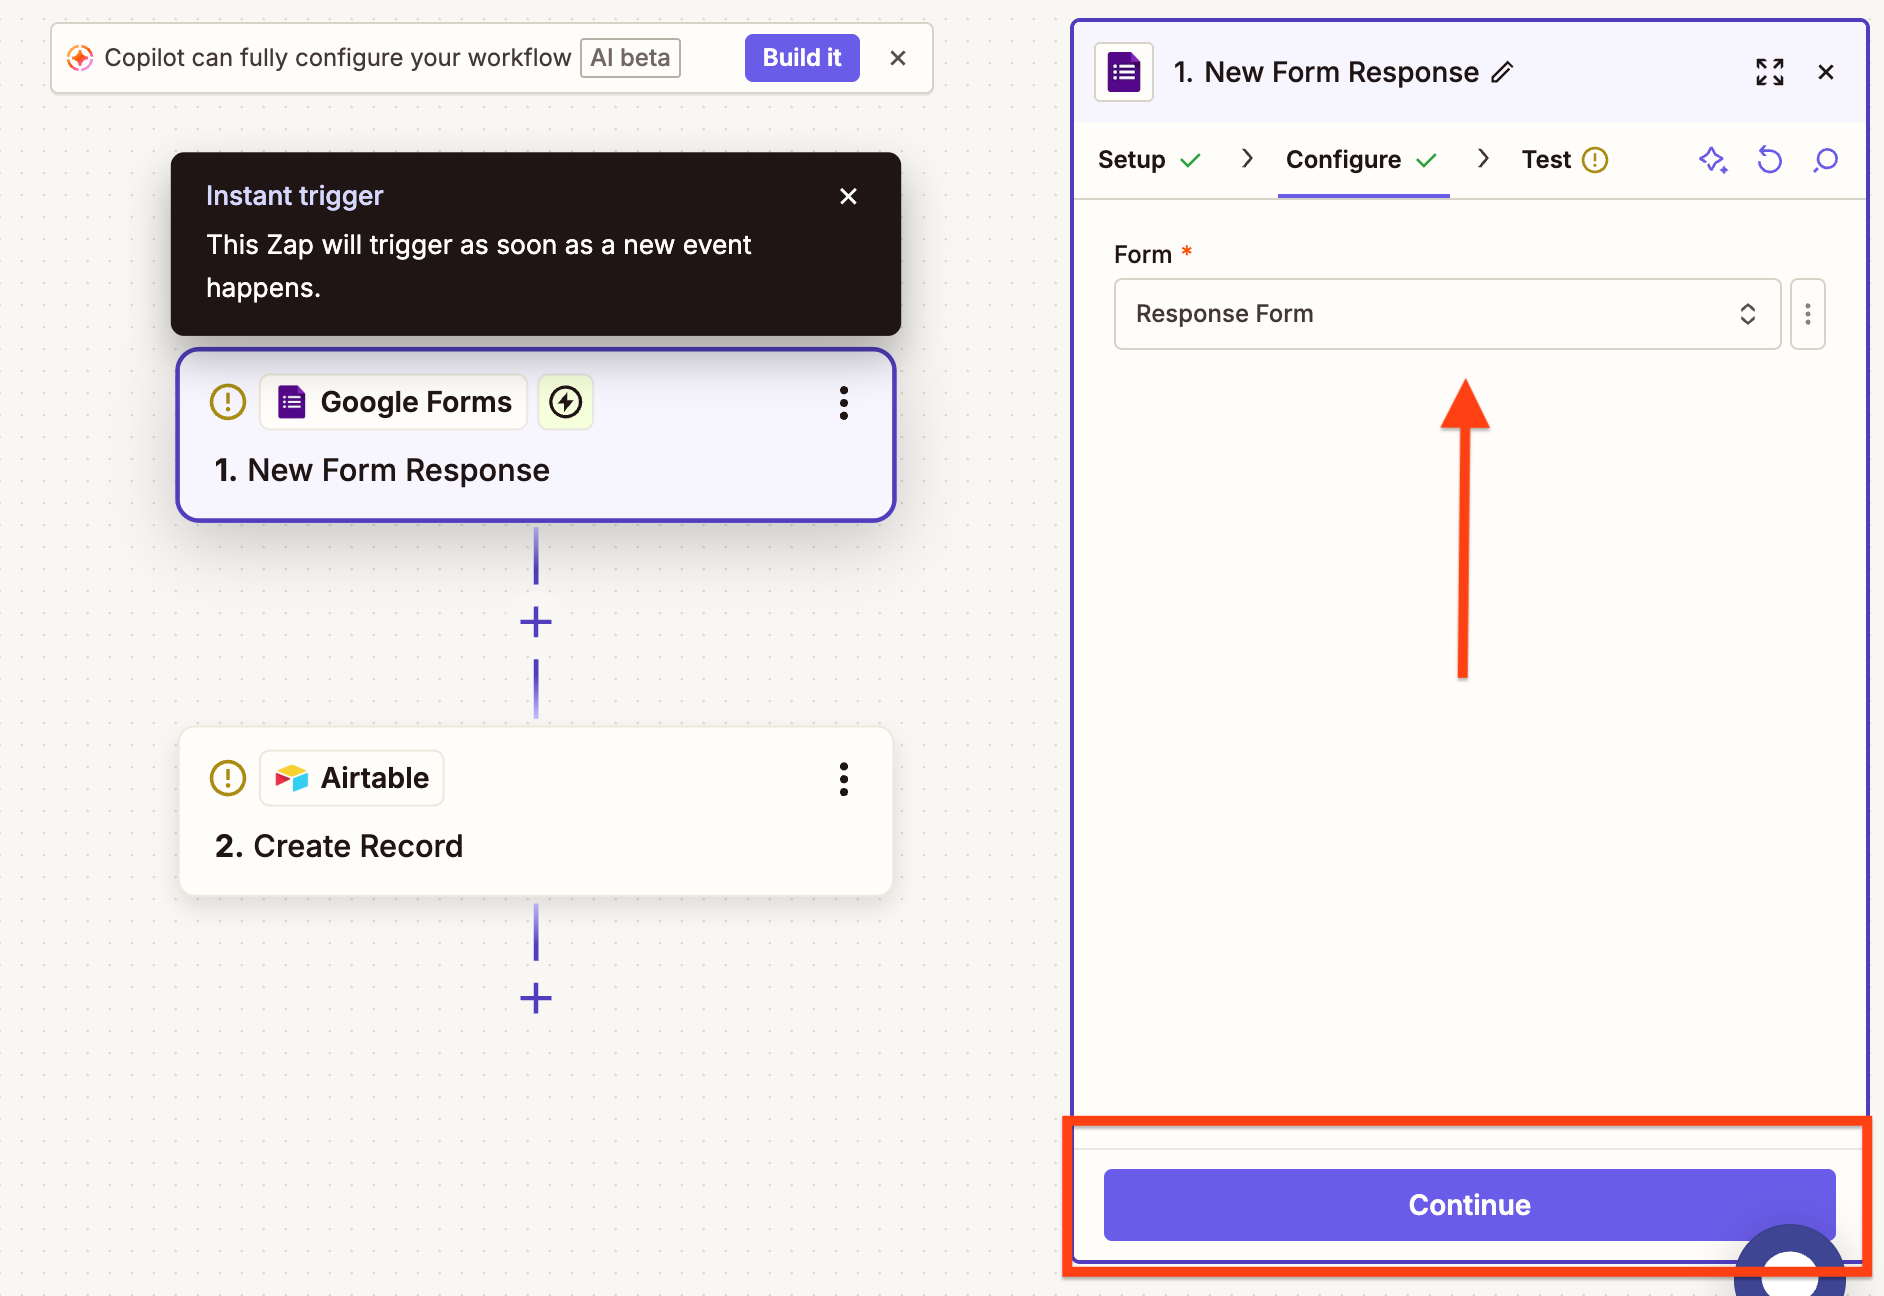
- Select the Google Form you want to connect from the Form dropdown and click Continue.
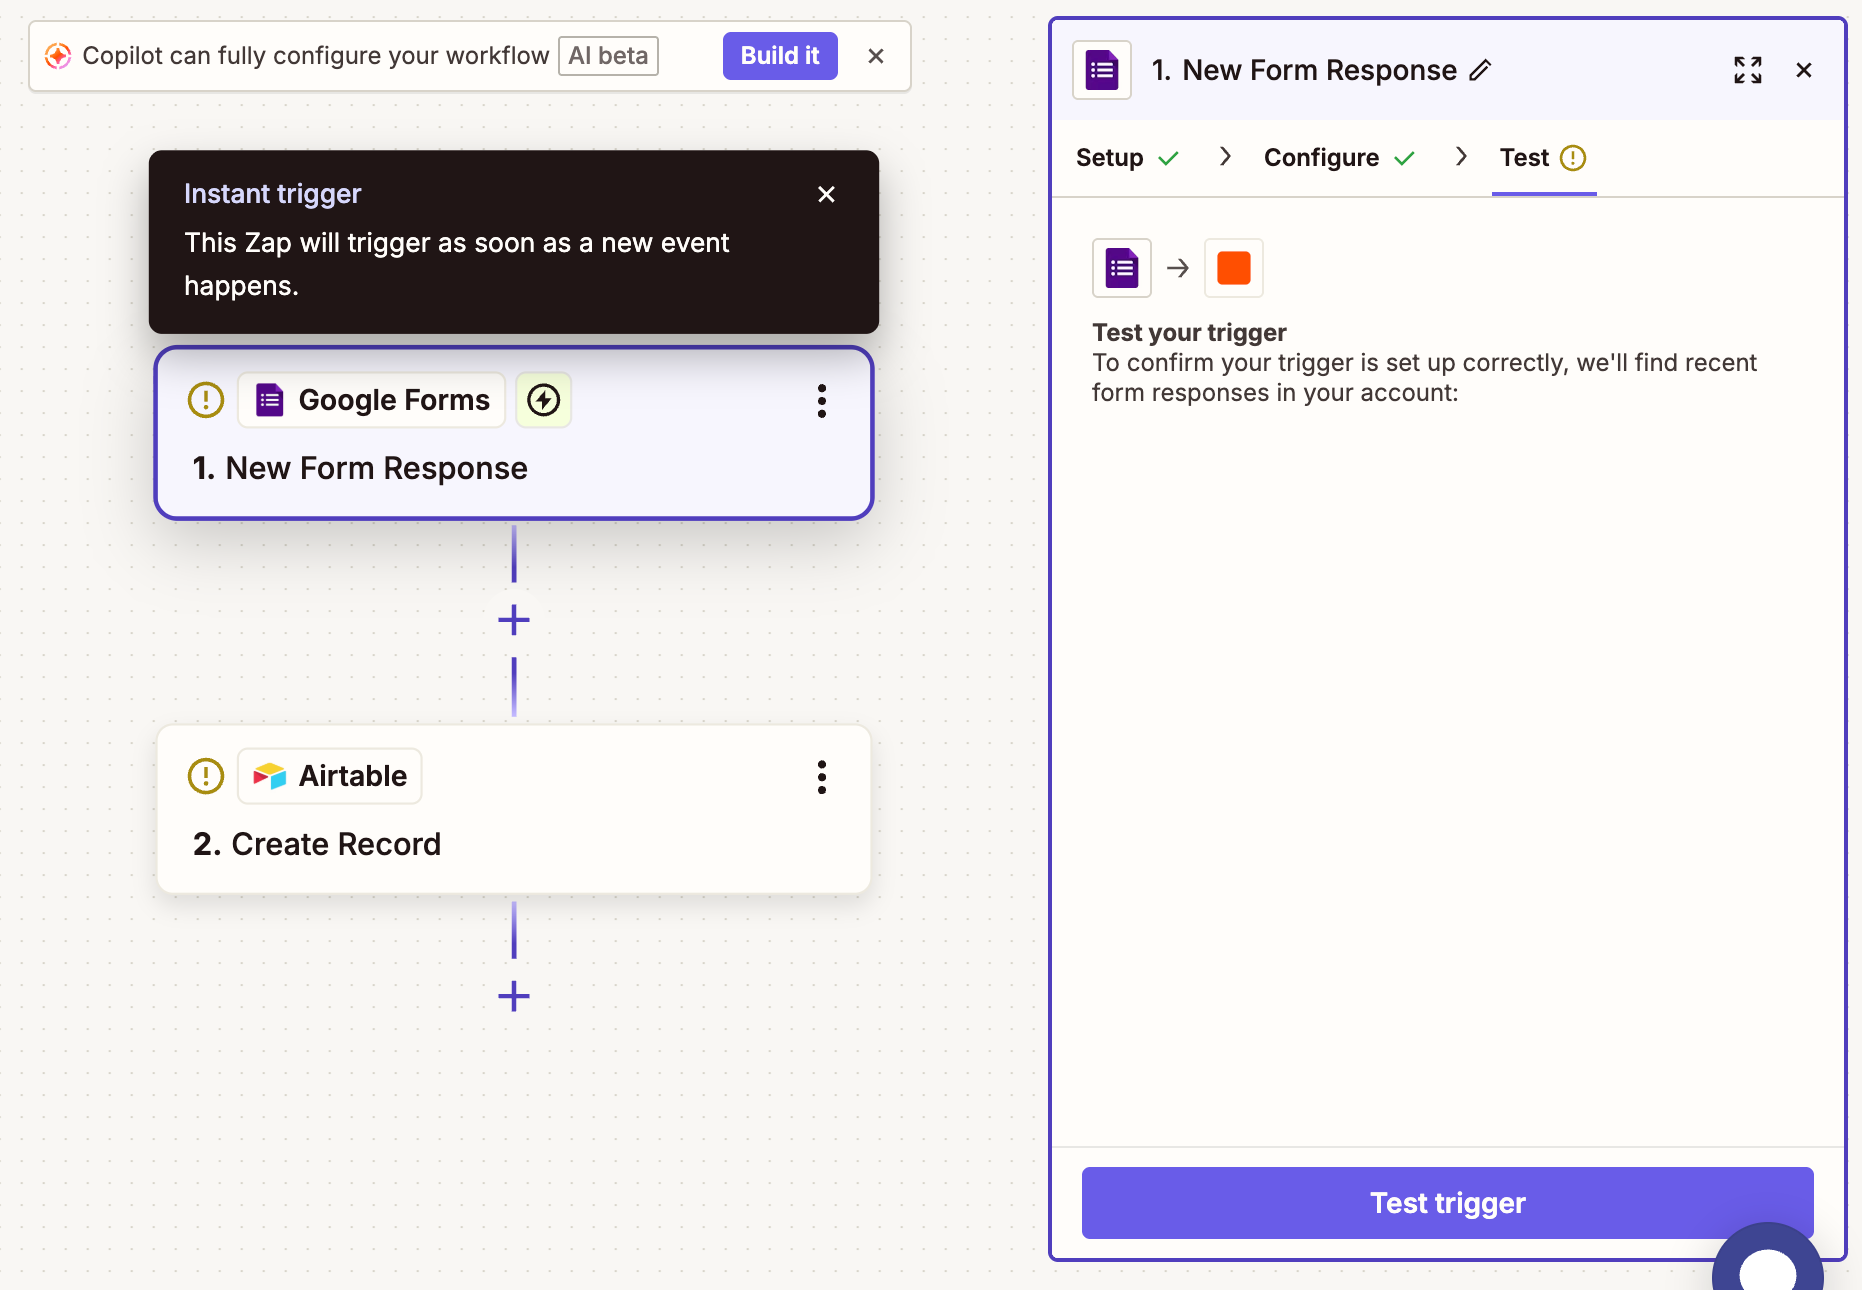
- Click Test trigger to confirm it was set up correctly.
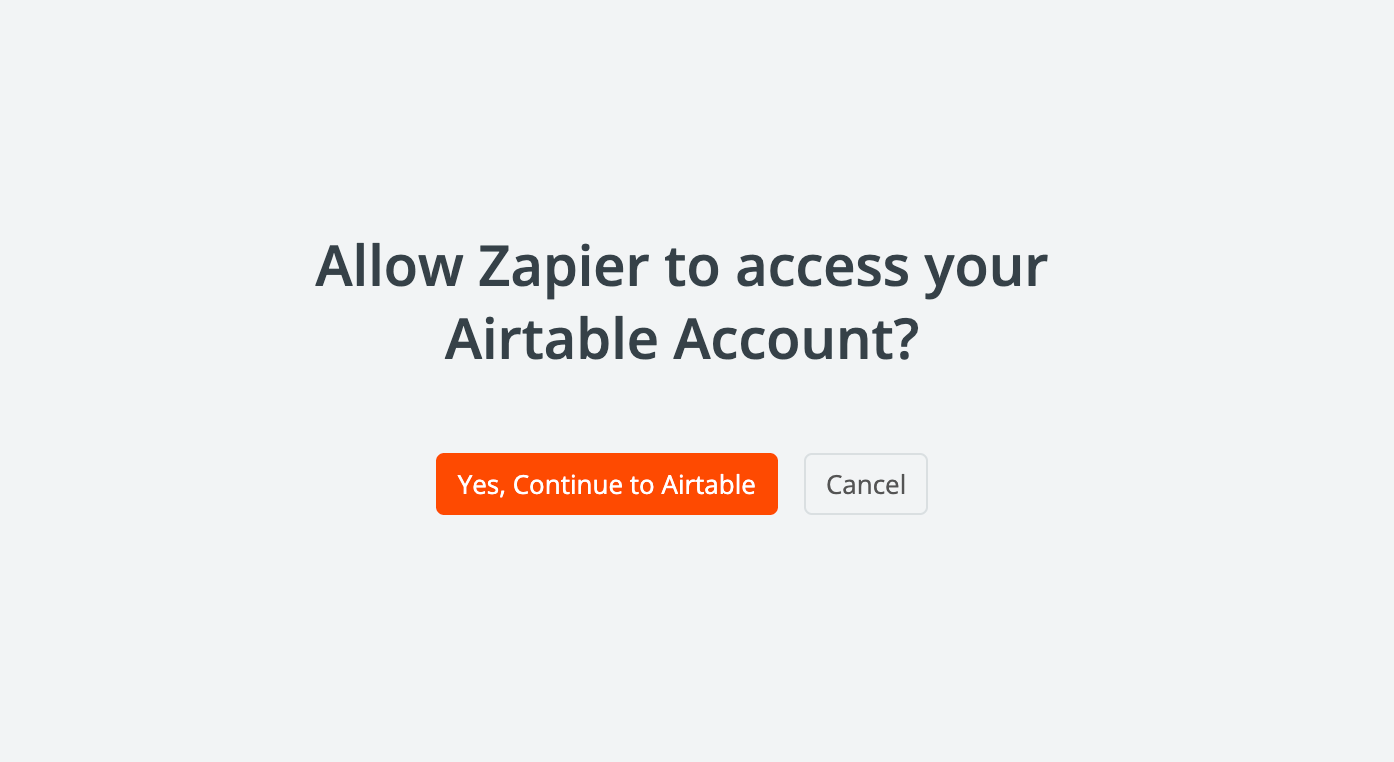
- Allow Zapier to access your Airtable account, and then grant Zapier access to your Airtable base.
- In the Action event dropdown, select the record of the Airtable you’d like to connect to this Zap, and click Continue.
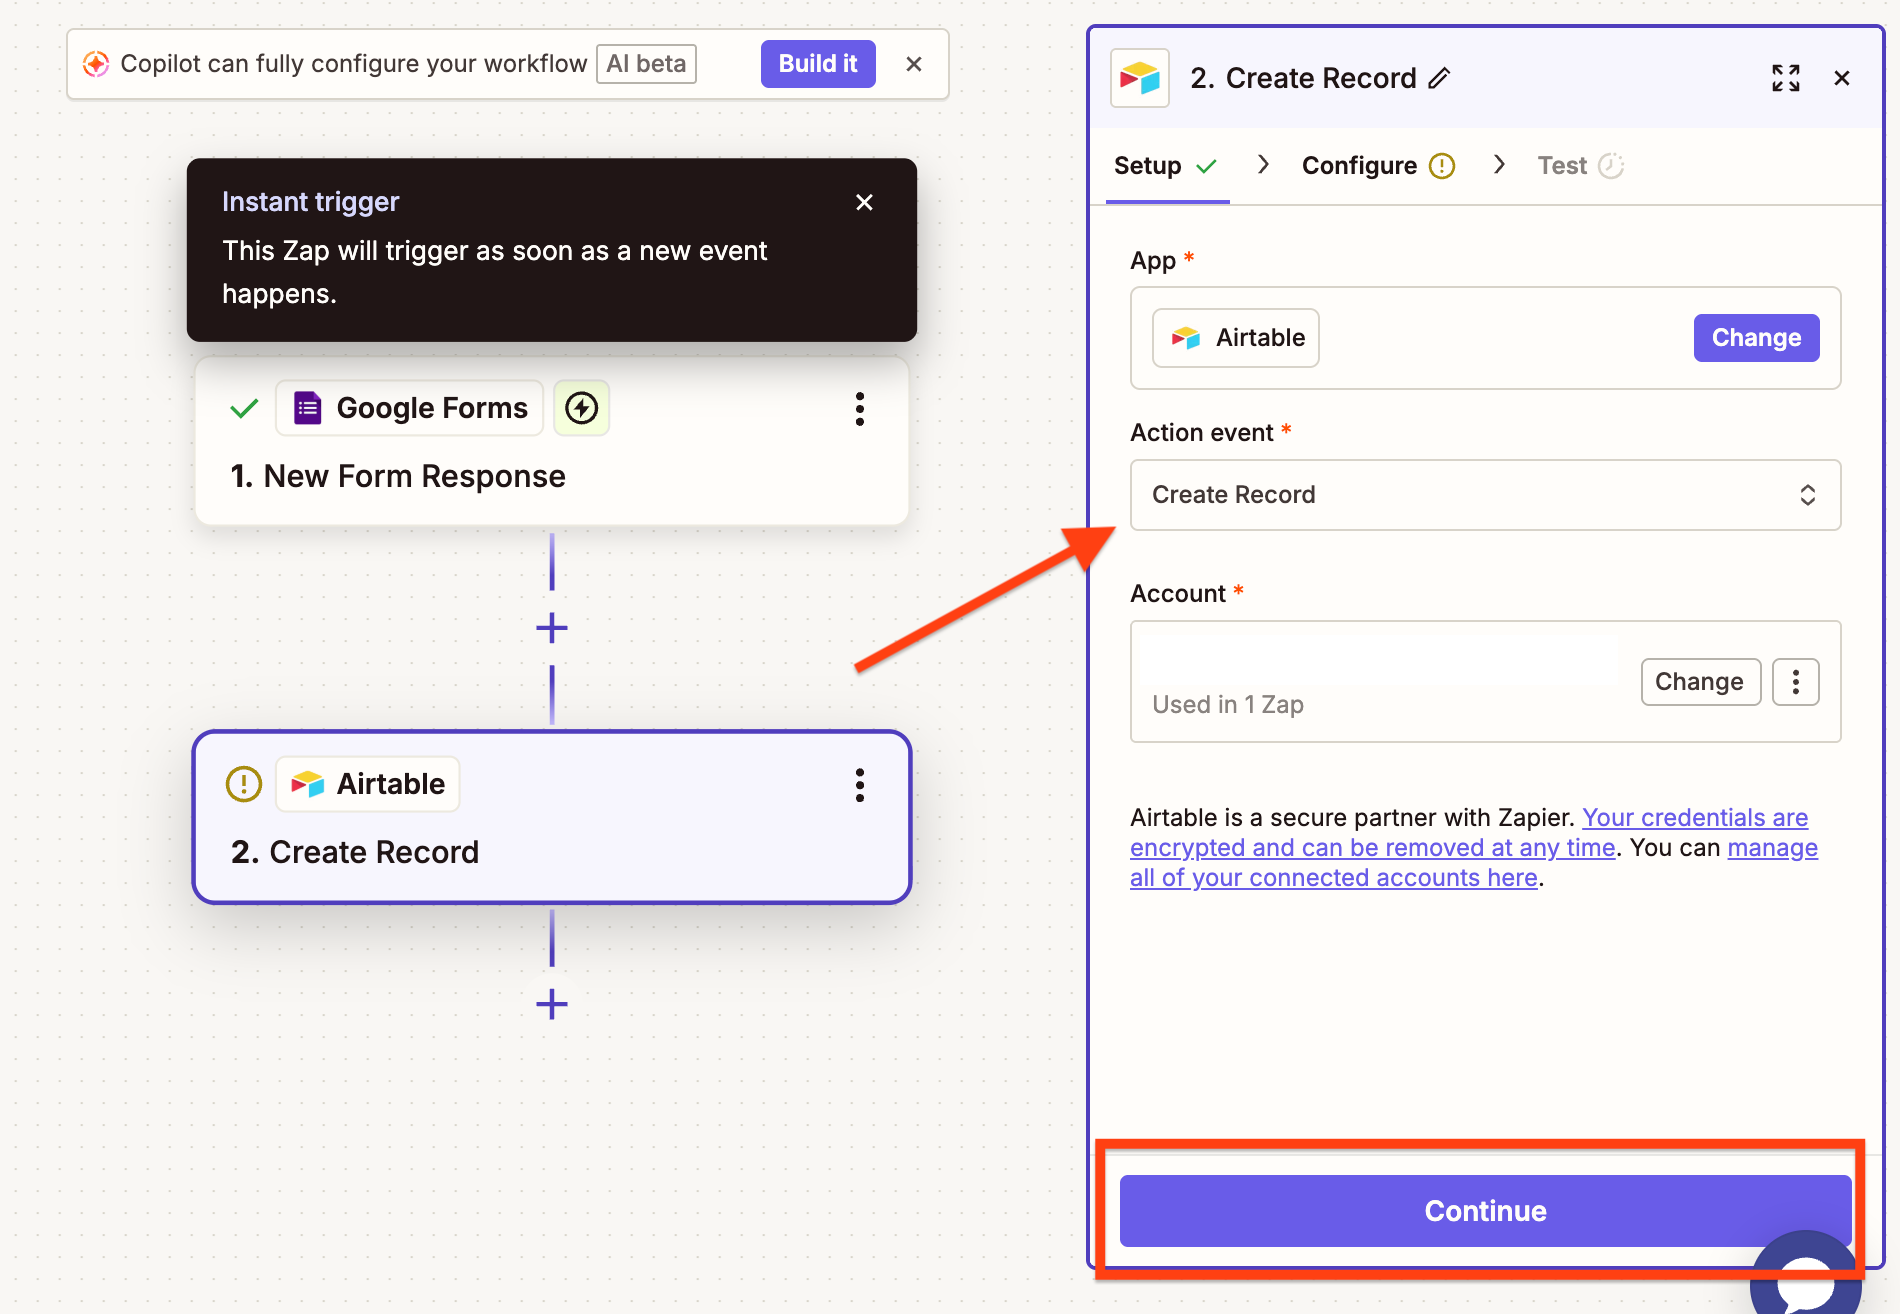
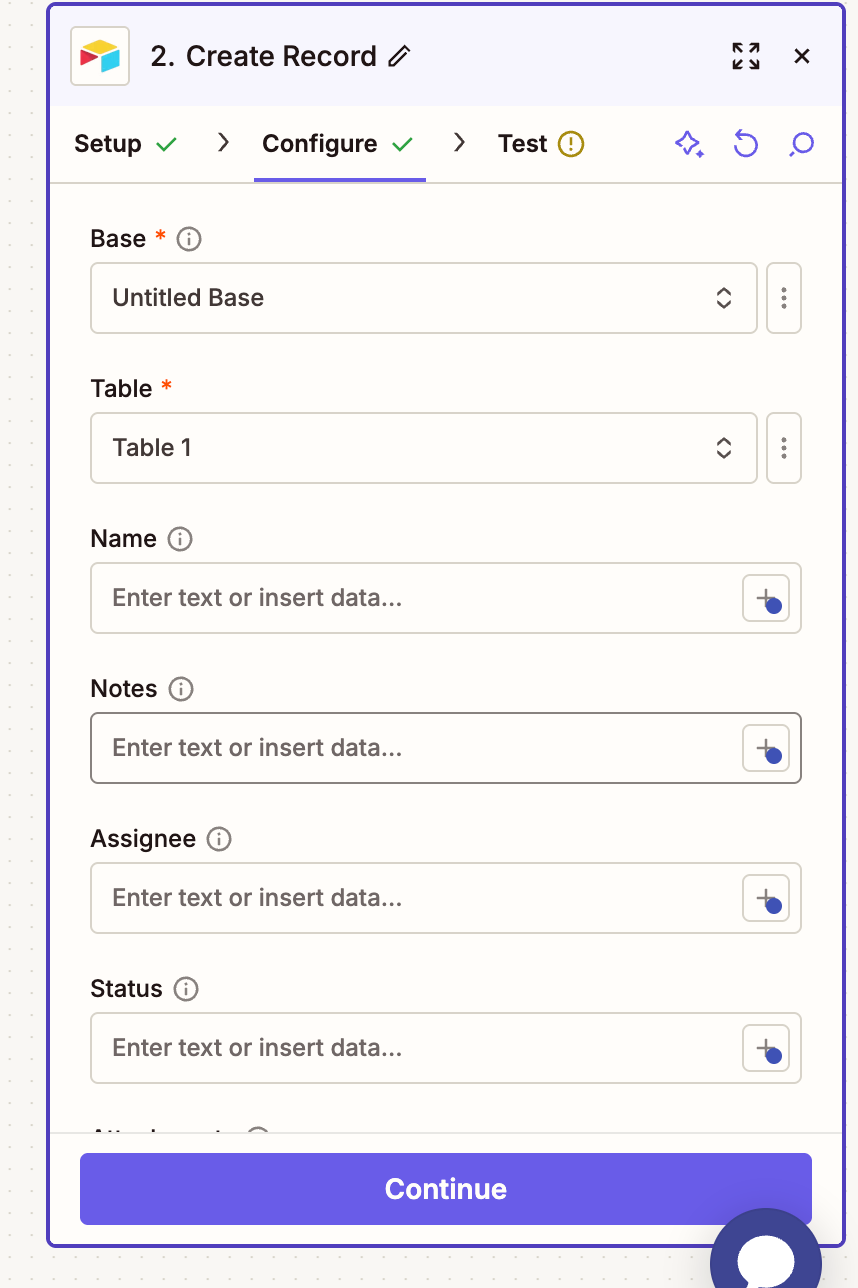
- Select the Airtable base and any related fields you’d like to include.
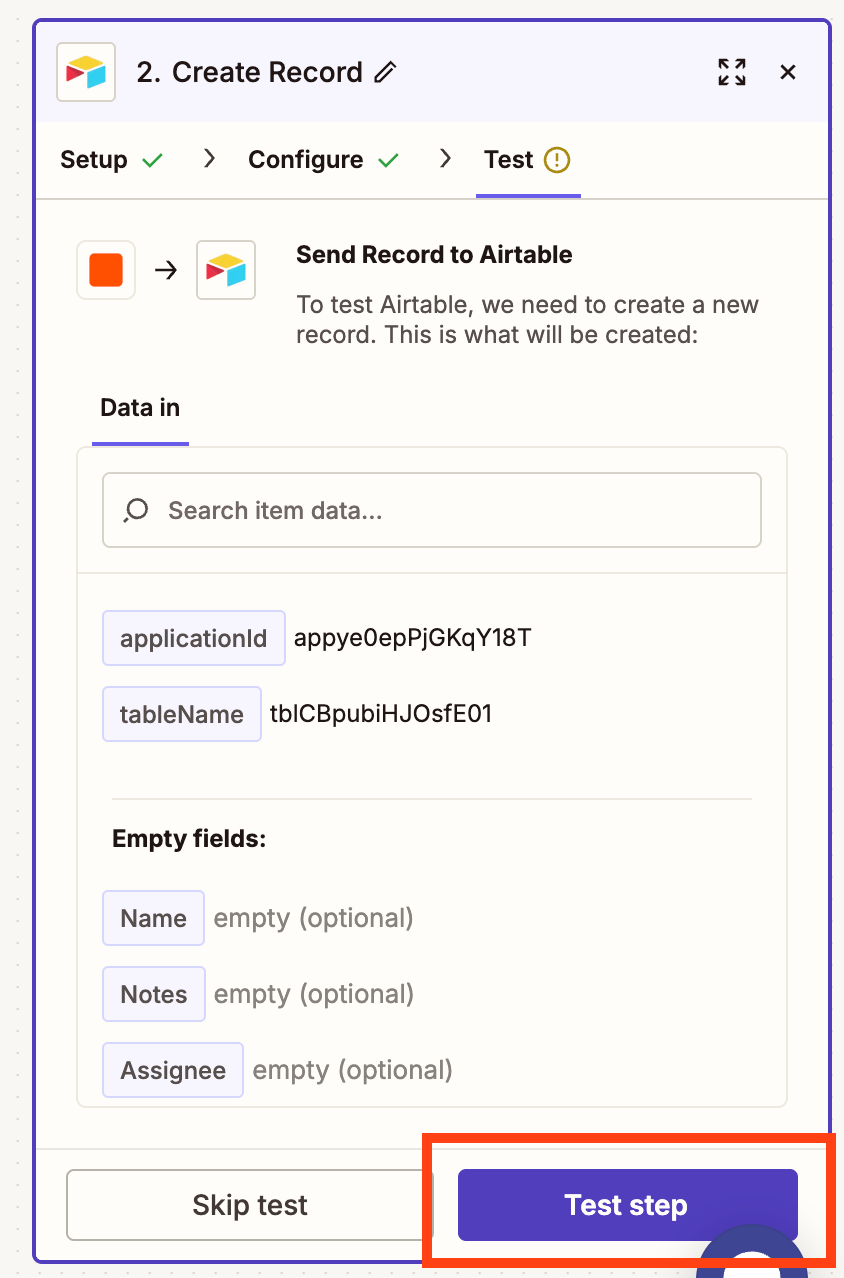
- Click Test step to confirm the record will be sent to Airtable correctly.
- After testing, your Zap will automatically trigger when a new form response is submitted. The Google Form response will automatically be sent to Airtable.
Pros and cons
Using Zapier to connect Google Forms to Airtable makes it possible to automate your workflow easily. By routing responses through Google Sheets, you can send submissions into Airtable and even add steps like filtering or formatting along the way.
That said, this setup introduces multiple moving parts — Forms, Sheets, and Zapier — which can lead to delays, data inconsistencies, and more ongoing maintenance. As your workflow grows, managing tasks, fixing broken connections, and cleaning up data can become time-consuming. While it is a flexible solution, it often requires extra tools and effort to maintain a smooth, reliable system.
How to connect Google Forms to Airtable using Unito
Connecting Google Forms to Airtable using Unito is also quick and relatively simple compared to using Airtable Automations. Once you’ve created a Unito account, here’s how to connect:
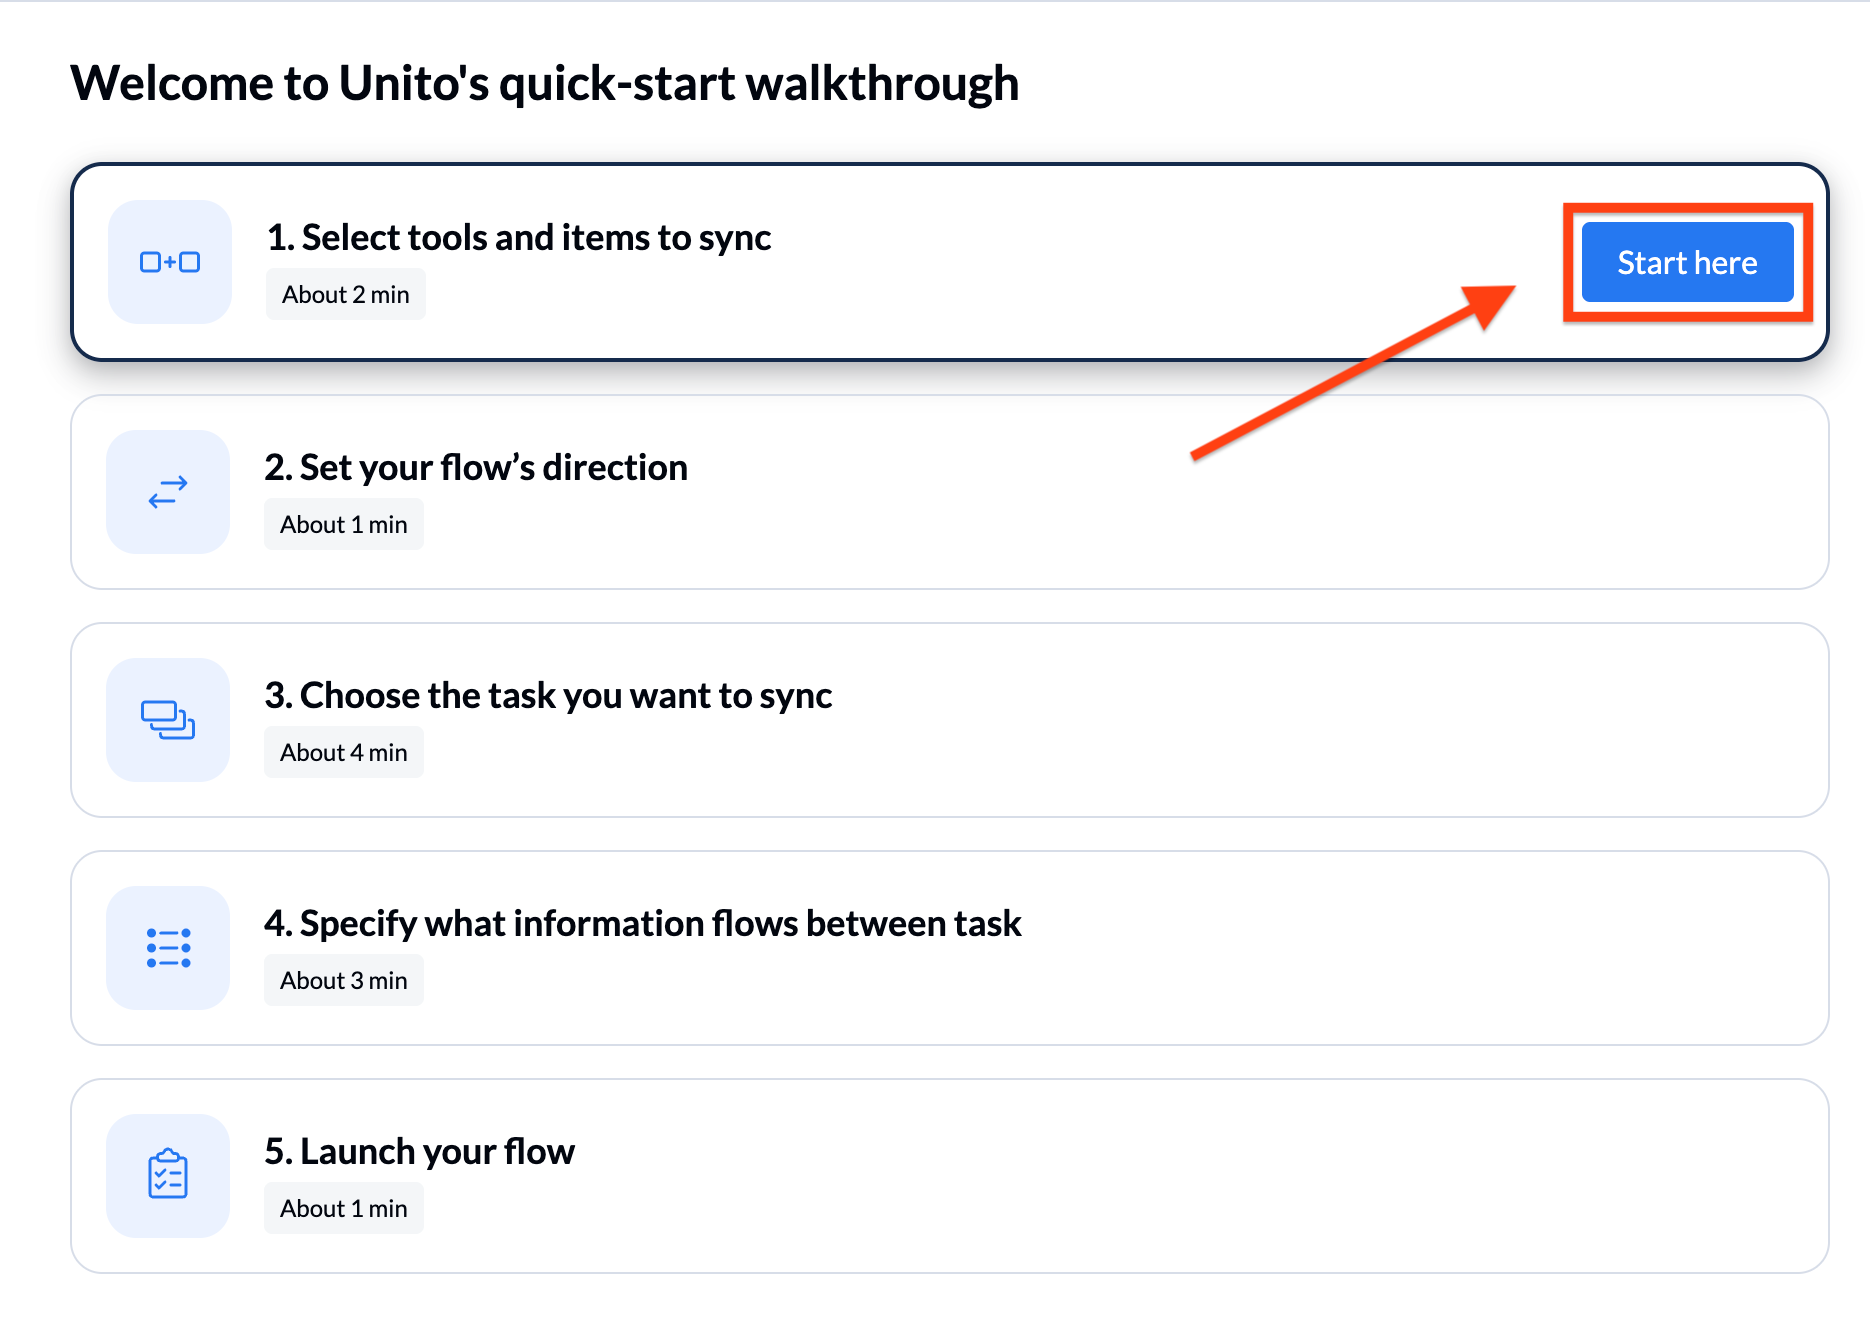
- Open Unito and click Create flow.
- Click Start here in the “Select tools and items to sync” box.
- Next, choose the tools you want to connect: Airtable and Google Forms.
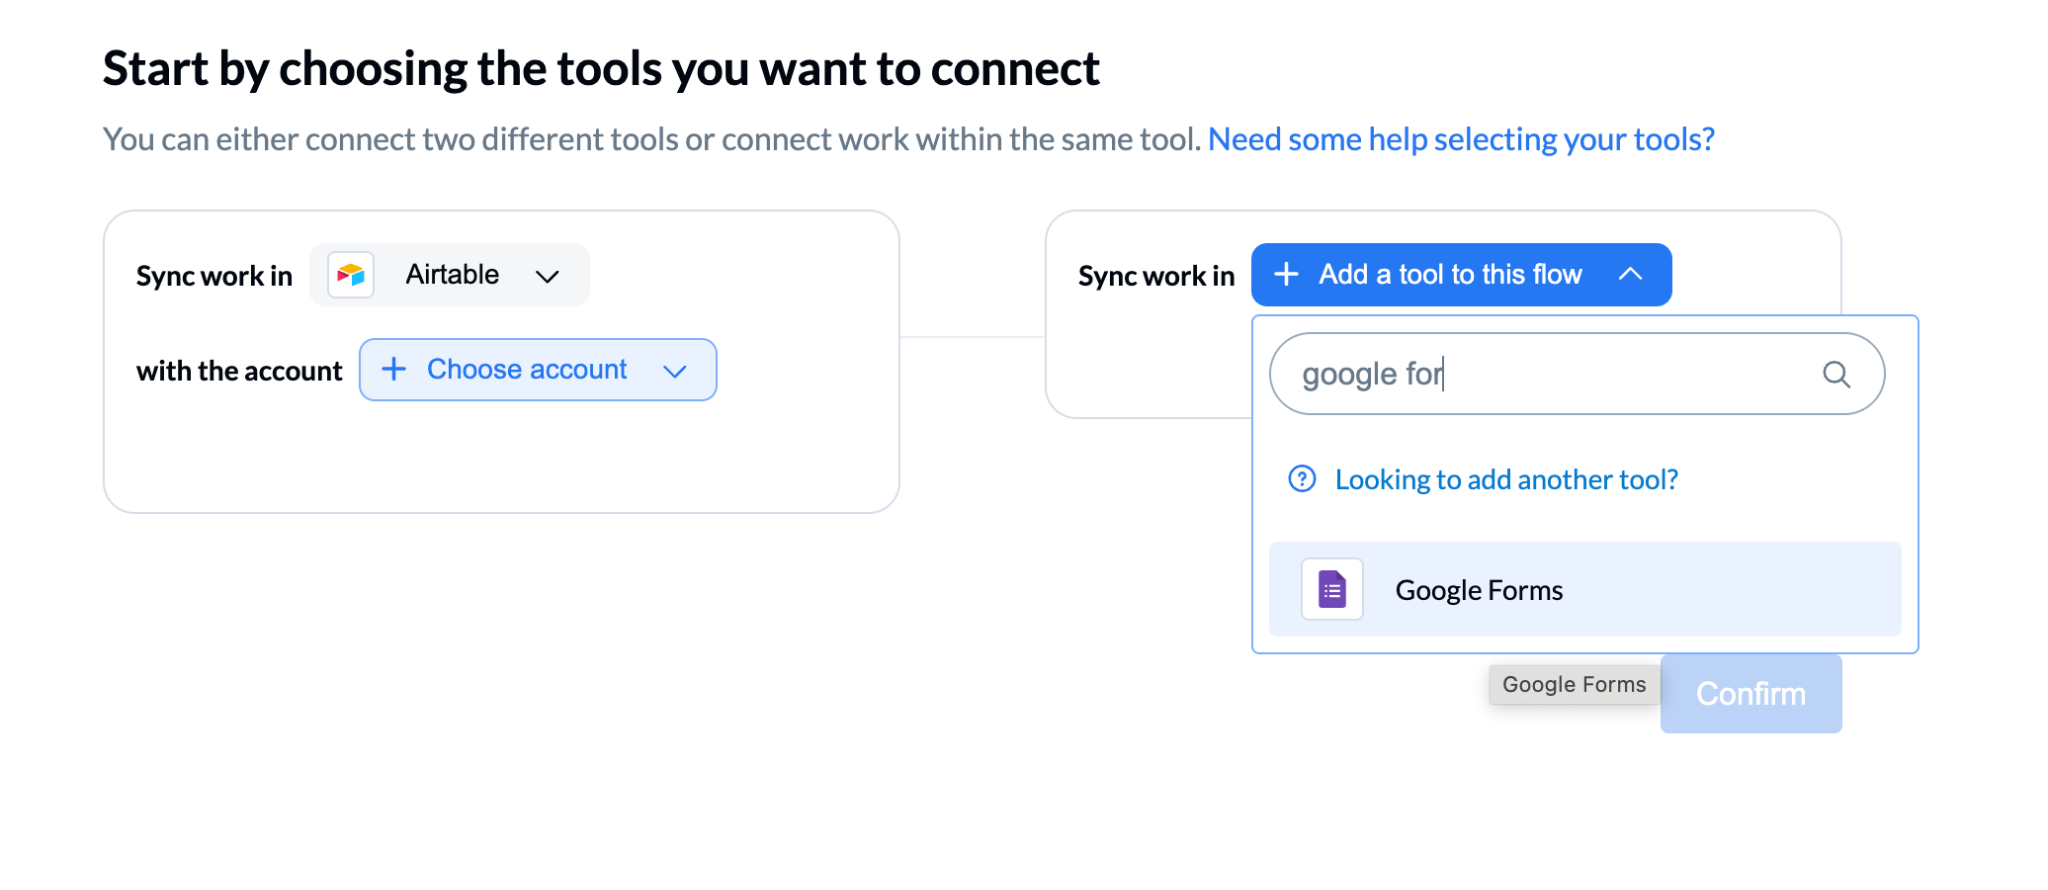
- Provide your email address to connect your accounts for both tools. After connecting your accounts, select the fields you’d like to sync for the connection. Do this for both Airtable and Google, and then click Confirm.
- In the walkthrough screen, click Continue in the “Choose the records and responses you want to sync” box.
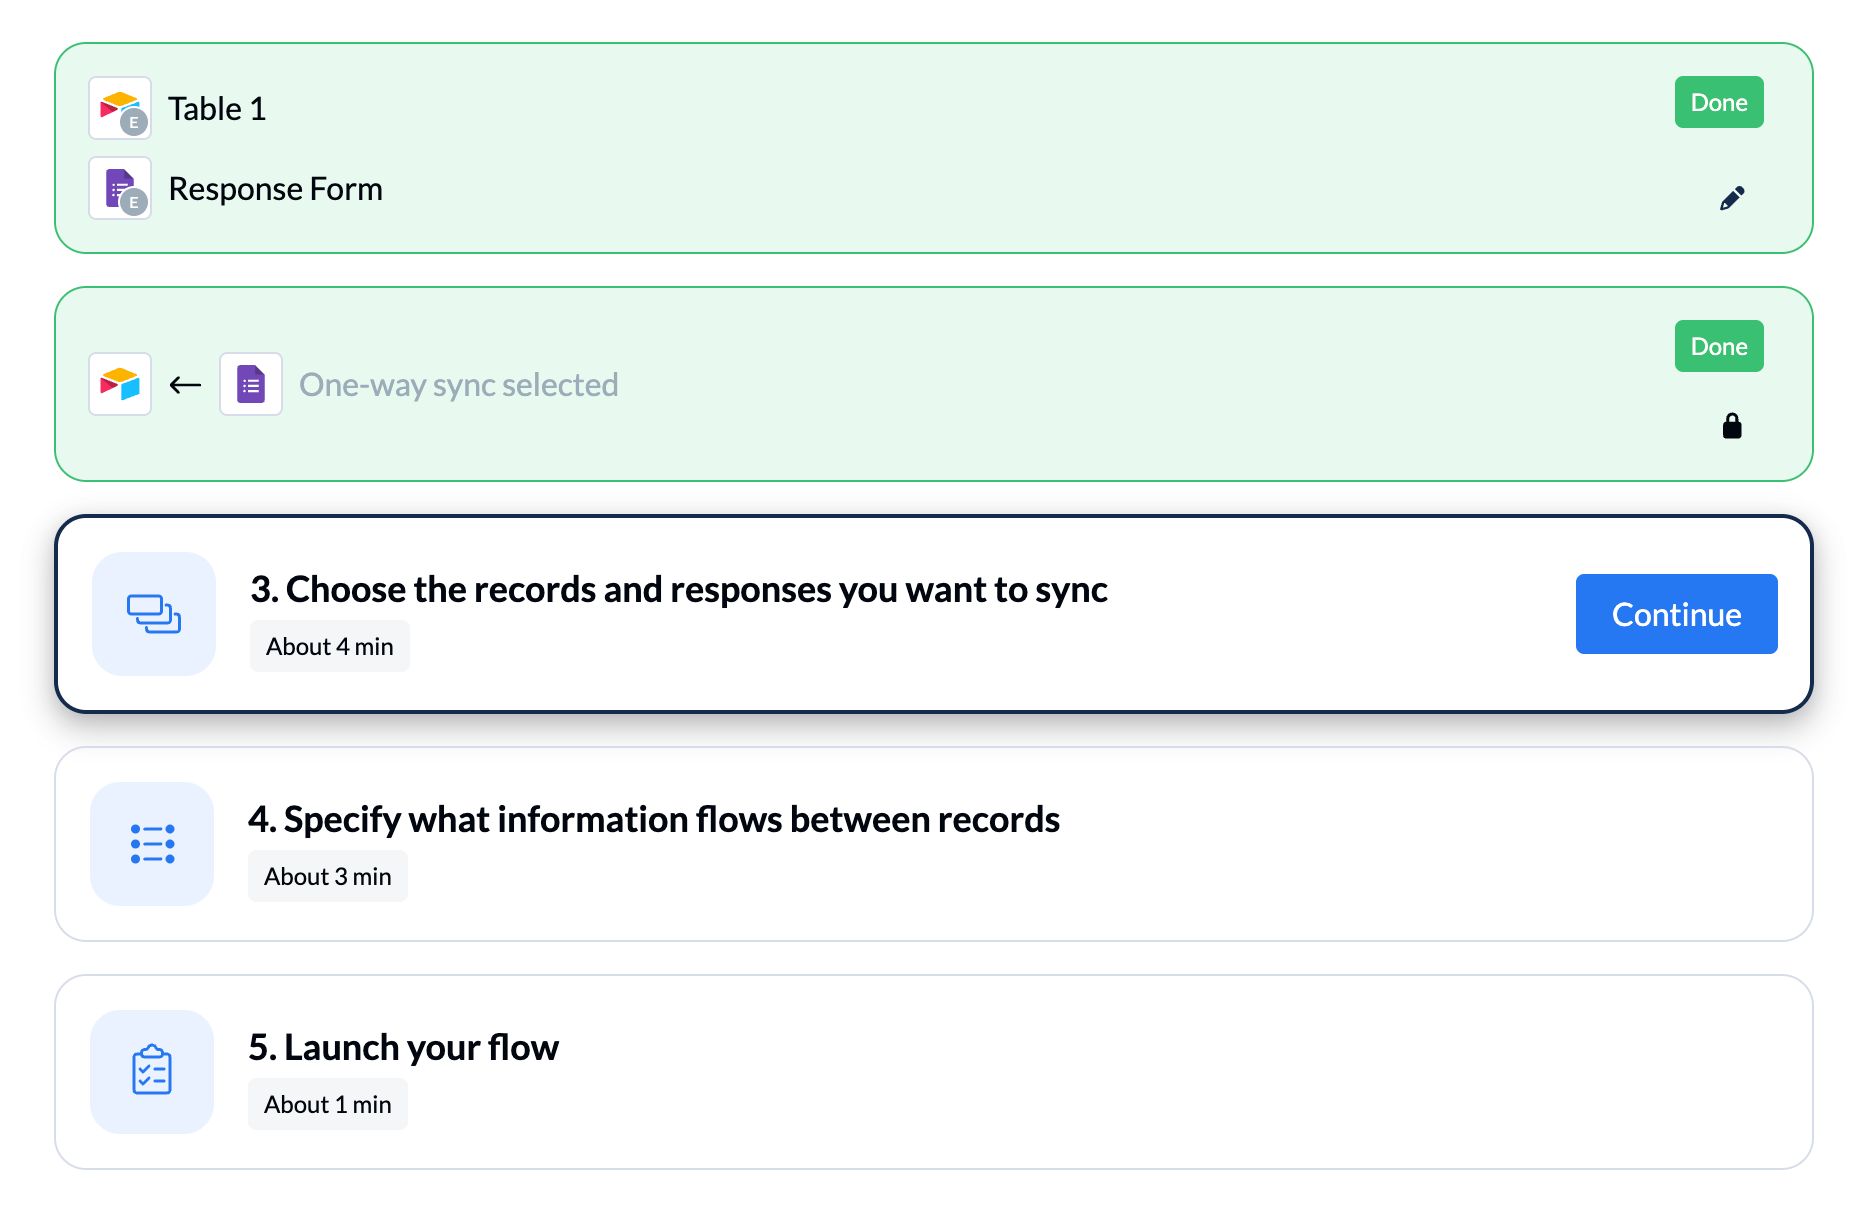
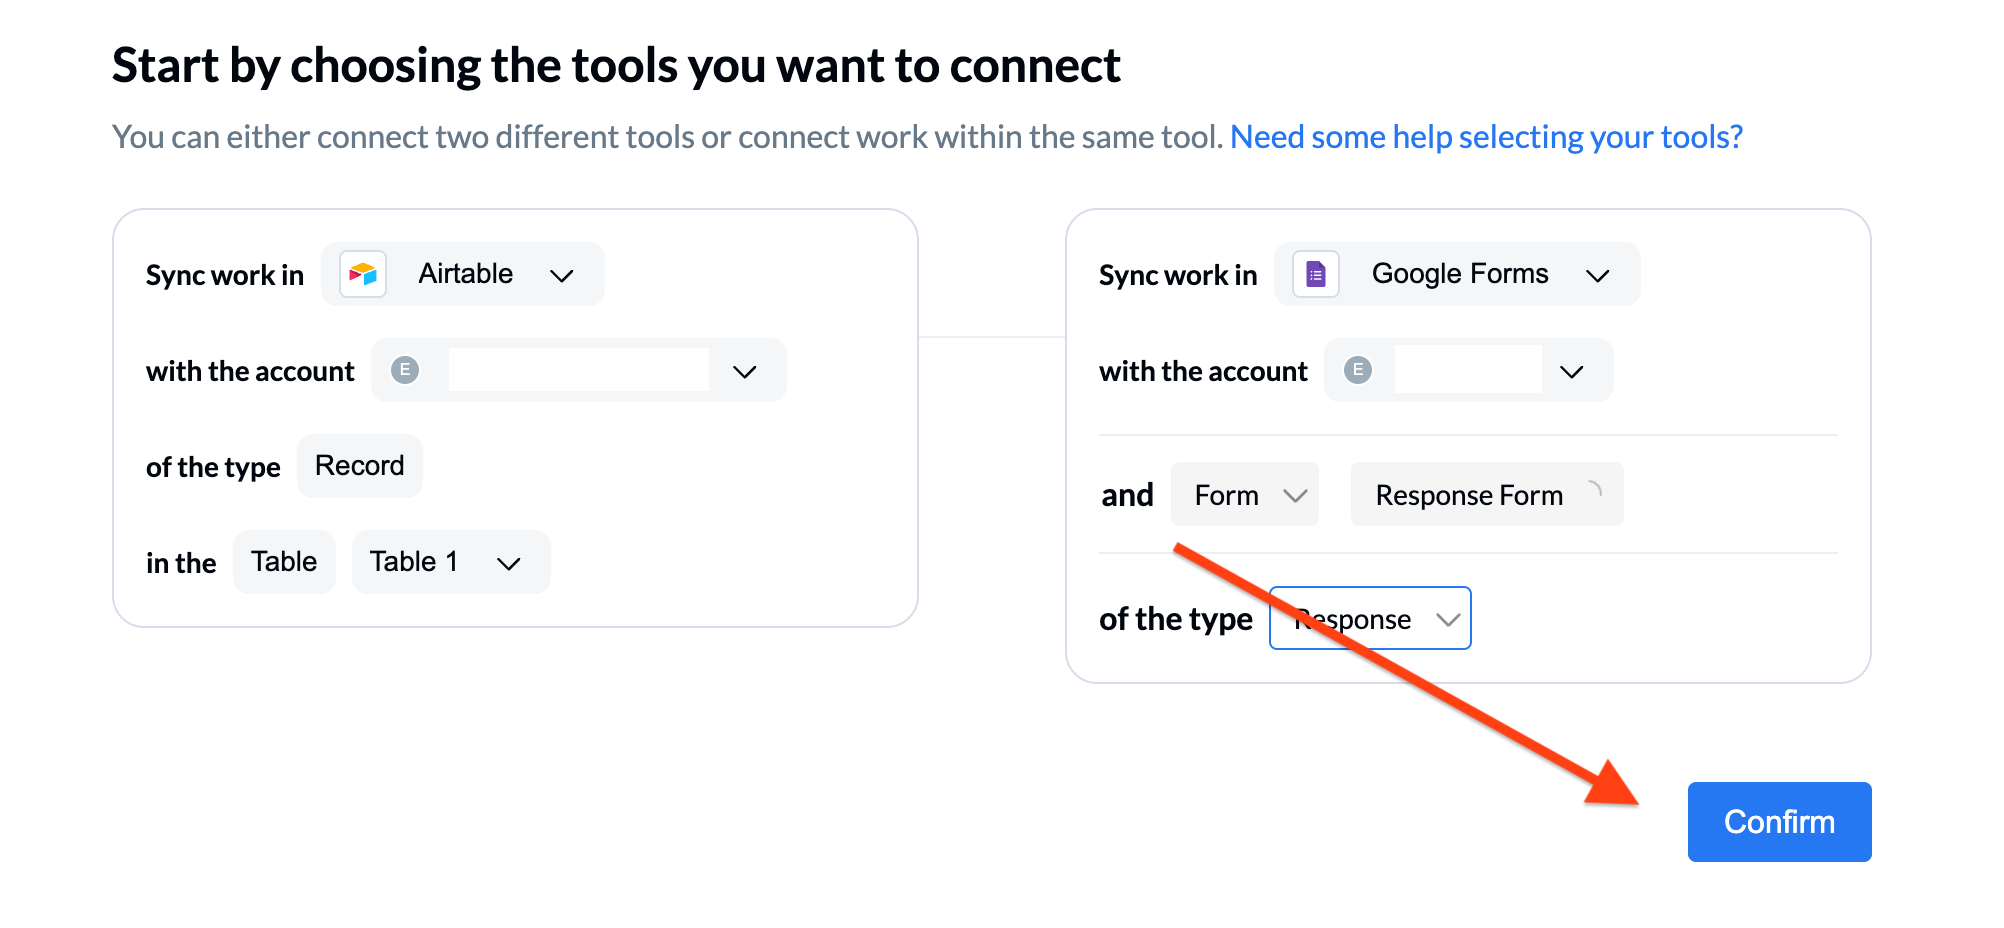
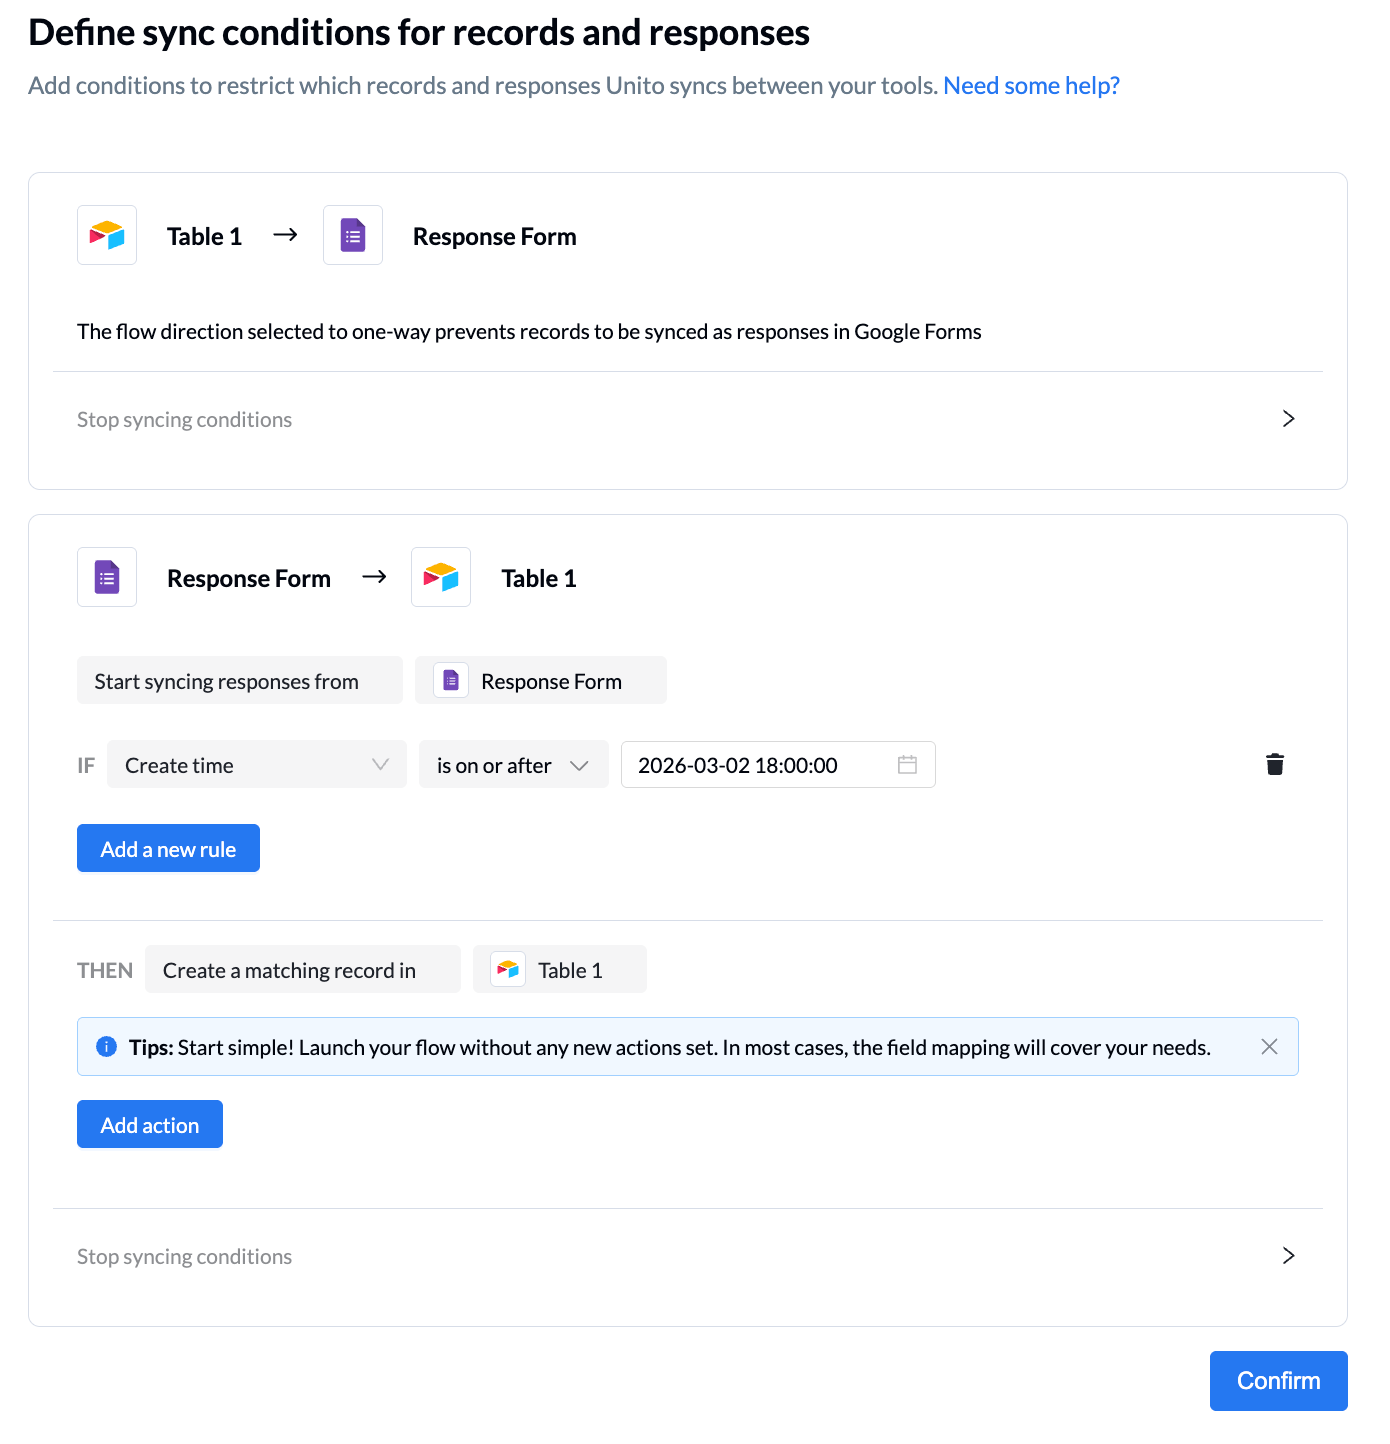
- Define the sync conditions for your form and click Confirm.
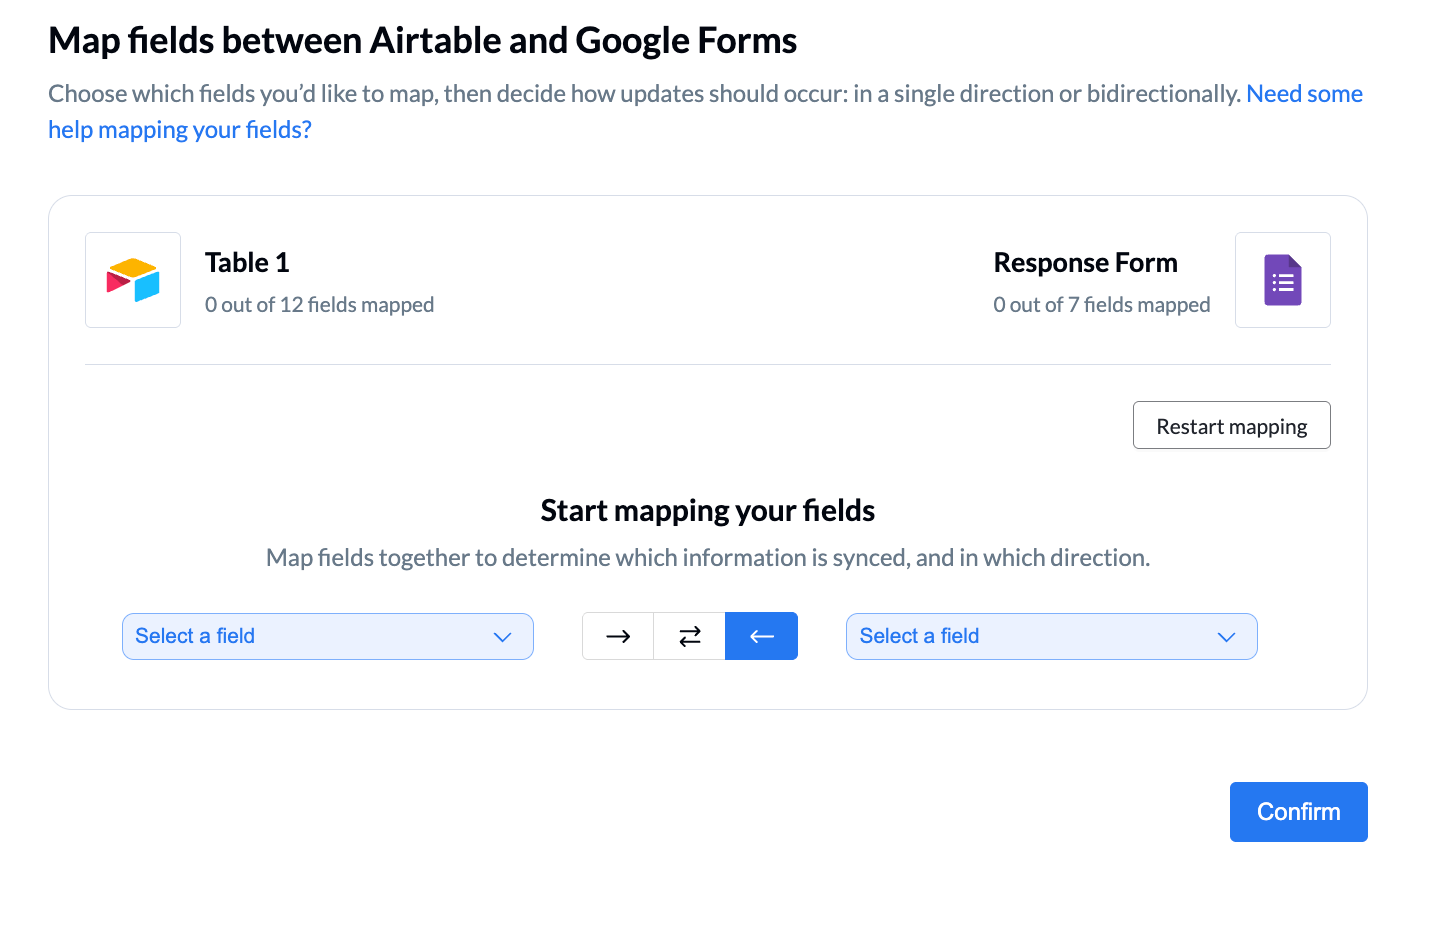
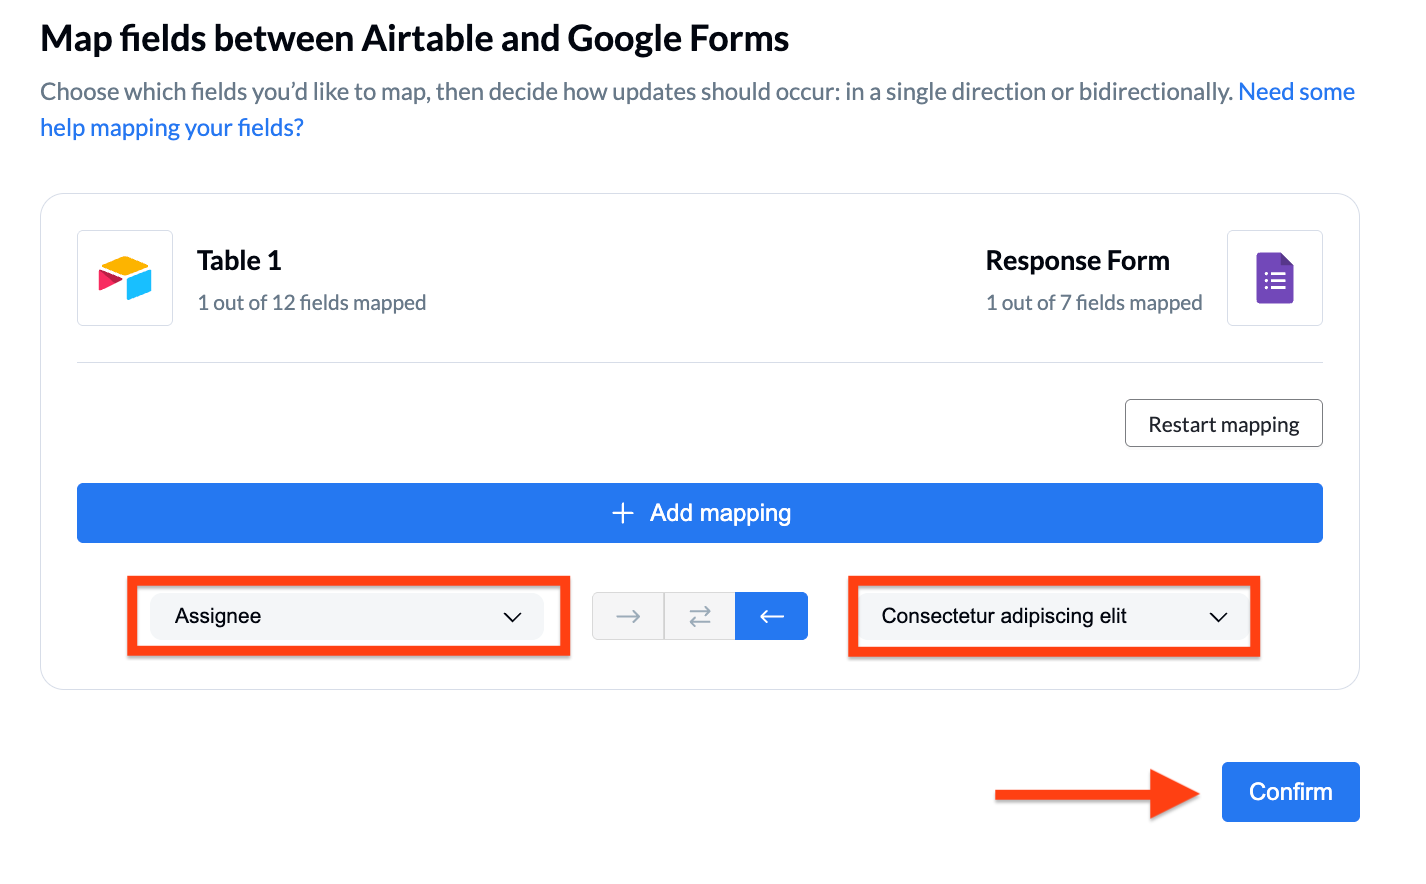
- Select the fields you’d like to map between Airtable and Google Forms and click Confirm.
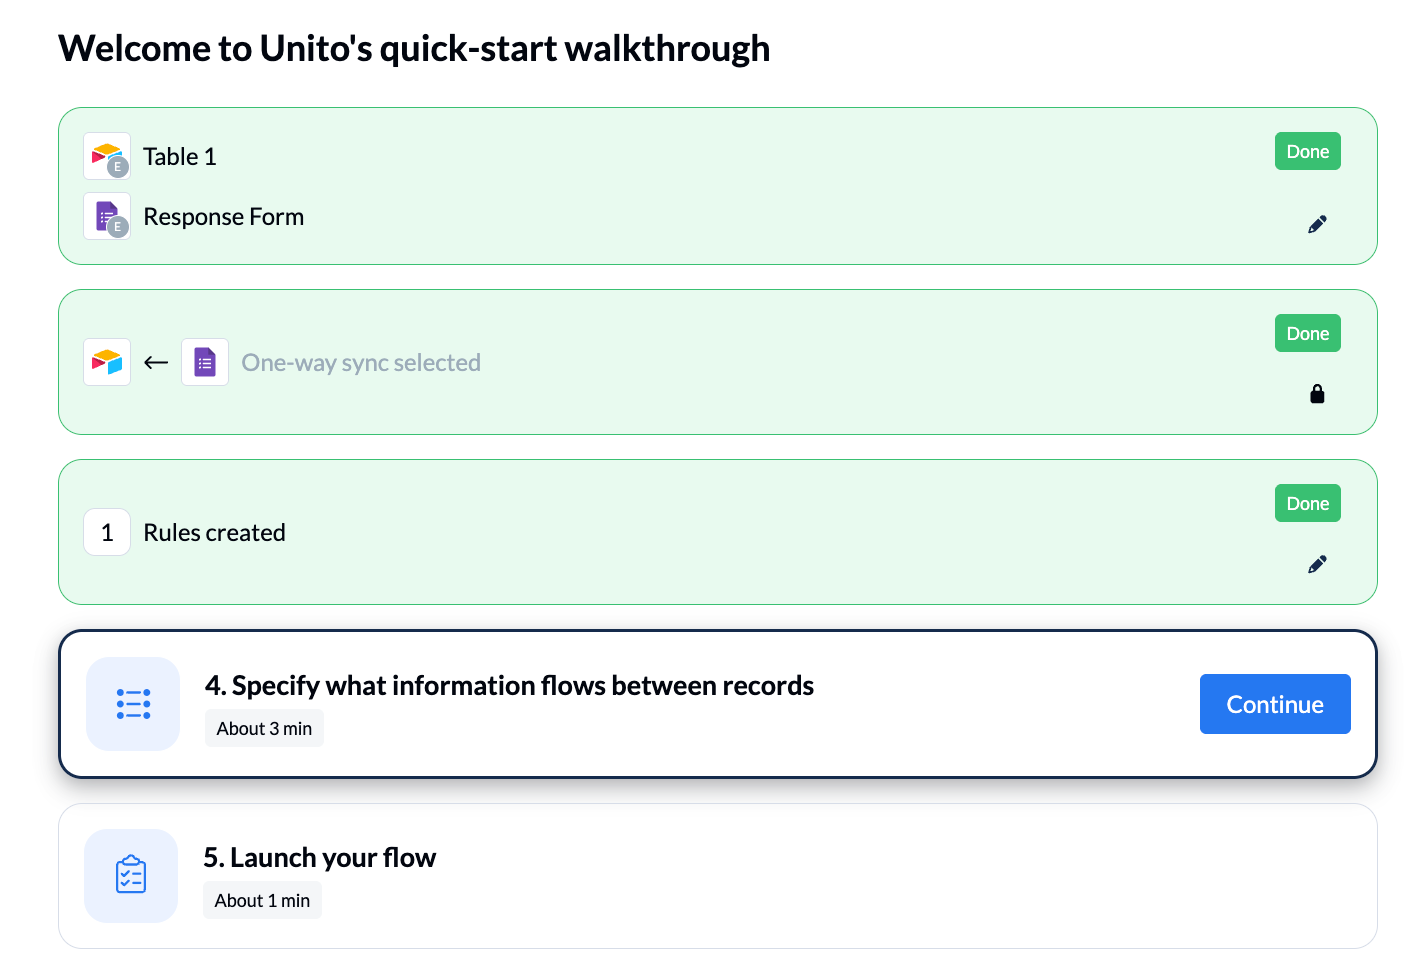
- On the walkthrough screen, click Continue in the box labeled “Specify what information flows between records.”
- Select the fields to map and click Confirm.
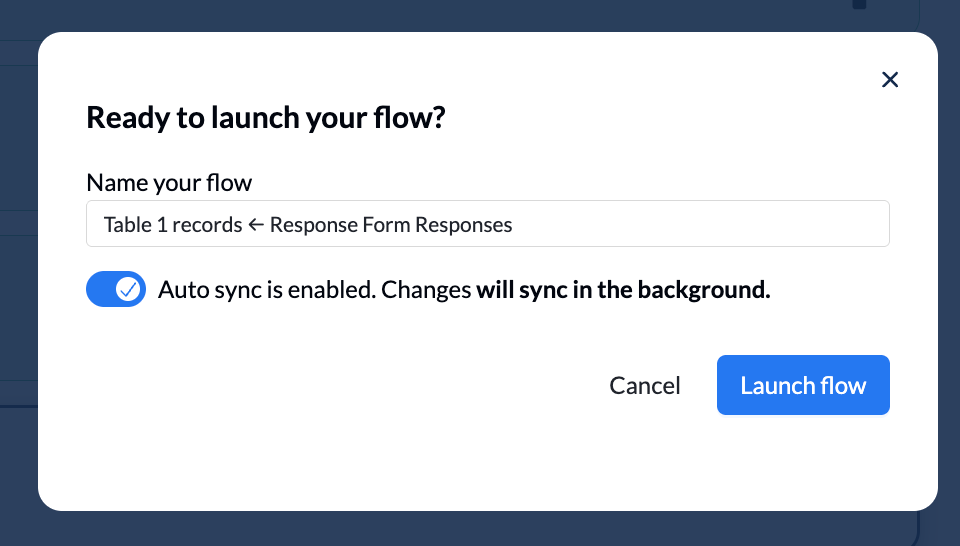
- In the final step of the walkthrough screen, select Continue to launch your flow.
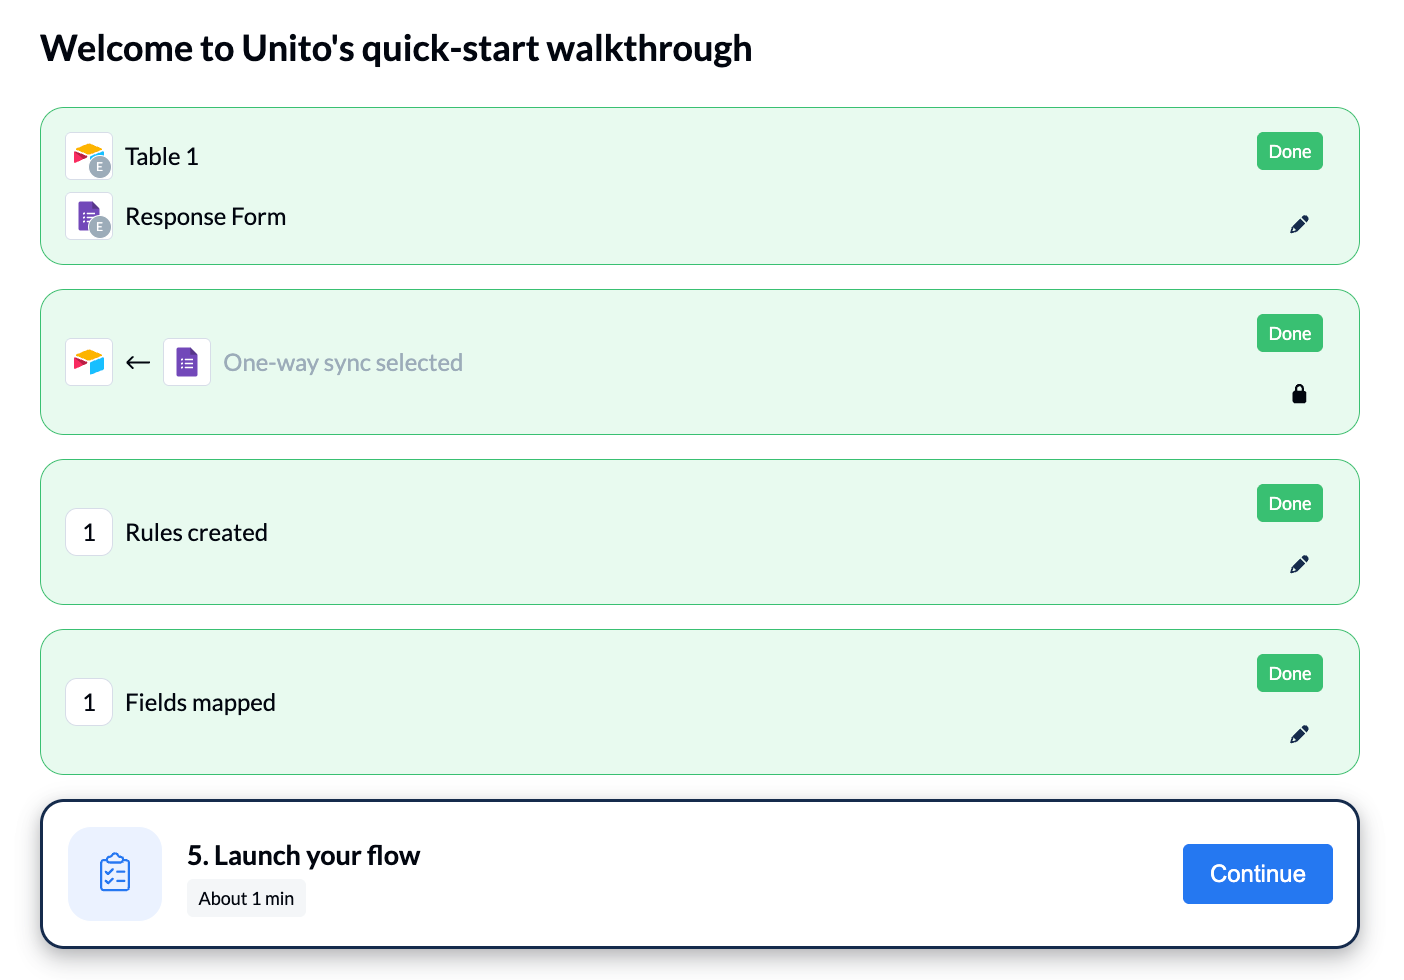
- Name your flow and click Launch flow.
- Once your flow is launched, you’ll be able to see the connection between Google Forms and Airtable in Unito and receive updates when new responses are submitted.
Pros and cons
Using Unito to connect Google Forms to Airtable allows you to sync data automatically between tools, creating a more continuous flow of information. By connecting Google Sheets — where form responses live — to Airtable, Unito can keep records updated in near real time and can support two-way syncing.
This setup still depends on Google Sheets as a middle step, though, which adds complexity and another potential point of failure. It also requires ongoing setup and management to ensure fields stay mapped correctly and data remains consistent across platforms. While Unito offers powerful syncing capabilities, it can be more complex than necessary for simple form-to-database workflows.
Jotform: An alternative to sending data from Google Forms to Airtable
While it is possible to send your data from Google Forms to Airtable, it’s not easy. Put simply, Google Forms is designed to collect responses — period. It wasn’t designed for automation and integration. The problem is, most users need these additional tools to make good use of the form responses they receive.
If you’re creating Google Forms and trying to connect to Airtable leaves you frustrated, there is an excellent alternative right under your nose: Jotform.
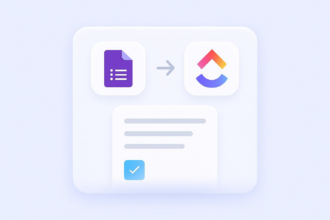
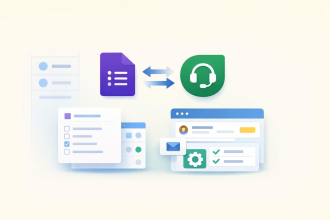
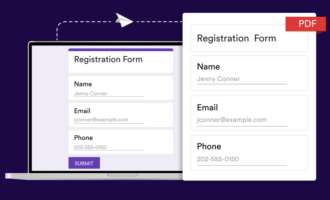
Jotform is another popular online form builder that offers a seamless integration with Airtable. Its direct Airtable integration keeps things simple: no extra tools, fewer break points, and data that arrives clean, structured, and ready to use. It also works in real time and scales easily, so you can respond faster and grow your workflow without adding complexity.
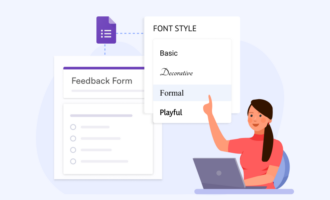
There are numerous other features that make it easier to work with forms overall, too. With over 20,000 form templates, data collection is straightforward and fast. It also has built-in tools and an entire ecosystem of integrated products that allow you to generate leads, collect payments, gather feedback, and more — all in one intuitive platform.
What else can you do with Jotform?
- Easily integrate your forms with not only Airtable but also more than a hundred other business tools, including Zapier and Unito — even with a free account.
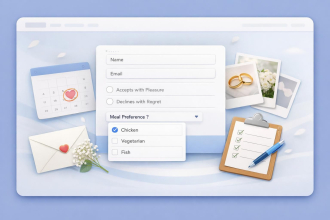
- Create dynamic conditional logic forms that can change fields based on users’ answers.
- Collect signed documents with Jotform Sign and send the information directly to Airtable to update records.
- Process and store form-related data (even without integrations) — such as tables, workflows, and more — using Jotform process automation.
How to integrate Jotform with Airtable
It’s easy to connect your Jotform forms with Airtable to automatically send submissions and keep your data organized in one place. Here’s what you’ll do:
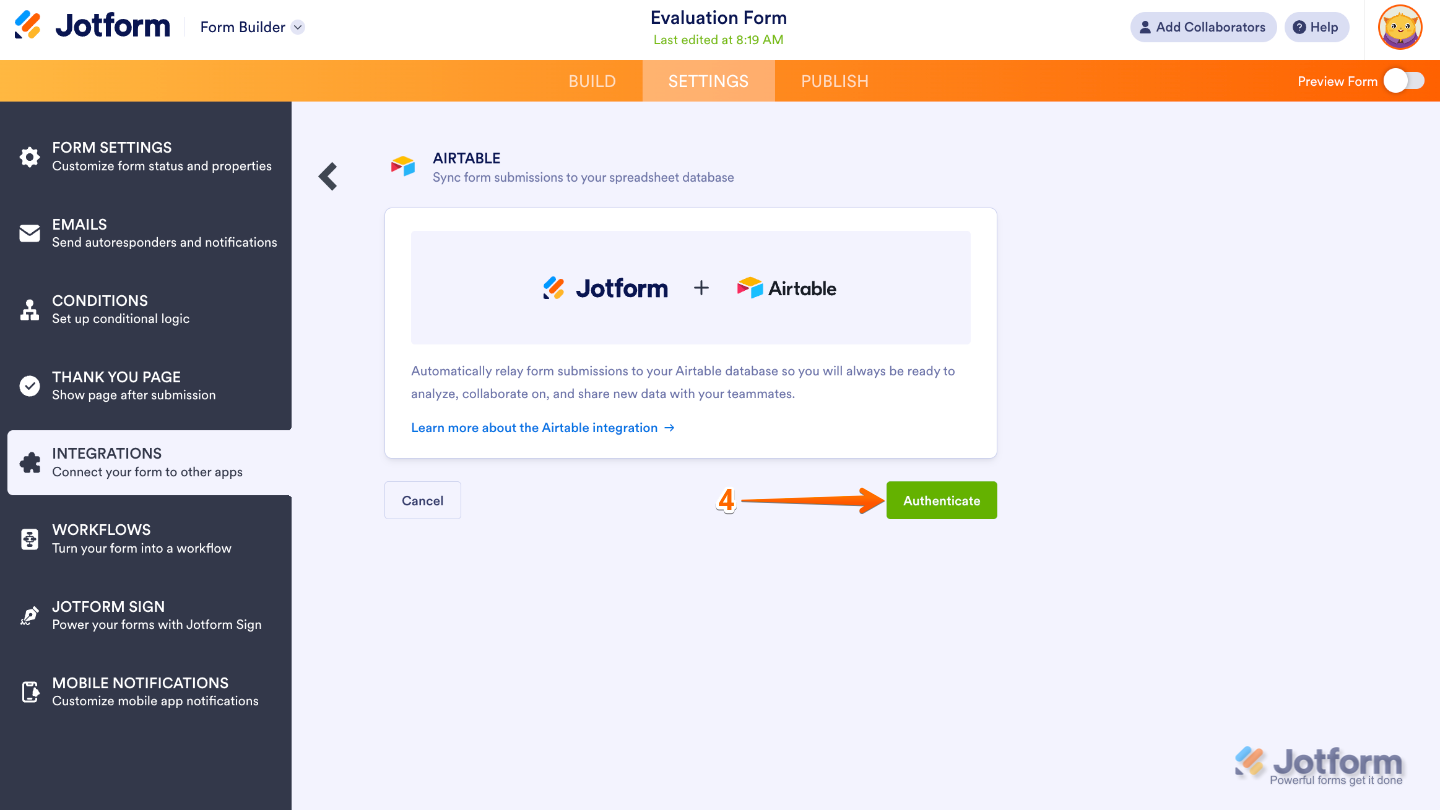
- In the Form Builder, click Settings in the orange navigation bar at the top of the page.
- Click on Integrations in the menu on the left side of the page.
- Search for Airtable and click on it.
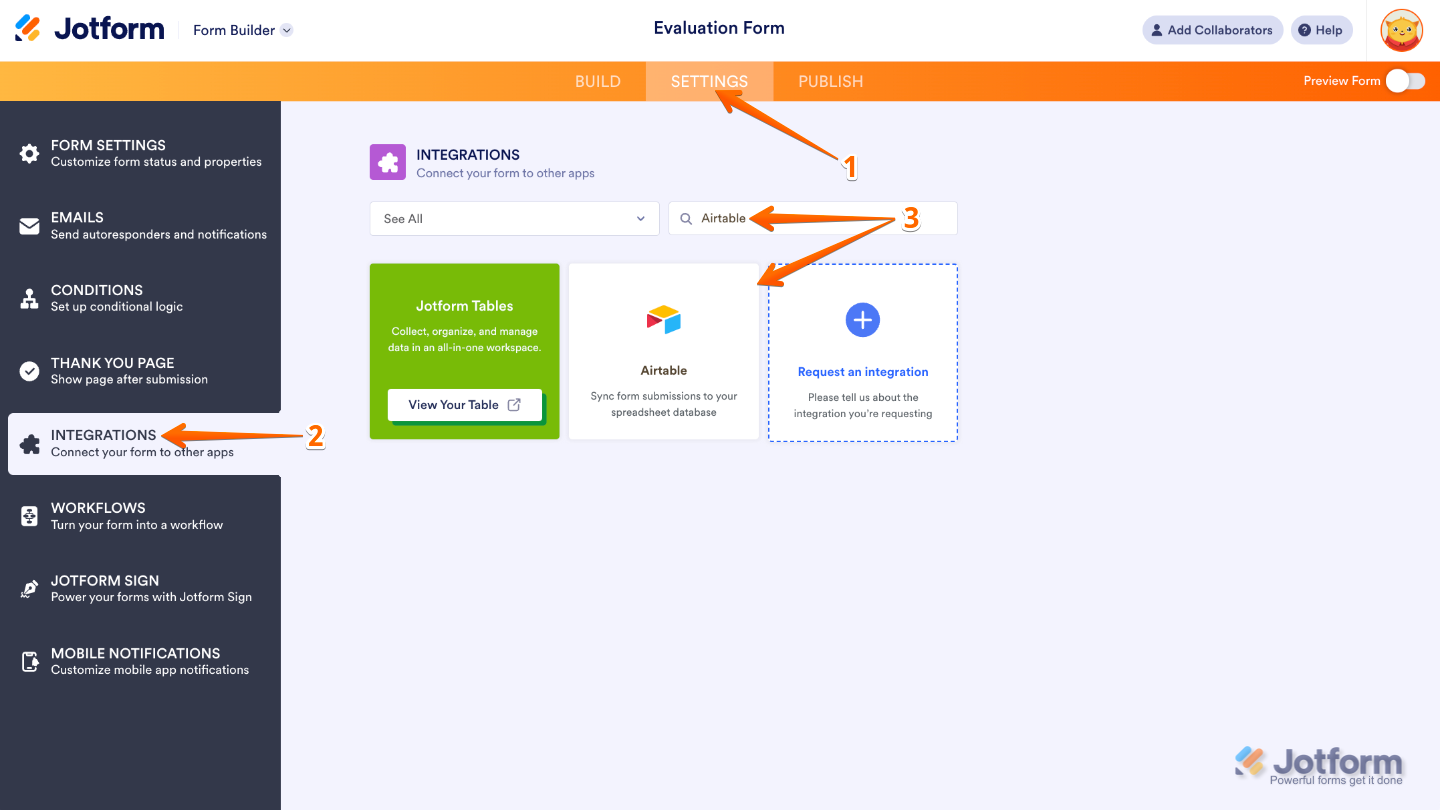
- Then, click on Authenticate.
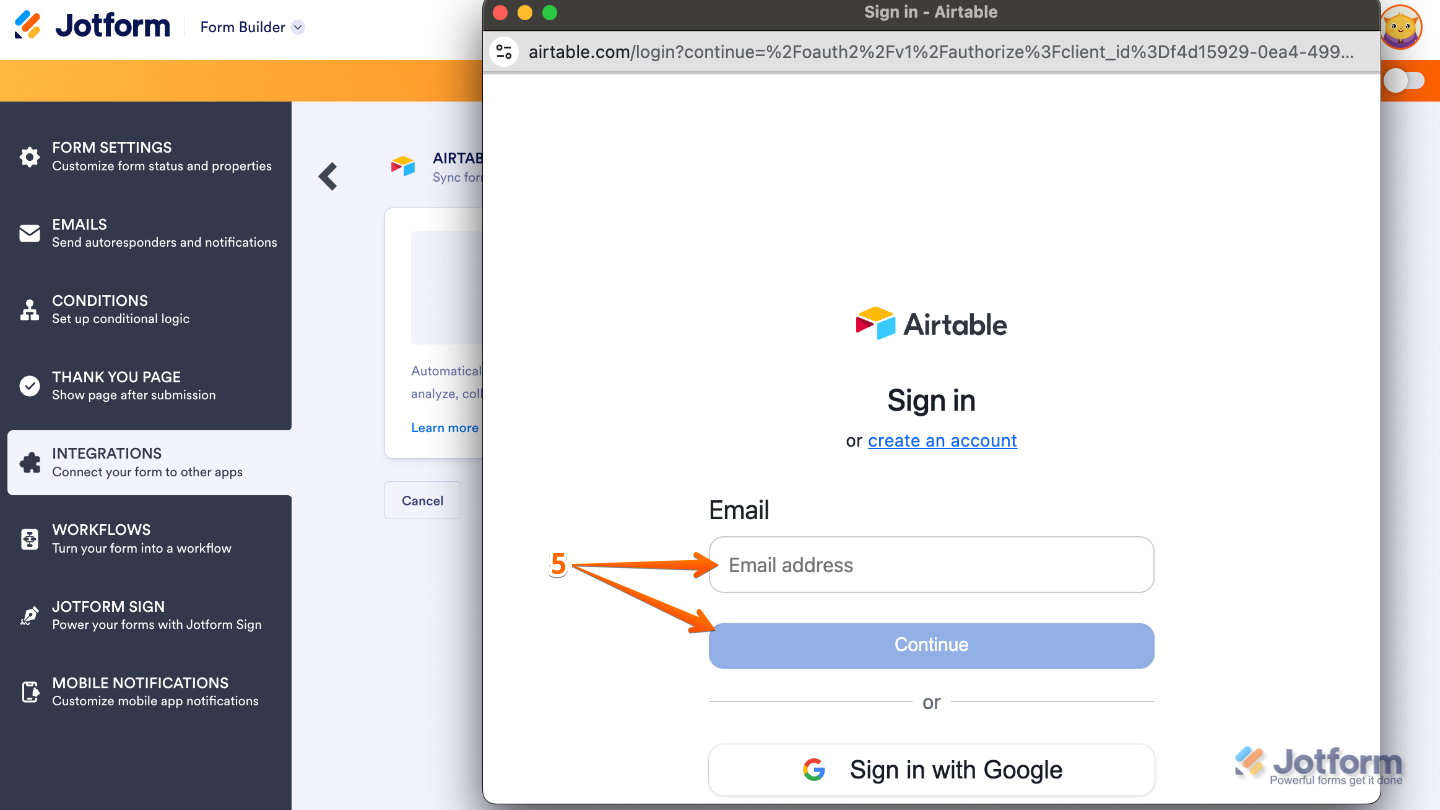
- In the window that pops up, enter the email address for your Airtable account and then click Continue.
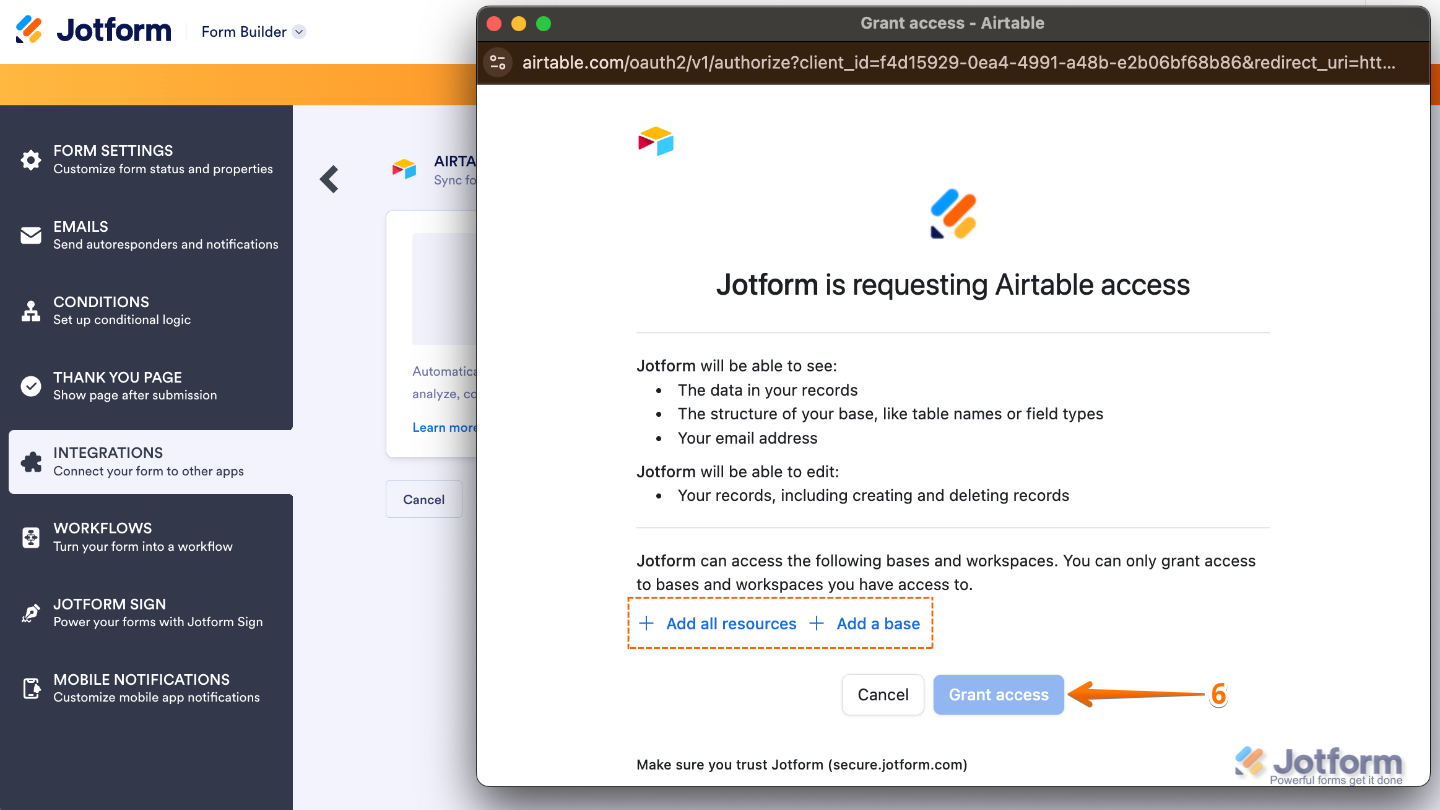
- Once logged in, click on Add all resources and Add a base to select your Airtable resources and base. Then click Grant access.
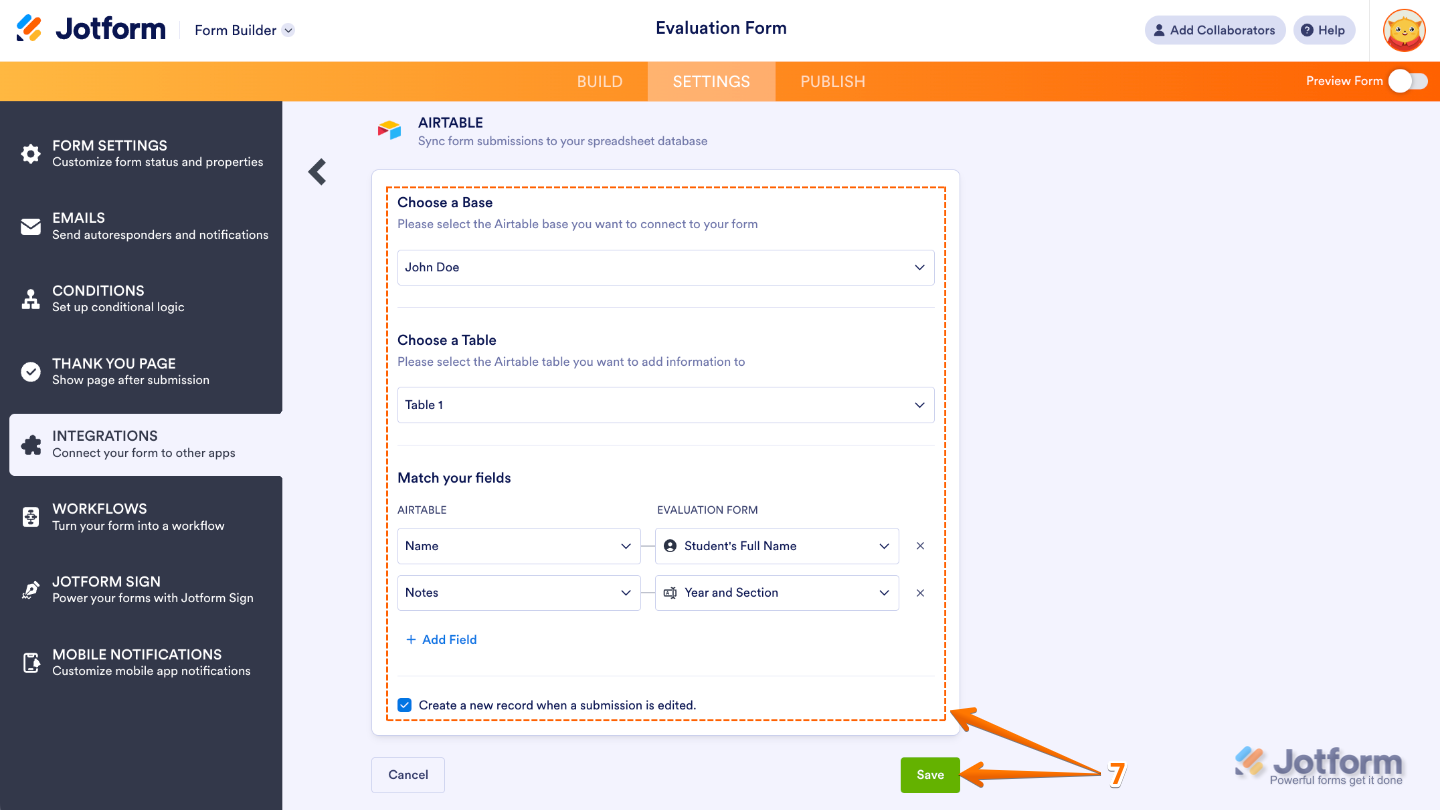
- Lastly, edit the Choose a Base, Choose a Table, and Match Your Fields sections with the correct information and check the box at the bottom for “Create a new record when a submission is edited.” Once you’re done, click Save.
That’s it.
Keep in mind that you can connect additional Airtable bases using the same integration. Just click on Add New Action in the Airtable integration window and you’ll be able to send your form submissions to multiple bases at once, keeping all your data synced and organized effortlessly.
Jotform is built with integrations and workflows in mind from the start. It’s designed for people who don’t just want to collect data — they want to do something with it. That shows up in how easily it connects to tools like Airtable and how much you can shape the data before it ever gets there.
If your goal is simply to collect responses, Google Forms is more than enough. But if you’re building a workflow — especially one that depends on Airtable — Jotform is smoother, cleaner, and far less dependent on extra tools to make everything work. Sign up for Jotform for free today and explore its range of features for yourself.
This article is for website operators, content managers, marketing teams, and no-code builders who use Google Forms and Airtable, as well as anyone who wants to connect form submissions to Airtable more efficiently or explore a more flexible Google Forms alternati


Send Comment: