-
nplayoustAsked on July 15, 2019 at 4:23 AM
-
Girish JotForm SupportReplied on July 15, 2019 at 6:36 AM
I'm afraid our standard Salesforce Integration is limited to Lead, Contact and Account objects.
If you want to create new Custom Objects, you can do that using a third party tool like Zapier or Automate.io.
Automate.io: https://automate.io/app/bots/install/jotform/salesforce/new-form-entry/add-custom-object
I'll also raise this as a feature request to our back end team to check if this can be implemented. We will not be able to provide an ETA at this moment, but we will keep you posted on updates as we receive them.
-
Gabriela JotForm SupportReplied on September 5, 2023 at 7:54 AM
Hi Nicholas,
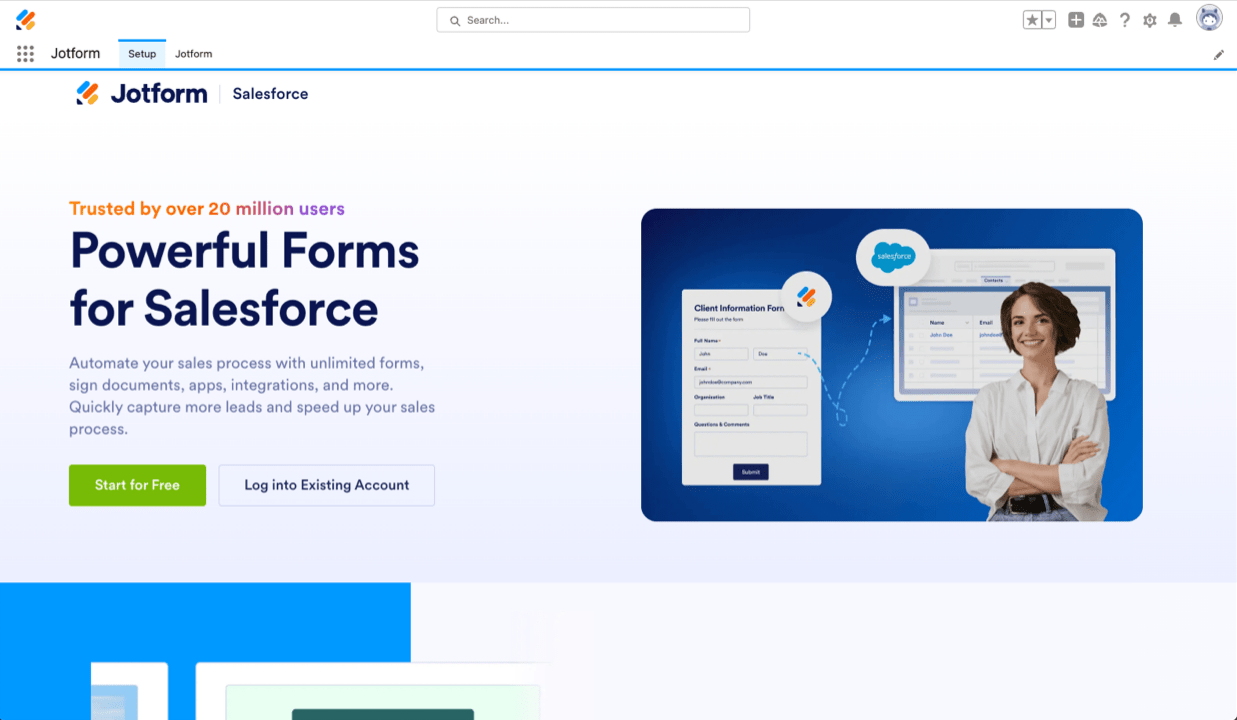
We’re excited to announce that Jotform is now available on the Salesforce AppExchange! Salesforce AppExchange is an online application marketplace for third-party applications and solutions and it offers thousands of solutions and services that extend Salesforce, eliminating the need for constant platform switching. All that is required is to use the Salesforce forms and select object types to map them to corresponding fields.
Here's how you can get started with the Jotform for Salesforce setup:
How to Add Jotform to your Salesforce Account
When you install Jotform’s app on your Salesforce account, you’ll have a Salesforce button right there on your forms, so now you can automate the creation of records in Salesforce. Keep on reading to learn how to install Jotform on Salesforce AppExchange.
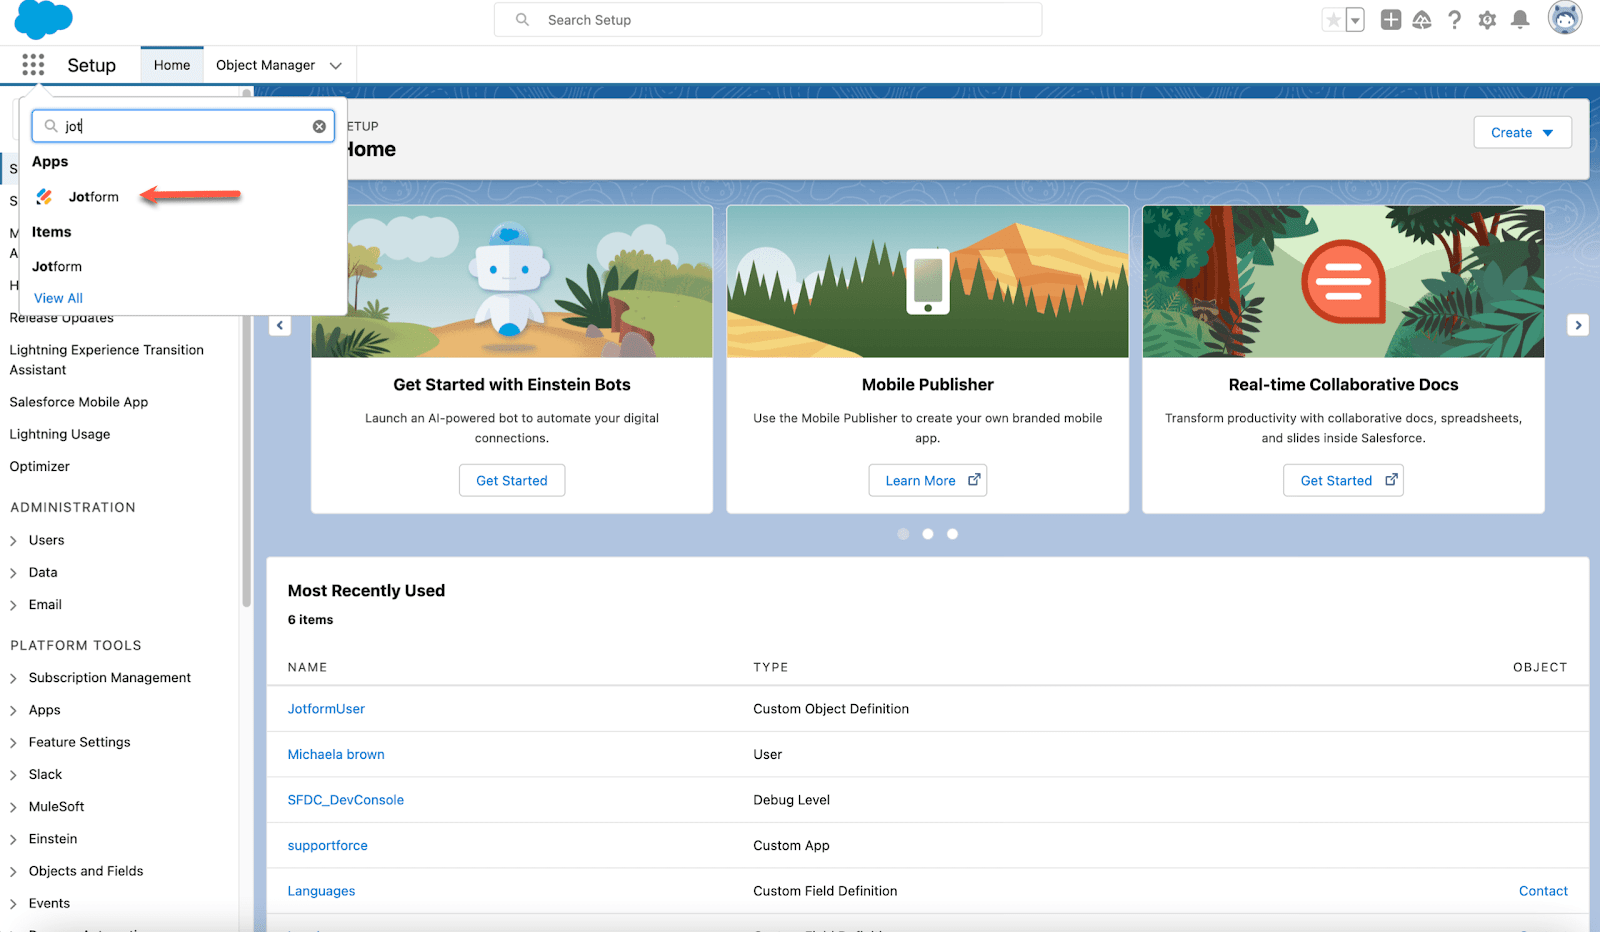
- Log into your Salesforce account and click on the 9 Dots Icon on the left side of your homepage to open the App Launcher.

- Search for Jotform and click on it.
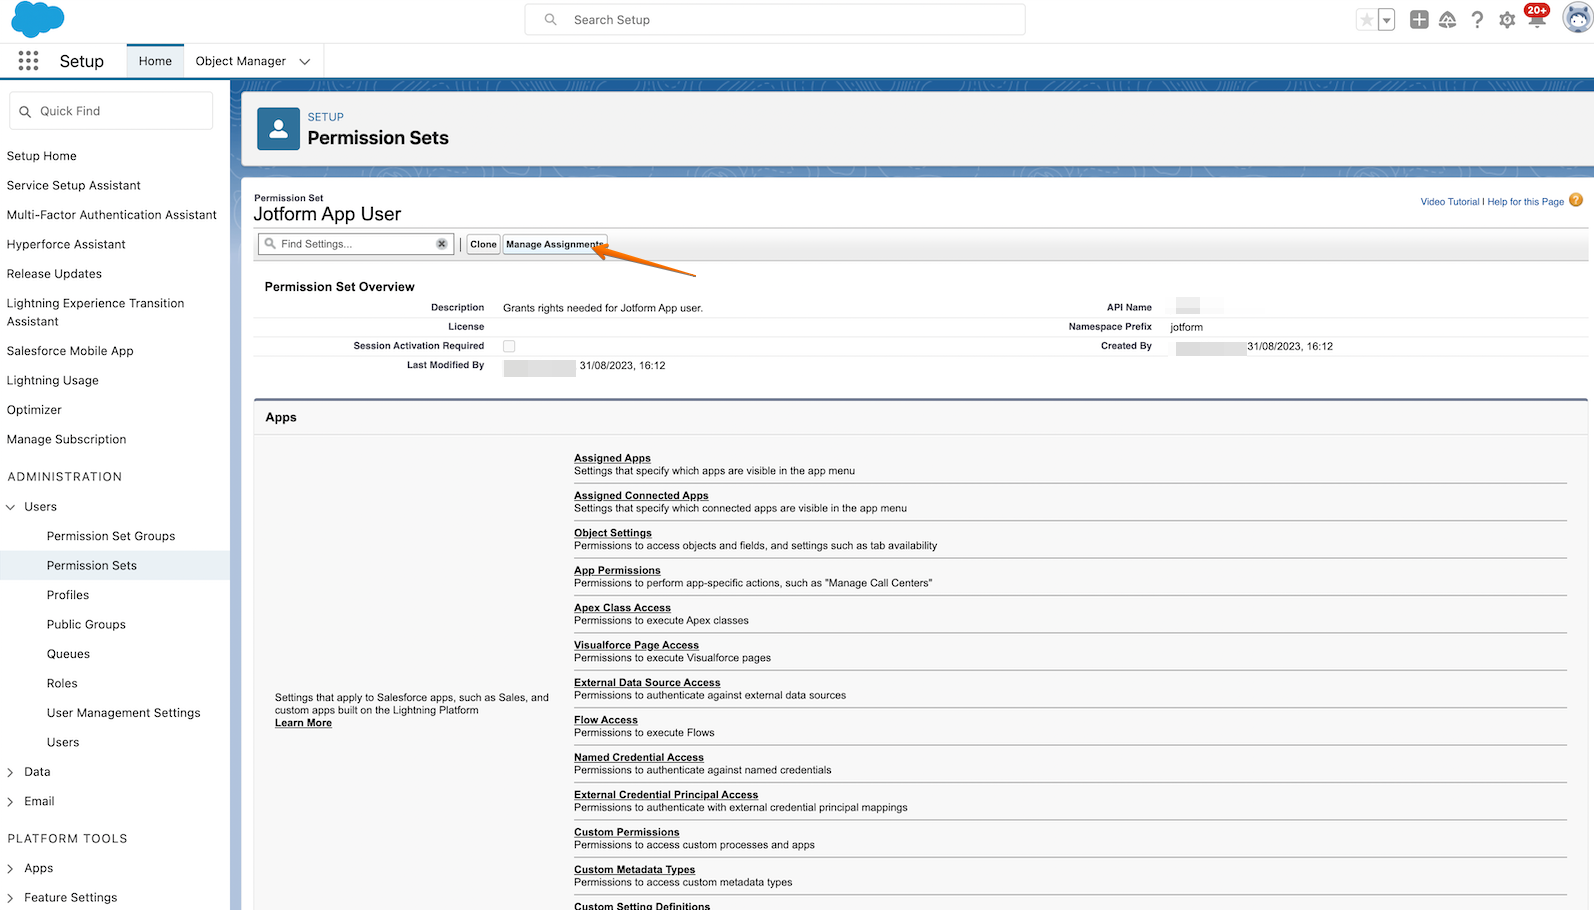
- To assign the Jotform App User permission to relevant users, go to the Setup tab. Note that you need to be the system administrator to change the permission settings.
- After that, go to the Administration section on the left side of the page.
- Under the User dropdown list, select Permission Sets.
- Click on Jotform App User permission, then click on the Manage Assignments button.
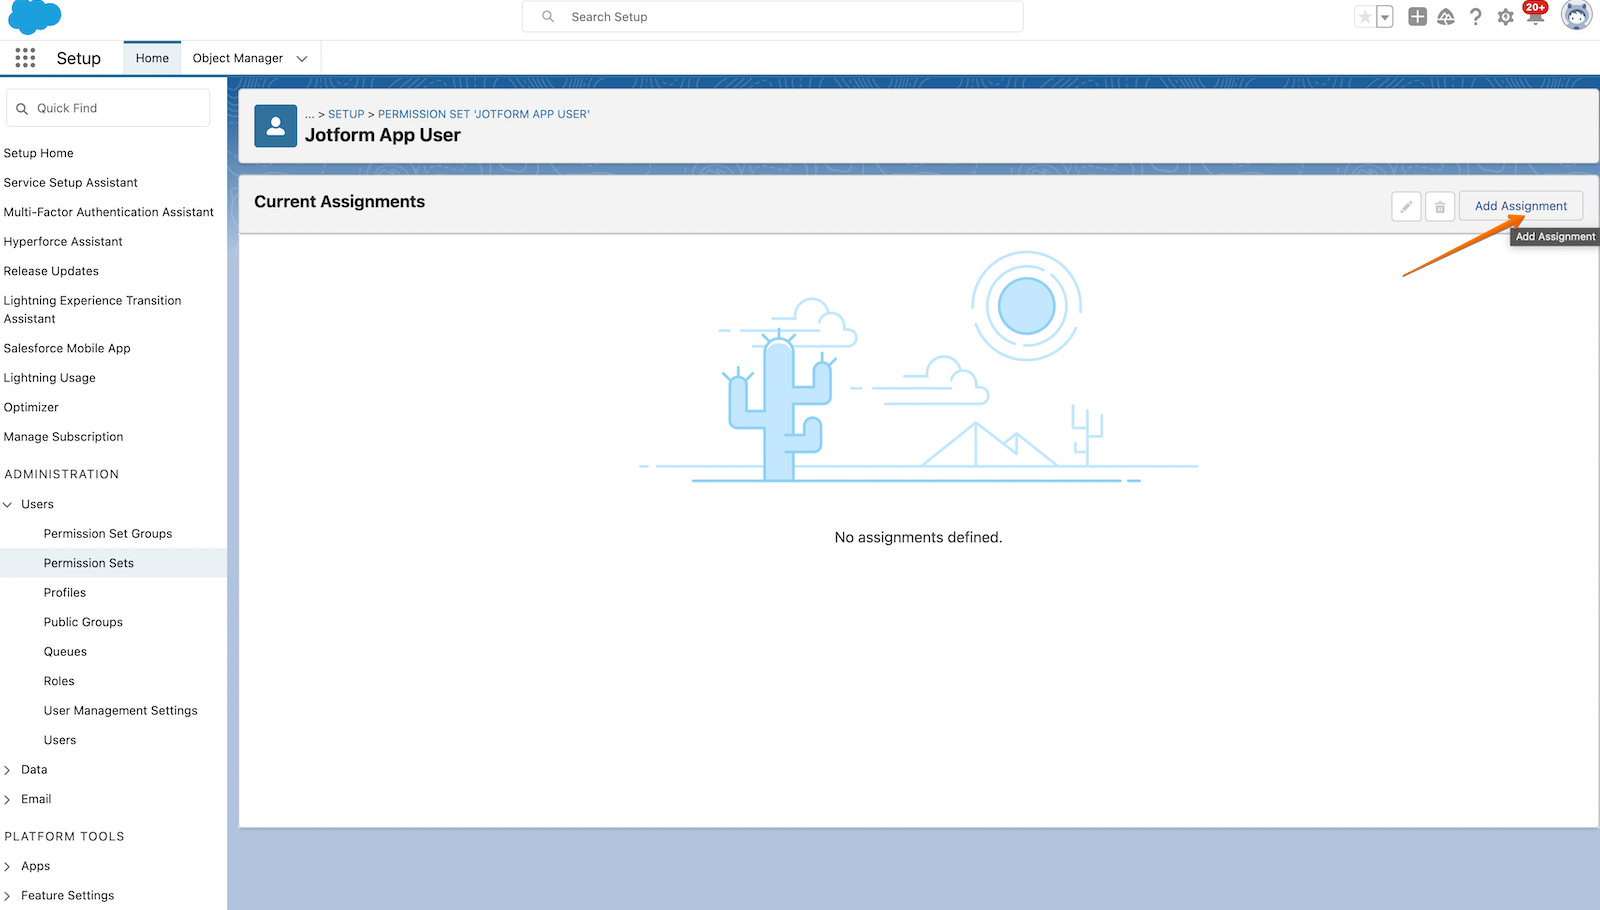
- On the Current Assignments page, click on the Add Assignment button, and select users to assign the permissions.
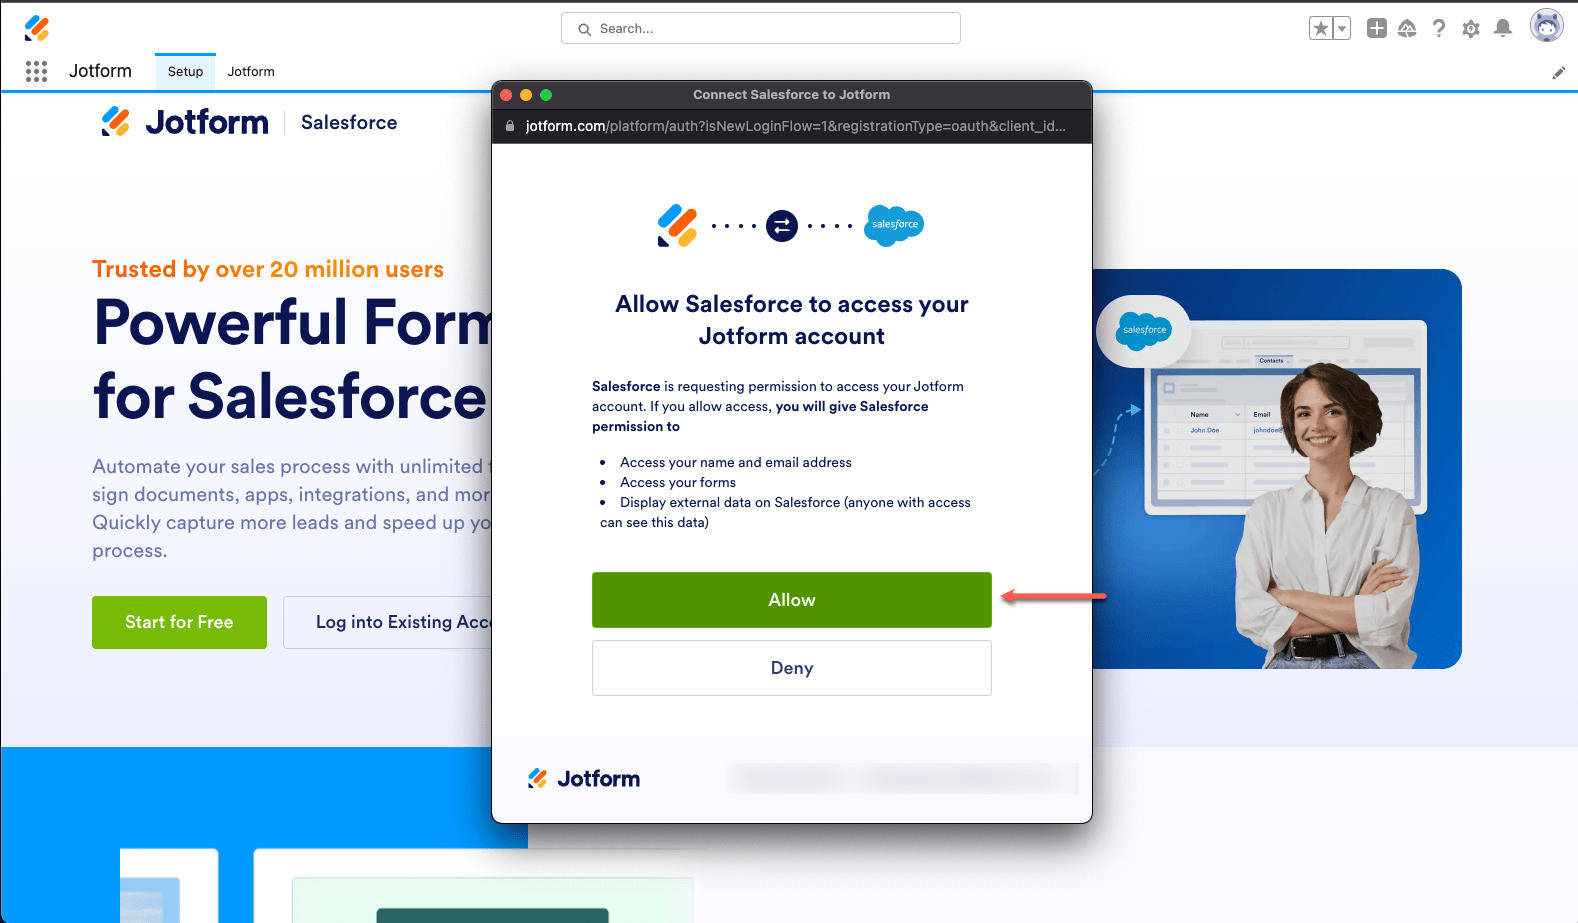
- Under the Setup tab, you can either log into your existing Jotform account or create one for free. If you’re new to Jotform, check out our subscription options.
- Once you log in or create your account, you’ll be asked to allow Salesforce to access your Jotform account. Click on Allow, and your setup will be complete!
Creating a Salesforce Form
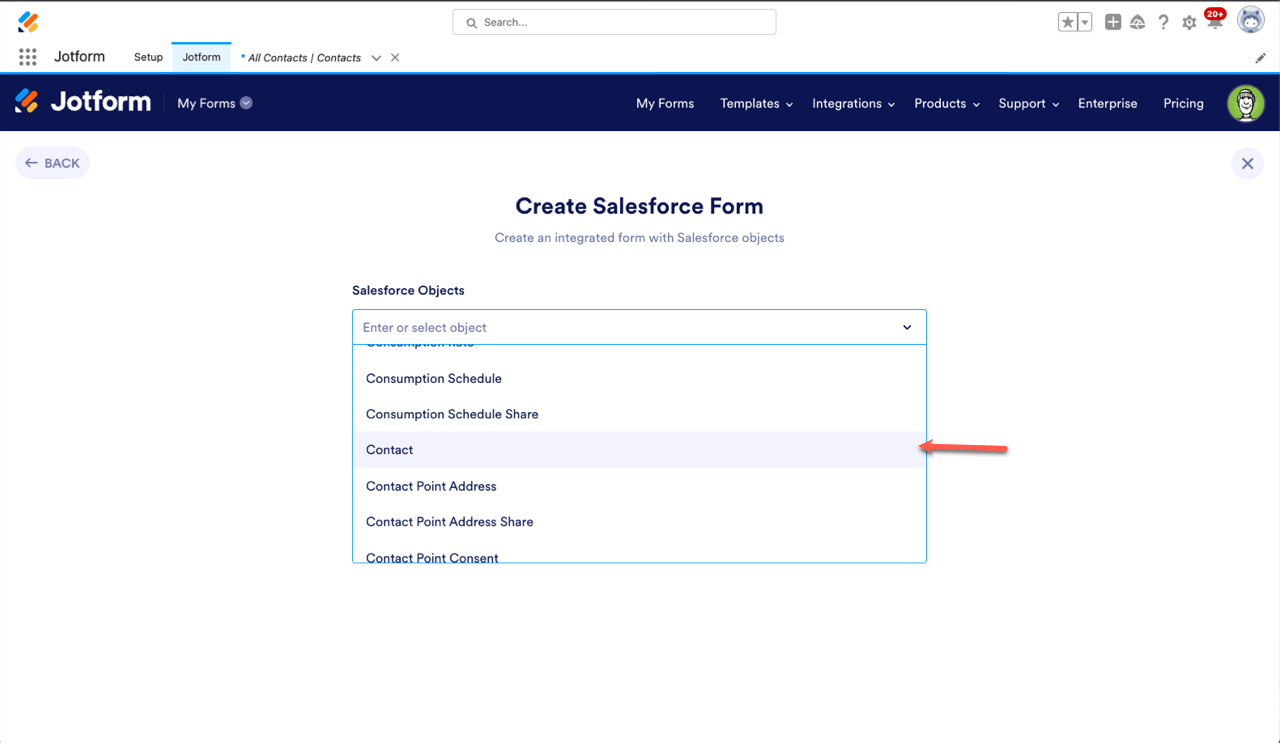
- Now you can create forms that are automatically integrated with Salesforce. All you have to do is select the Create Salesforce Form option on the Create a Form page.
- When you select Create Salesforce Form, you can pick the Salesforce objects you want to include as fields in your form from the Salesforce Objects dropdown list.
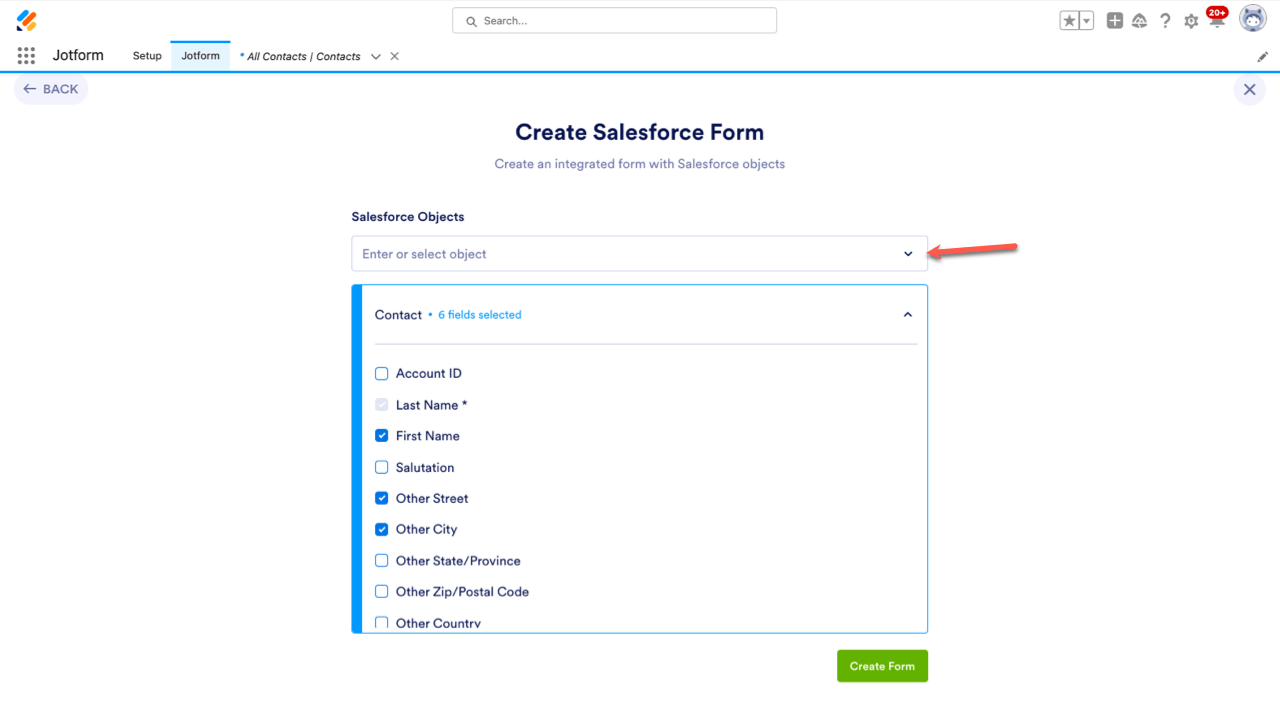
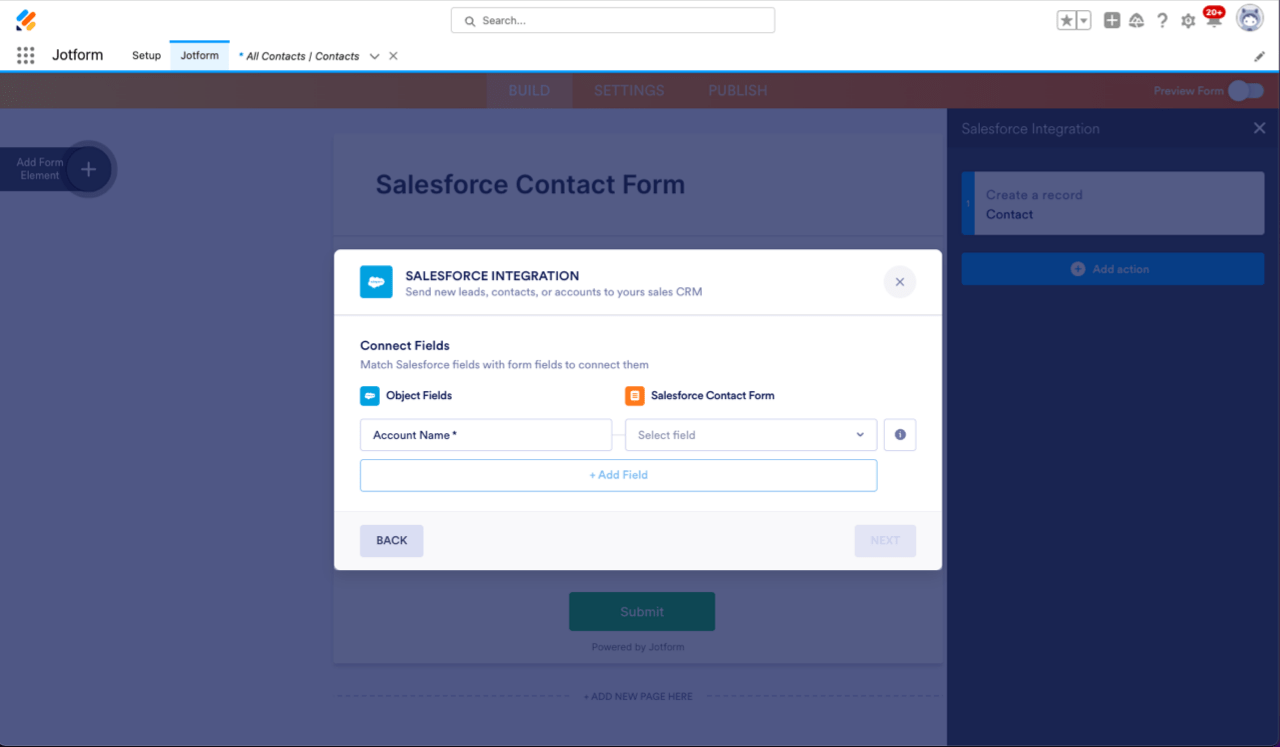
Objects are essentially databases you can create. Objects are made up of fields that you can map to in your forms. This allows you to automatically create Salesforce records. In this example, we created a Contact form that will connect to a Contact Object in Salesforce. - When you select an object, it will come up with a set of fields for you to include in your form. Now you can select the fields you want to include in your Contact object.
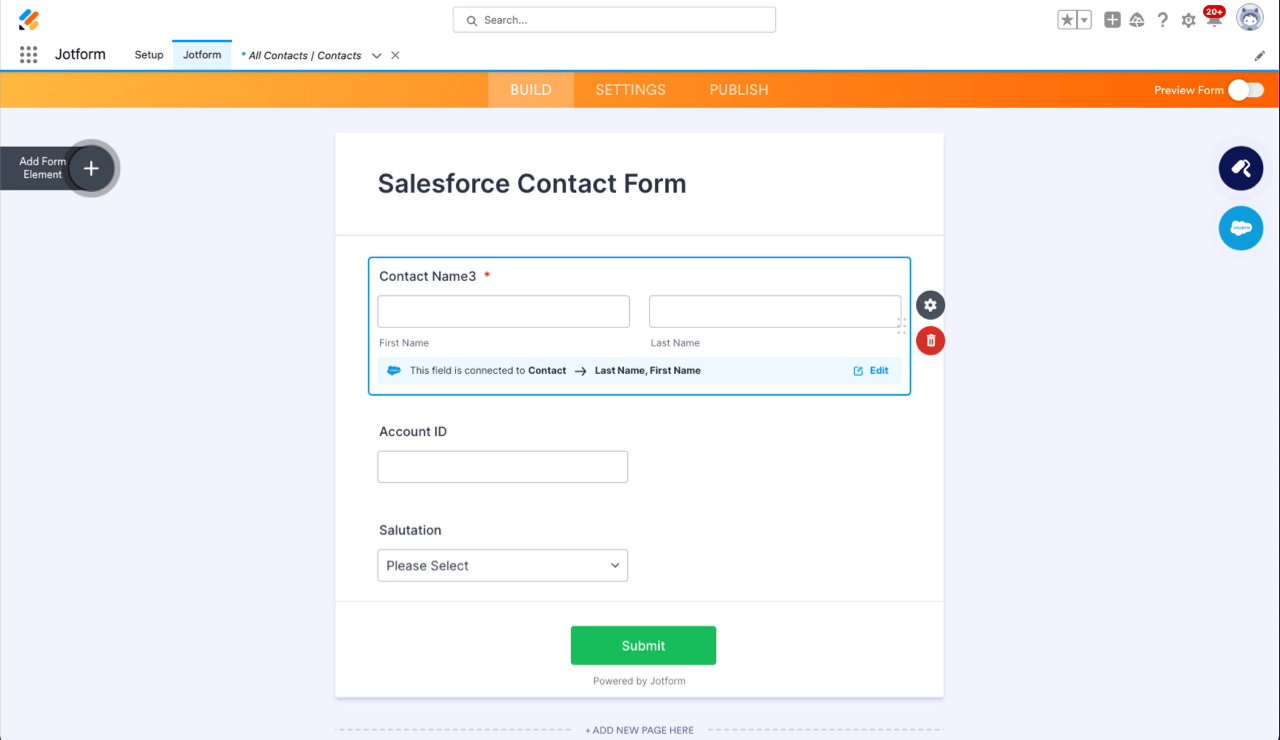
- Click on Create Form when you’re done, and your form will show all the fields you selected earlier.
Now, whenever someone submits this form, their contact information will be added to your database in Salesforce. - If you want to connect other objects with your forms and fields you have already created, just click on the Salesforce cloud on the right to map your Jotform fields to your Salesforce fields.
If you want to learn more about mapping fields in Salesforce, check out Salesforce’s Help Docs on Standard Contact Matching Rules and Standard Account Matching Rules.
How to Embed a Salesforce Form
Embedding your Salesforce form into your website will make it so much easier to get your contacts to go straight to your Salesforce database. Let me show you how to embed your Salesforce forms into your website:
- First, make sure you’re logged on to the Jotform App in Salesforce.
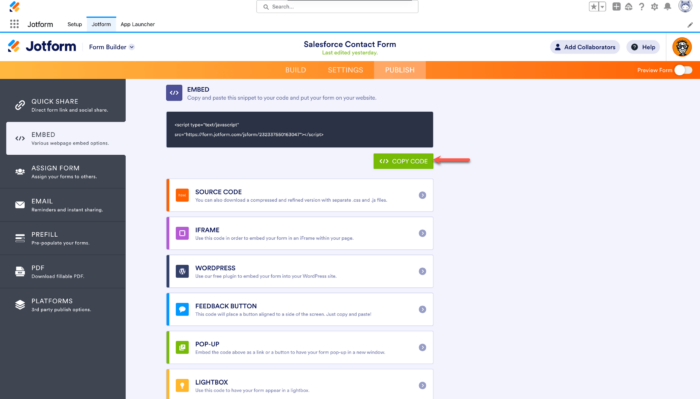
- Then in Form Builder, go to the Publish tab in the orange navigation bar at the top of the page.
- Select Embed from the menu on the left side of the page.
- Click on the green Copy Code button under the Embed option.
The first line of code you see is in Javascript. We have other versions of embed codes to use as well. You can check out our help guide about Embed Codes to see which one works best for you.
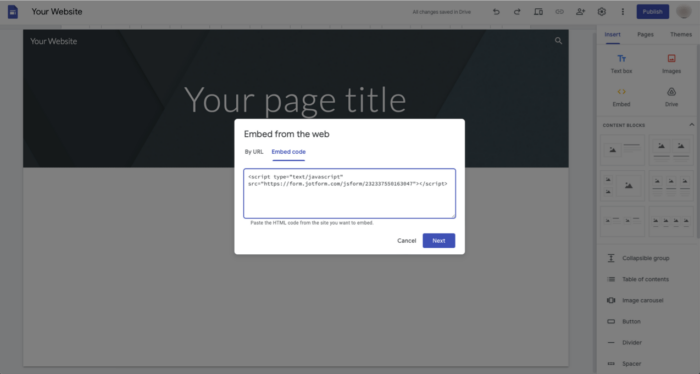
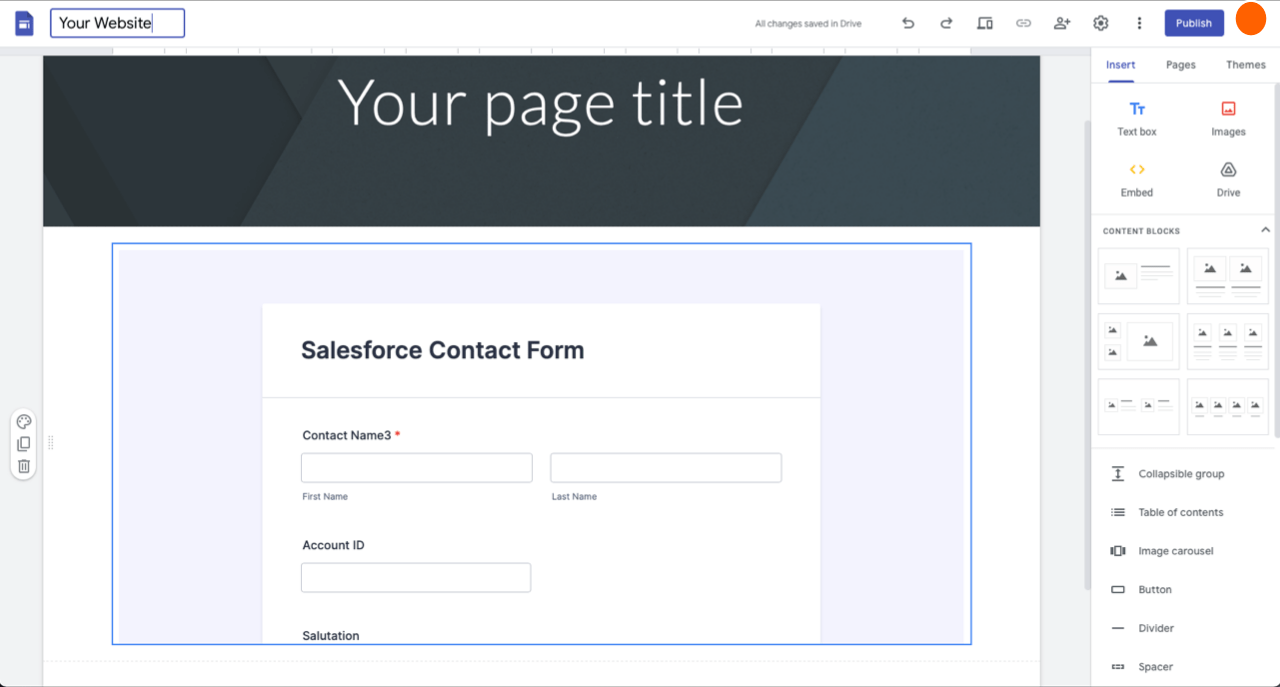
- Paste the code into the embed section of your site builder.
- Preview your site to make sure that it’s working correctly.
Let us know if you have any questions.
- Log into your Salesforce account and click on the 9 Dots Icon on the left side of your homepage to open the App Launcher.
- Templates
- Integrations
- Products
- PRODUCTS
- Form Builder
- Jotform Enterprise
- Jotform Apps
- Store Builder
- Jotform Tables
- Jotform Inbox
- Jotform Mobile App
- Jotform Approvals
- Report Builder
- Smart PDF Forms
- PDF Editor
- Jotform Sign
- Jotform for Salesforce Discover Now
- Support
- GET HELP
- Contact Support
- Help Center
- FAQ
- Dedicated Support
Get a dedicated support team with Jotform Enterprise.
Contact Sales - Professional ServicesExplore