Jotform Workflows makes it simple to build automated processes for your forms—no need to add tons of fields, set up multiple email alerts, or juggle complex conditions. Everything you need is built right in. With just a few clicks, you can design a workflow that automatically routes submissions, sends notifications, or triggers actions based on how you want things to run.
You can start building your workflow directly from the Form Builder or through the My Workflows page, whichever feels more convenient for you. It’s a quick, powerful way to streamline how your forms work—saving you time and keeping everything organized and efficient.
Creating a Workflow from the Form Builder
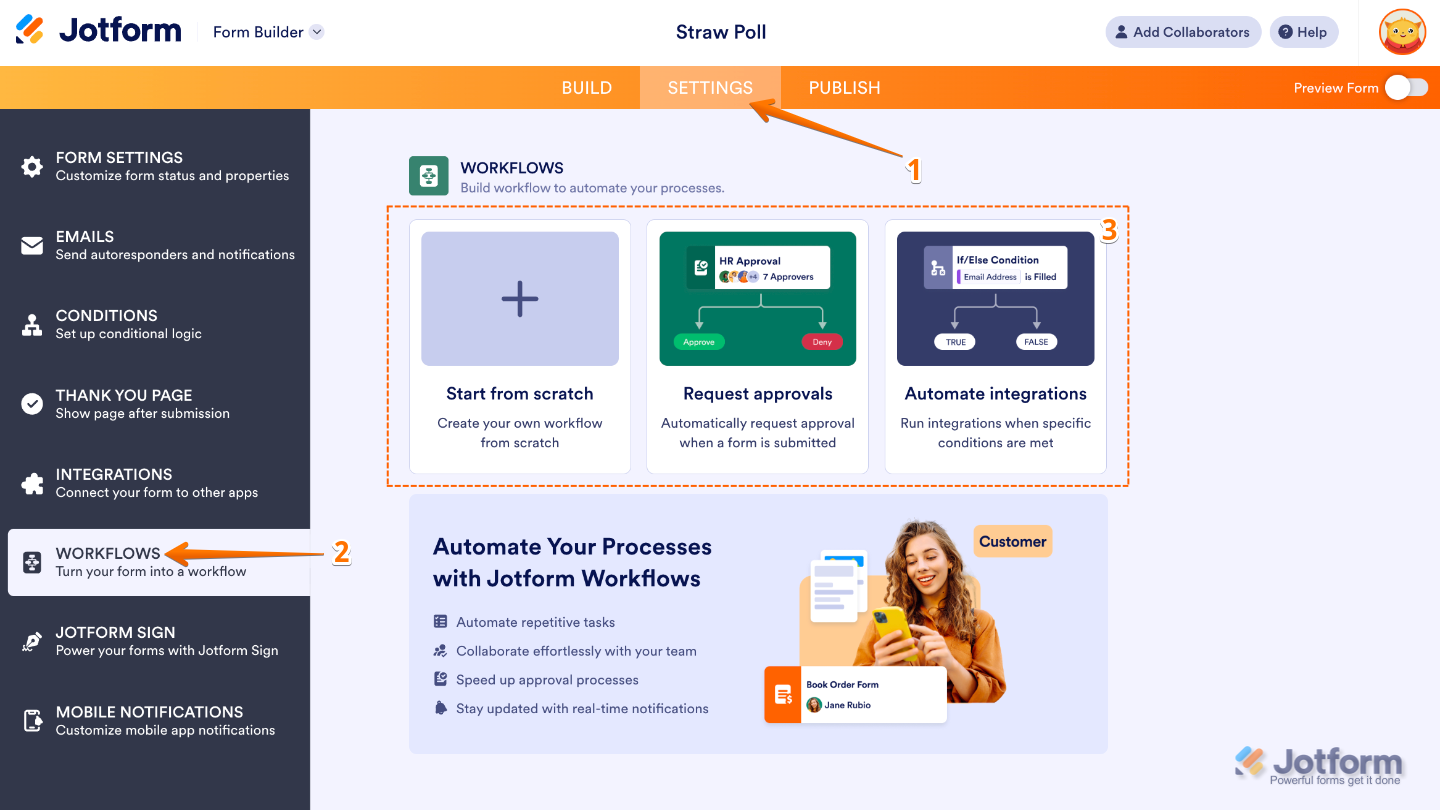
To create a more customized workflow, you can start right from the Form Builder. This option gives you the flexibility to design workflows that perfectly match how you want your process to run. Here’s the quick way to do it:
- In Form Builder, in the orange navigation bar at the top of the page, click on Settings.
- Then, in the menu on the left, click on Workflows.
- Next, in the Workflows section on the right, select one of the following options:
- Start From Scratch — This option gives you a blank canvas to create your workflow exactly the way you want it. You can design each step from the ground up. It’s perfect if you want full control and flexibility over how your process works.
- Request Approvals — Once selected, the system will automatically build an approval flow for your form. You can assign approvers, set conditions for automatic approvals or denials, and customize notifications to keep everyone in the loop.
- Automate Integrations — Choose this option to automatically create an approval flow for your form, complete with an If/Else condition to guide how submissions are handled. It’s a quick way to set up a smart workflow without having to build everything from scratch.
Creating a Workflow from Workspace Page
To create a more customized workflow, you can start directly from your Workspace page. This gives you a clean slate to design how your form submissions move through each step—from approvals and notifications to automated actions. To get going, here’s what you’ll do:
- On your Workspace page, click on Create on the top-left side of the screen.
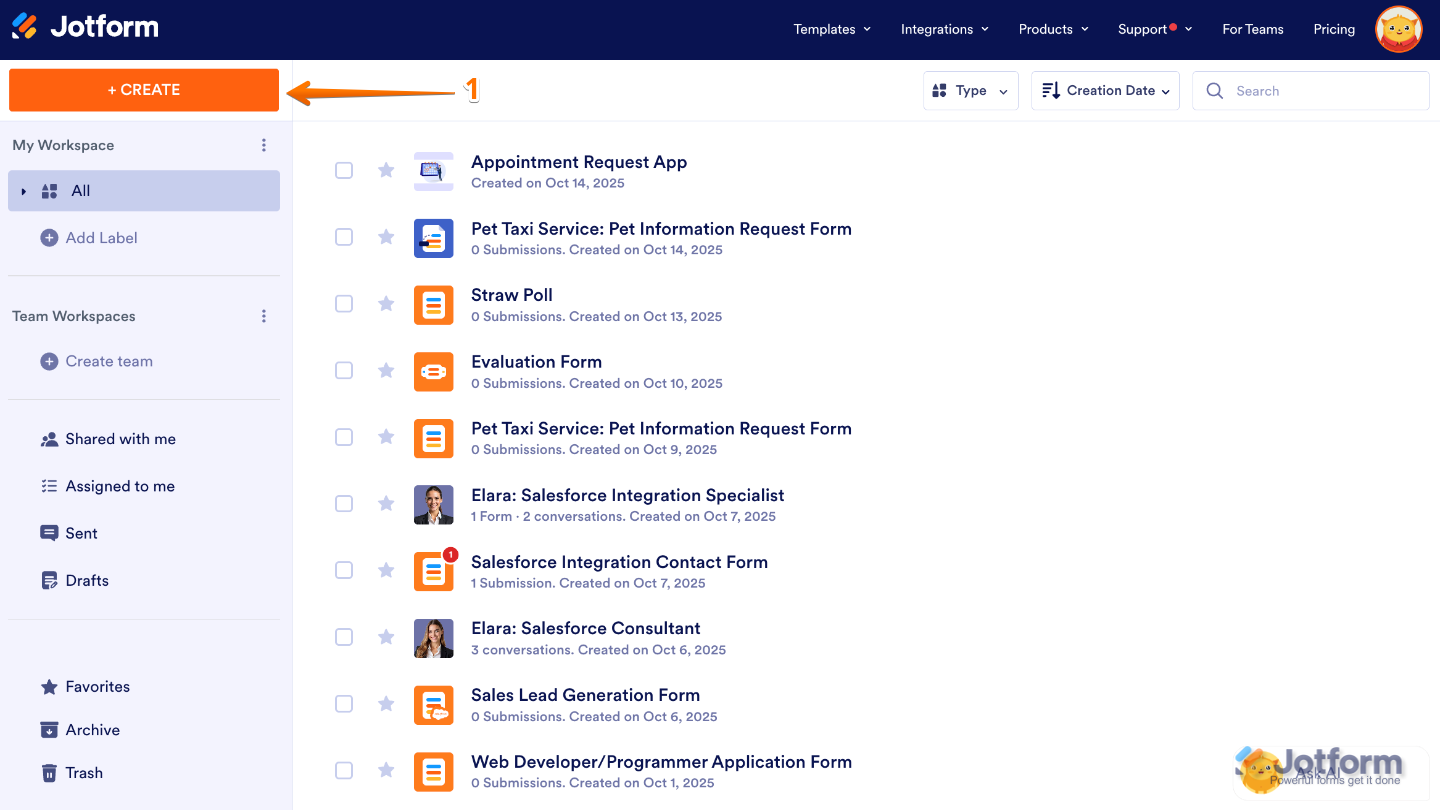
- Then, in the window that opens up, click on Workflow.
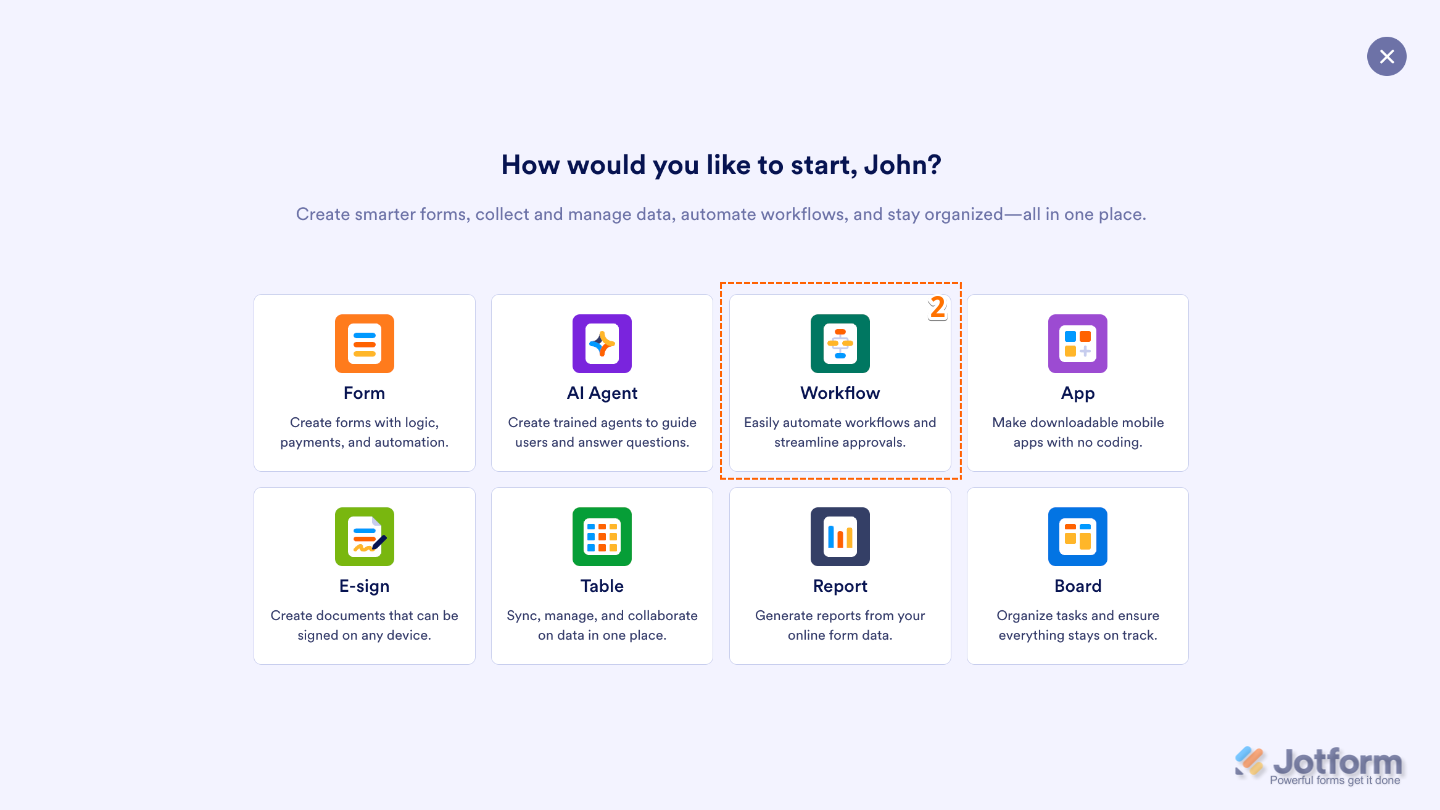
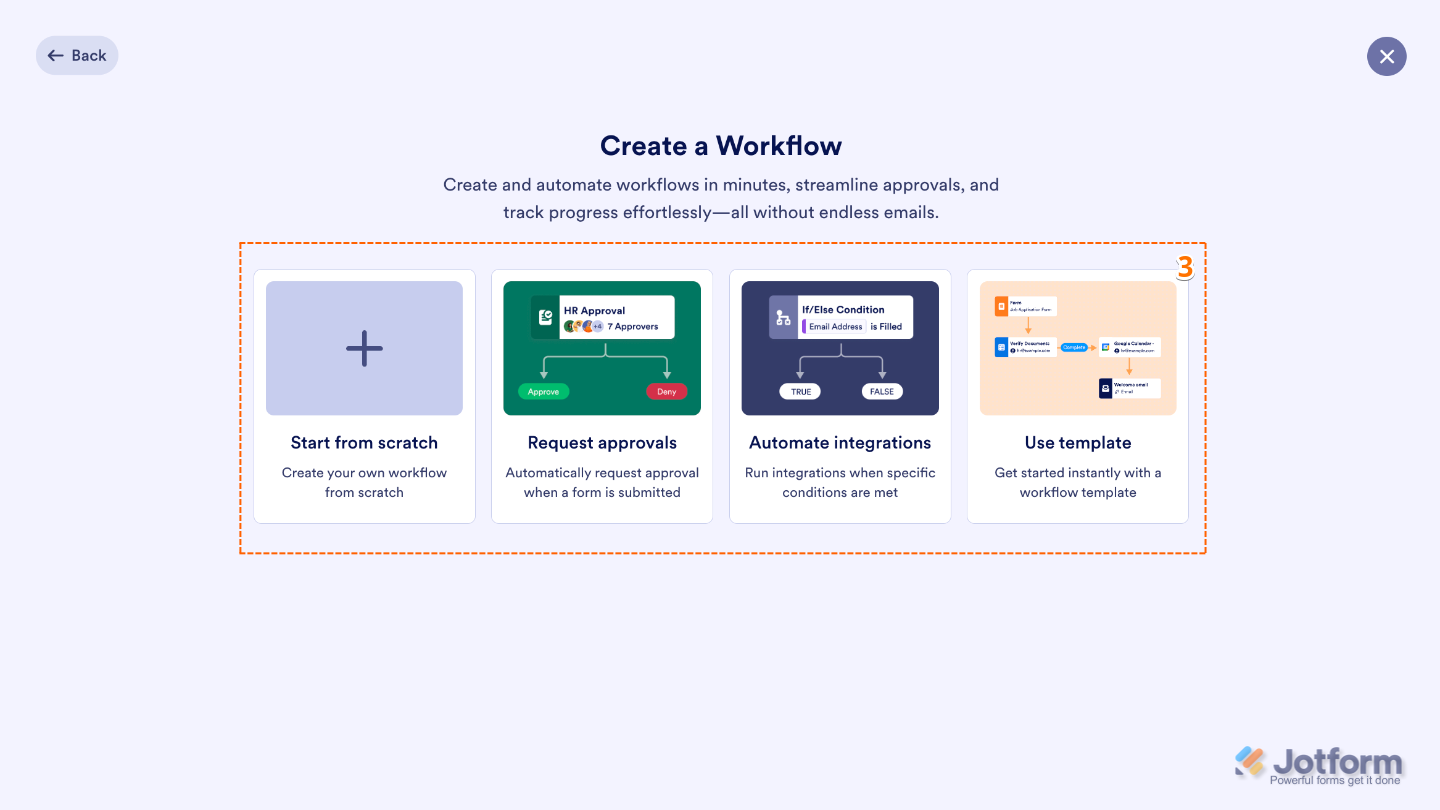
- Next, choose one of the following options:
- Start From Scratch — This option gives you a blank canvas to create your workflow exactly the way you want it. You can design each step from the ground up. It’s perfect if you want full control and flexibility over how your process works.
- Request Approvals — Once selected, the system will automatically build an approval flow for your form. You can assign approvers, set conditions for automatic approvals or denials, and customize notifications to keep everyone in the loop.
- Automate Integrations — Choose this option to automatically create an approval flow for your form, complete with an If/Else condition to guide how submissions are handled. It’s a quick way to set up a smart workflow without having to build everything from scratch.
- Use Template — Pick from a variety of ready-to-use Approval Workflow Templates to get started quickly—no need to build everything from scratch.
You can explore the guides below to dive deeper and learn more at your own pace.

Send Comment:
18 Comments:
August 4, 2025
Why are you playing background music. The interface is distracting enough.
June 4, 2025
How do I add a person with authority to approve forms?
May 15, 2025
On my Pre-screening form, I need to create workflow that if they choose the "New" option under Patient Status (Single Choice Properties), they need to be redirected to another form named, New Patient Registration form. If they choose the "Current:" option and one of of the Health Package option, they need to be redirected to that Health Package form. I need help urgently please.
April 12, 2025
Why isn't my form showing in the dropdown box so I can add it to my workflow?
March 28, 2025
Can a workflow ONLY start with a Form?
December 9, 2024
I am trying to create a registration form that will include four different types of vendors/food. I want to use a master form with drop downs that then it takes the type of vendor that you choose (ex: brewery) to a specific form to fill out. If you are a craft vendor it takes you to a different form etc.... But I want the basic information form to show name, address and all the normal info for registration, but want a vendor to be able to pick what they are from a dropdown and then it takes them to a specific form of questions just for their particular type of business, but leave the main form intact. But want them to come back to the main form after filling out their particular form in order to complete the basic form for signature etc. Can someone head me in the correct direction please. Is this done through Workflow or somewhere else?
June 20, 2024
Are you able to add your form to an approval template? When I search my forms I cannot find my forms to change a template form.
October 5, 2023
Signed up for a free tablet haven't heard from it.
August 4, 2023
We need to see the total form plus approval in the JOtform Approval report. But currently we can only see the approval part at the end. How do we include the total form with all information regarding an employees leave.
Sorry but as well as the actual signed approval at the end of the actual form
June 11, 2023
If I need the manager to assign ratings as a part of the approval technique, in [preference]( to only an easy approval or denial, is that possible?
June 8, 2023
Does approval flows cancel any conditional emails that may have been in place before the flow was set.
October 19, 2022
Hi
I would like to use this to manage invoices approval within company
Two things I have a question on
1. When a user receives an email about a pending approval in their jotform inox, is there a way for the email to contain a link to that inbox
2. Can I make it so that once the approver click on the link to see the pending items in their jotform mailbox the approver only see the list of items pending in their own inbox rather than seeing everyone else's?
Kindest Regards
October 4, 2022
If i want the manager to assign rankings as part of the approval process, instead of just a simple approval or deny , is that possible ?
April 5, 2022
How do I remove approval flow if I no longer require them on a form?
March 28, 2022
If I add approvals to the flow which the approval flow is in progress, will the new approvals be included in the flow?
March 23, 2022
Approval flow re-route set to 1 hour but the form did not re-route to the person it should have. What can cause this to happen.
December 3, 2021
Is there a limitation for the amount of Approval Workflows that can be added to a single Jot Form?
May 31, 2021
Does The Approval Flow requires an Approver to CREATE a Jotform account?
Because I UNCHECKED the box "Require Approver to LOGGIN" to approve a request.
However, it prompts me (as the approver) to CREATE a Jotform Account before I can approve or deny anything - where you say LOGGIN is NOT required..
Can you clarify?