
How to embed MailerLite forms
- Go to the Forms page
- Click the Overview button
- Scroll down to JavaScript snippet
- Copy the universal tracking snippet and paste it into your website’s HTML
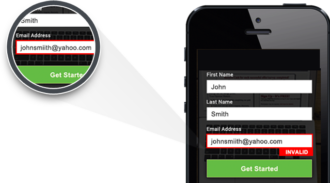
If you’ve ever filled out a form — like a product survey, newsletter signup, or event registration — directly on a business’s website, then you know what an embedded form is. It’s a form that’s been directly embedded on a web page using a snippet of HTML code. With embedded forms, users don’t have to click a link to another site to fill out a form — they can do so on the web page they’re already on.
Used to gather information from prospects, customers, and subscribers, embedded forms are convenient and easy to use. They’re also trackable, so you can see which pages of your site are generating form submissions, which helps inform future ad placement.
There are various ways to embed a form directly onto your web page. If you use email marketing software MailerLite, here’s a helpful breakdown of how to embed a MailerLite form on your website.
How to create a MailerLite embedded form
Before you can embed a MailerLite form on a page of your website, you first need to create the form.
Here’s how to create an embedded form with MailerLite:
- Go to the Forms page.
- Select the Embedded forms tab.
- Click Create form.
- Give your form a name (don’t worry, you can always change it later) and select the form type Embedded form.
- Hit Save and continue.
- Choose a subscriber group (or several) to add contacts to and click Continue.
- Click Continue again to open up the embedded form editor.
- To edit the heading (the default is “Newsletter”) and text (“Signup for news and special offers!”) on your embedded form, click on the heading and text block and make your changes in the sidebar.
- To edit the signup field (“Email”) on your form, click on the field block and make your changes in the sidebar. You can change the sample text within the input fields, add additional fields to your form, and reorganize the order of the fields.
- To edit the text of the button (“Subscribe”) on your form, click on the button block and make your changes in the sidebar.
- Once you’ve created your embedded form, click Next to save your changes.
How to embed a MailerLite form
Now that you have your MailerLite form, the next step is to embed it on your website.
To do so, you’ll need to copy and paste a JavaScript snippet onto each page of your website that you’d like your form to appear. Follow these steps.
- To access the JavaScript snippet, go to the Forms page of MailerLite.
- Click the Overview button.
- Scroll down to JavaScript snippet, where you’ll find two JavaScript snippet options. First, you’ll see the MailerLite universal tracking snippet (which is a longer piece of code) and second, your individual form’s code (which is shorter).
- Copy the universal tracking snippet and paste it into your website’s HTML, right before the closing </head> tag. If you’re unsure how to edit your website HTML, contact the support team of whatever platform you used to create your site.
If you’d like to change anything about your MailerLite embedded form, you can customize it using the same form editor you used to create it — including its background color, call-to-action (CTA) button, privacy statement, and reCAPTCHA box. Simply click on either Design or Settings in the form editor’s sidebar to get started.
How to use Jotform as a MailerLite embedded form alternative
Though embedding MailerLite forms to your website is quick and easy, you do need to have access to your site’s metadata in the <head> section to place the snippet (though if you use WordPress, there is a MailerLite plugin that can help). But you could also use another tool to get a simple embed code to paste on any page of any type of website.
Online form builder Jotform lets you create forms you can embed anywhere, and it has roughly 20,000 customizable form templates to work from. Jotform is easy to use, intuitive, and, best of all, completely code-free, helping you build forms, apps, approval flows, tables, and PDFs, regardless of your programming experience.
Plus, embedding a form to a web page with Jotform is simple and straightforward.
Here’s how to do it in just a few simple steps.
- Create a new form in Jotform’s Form Builder, then select Settings.
- In the Form Builder, navigate to the Publish tab.
- Click Embed.
- Click the Copy Code button.
- Paste the code directly into the body of the web page(s) where you’d like the form to display.
What’s more, thanks to Jotform’s MailerLite integration, any information you collect from your website’s embedded Jotform forms can be sent directly to MailerLite for email marketing purposes — such as growing your newsletter subscriber list.
Embedding forms on your website is an effective, convenient way to collect data safely and securely. And though both MailerLite and Jotform require a minor setup process to enable embedded forms on websites, they’re both user-friendly and uncomplicated tools. You can feel confident embedding forms to your website and collecting valuable data for your business.


Send Comment: