

Key takeaways
- To edit or delete a contact in Docusign, you have to leave your envelope, select your profile image, go to My Preferences, and open Contacts.
- Docusign connects to CRMs such as HubSpot, but HubSpot’s listing for the Docusign CRM integration says it doesn’t sync data between the two, so updating a contact in one doesn’t update it in the other.
- With Jotform, you can send form data to your CRM through built-in integrations and keep client records organized in Jotform Tables, so you don’t have to enter the same details twice.
You’re about to send a contract when you notice a typo in the client’s email address. You select the address book icon in the document you’re sending, expecting to fix it, but the list only lets you choose a contact to add. That’s because Docusign keeps contact management in My Preferences, a settings menu outside your envelope, so you have to step away from what you’re sending to correct the email address.
If you’re a sales rep, HR professional, or small-business owner who sends contracts every week, keeping your Docusign contacts accurate is crucial. Here’s a step-by-step guide for editing your address book in Docusign. If you’re new to the platform, learn more about what Docusign is before getting started.
1. Open preferences
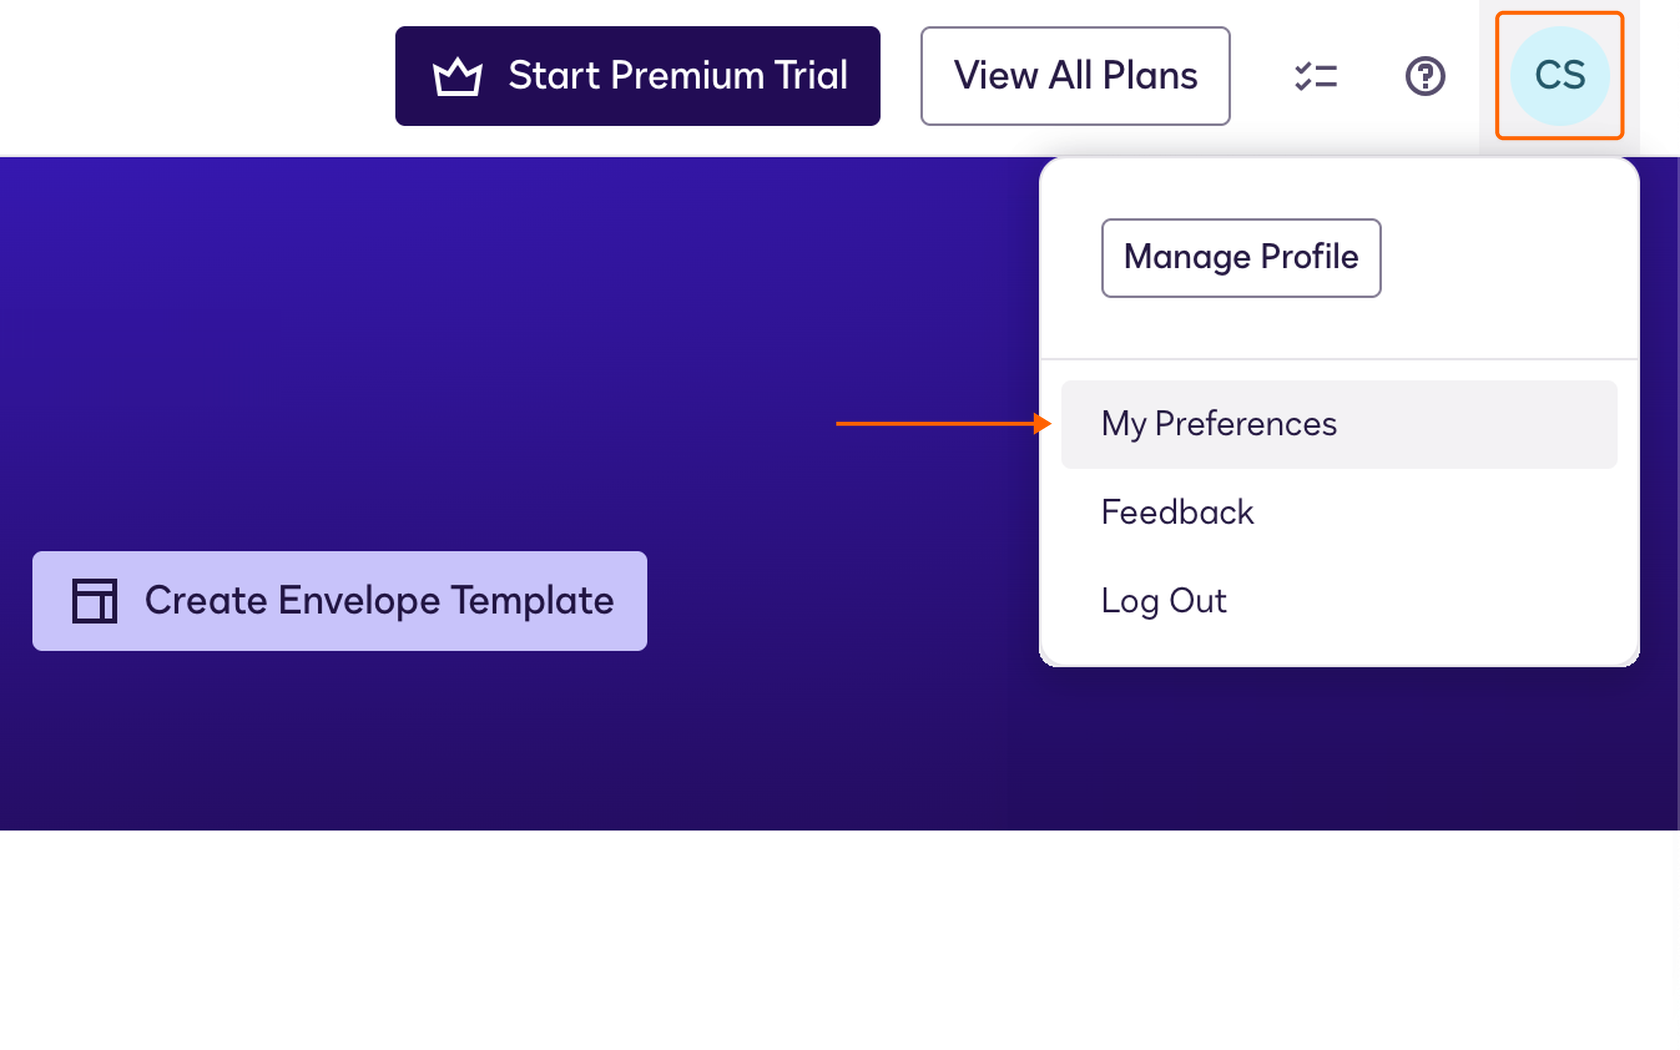
Log in to your Docusign account and select your profile image or initials in the top-right corner, then select My Preferences from the menu. My Preferences is where Docusign keeps your personal settings, including your address book, so you’ll need to leave the document you’re preparing to send. If you’re in the middle of preparing a document to send, save it as a draft first so you don’t lose your progress.
2. Select contacts
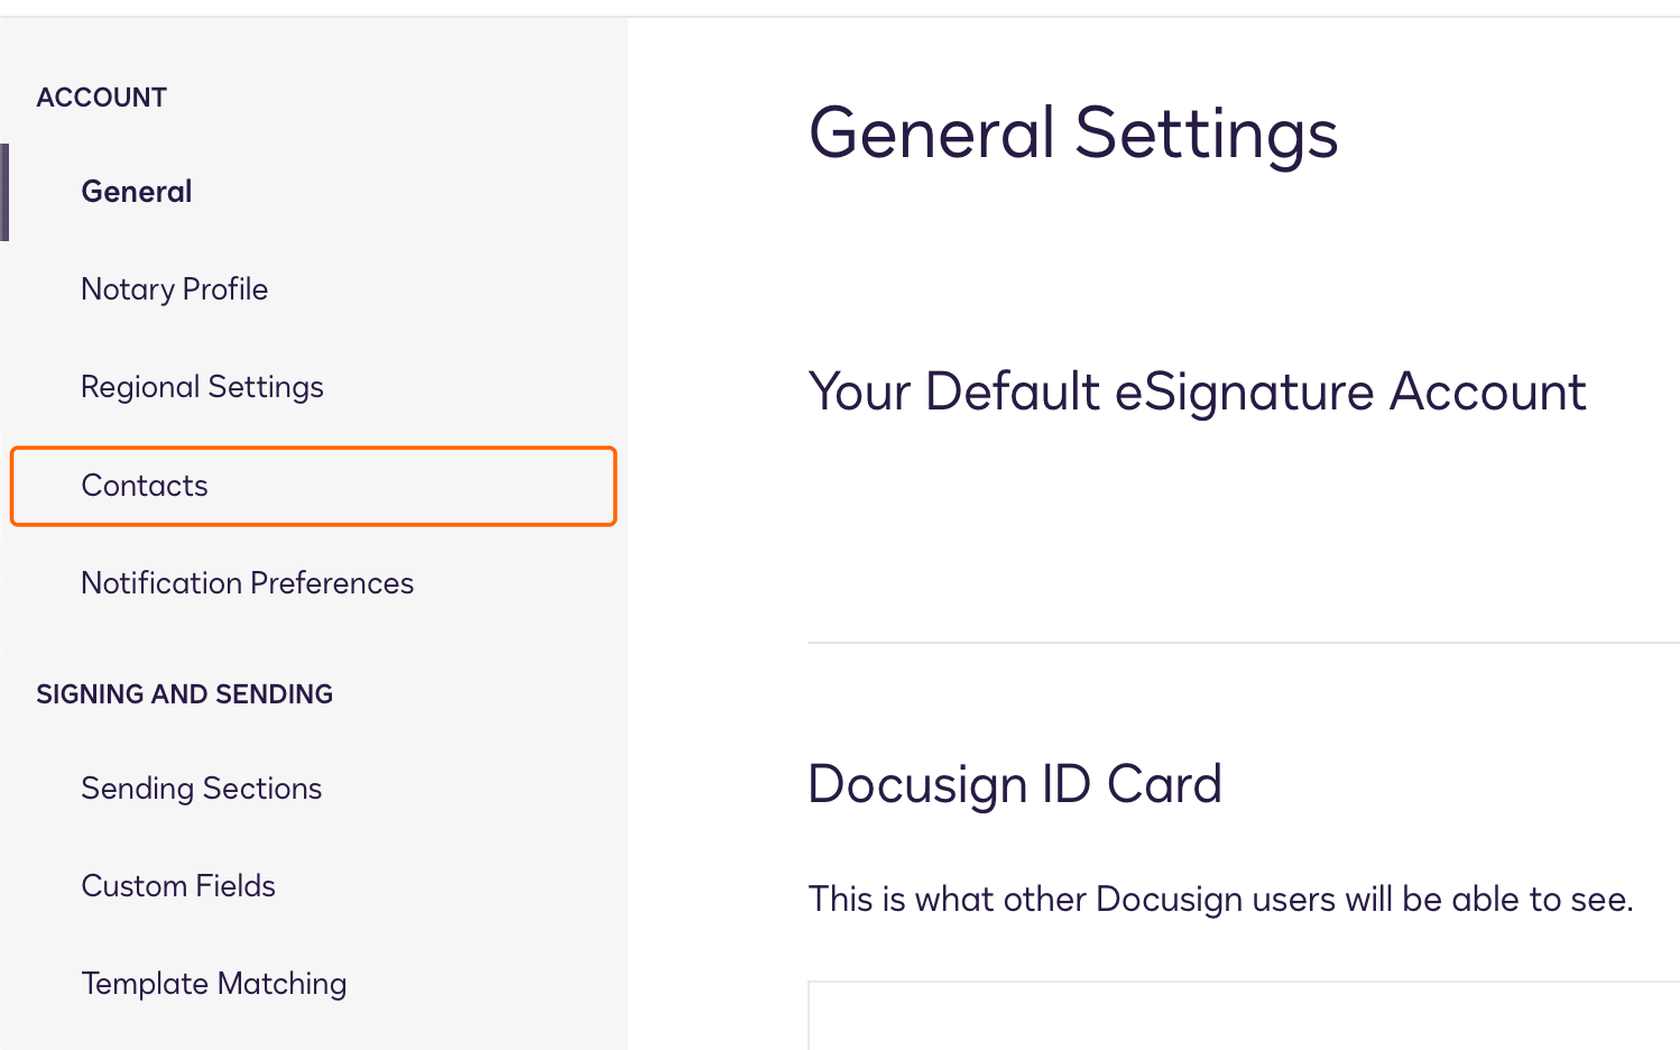
In the left panel, under Account, select Contacts. Your address book includes contacts you’ve added, contacts shared across your account, and signing groups. Docusign notes that your permissions determine which ones you see. If Contacts doesn’t appear at all, your Docusign administrator may need to give you address book permissions.
3. Edit a contact
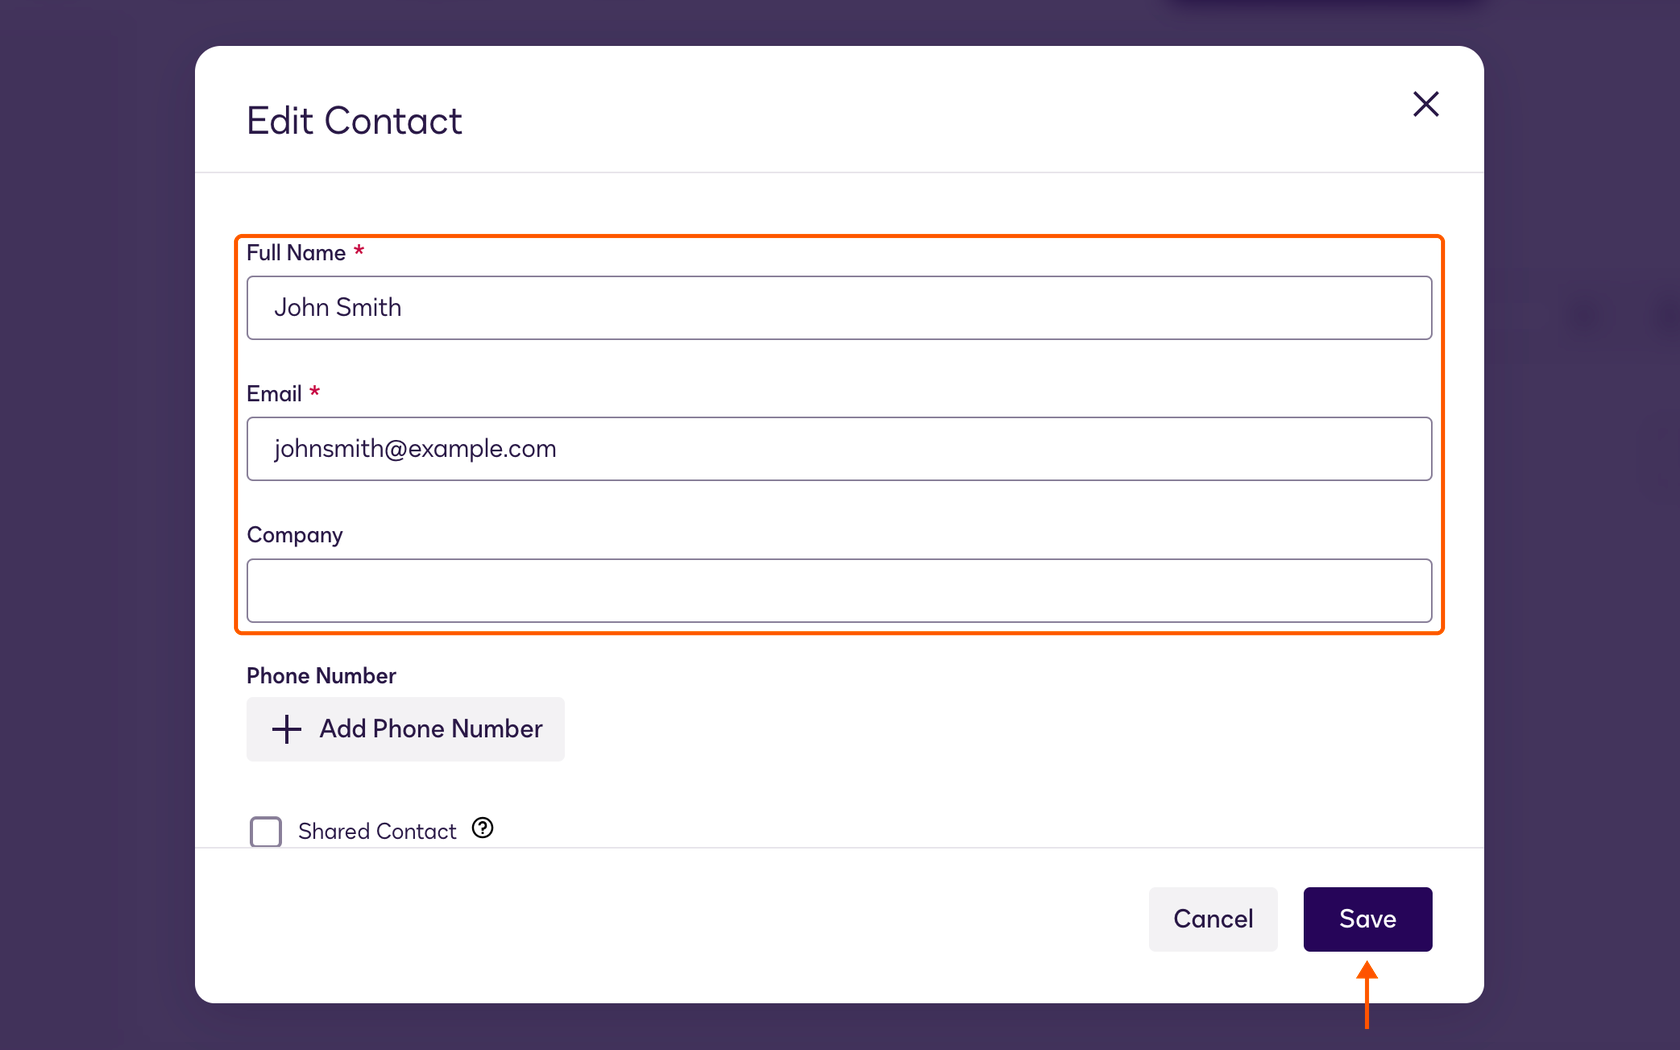
Find the contact you want to change by searching or scrolling through the list, then select Edit. Update the details you need, such as the person’s name, email address, company, or phone number, and select Save. The next time you add that client to a document, Docusign will use the corrected address.
If the Edit option doesn’t appear for a contact, it may be a shared contact, which only the person who created it can change.
4. Delete a contact
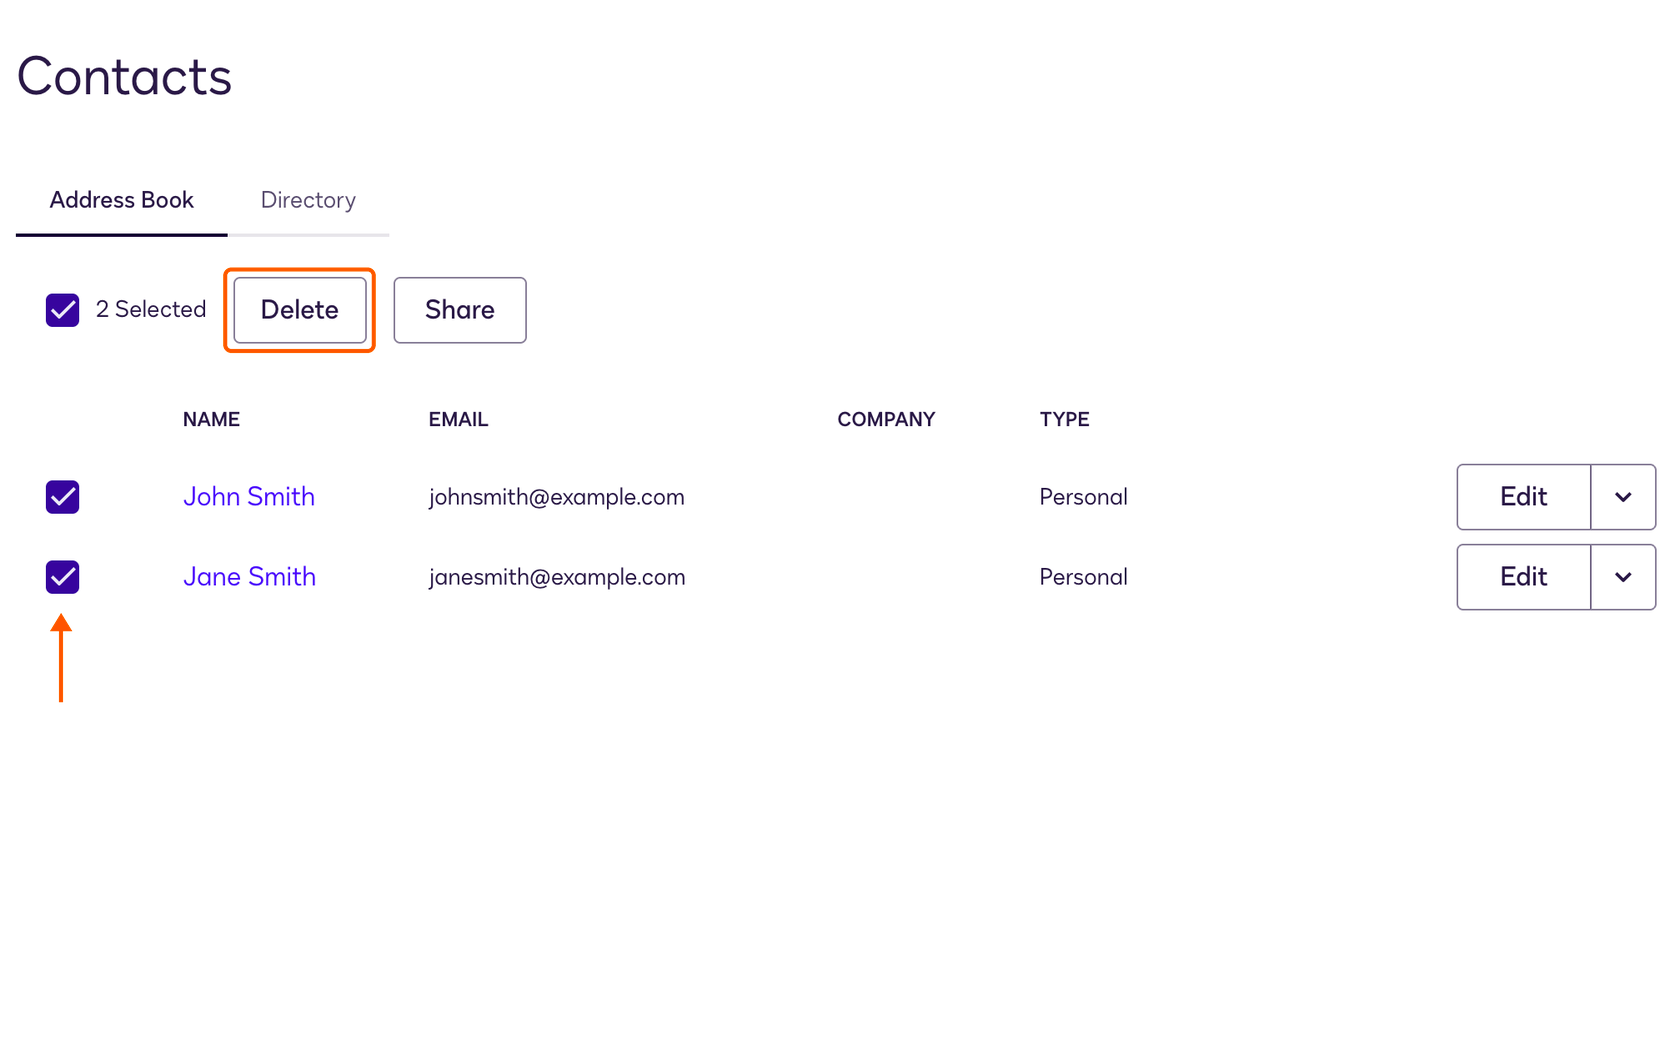
To delete a contact in Docusign, select the checkbox next to the name, then select Delete. You can also do this by clicking the dropdown arrow next to Edit and selecting Delete. You can check several boxes at once to remove multiple contacts in one step.
Why you should sync your contacts with Jotform instead
Docusign’s address book includes only the people you’ve added or sent to before, so keeping it current means updating the same client details in more than one place. Jotform takes a different approach by working from the information you already collect. When a client fills out an intake or order form, their details go straight into your Jotform account, ready to search, share, or send to your CRM through Jotform’s CRM integrations.
- Track every document: The Jotform Sign Inbox lets you monitor signature requests and document progress in one place, so you can see which documents are complete and which are still awaiting signatures, much like how Jotform Inbox organizes your form submissions.
- Find any record: Every Jotform account includes Jotform Tables, a database that lets you search, filter, and sort records by client name, company, or date instead of hunting for an envelope ID.
- Collaborate without extra accounts: While Docusign’s Standard and Business Pro plans charge for every user on your team and cap how many envelopes each user can send, every Jotform plan, including the free Starter plan, allows coworkers to edit forms together via a shared link. Full team workspaces and managed multiuser access are available through Jotform Enterprise, with pricing based on your organization’s requirements.
- Send and sign from anywhere: Jotform Sign lets you prepare contracts, set a signing order, and send automatic reminders to signers with pending documents. The free Jotform Sign Mobile app adds document scanning, in-person signature collection, and notifications as each person signs.
If you’re looking for Docusign alternatives, see how Jotform Sign vs Docusign compare.
How to connect your CRM to Jotform
Jotform connects with CRMs such as Salesforce, HubSpot, Zoho CRM, and Pipedrive. The steps in this section use HubSpot as an example, since you can start with its free CRM tools. With Jotform’s HubSpot integration, every form submission can create a new contact in HubSpot or update an existing one, so client details reach your CRM without anyone retyping them.
If you don’t use a CRM yet, a Jotform Tables template such as Sales CRM or Small Business CRM can serve as your contact database instead, and form submissions will fill it in automatically.
Here’s how to connect HubSpot to a Jotform form:
- Open your form’s integrations: In the Form Builder, hover over Integrations at the top, then click See All at the top right.
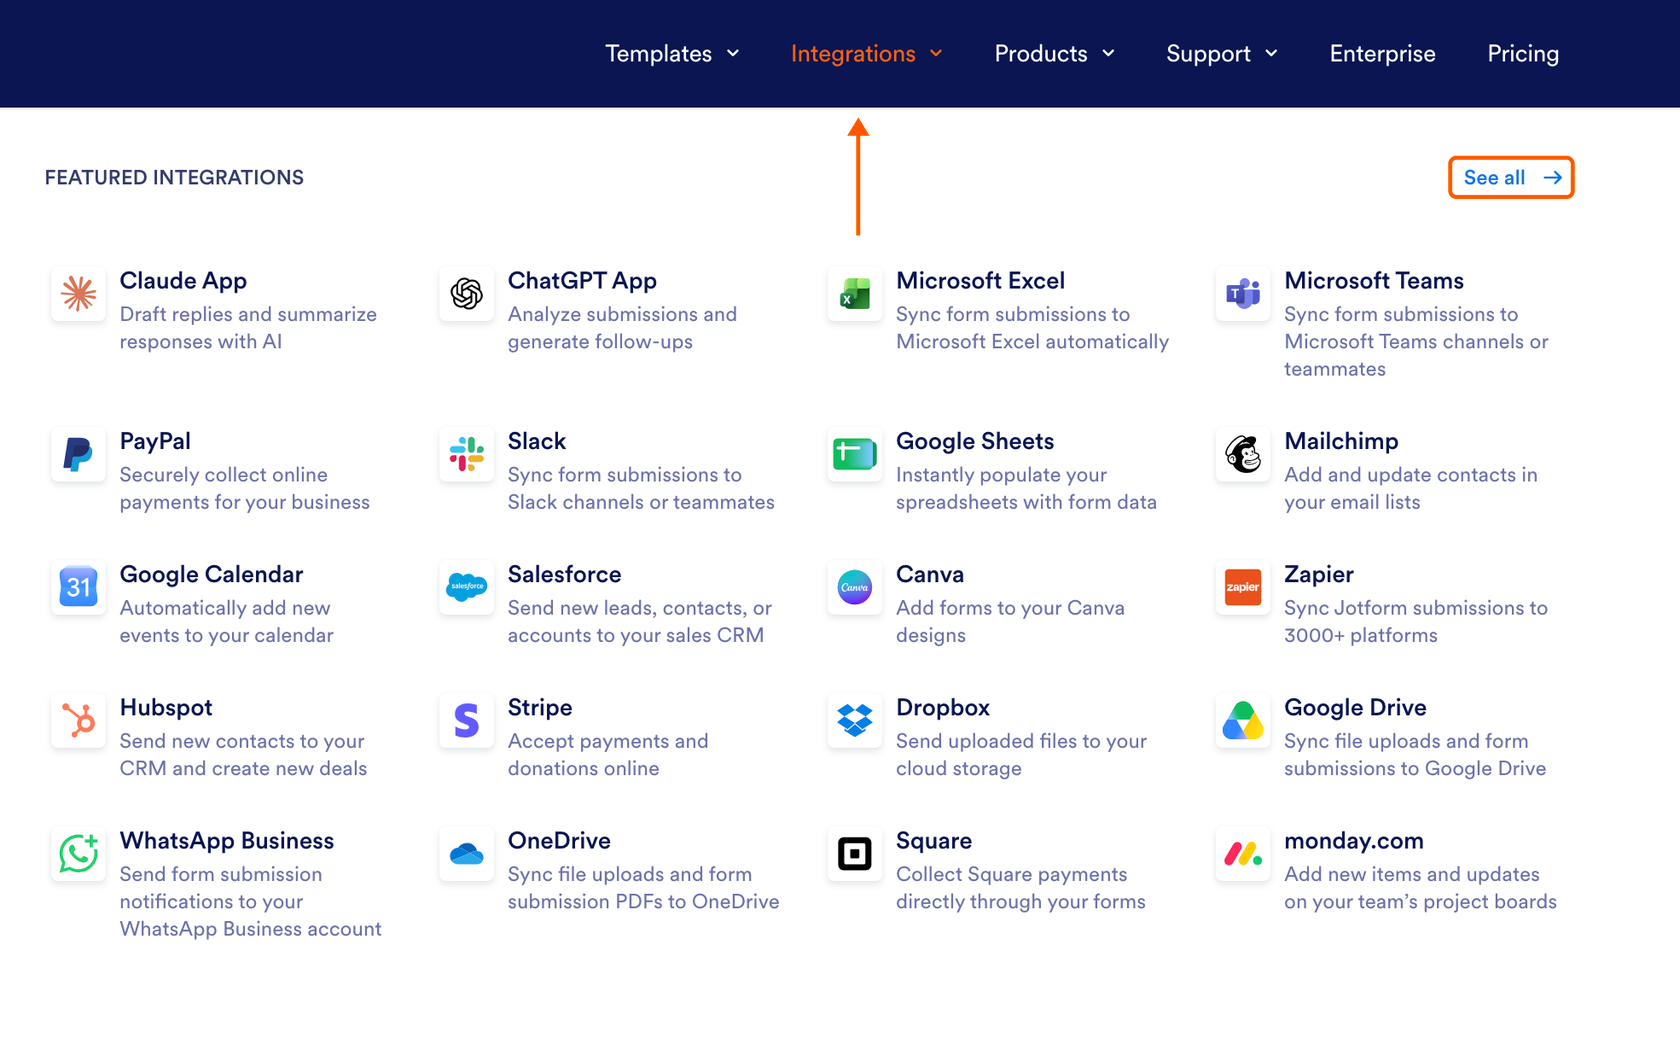
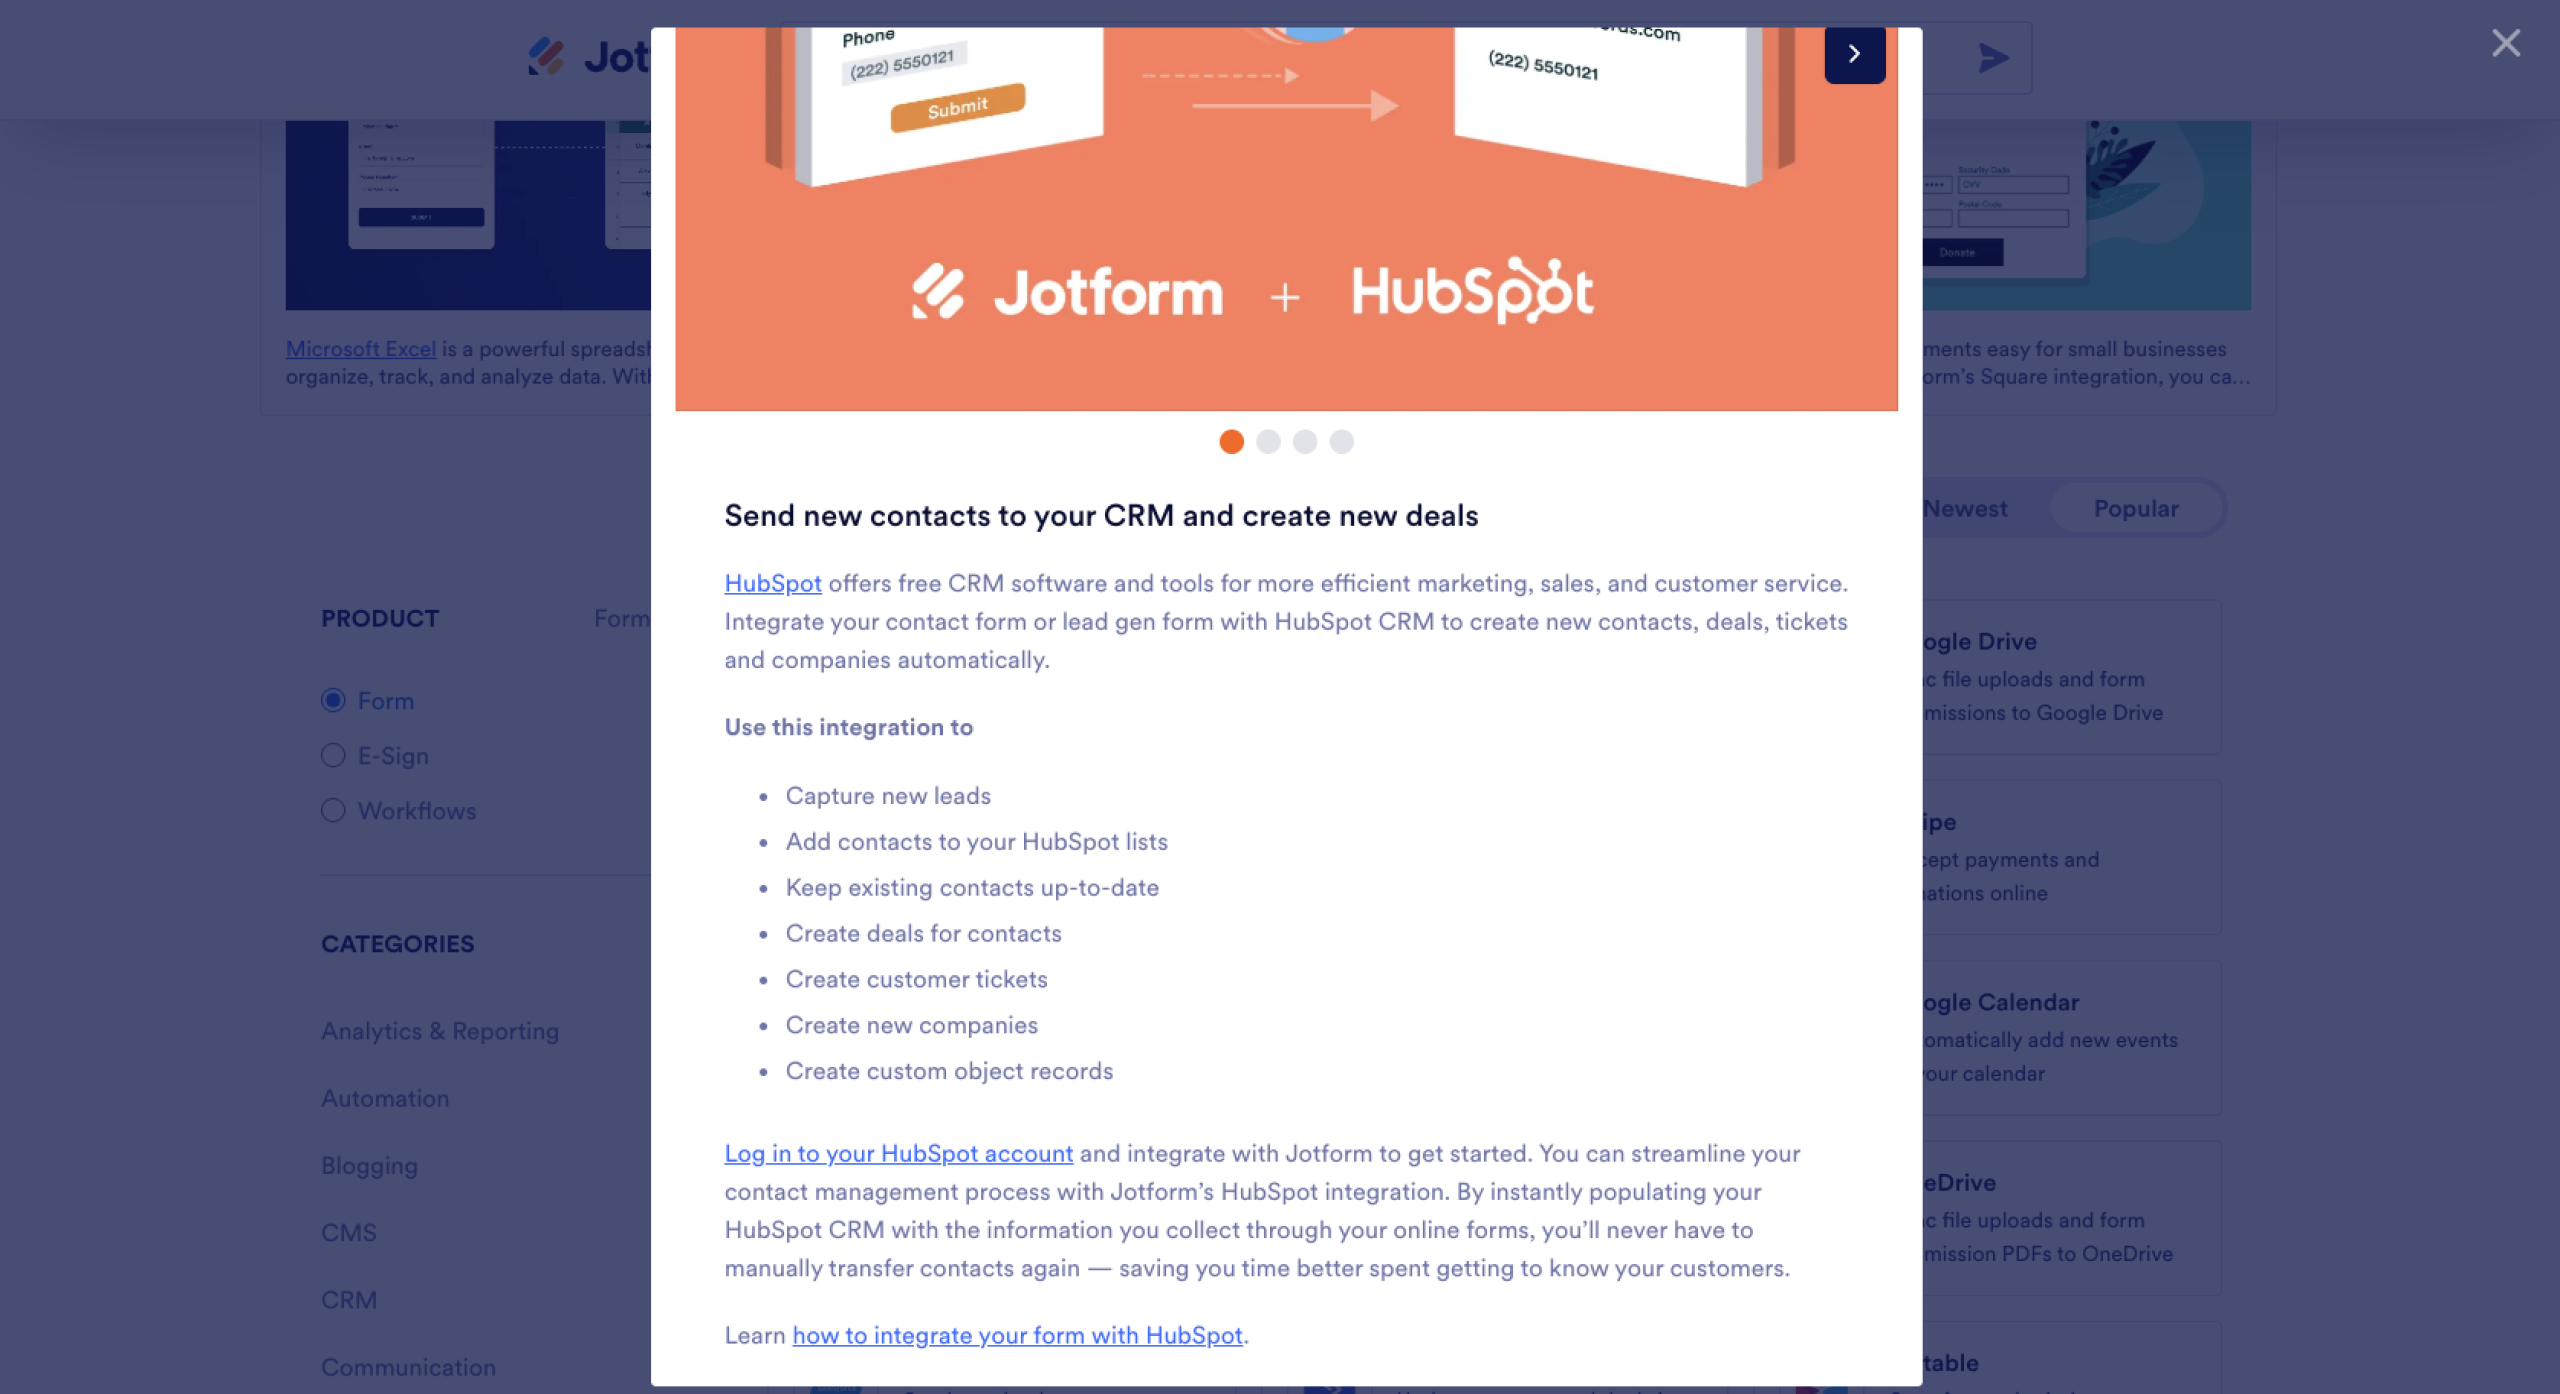
- Find HubSpot: Search for HubSpot and select it.

- Connect your account: Scroll down, click Log In to Your HubSpot Account, and choose the account you want to use.
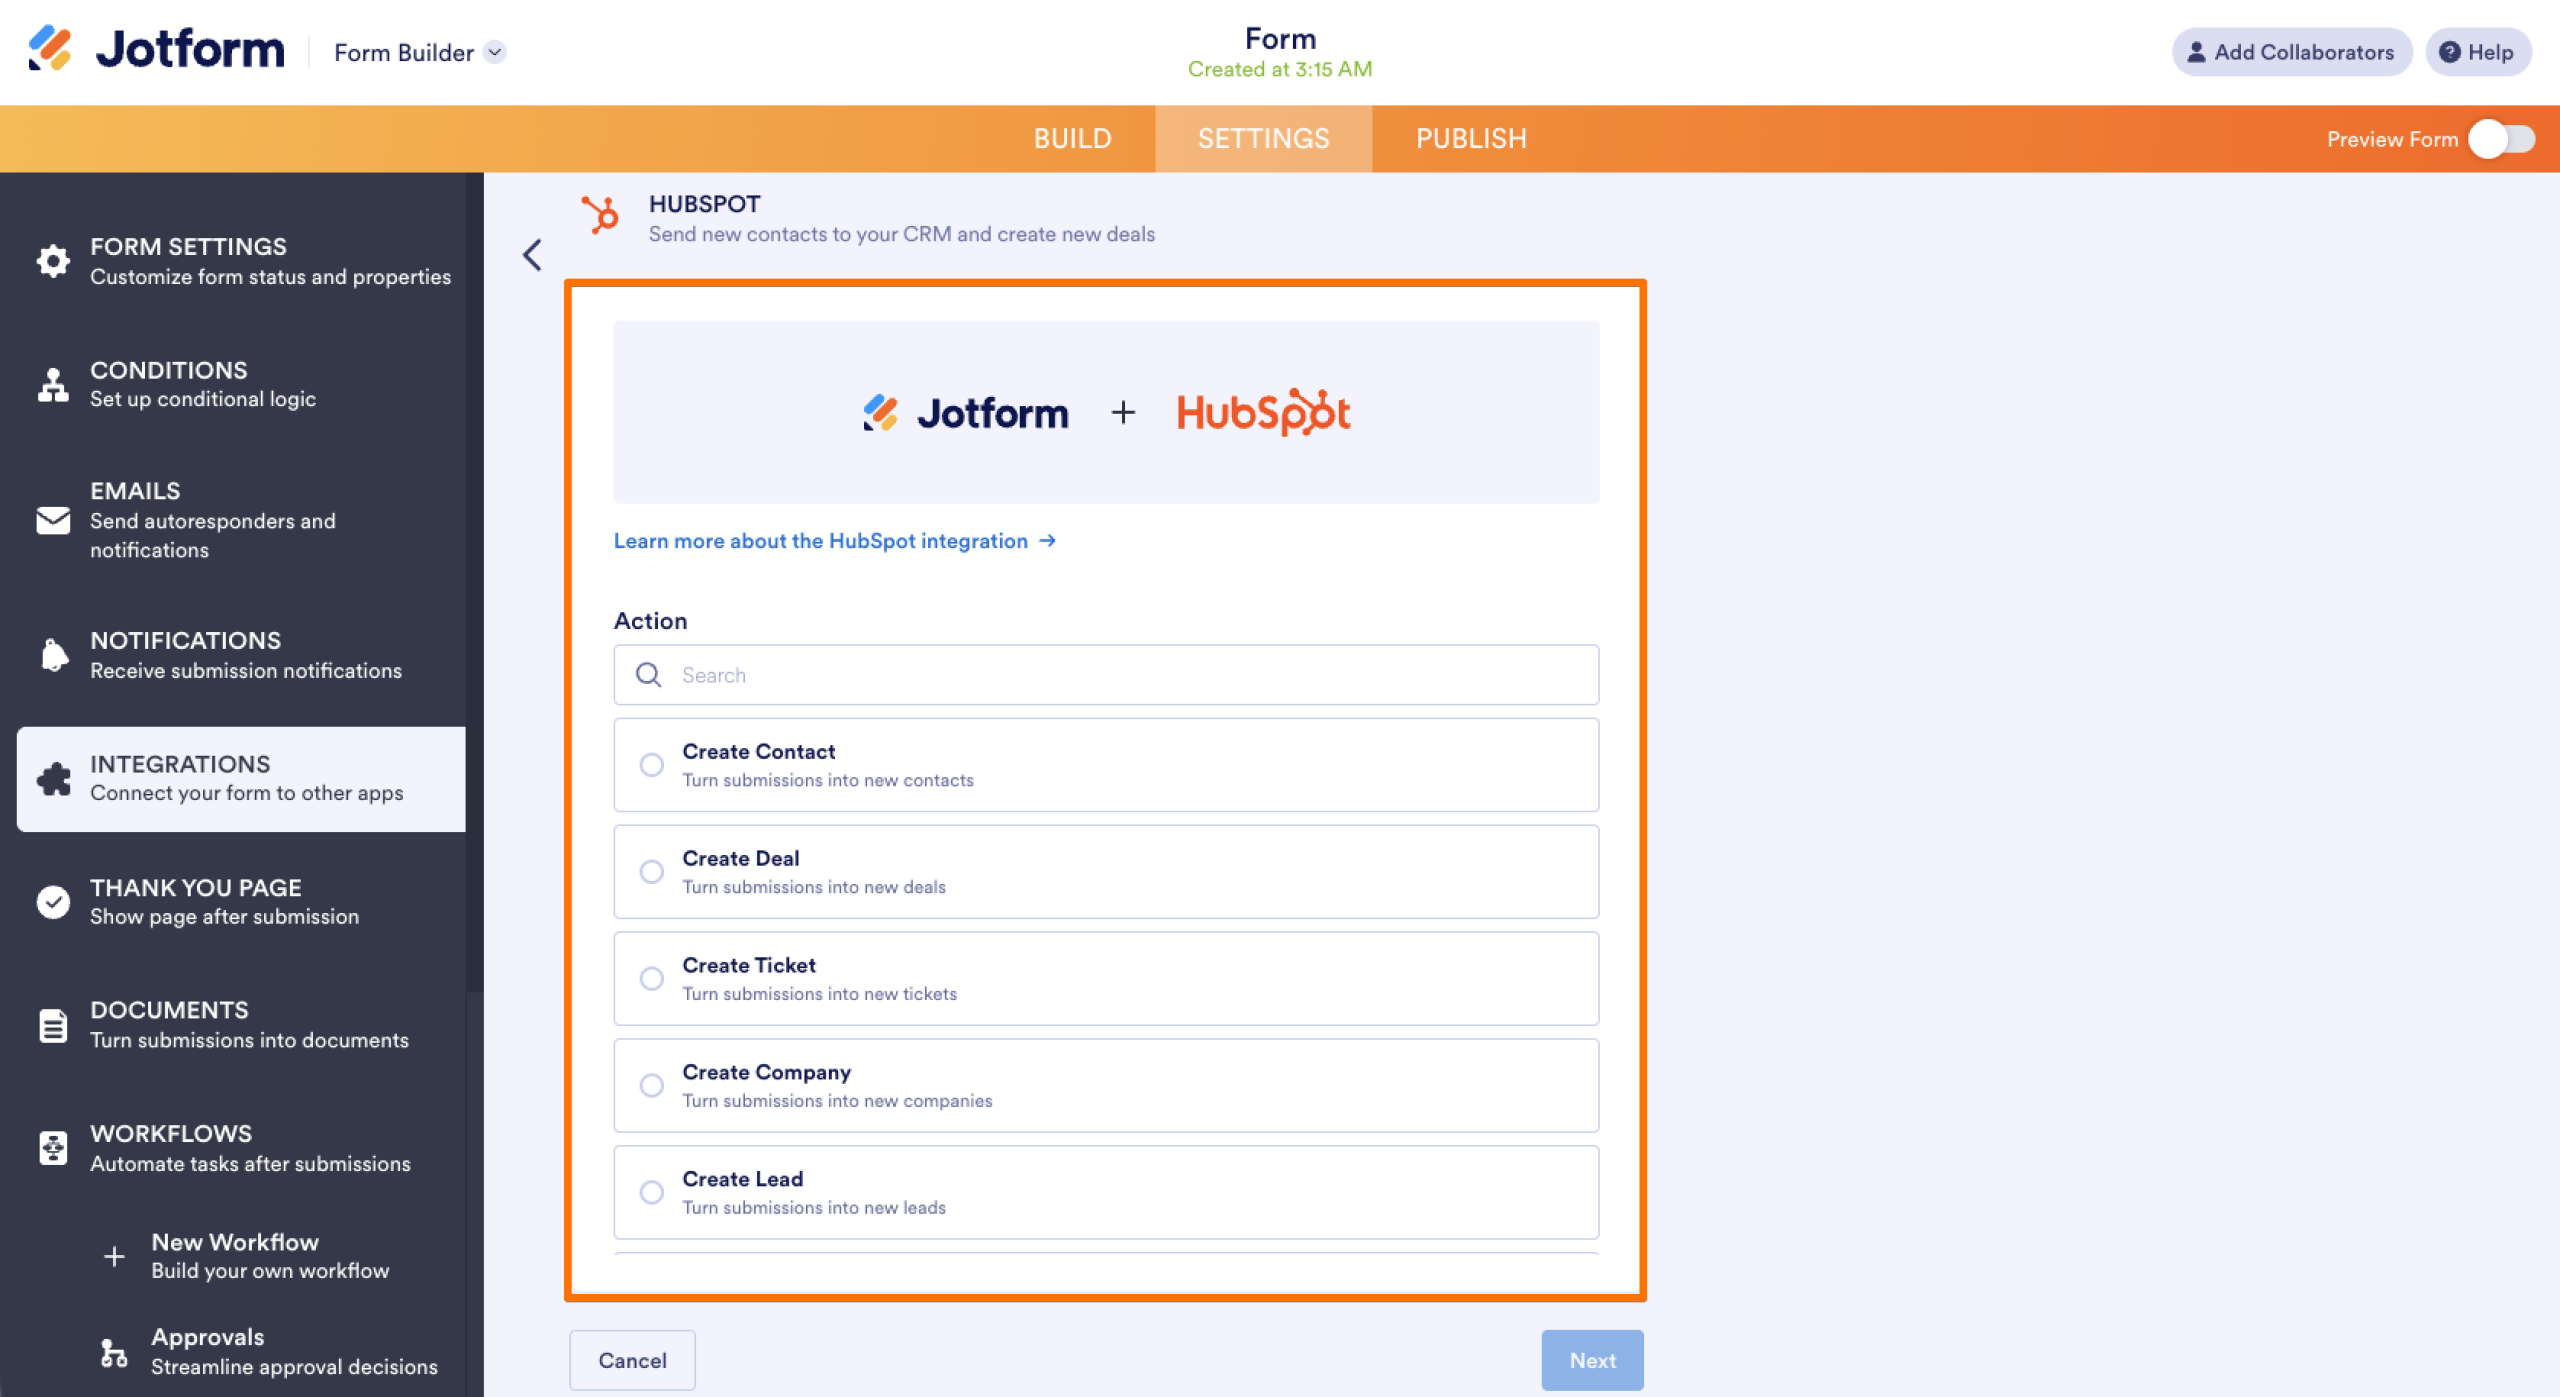
- Choose an action: In Jotform’s HubSpot settings, select what each submission should do in HubSpot, such as create a contact, deal, or ticket.
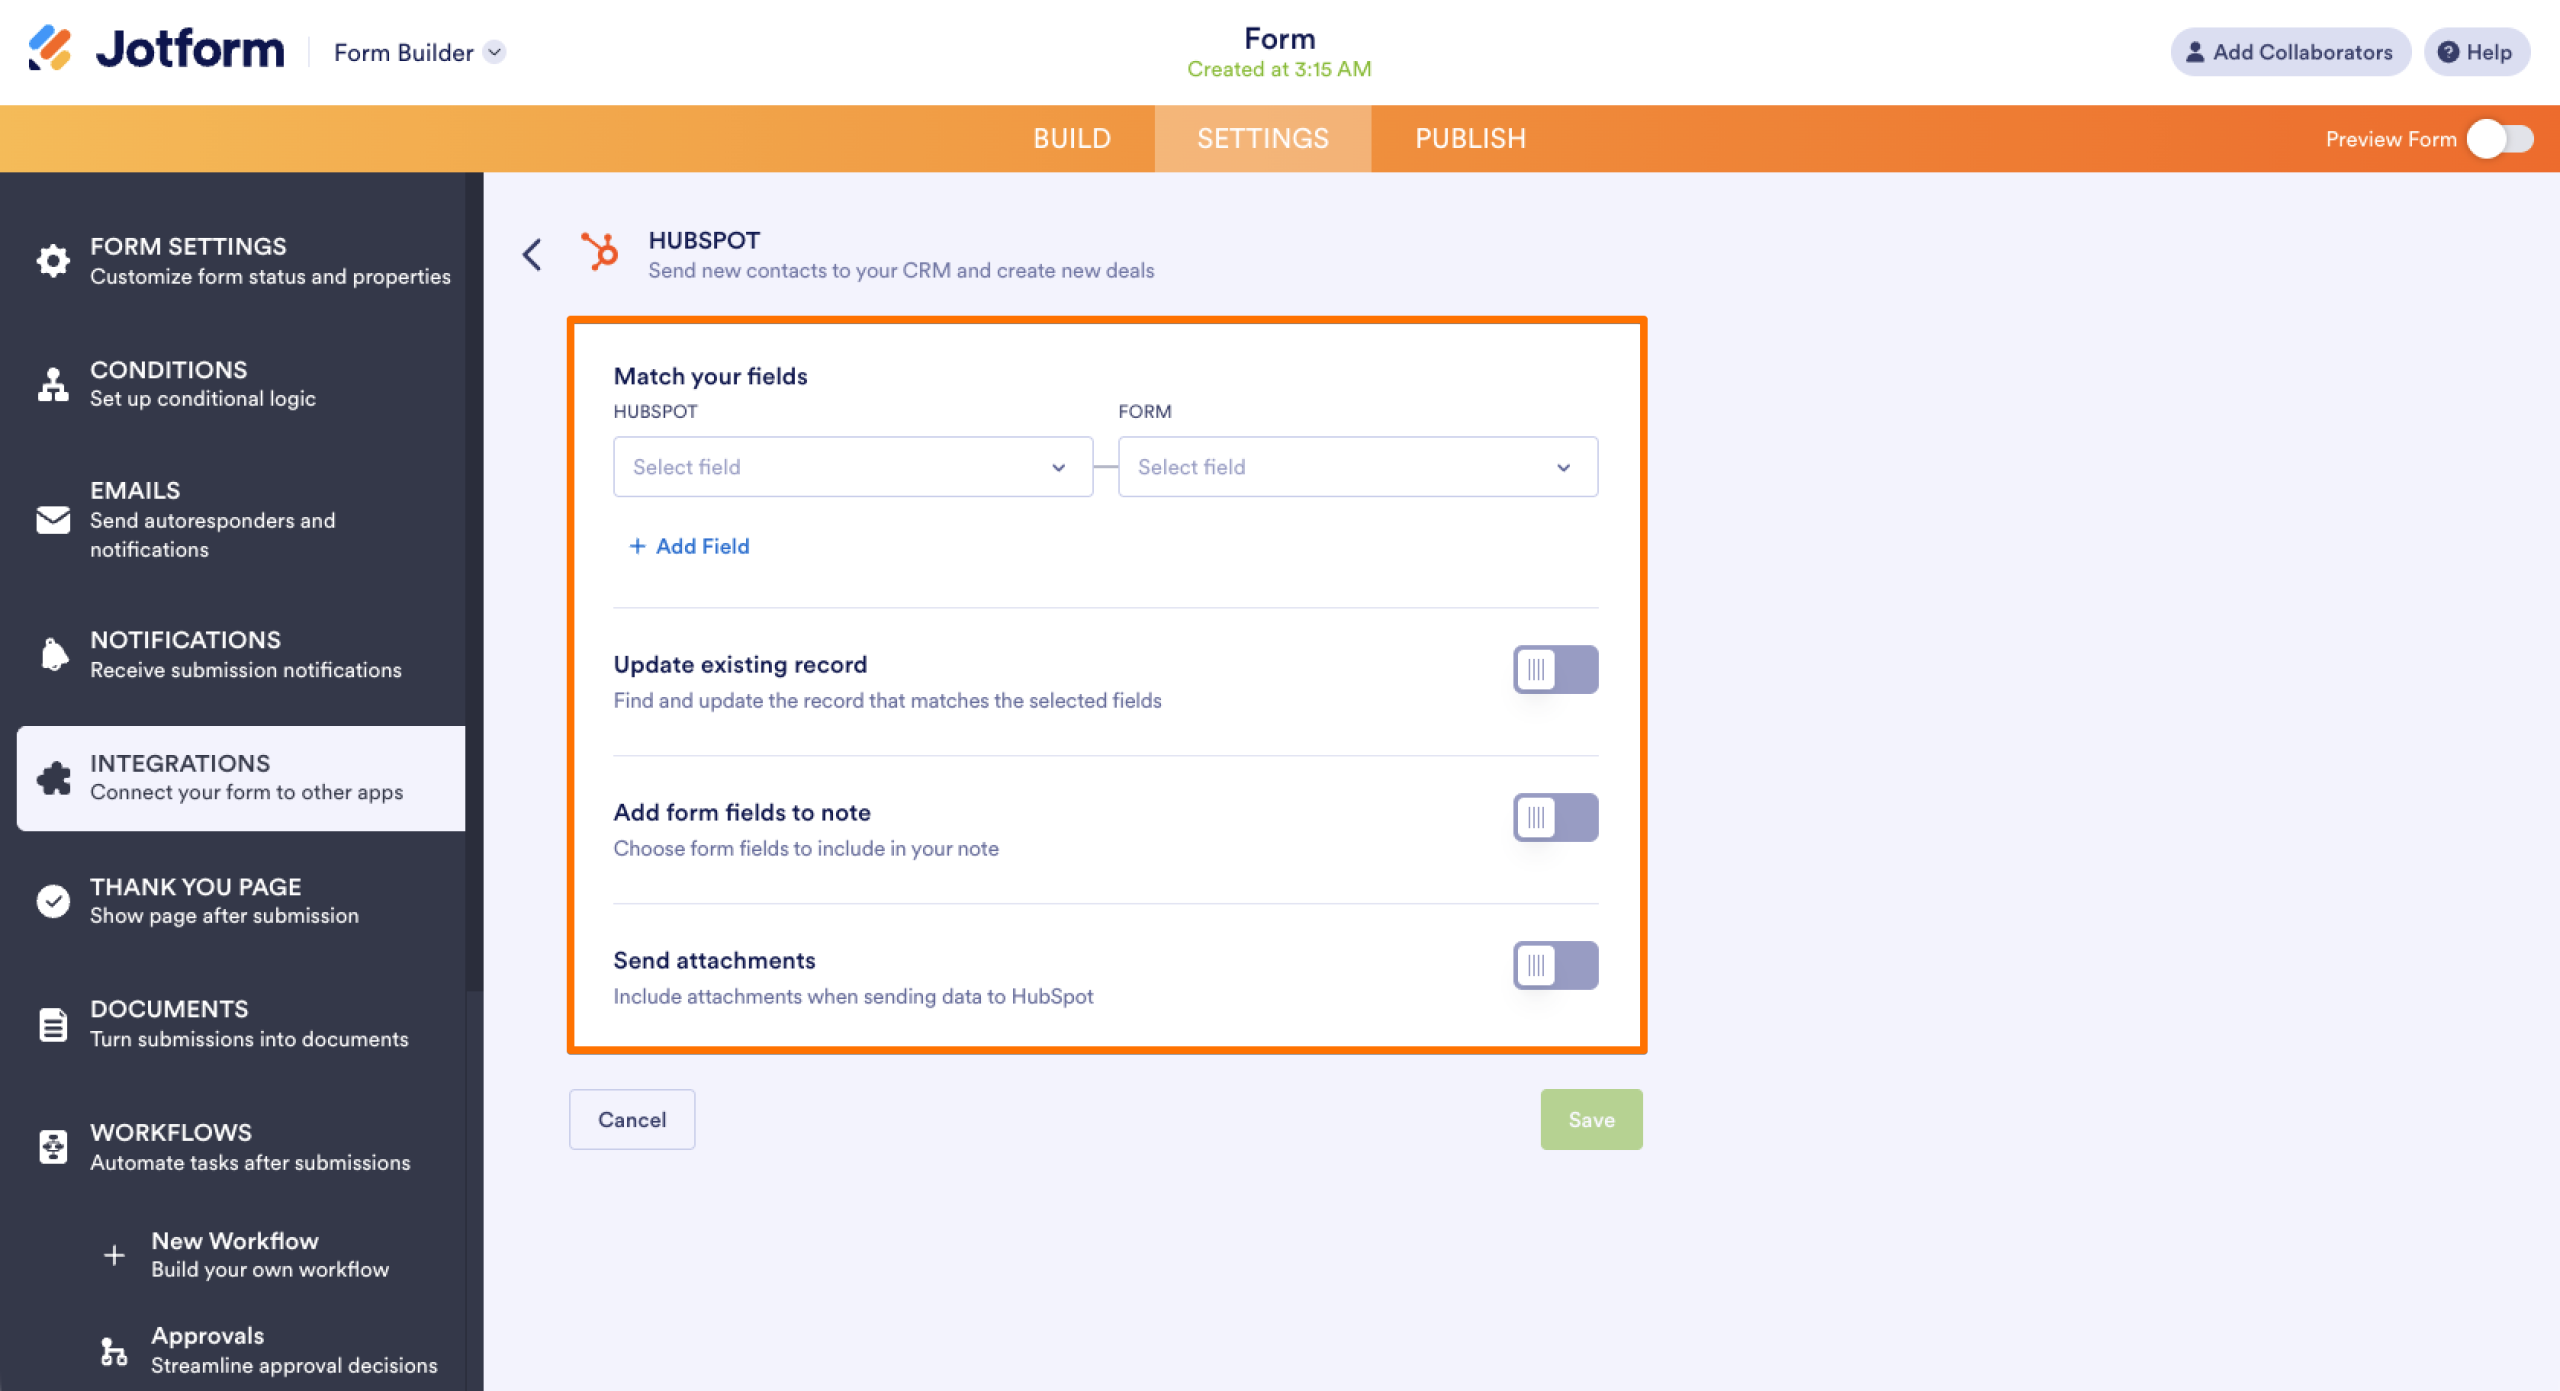
- Map your fields: Match each form field, such as name and email, to its HubSpot property. Then turn on Match Your Selected Fields with Existing Contacts, so returning clients update their existing record instead of creating a duplicate.
- Save and test: Save the action and submit a test entry to confirm the contact appears in HubSpot.
From there, Jotform Prefill can fill in a form with details you already have, so returning clients don’t need to retype all their information, and Jotform’s online contract maker helps you turn those details into a contract ready to send via Jotform Sign.
FAQs about managing Docusign contacts
Shared contacts appear in the address books of other users on your account, but only the person who created a shared contact can edit or delete it. If a shared contact has an outdated email address, ask its creator to update it, or contact your Docusign administrator if that person has left your team.
Yes. If your permissions let you create personal contacts, Docusign saves each recipient’s name and email address when you send an envelope. That saves time with repeat clients, but it also means a typo saved once reappears in every new envelope until you update the contact.
This article is for sales reps, HR professionals, and SMB owners who send frequent contracts and are frustrated by manual data entry and outdated contact information.






































Send Comment: