We’re excited to announce that one of Jotform’s core functions just got stronger thanks to our new Calendly widget. Now you can schedule meetings and appointments on your form with Calendly, and the event will automatically appear in your synced calendar.
In Calendly’s survey of 1,000 knowledge workers for The Time Economy Report, more than 50 percent agreed that they spend “an outrageous amount of time” scheduling meetings with people outside their organization and rearranging their calendars as they do.
The solution? How about Jotform’s Calendly widget? You can use it to
- Instantly schedule meetings on your form
- Manage meetings in one central location and avoid double bookings
- Use conditional logic to show/hide the widget on your form
- Prefill Calendly name and email fields directly from your form
Ready to start using Jotform’s new Calendly widget? Add it to your form now!
Strengthening our core
Calendly’s reputation for scheduling expertise, along with the popularity of appointment setting with Jotform, made Calendly one of the most requested widgets in Jotform’s history.
Industries that set the most appointments using Jotform are
- Nonprofit
- Healthcare
- Education
- Transportation
- Beauty/personal care
The real estate, sports and activities, finance, and e-commerce industries also use forms to schedule appointments at a notable rate.
All of these users can now schedule their appointments using the Calendly widget, which takes scheduling automation to a new level.
Want to request an integration or widget? Jotform has a form for that!
Adding Calendly to your form
There are a few easy ways to add the Calendly widget to your form. You can find it on the Jotform widgets page and add it to a form from there. You can use an existing form or create a new one.
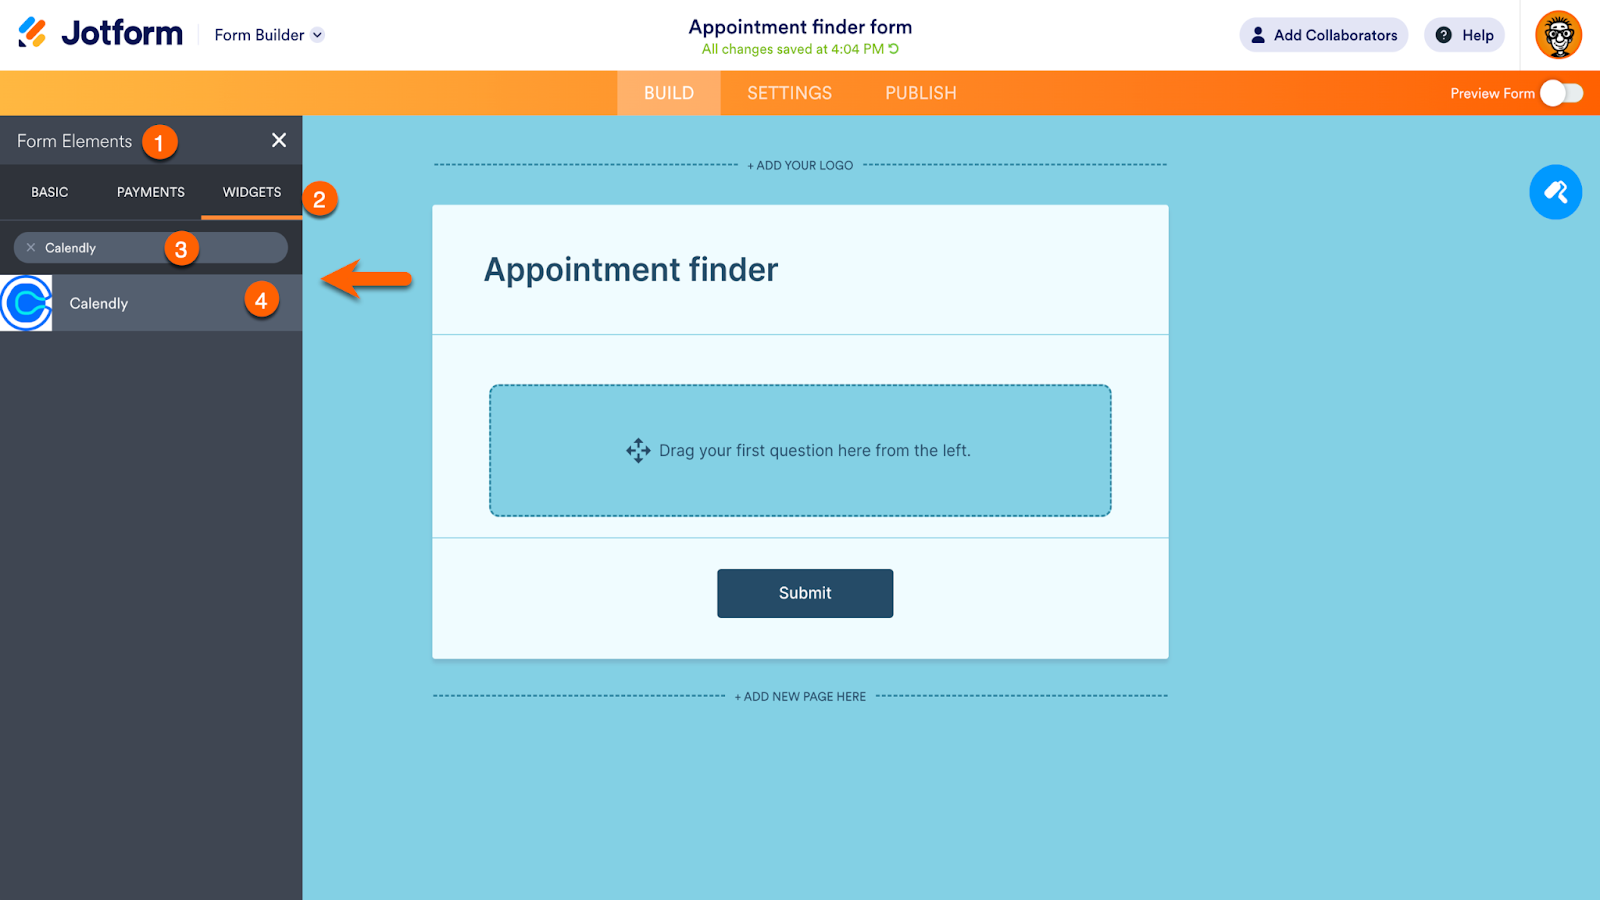
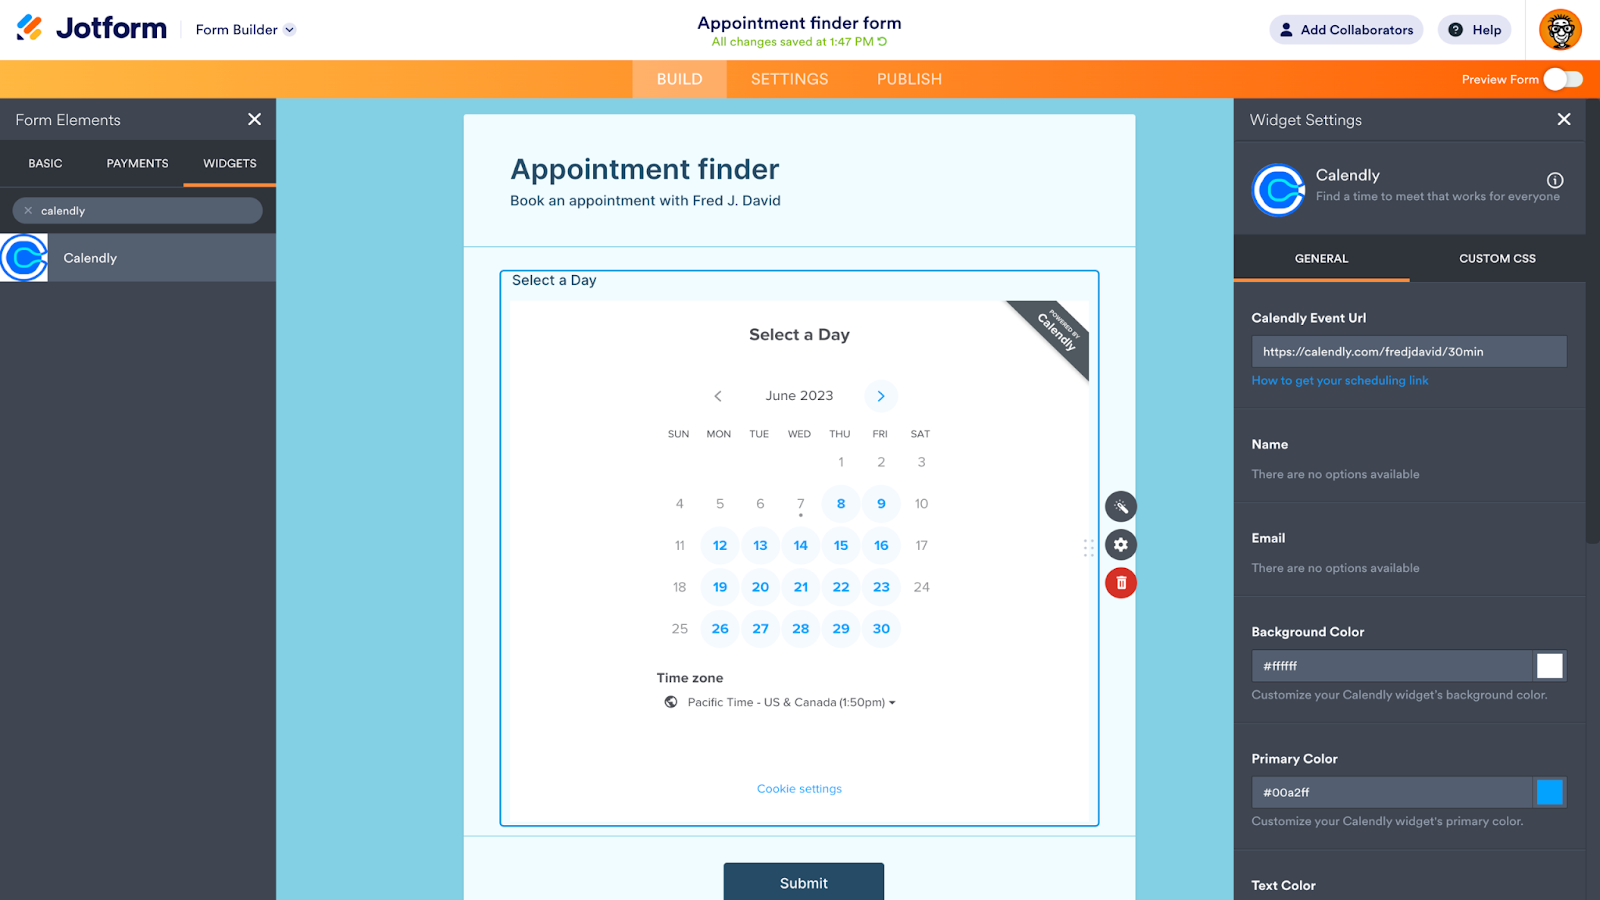
Alternatively, you can go directly to Jotform’s Form Builder. Access the Settings menu and then click Integrations, or find the Calendly widget in the (1) Form Elements menu as you build your form. Click on (2) Widgets, search for (3) Calendly, and click the (4) Calendly icon to add the widget to your form.
Use a form template!
Take advantage of Jotform’s 20,000-plus form templates. We’ve got appointment forms, meeting room reservation forms, Zoom appointment forms, and more. Simply add the Calendly widget when you customize the template.
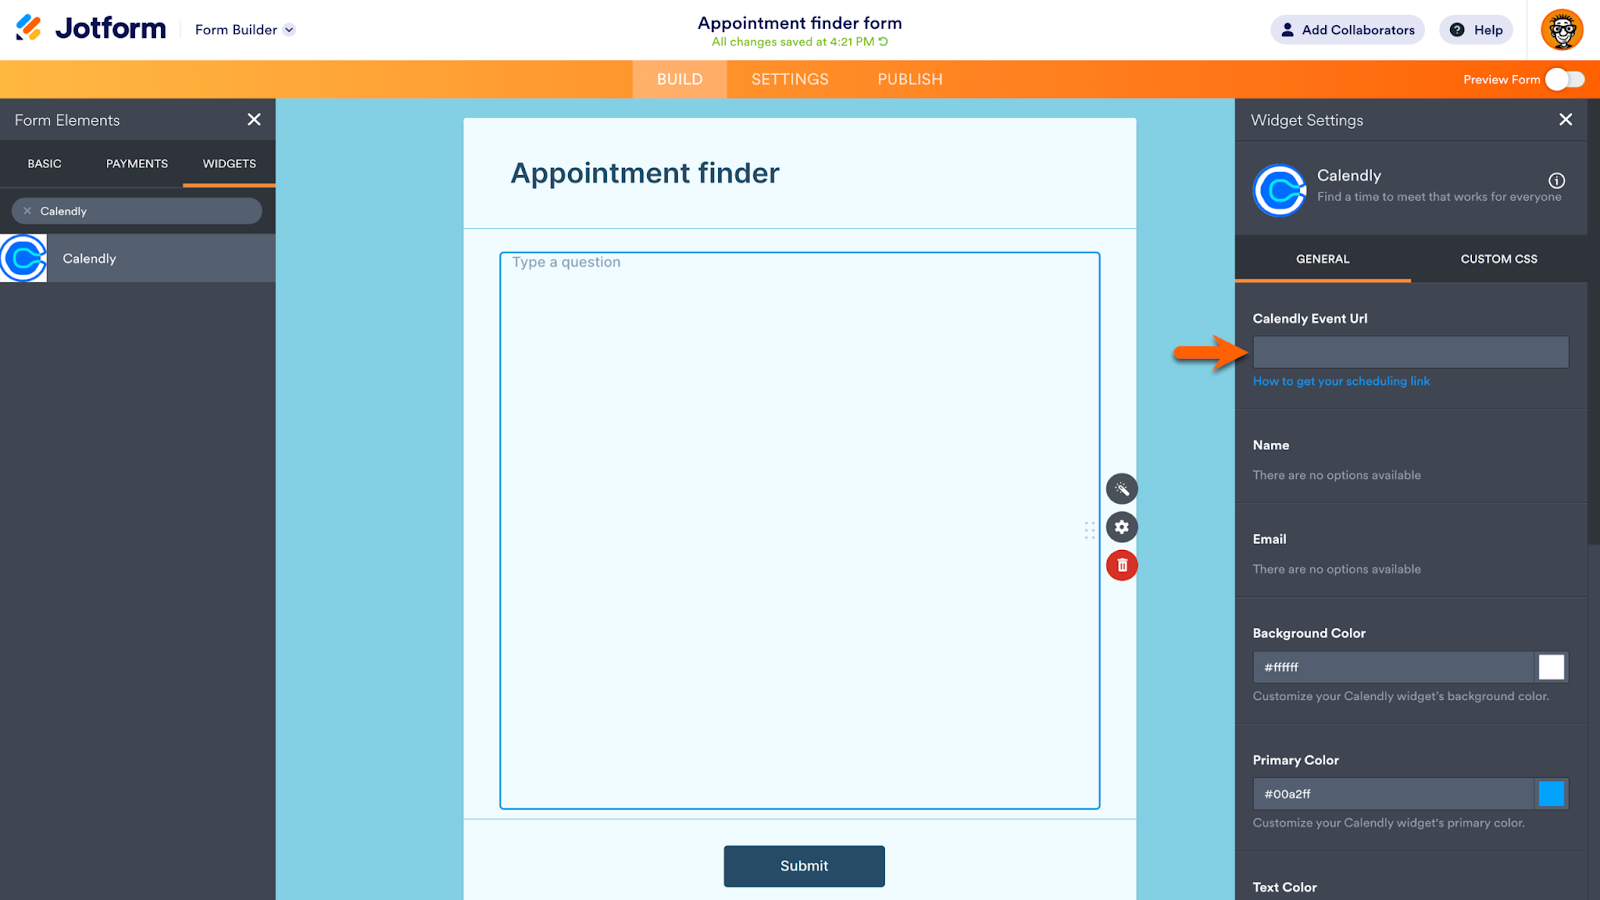
Once the widget is added, a placeholder will appear on your form. This is where your Calendly widget will come to life. To set up the widget, you’ll need to enter your Calendly Event URL in the Widget Settings. If you don’t already have a Calendly account, it’s free and takes just a few minutes to sign up.
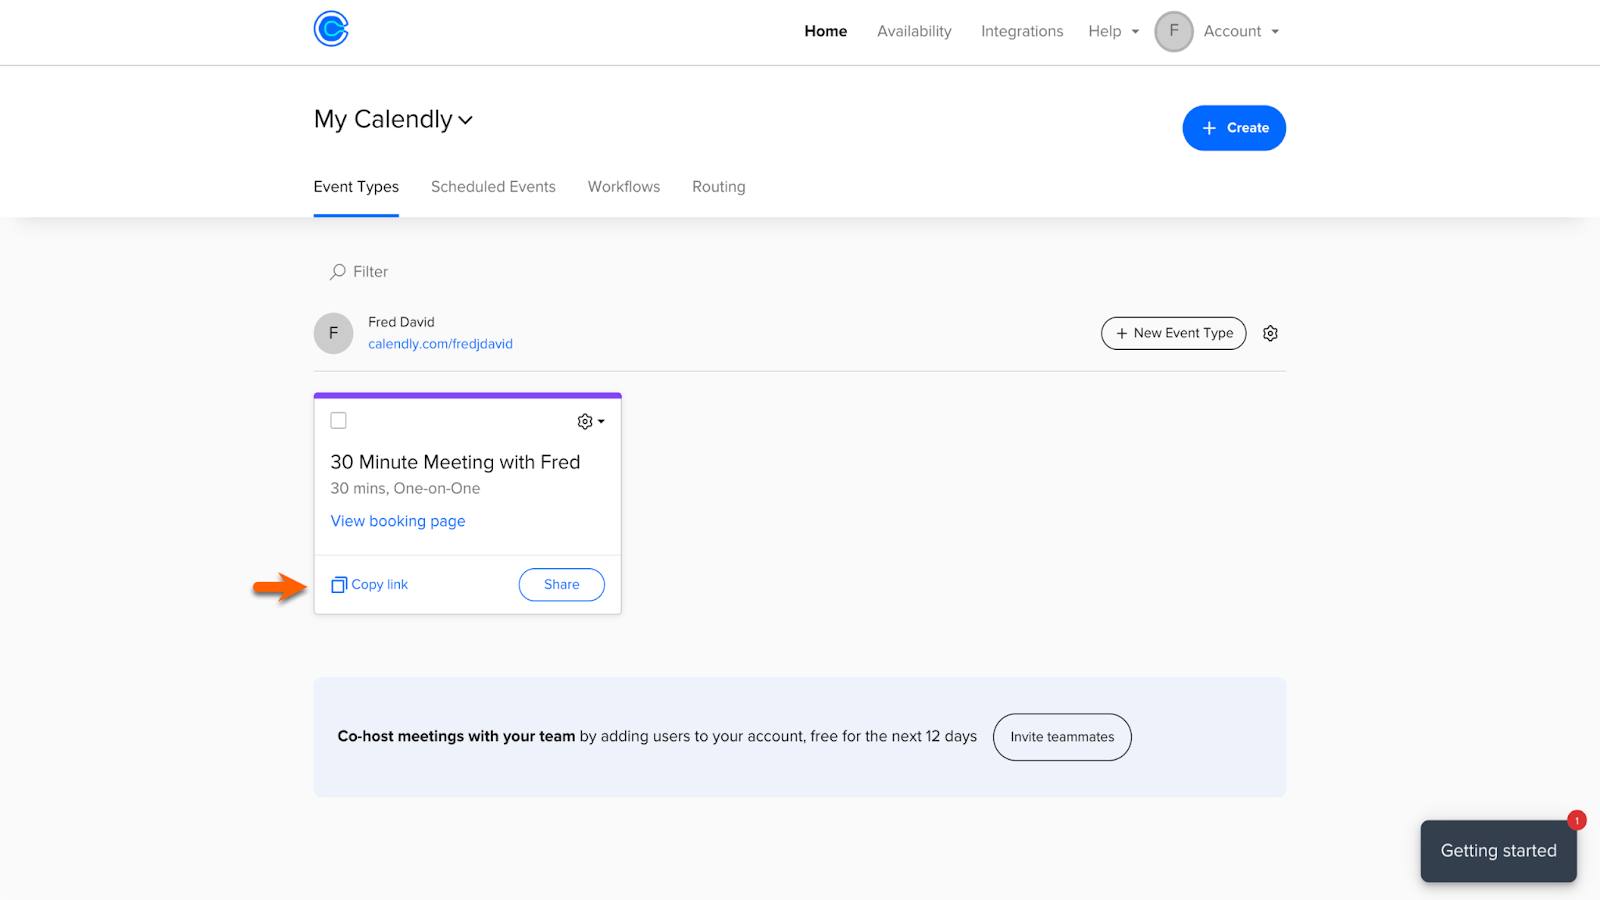
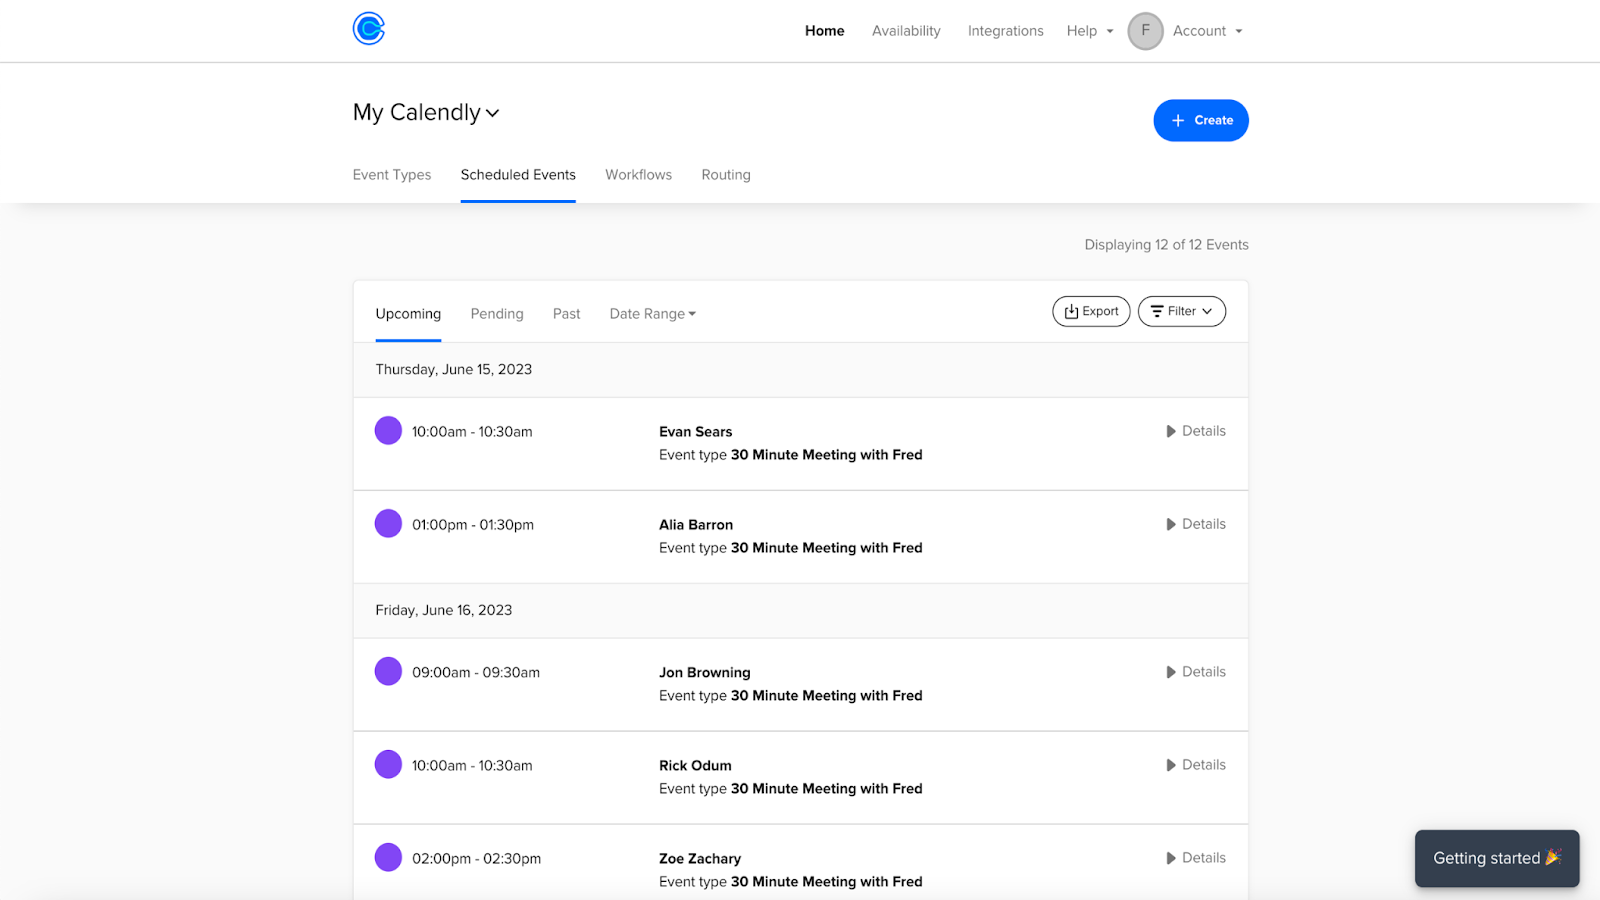
To find the Calendly Event URL, go to your My Calendly homepage. When you create your Calendly account, a 30-minute one-on-one event is automatically accessible. If you already have a Calendly account, you may have multiple events to choose from. Each event has a Copy link button. After copying the link, return to the Jotform Form Builder.
Pro Tip
Are you scheduling paid sessions with clients? Use Jotform to collect payments with one of more than 30 payment processor integrations, including Apple Pay and Google Pay.
Paste the link into the Calendly Event URL field in the Widget Settings. A Calendly calendar will automatically appear on your form. Make sure to click the Update Widget button to save your changes.
You can share your form immediately via link, email, website embed, QR code, and more, including a mobile app built using Jotform Apps.
Pro Tip
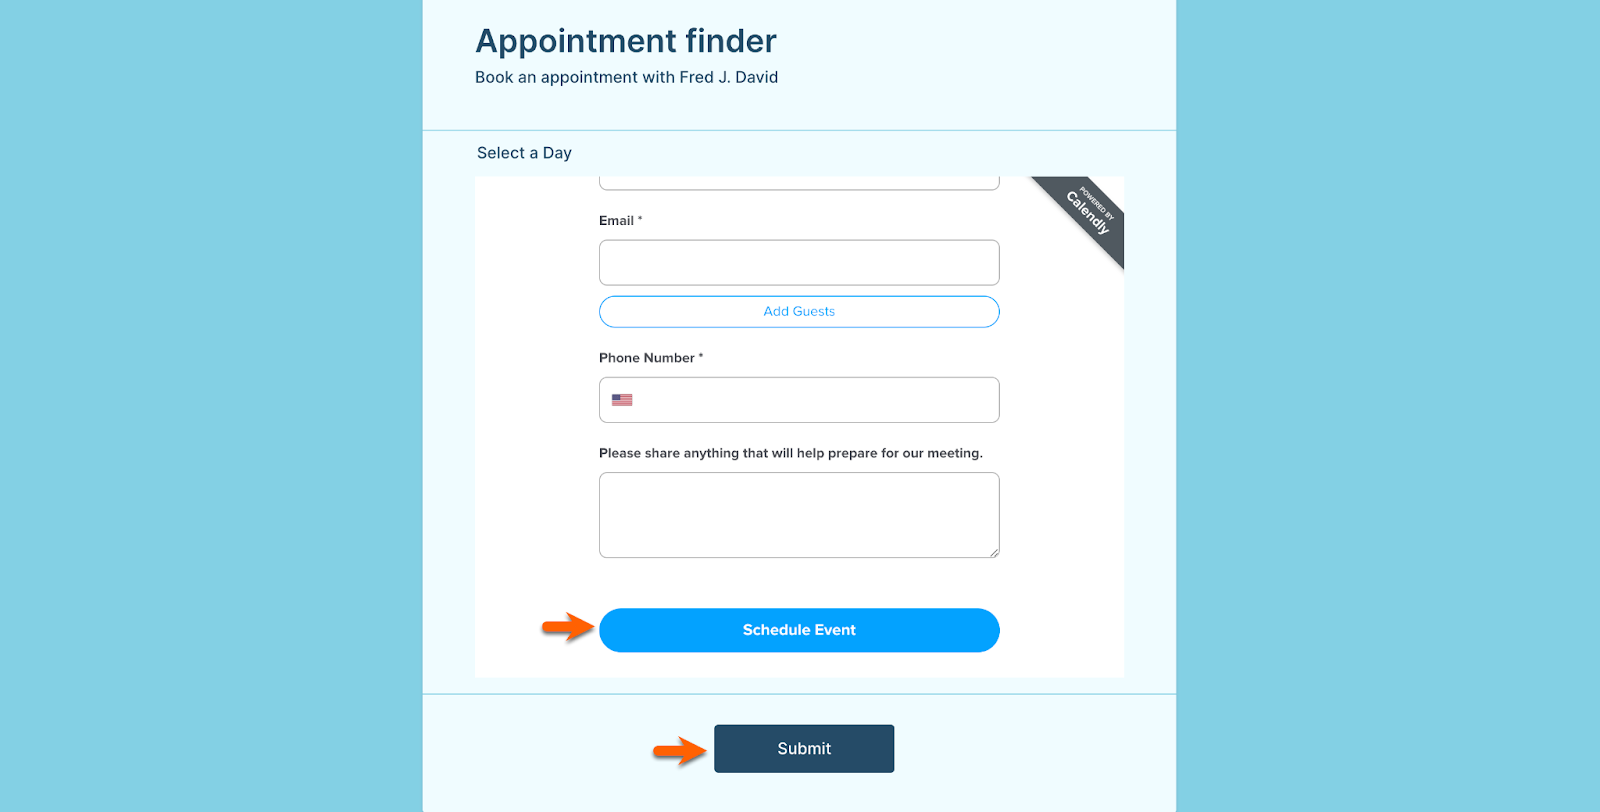
After you add the Calendly widget, there will be two separate buttons on your form. One is the Jotform Submit button, and the other is the Schedule Event button on the widget. The latter sends appointments directly to your Calendly account. Form users will need to click them both.
Prefill with Jotform
To record the form filler’s name and email address in your Jotform account, you must include those fields in your form. You can set this information to prefill the Calendly widget. After you add the fields to your form, activate prefill in the Calendly Widget Settings, directly below the Calendly Event URL.
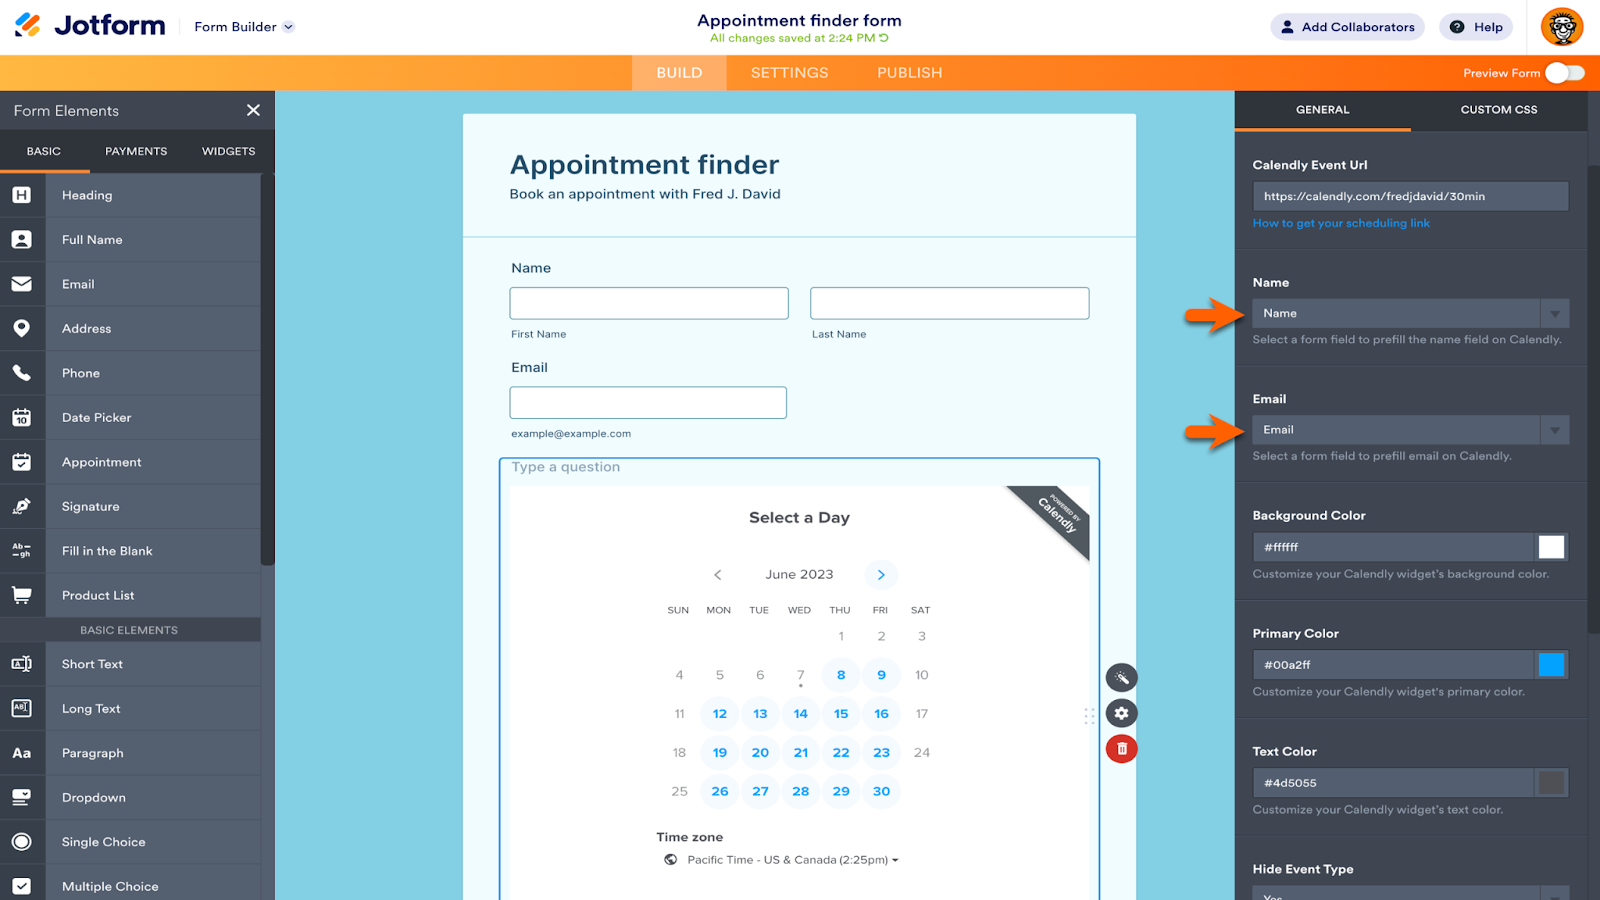
With prefill, respondents have to enter their name and email just once. The information will be stored in your Jotform and Calendly accounts after the event is scheduled and the form is submitted.
After the event is booked through your form, Calendly will send you a notification email, and the event will automatically appear on your digital calendar of choice.
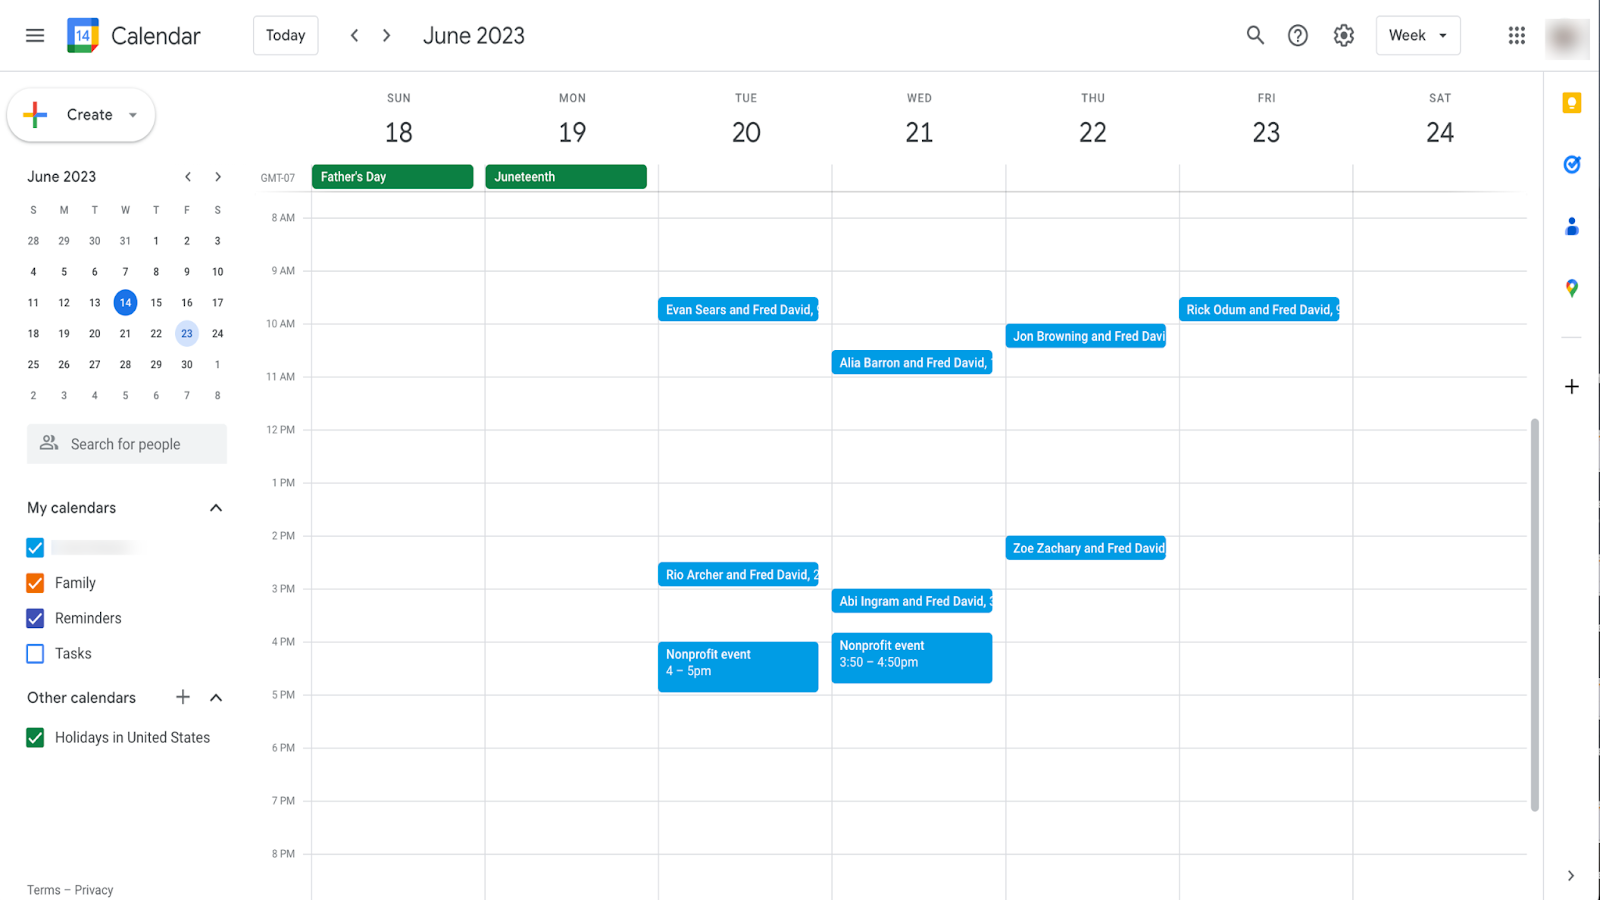
The appointment will also appear in your Calendly account. You can take advantage of Calendly features to set your availability, avoid double bookings, and more.
Pro Tip
To show or hide the Calendly widget with conditional logic, head to the Settings in the Form Builder. Select Conditions, click Show/Hide Field, and then set your conditions. These are the same steps you’ll follow to set up conditional logic on any of your forms.
Once the Calendly widget is operational, you can change the look and feel of the widget with customization options in the Widget Settings. Alter the primary, background, and text colors or add custom CSS code. Use the Properties menu (accessed via the gear icon next to the widget) to change the height and width of the widget and align it to different sides of your form.


Streamlined scheduling
Our chief executive is a fan of Calendly. Jotform CEO Aytekin Tank recommends Calendly in his book, Automate Your Busywork, a Wall Street Journal best-seller. And many Jotform users need to schedule appointments — in fact, this capability was added to nearly half a million forms in just one month. That’s one reason Calendly and Jotform are a great fit.
What’s more, Jotform and Calendly are both used worldwide. Calendly has active users in 155-plus countries, and Jotform strives to be accessible the world over, offering forms in more than a dozen languages as well as multilingual forms.
Whether you requested this upgrade or just learned about Calendly for the first time, Jotform’s new widget can streamline your scheduling process, giving you even more time to develop big ideas and move your organization forward. So why delay? Try the new Calendly widget today!


Send Comment:
1 Comment:
April 10, 2025
The problem with this is that when you finish and 'schedule' with Calendly it comes back and says you're all scheduled, but if you don't then hit the submit button all of the form information is lost. The somehow need to be tied together so hitting one button both completes the scheduling and submits the information.